Trip Date: March 15-22, 2023
2023 PATAGONIA ADVENTURE VACATION
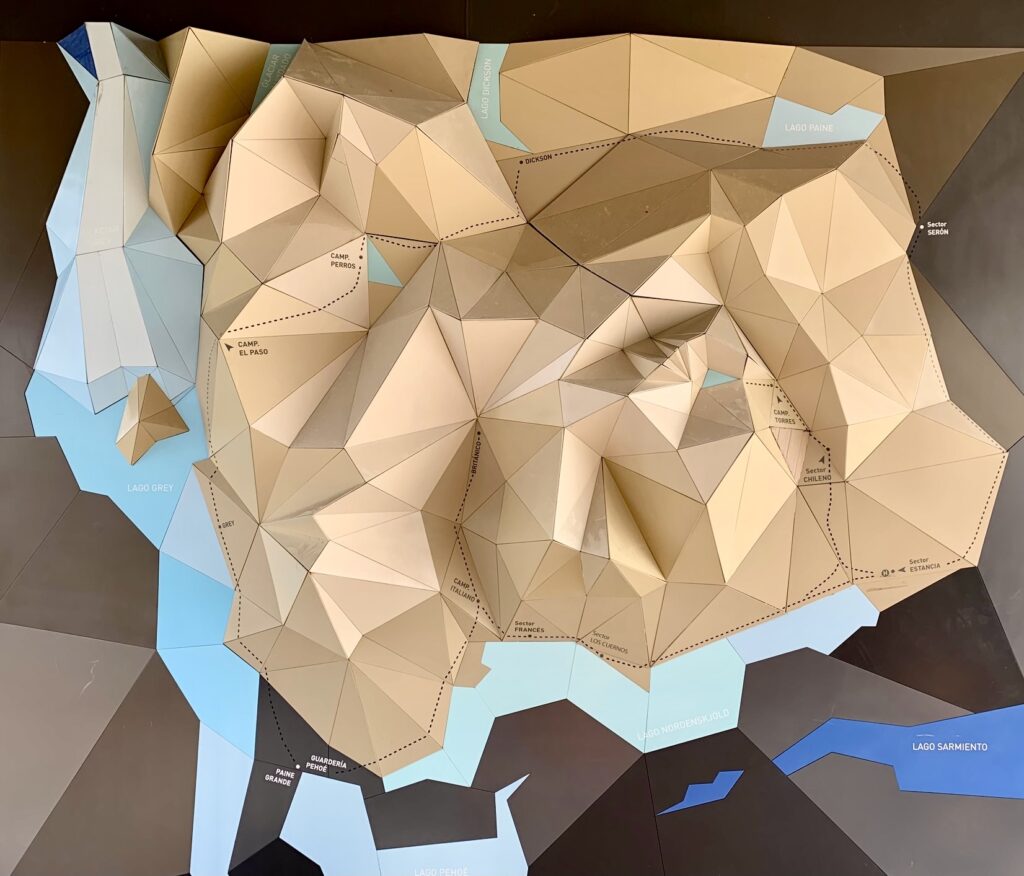
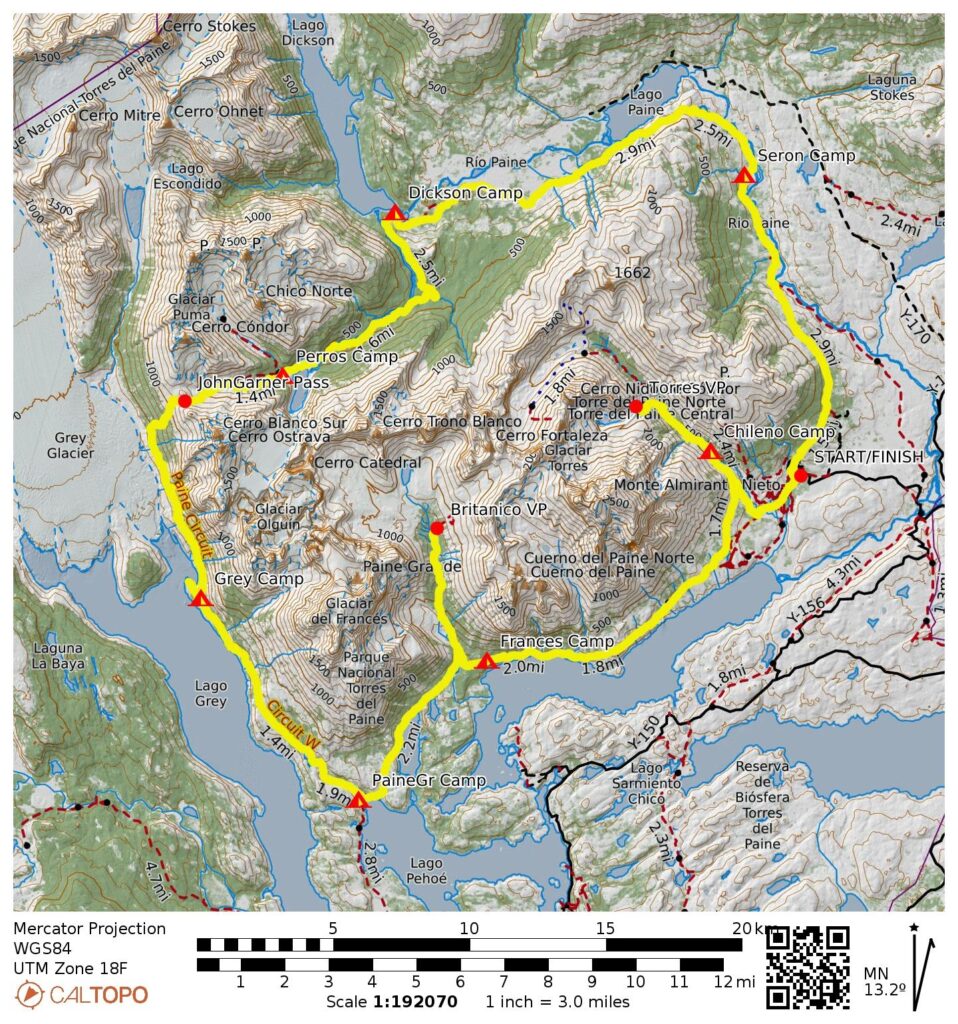
“O-W” Trekking Circuit: Torres Welcome Center to John Garner Pass to Lake Pehoe to Torres Welcome Center
Lago Paine aka Lake Paine
Laguna Los Perros aka Lake Los Perros
Paso John Garner aka John Garner Pass
(Note: erroneously spelled John Gardner in many references)
Mirador Glaciar Grey aka Grey Glacier Viewpoint
Lago Pehoe aka Lake Pehoe
Lago Skottsberg aka Lake Skottsberg
Mirador Britanico aka Britanico Viewpoint
Lago Nordenskjold aka Lake Nordenskjold
Mirador Torres Base aka Torres Base Viewpoint
- Trip Report Summary
- Trip Overview
- Full Trip Report
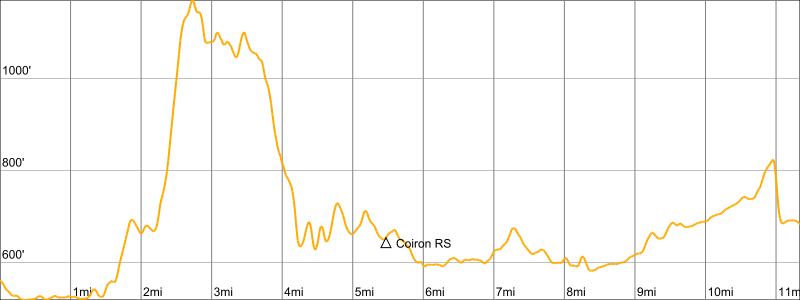
- Day 1: Torres Welcome Center to Seron Camp
- Day 2: Seron Camp to Dickson Camp
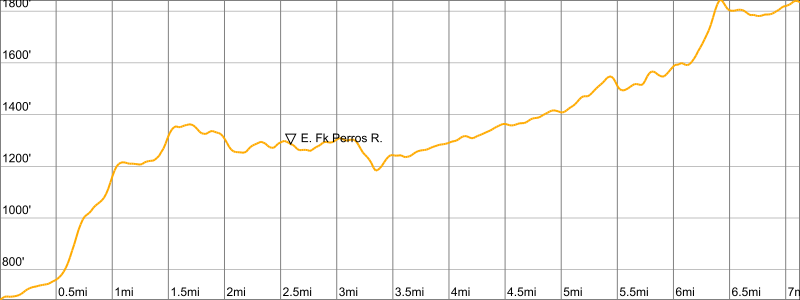
- Day 3: Dickson Camp to Los Perros Camp
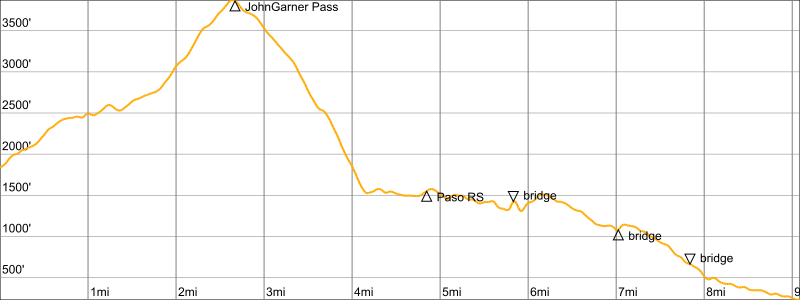
- Day 4: Los Perros Camp to Grey Camp
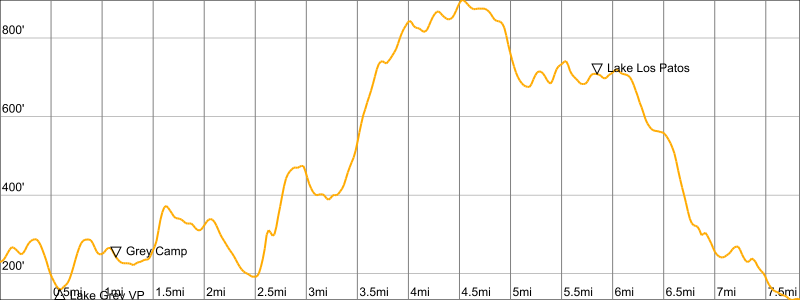
- Day 5: Grey Camp to Paine Grande Camp
- Day 6: Paine Grande Camp to Frances Camp + Britanico VP
- Day 7: Frances Camp to Chileno Camp
- Day 8 (AM): Torres Base VP Sidetrip
- Day 8 (PM): Chileno Camp to Torres Welcome Center
- Gear Comments
- Route Map & Profiles
- Photo Gallery
Trip Report Summary
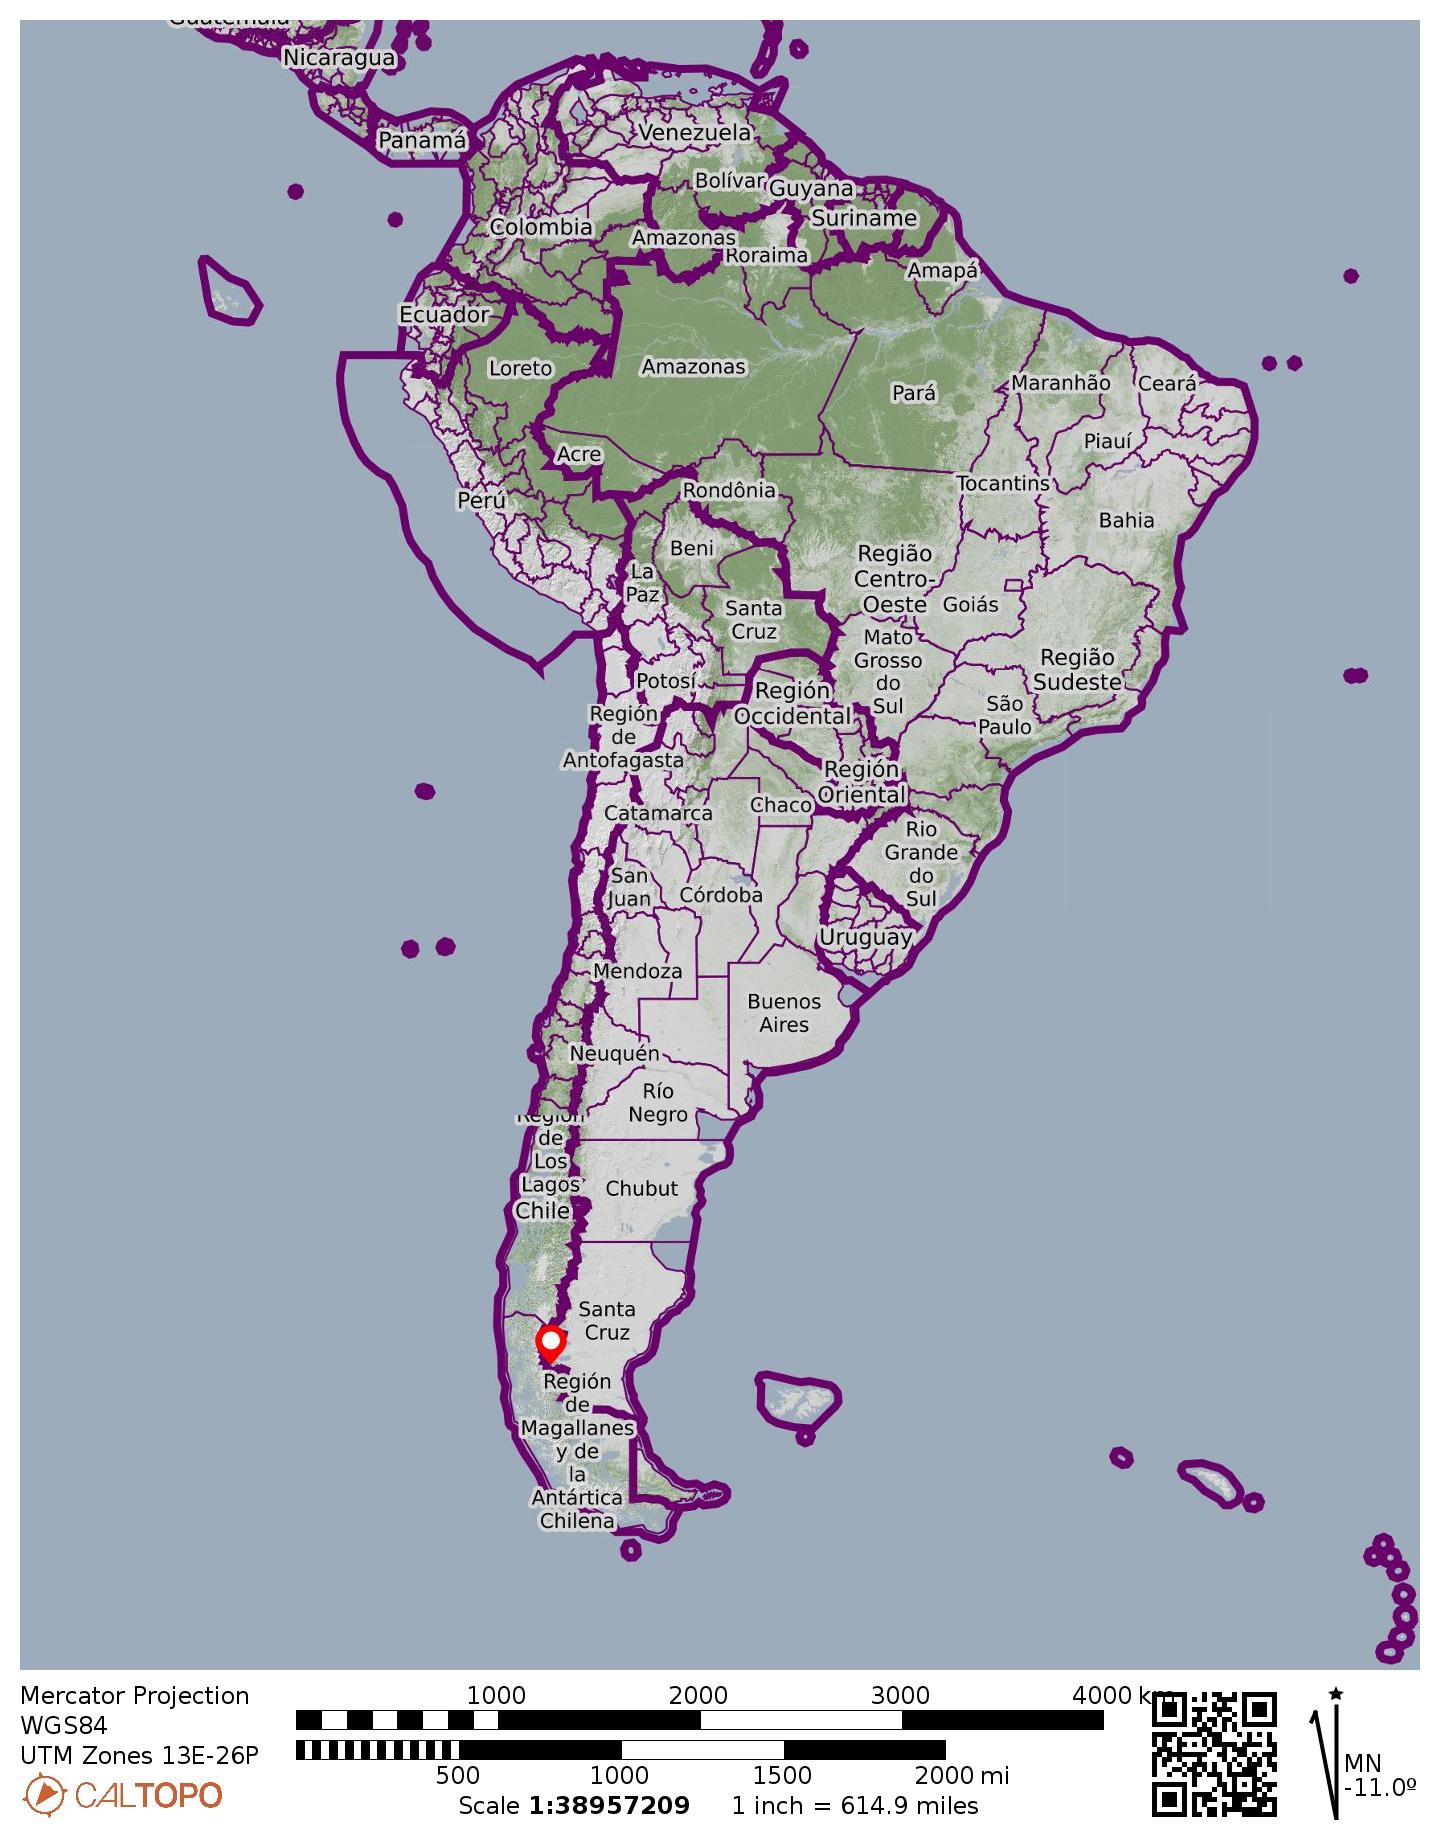
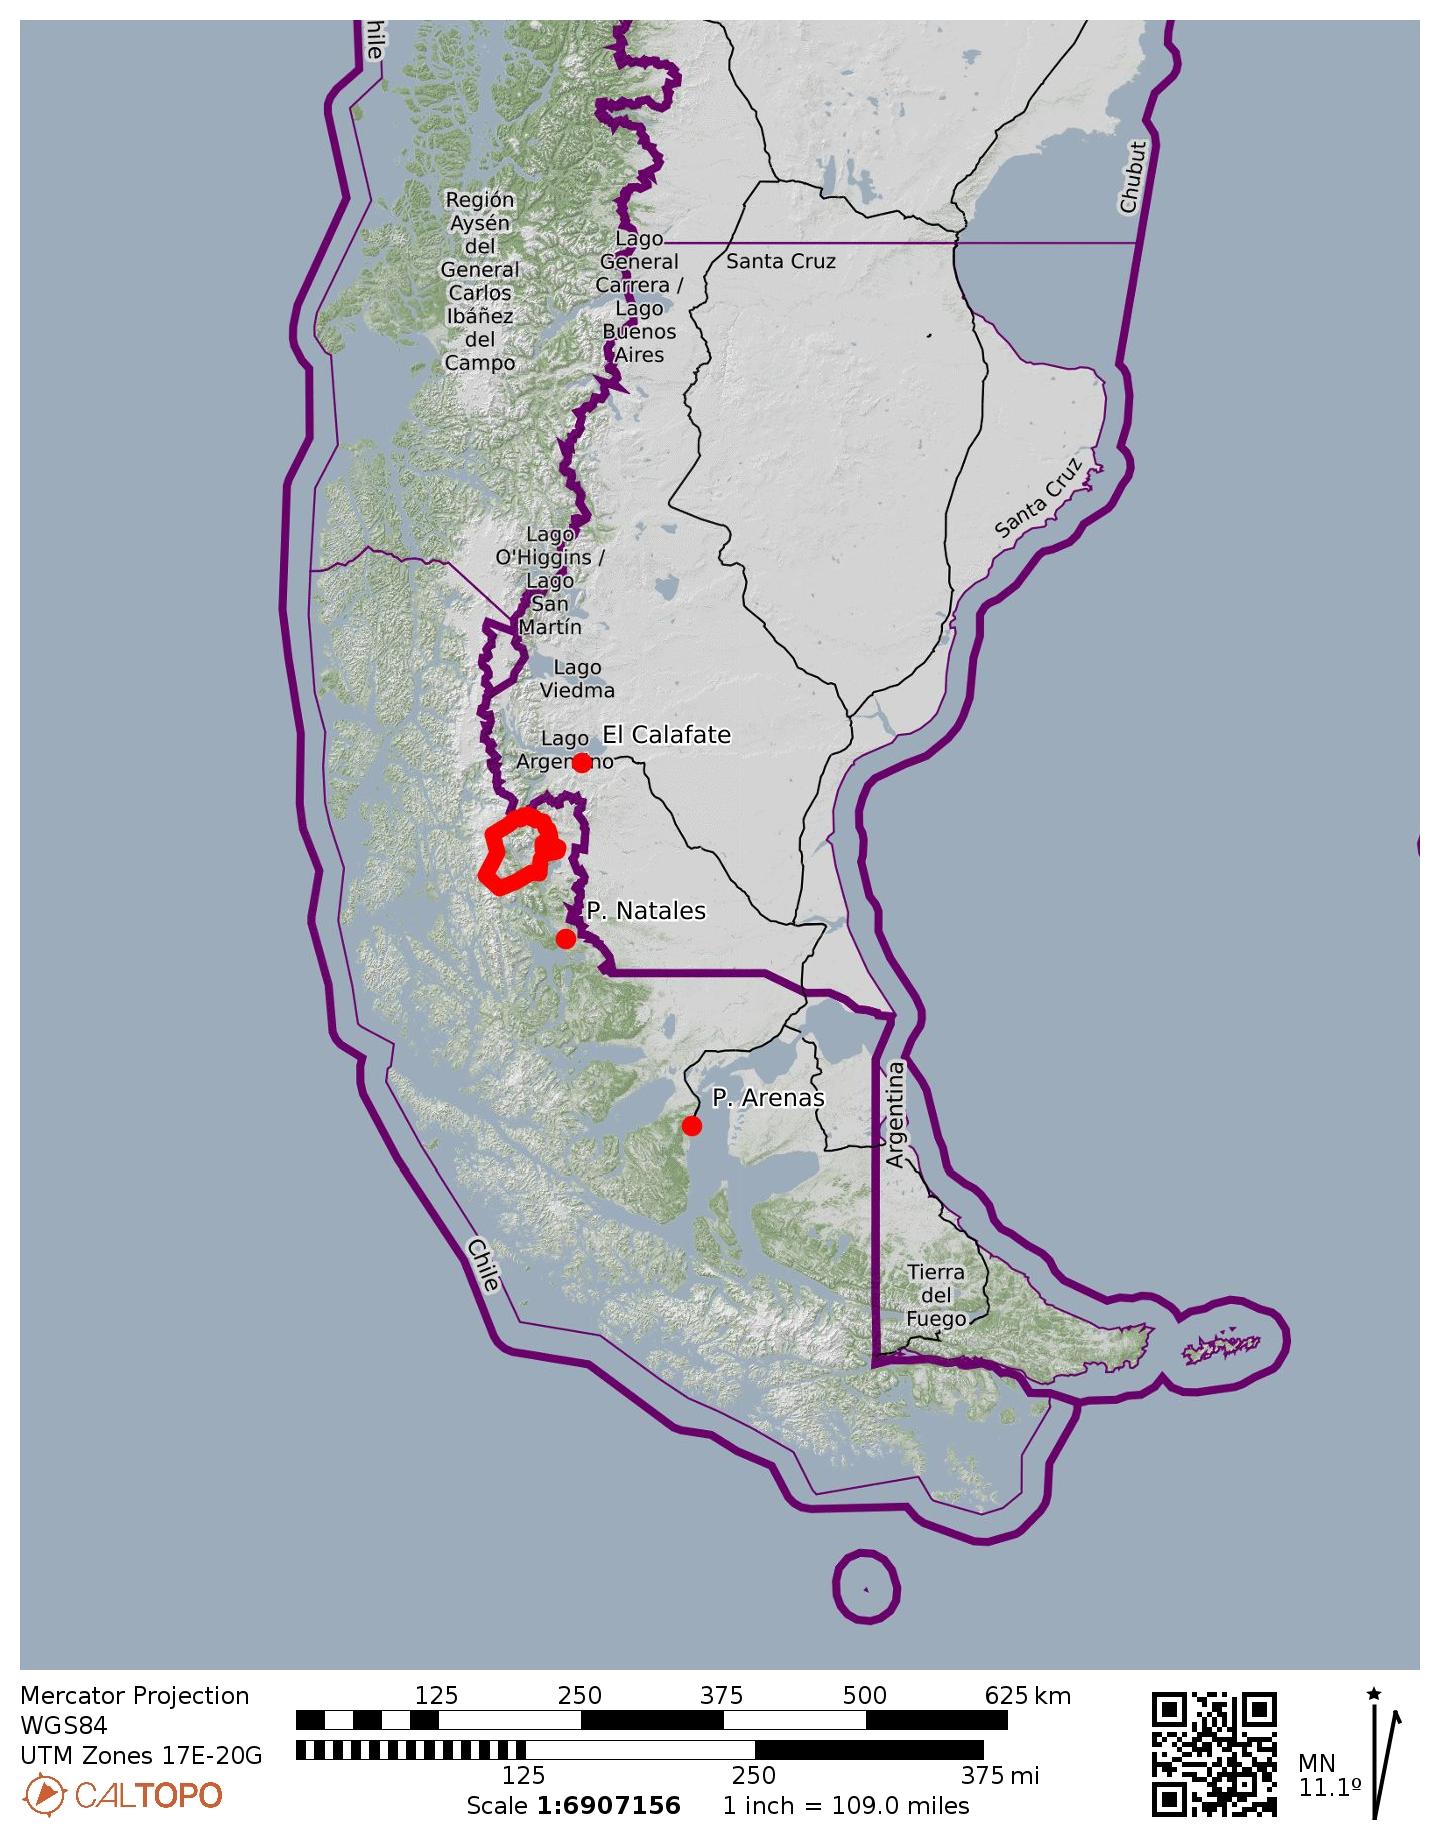
Region: Chilean Patagonia
Sub-Region: Cordillera Paine aka Paine Massif
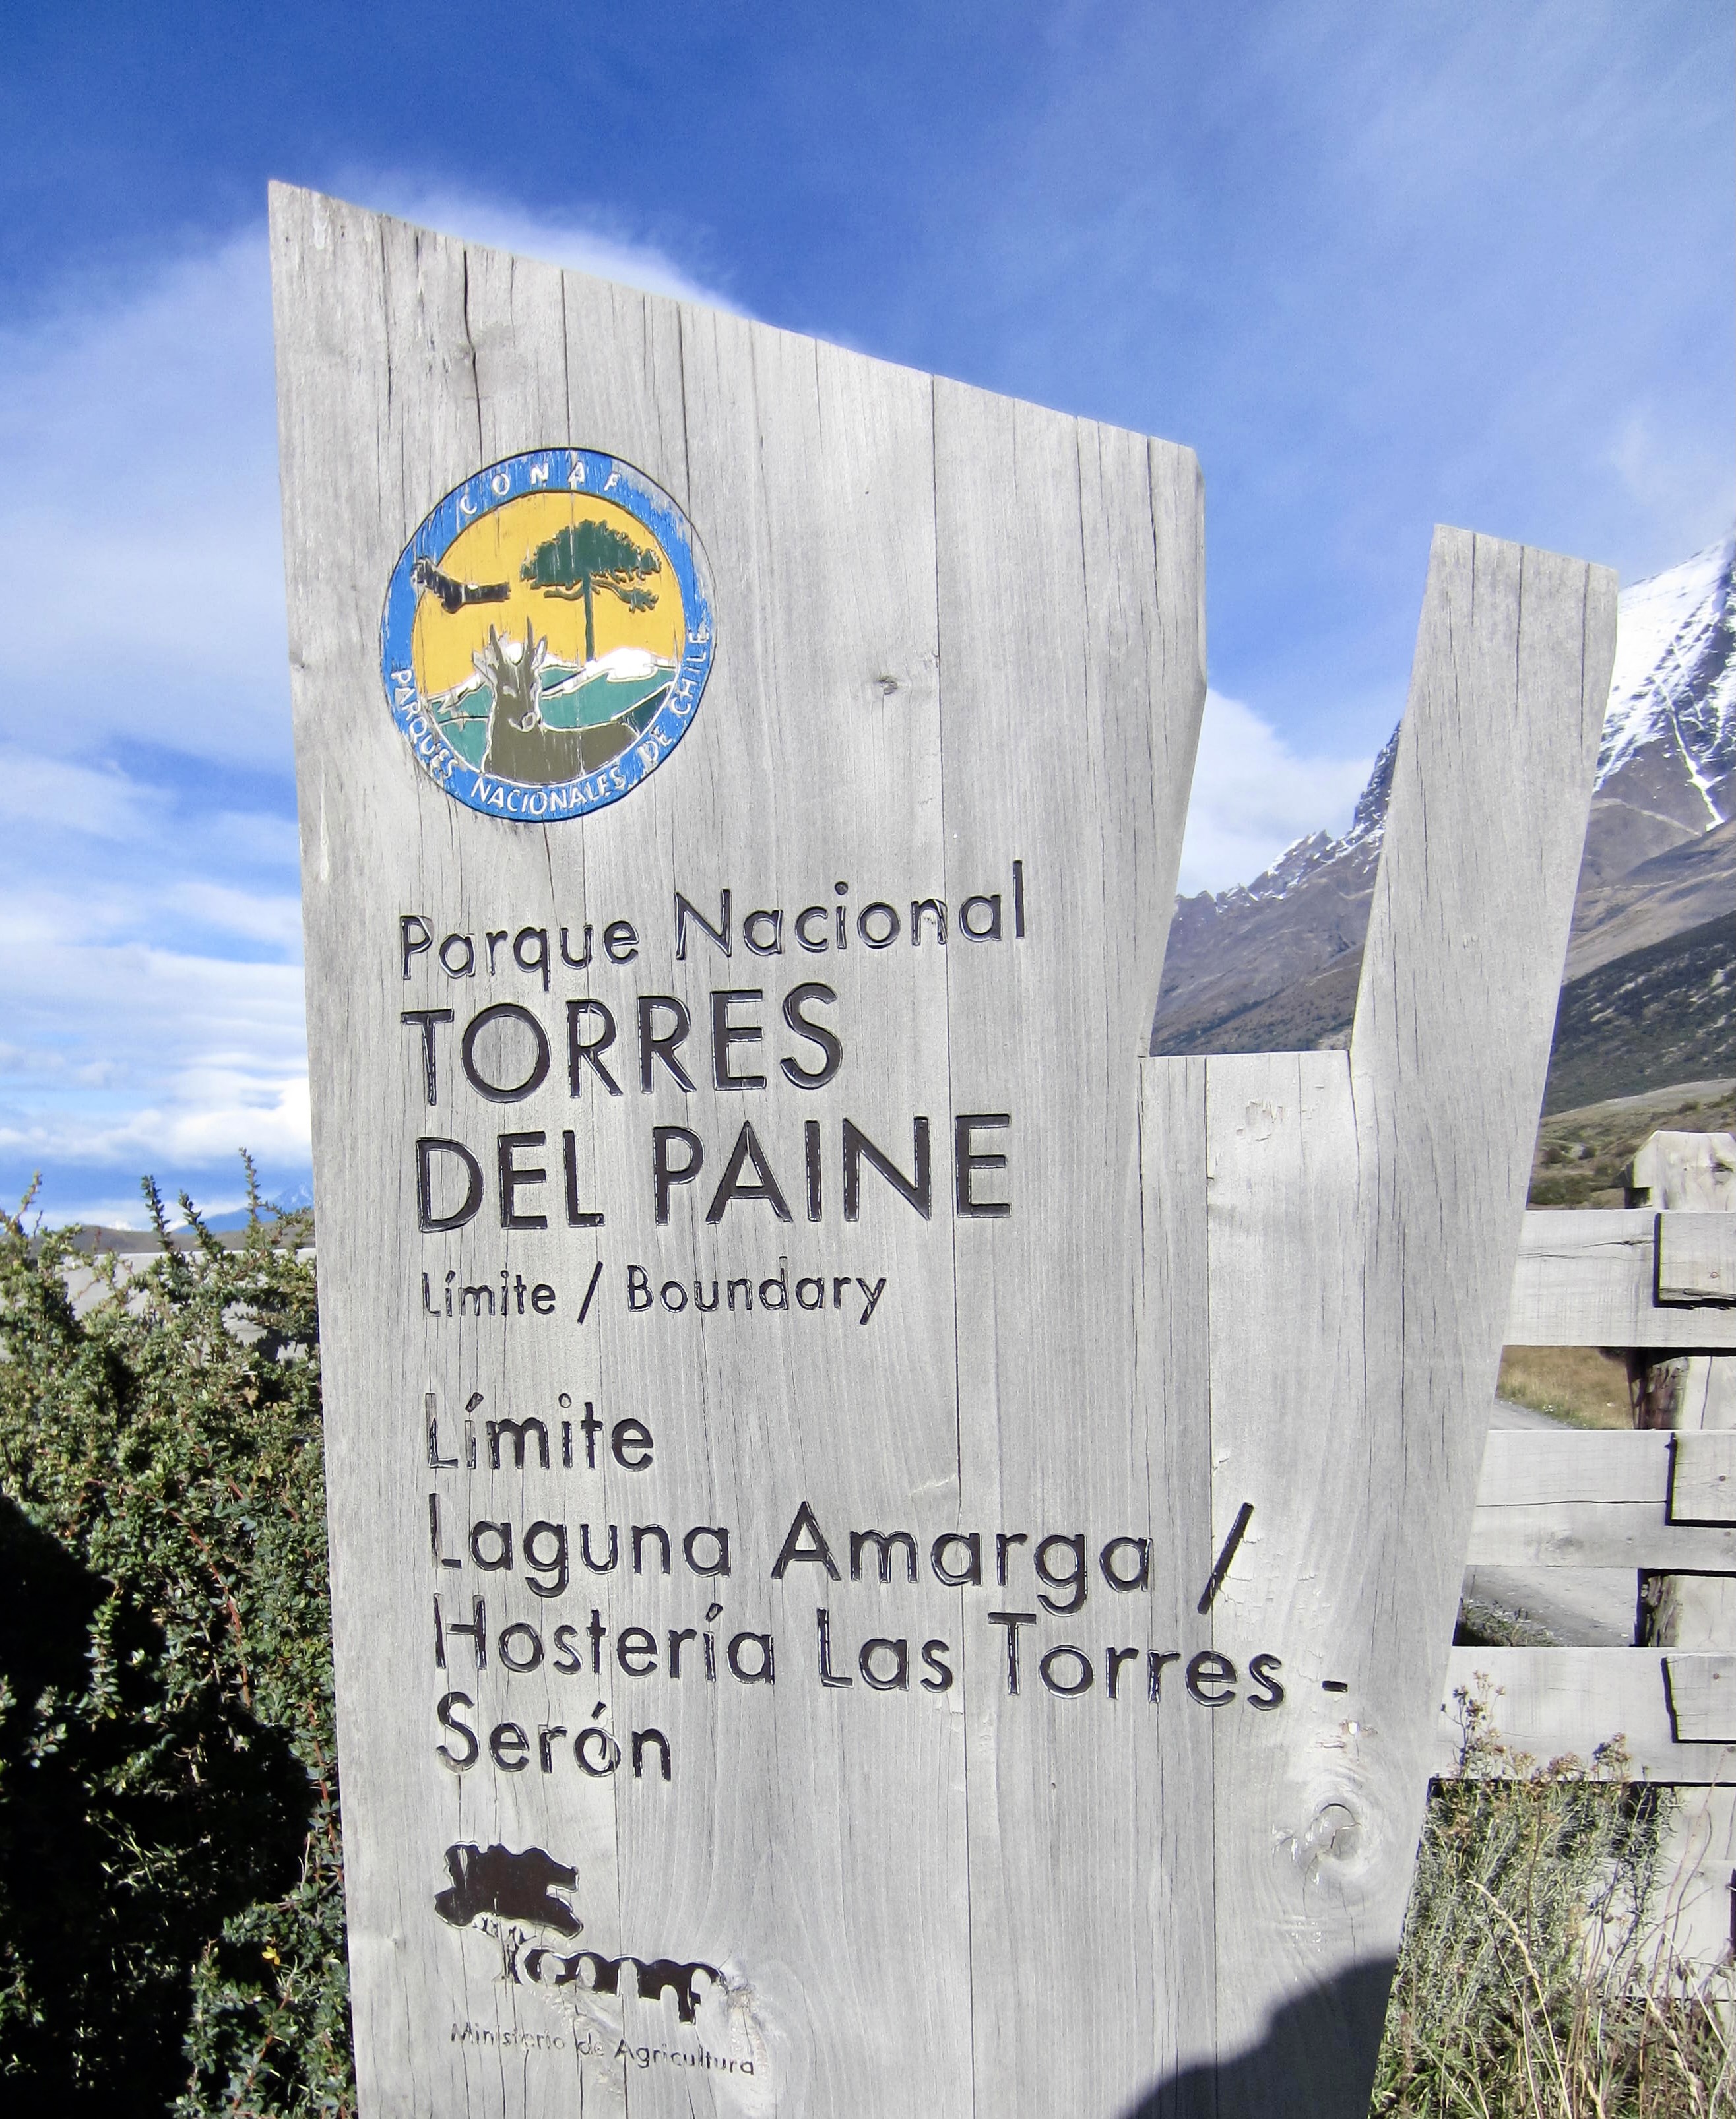
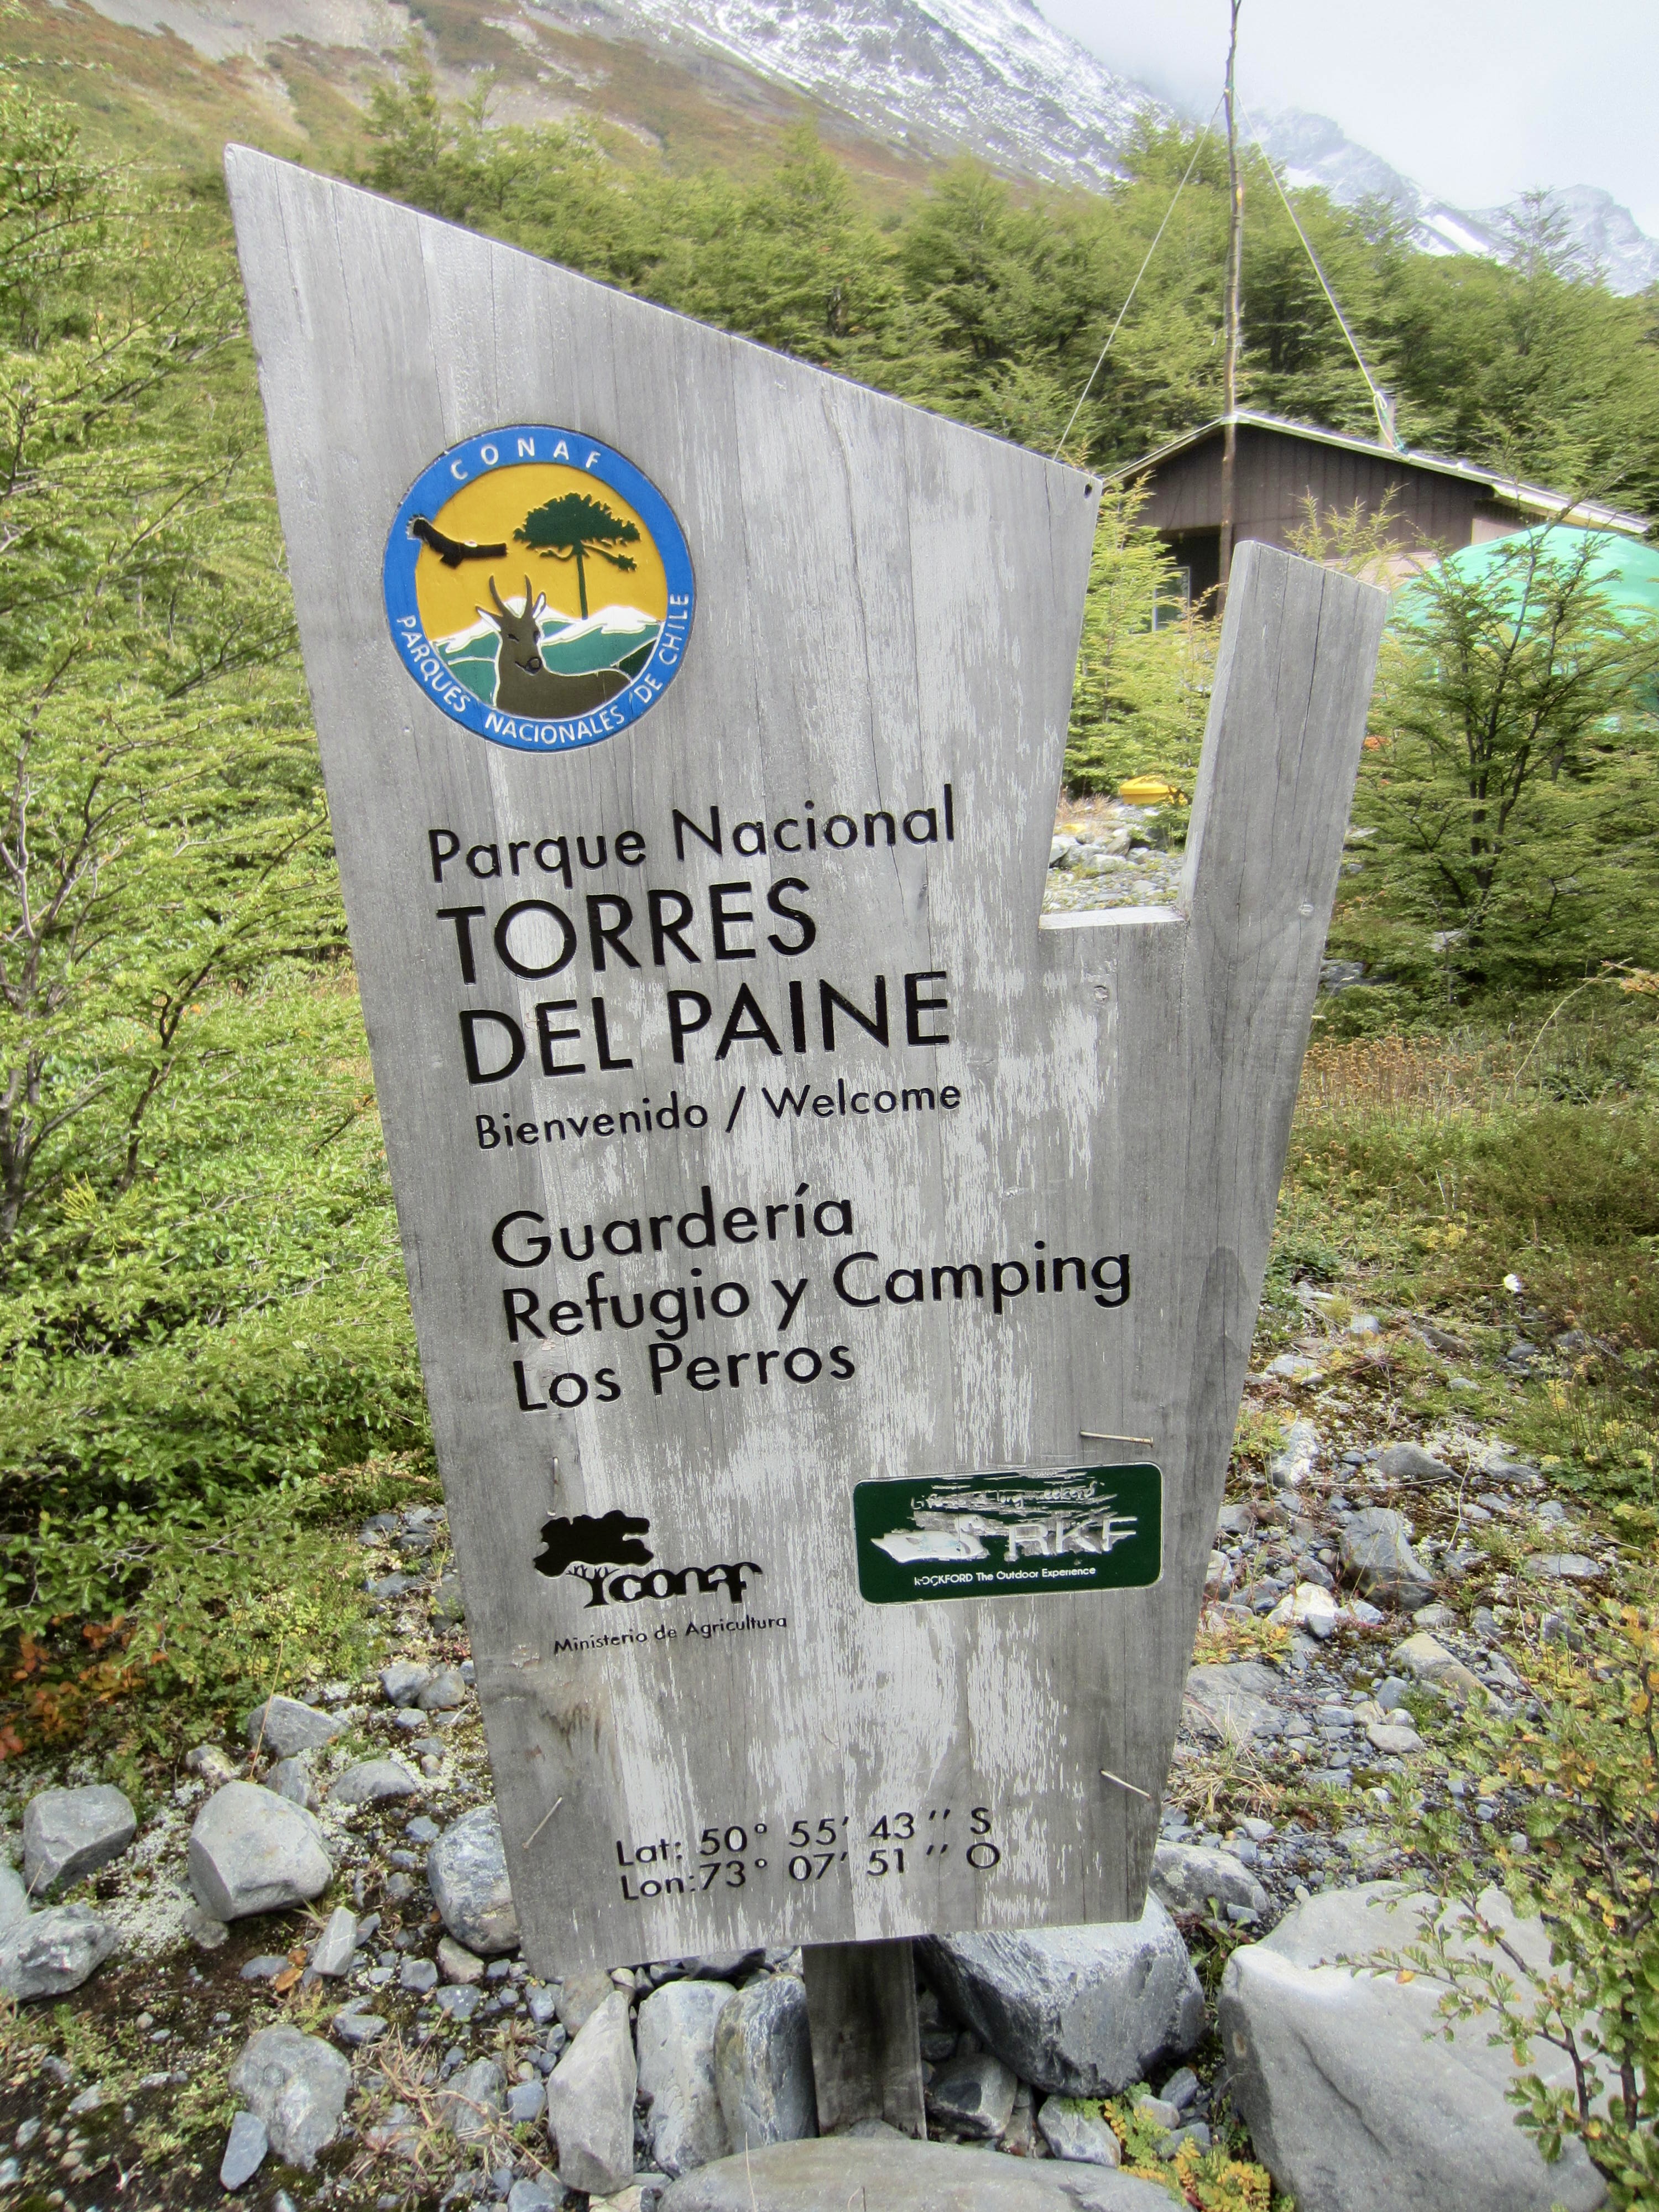
Area: Torres del Paine National Park
Starting & Ending Point: Torres Welcome Center (Elev. 450 feet / 140 meters)
Way Points: Central Camp & Paine River Valley & Seron Camp & Upper Paine River Valley & Lake Paine & Coiron Ranger Station & Dickson Camp & East Fork Los Perros River Bridge & Los Perros River Valley & Lake Los Perros & Los Perros Camp & Condor Creek Valley & John Garner Pass & Paso Ranger Station & Grey Glacier Viewpoint & Grey Camp & Lake Los Patos & Paine Grande Camp & Lake Pehoe & Lake Skottsberg & Frances River Bridge & Italiano Camp & Frances Camp & Lake Nordenskjold & Lake Inge & Middle Ascencio River Bridge & Chileno Camp & Middle Ascencio River Bridge & Lower Ascencio River Bridge & Paine River Valley & Torres Welcome Center (trail hike & trail scramble)
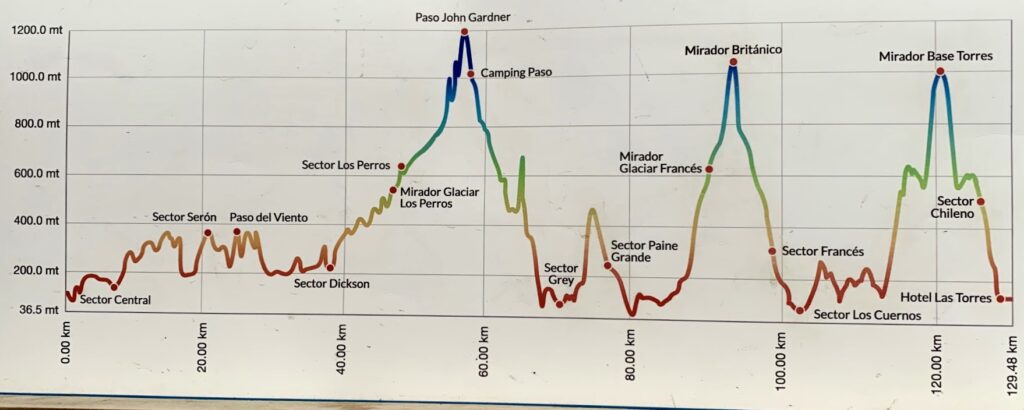
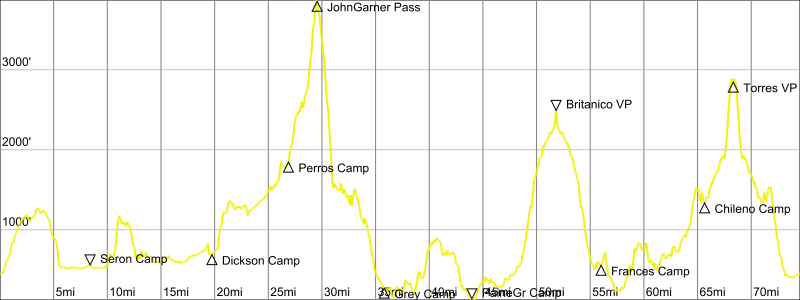
High Point: John Garner Pass (Elev. 3850 feet / 1170 meters)
Campsites: Seron Camp & Dickson Camp & Los Torres Camp & Grey Camp & Paine Grande Camp & Frances Camp & Chileno Camp
Sidetrip 1: Lake Grey Viewpoint (trail hike)
Sidetrip 2: Frances Viewpoint & Lower Britanico Viewpoint (trail hike & trail scramble)
Sidetrip 3: Torres Ranger Station & Torres Base Viewpoint & Lake Torres (trail hike & trail scramble)
Approximate Stats (including all sidetrips): 74.4 miles / 119.7 kilometers traveled; 18,900 feet / 5760 meters gained & lost.
…
Trip Overview
The “O” + “W” Circuit (or simply “O-W” Circuit) is a popular 75-mile / 120-kilometer trek around the Paine Massif in Chilean Patagonia. Most of the route lies within Torres del Paine National Park, which is named for its photogenic trio of striking granitic towers, or torres, near the center of the park. Eileen and I took eight days to complete the entire circuit, and Brooke (having just done the second half) joined us for the first half.
According to the Vertice S.A. website, the “O-W” Circuit was originally envisioned by English mountaineer and explorer, John Garner, during an expedition to Chilean Patagonia. In 1976, Garner and park ranger Oscar Guineo spent many months teasing out a route around the Paine Massif. Their key discovery was a high alpine pass that separates the Grey River drainage on the west from the Paine River drainage on the east. This important pass was subsequently named after John Garner, and the entire route was initially called the Paine Massif Circuit.
The “O-W” Route
The “O-W” Circuit consists of two distinct parts: an “O” Trek and a “W” Trek. The “O” Trek makes a big curve around the northern side, or “back side,” of the Paine Massif, and it has become well-traveled in recent years. By park regulations, the “O” must be hiked in an east-to-west direction. The ultra-famous “W” Trek lies on the southern side, or “front side,” of the massif. In its entirety, this trek involves three separate sidetrip legs connected by two traversing legs, thereby scribing a rough W-shaped track onto the map. Park regulations allow the “W” to be hiked in either direction.
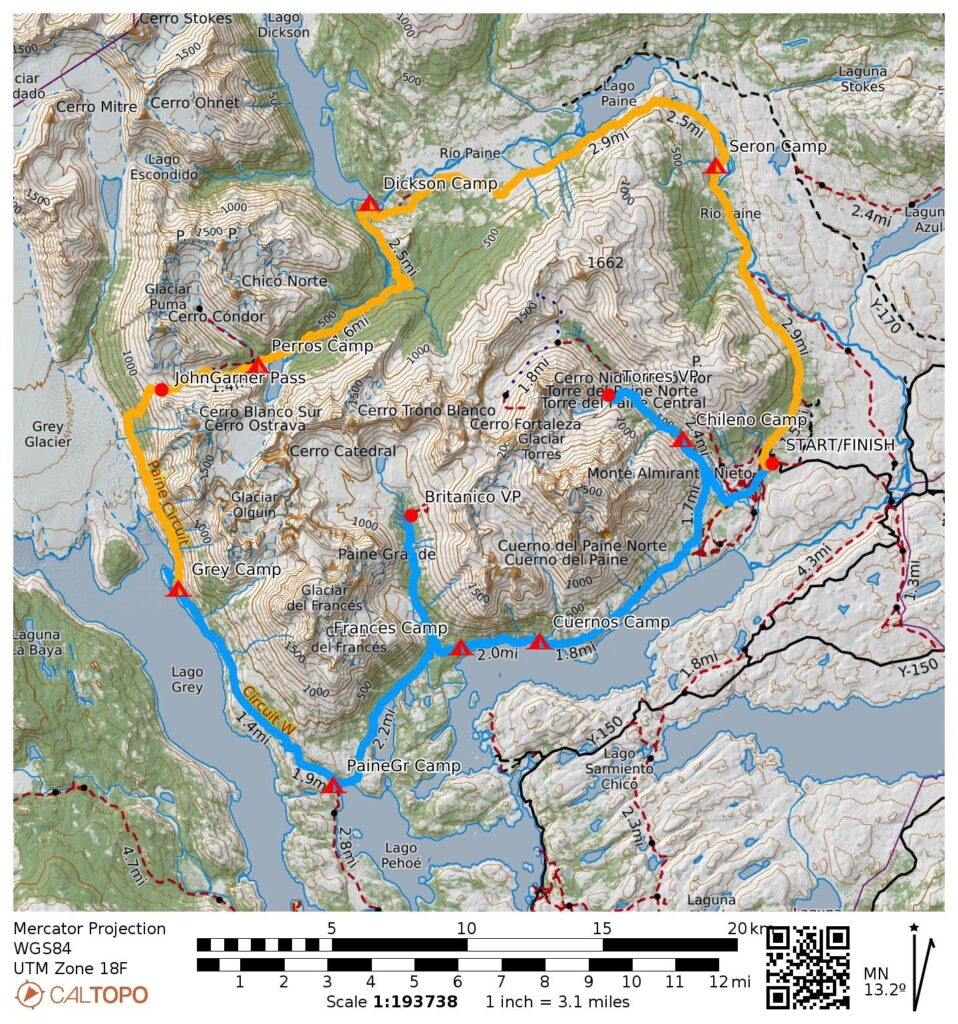
Given the aforementioned directional requirement, the combined “O-W” Circuit must be done in a counter-clockwise direction, but trekkers can choose between two different starting points. One starting point is at the Torres Welcome Center, which is accessible by a short shuttle-bus ride from the park’s Lake Amarga Ranger Station. This option means that trekkers begin on the “O” and finish on the “W.” The other possible starting point is at Paine Grande Camp, which is accessible by a long catamaran ride from the eastern end of Lake Pehoe. This option means that trekkers begin on the “W” and finish on the “O.”

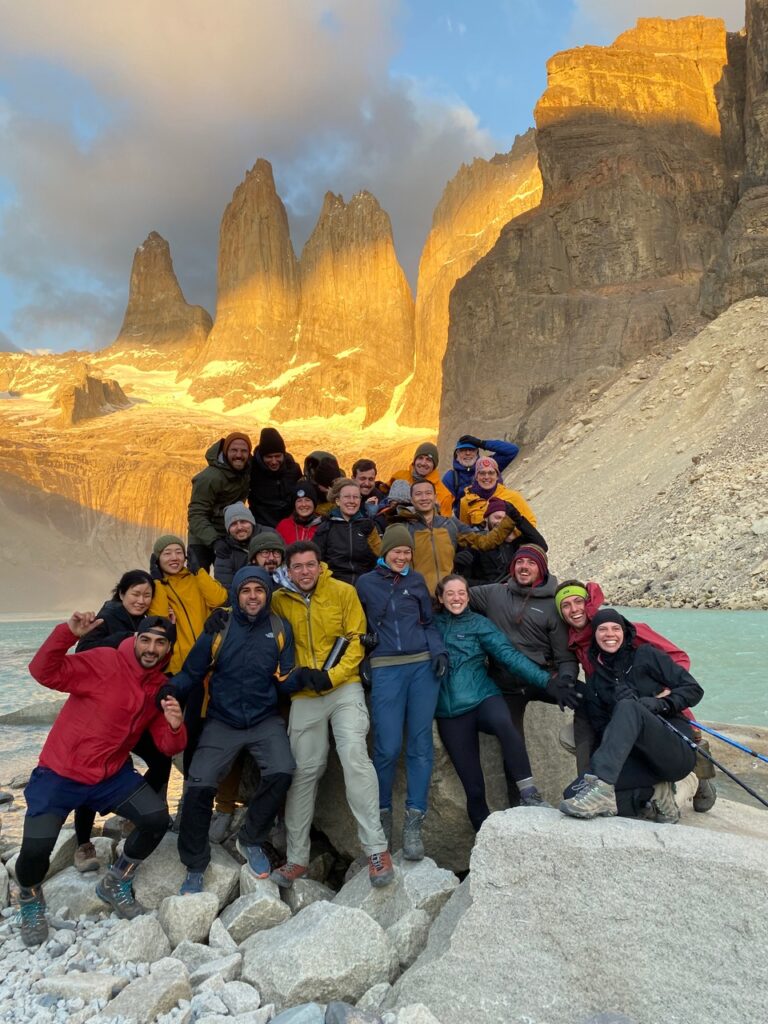
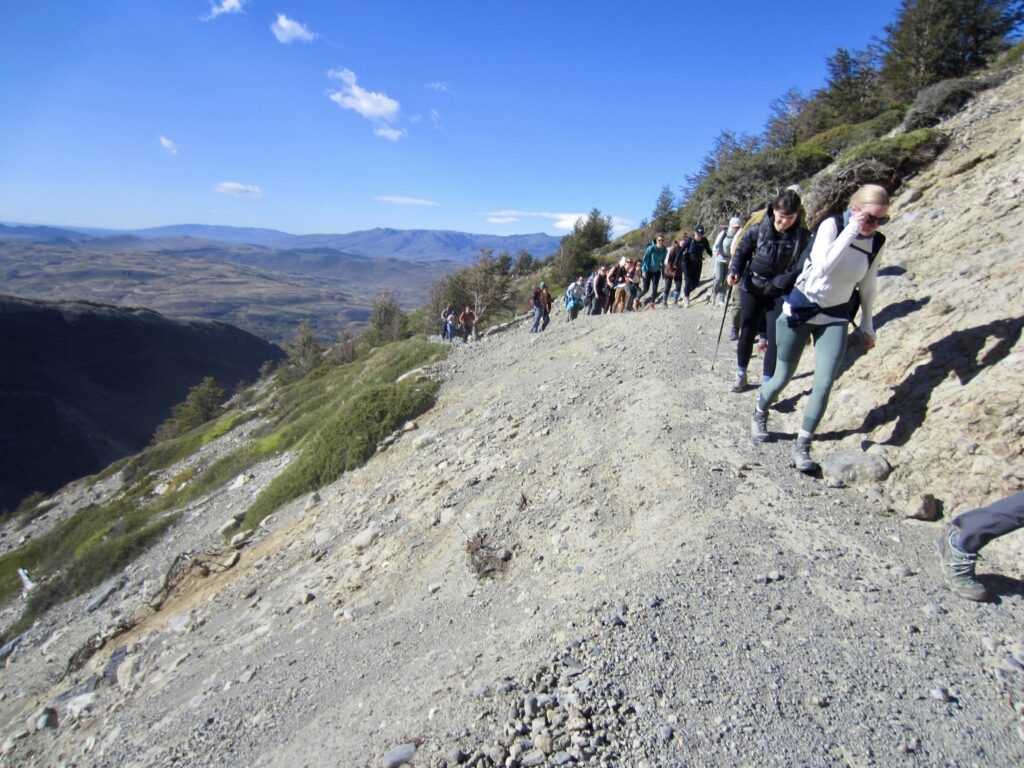
Eileen and I chose to start at the Torres Welcome Center for several reasons. This option not only conformed better with Brooke’s travel plans but is also less expensive and less time-restrictive due to the cost and schedule difference between the shuttle bus and the catamaran. In addition, it saves the best scenery for the last few days of the circuit. We did not initially realize, however, that there is also a good social reason to start at the Welcome Center. Namely, by performing the less-traveled “O” Trek first, we were able to form a peloton and meet most or all of our members before encountering the relative chaos of the heavily traveled “W” Trek. Indeed, the camaraderie that developed during our first few days on the trail was one of the trip highlights for us.
For anyone planning to do the “O-W” Circuit, the natural question arises, “How difficult is it?” The basic statistics shake out thusly: For a typical eight-day trek, you will average slightly less than 10 miles / 16 kilometers per day and slightly less than 2400 feet / 730 meters of elevation gain per day. These are pretty moderate numbers compared to many other popular international trekking routes. However, the compounding effects of adverse weather and rough trail conditions can make the circuit feel a bit more difficult. On the whole, novice backpackers will likely find the “O-W” challenging but doable, whereas experienced backpackers will likely find it moderate but engaging. Novice and experienced trekkers alike will find their gear and clothing systems taxed by the wild swings in weather!
Terrain & Trail Conditions
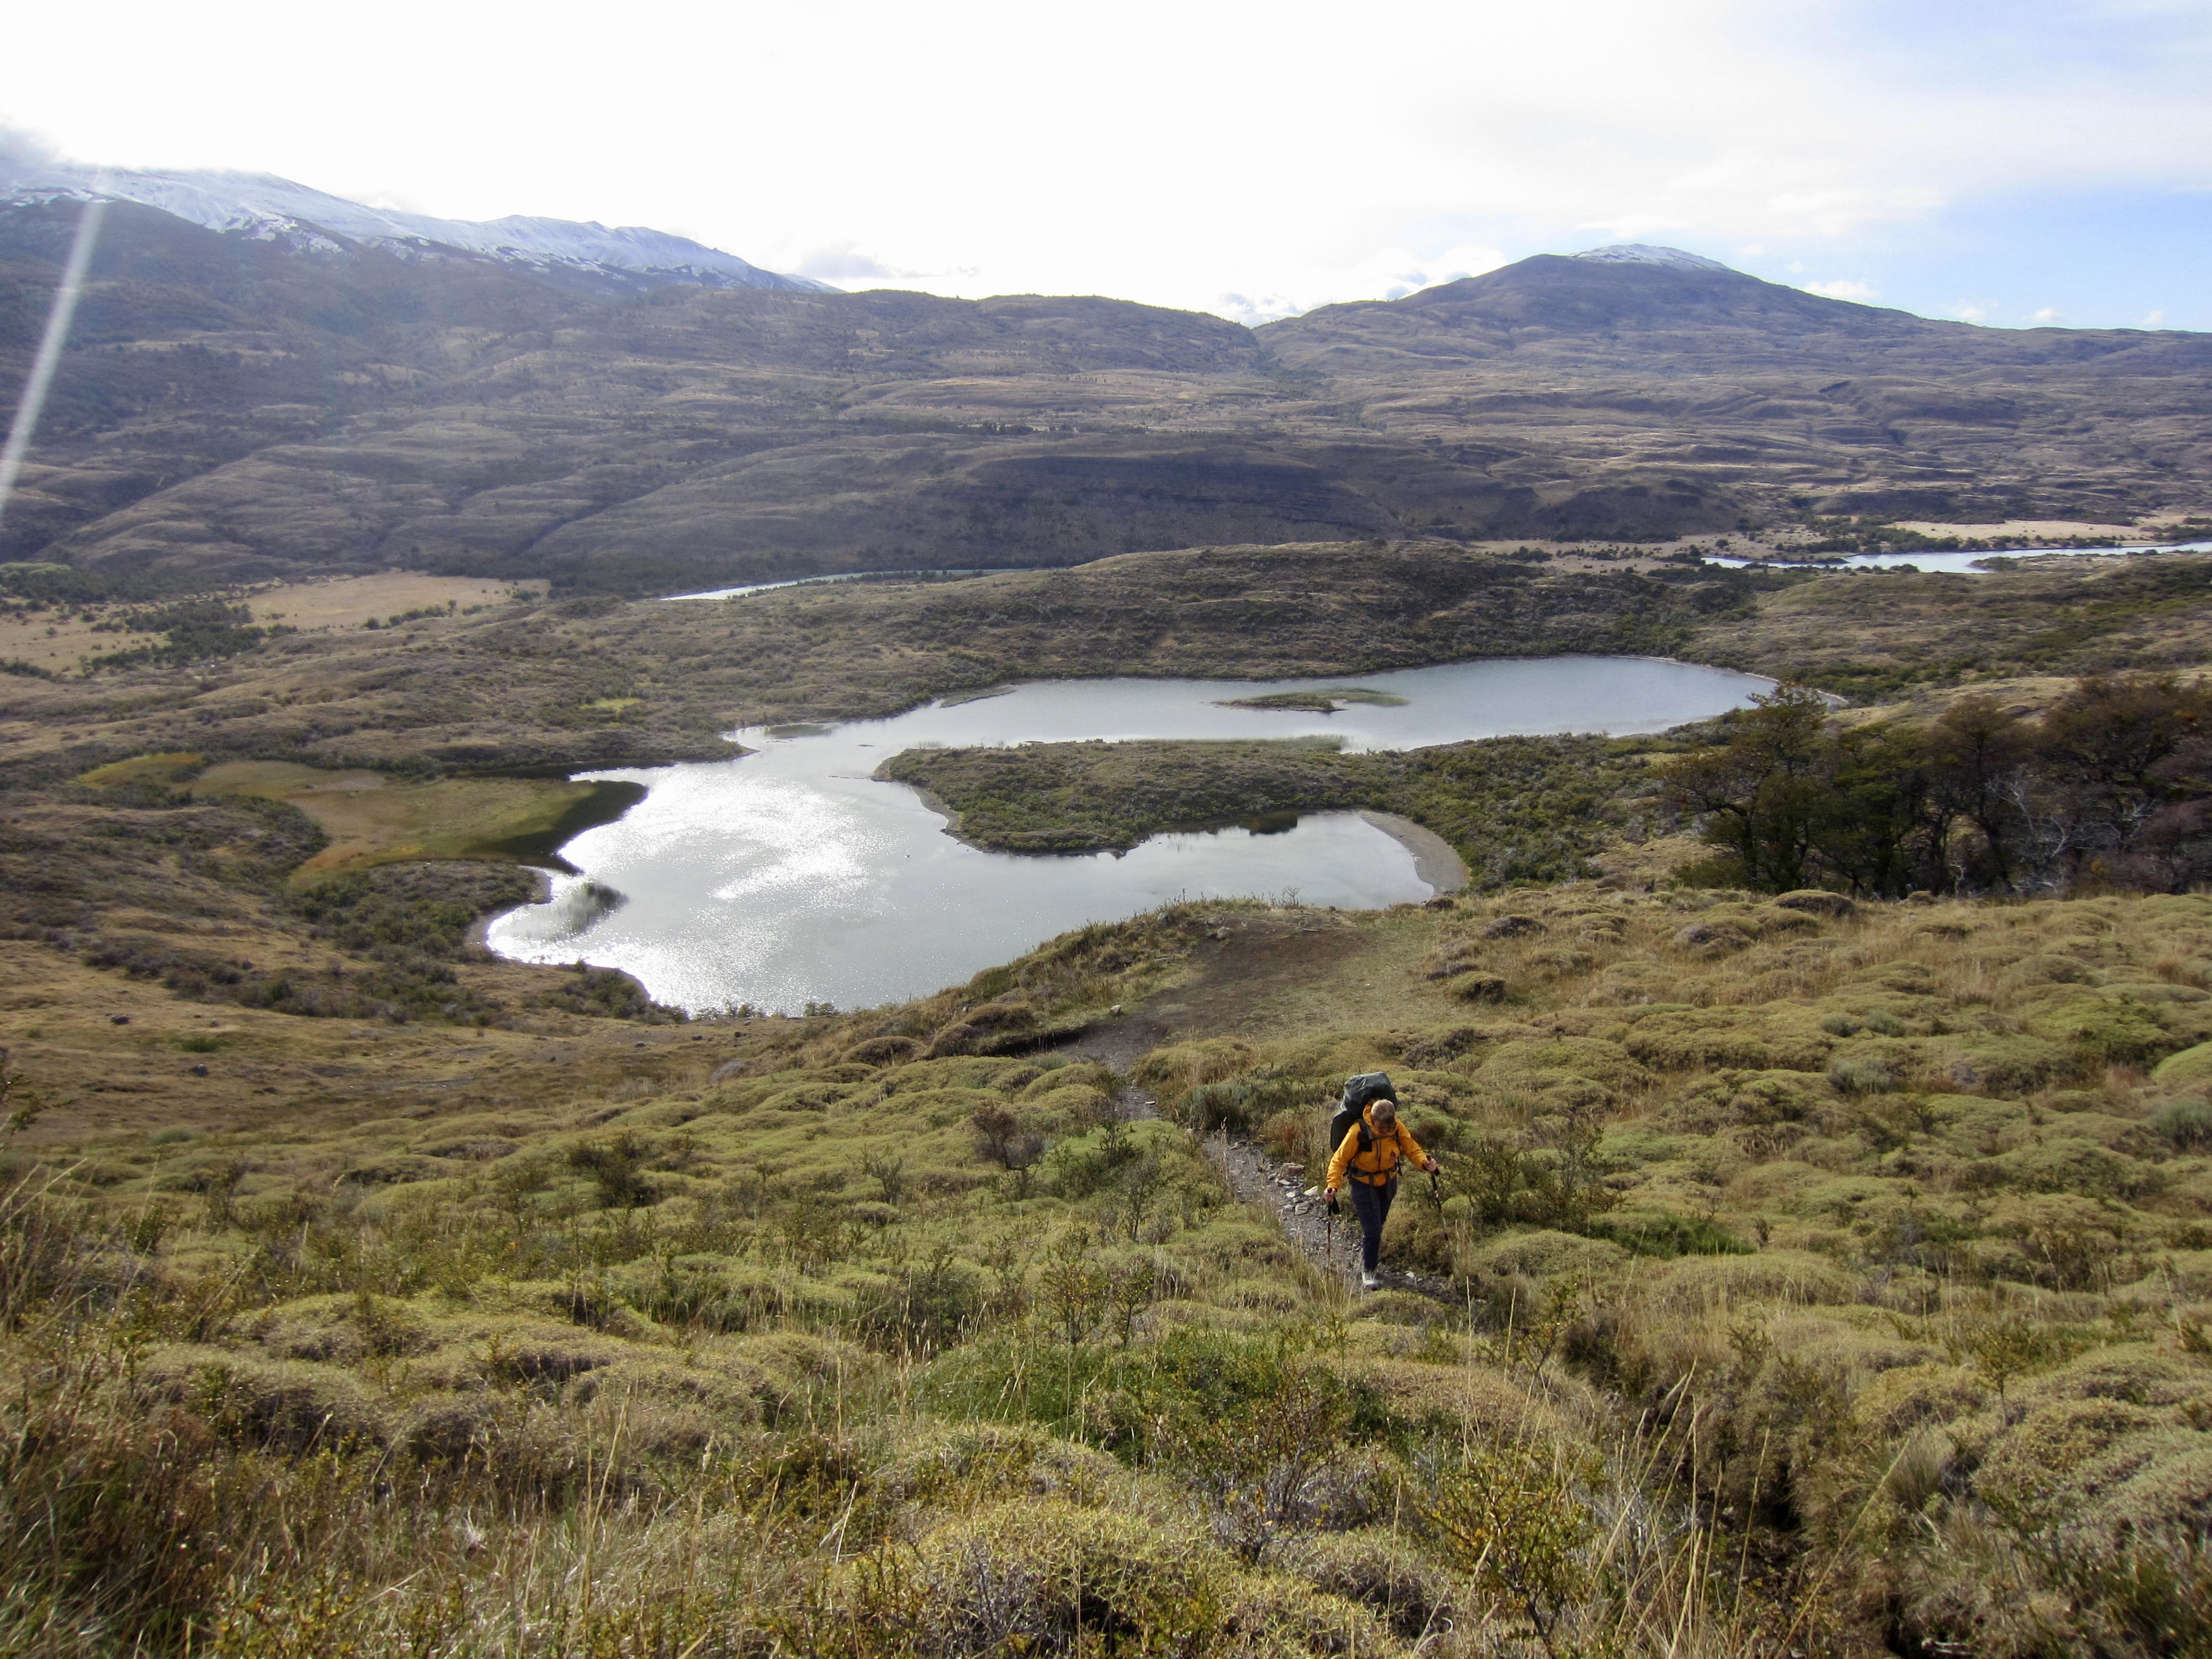
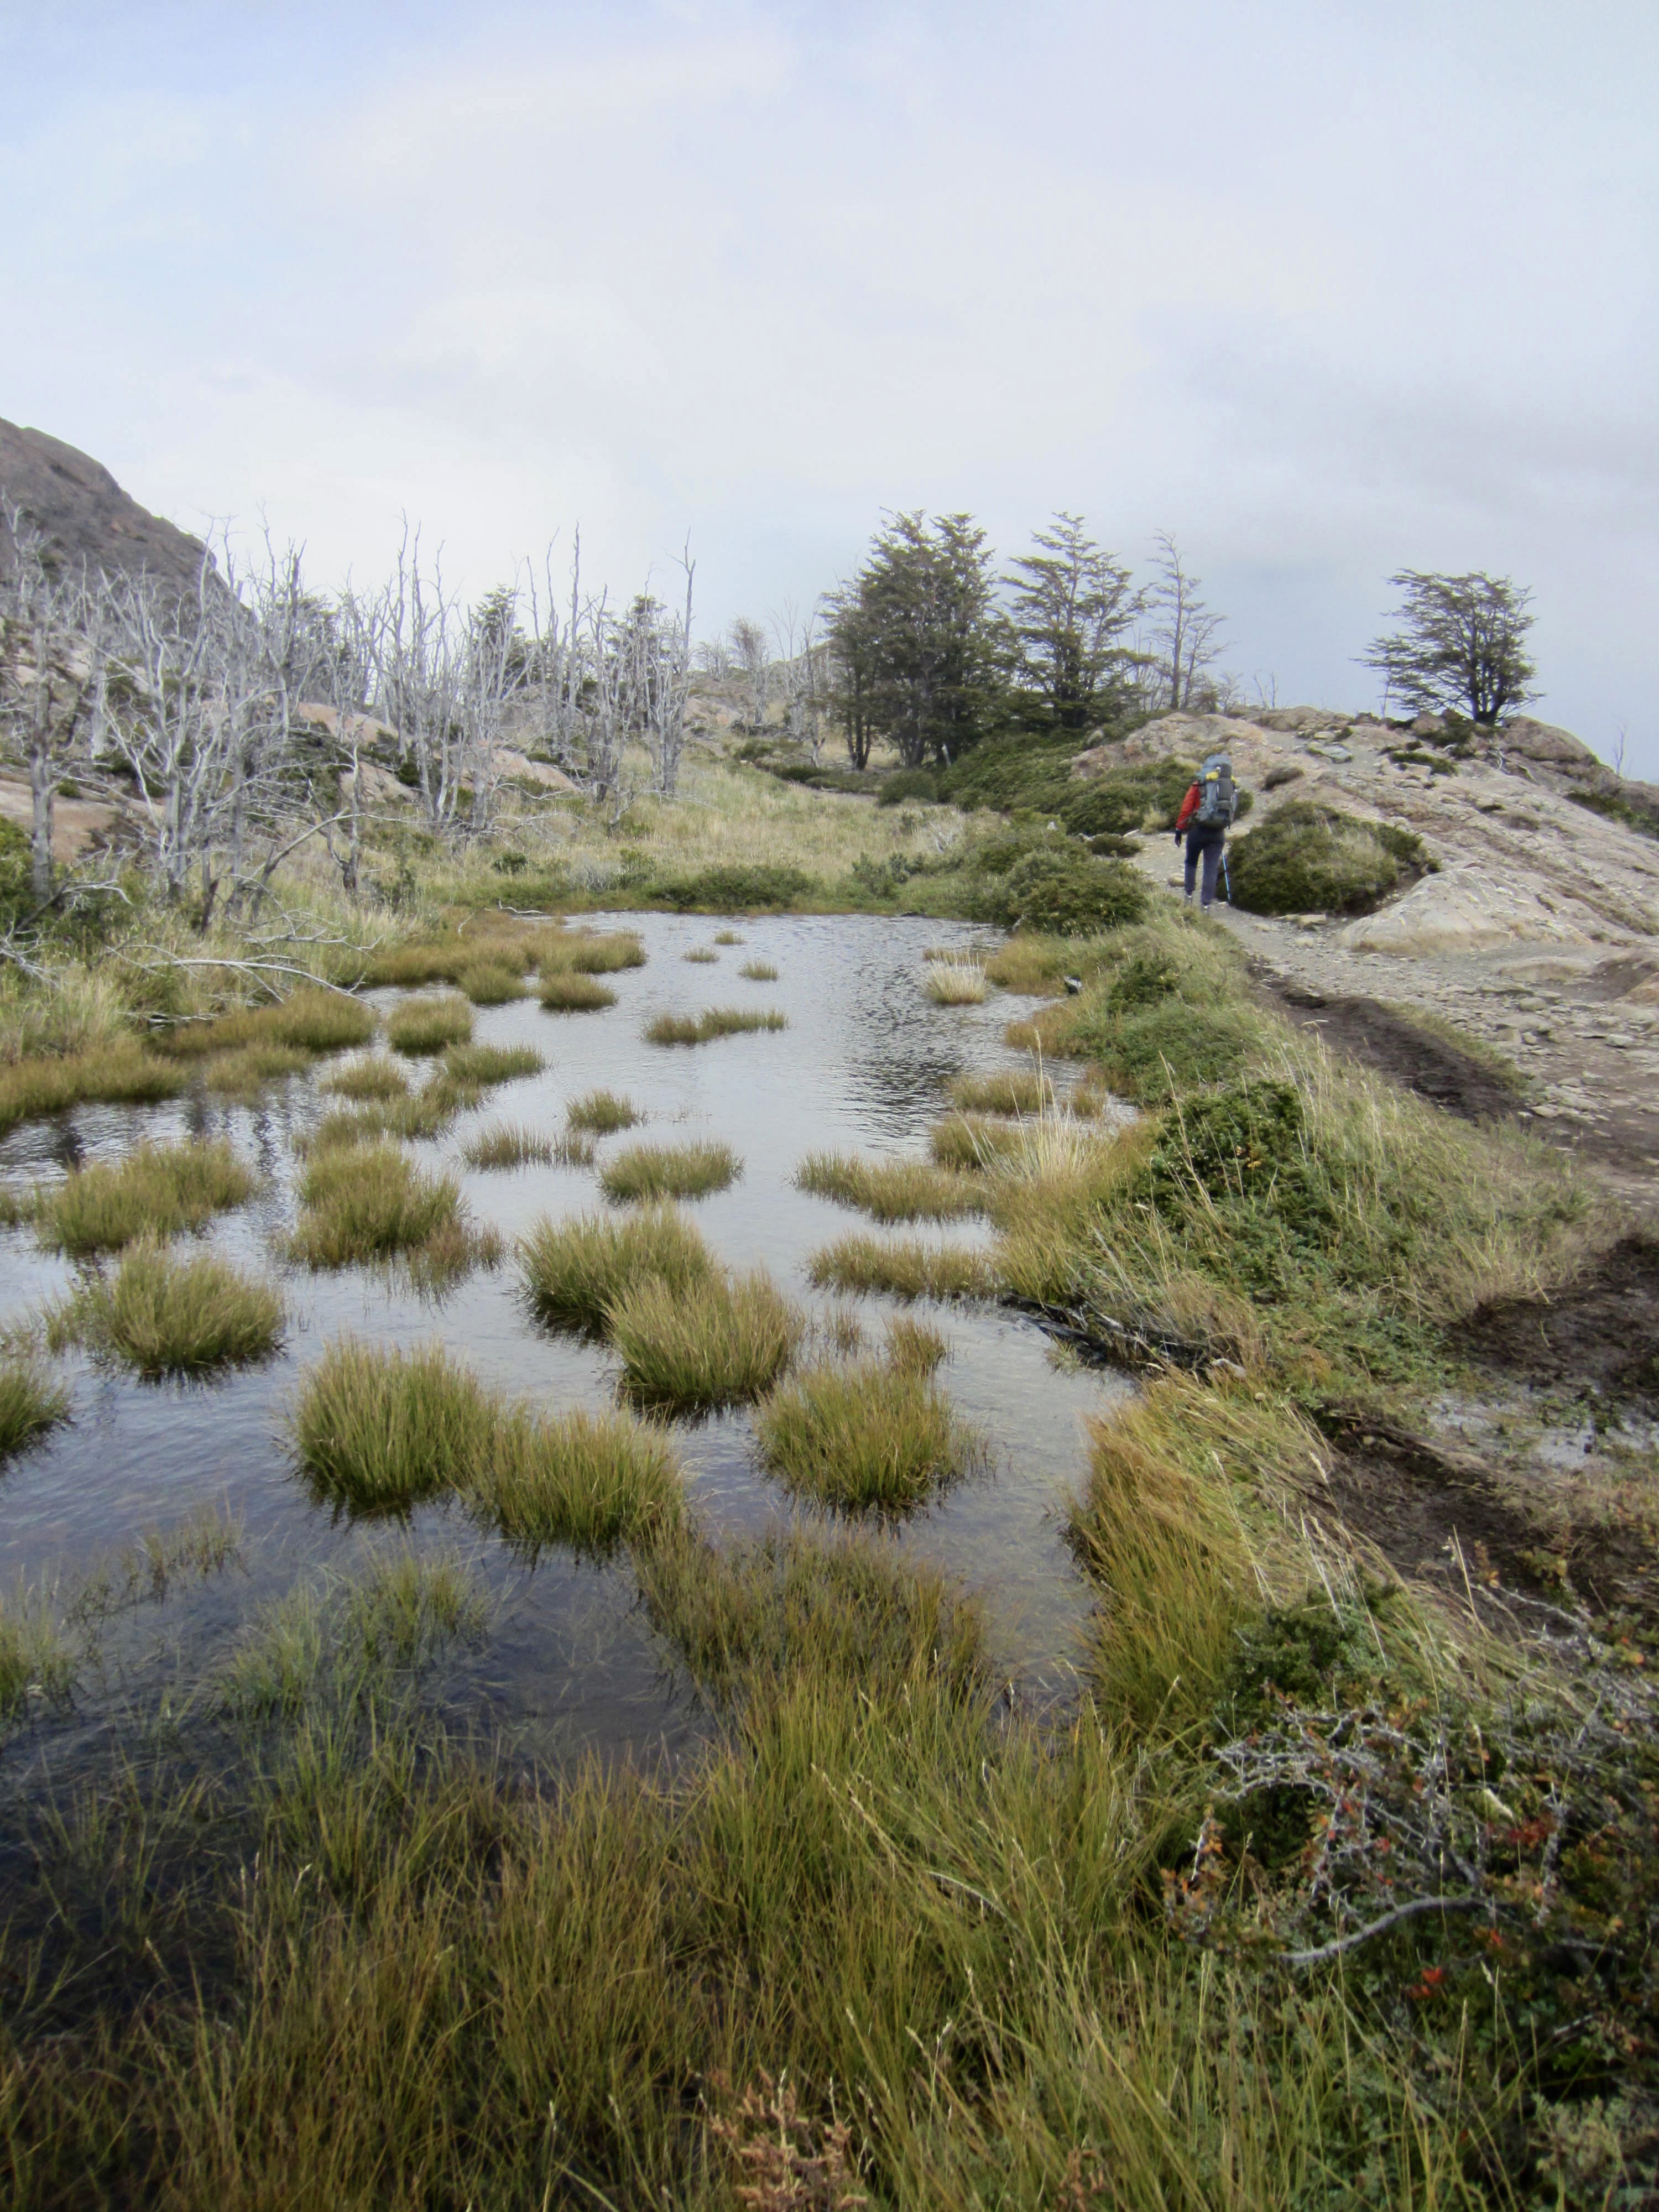
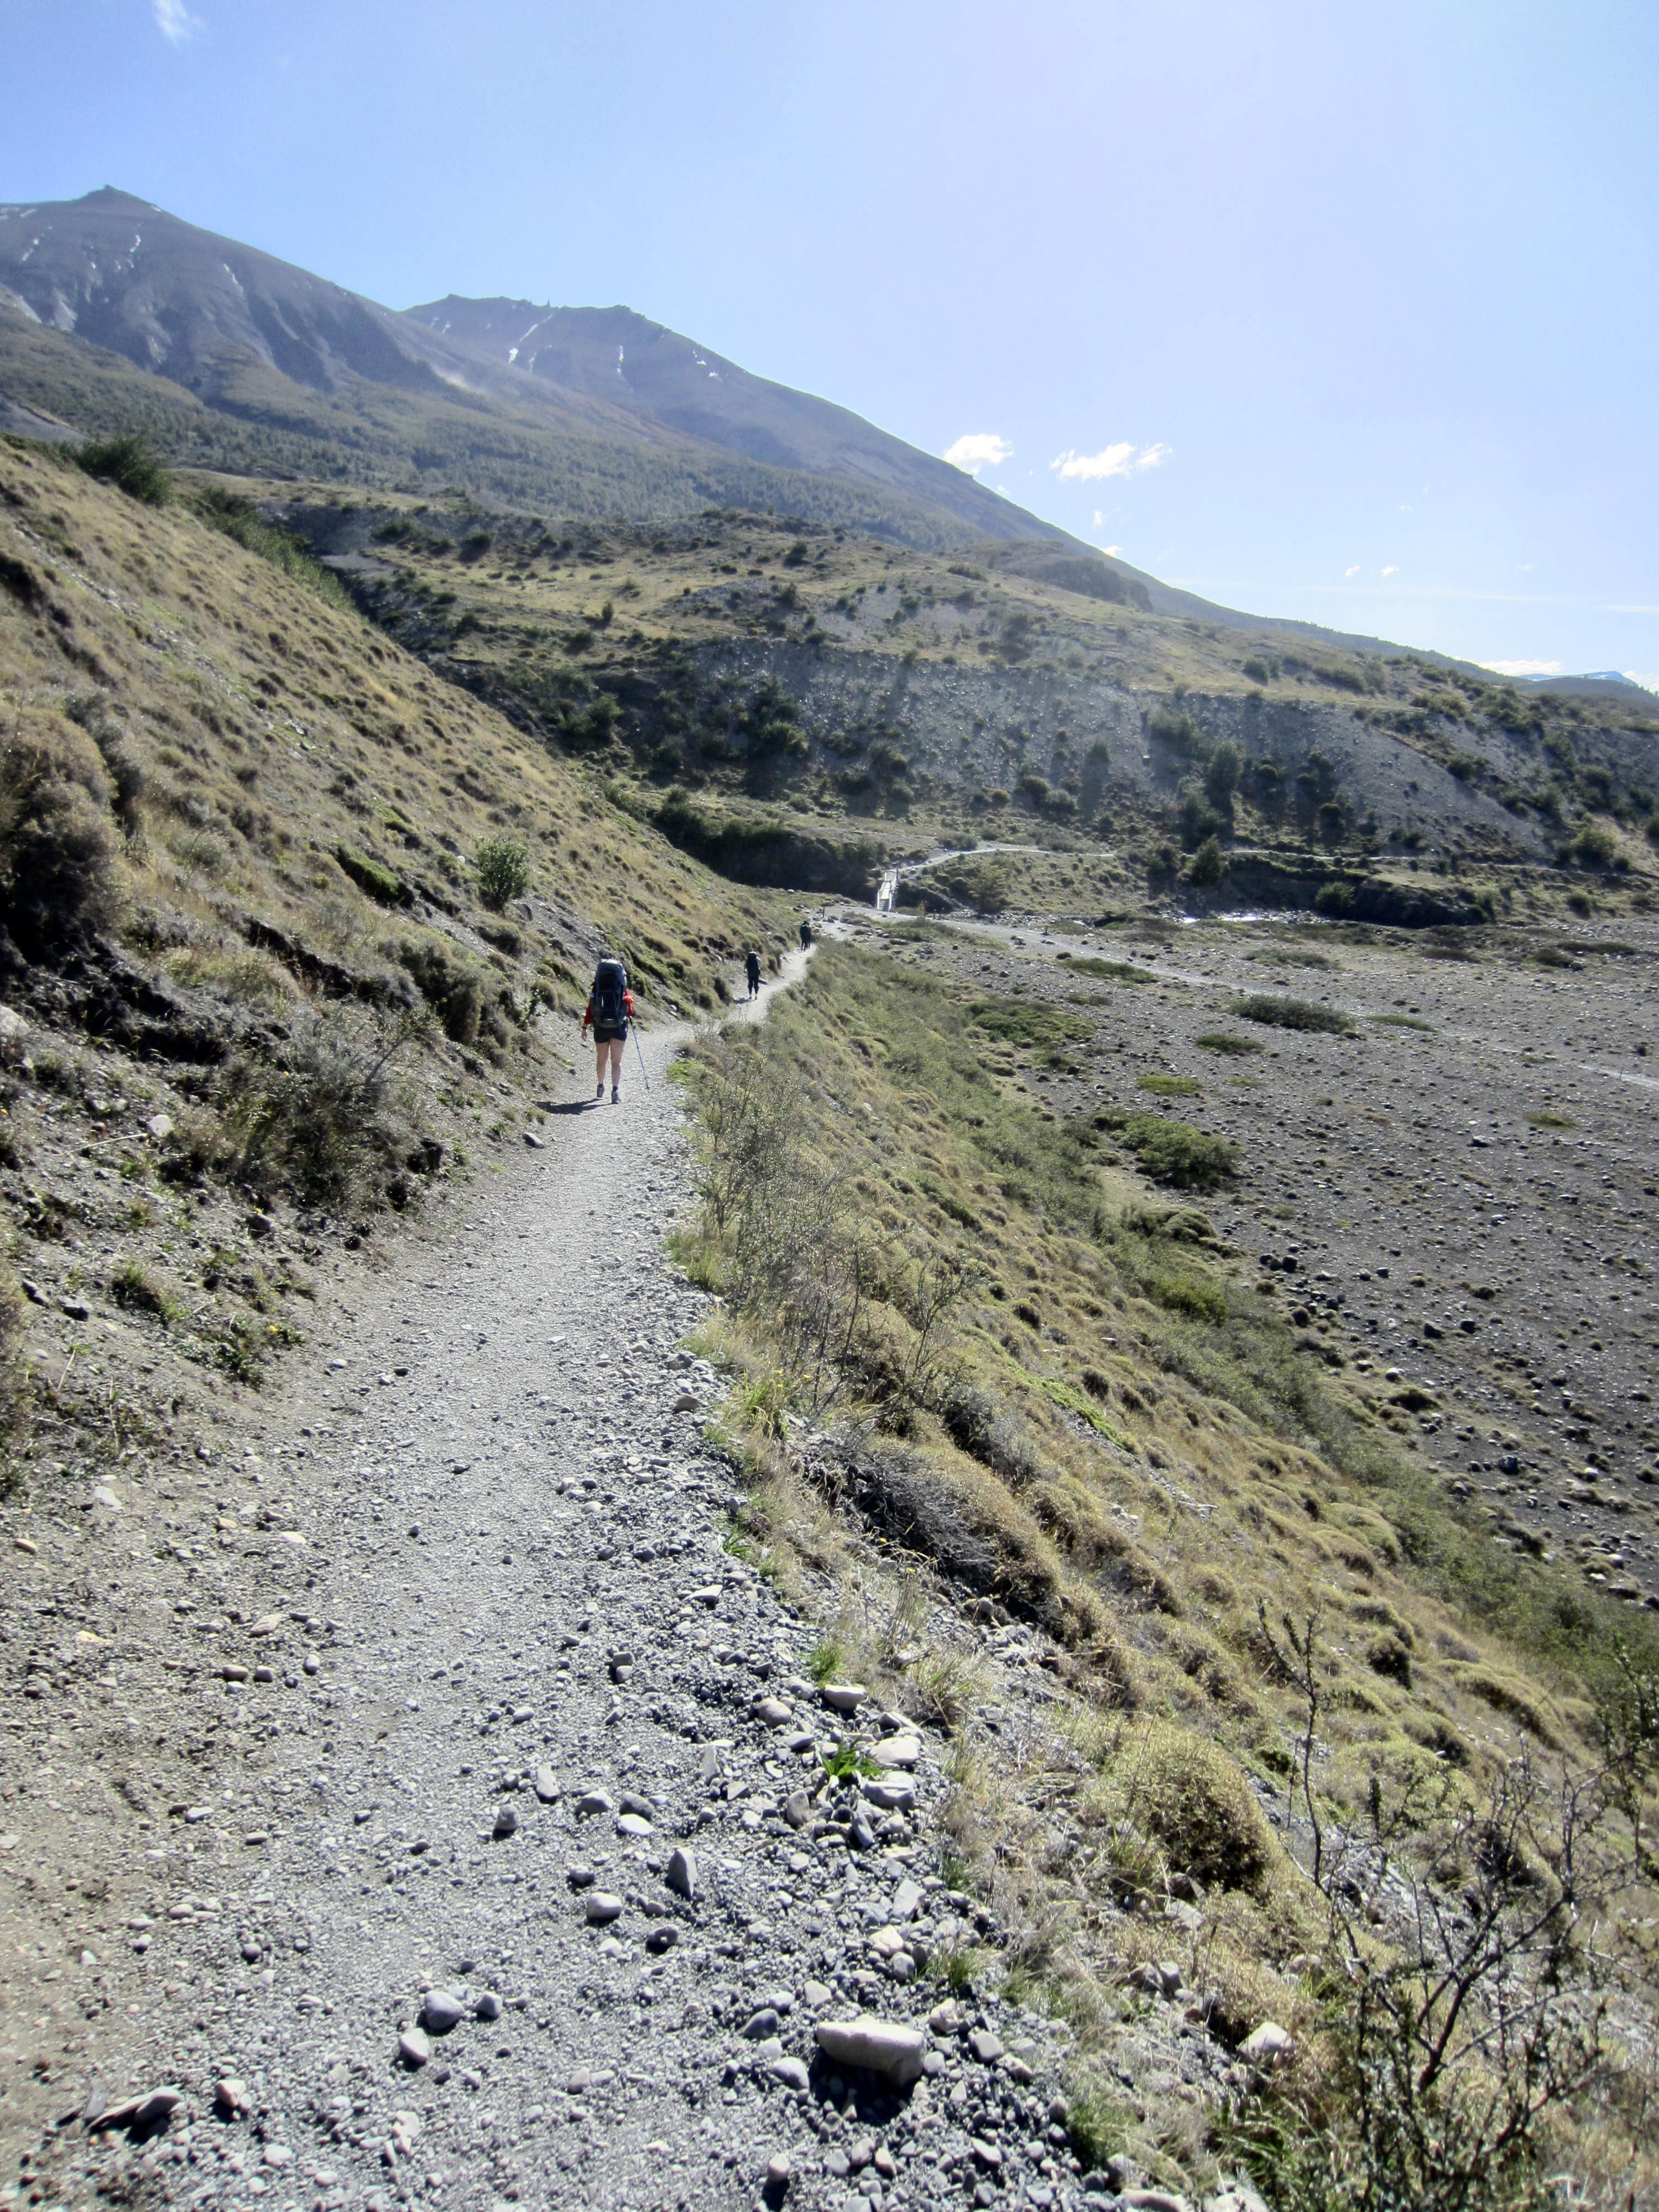
Despite the rugged mountain scenery along the “O-W” Circuit, it is a surprisingly low-elevation trek. Most of the route lies within dense beech forest at elevations less than 1000 feet / 300 meters above sea level, and only a few parts of the route involve alpine terrain above timberline. It is noteworthy that the highest point along the circuit—John Garner Pass—does not even quite reach an elevation of 4000 feet / 1200 meters.
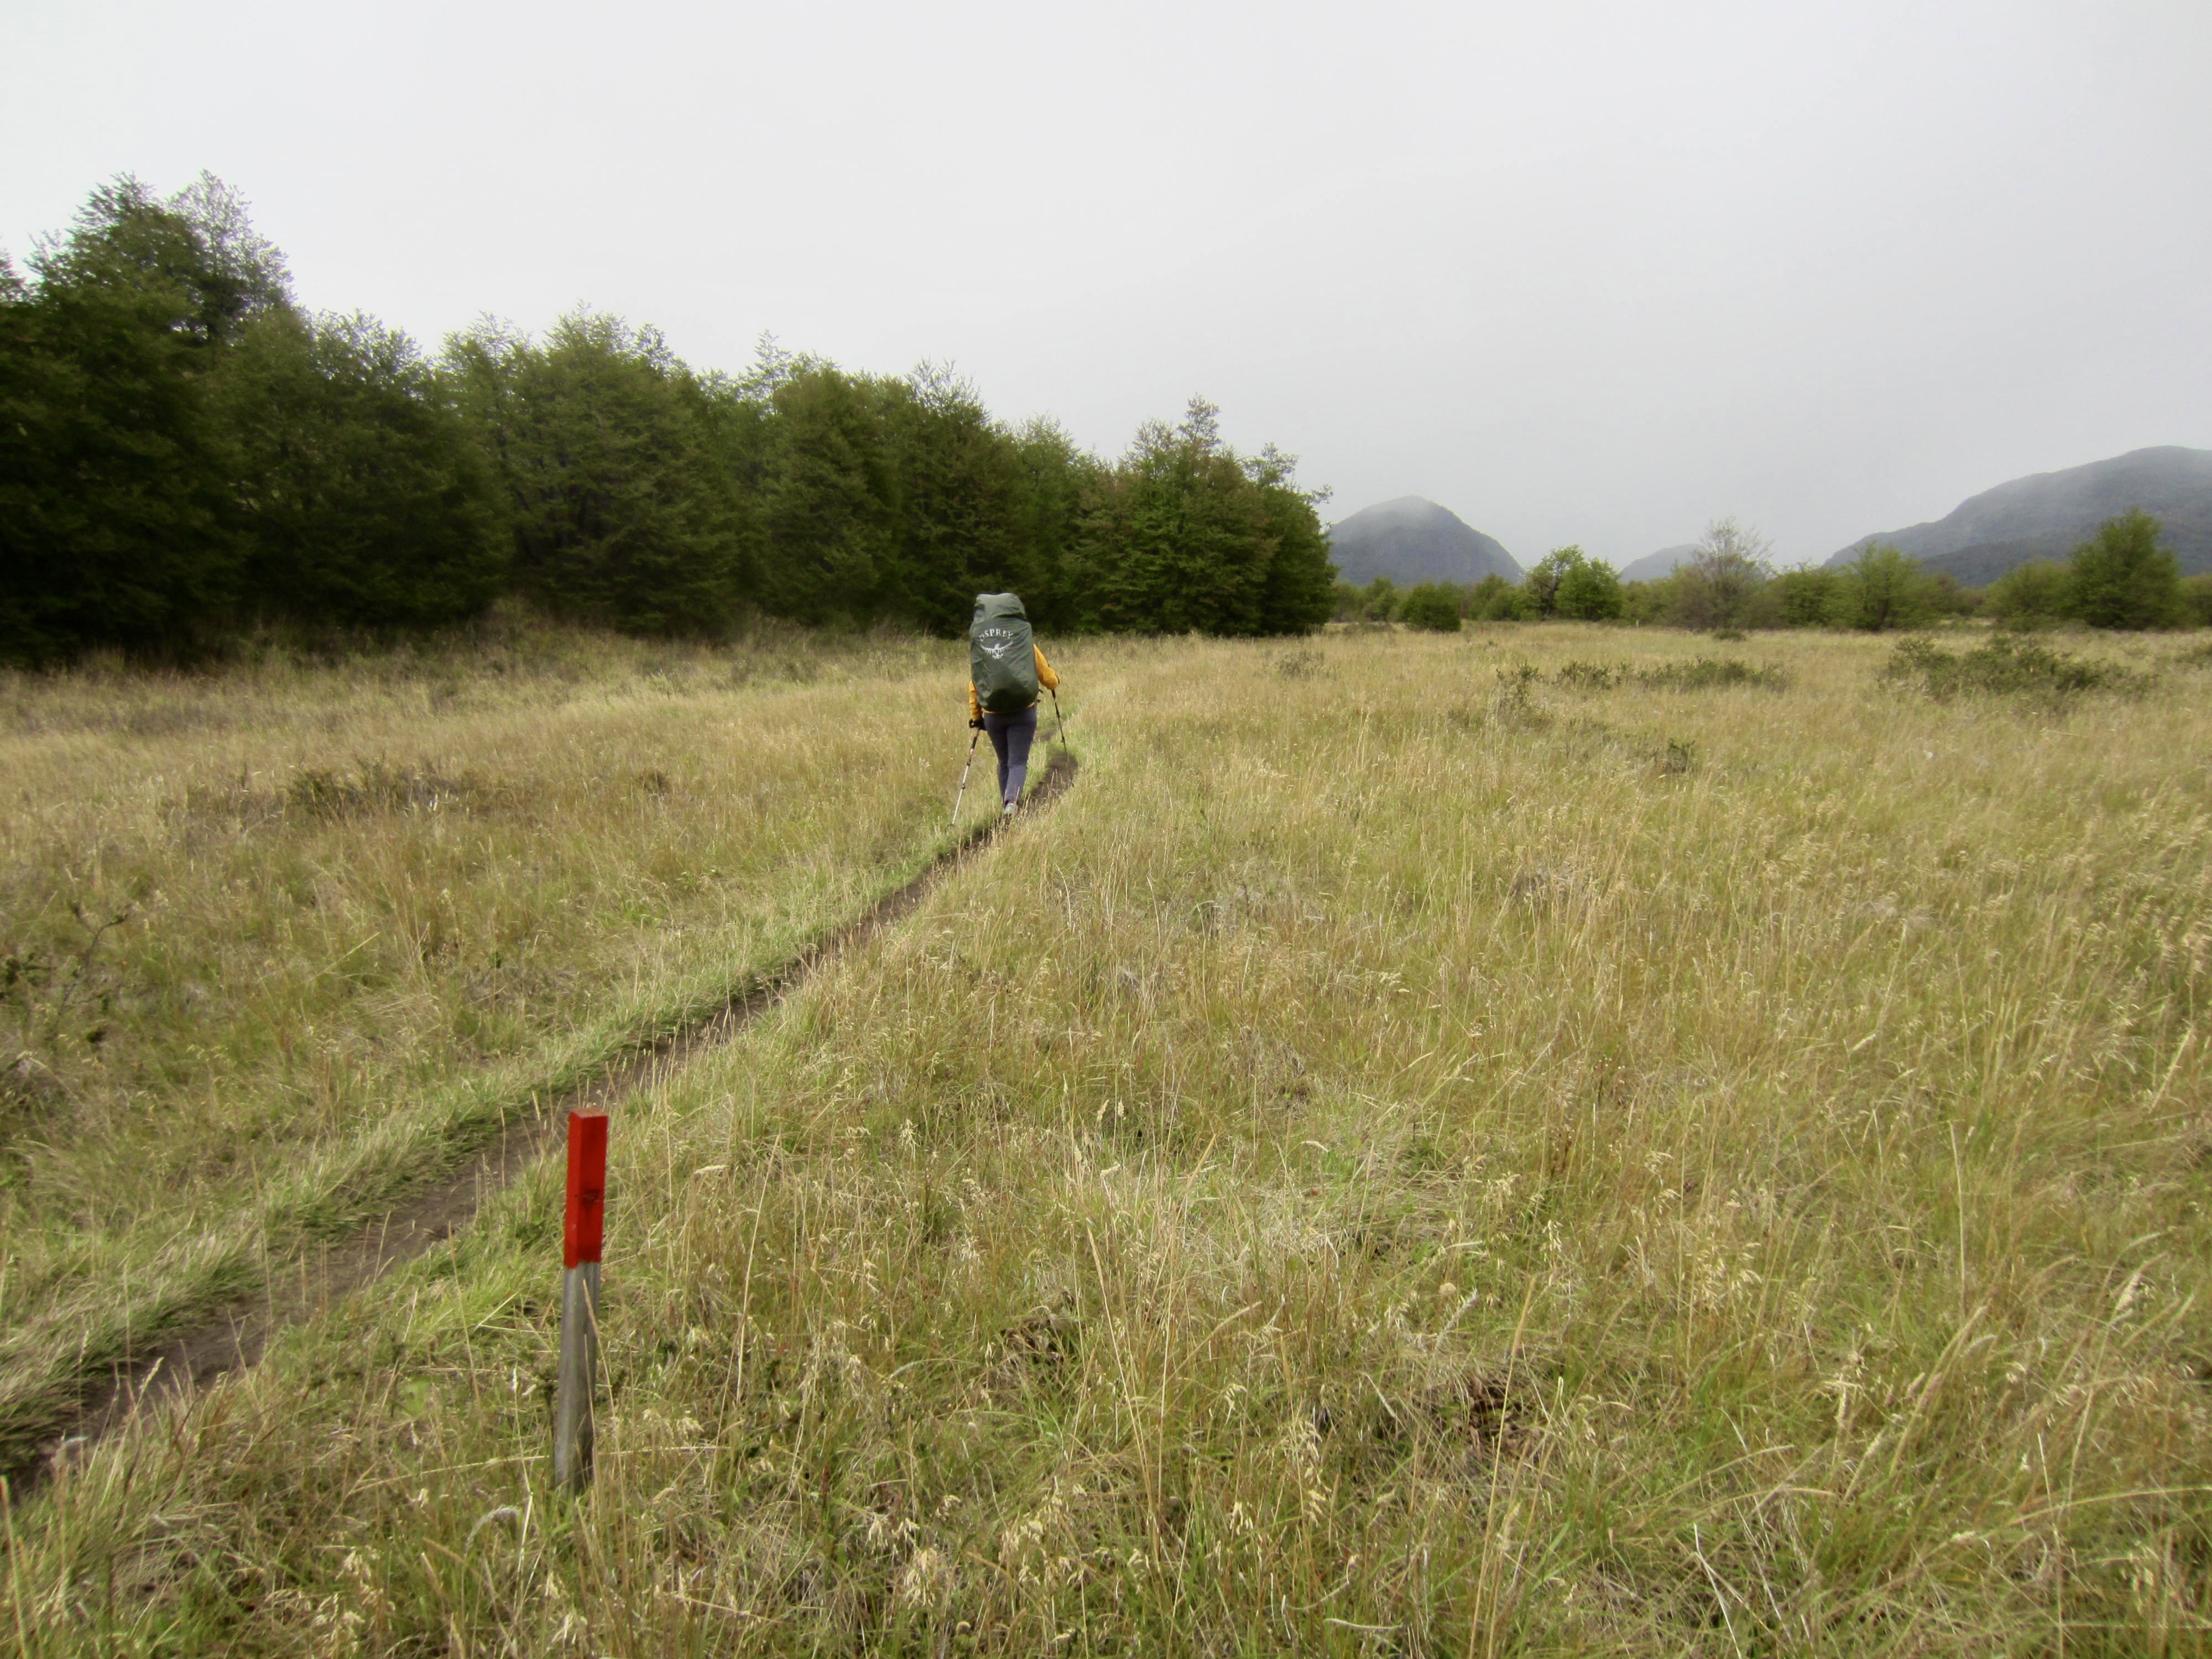
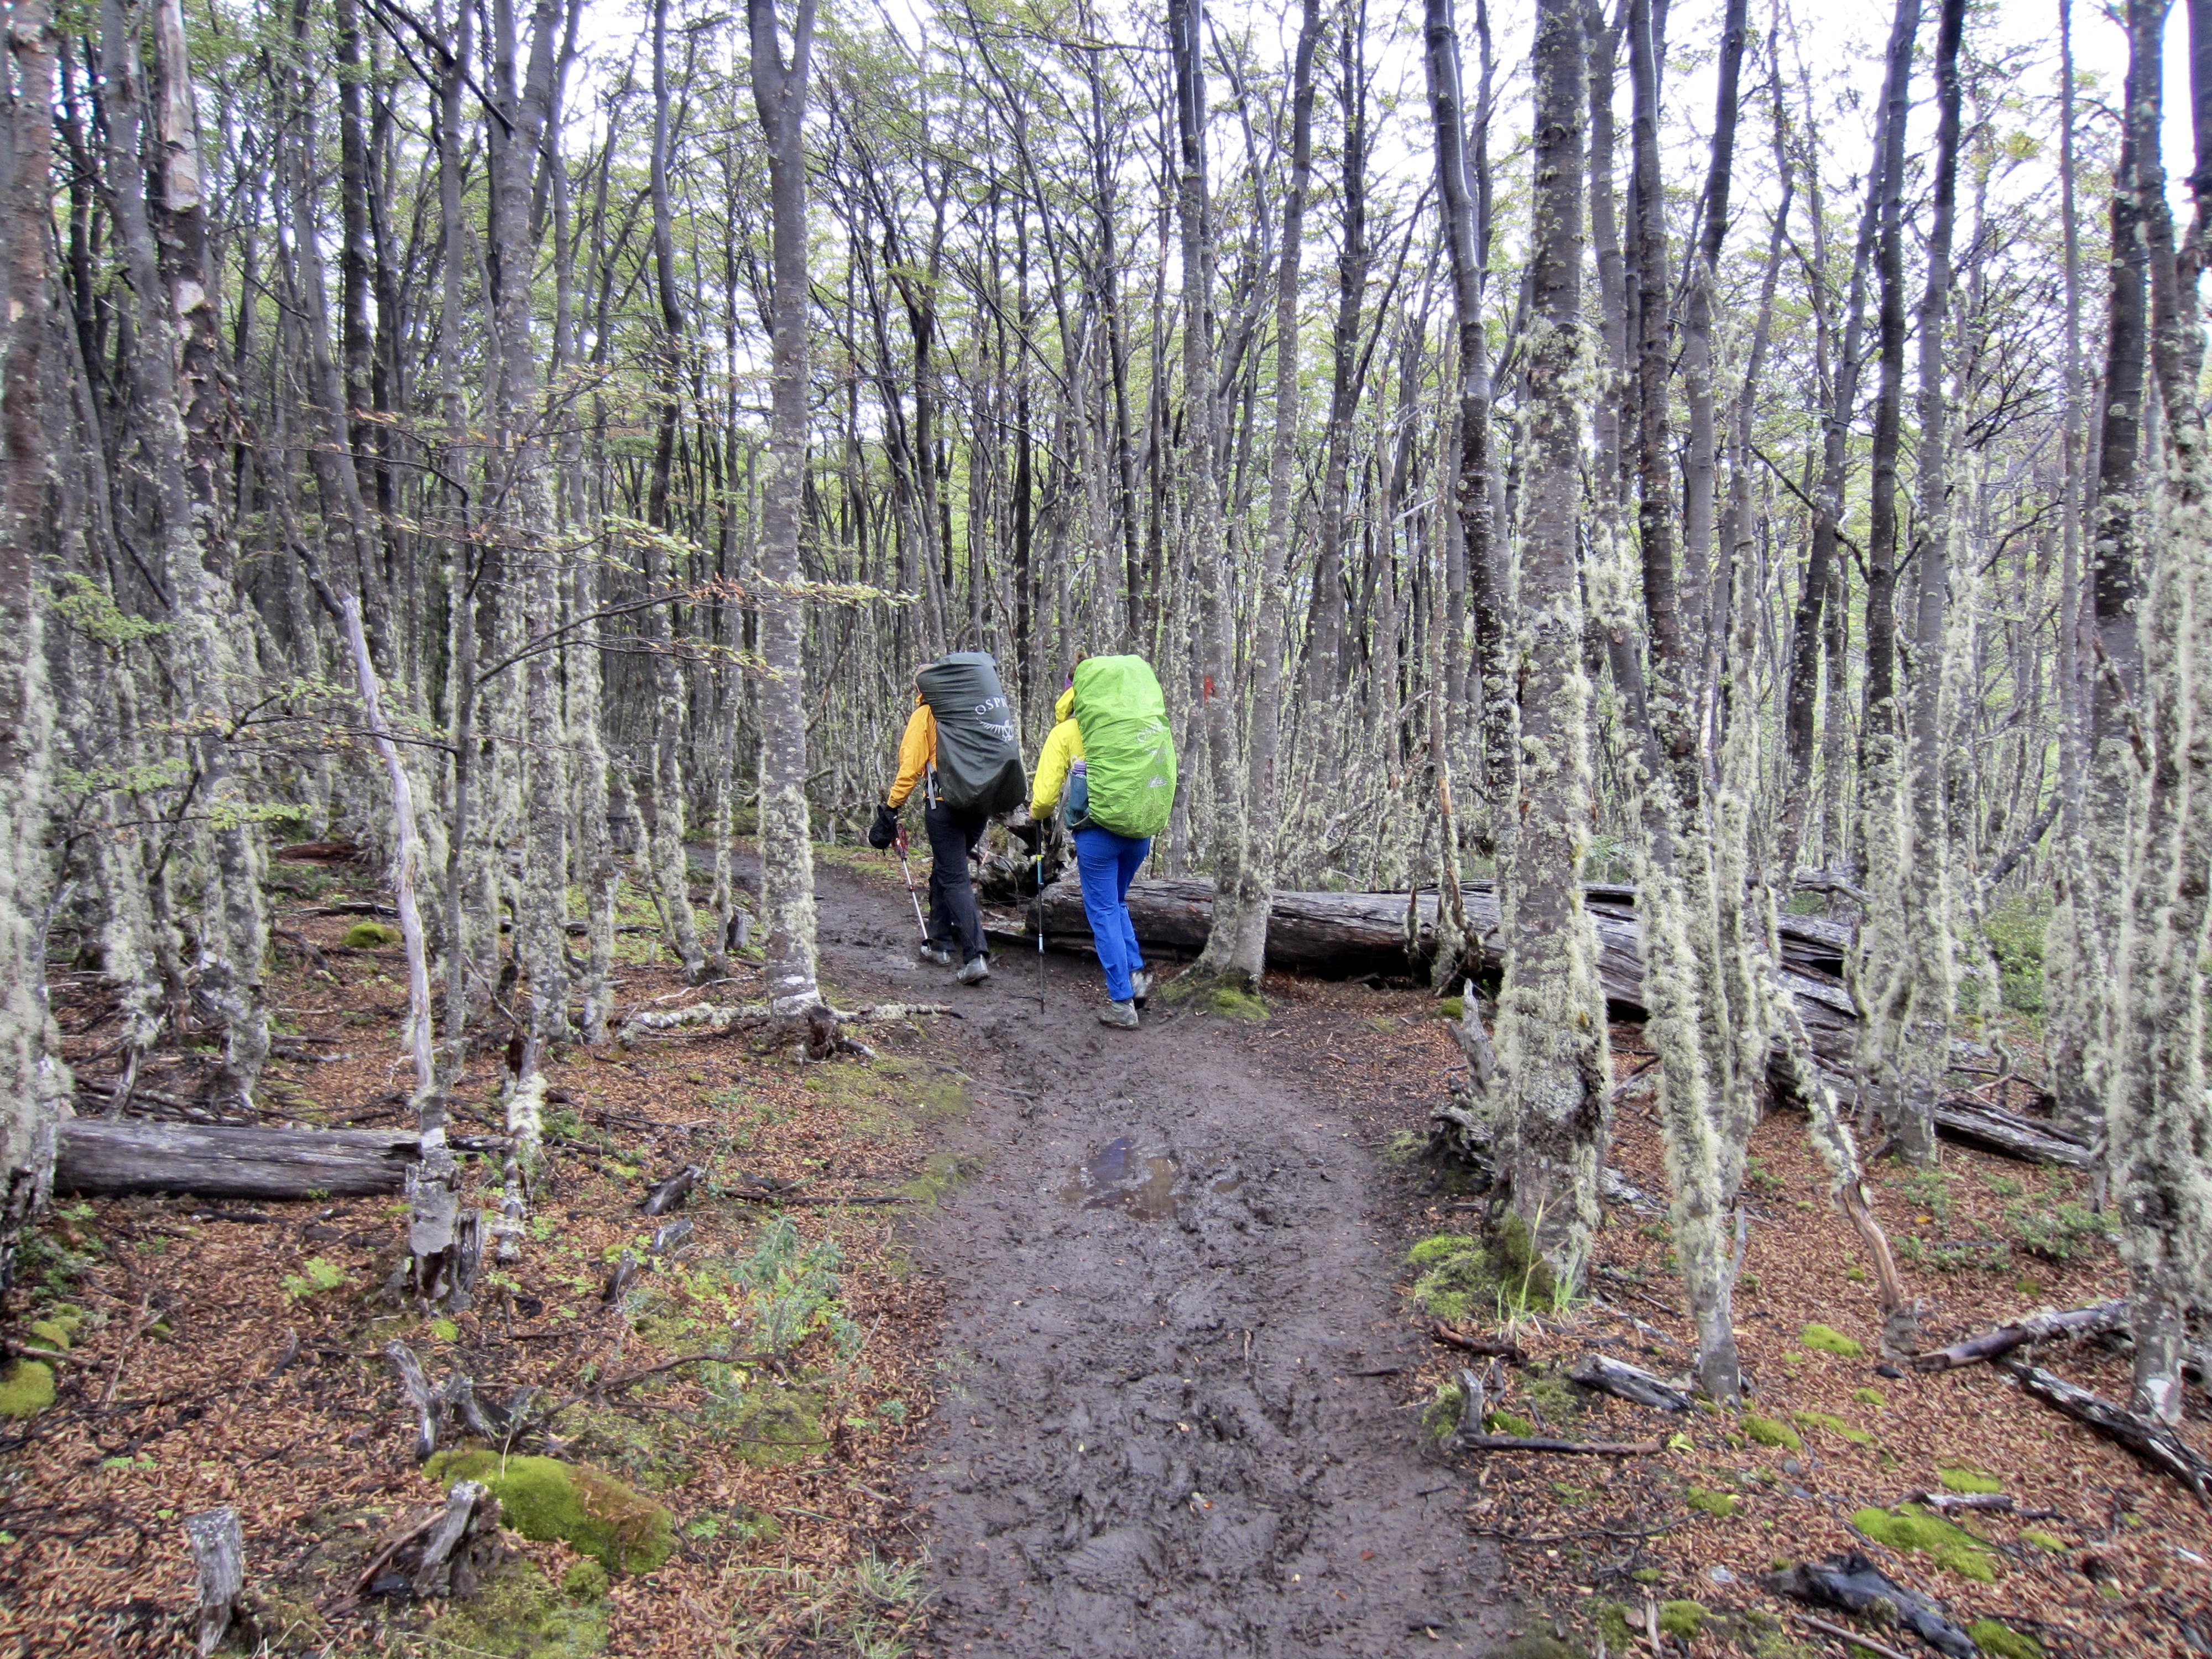
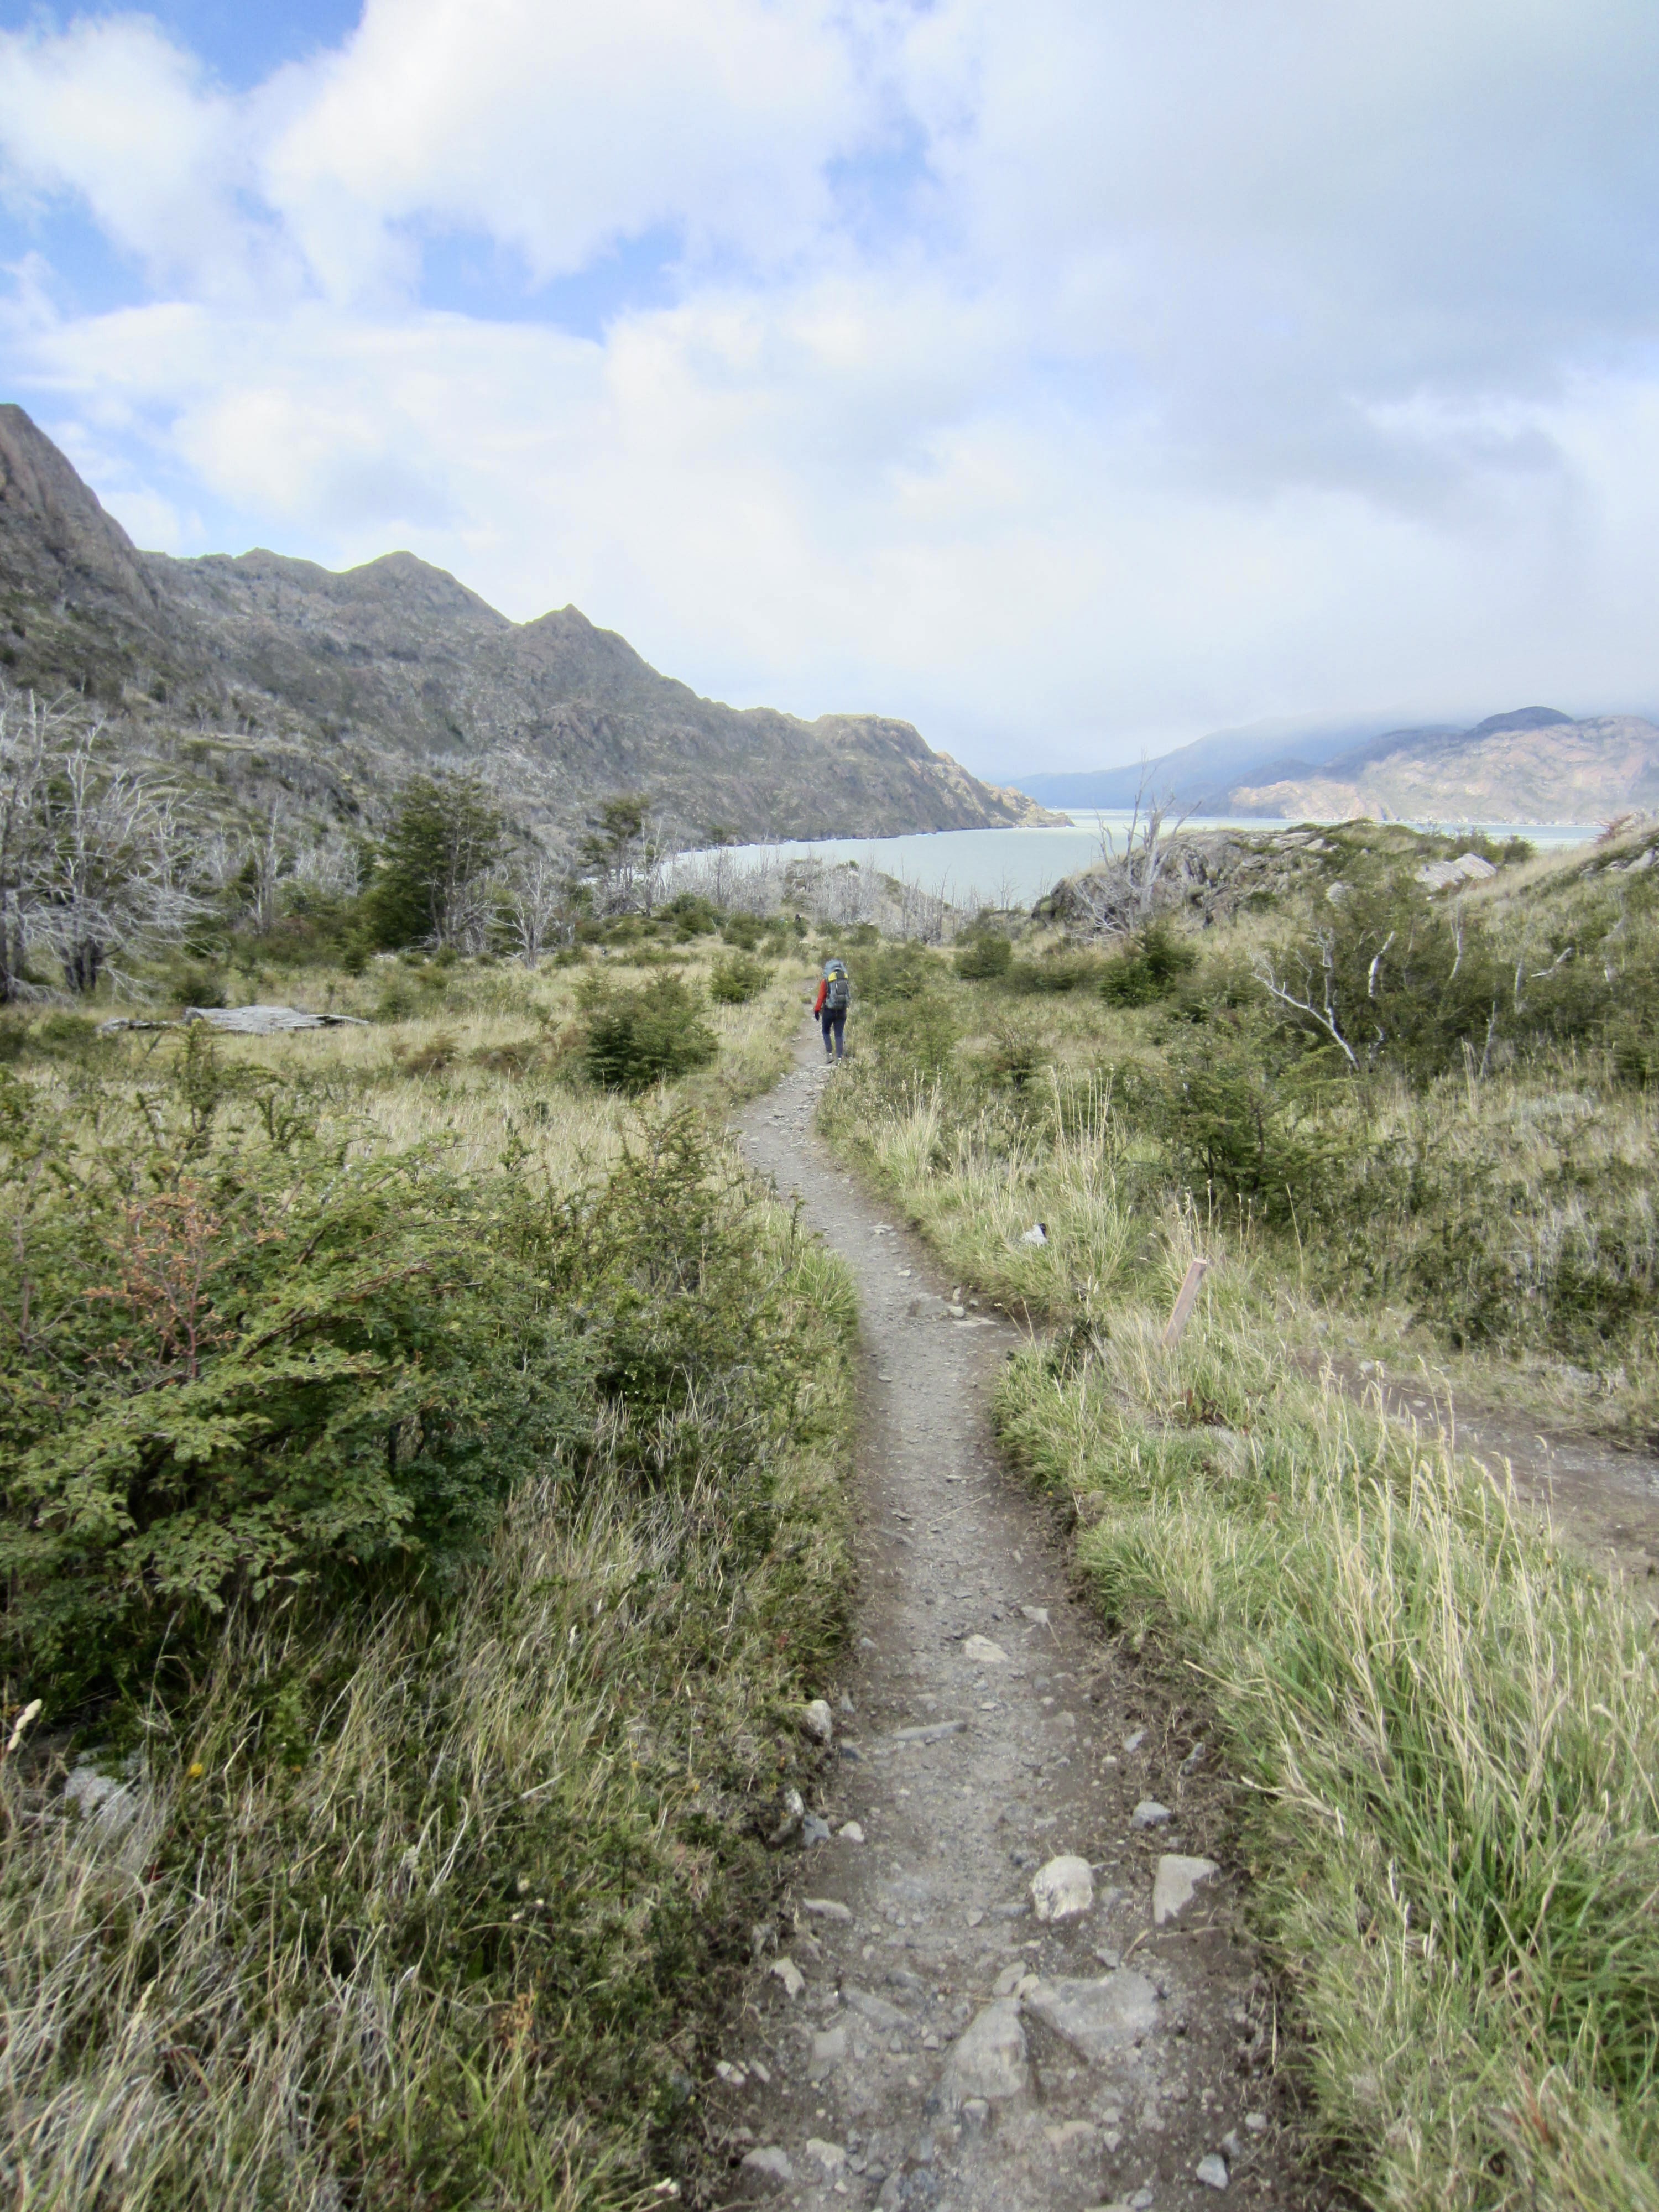
Trail conditions vary considerably along the “O-W” Circuit. In general, the “O” segment follows a primitive trail that appears to have been beaten out by thousands upon thousands of trekkers over many years. I saw precious little evidence that a trail was ever formally constructed. The lowland parts of the trail tend to be extremely muddy, eroded, rocky, and/or rooty, whereas the upland parts of the trail have been tromped into the scree, talus, and detritus, with short scramble sections over rock outcrops. There have been some basic improvements and maintenance efforts along the way, though, such as bridges, puncheons, boardwalks, and steps. Overall, the trail has the look and feel of a well-trodden climber’s path.

In contrast to the “O” segment, much of the “W” segment appears to have been formally constructed. The trail is generally well-bedded and well-graded, with proper switchbacks, effective drainage features, and engineered bridges. We encountered very little mud and ponded water, even after a rainy spell. However, the sidetrip legs of the “W” leading up to the high viewpoints at Britanico and Torres Base are steep and rocky—again having the characteristics of a boot-beaten climber’s path.
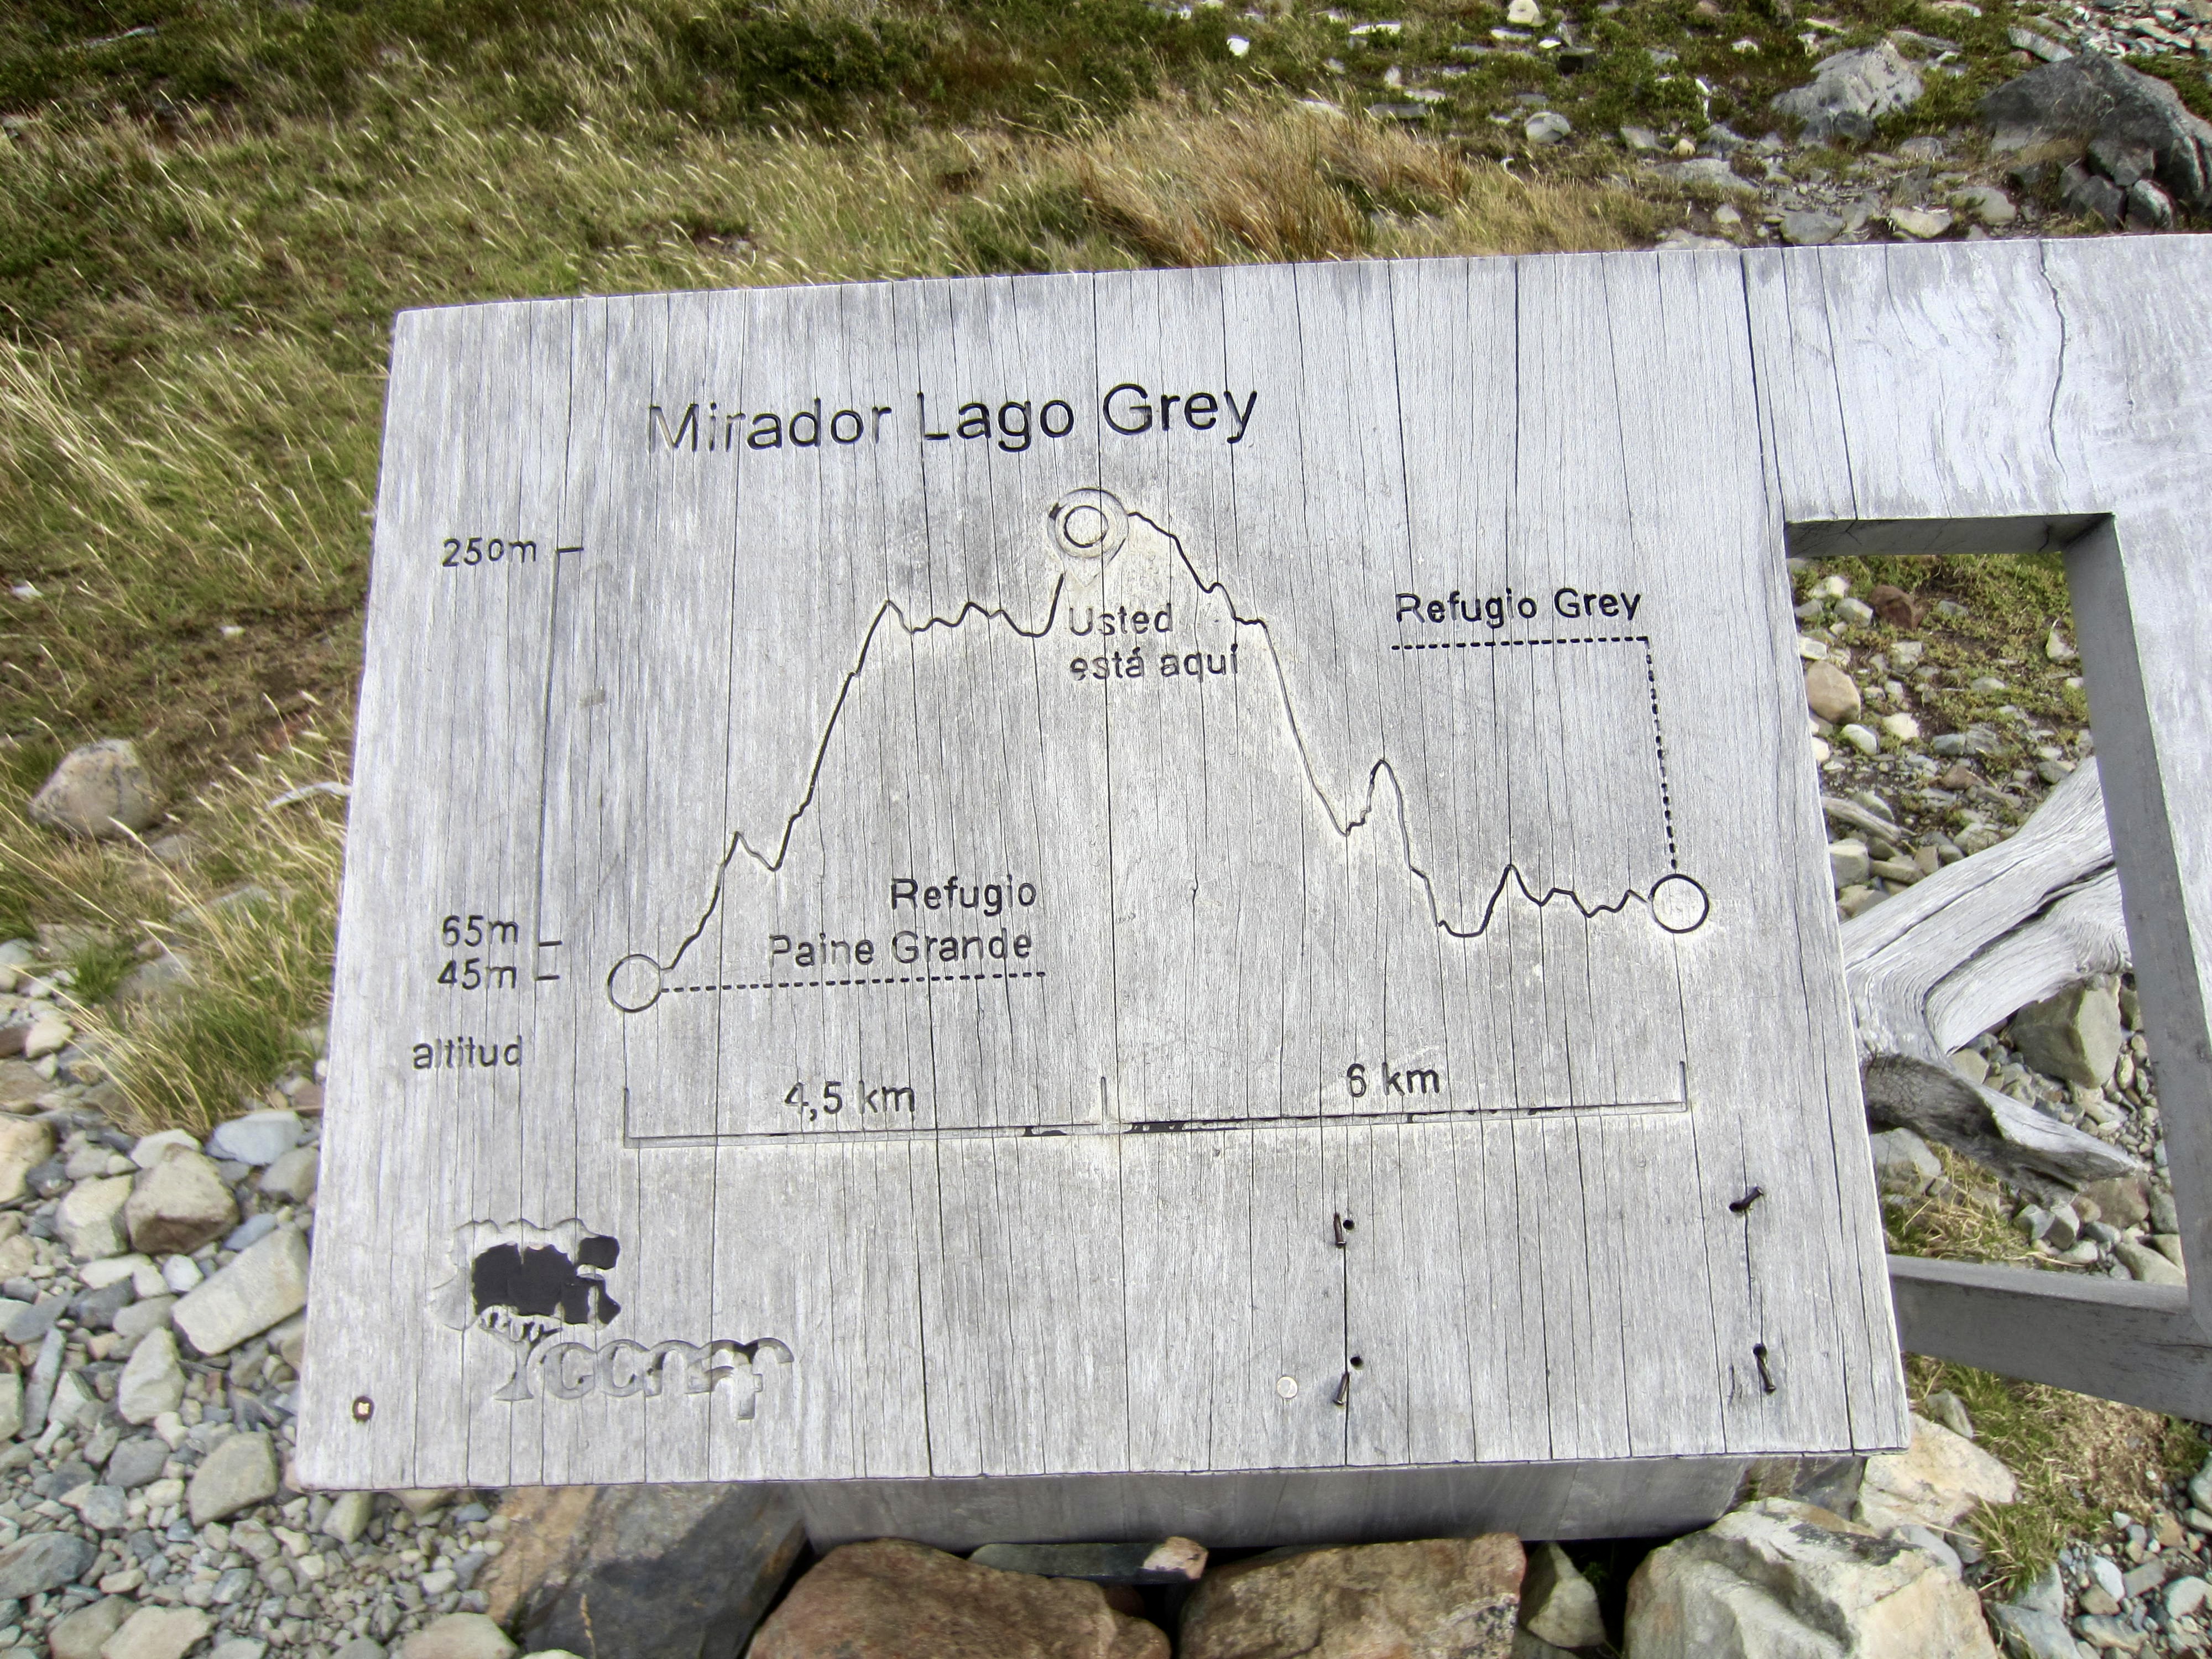
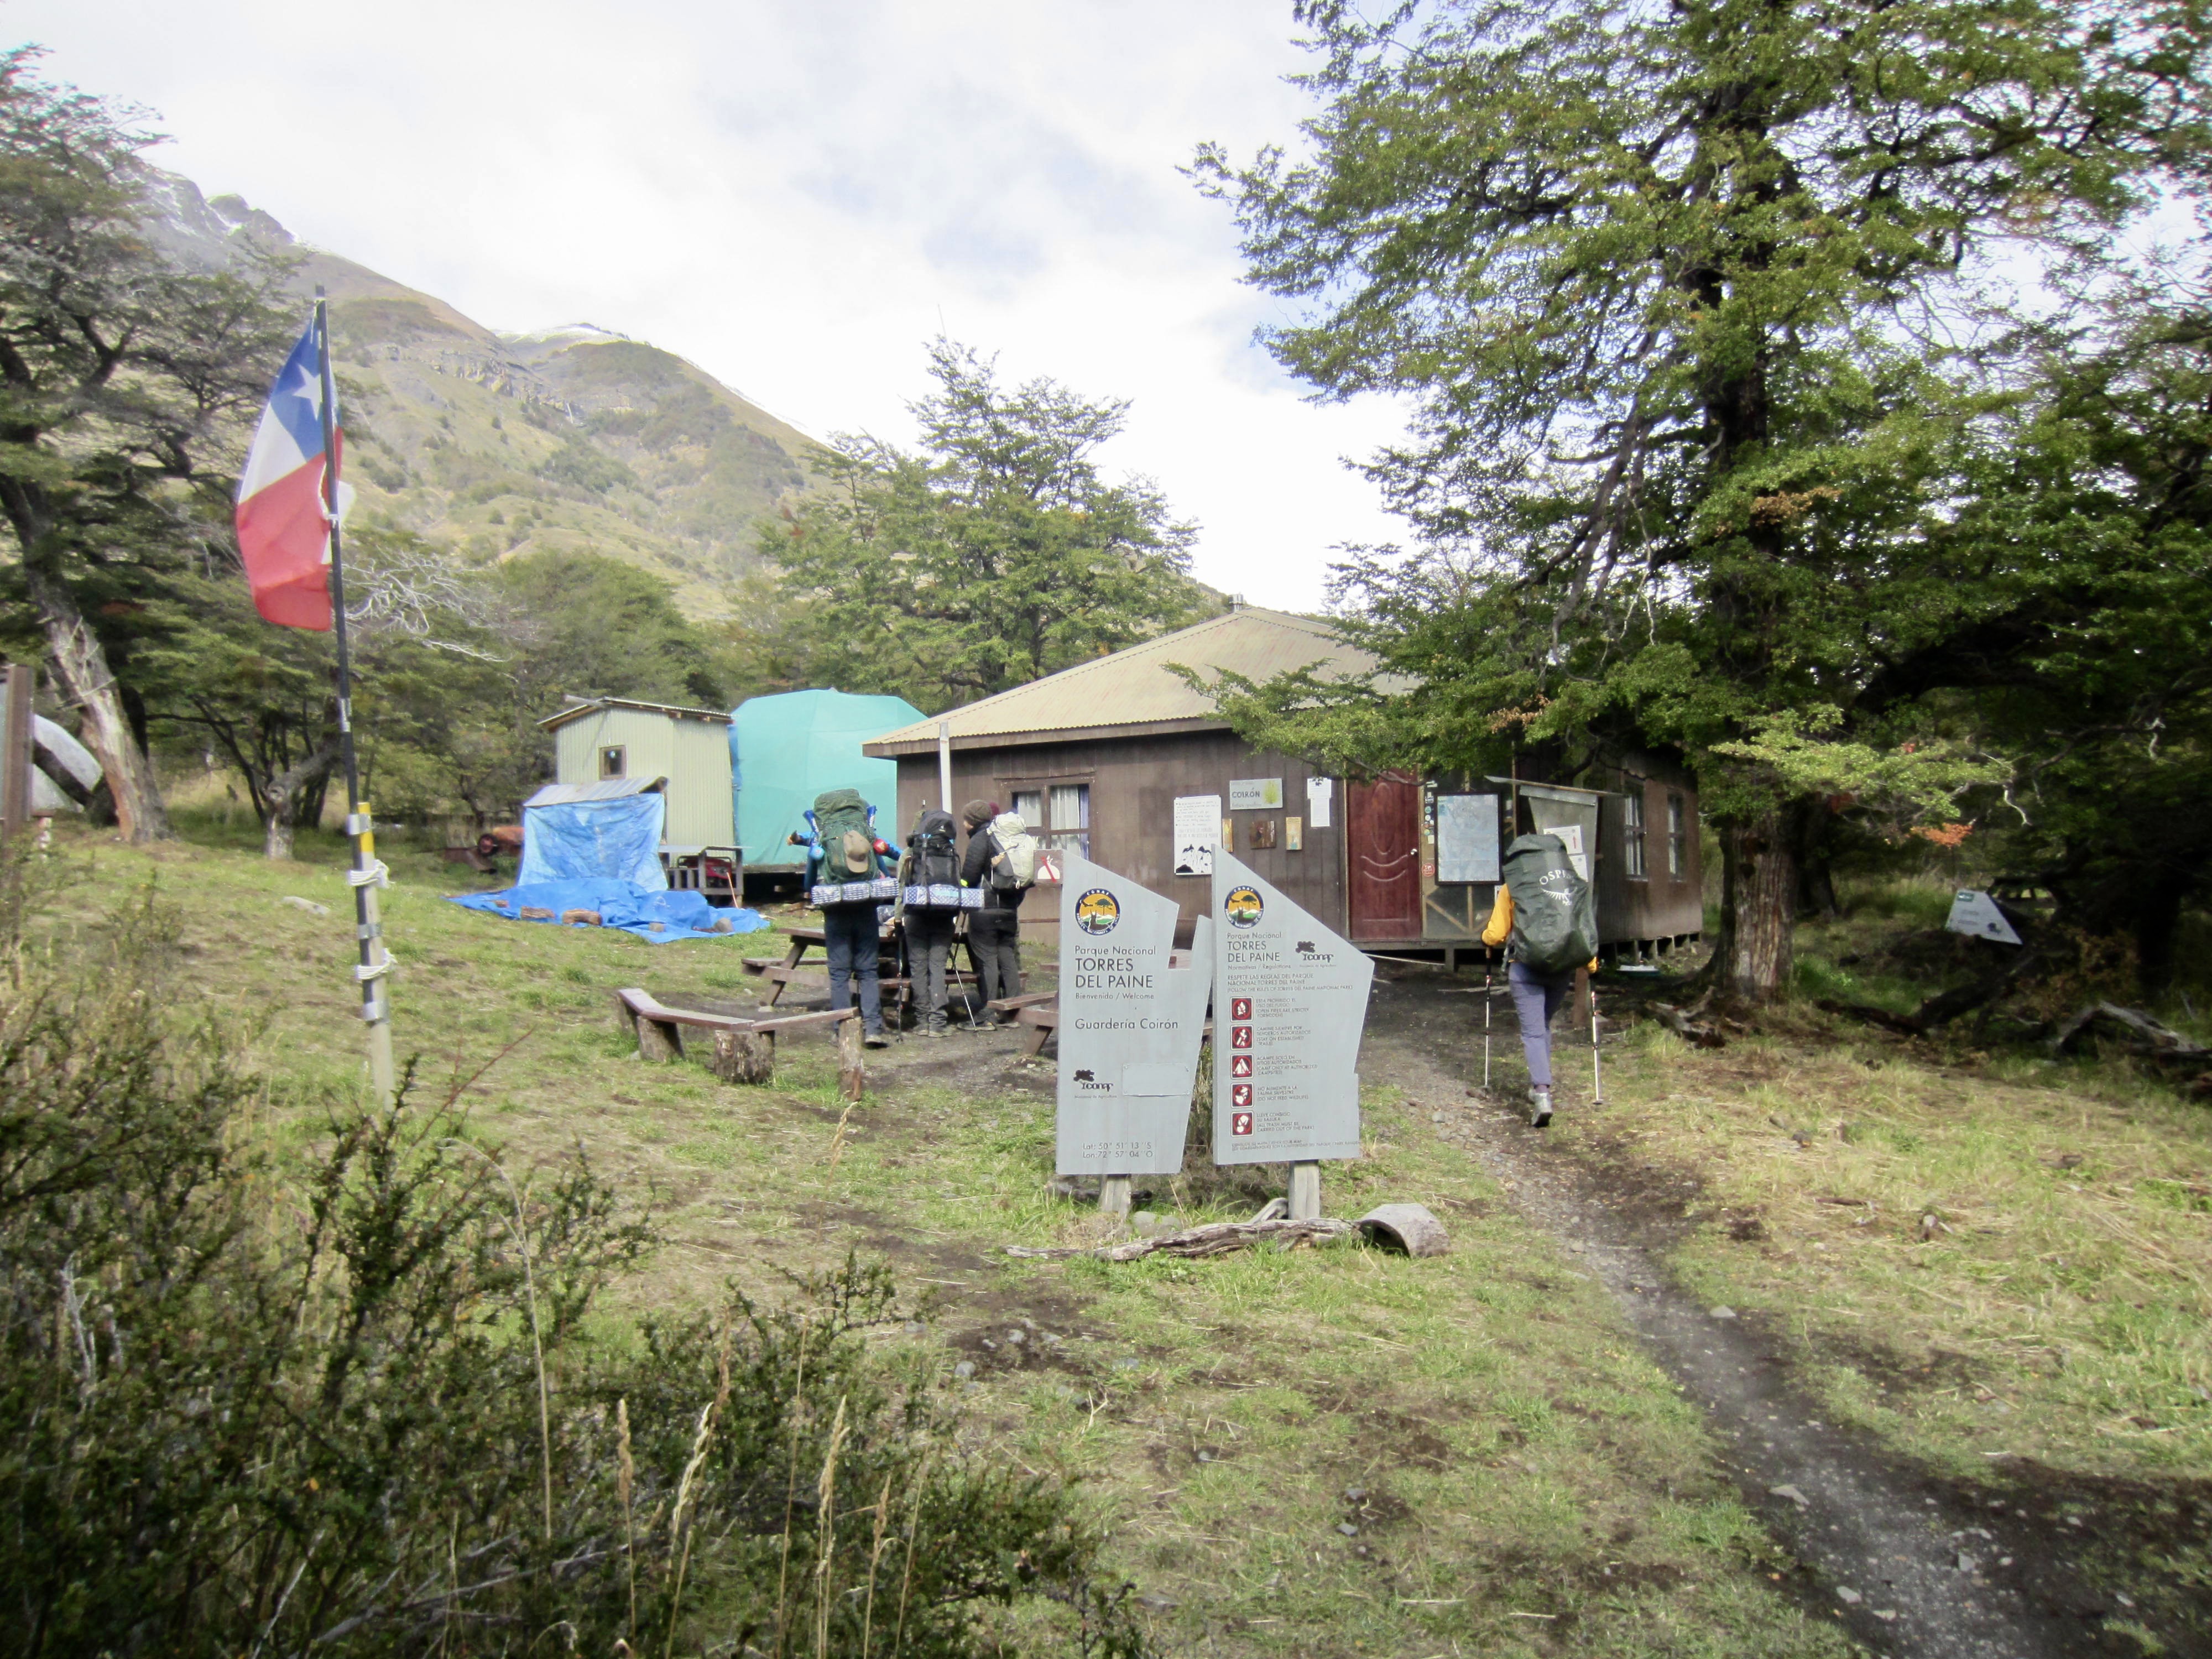
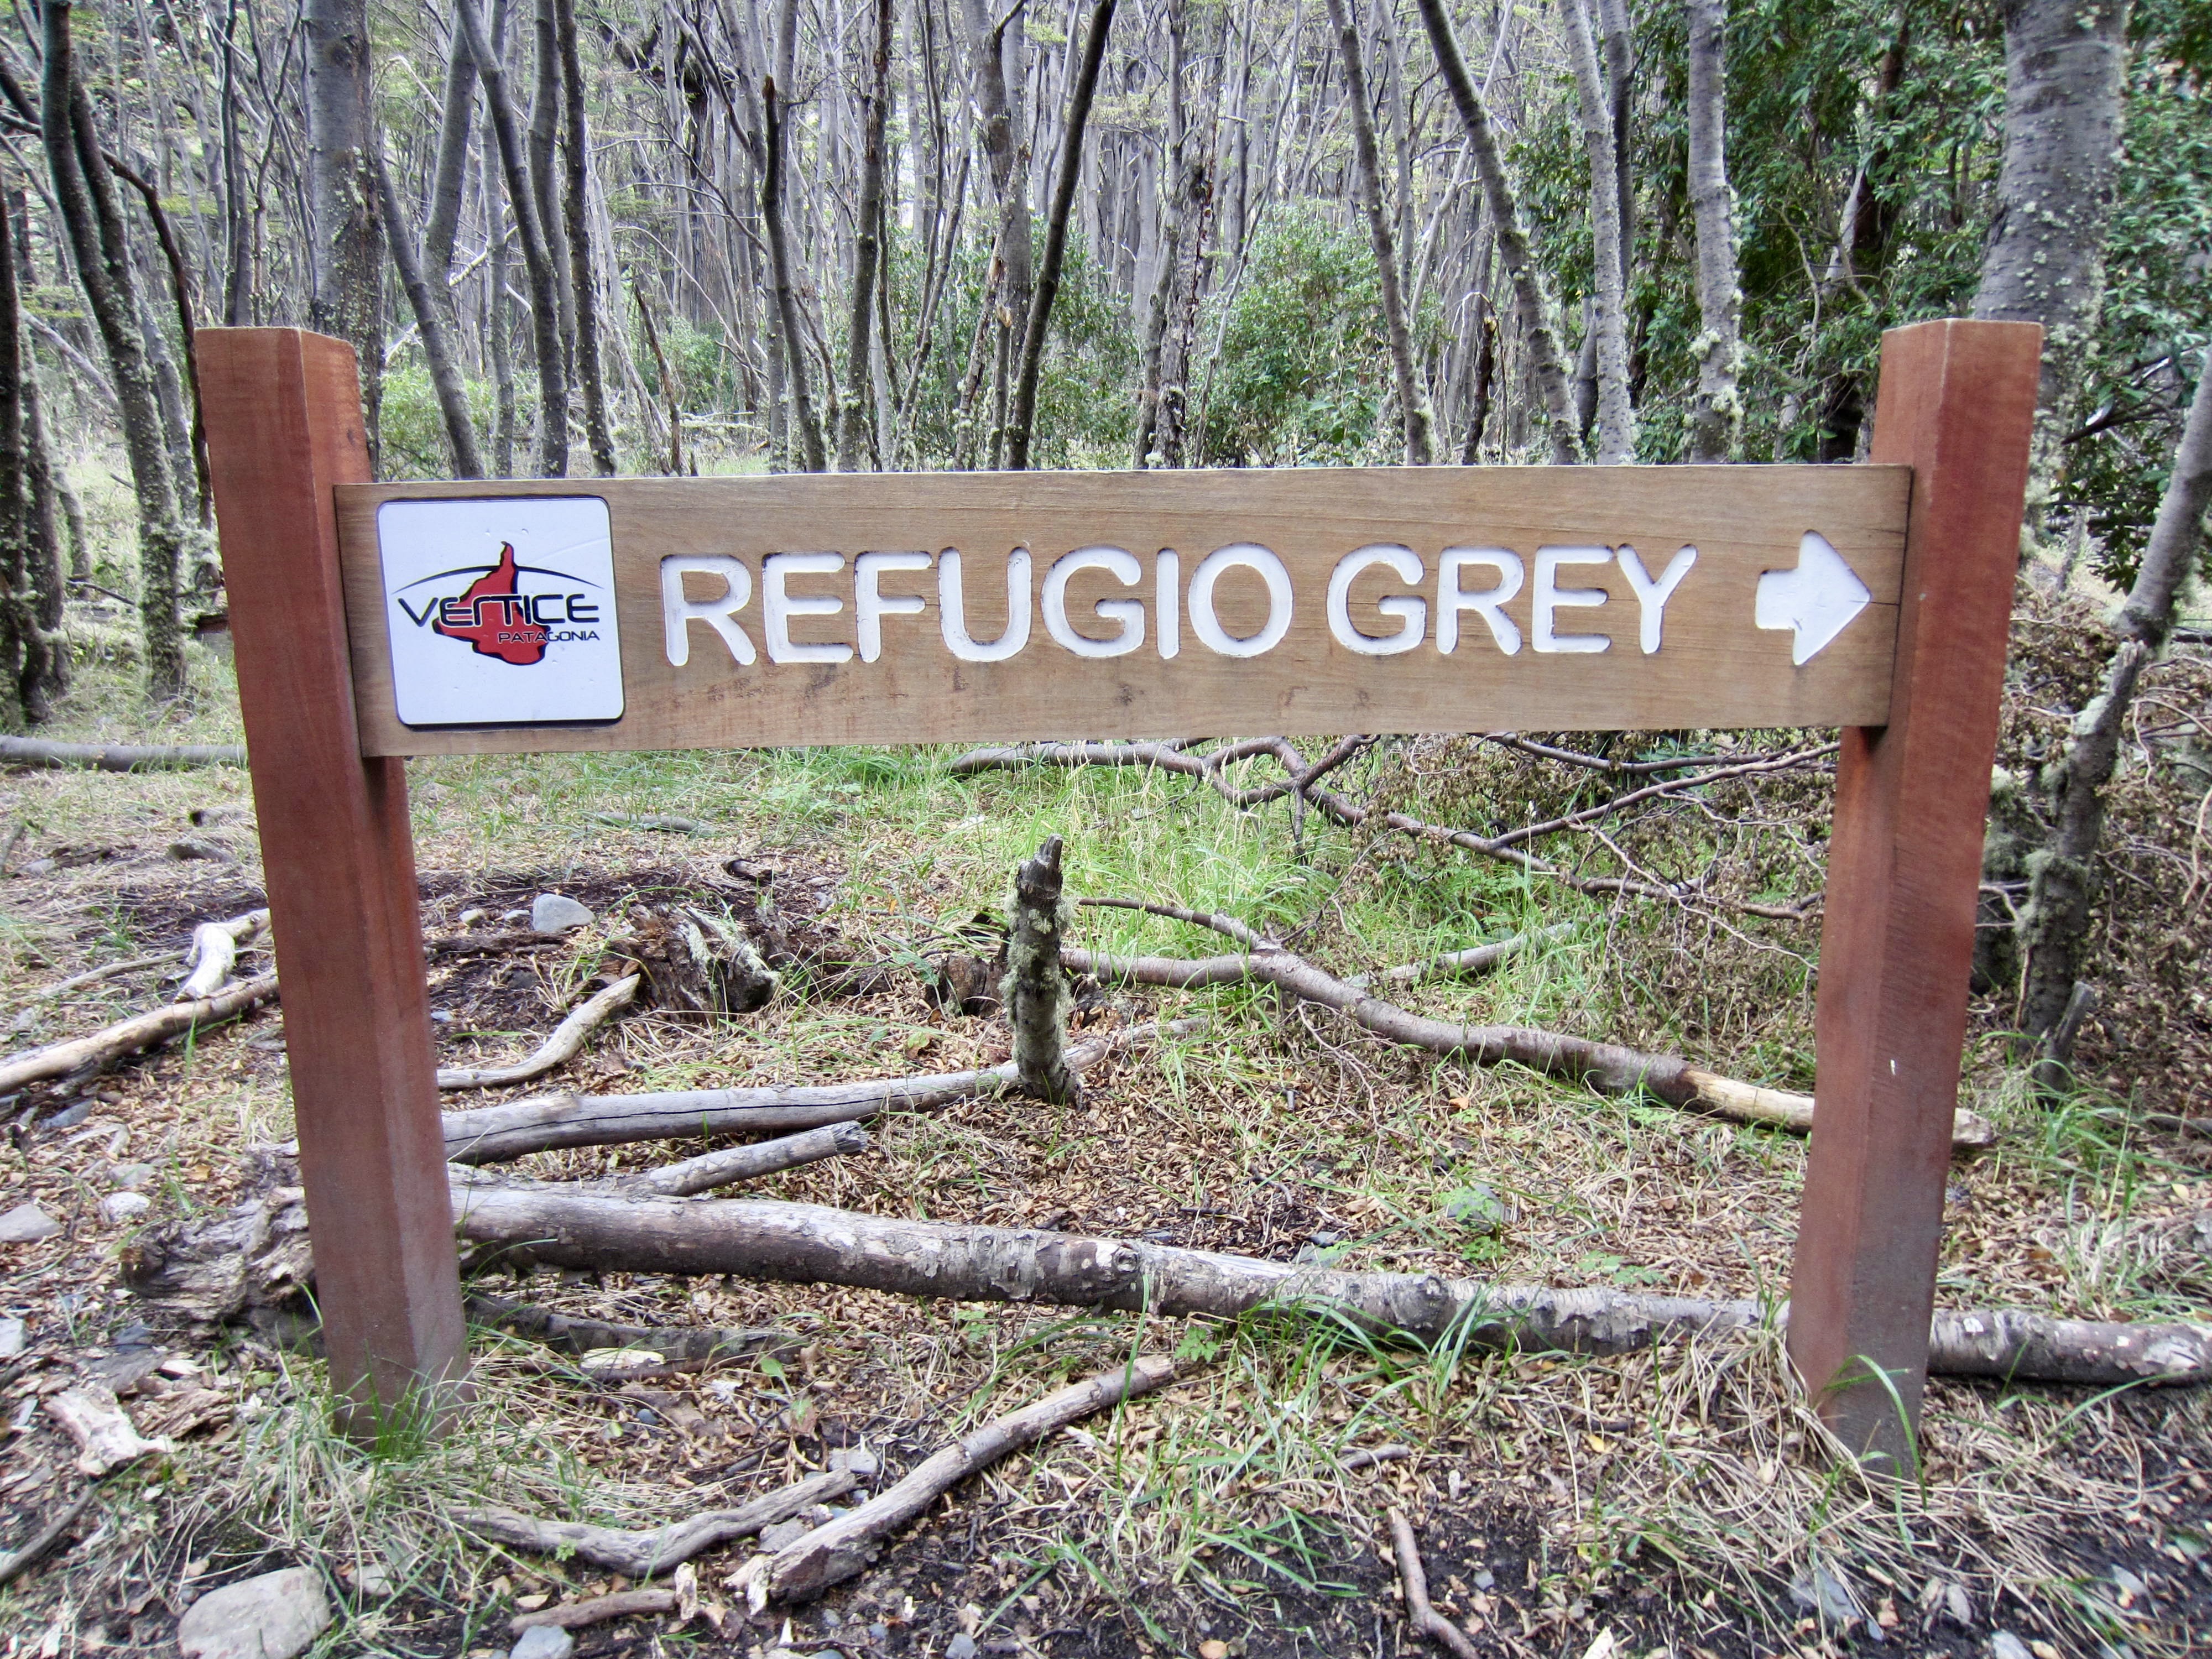
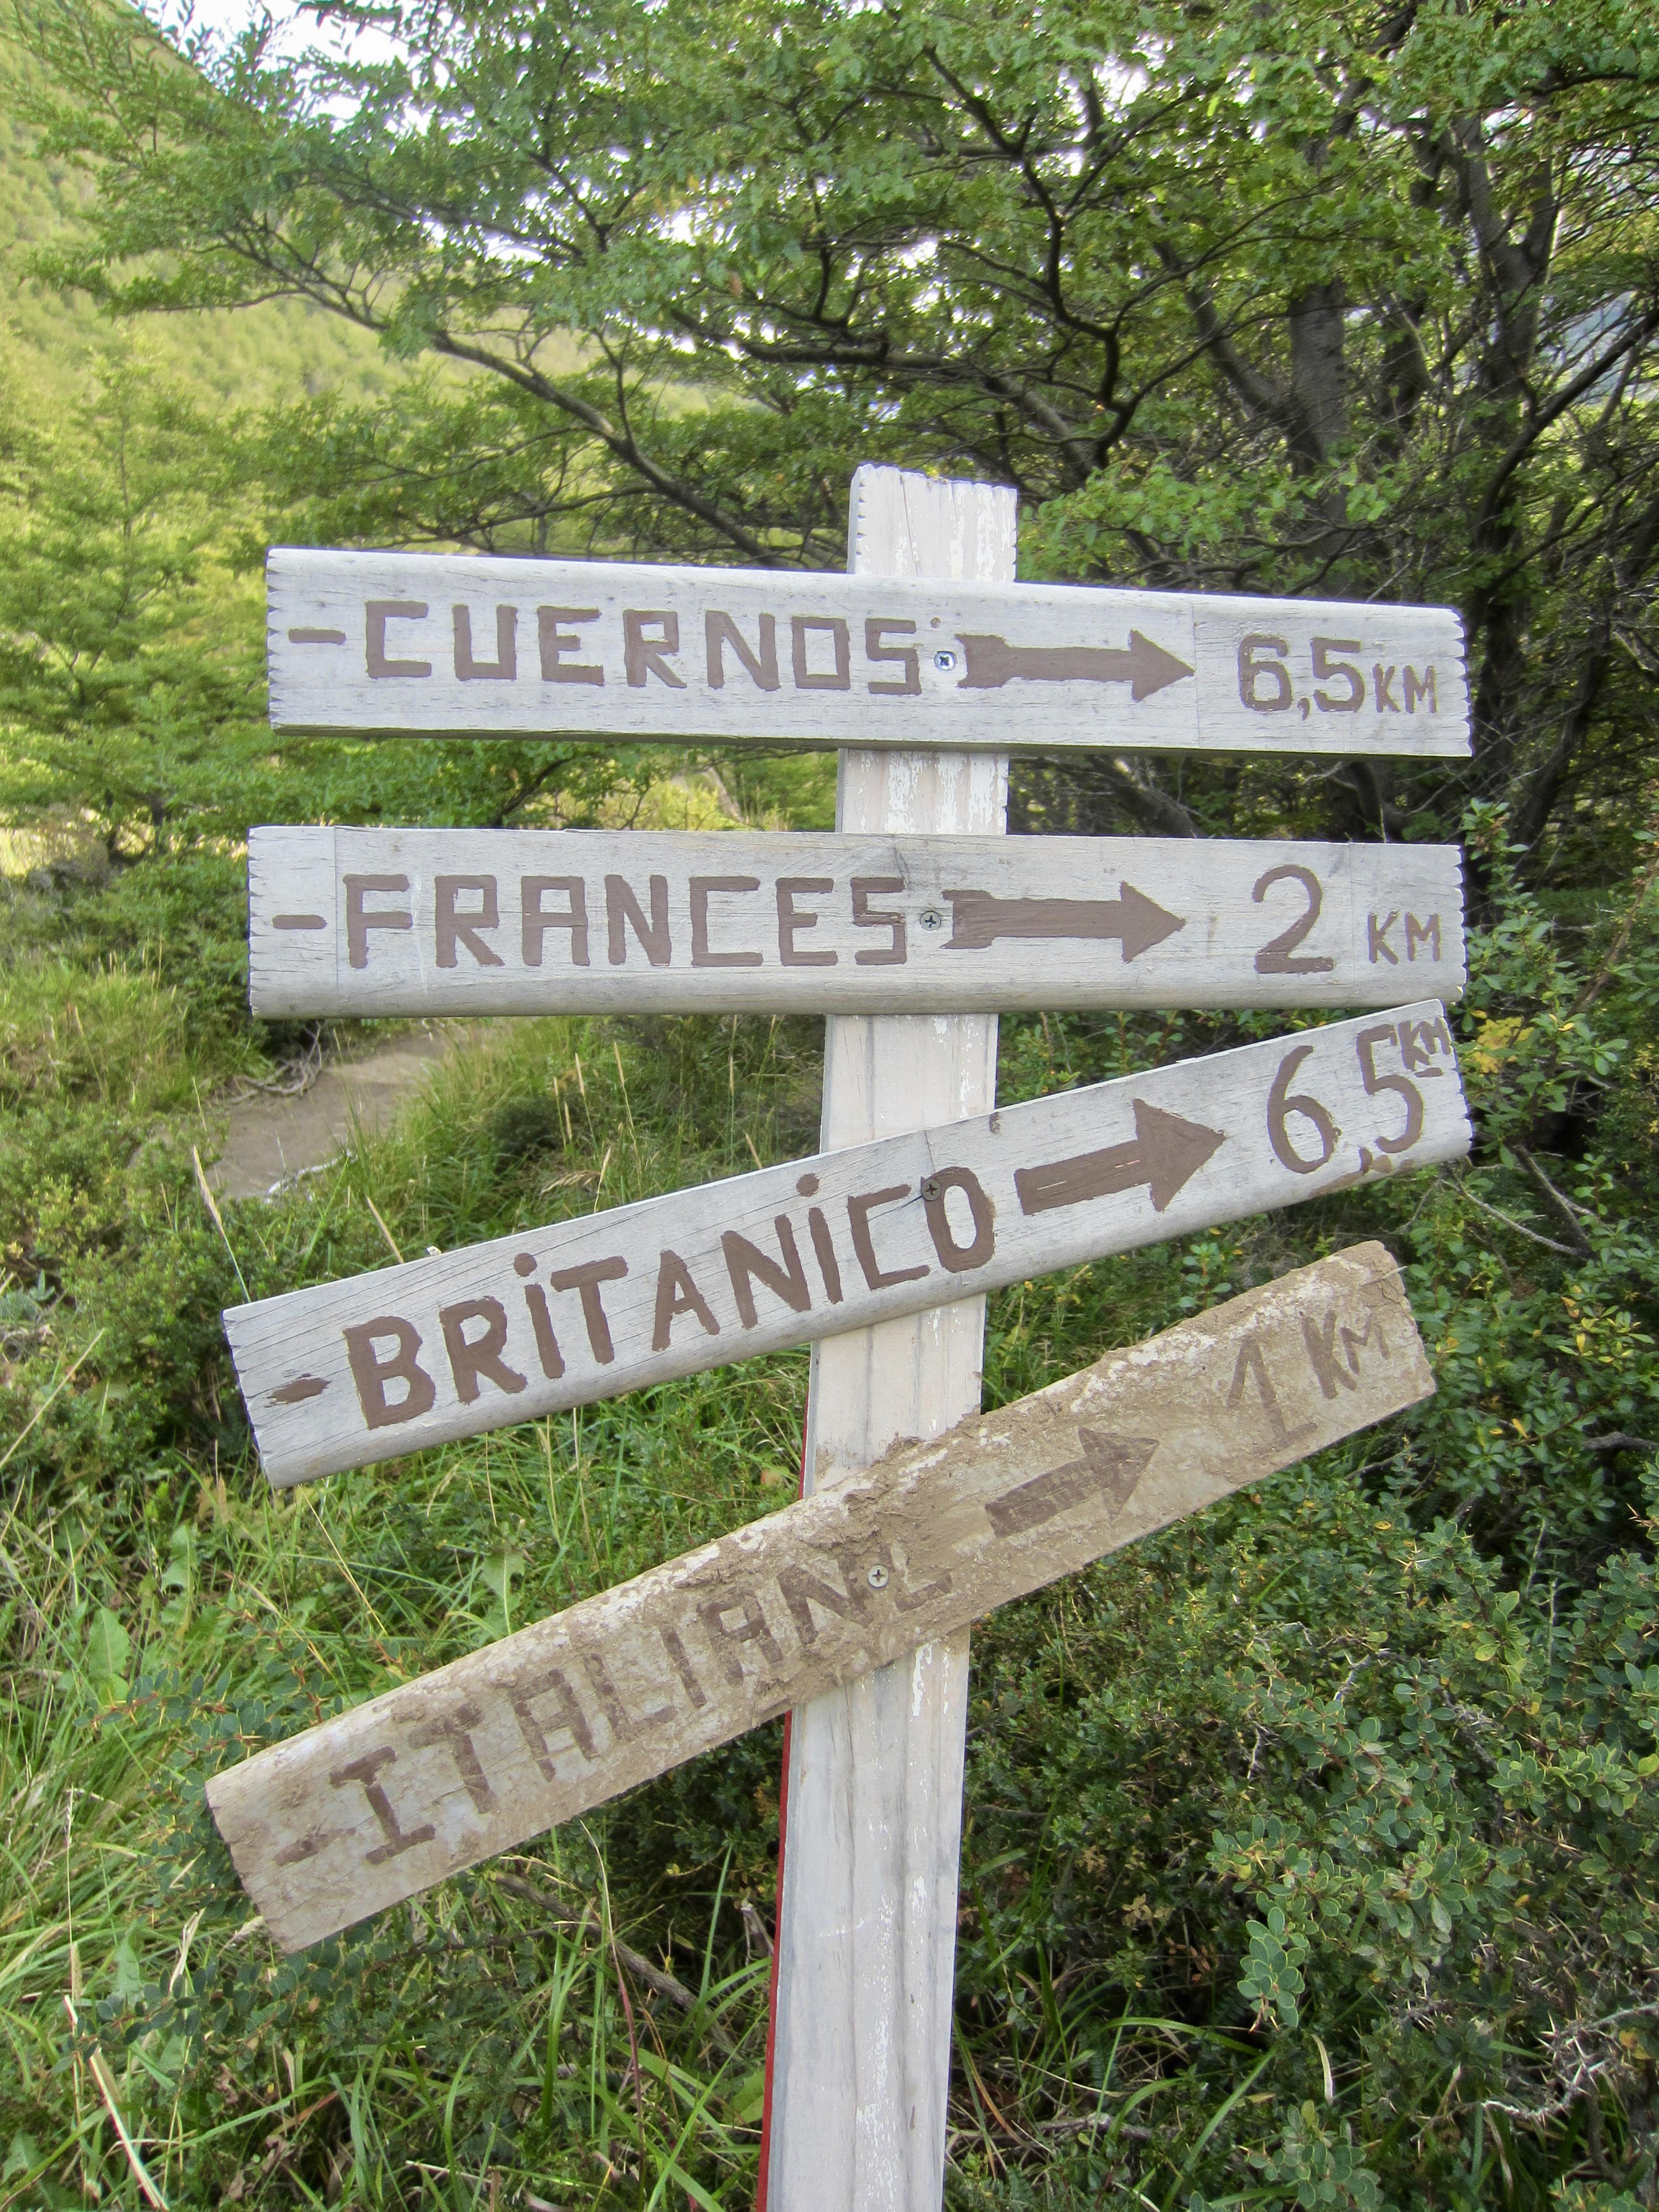
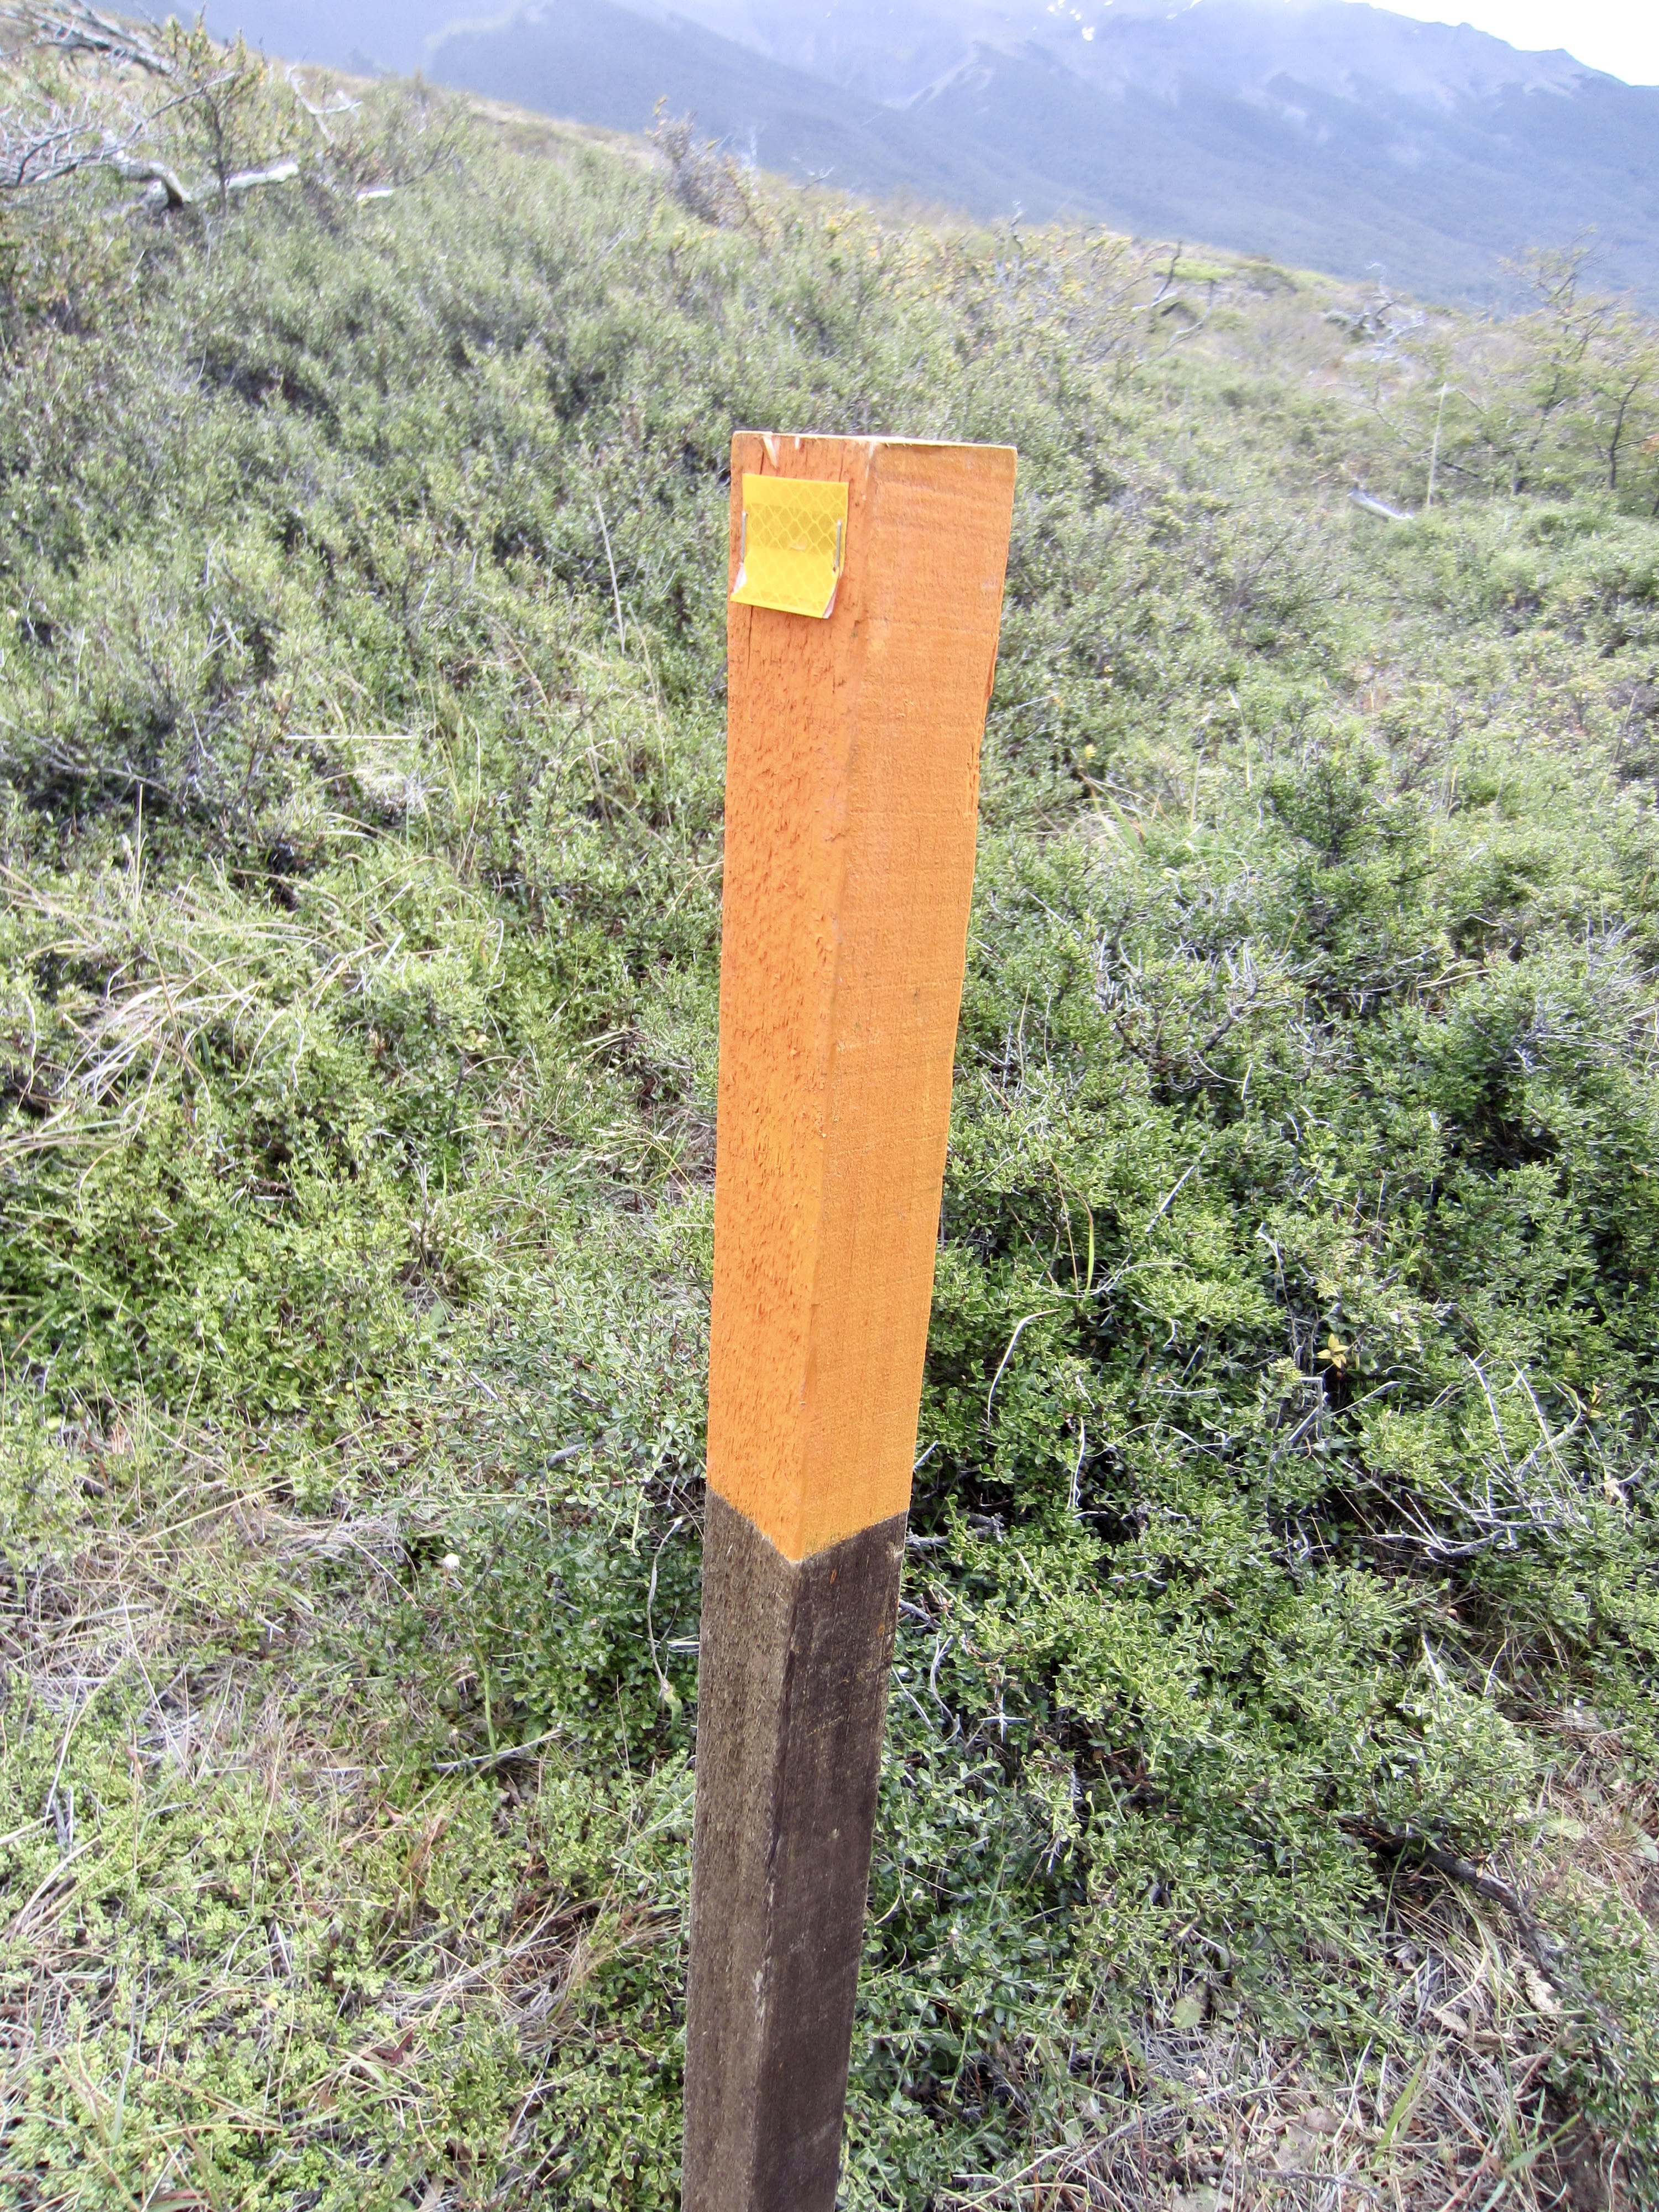
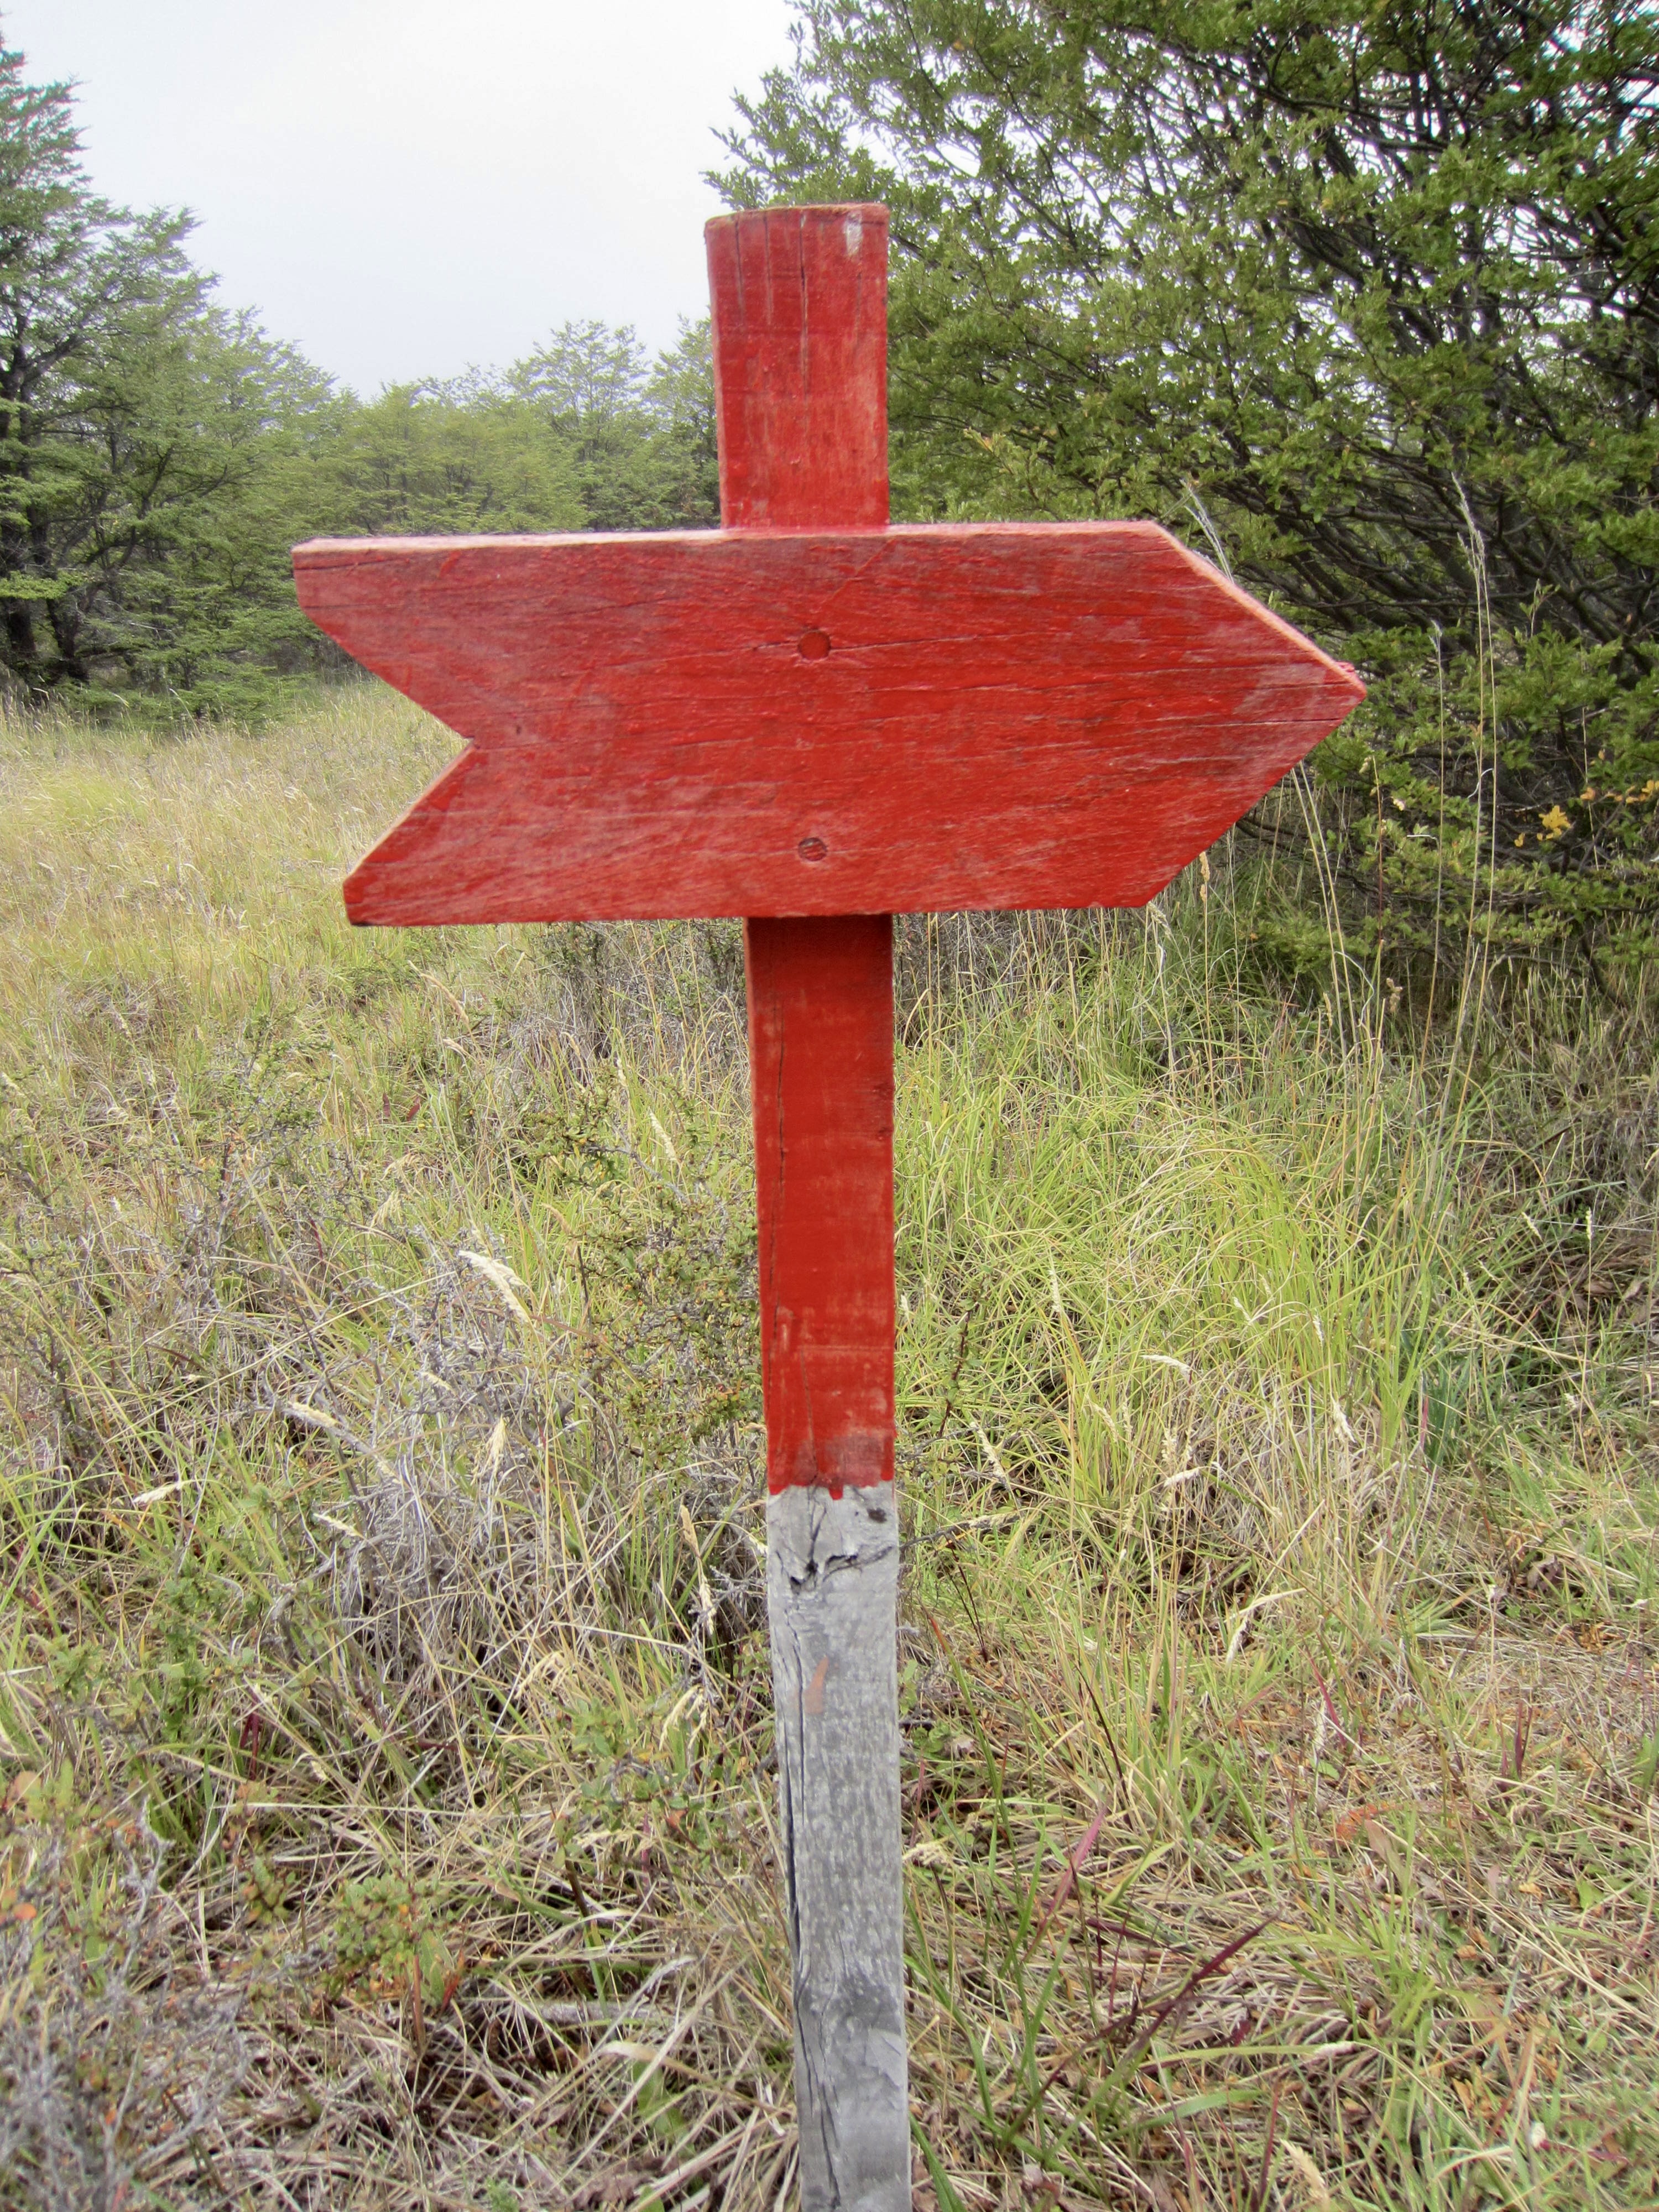
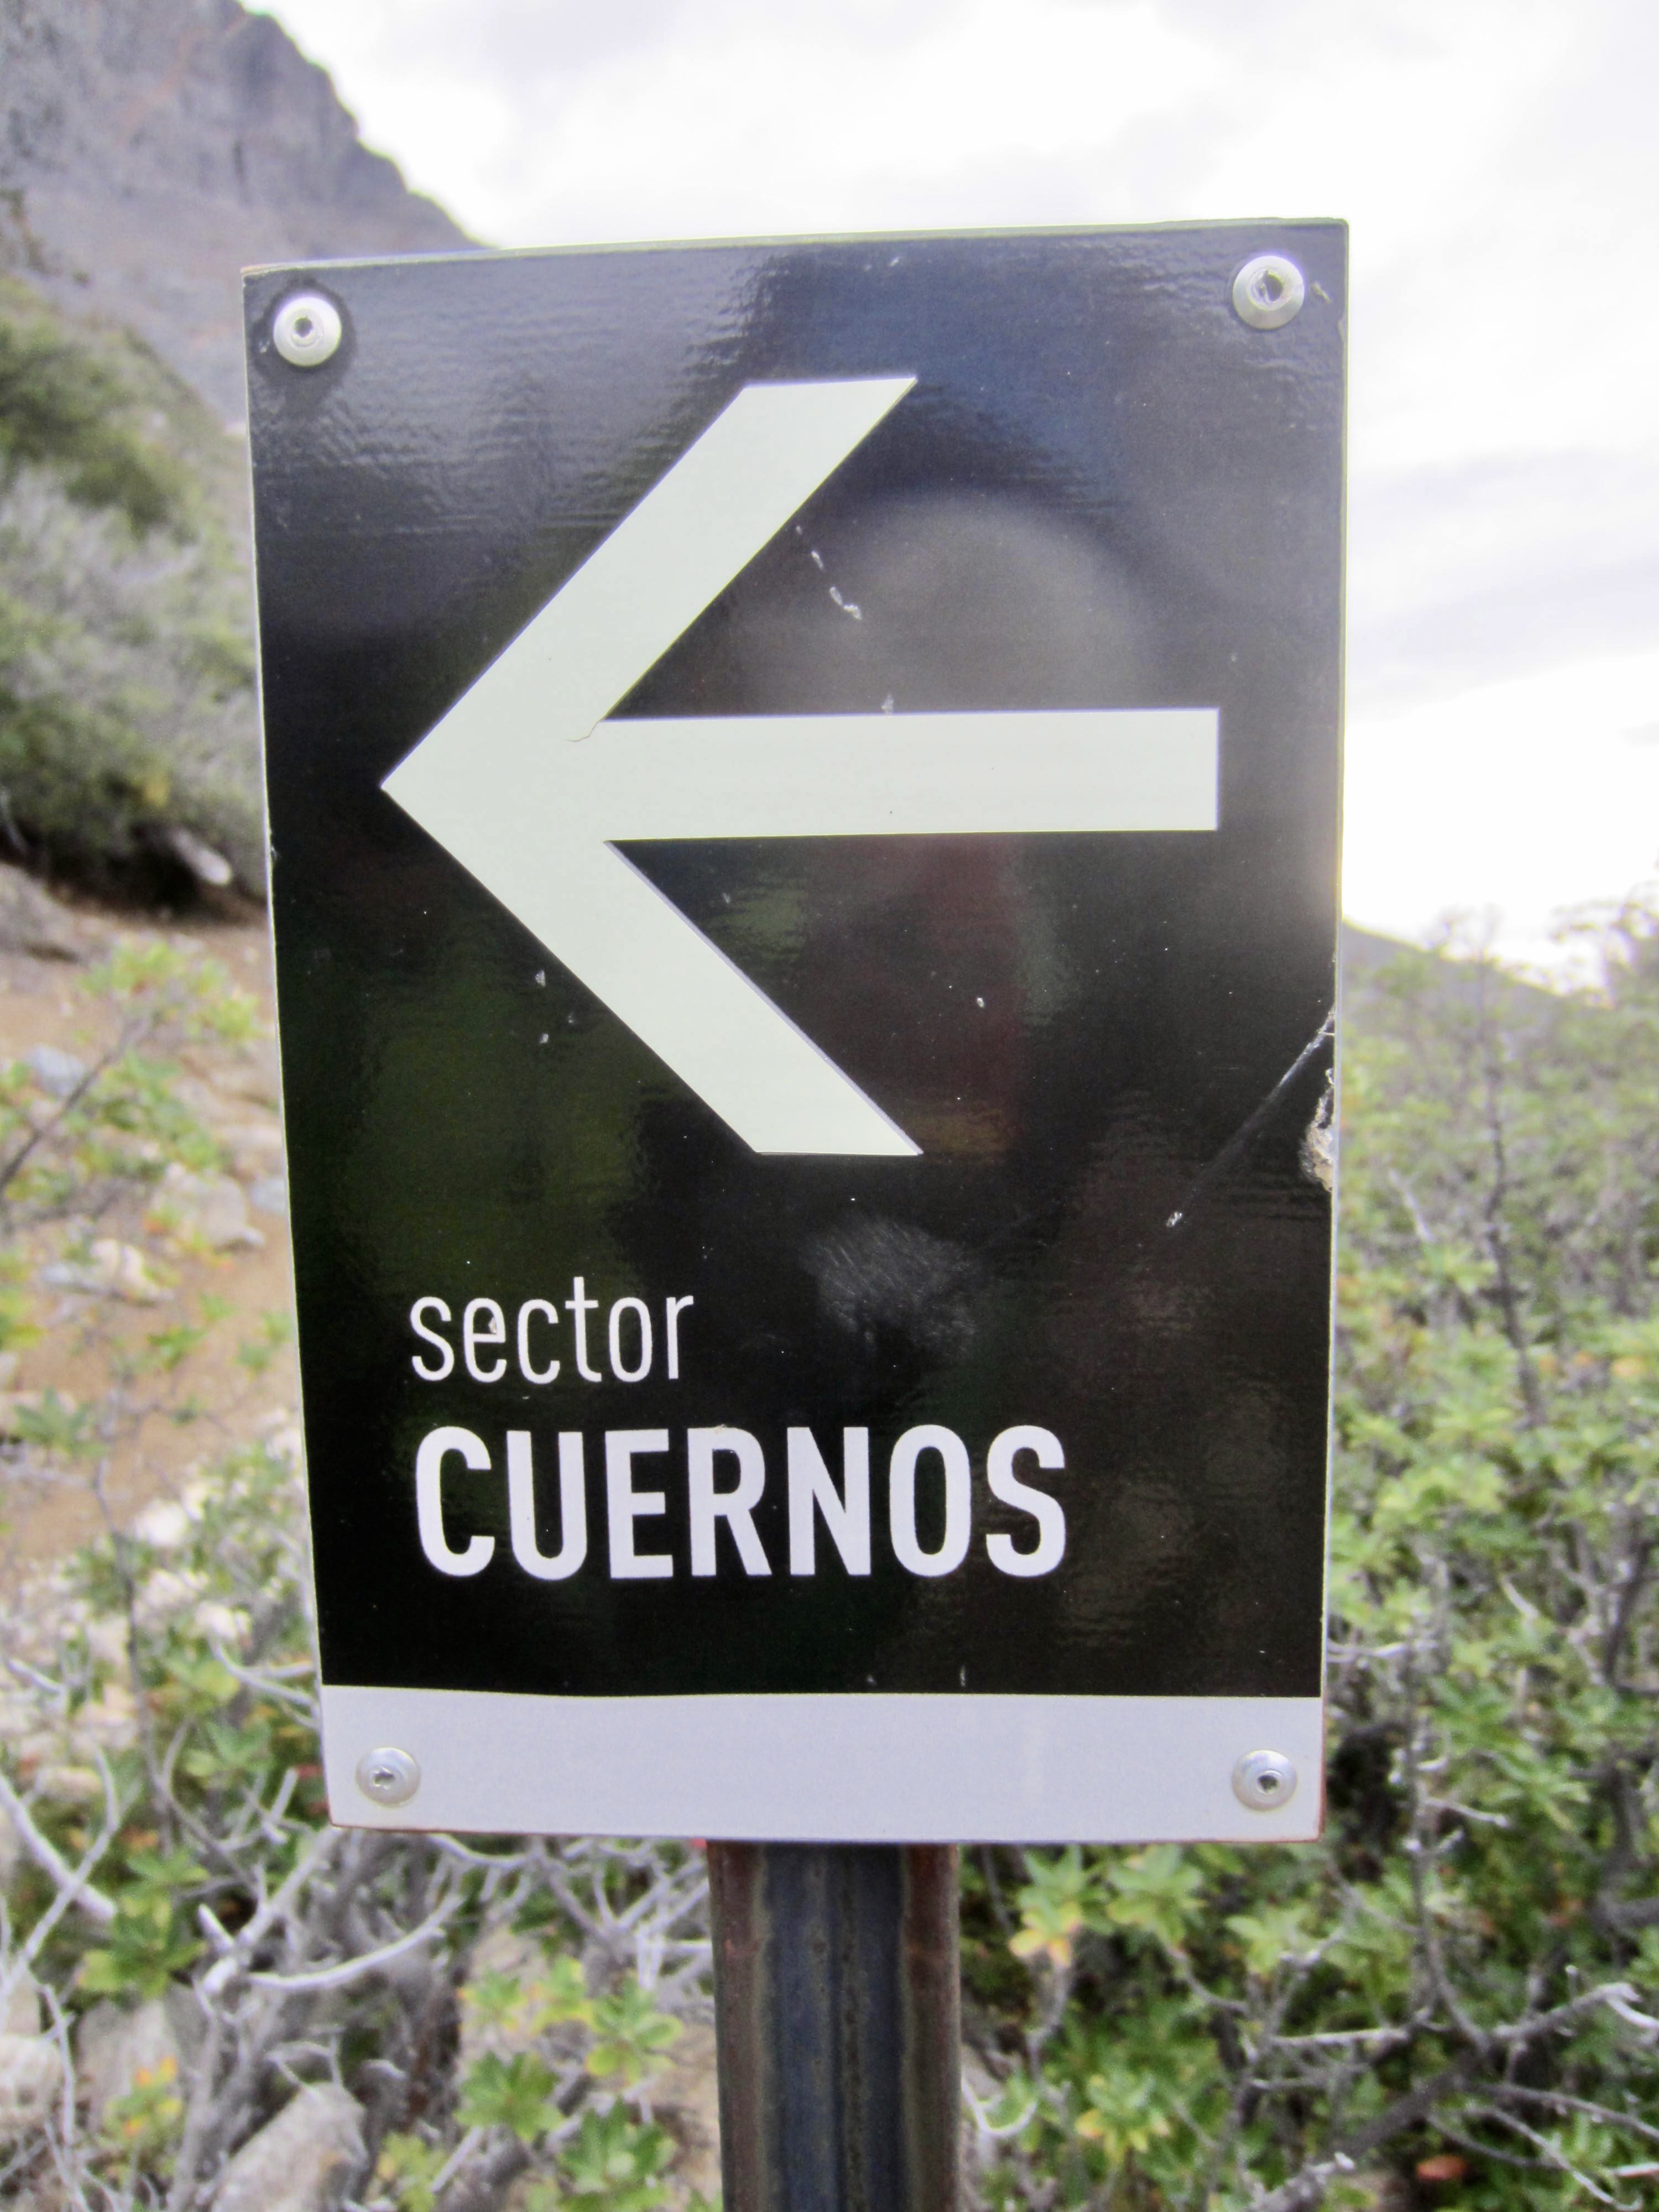
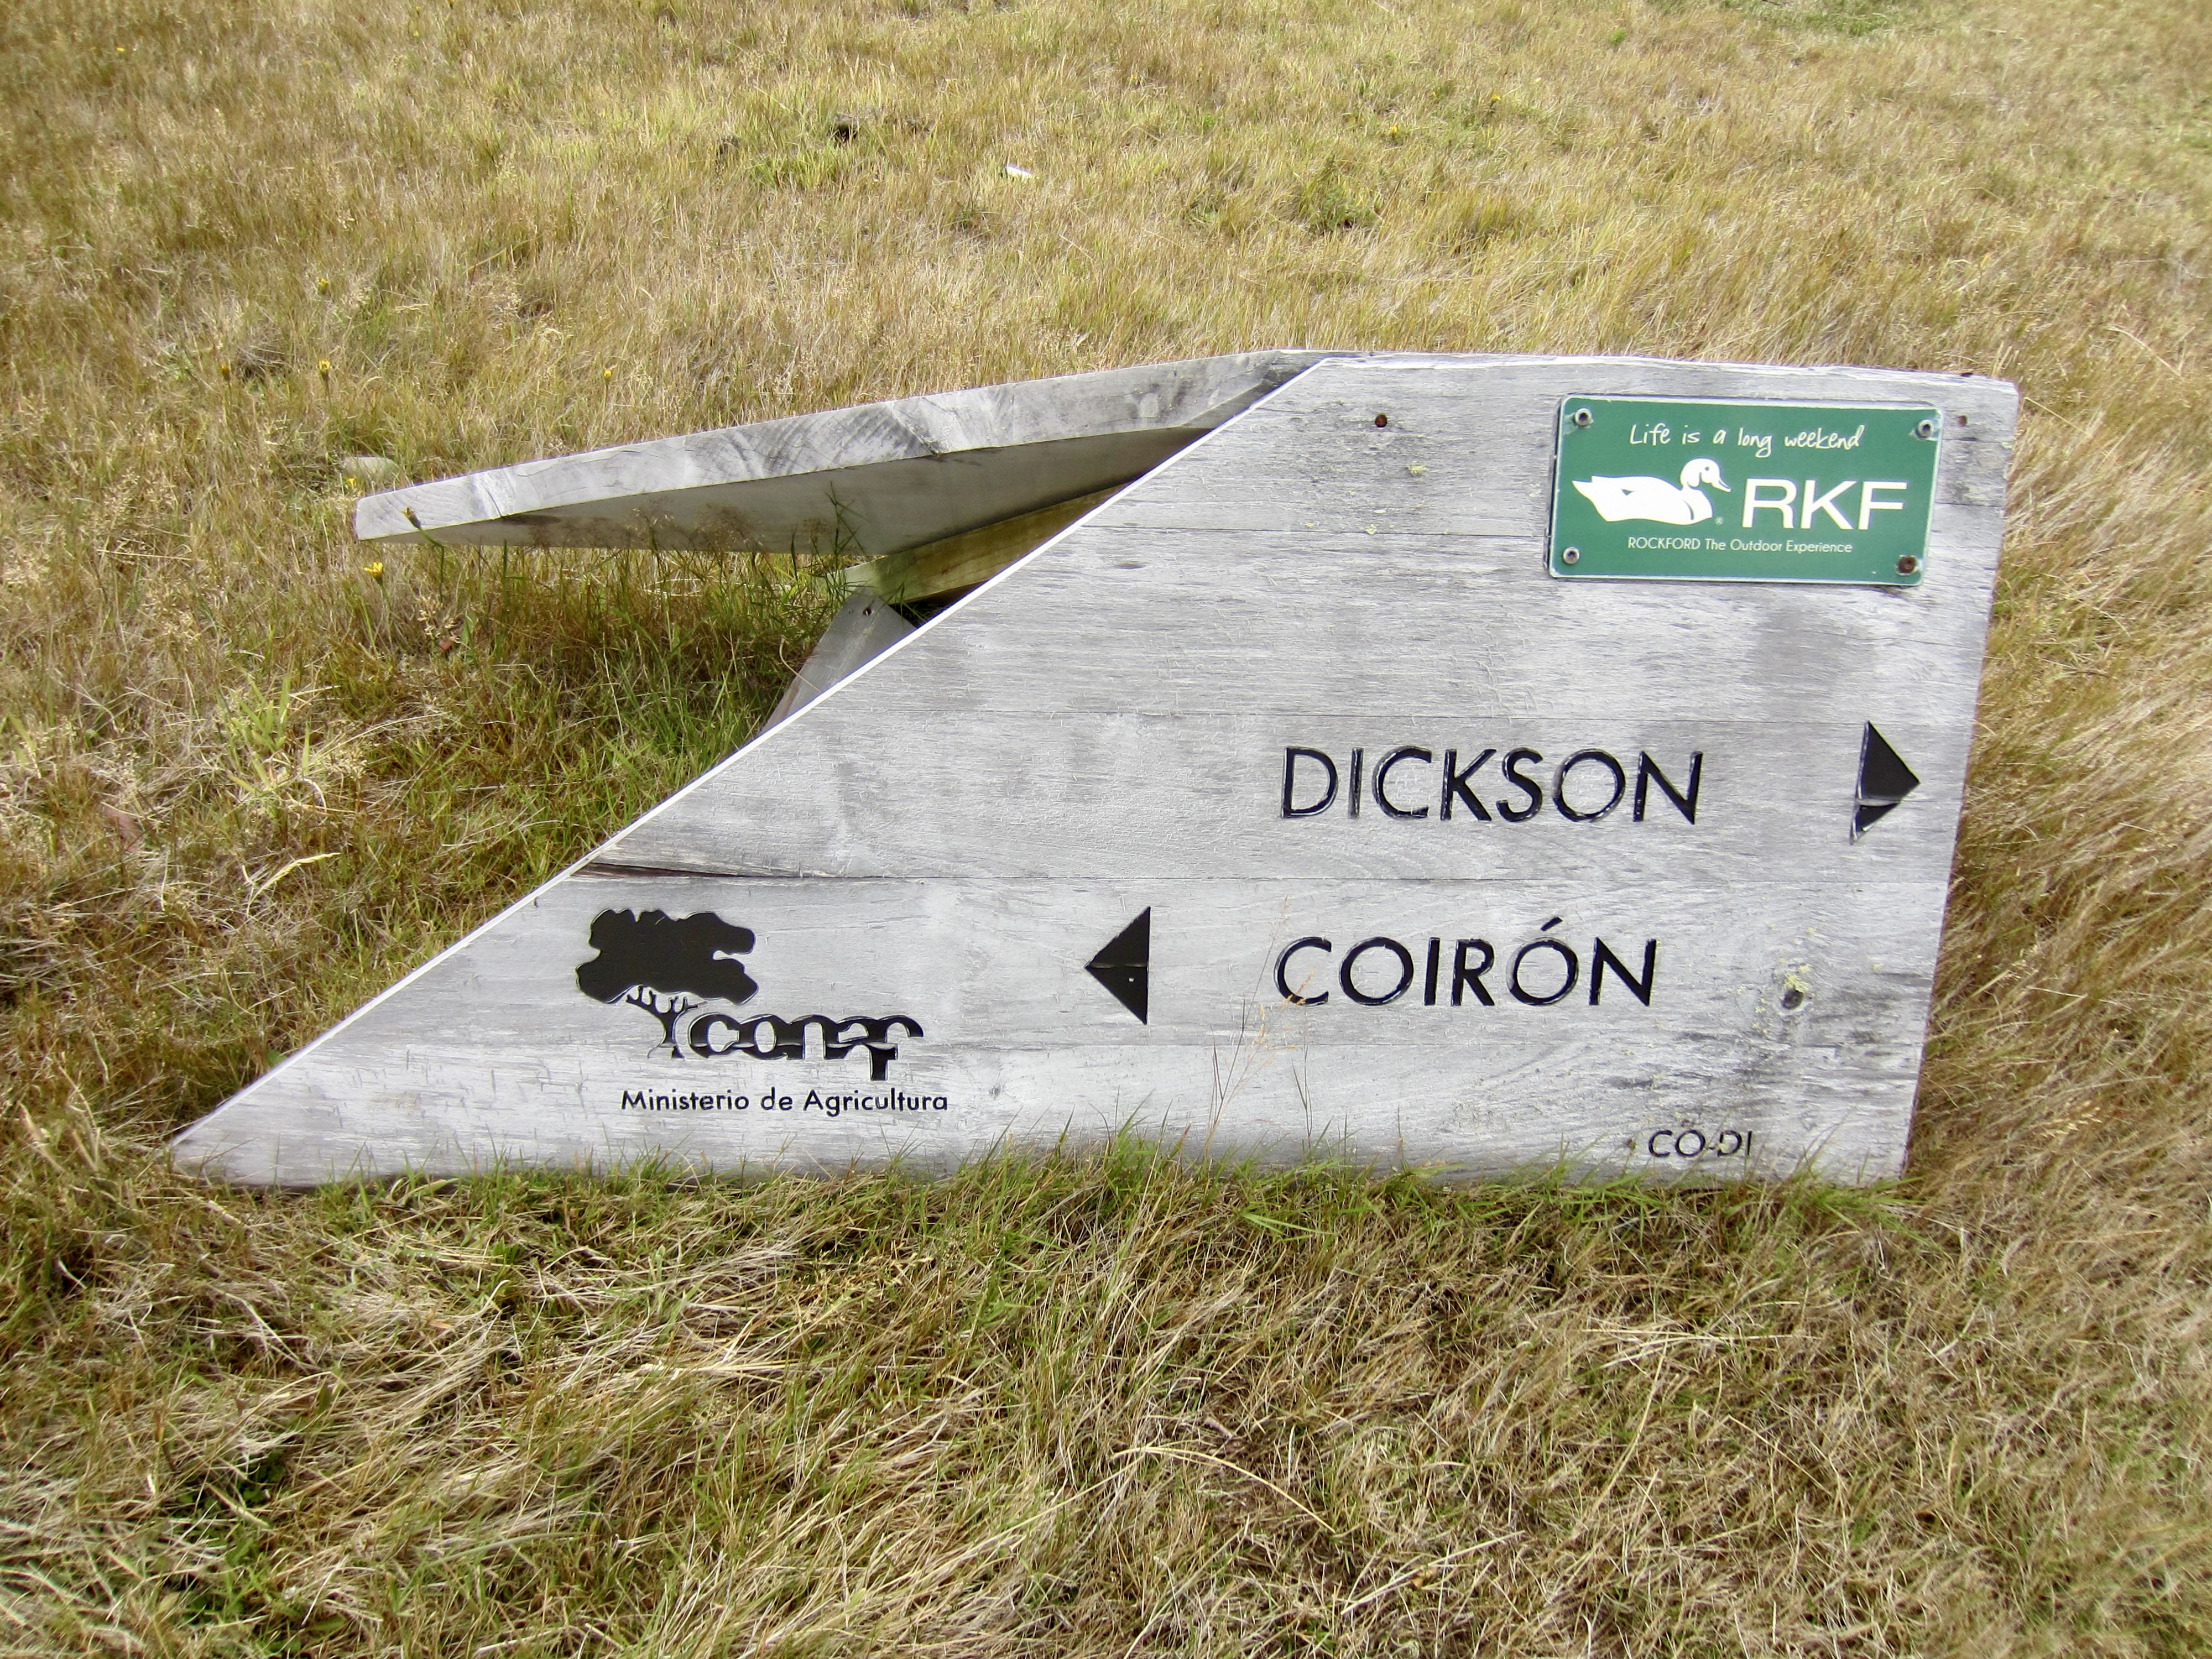
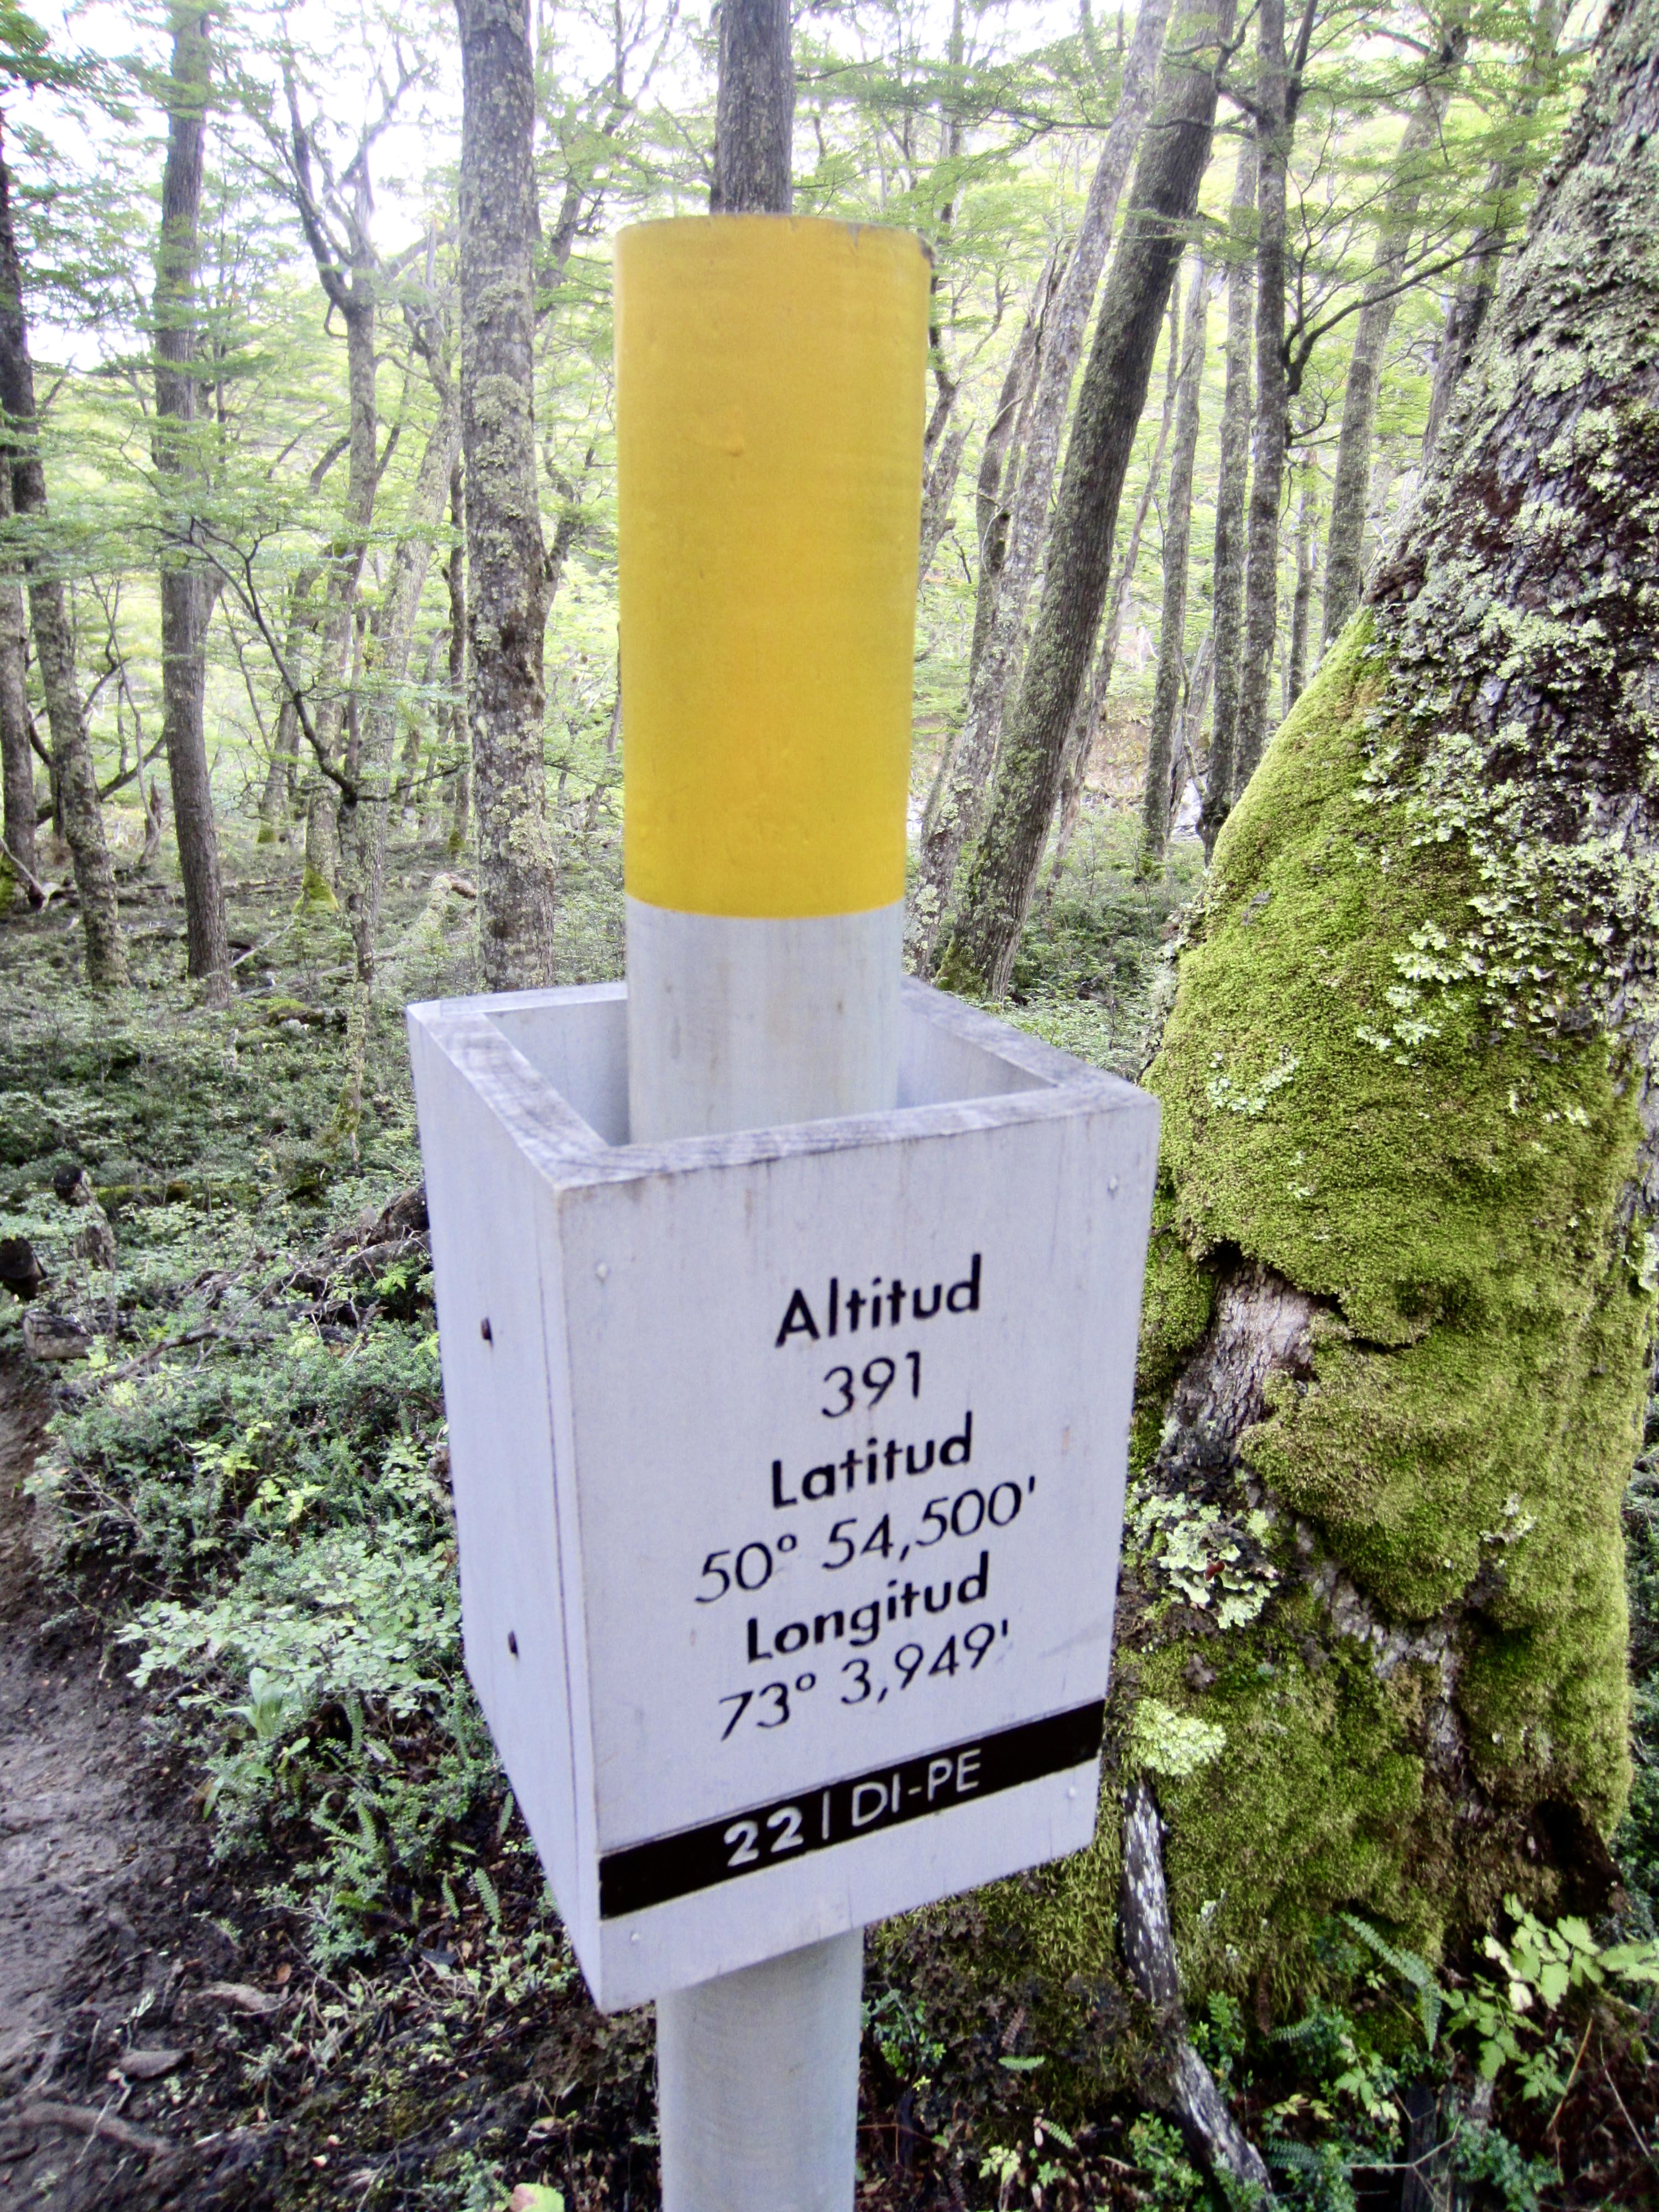
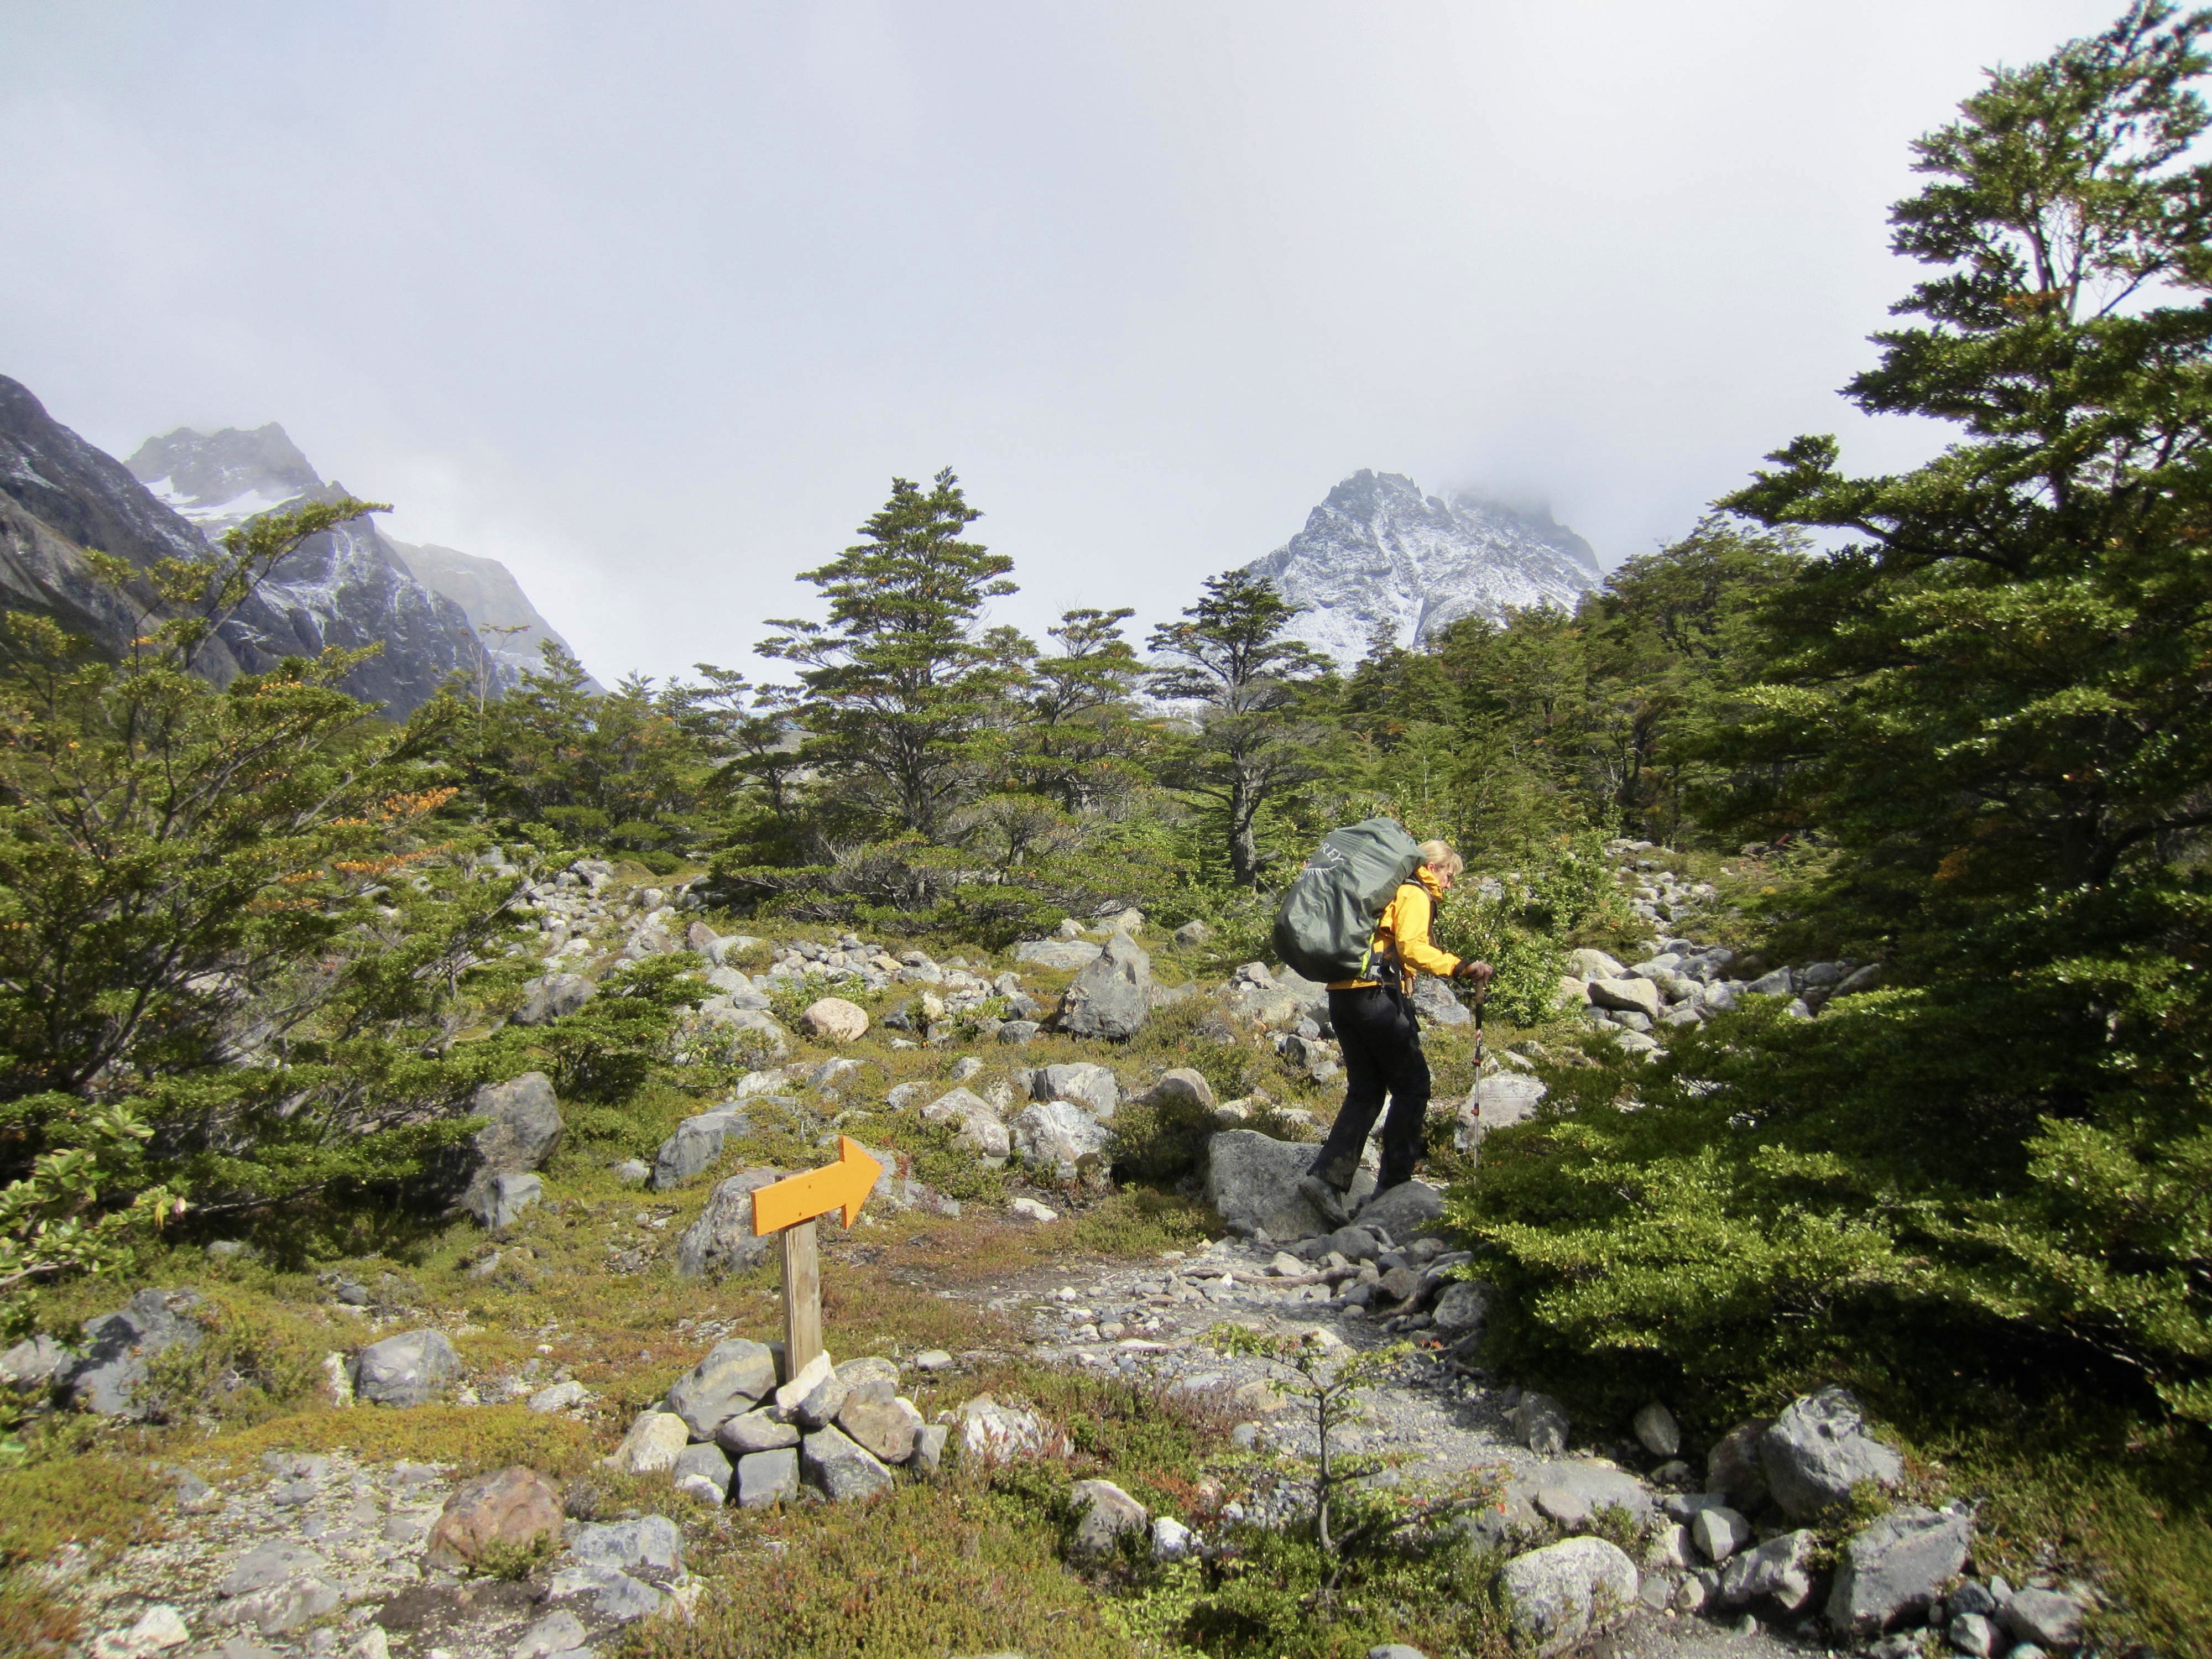
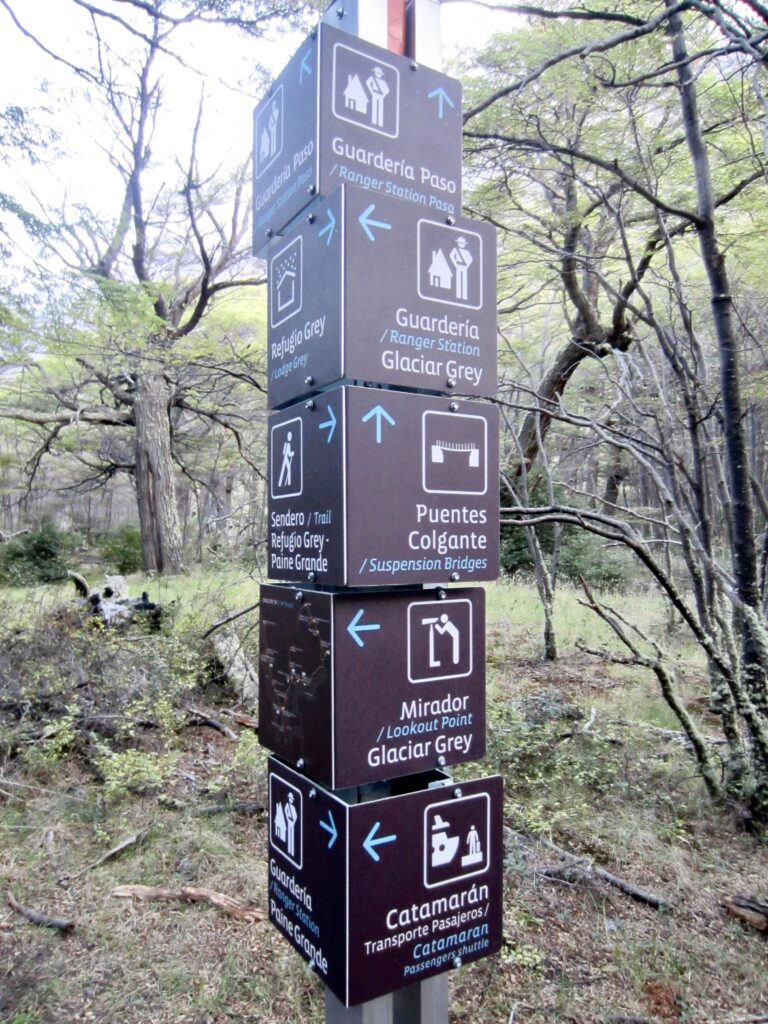
The “O-W” trail is generally well-defined and well-marked throughout, with countless painted stakes, poles, blazes, and arrows. There are also numerous signs indicating the direction to the nearest campsite or ranger station. In addition, informative graphical signs are placed at selected locations along the trail. These signs display a topographic profile of the trail segment between key waypoints, as well as a “you are here” (“usted esta aqui”) indicator, with distances and elevations shown. A separate set of distinctively shaped signboards are located at campsites and park boundaries, and a small number of coordinate posts have been installed along the trail for emergency purposes.

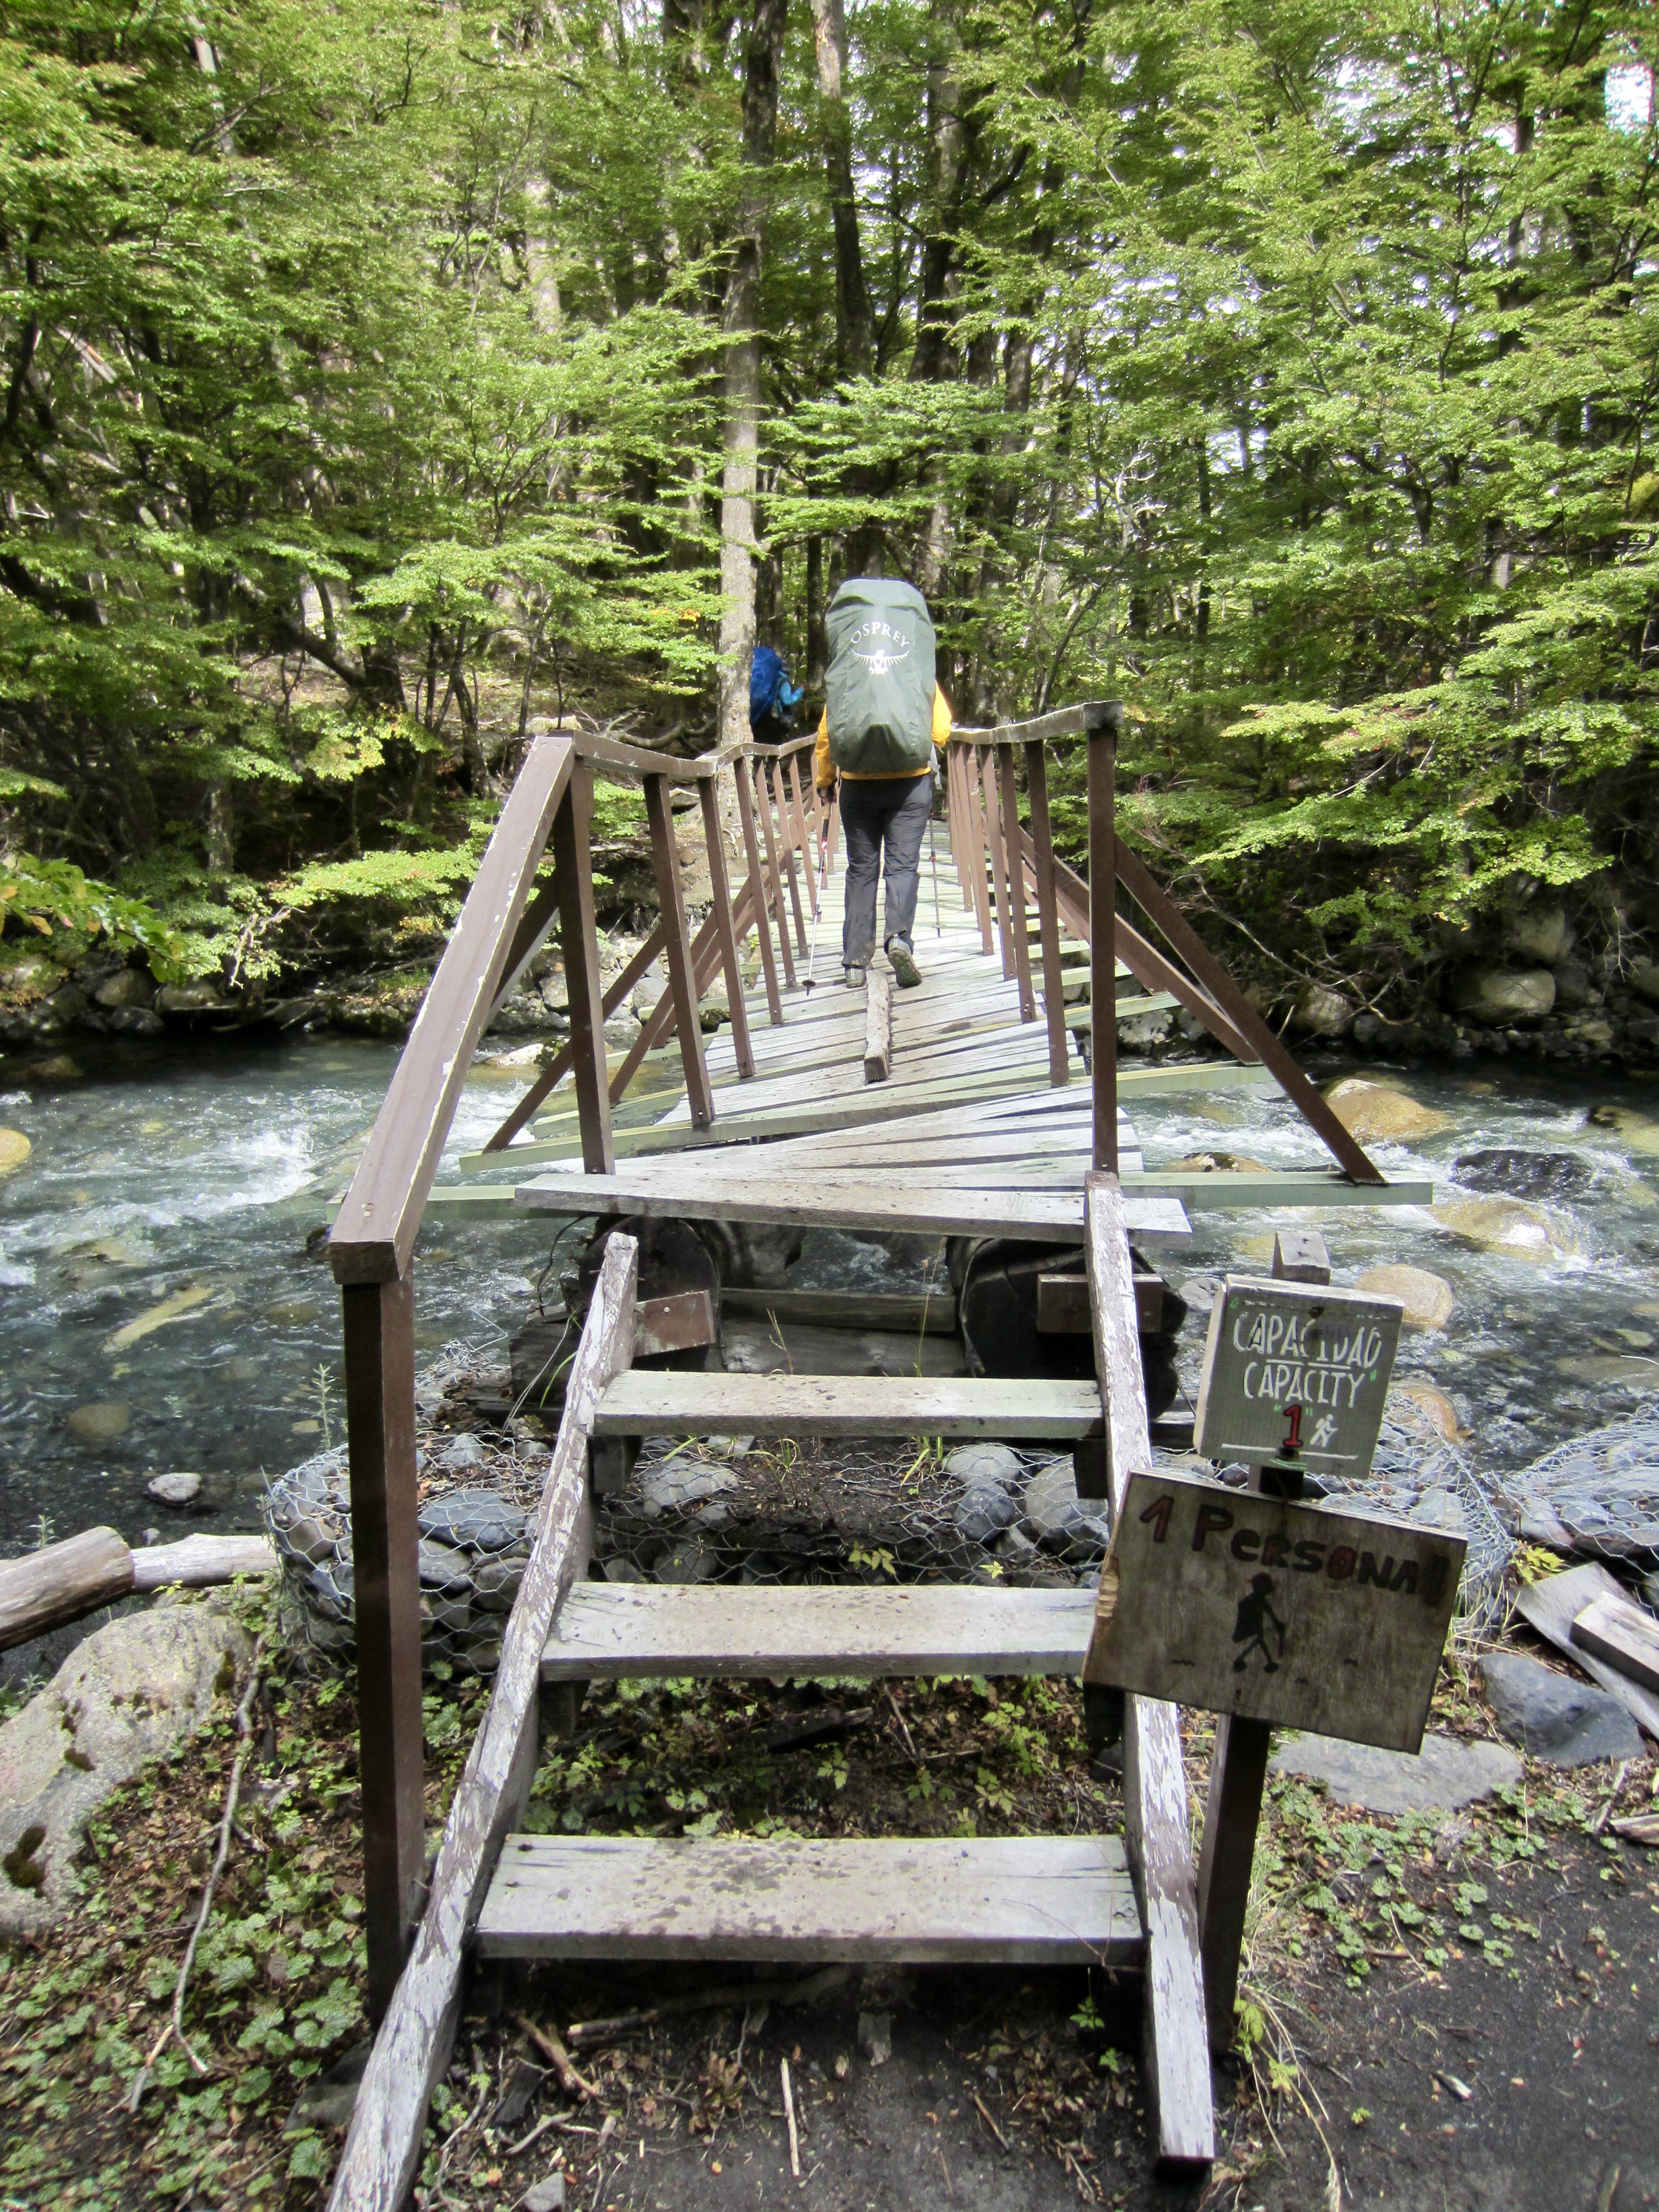
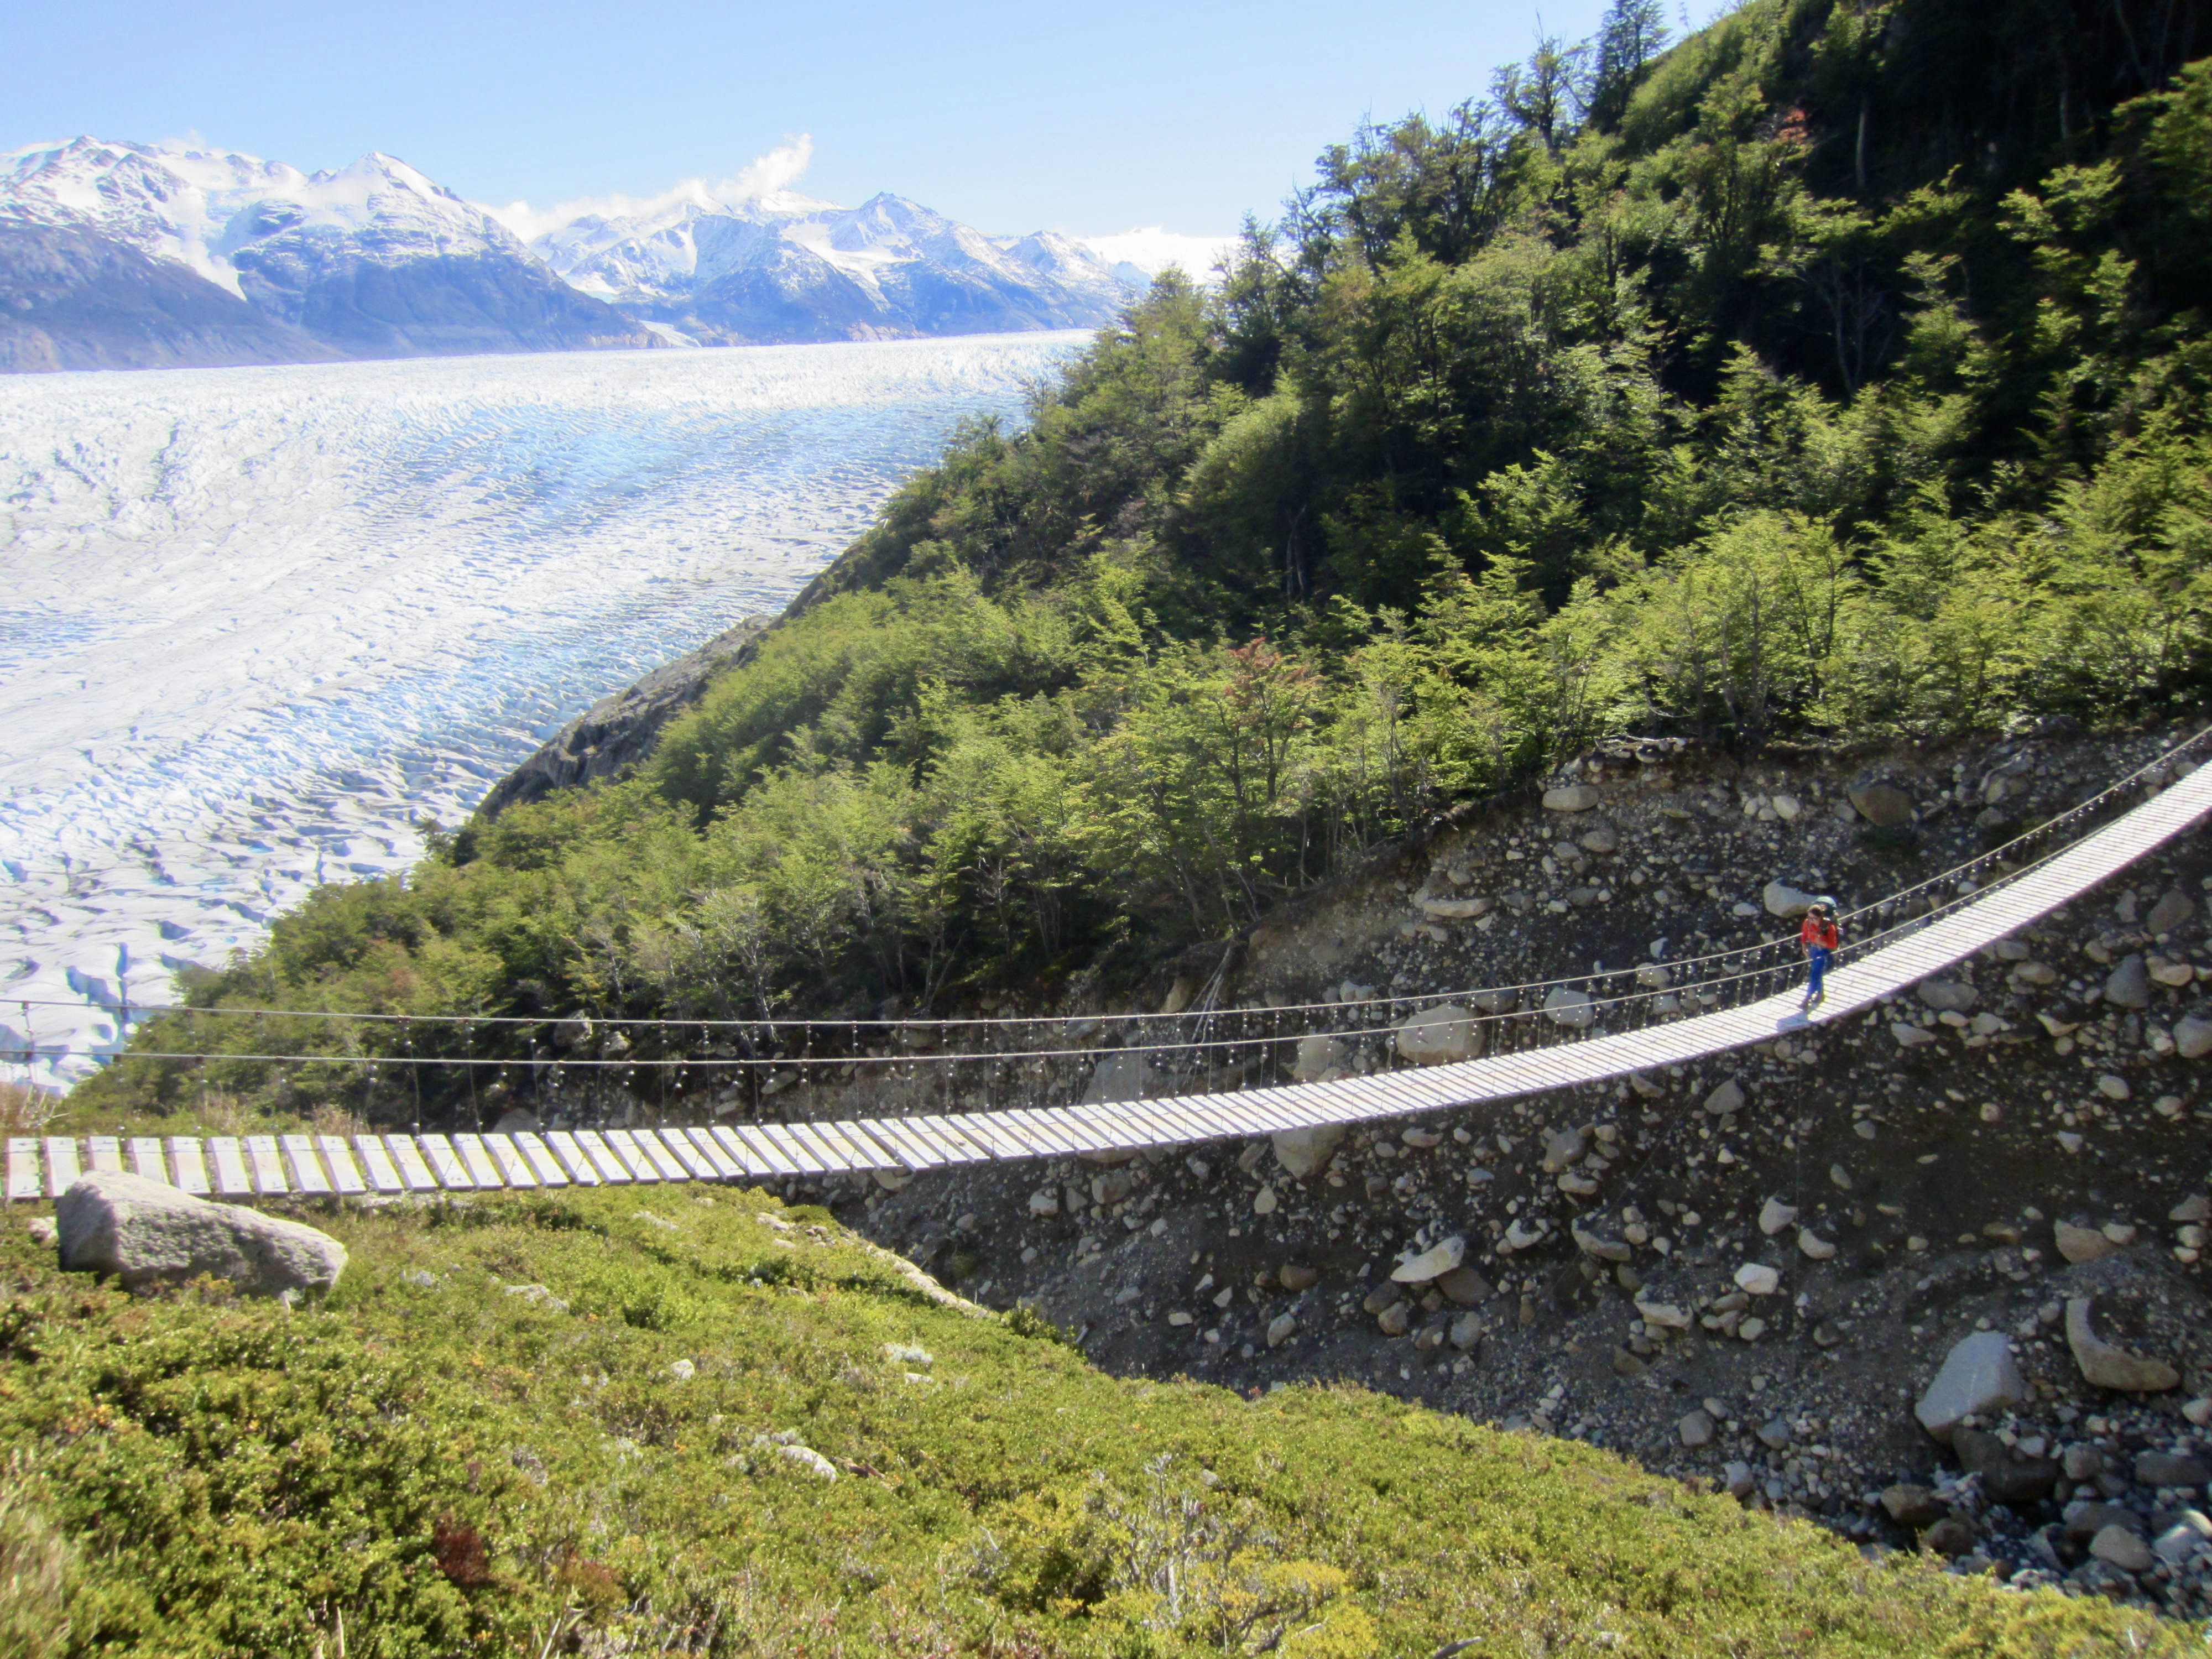
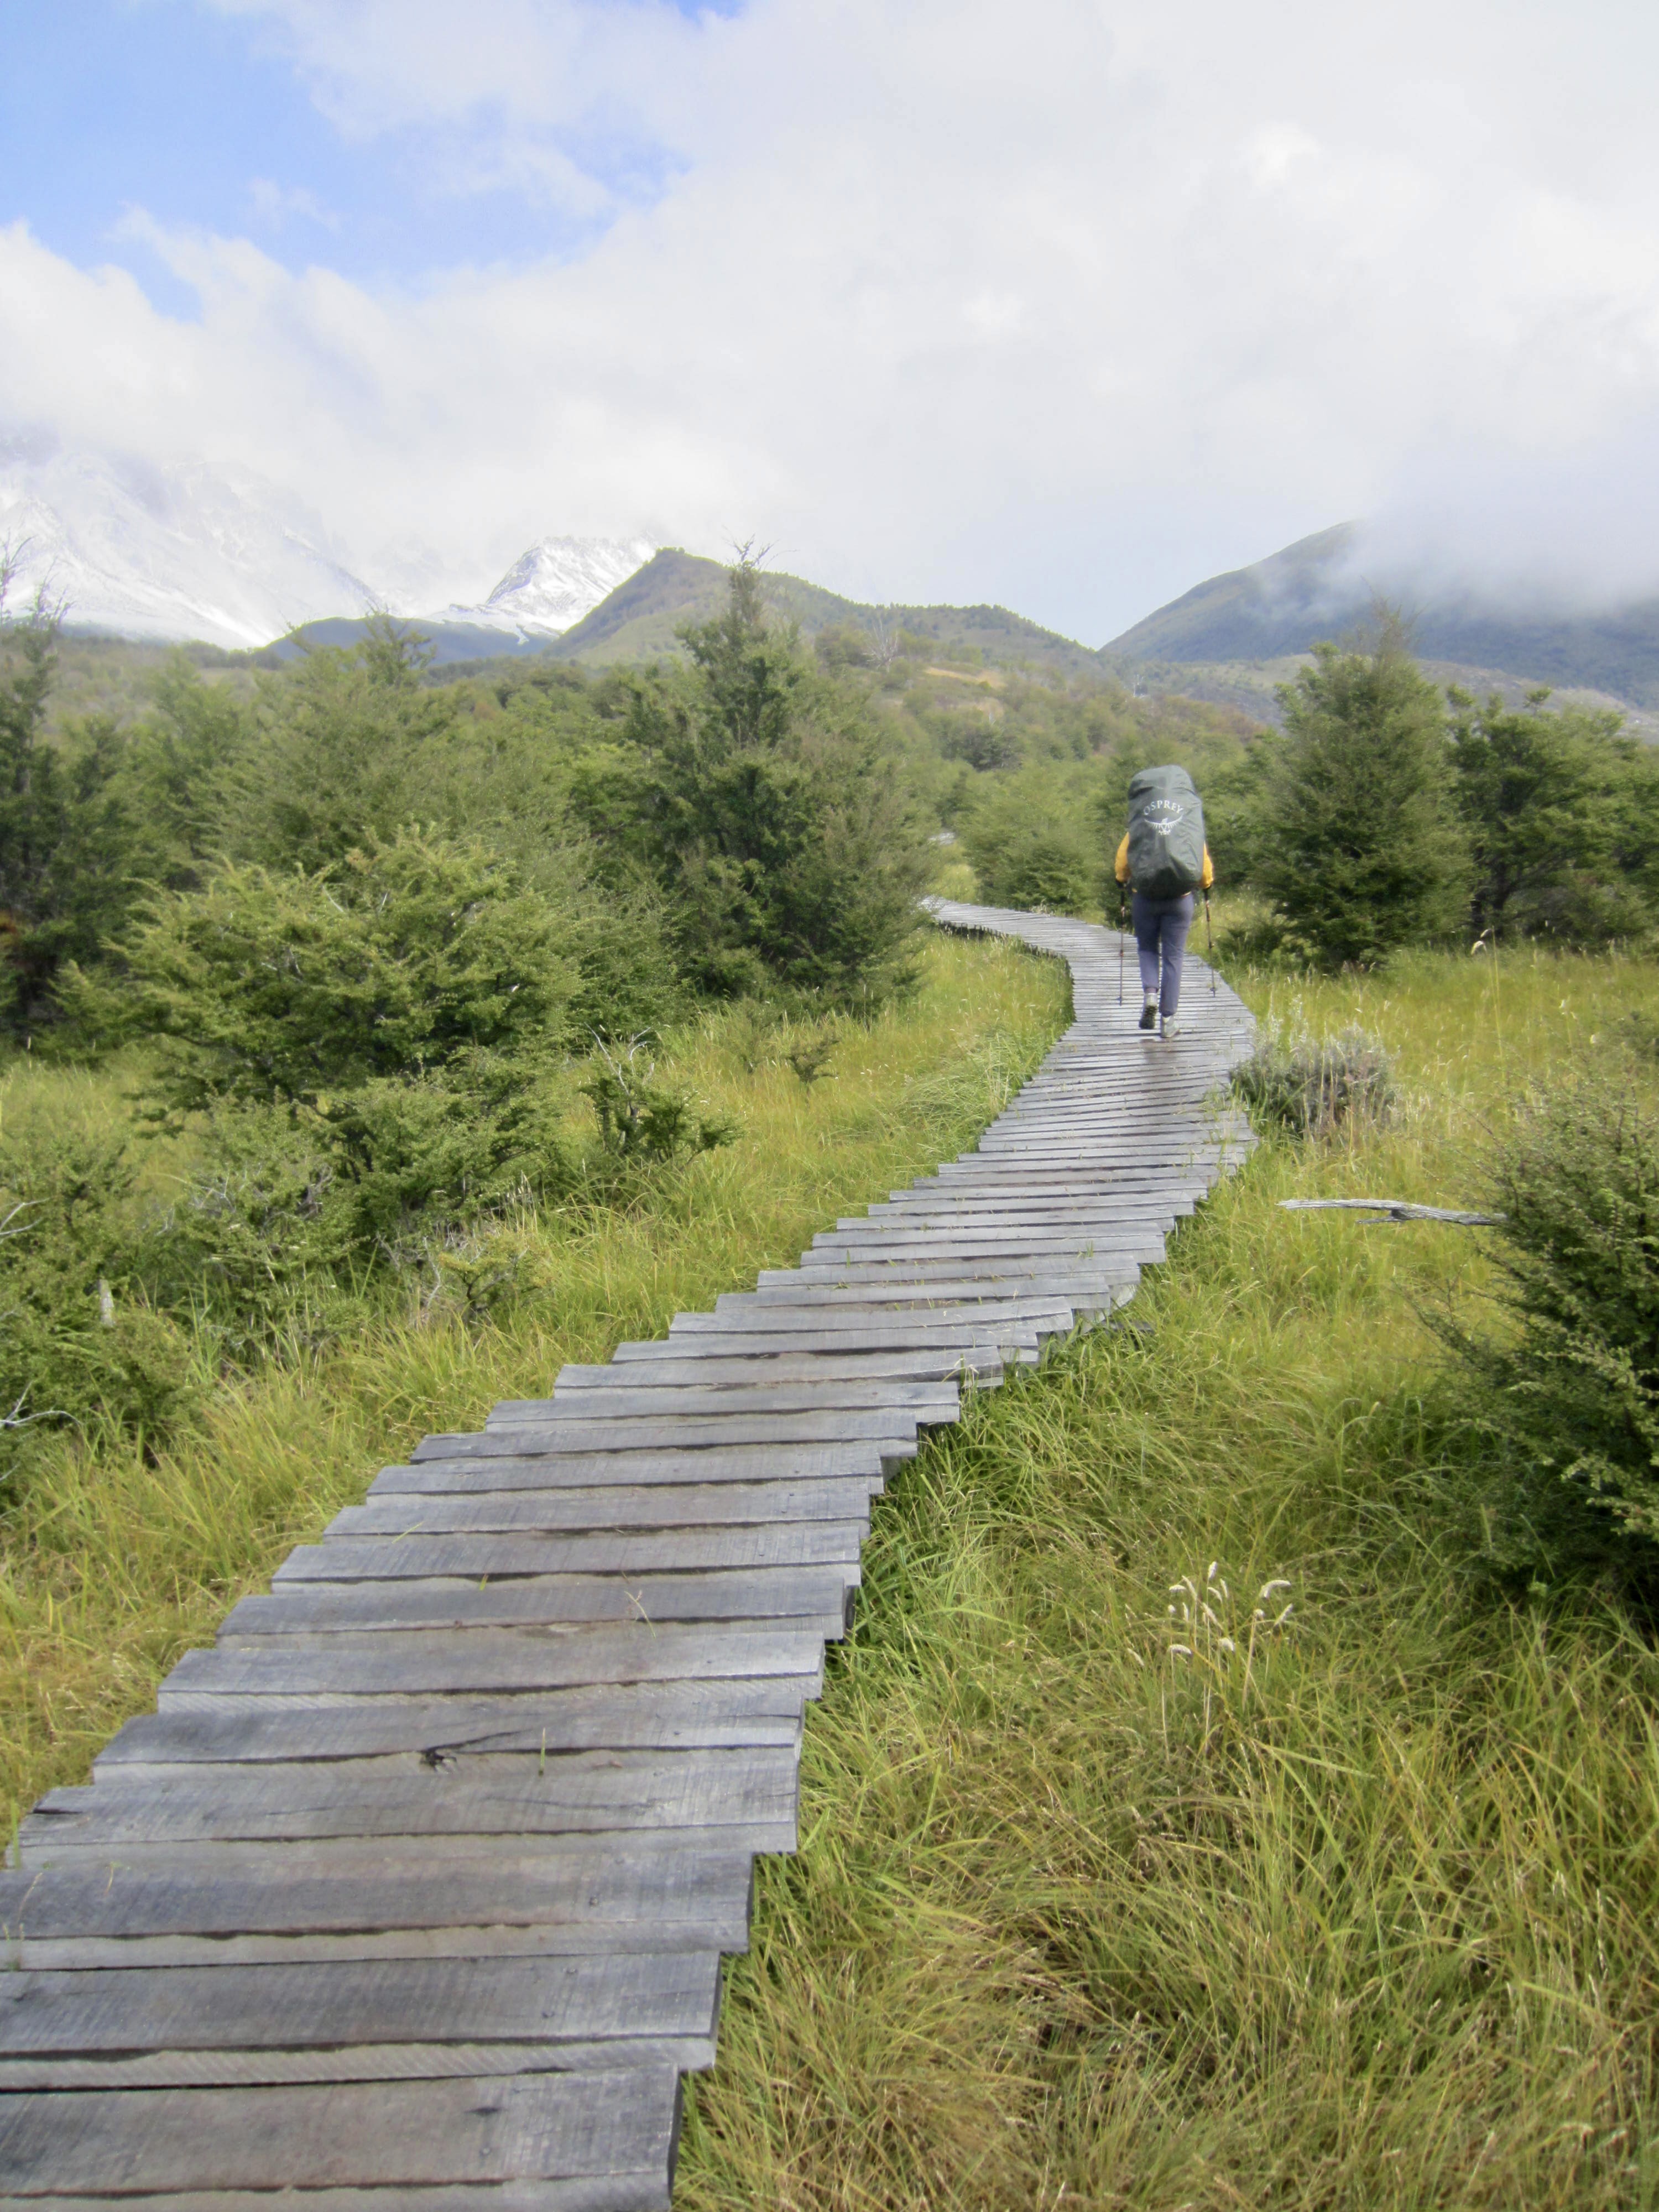
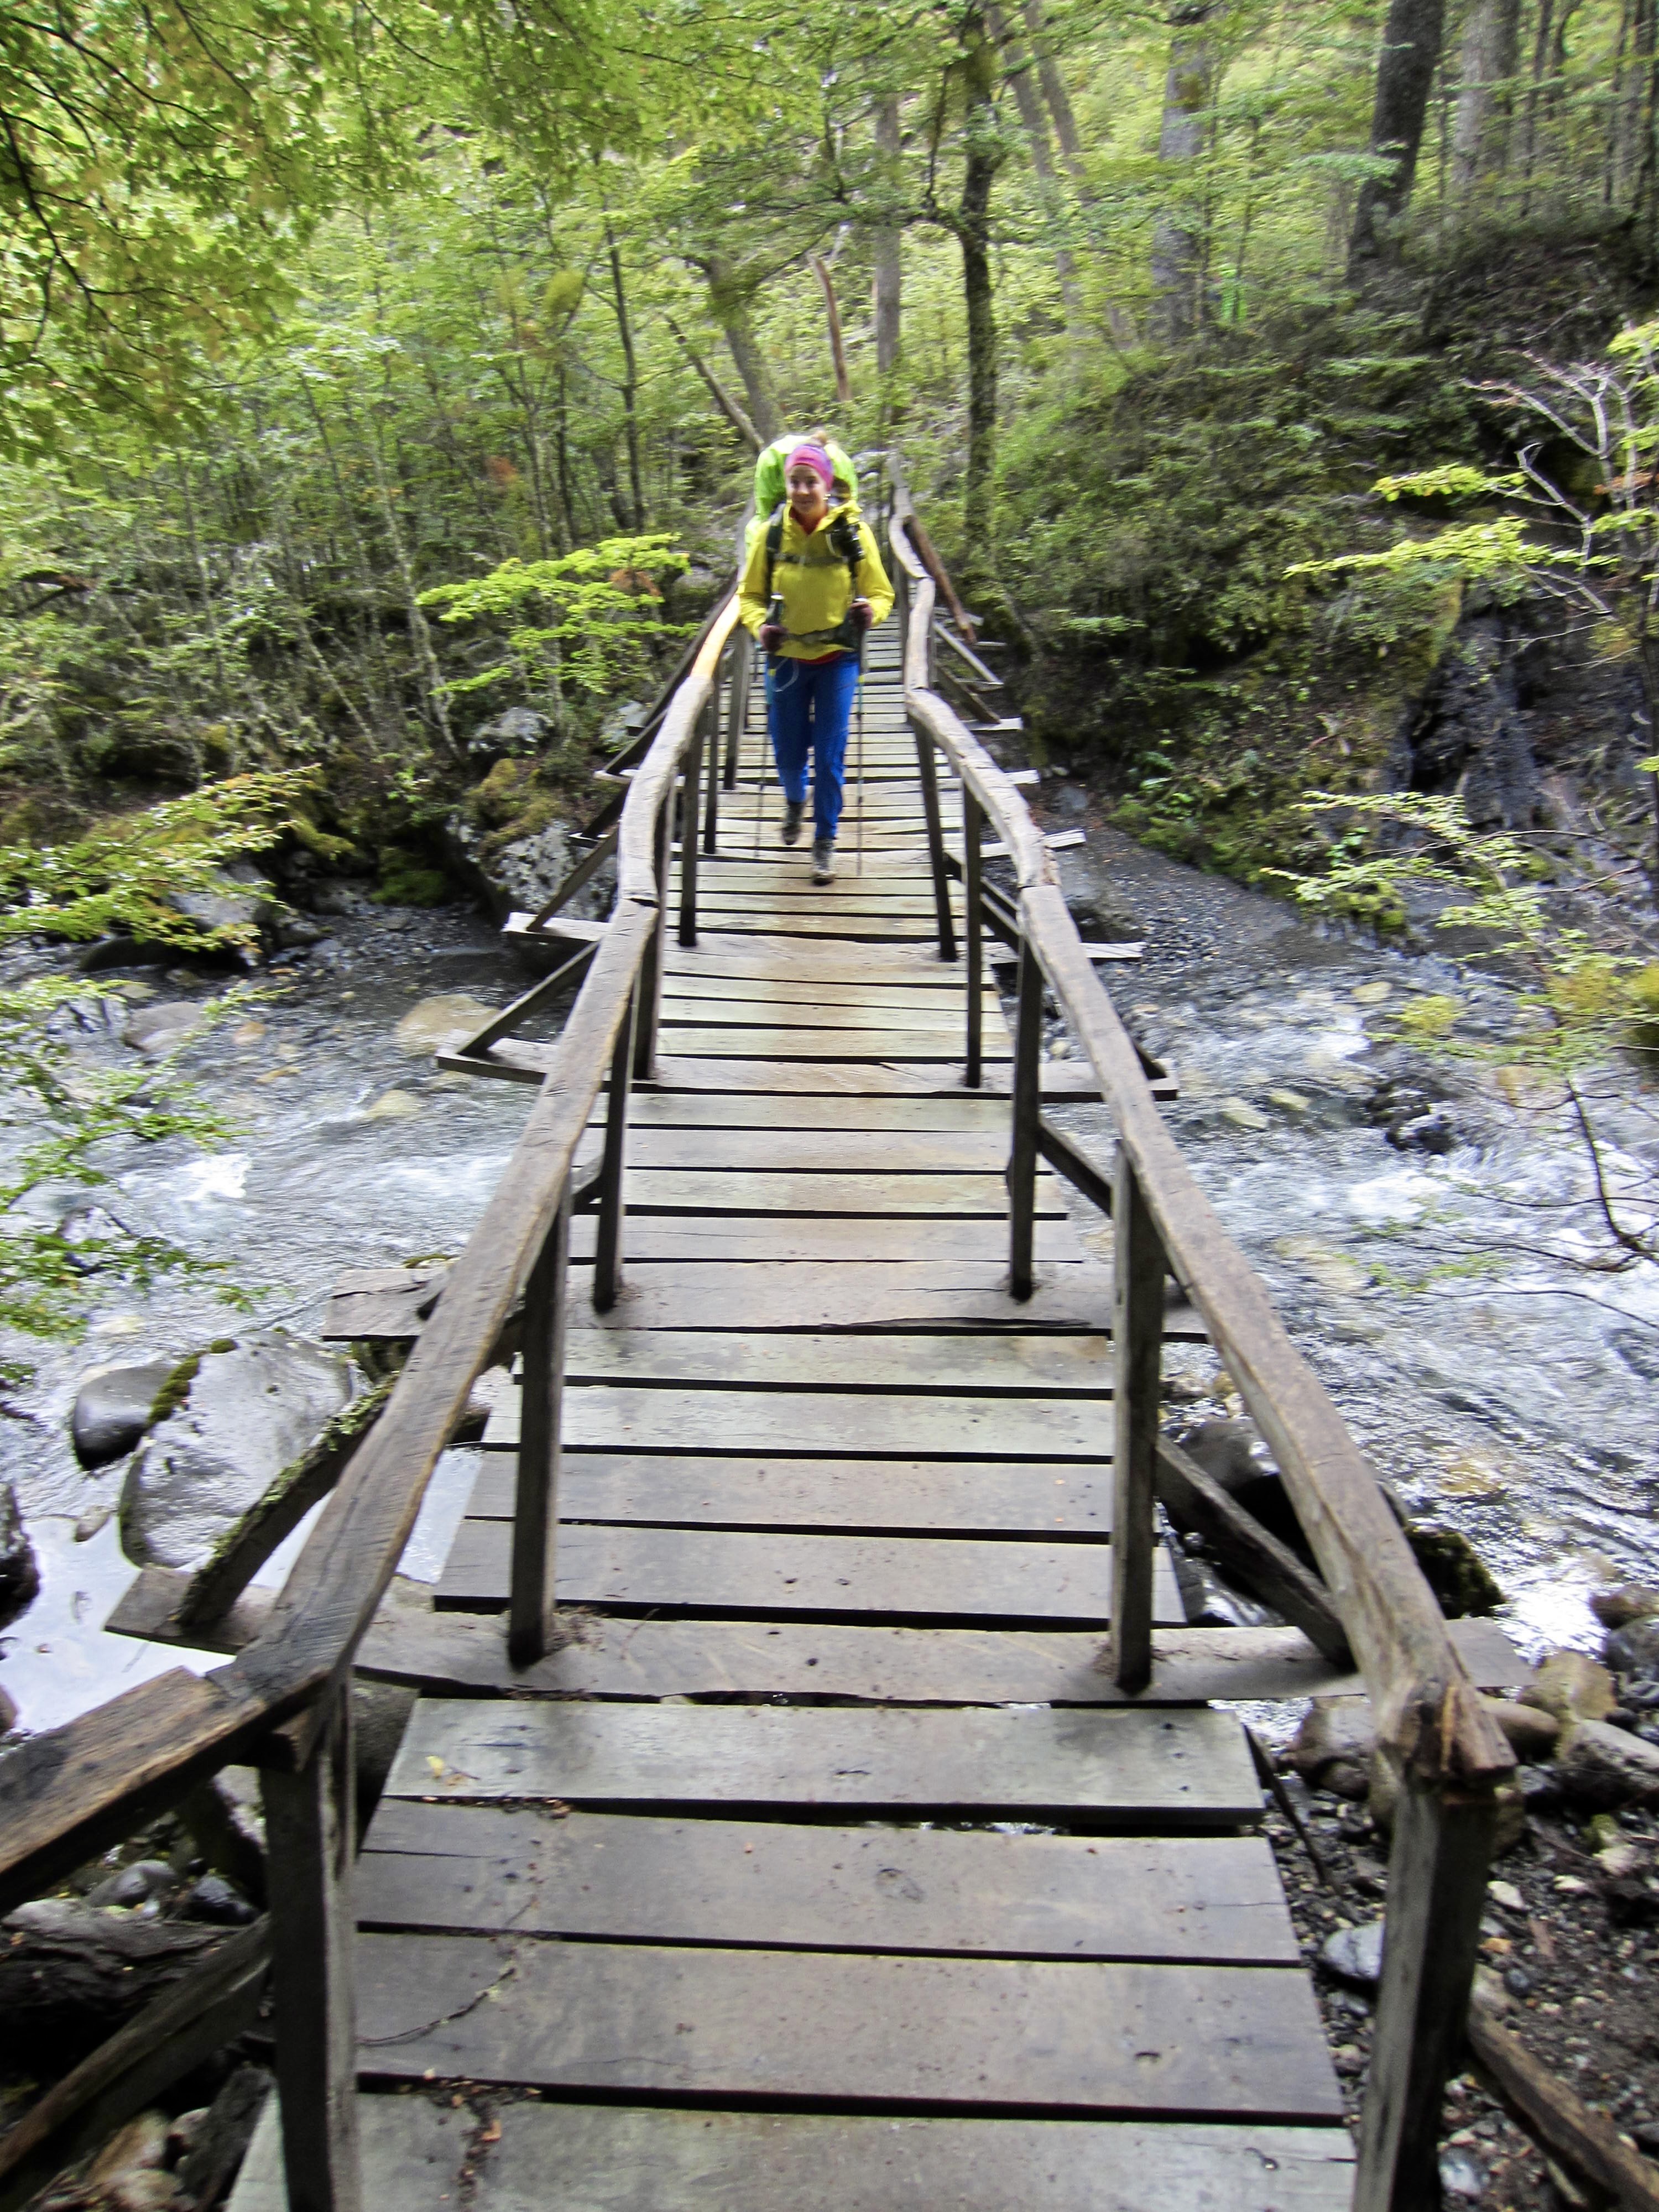
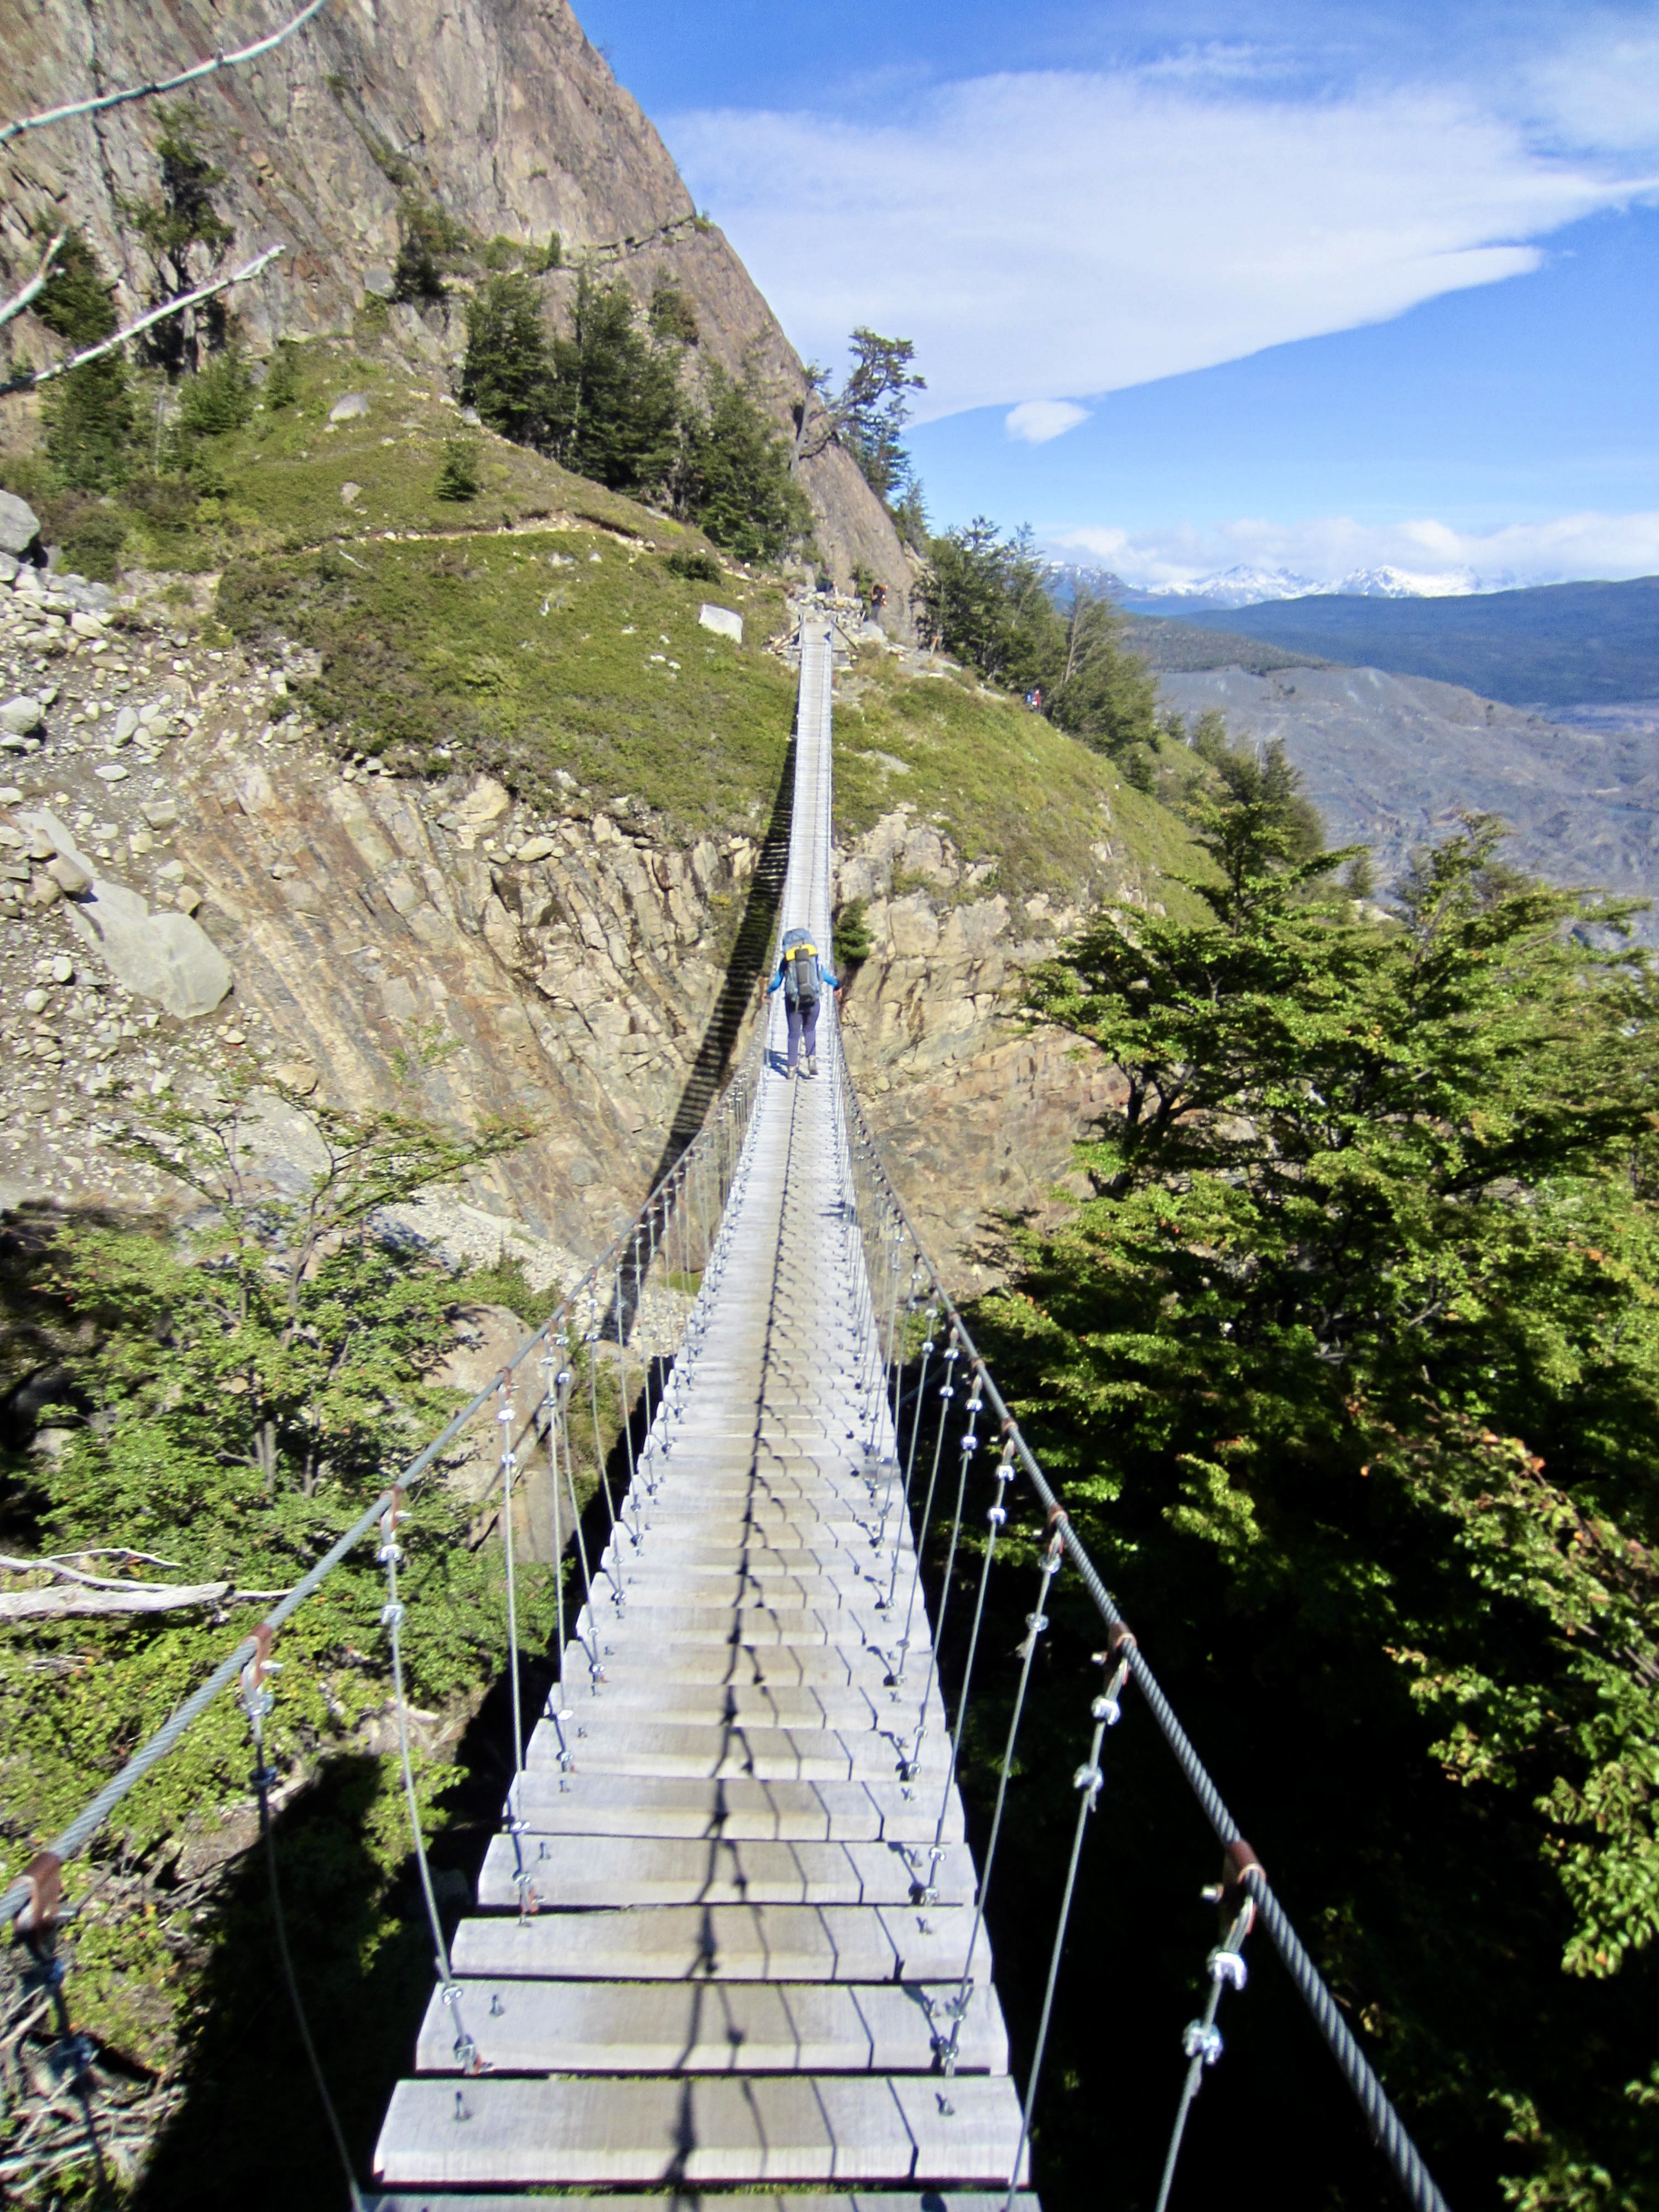
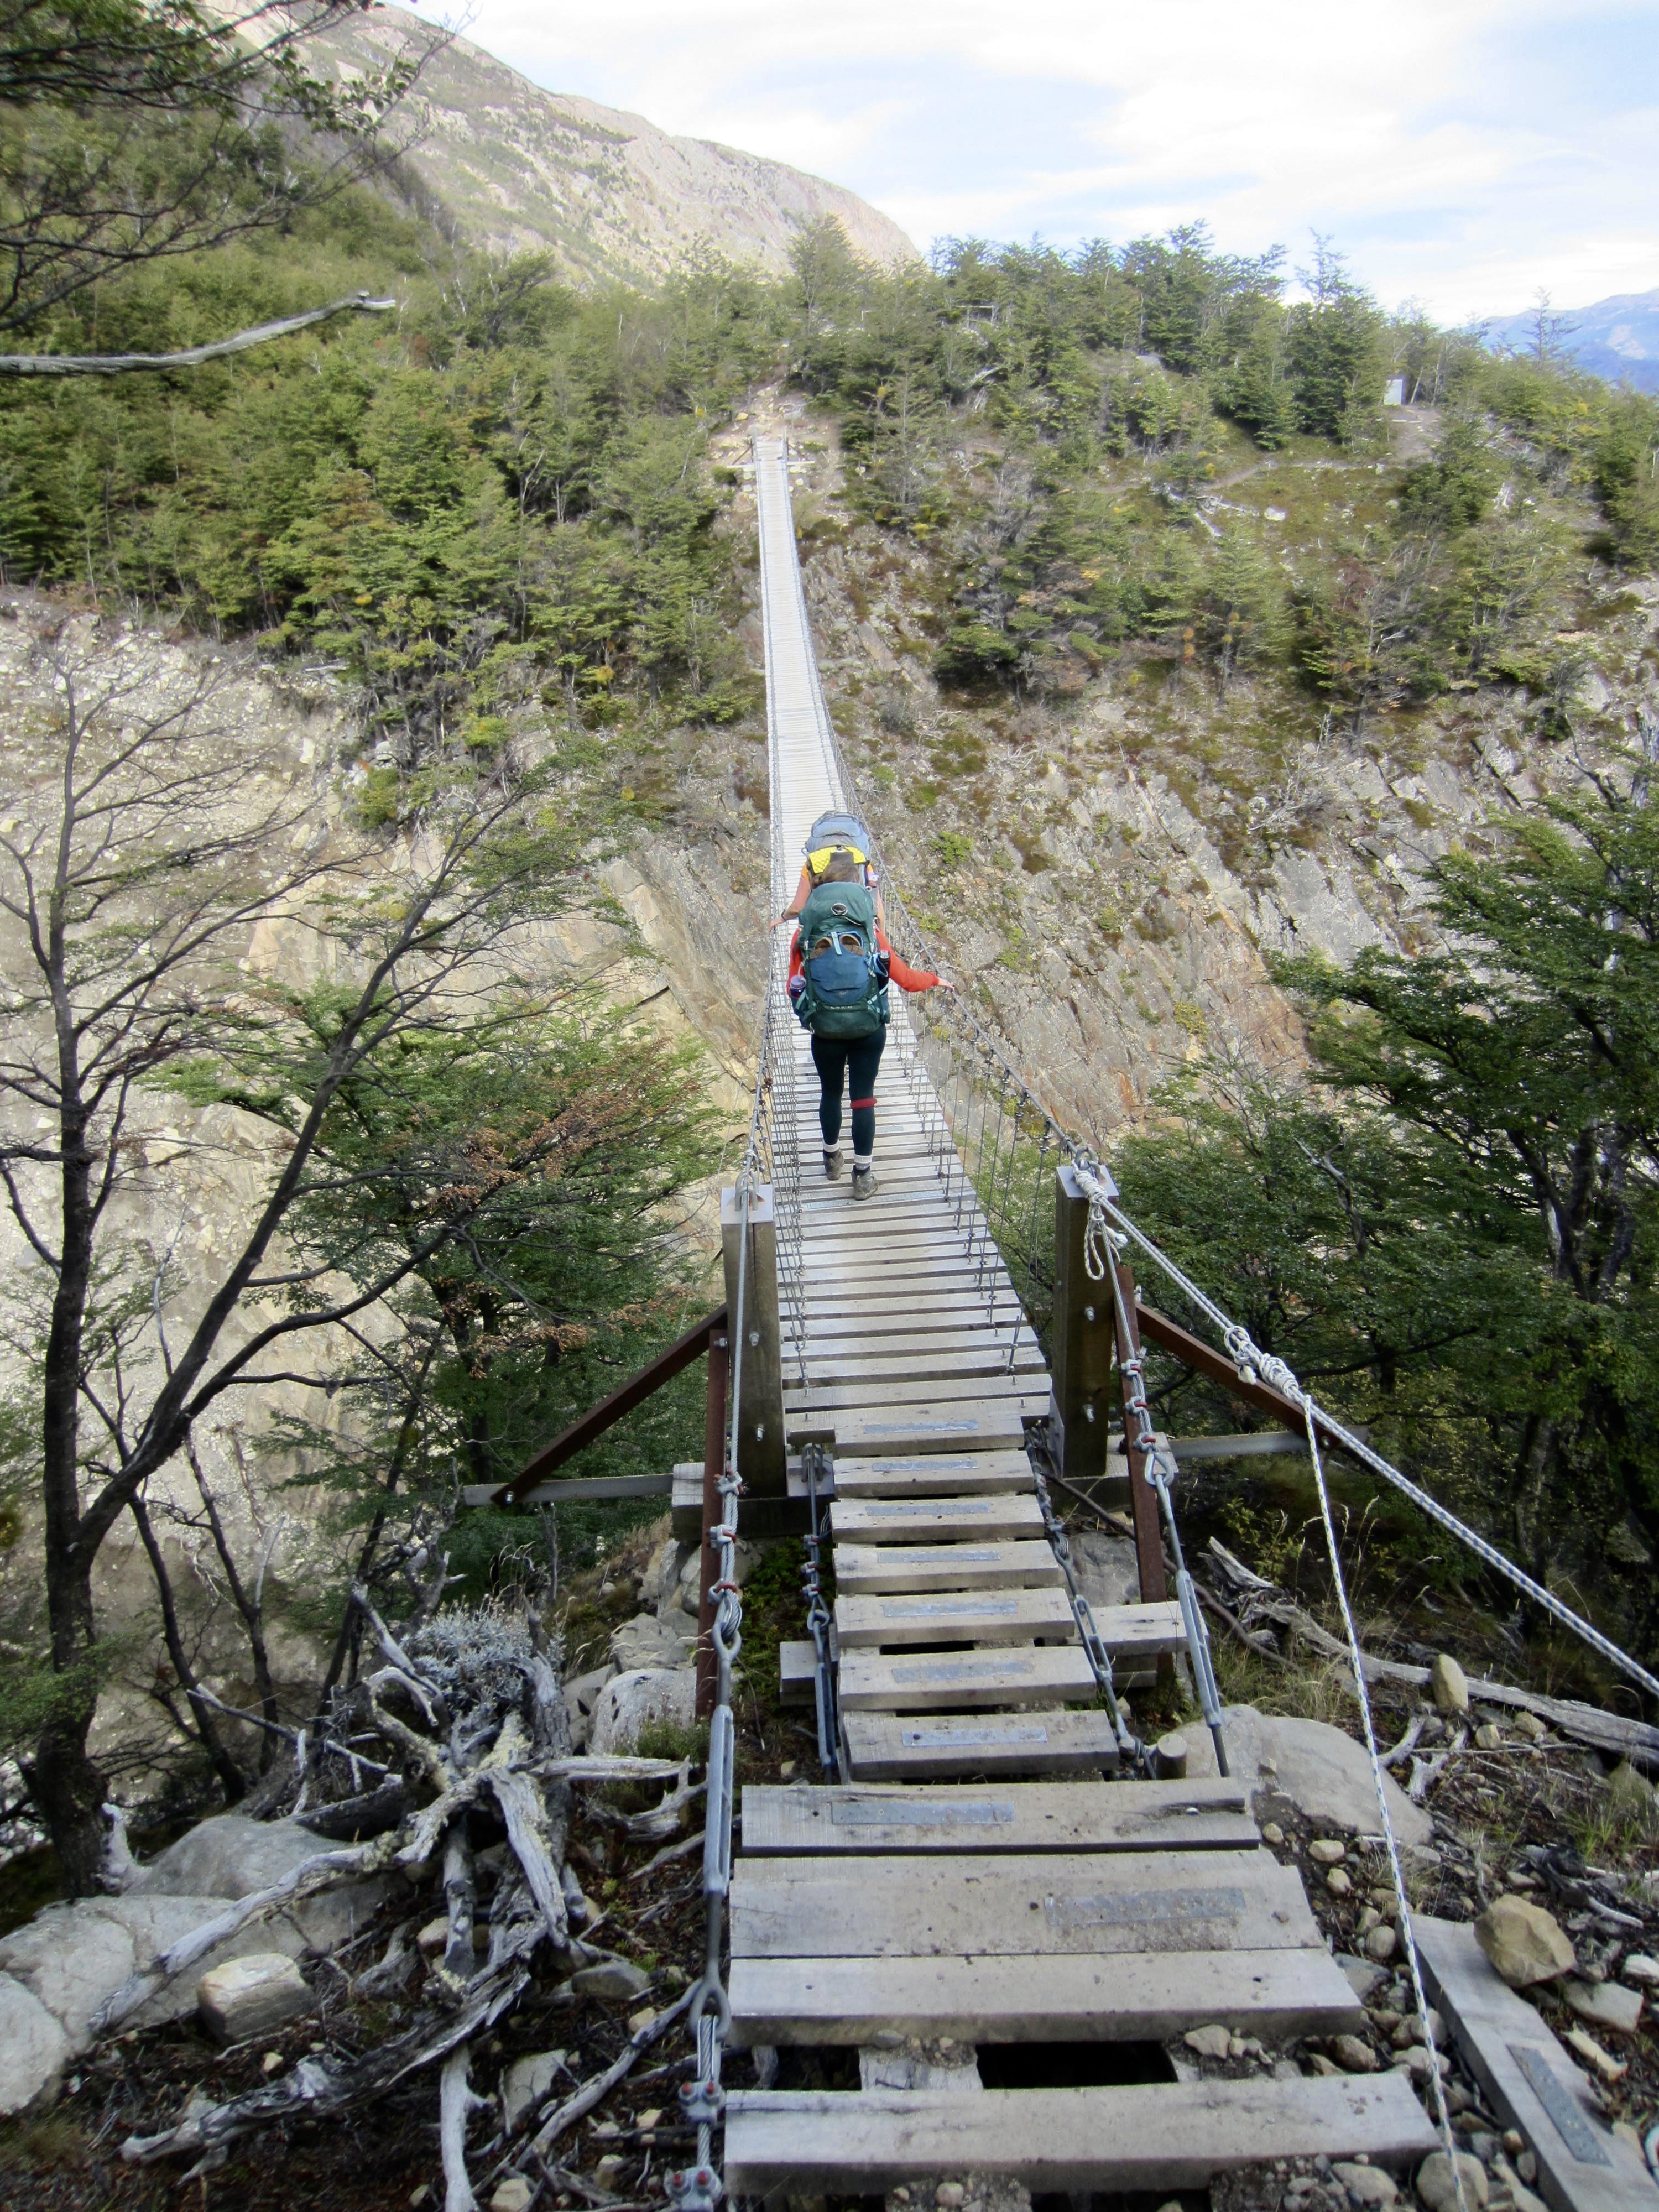
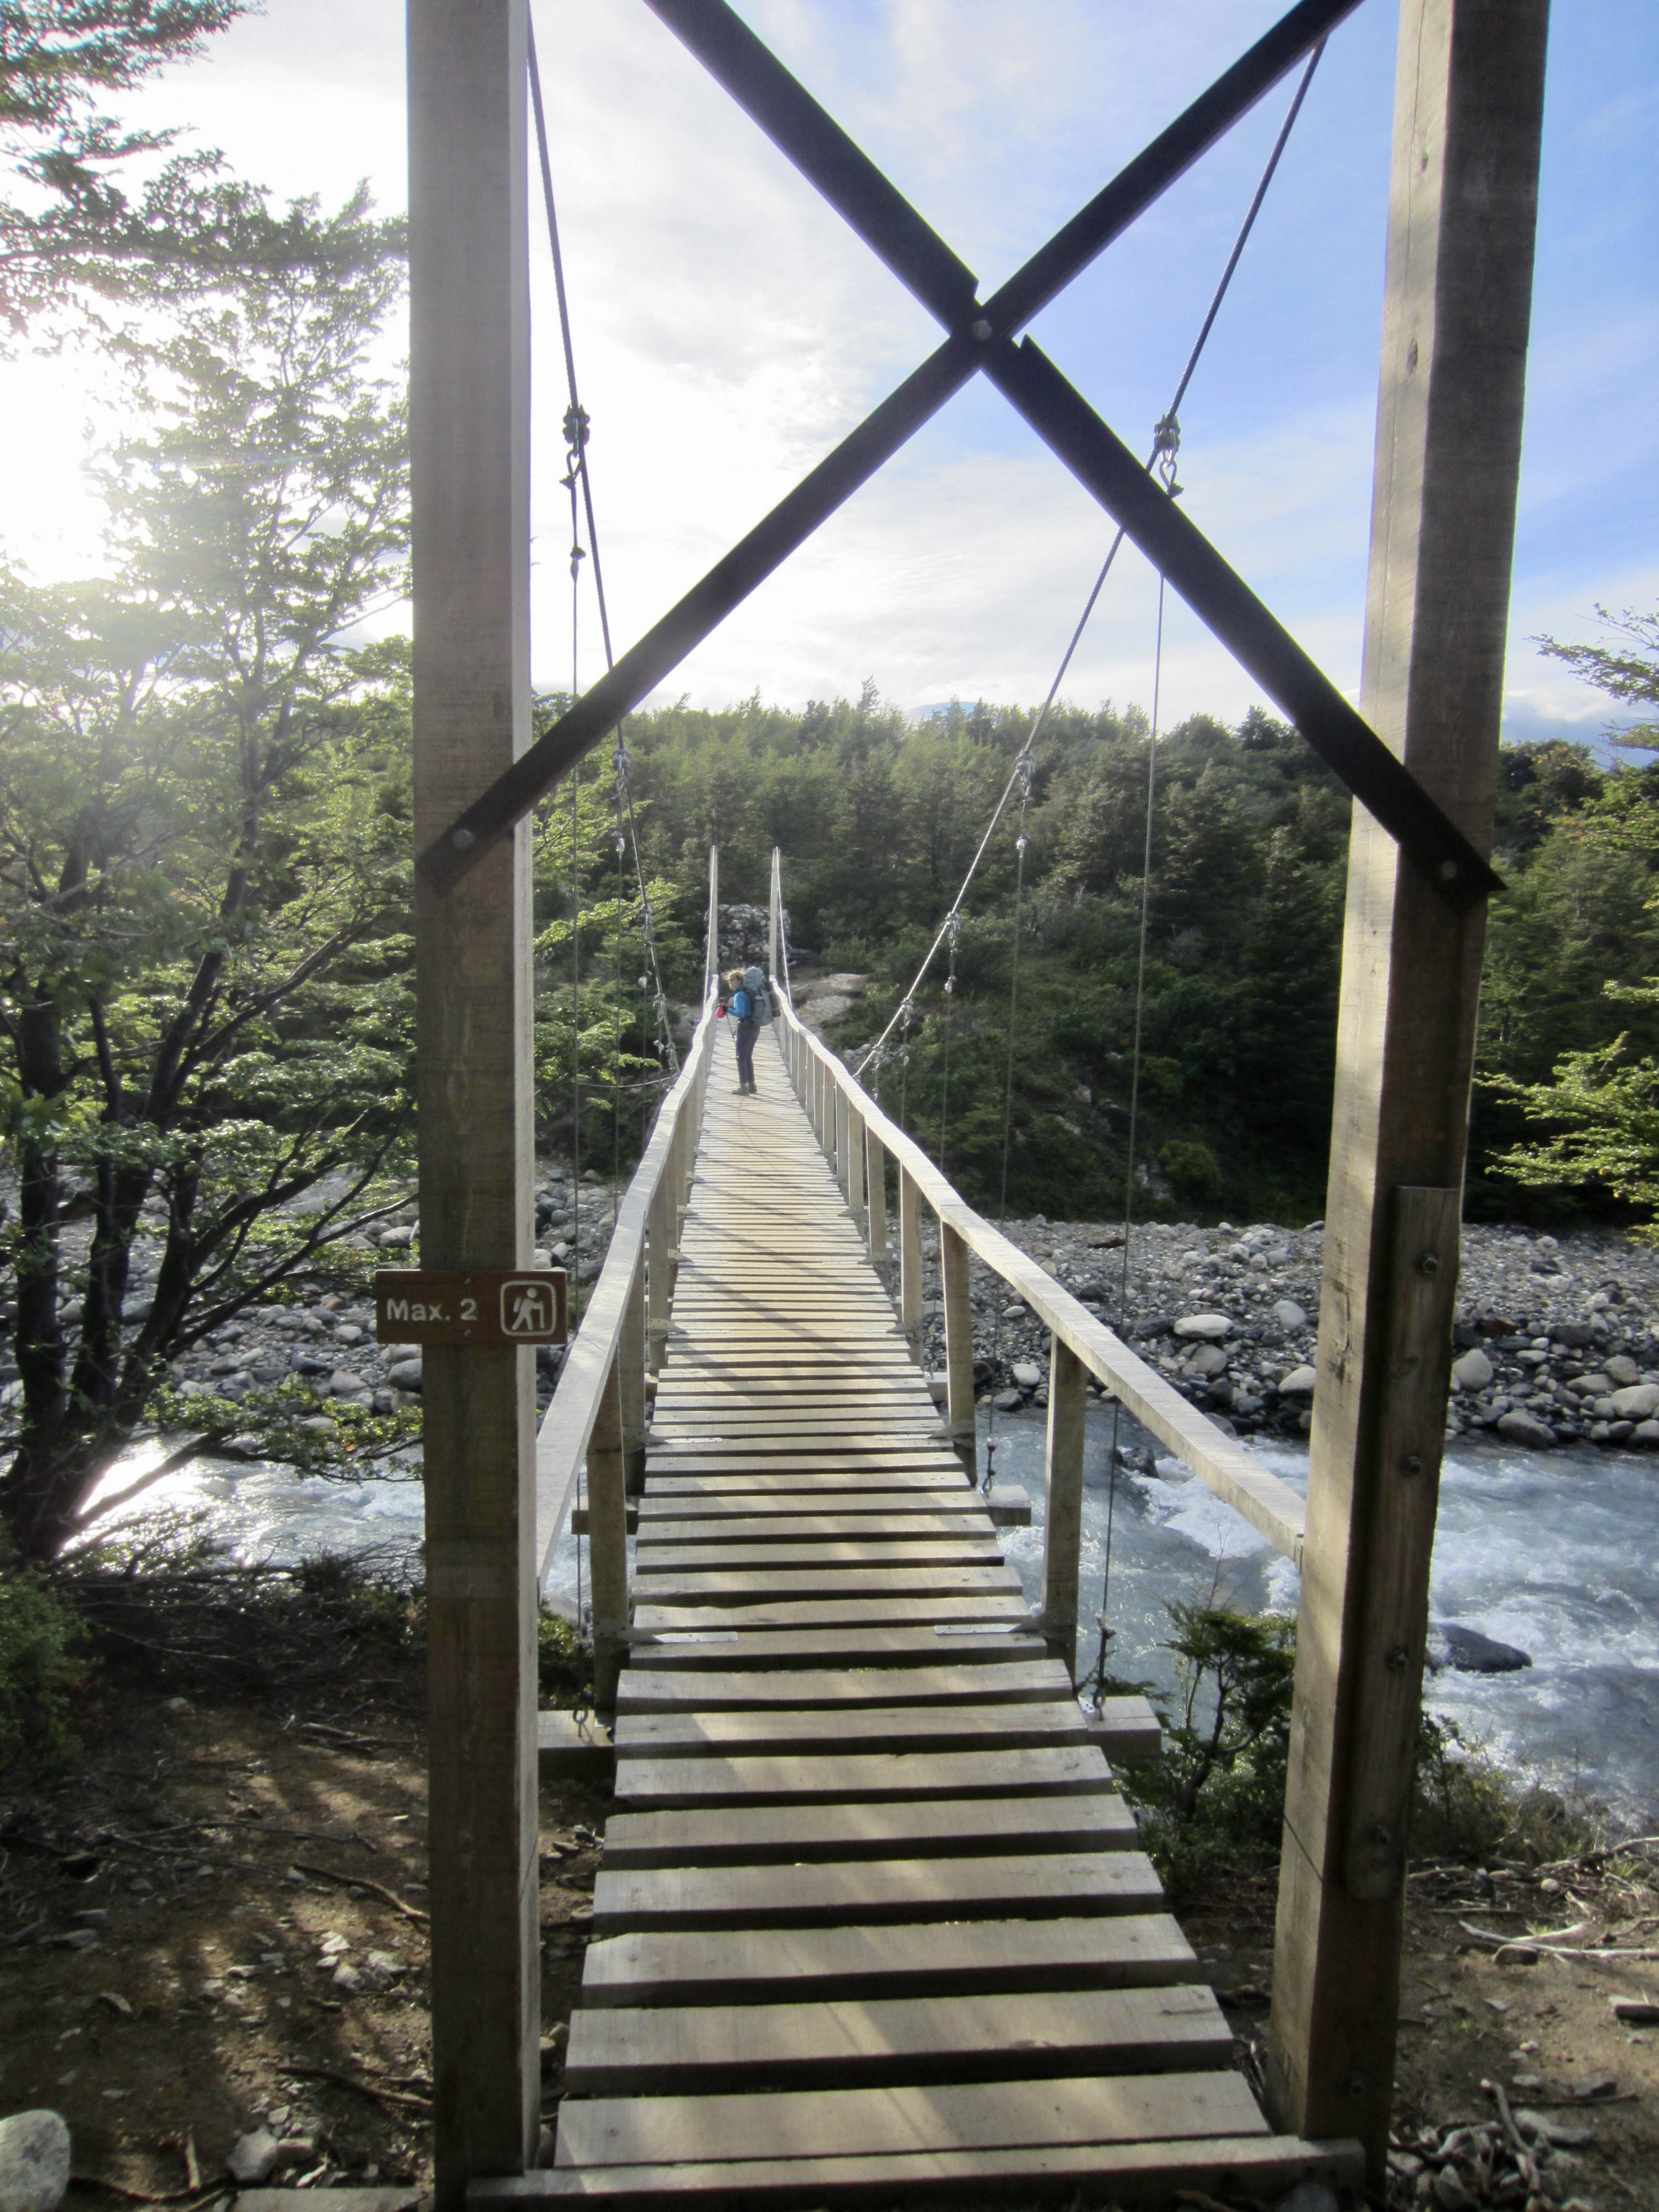
Although most bridges along the circuit are fairly short and simple, there are three notable suspension bridges in the western sector. These triplets have long spans across deep ravines, thereby providing trekkers with a thrilling experience and even serving as day-trip destinations in their own right. The only other memorable trail structures are, in my mind, a suspension bridge across the Frances River and a long, sinuous boardwalk that winds gracefully through a wide marsh in the Paine River Valley.
Campsites & Accommodations
The “O-W” Circuit has eight established campsites along the route: Seron, Dickson, Los Perros, Grey, Paine Grande, Frances, Cuernos, and Chileno. About half of the campsites are co-located with official ranger stations (called guarderias), but there are also several other stand-alone ranger stations along the circuit. When checking into any camp or passing any ranger station, you will likely be asked for your passport and the PDI ticket that was issued to you upon entering Chile.
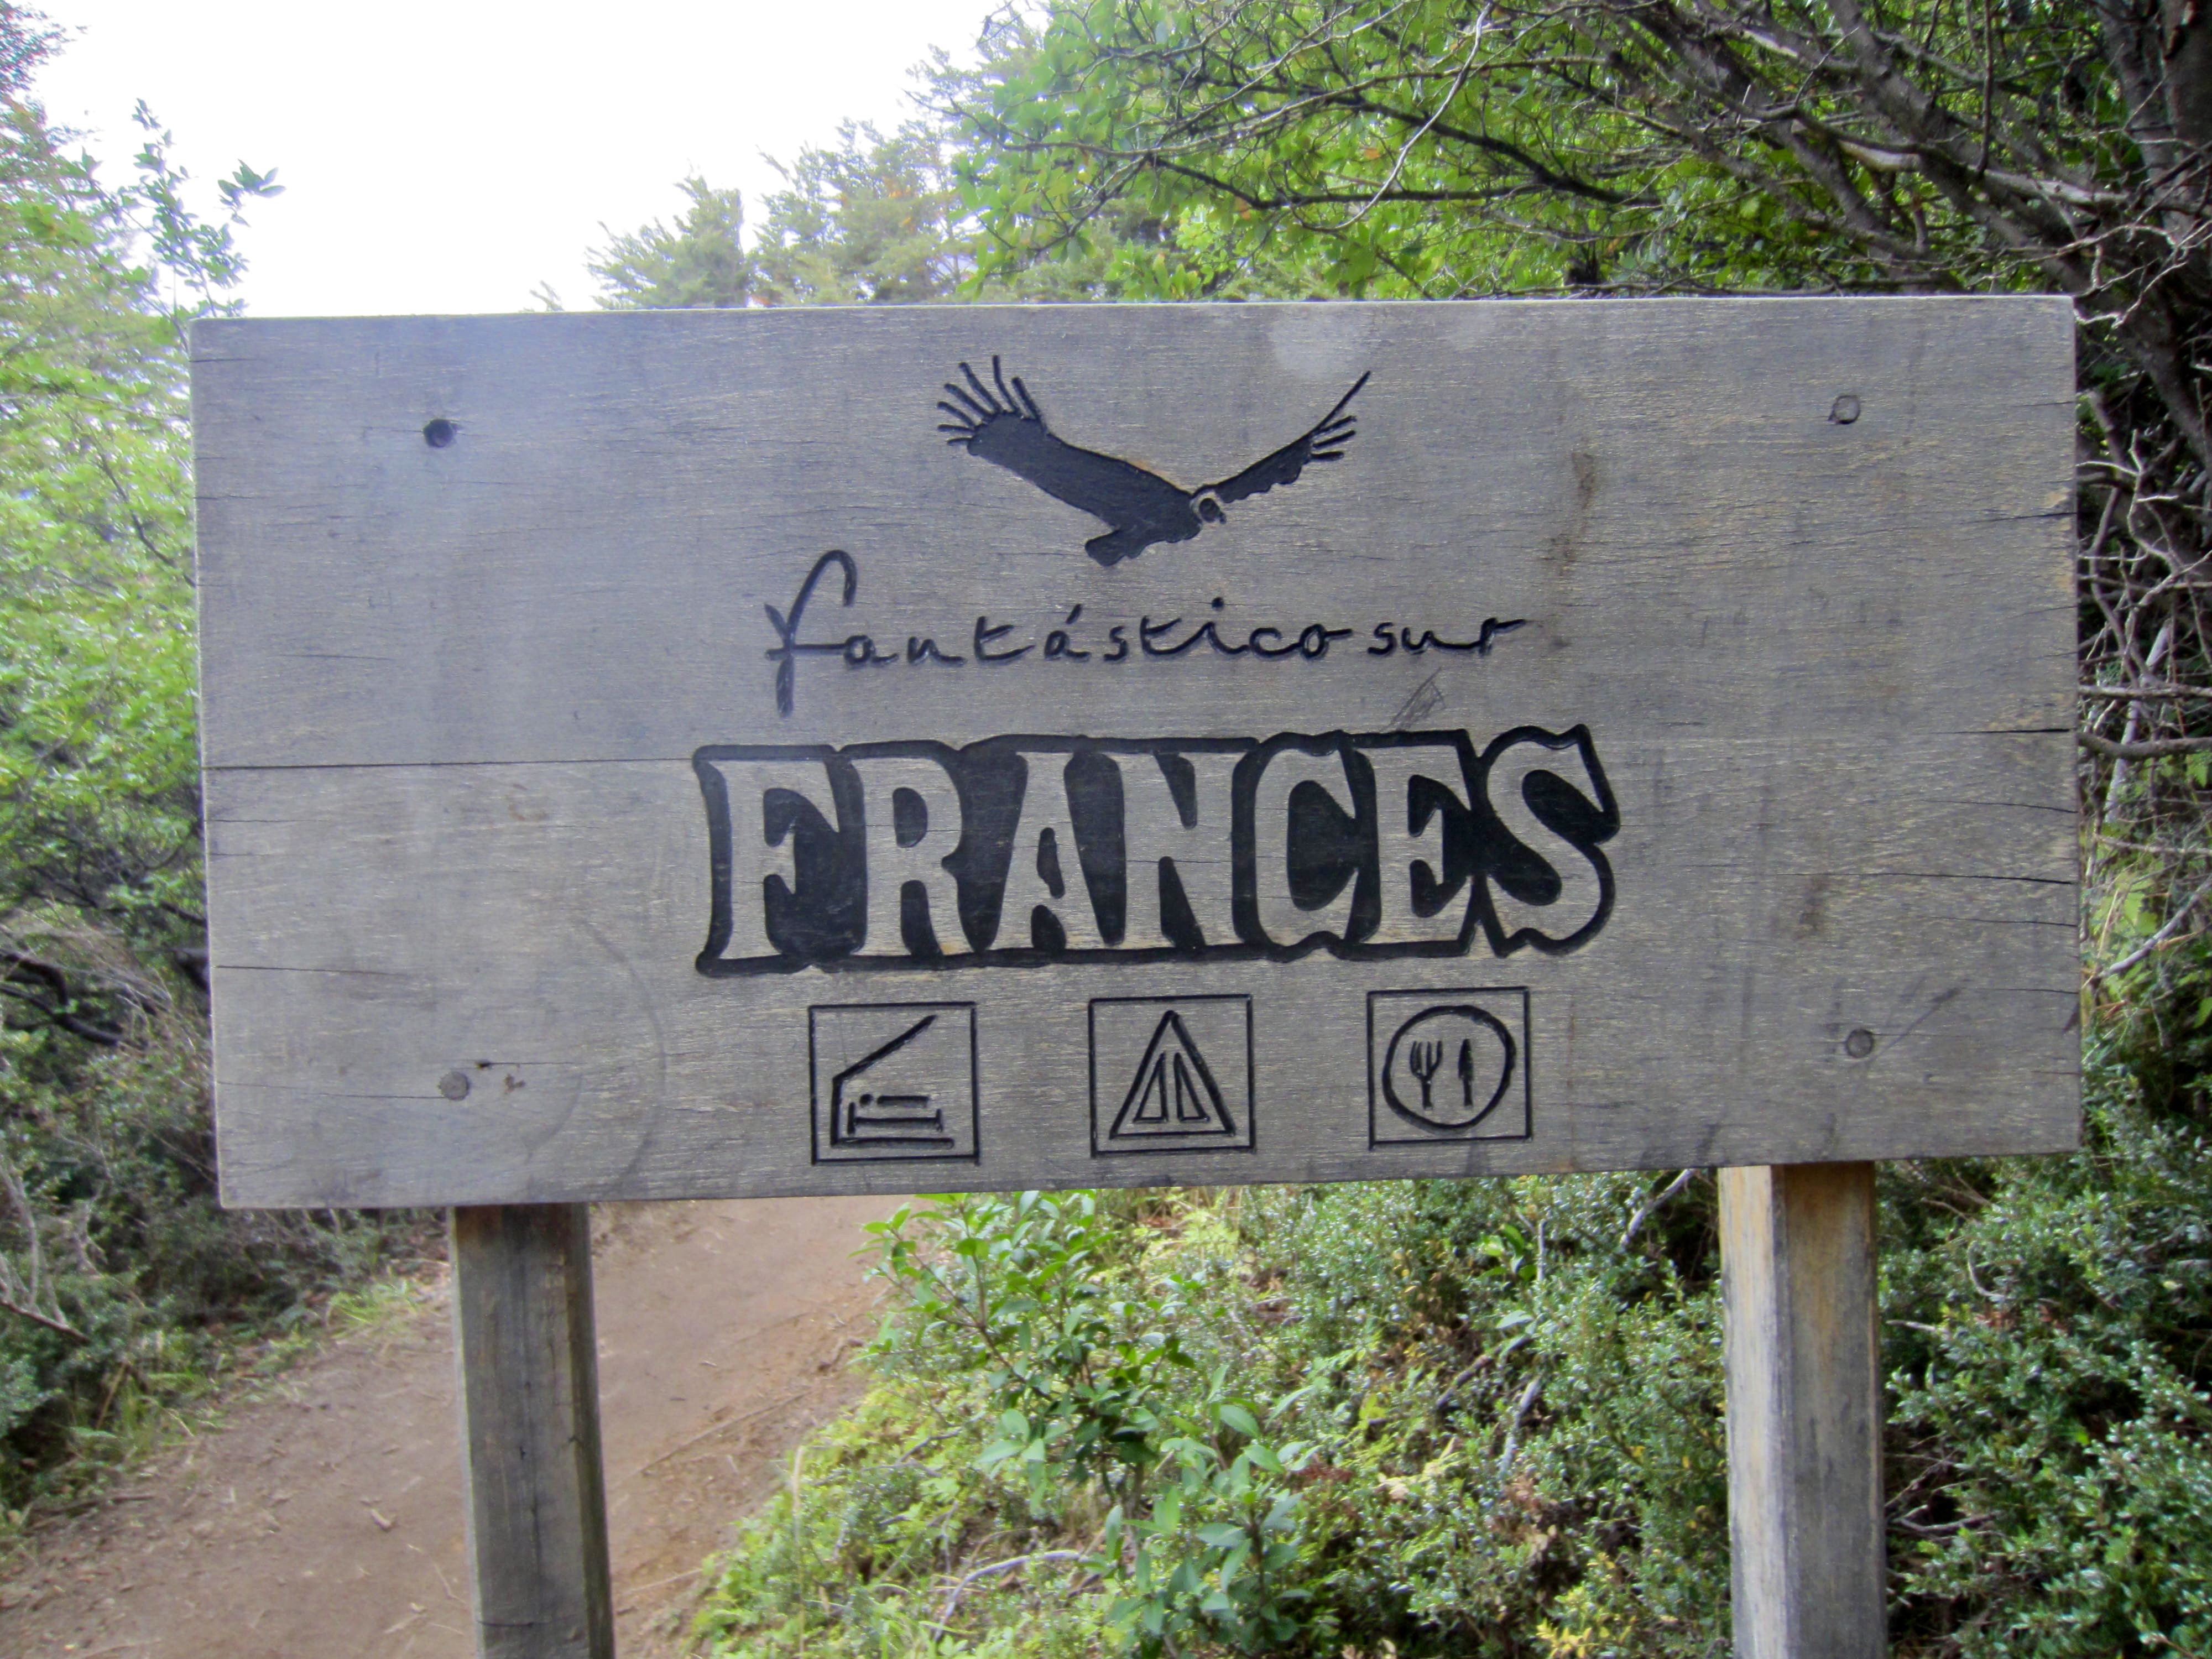
All existing campsites along the circuit are operated by private companies—specifically, either Fantastico Sur or Vertice—acting as concessionaires to Torres del Paine National Park. There used to be several other campsites operated by the national park service (CONAF), but those have now been closed down or maintained only as ranger stations.
Most campsites are conveniently spaced to be a day’s travel apart, although some along the “W” segment are closer together to accommodate the greater number of visitors and to better facilitate the key sidetrips. Due to dramatically increasing demand in recent years, all campsites tend to be fully booked well in advance, so early reservations are strongly advised.
No two campsites are alike in terms of size, layout, and amenities, but they do share some basic features. These include an area for personal tents; numerous pre-pitched private tents available to rent; one or more public shelters designed for personal cooking and dining; public bathroom and shower facilities (all of which are free); a mini market with a variety of snack foods, fuel canisters, and personal-care products; and a community building where catered meals are served. Most campsites also have bunkbeds (in lodges or domes) available for a nightly fee.

The campsites are equipped to provide a wide range of room-and-board options. At the “economy” end of the spectrum, trekkers can go fully self-supported—carrying their own tents, sleeping gear, cooking gear, and food. At the “luxury” end of the spectrum, trekkers can go fully supported—paying for a bunk bed and having all meals catered at every campsite. It is also possible to go with a hybrid plan that includes some purchased amenities but not others.
Eileen and I opted for just such a hybrid plan. We carried our own tent, sleeping gear, and cooking gear, but we purchased dinner and breakfast (called a “half-board” meal plan) for three of our seven nights. This allowed us to reduce our pack weights a bit and also to enjoy mealtime with some of the other fully supported trekkers in our peloton. All of the hut meals were tasty, satisfying, and reasonably priced. Throughout the trek, we carried our own trail snacks and lunch food, as this seemed more appealing than the catered sack lunches.
Weather & Season
Because Patagonia is located at the southern tip of South America, relatively close to Antarctica, one may naturally get the impression that it lies at a very high southern latitude. Most people would be surprised to learn, though, that the mountainous heart of Patagonia has a latitude of only 50 degrees south—roughly equivalent to Vancouver, Canada, and London, England, in the northern hemisphere. Clearly, Patagonia is not a region that goes for months each winter without seeing the sun, nor is it the summertime land of the proverbial midnight sun. During our March trip to Patagonia, Eileen and I experienced autumnal weather very similar to what we would expect during a September trip in the mountains near Seattle.
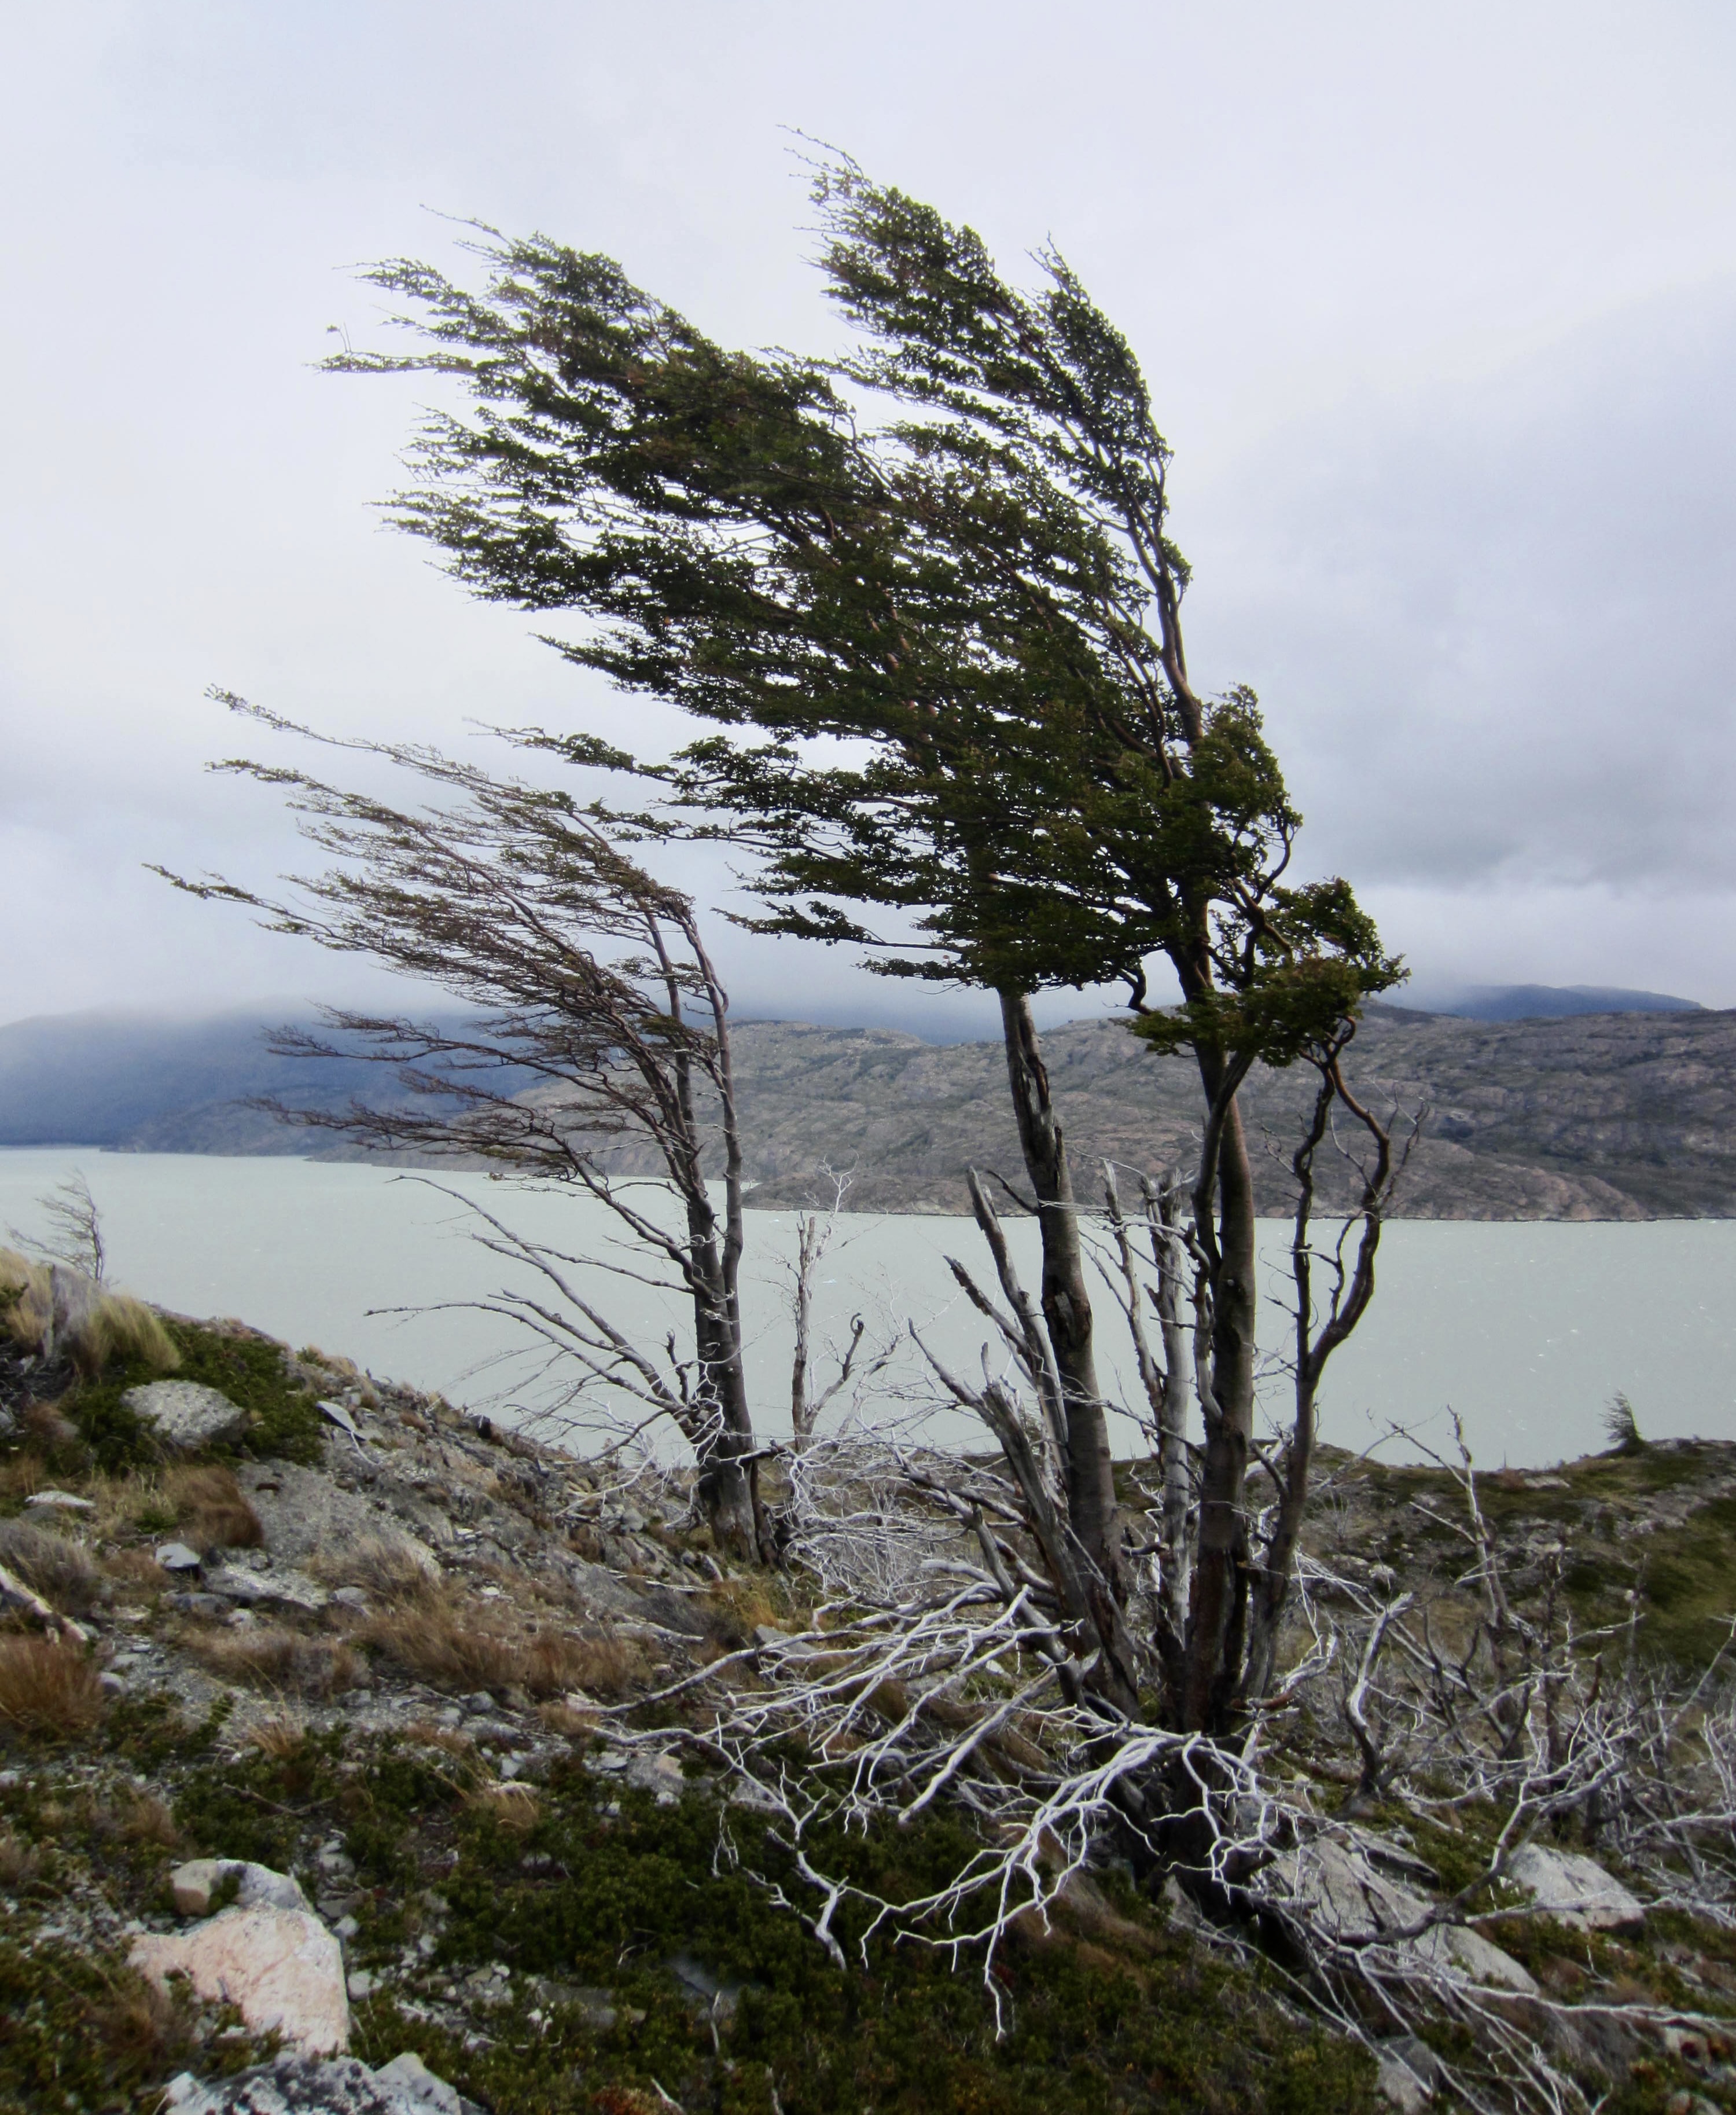
Moderate latitude notwithstanding, Patagonia does have a fully deserved reputation for inclement weather—in particular, its powerful and incessant winds. As one local resident put it, “Wind is your constant companion here.” We certainly experienced a healthy dose of these infamous winds, which hit speeds as high as 60 miles per hour / 100 kilometers per hour on several occasions. Yet, there were just as many time periods with little or no wind at all. Perhaps that is the true challenge here: you get lulled into complacency by calm weather and then get hammered by a sudden gale!
Aside from the prevalent winds, the maritime mountains of Patagonia are also subjected to harsh rainstorms and snowstorms, especially during the winter and spring months. However, precipitation is not uncommon even during the summer and fall. Over the course of two autumn weeks in the mountains, we encountered about six days of rain and narrowly missed a day of serious snow. Most of our rainy days involved only sprinkles or drizzle with little accumulation, but there were two days of steady rain accompanied by strong winds. It was on those particular days that we got the total Patagonia experience!
Drinking Water
Patagonia is blessed with copious amounts of potable water. Every campsite on the “O-W” Circuit has drinking-water spigots available to trekkers, and nearly every river and stream along the trail provides a safe water source. Of course, this does not eliminate the need for a modicum of common sense. For example, you would certainly not want to drink from a stream that flows through a horse pasture, and you would probably not want to drink from a river that is visibly laden with glacial silt. Patagonia’s generally favorable water situation contrasts greatly with the mountains of Peru, where all water is regarded as contaminated.

Full Trip Report
The following is a day-by-day description of our eight days on the “O-W” Circuit. As previously mentioned, we took a self-supported approach to the trek but availed ourselves of certain room-and-board amenities.
Day 1: Torres Welcome Center to Seron Camp
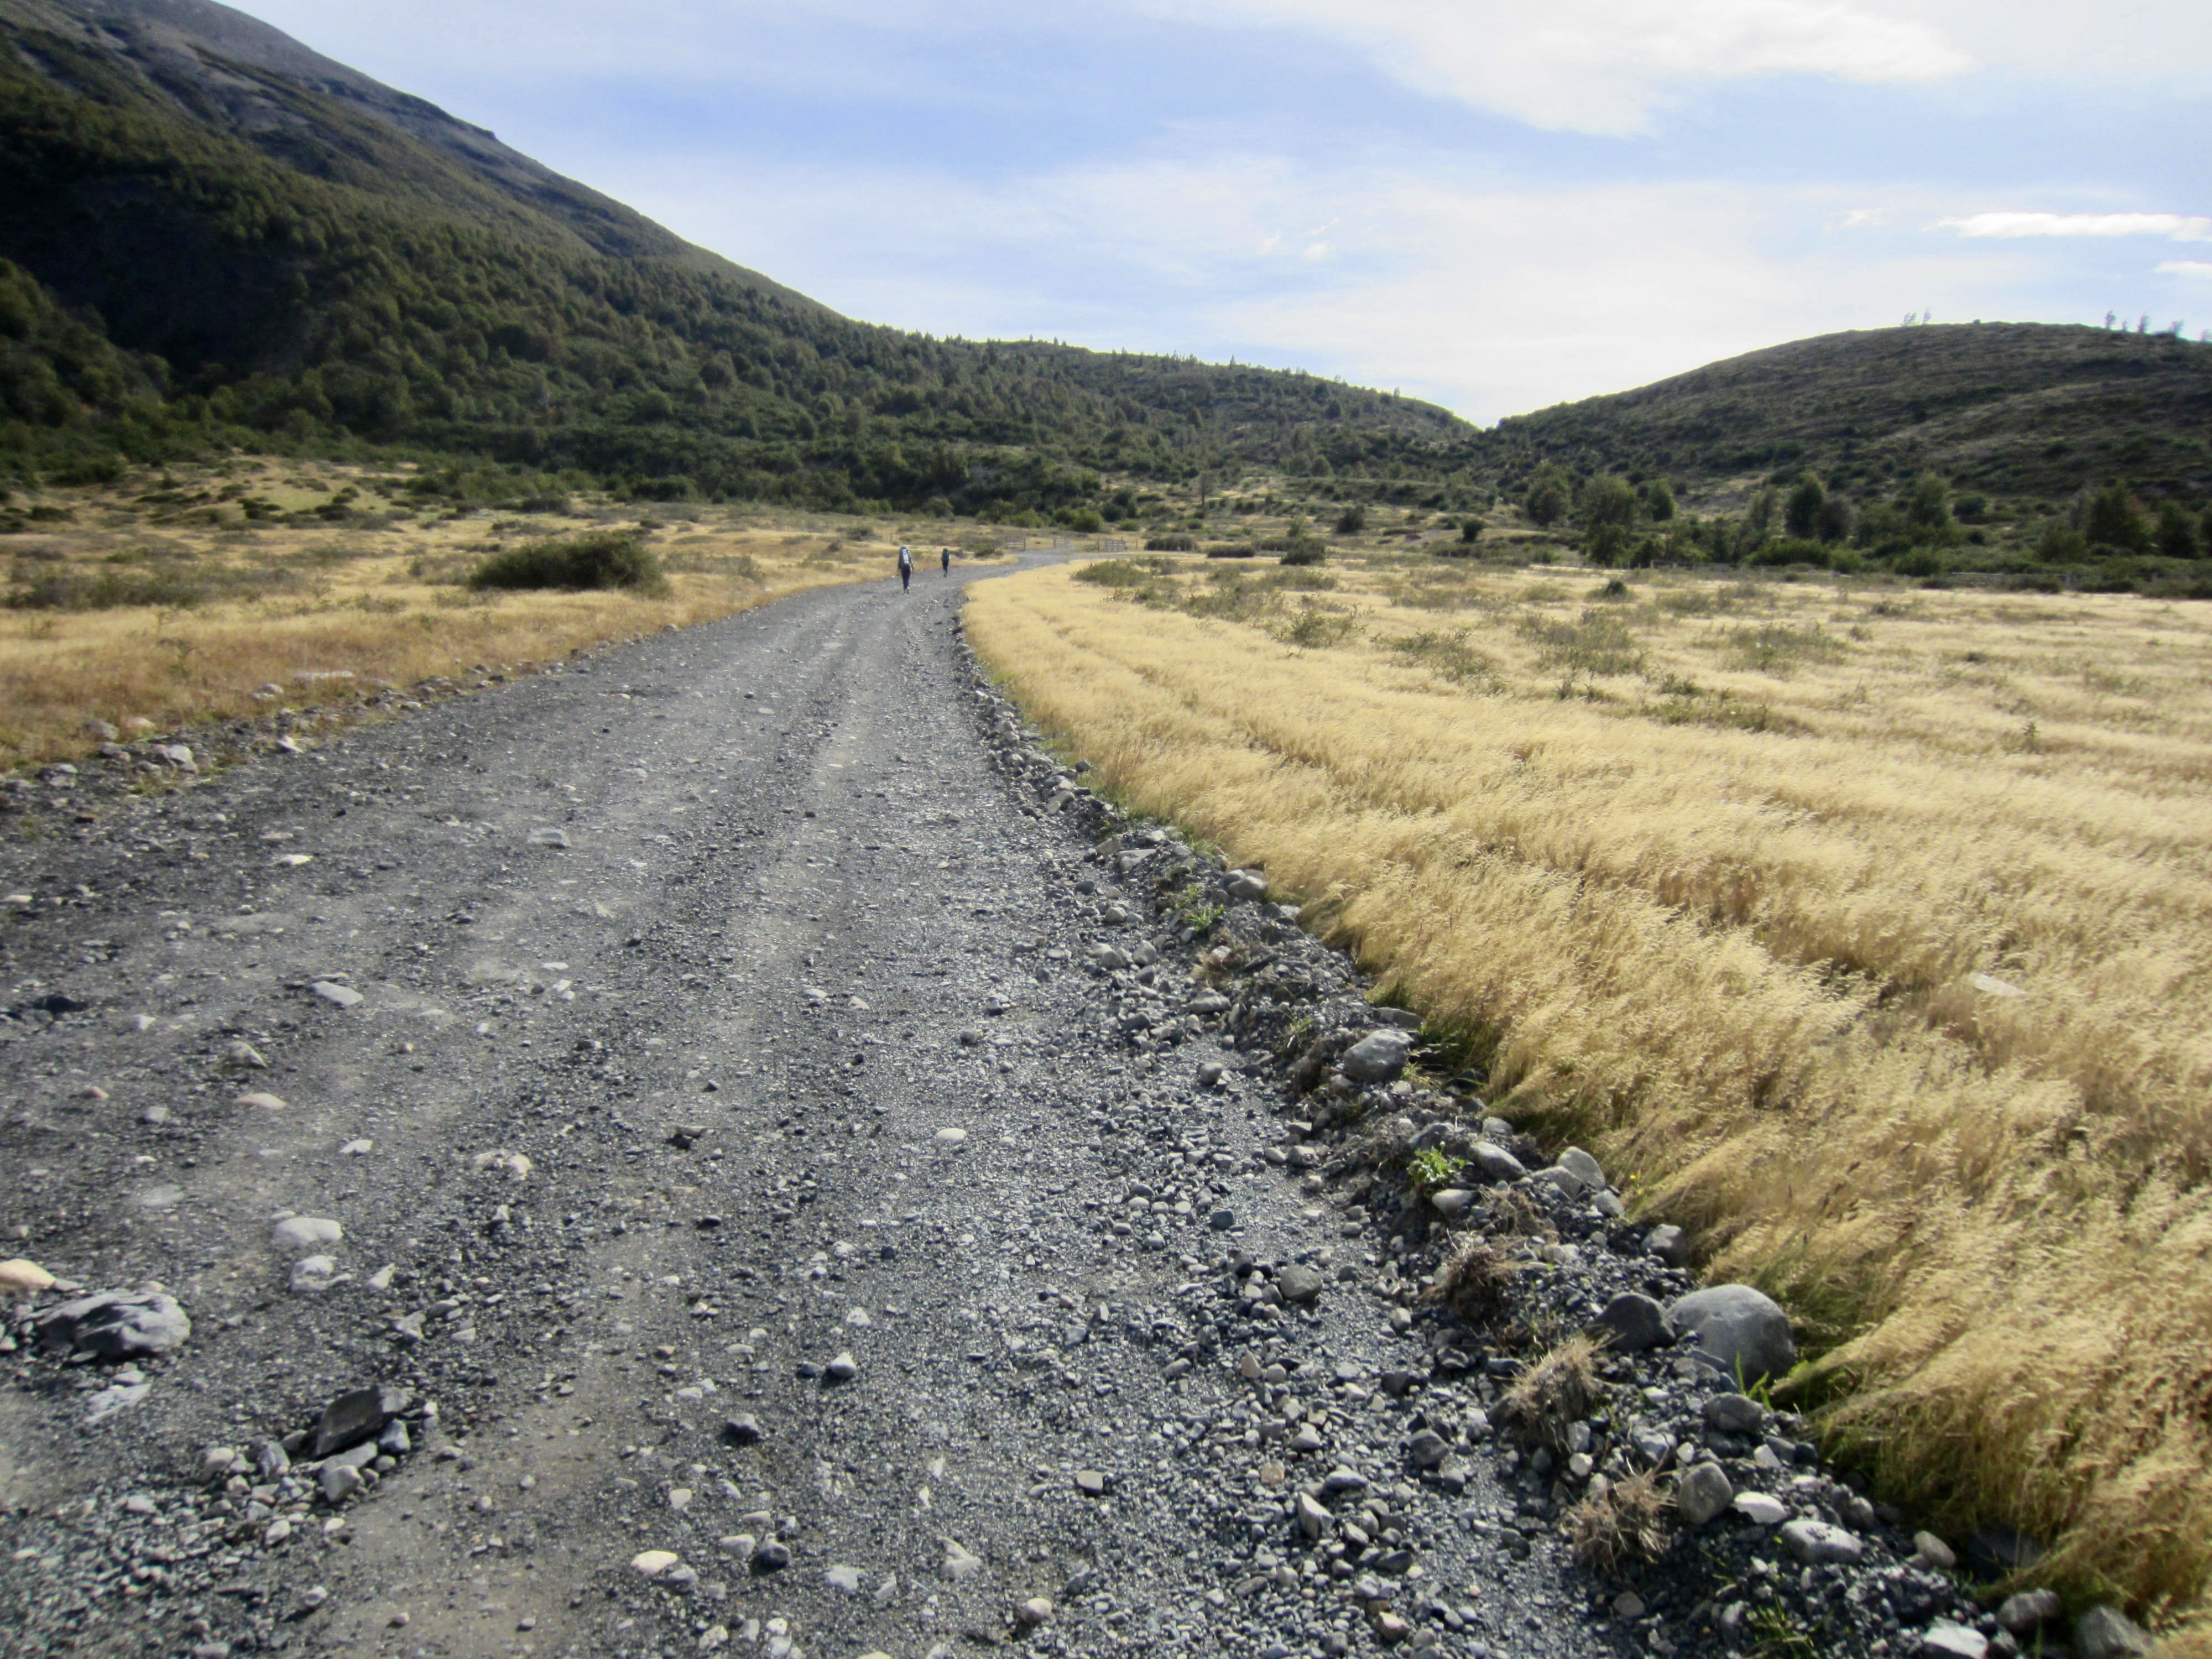
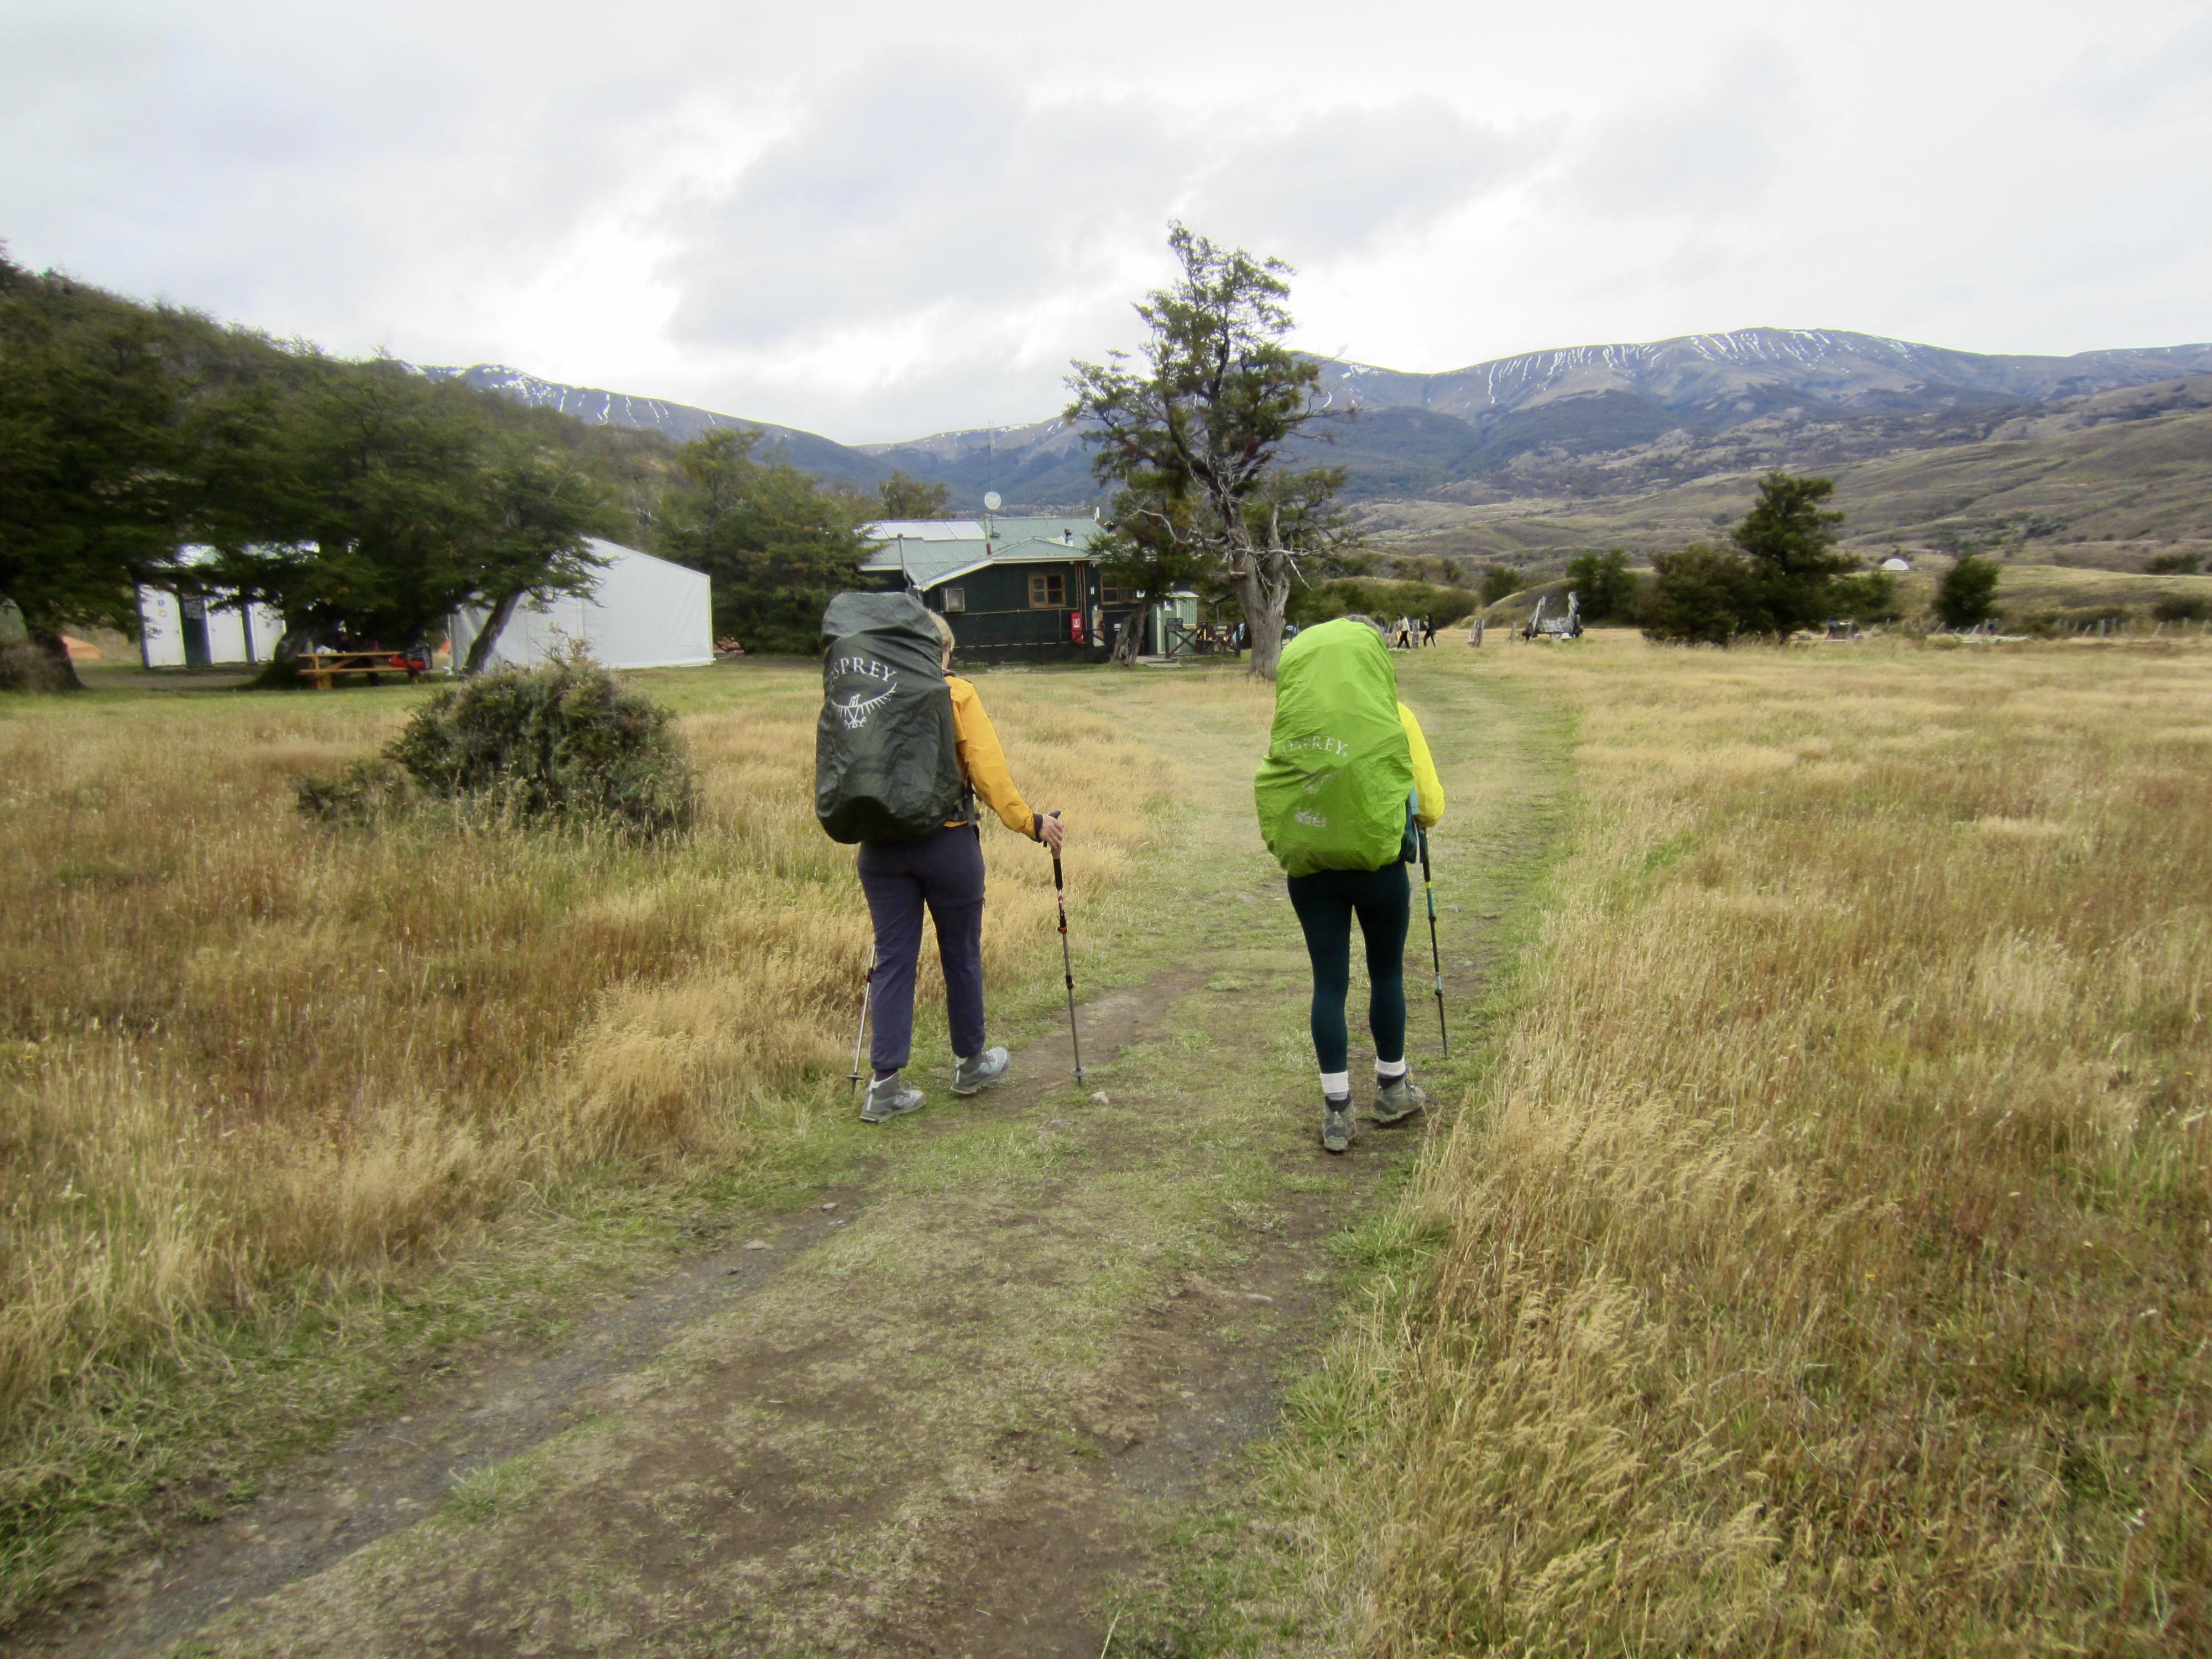
After taking a shuttle bus from Lake Amarga Ranger Station to the Torres Welcome Center, Eileen and Brooke and I headed out at 10:45am. We immediately got caught up in the maze of trails within Central Campground and wasted a half-hour trying to locate the correct track. We eventually found a wide gravel road heading to Seron Camp, but this felt like a very inauspicious beginning to a long trek. In retrospect, though, I am glad to say that this first mile proved to be the most confusing part of the entire trail.

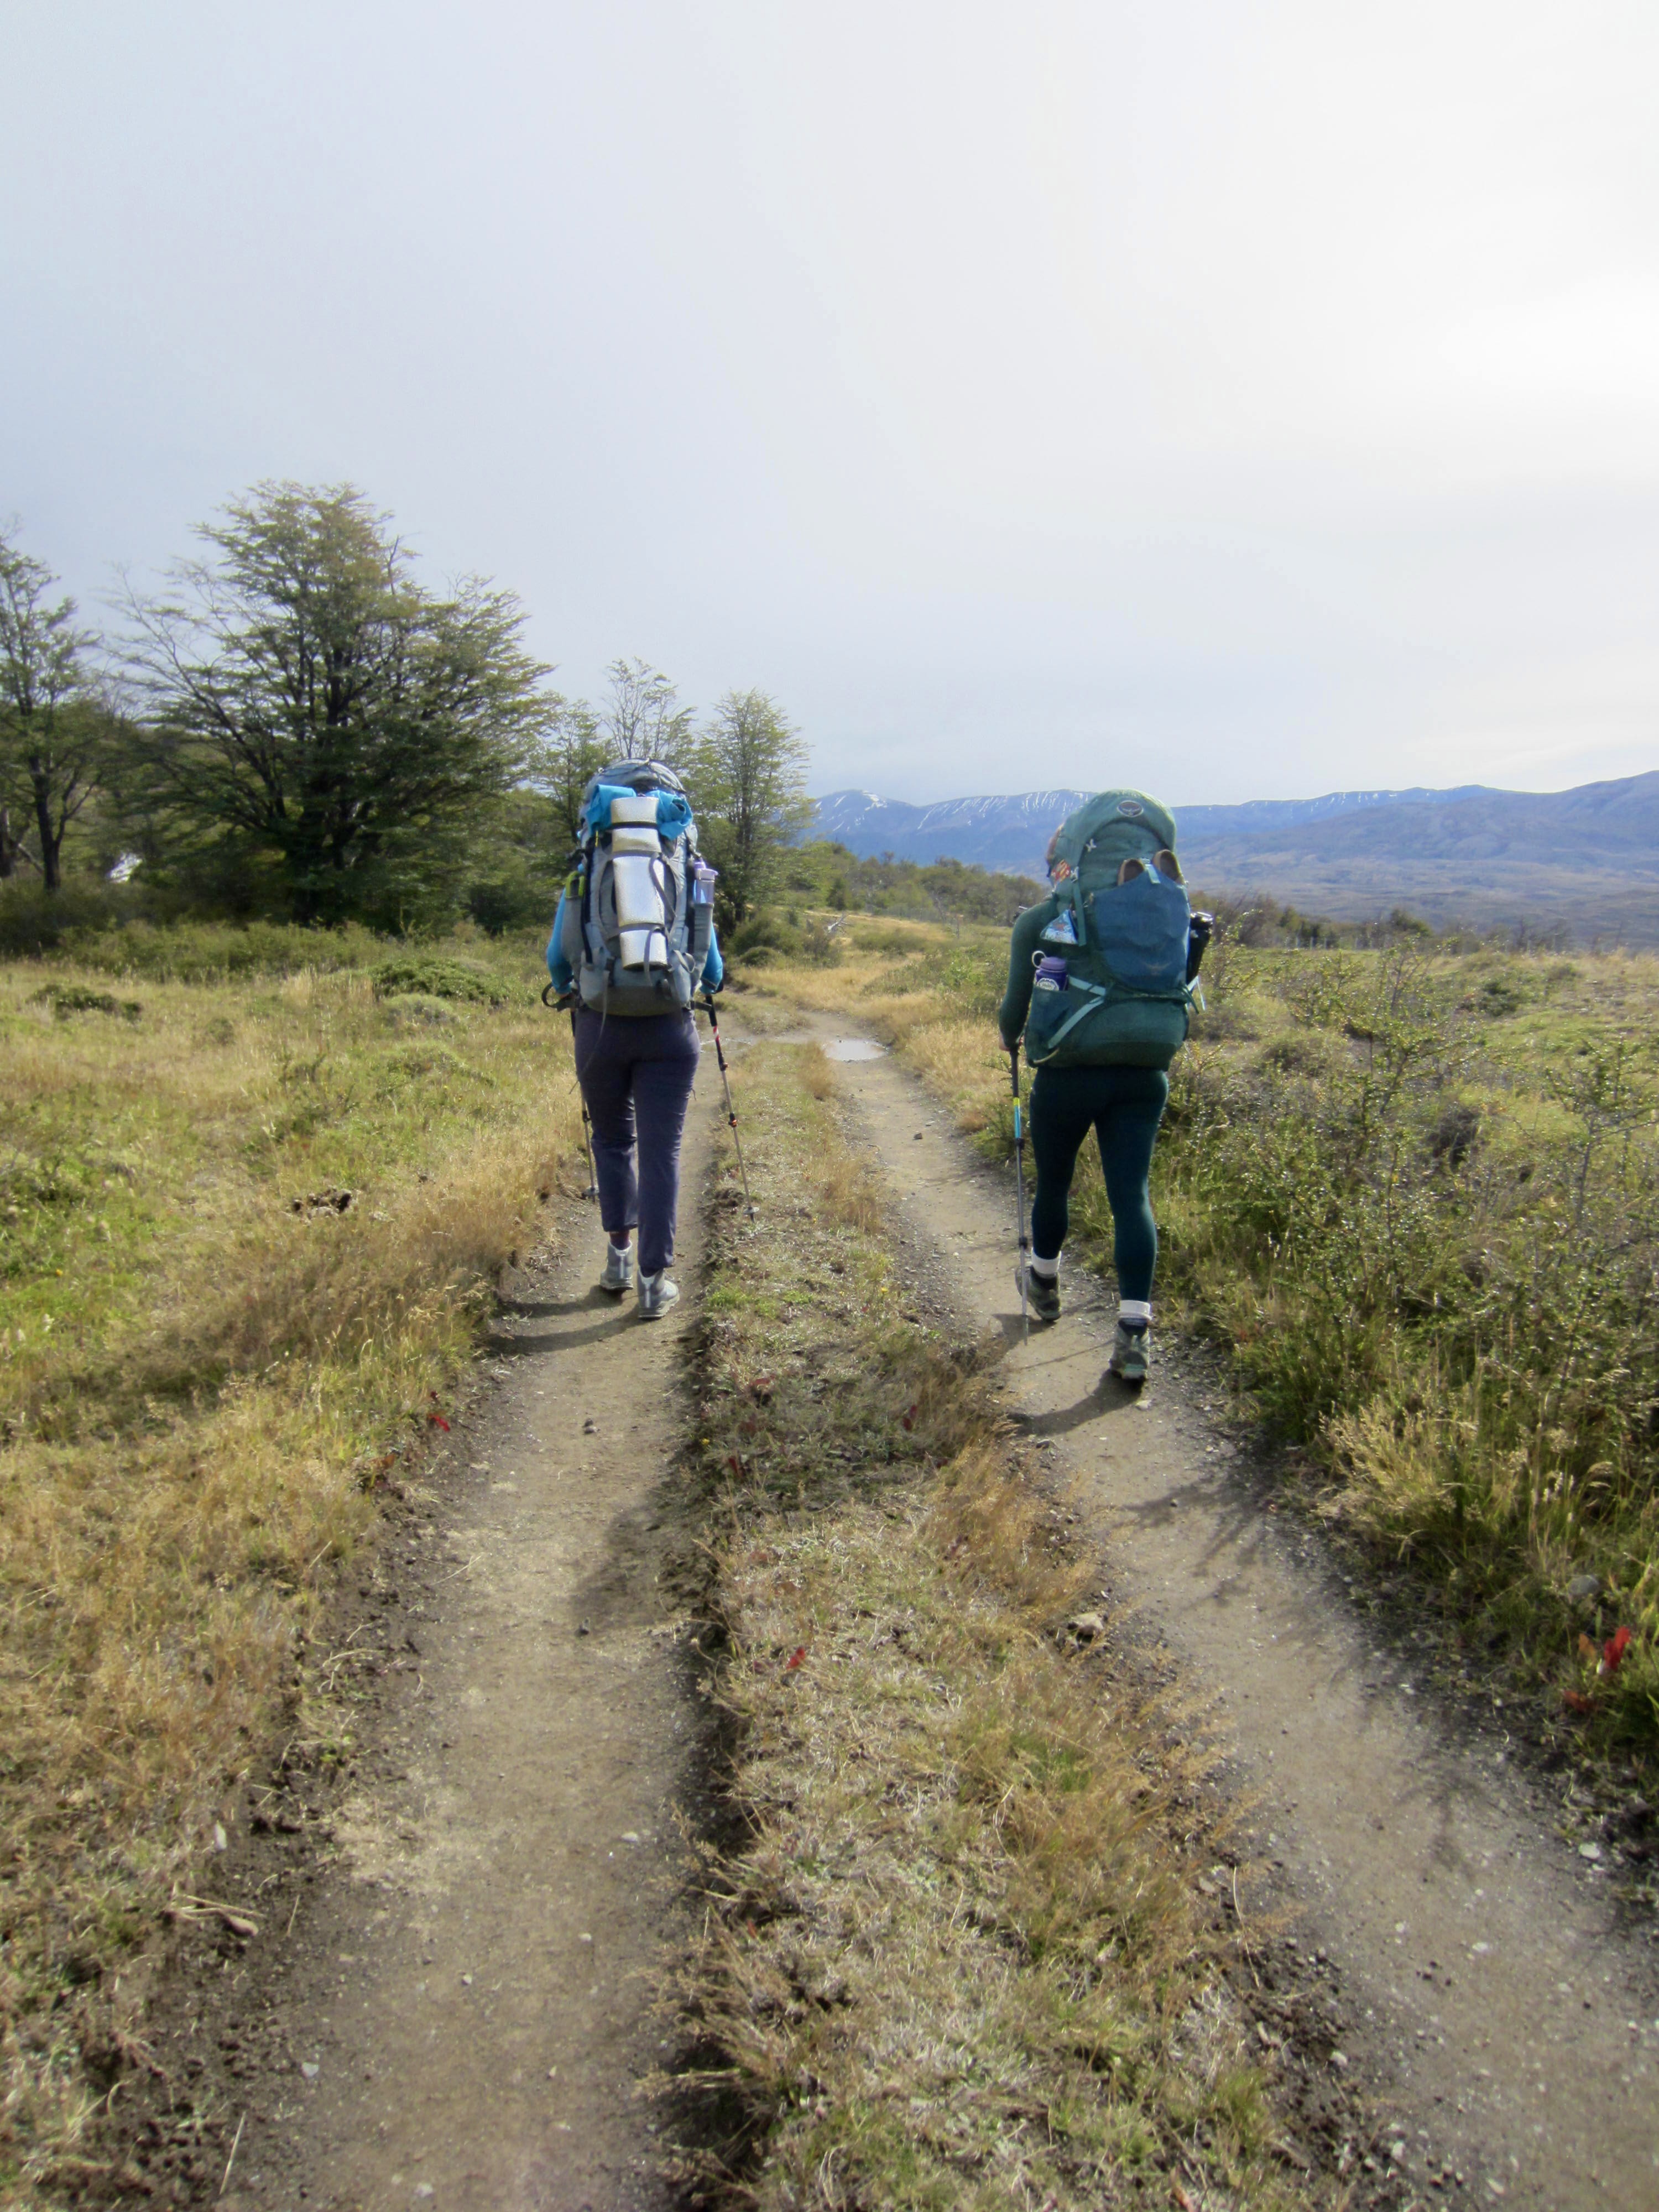
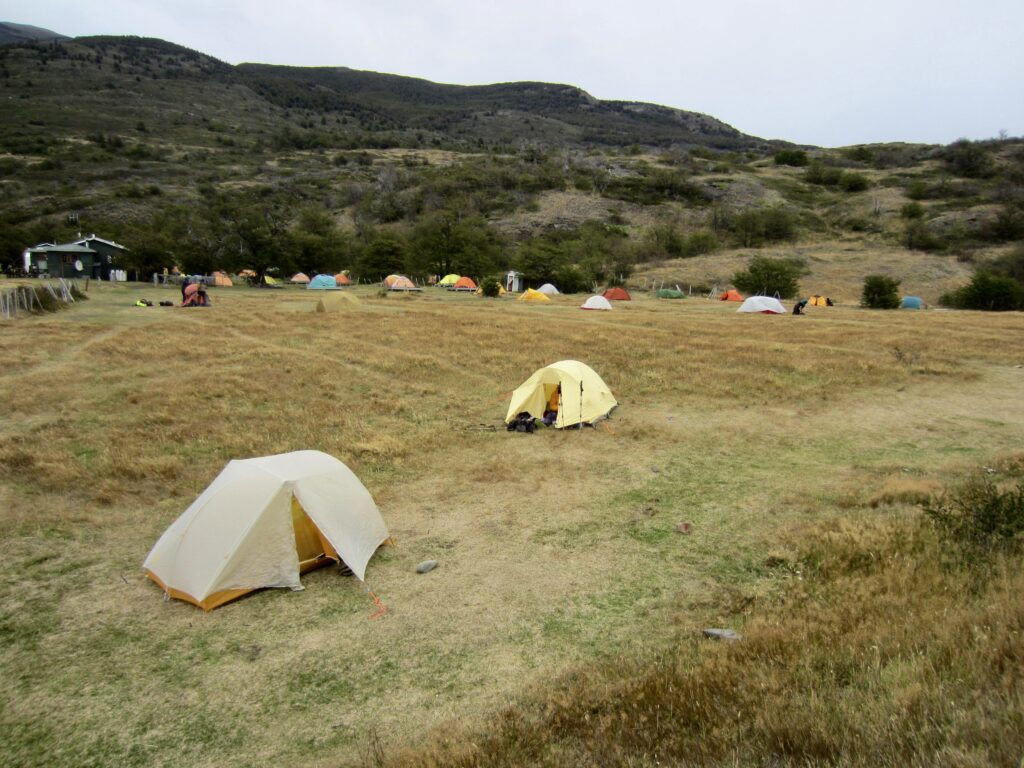
The gravel road transitioned to a double-track trail climbing 800 vertical feet / 240 vertical meters over a forested ridge and then descending to the grassy floor of the Paine River Valley. Single-track trail led us up the pastoral valley to Seron Camp in mid-afternoon (4.5 hours from Welcome Center). The morning had been mild and sunny, but the afternoon weather was cool and cloudy with some wind and intermittent rain.
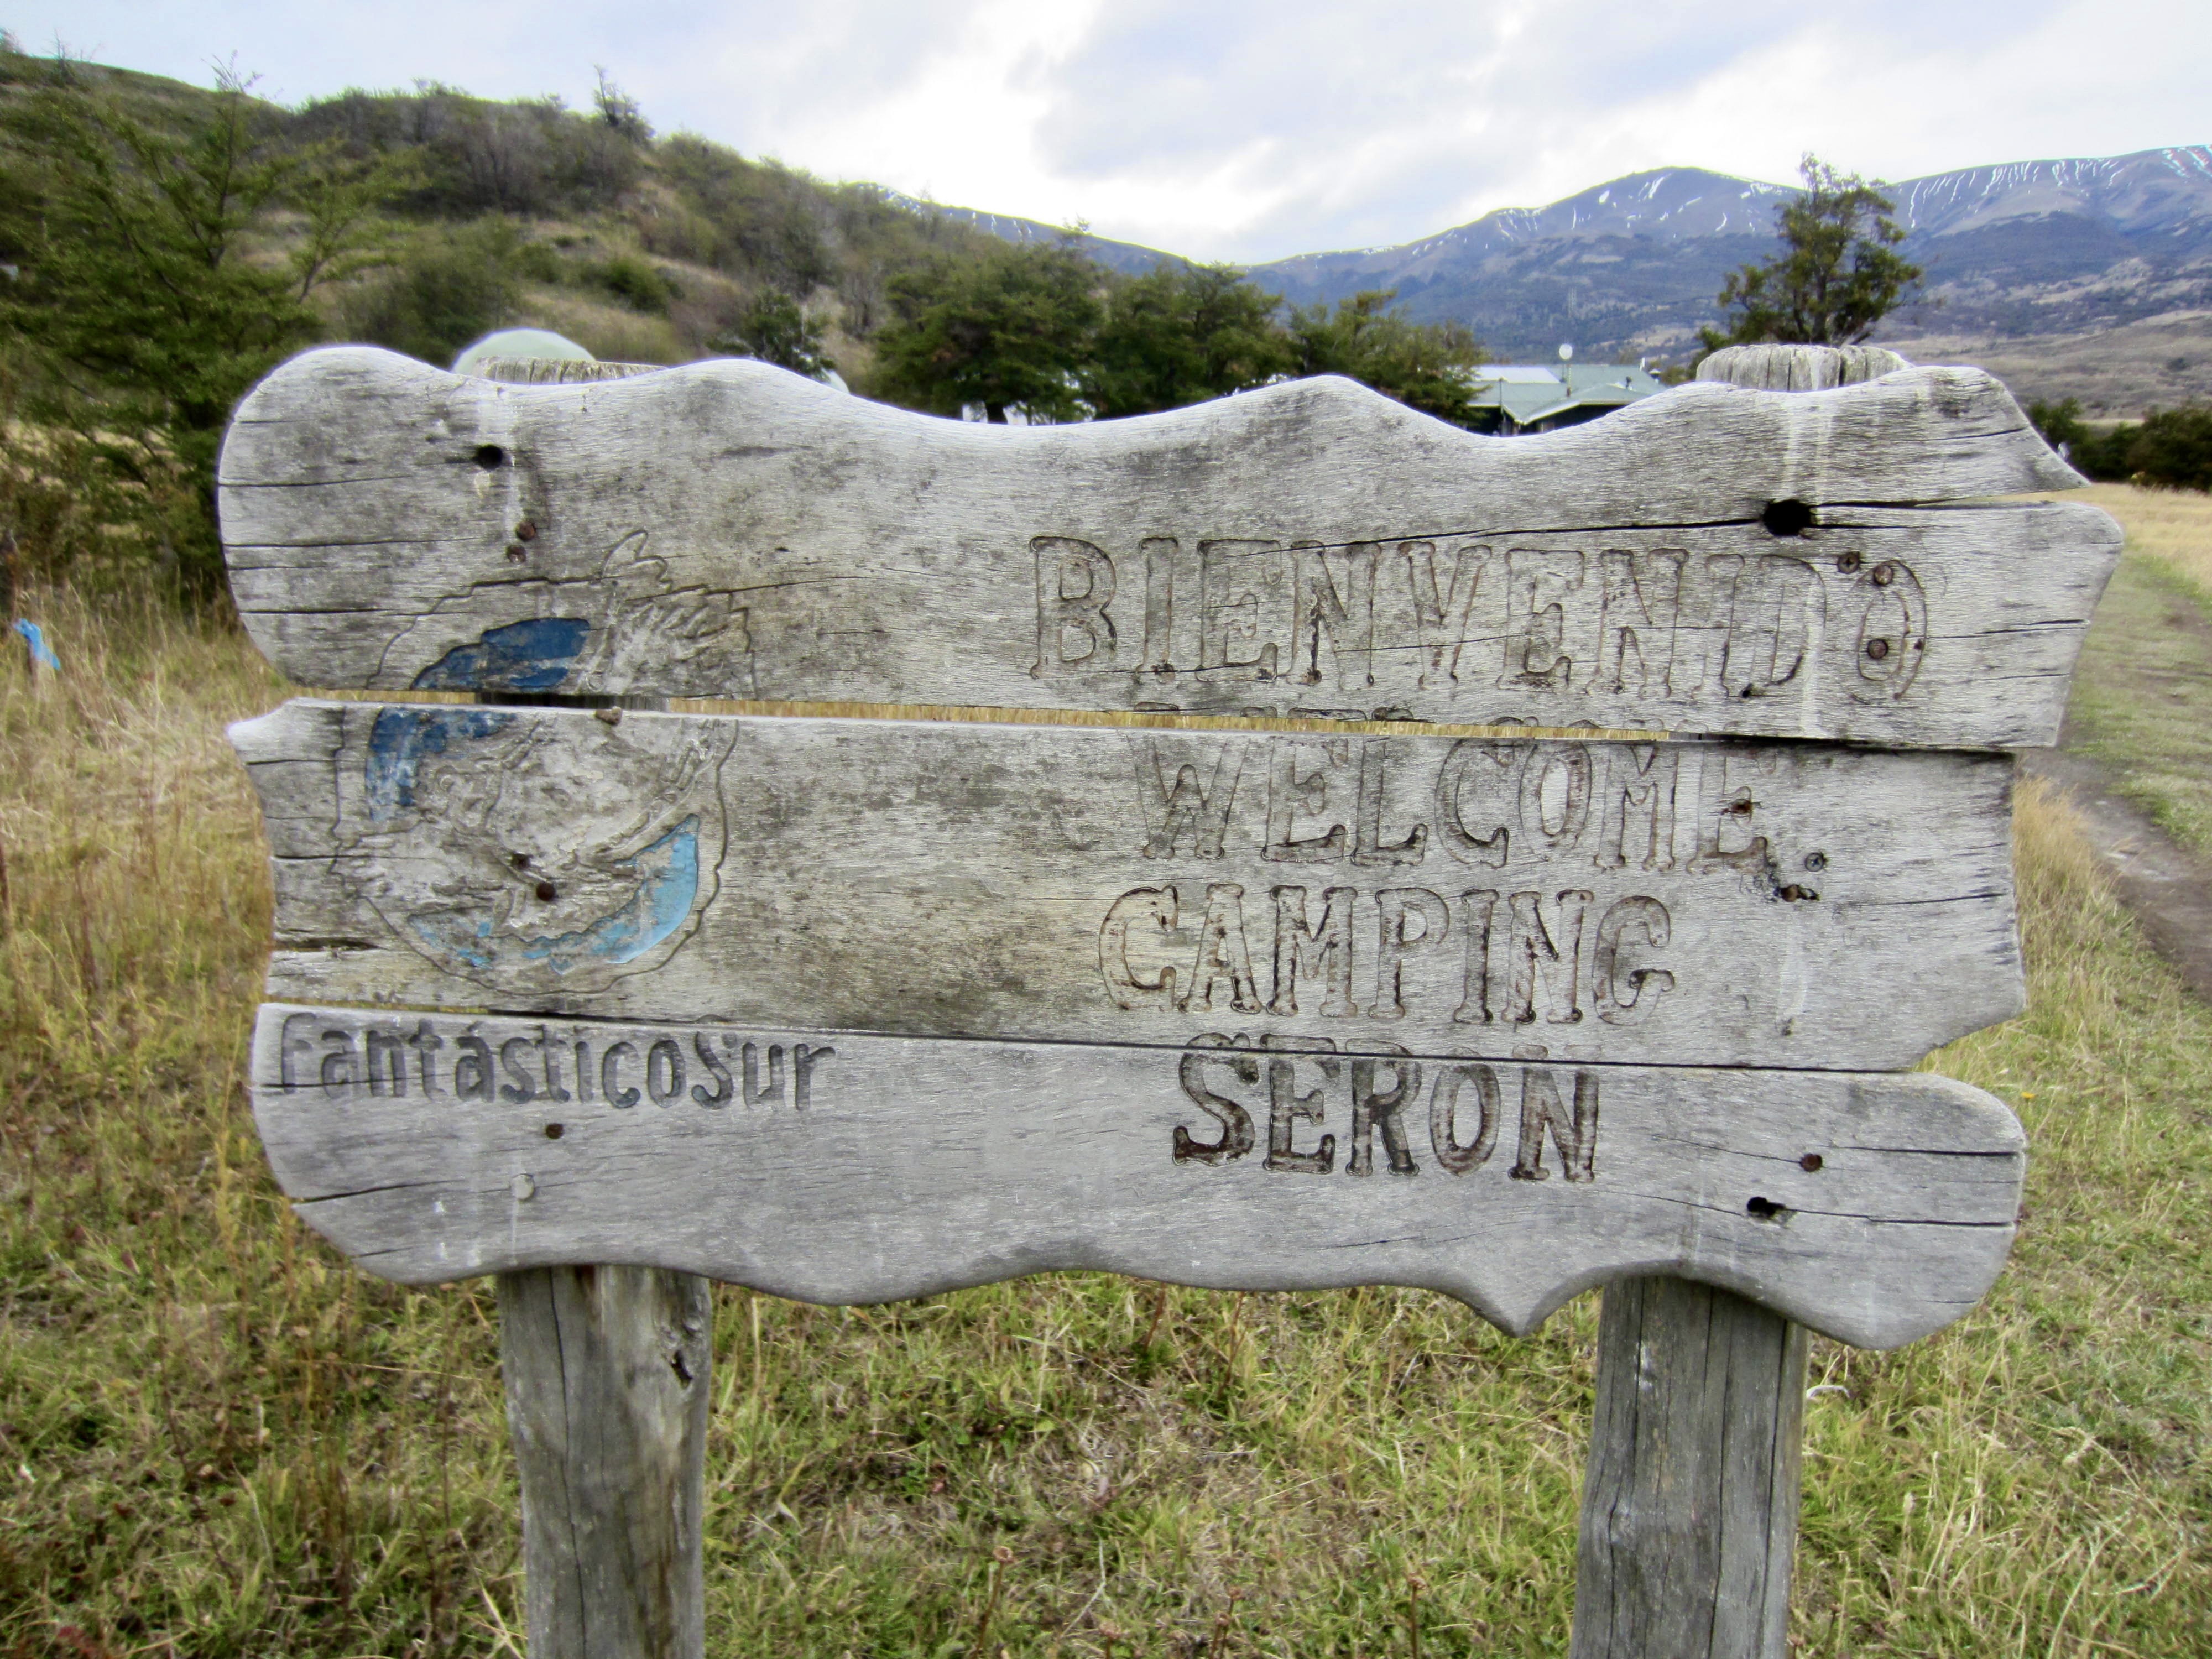

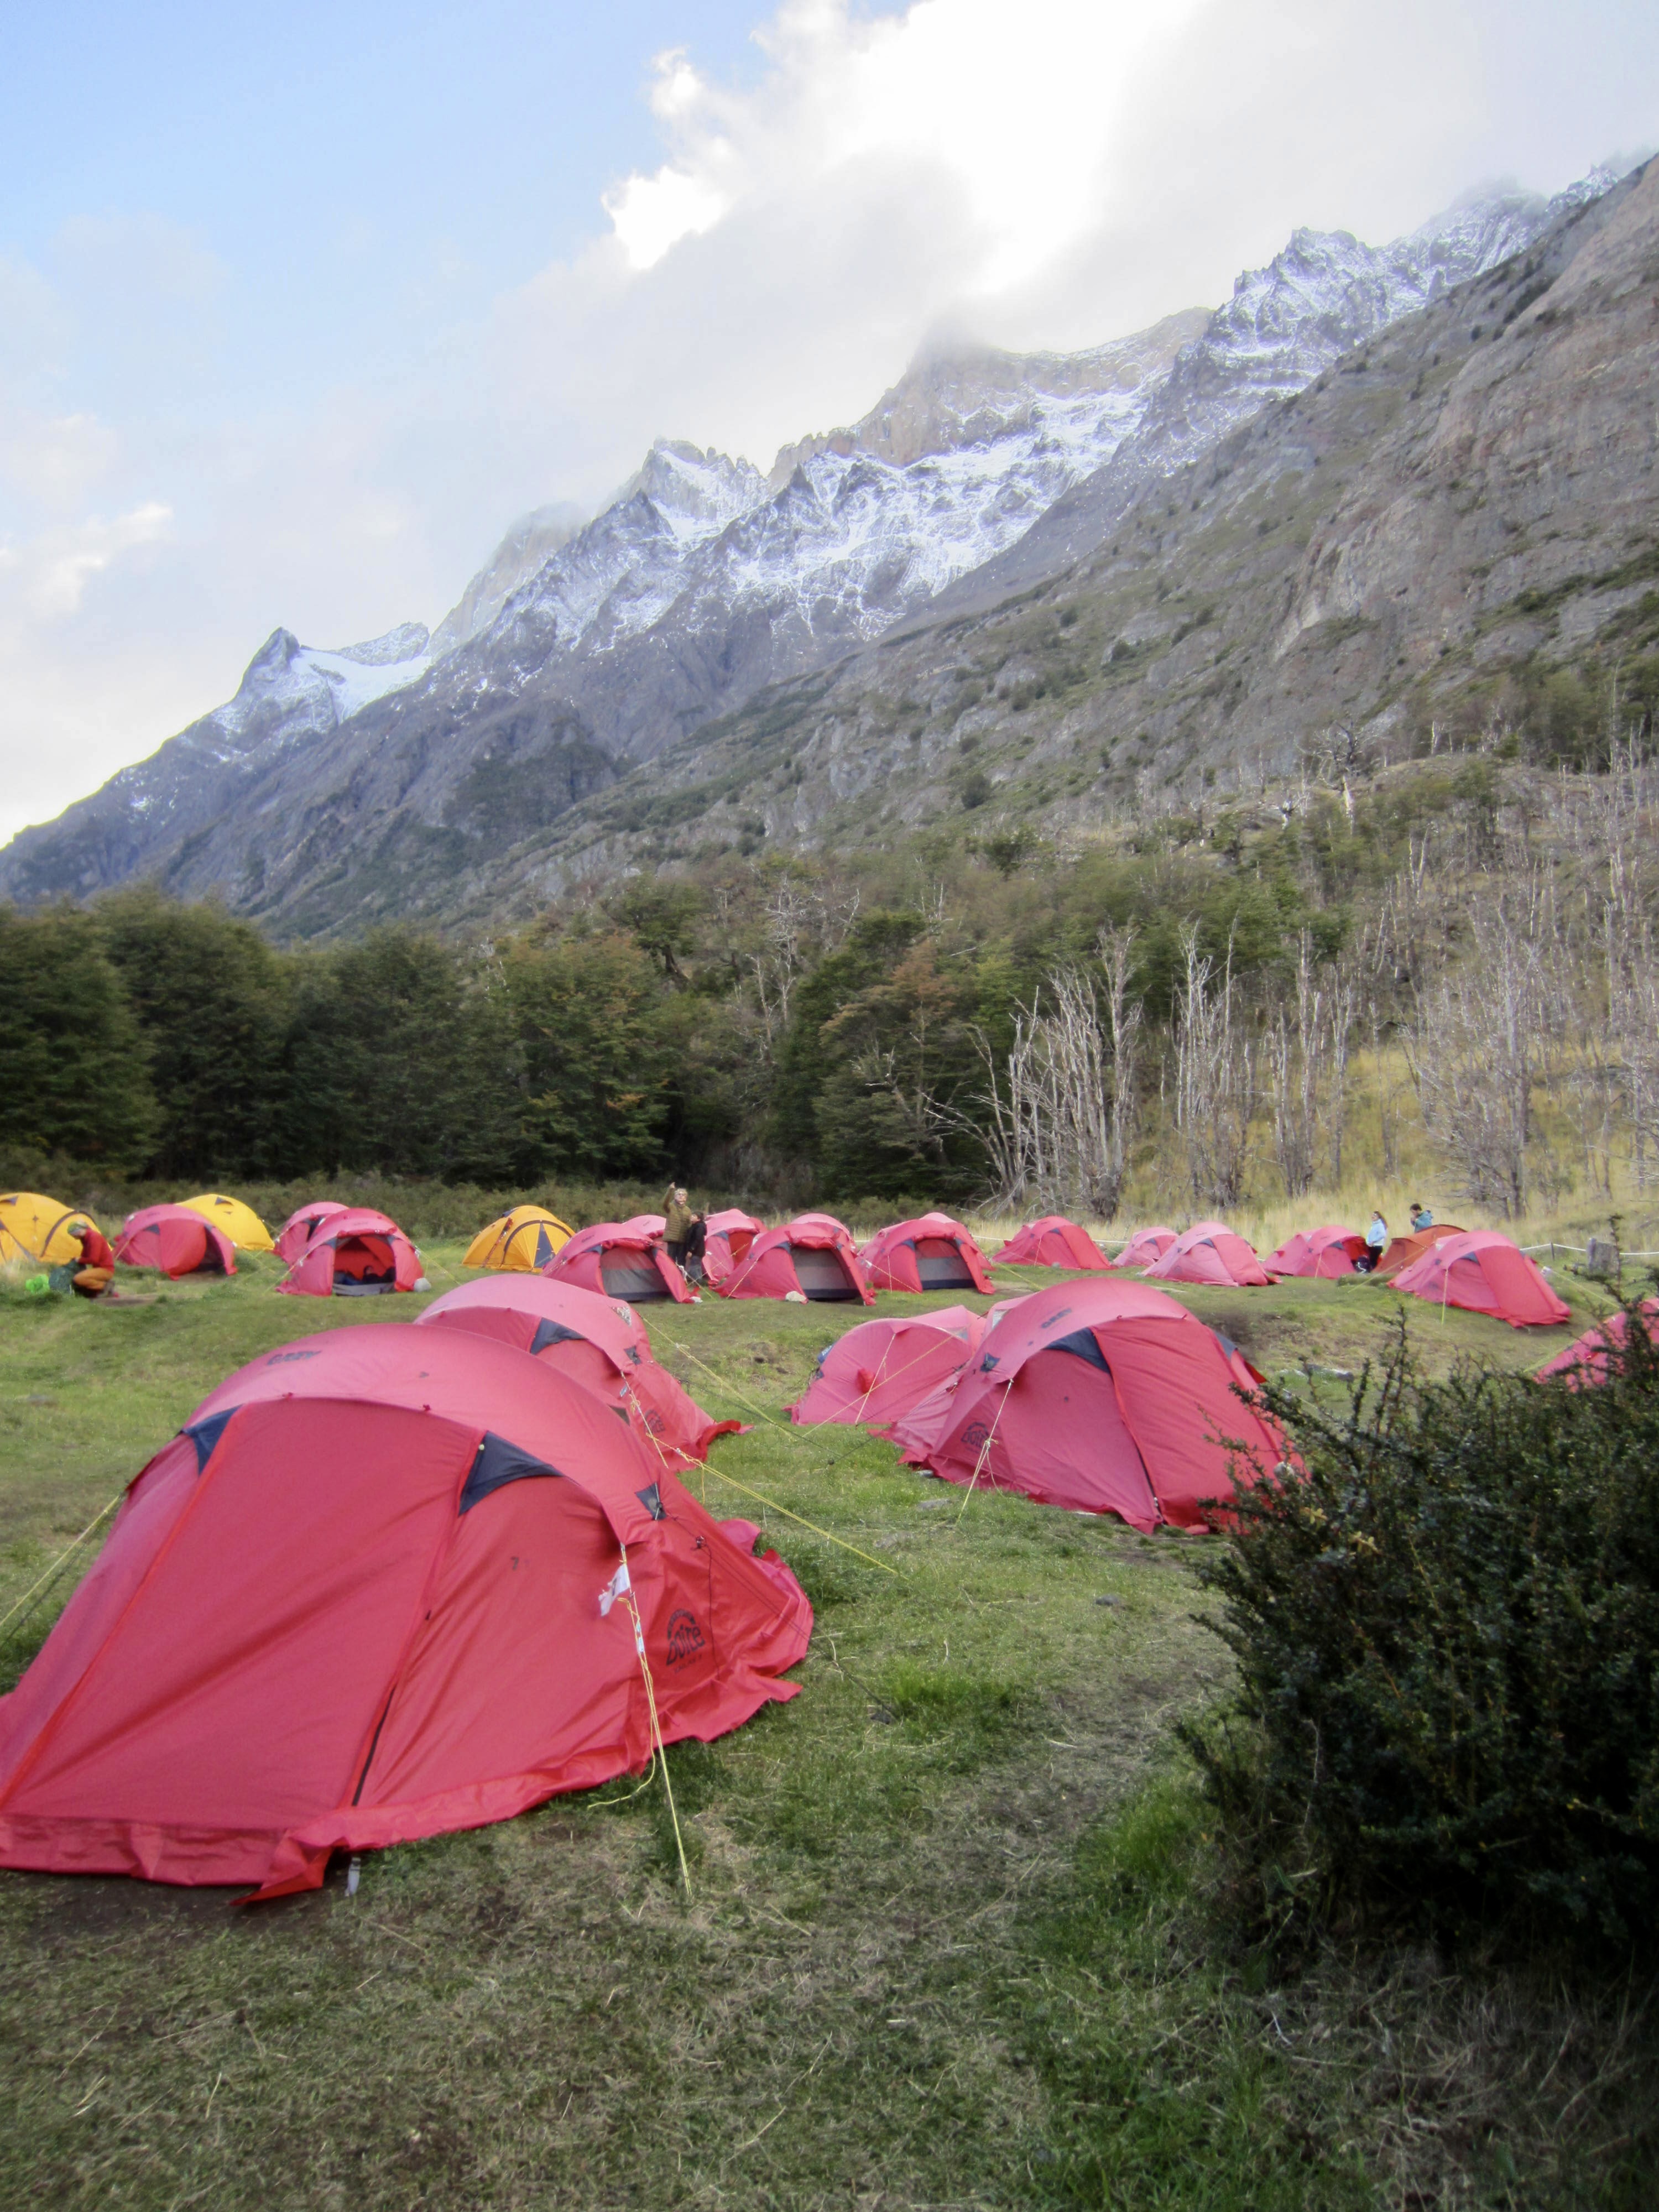
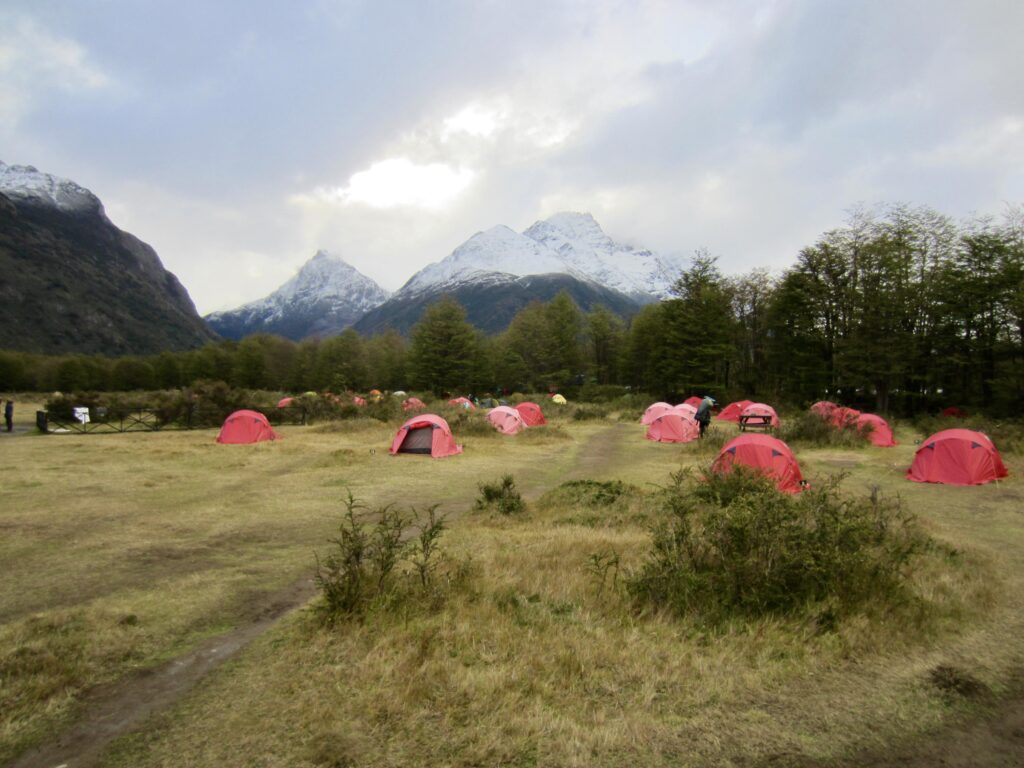
We pitched our tents in a large, grassy pasture among several dozen other trekking tents, then we crawled inside to escape the rain. At 7:00pm, we walked over to the small community hut to partake in a catered dinner (we had purchased a half-board meal plan here). Seron Camp has a visually pleasant setting but is relatively small and limited in terms of its amenities. Trekkers cooking their own meals are crammed into a little banquet tent, and there are only two toilets and two showers for the entire camp.
…
Approximate daily stats: 4.5 hrs elapsed; 8.4 mi / 13.5 km traveled; 1100 ft / 340 m gained; 1000 ft / 300 m lost.
Day 2: Seron Camp to Dickson Camp
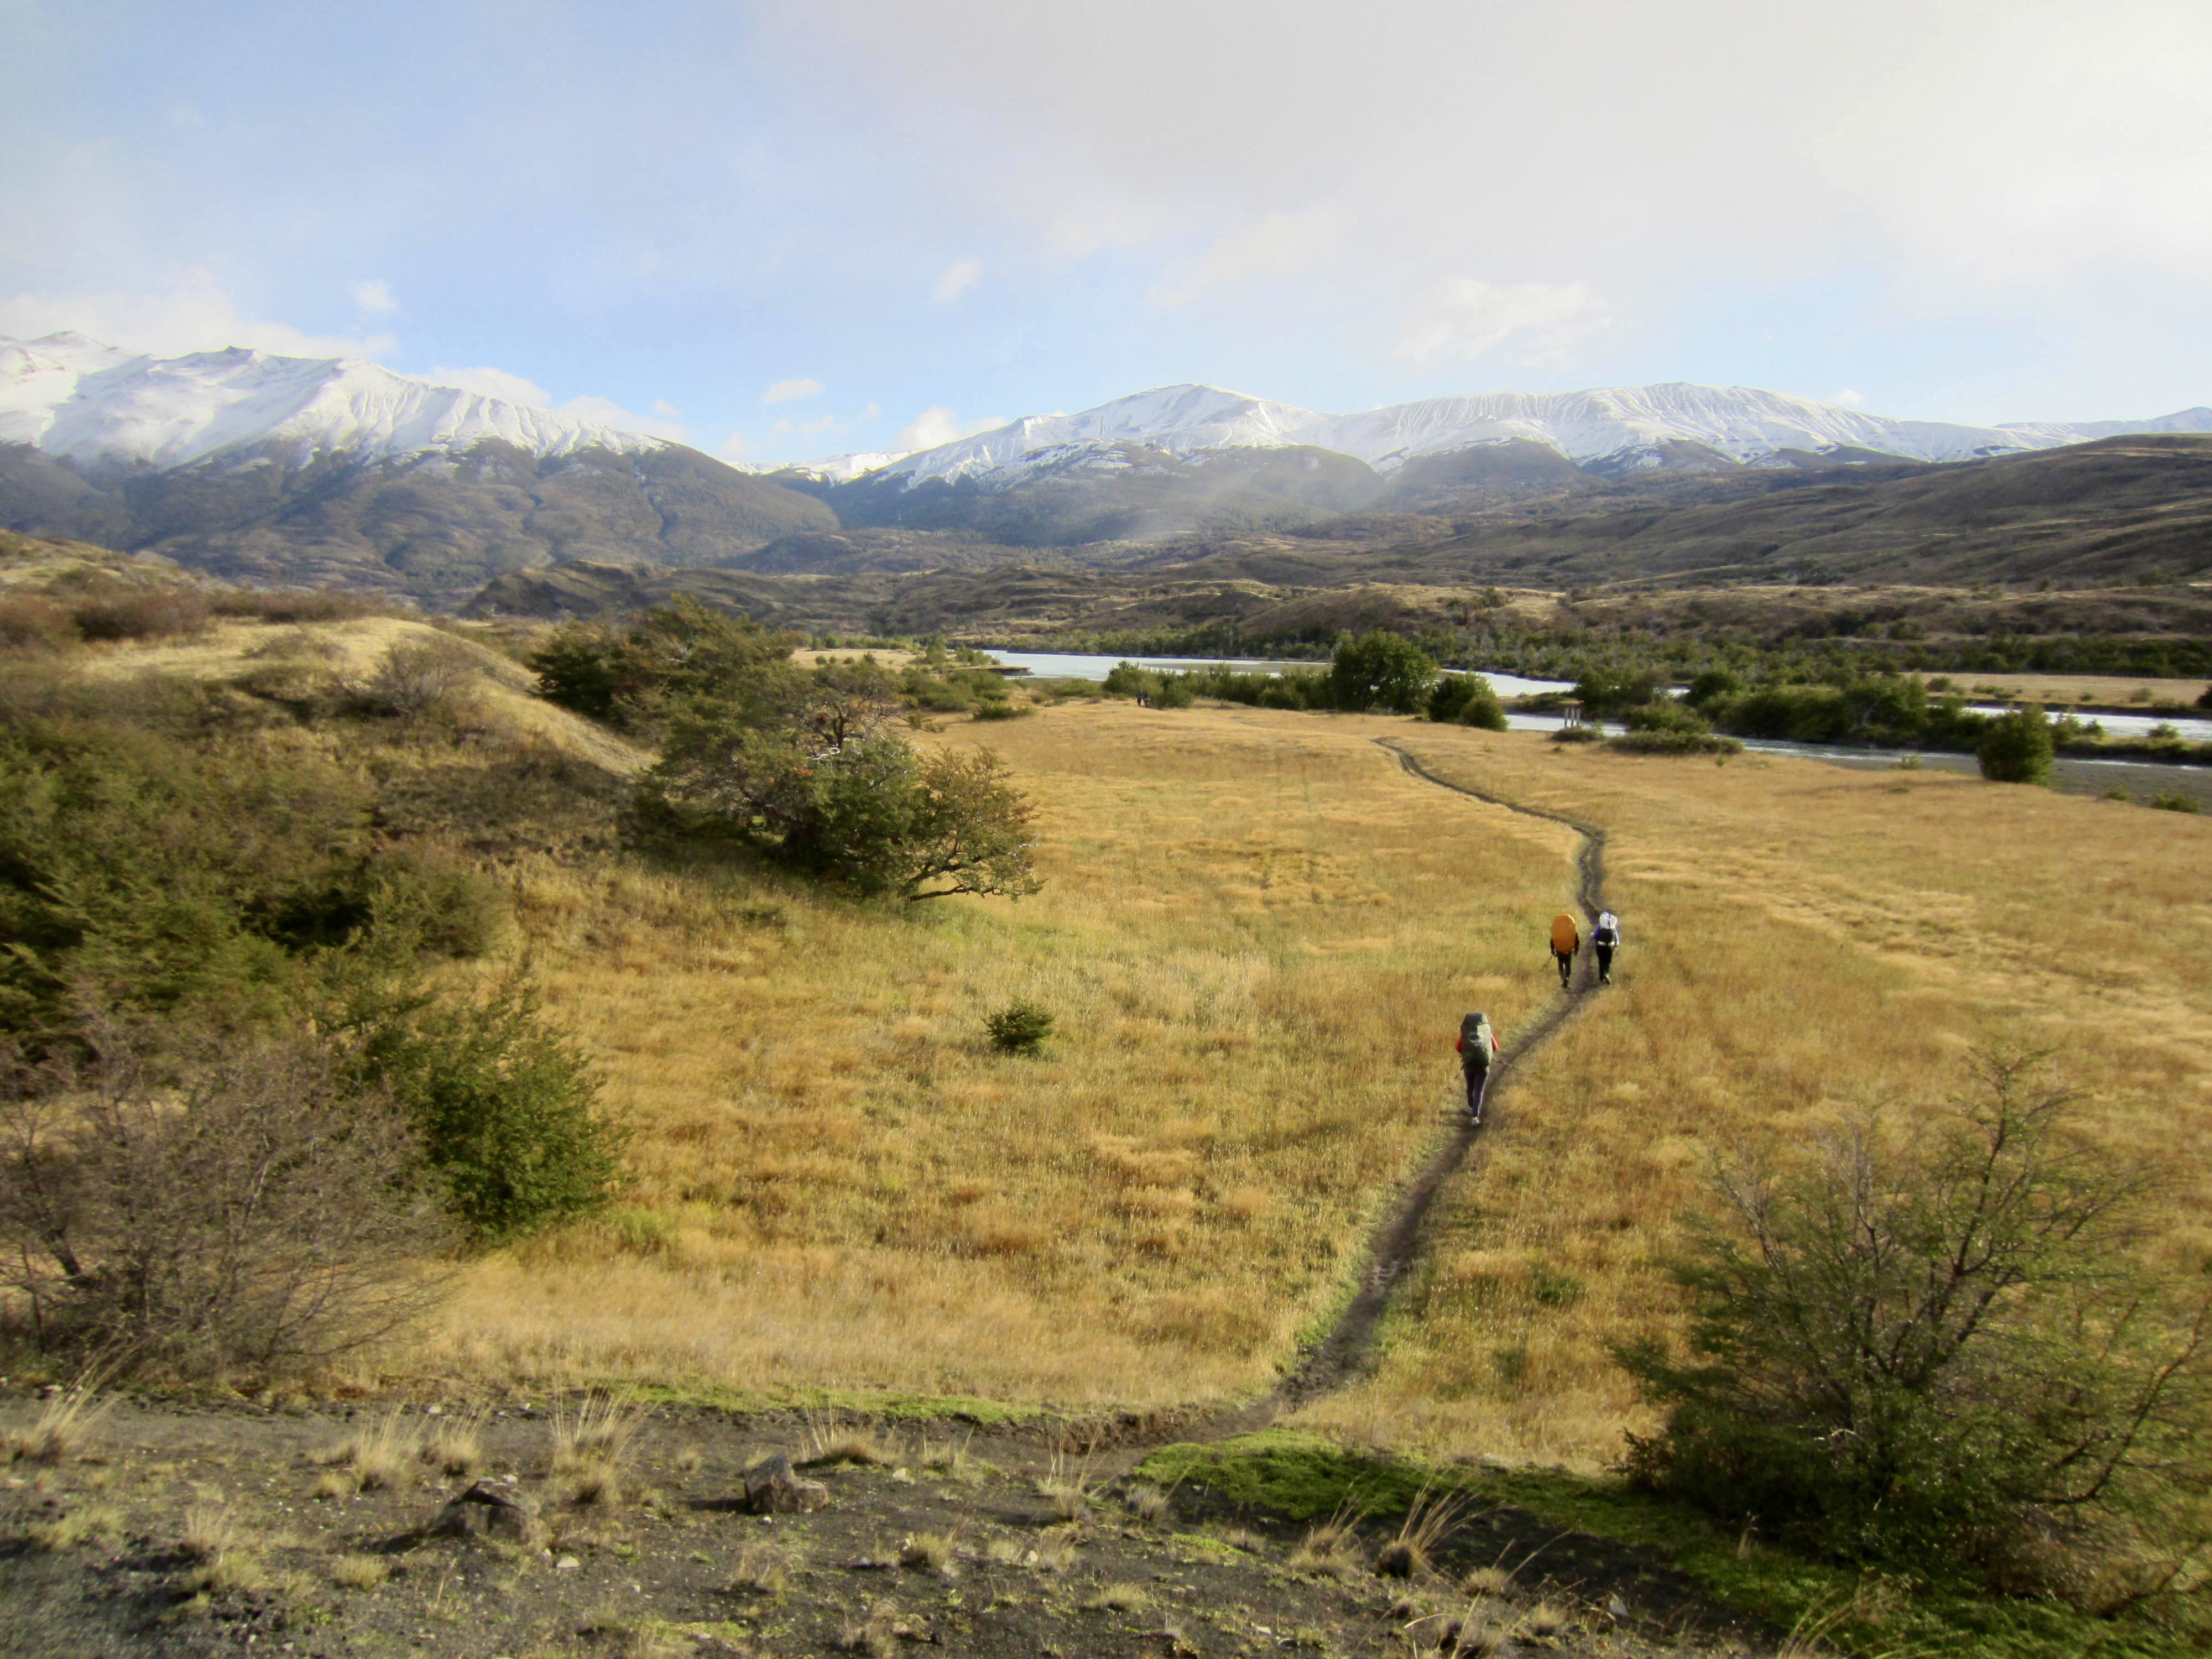
After a night of light but steady rain, we awoke to clearing skies. Eileen and I ate a catered breakfast in the community hut, then we all packed up and headed out before 9:30am. Our trail continued northwestward up the Paine River Valley at an easy grade before climbing steeply for 600 vertical feet / 180 vertical meters over the nose of a ridge.


At the top of the ridge, the trail entered Torres del Paine National Park and turned southwestward. We then made a gradually descending traverse above Lake Paine. Once again, our day started with promising weather but became cloudy and threatening in the afternoon.


Just beyond the head of Lake Paine, we came to Coiron Ranger Station and stopped for lunch with numerous other trekkers. Friendly conversation among the group here signaled the beginnings of a trail peloton that would fully gel in the ensuing days.

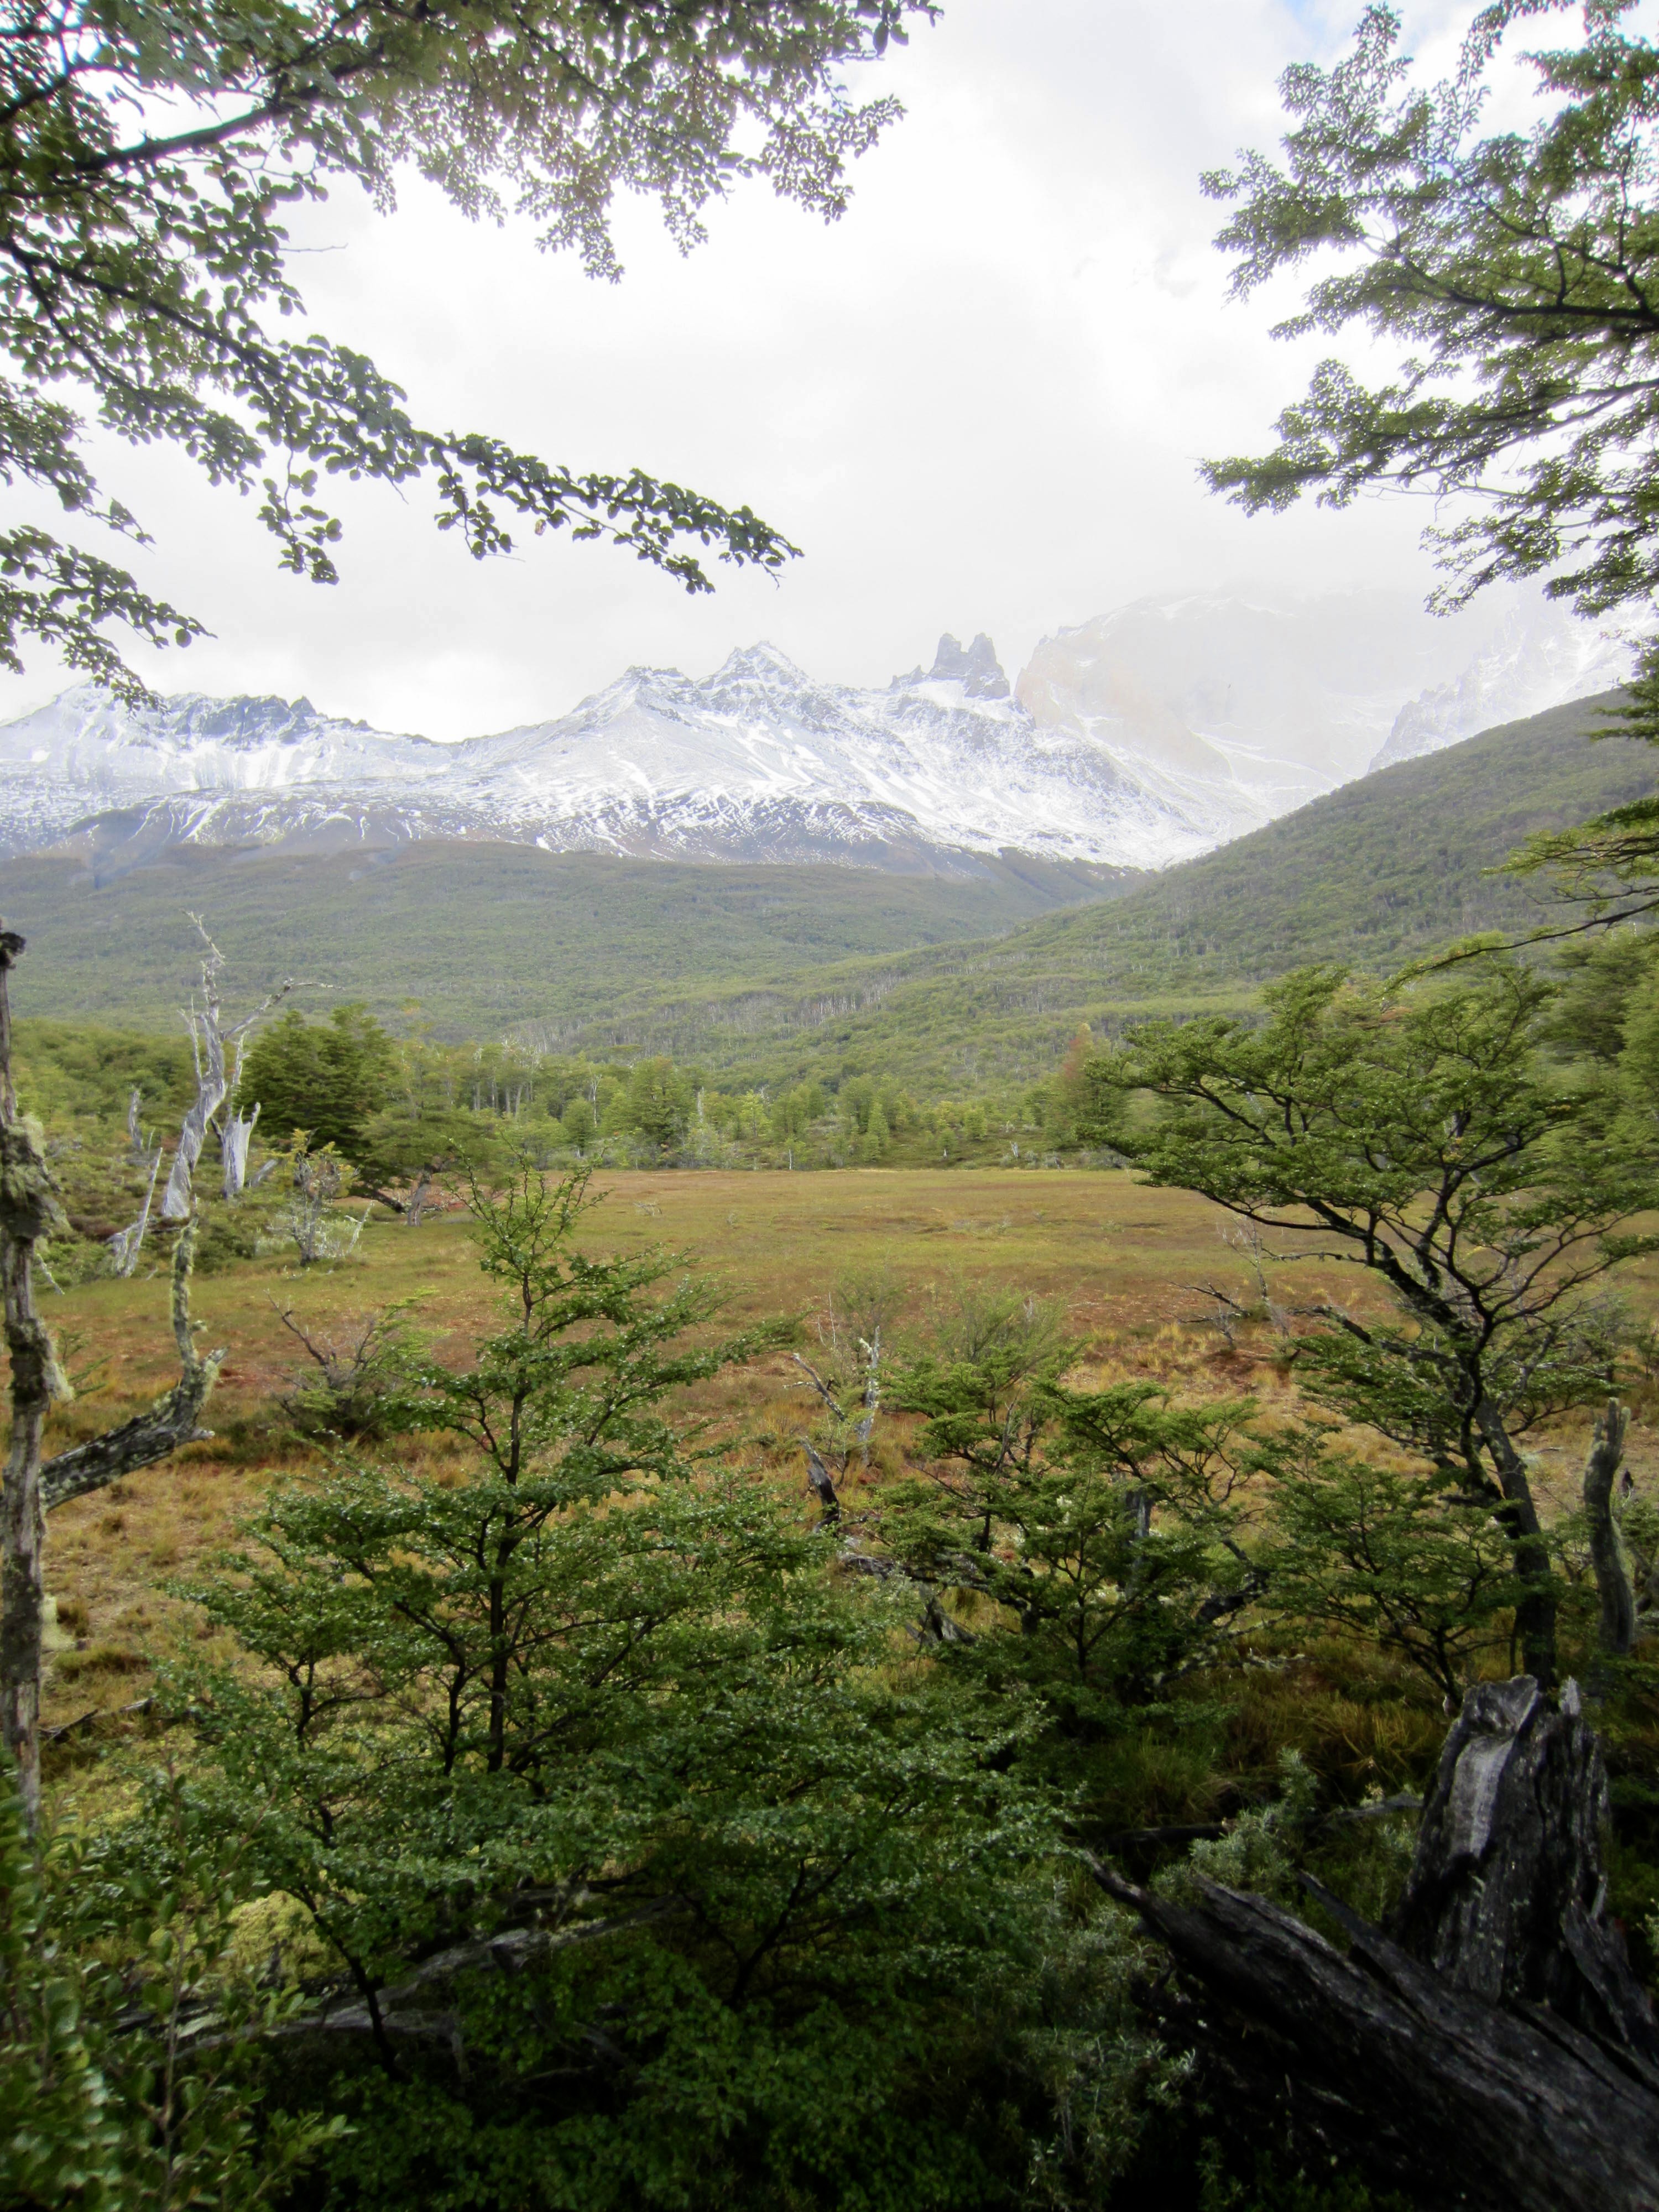
Our afternoon was spent hiking though the Upper Paine River Valley on a wandering trail and curving boardwalk. Patches of blue sky ahead teased us with partial views of rugged, snow-dusted mountains to the west.
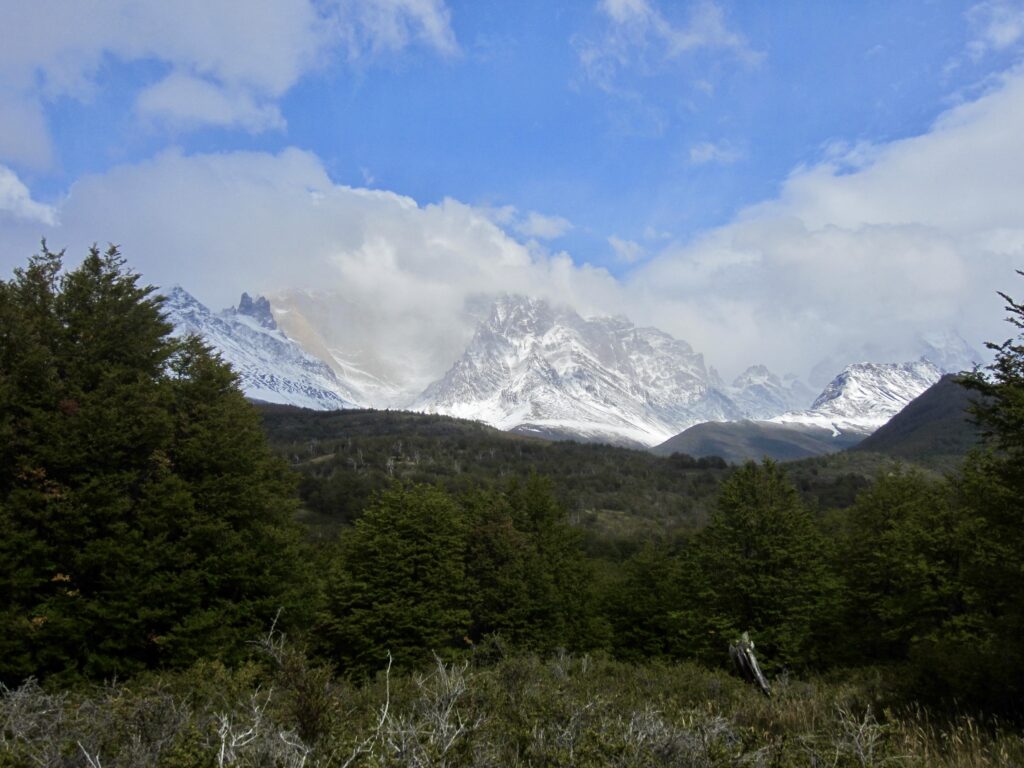
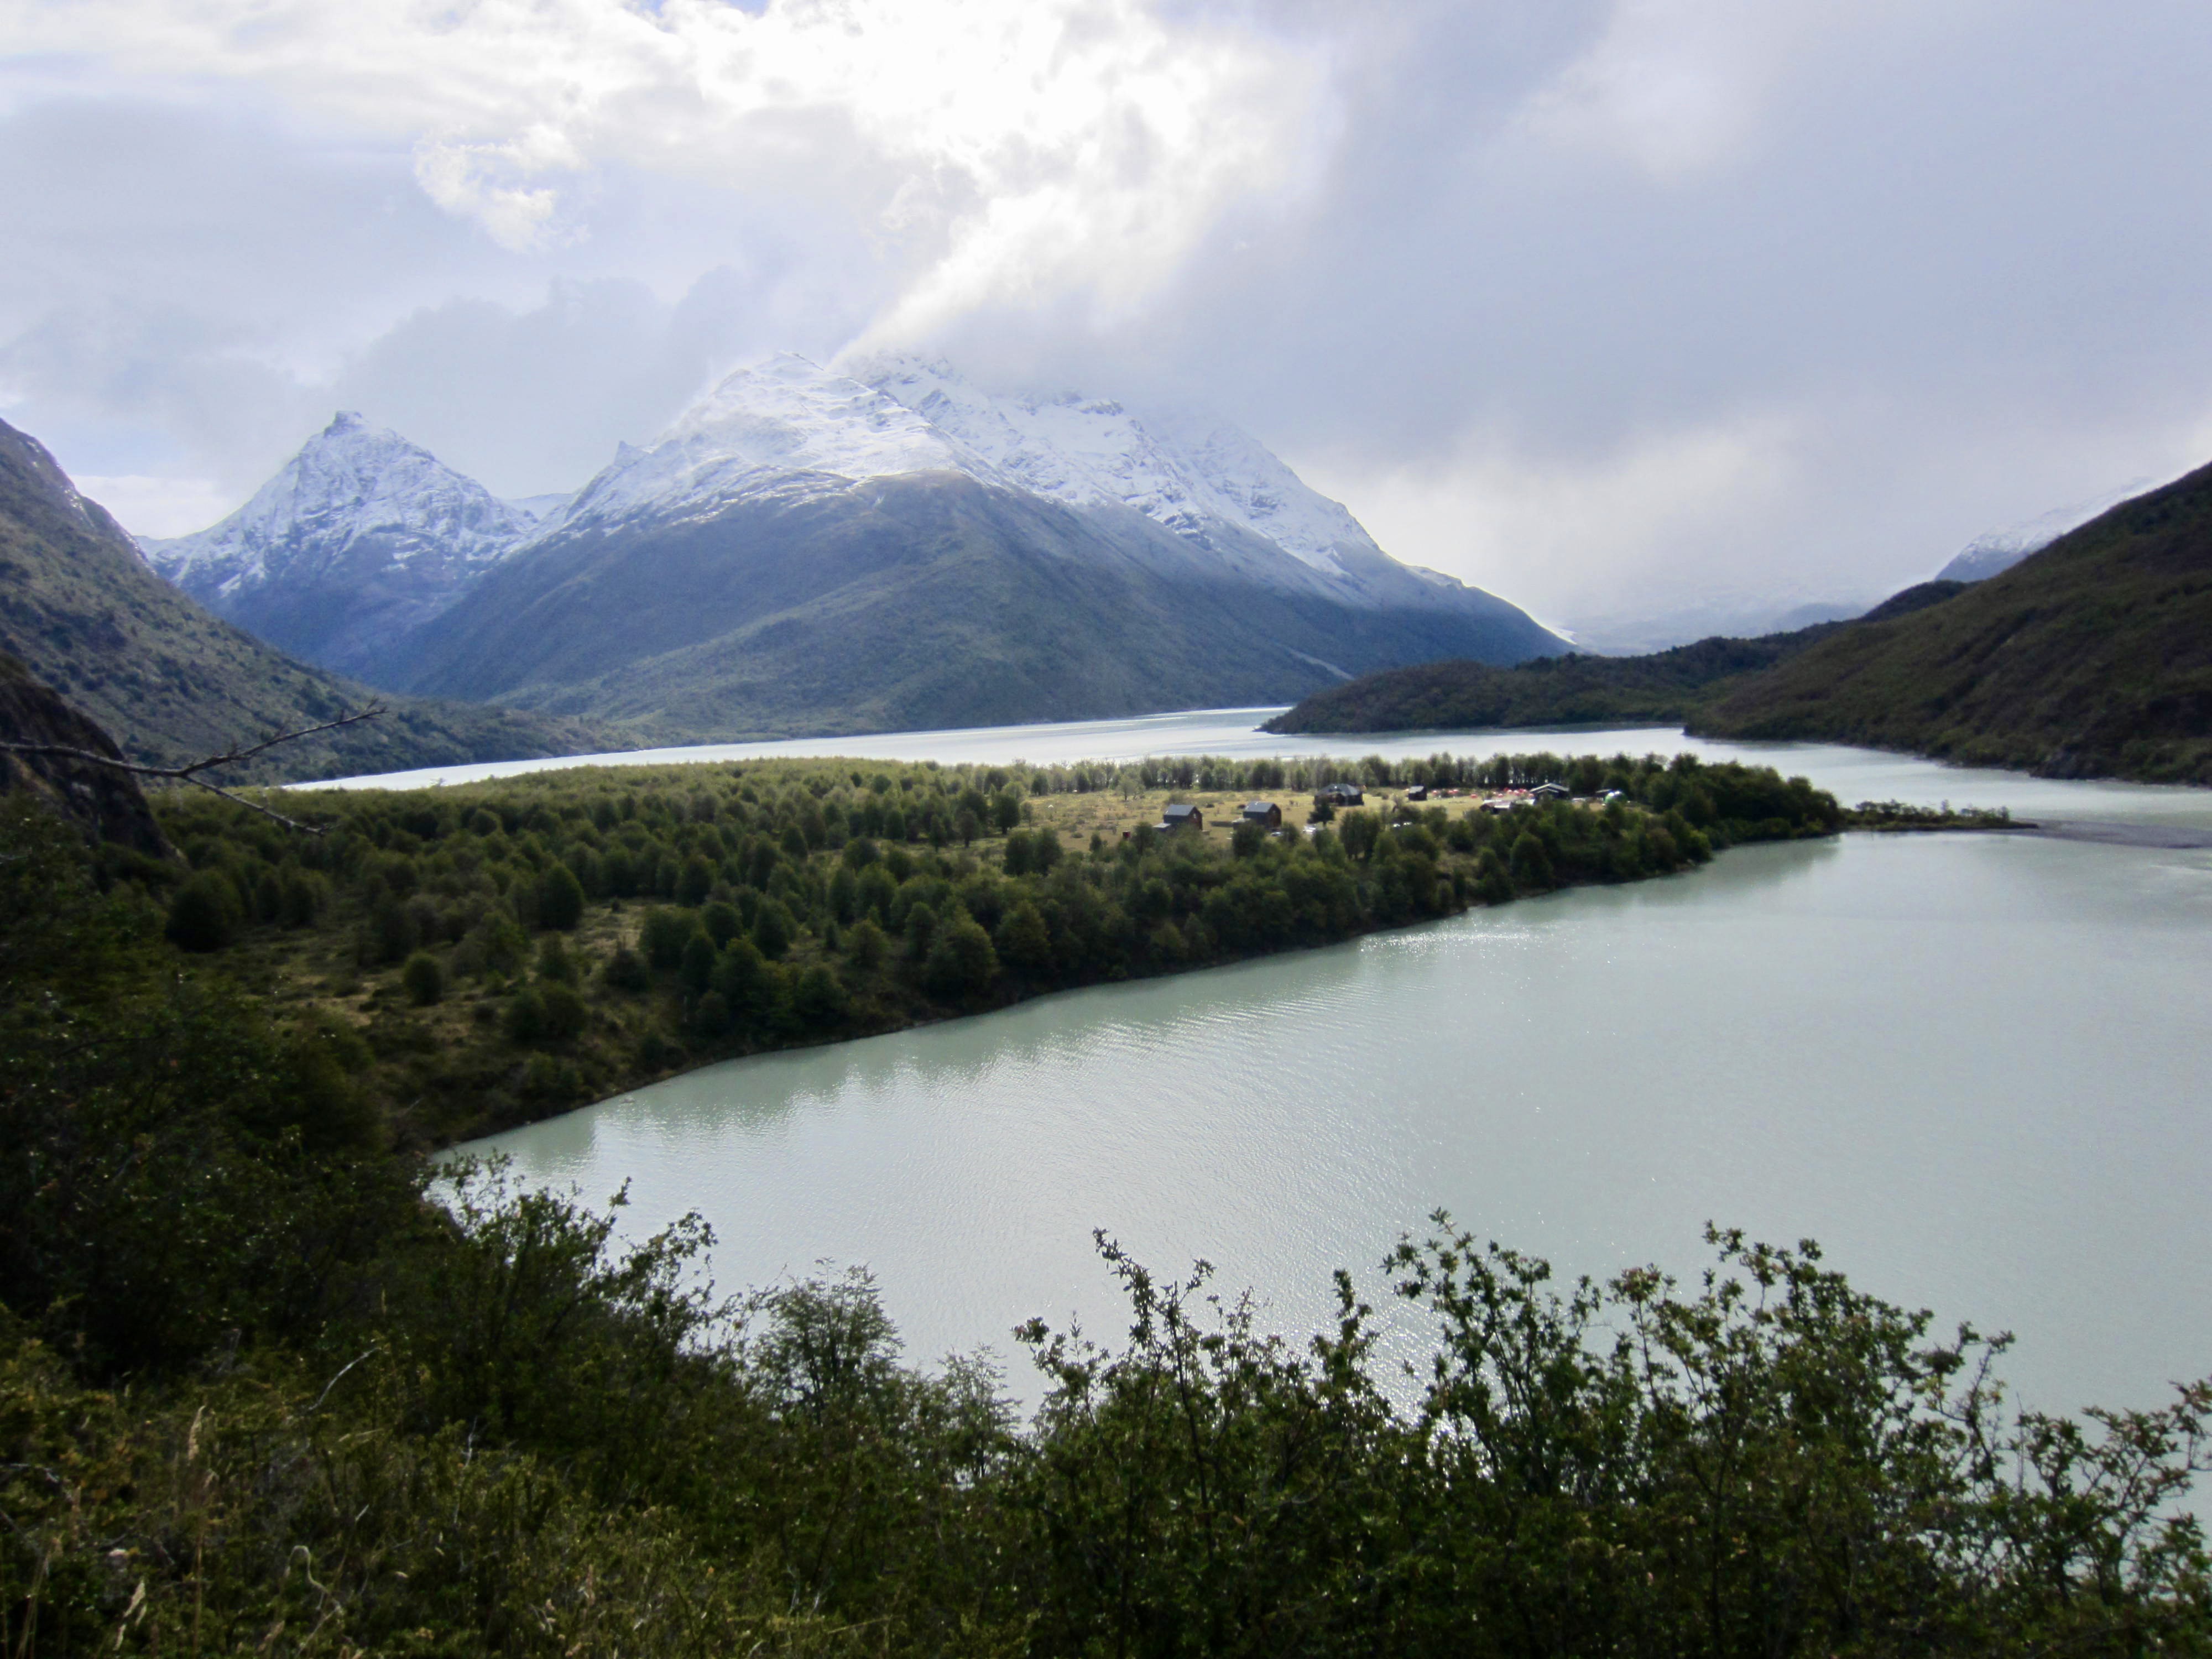
A short ascent at the valley head took us to a minor ridge giving a marvelous view of Dickson Camp, which occupies a grassy peninsula projecting into Lake Dickson. It struck me as an improbably idyllic setting for a campsite. Another trekker likened it to the fabled Mordor!


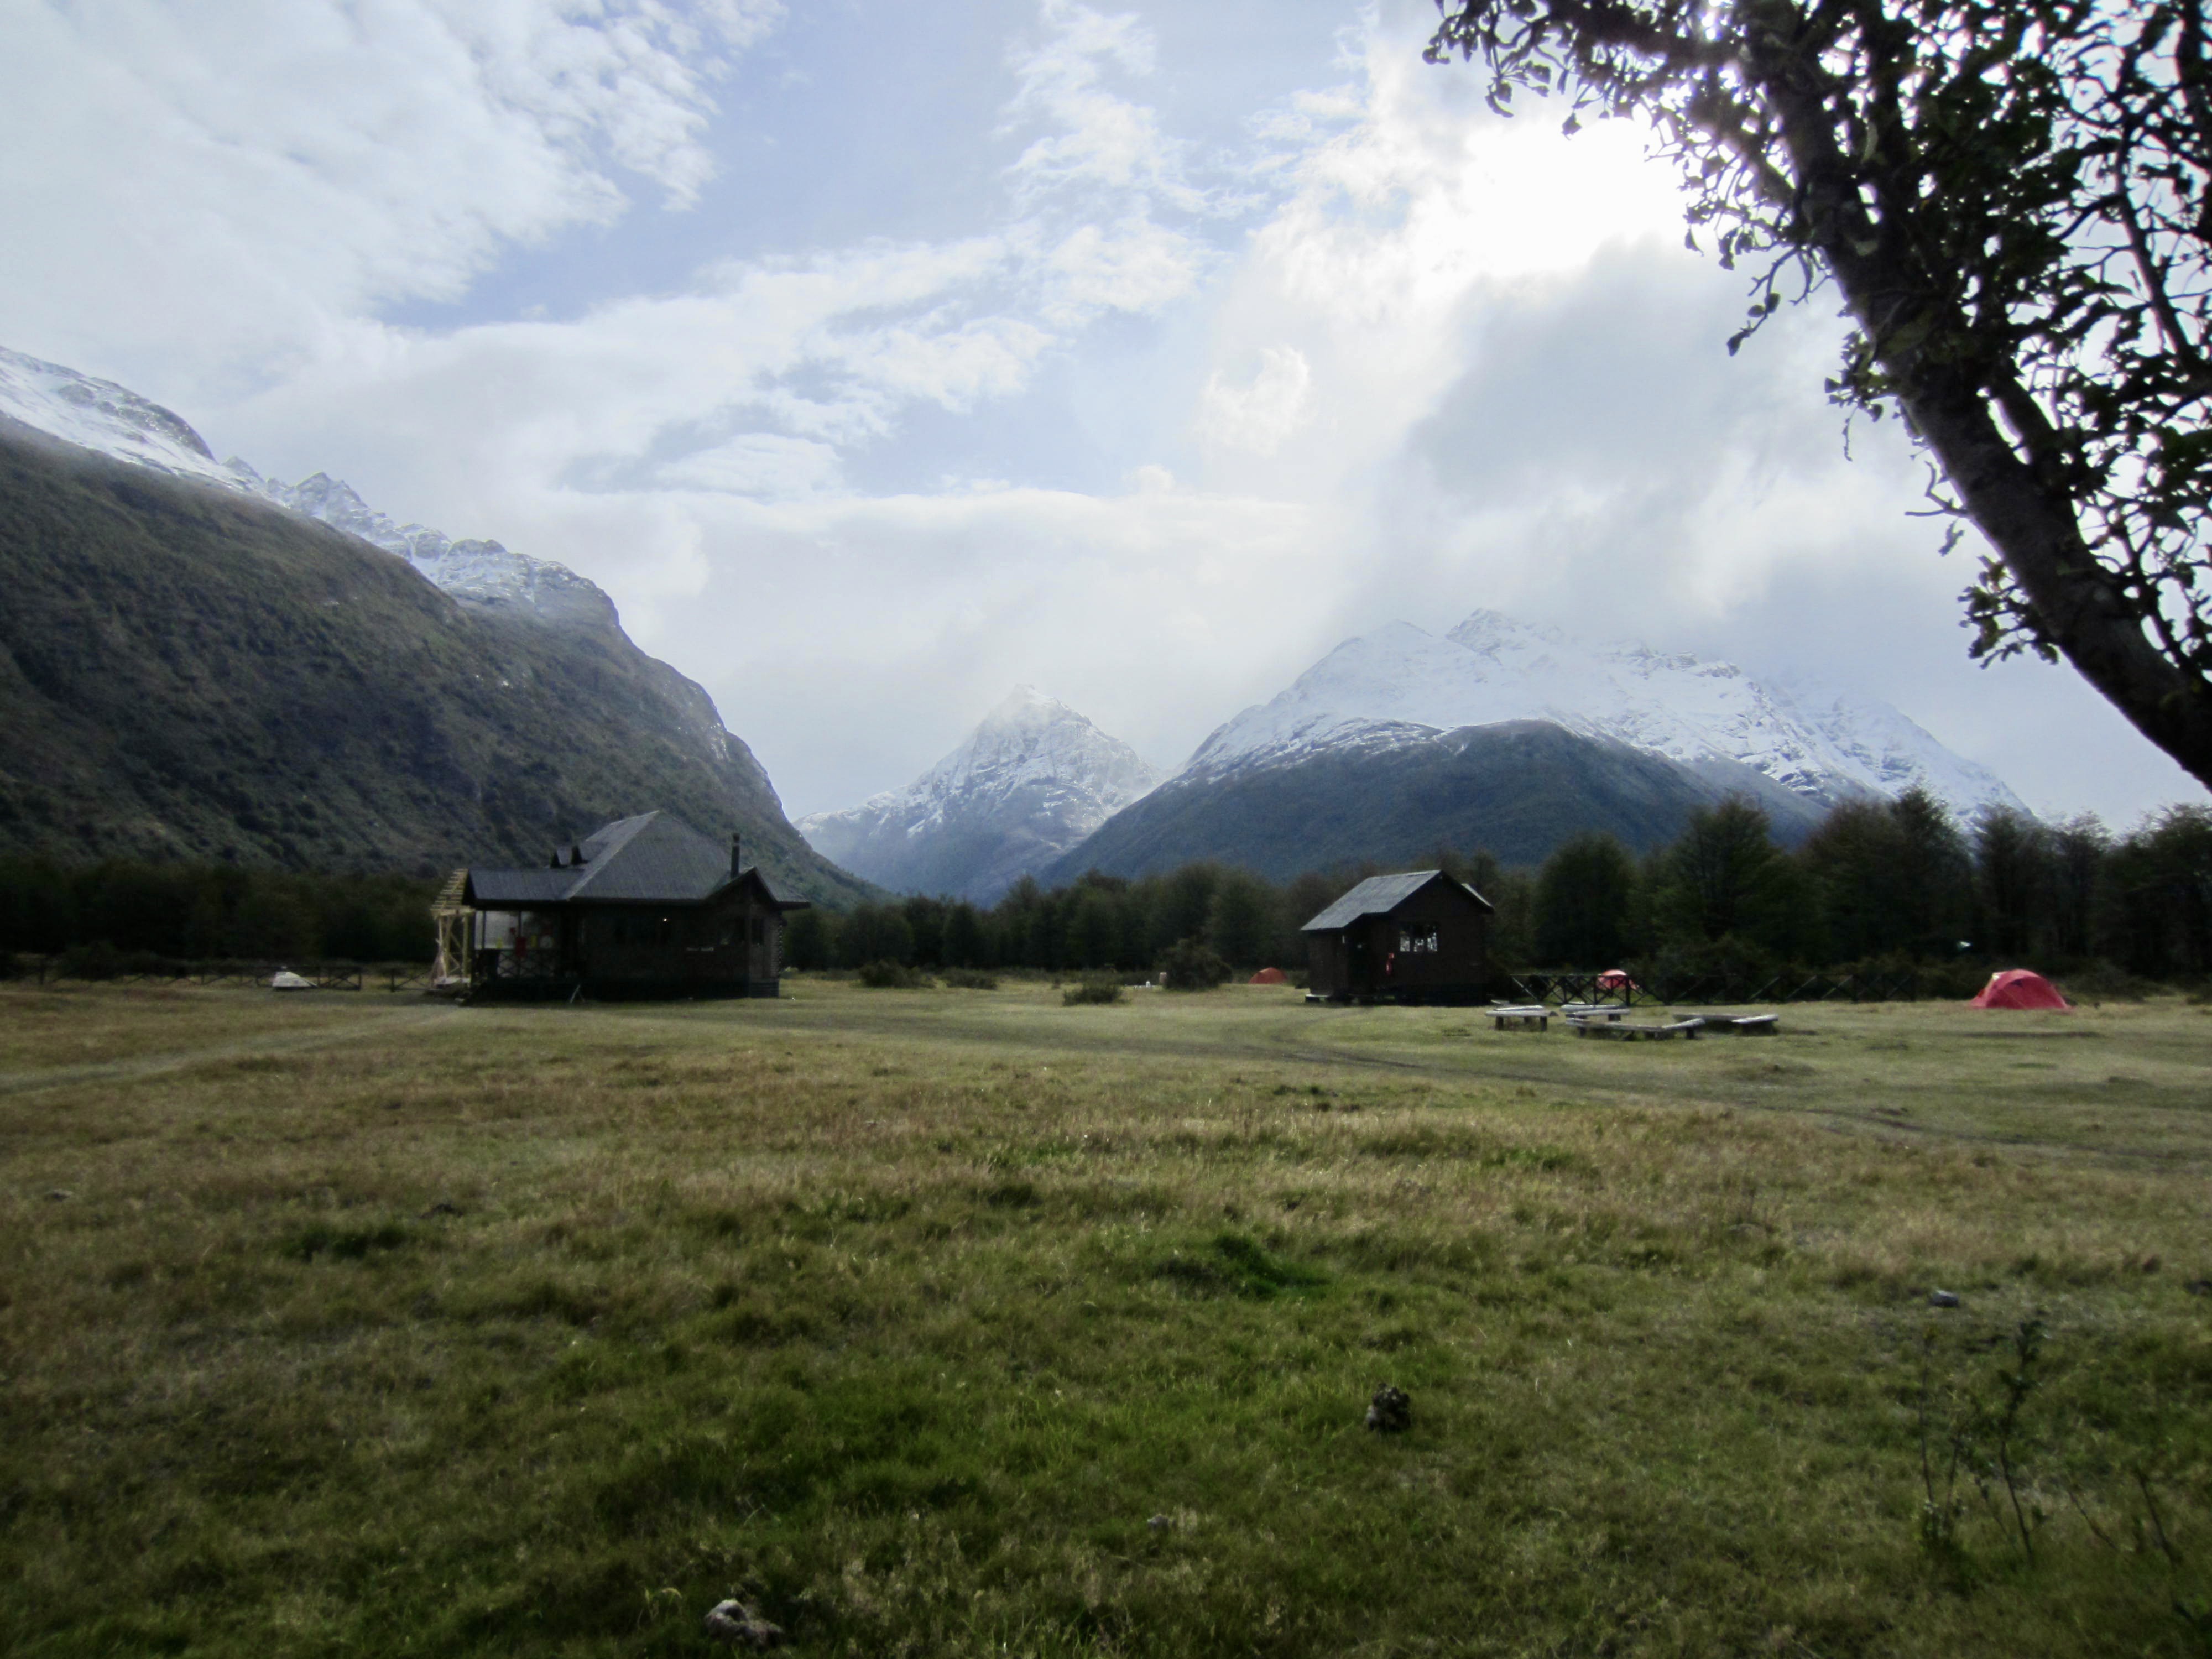
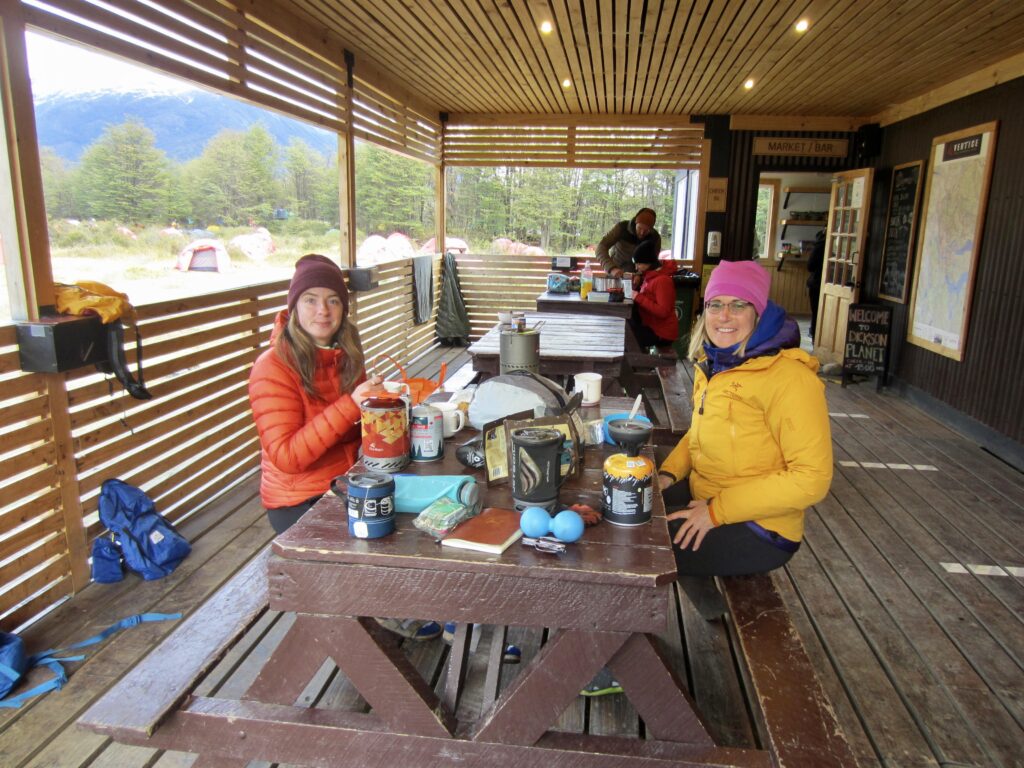
We descended to the campsite, arriving at 4:30pm, and pitched our tents in a somewhat sheltered location at the margin between meadow and forest. When dinnertime came, we declined to use the crowded and steamy public kitchen, instead choosing to cook and eat on the roomy veranda.
…
Approximate daily stats: 7.2 hrs elapsed; 11.3 mi / 18.3 km traveled; 1650 ft / 500 m gained; 1500 ft / 450 m lost.
Day 3: Dickson Camp to Los Perros Camp
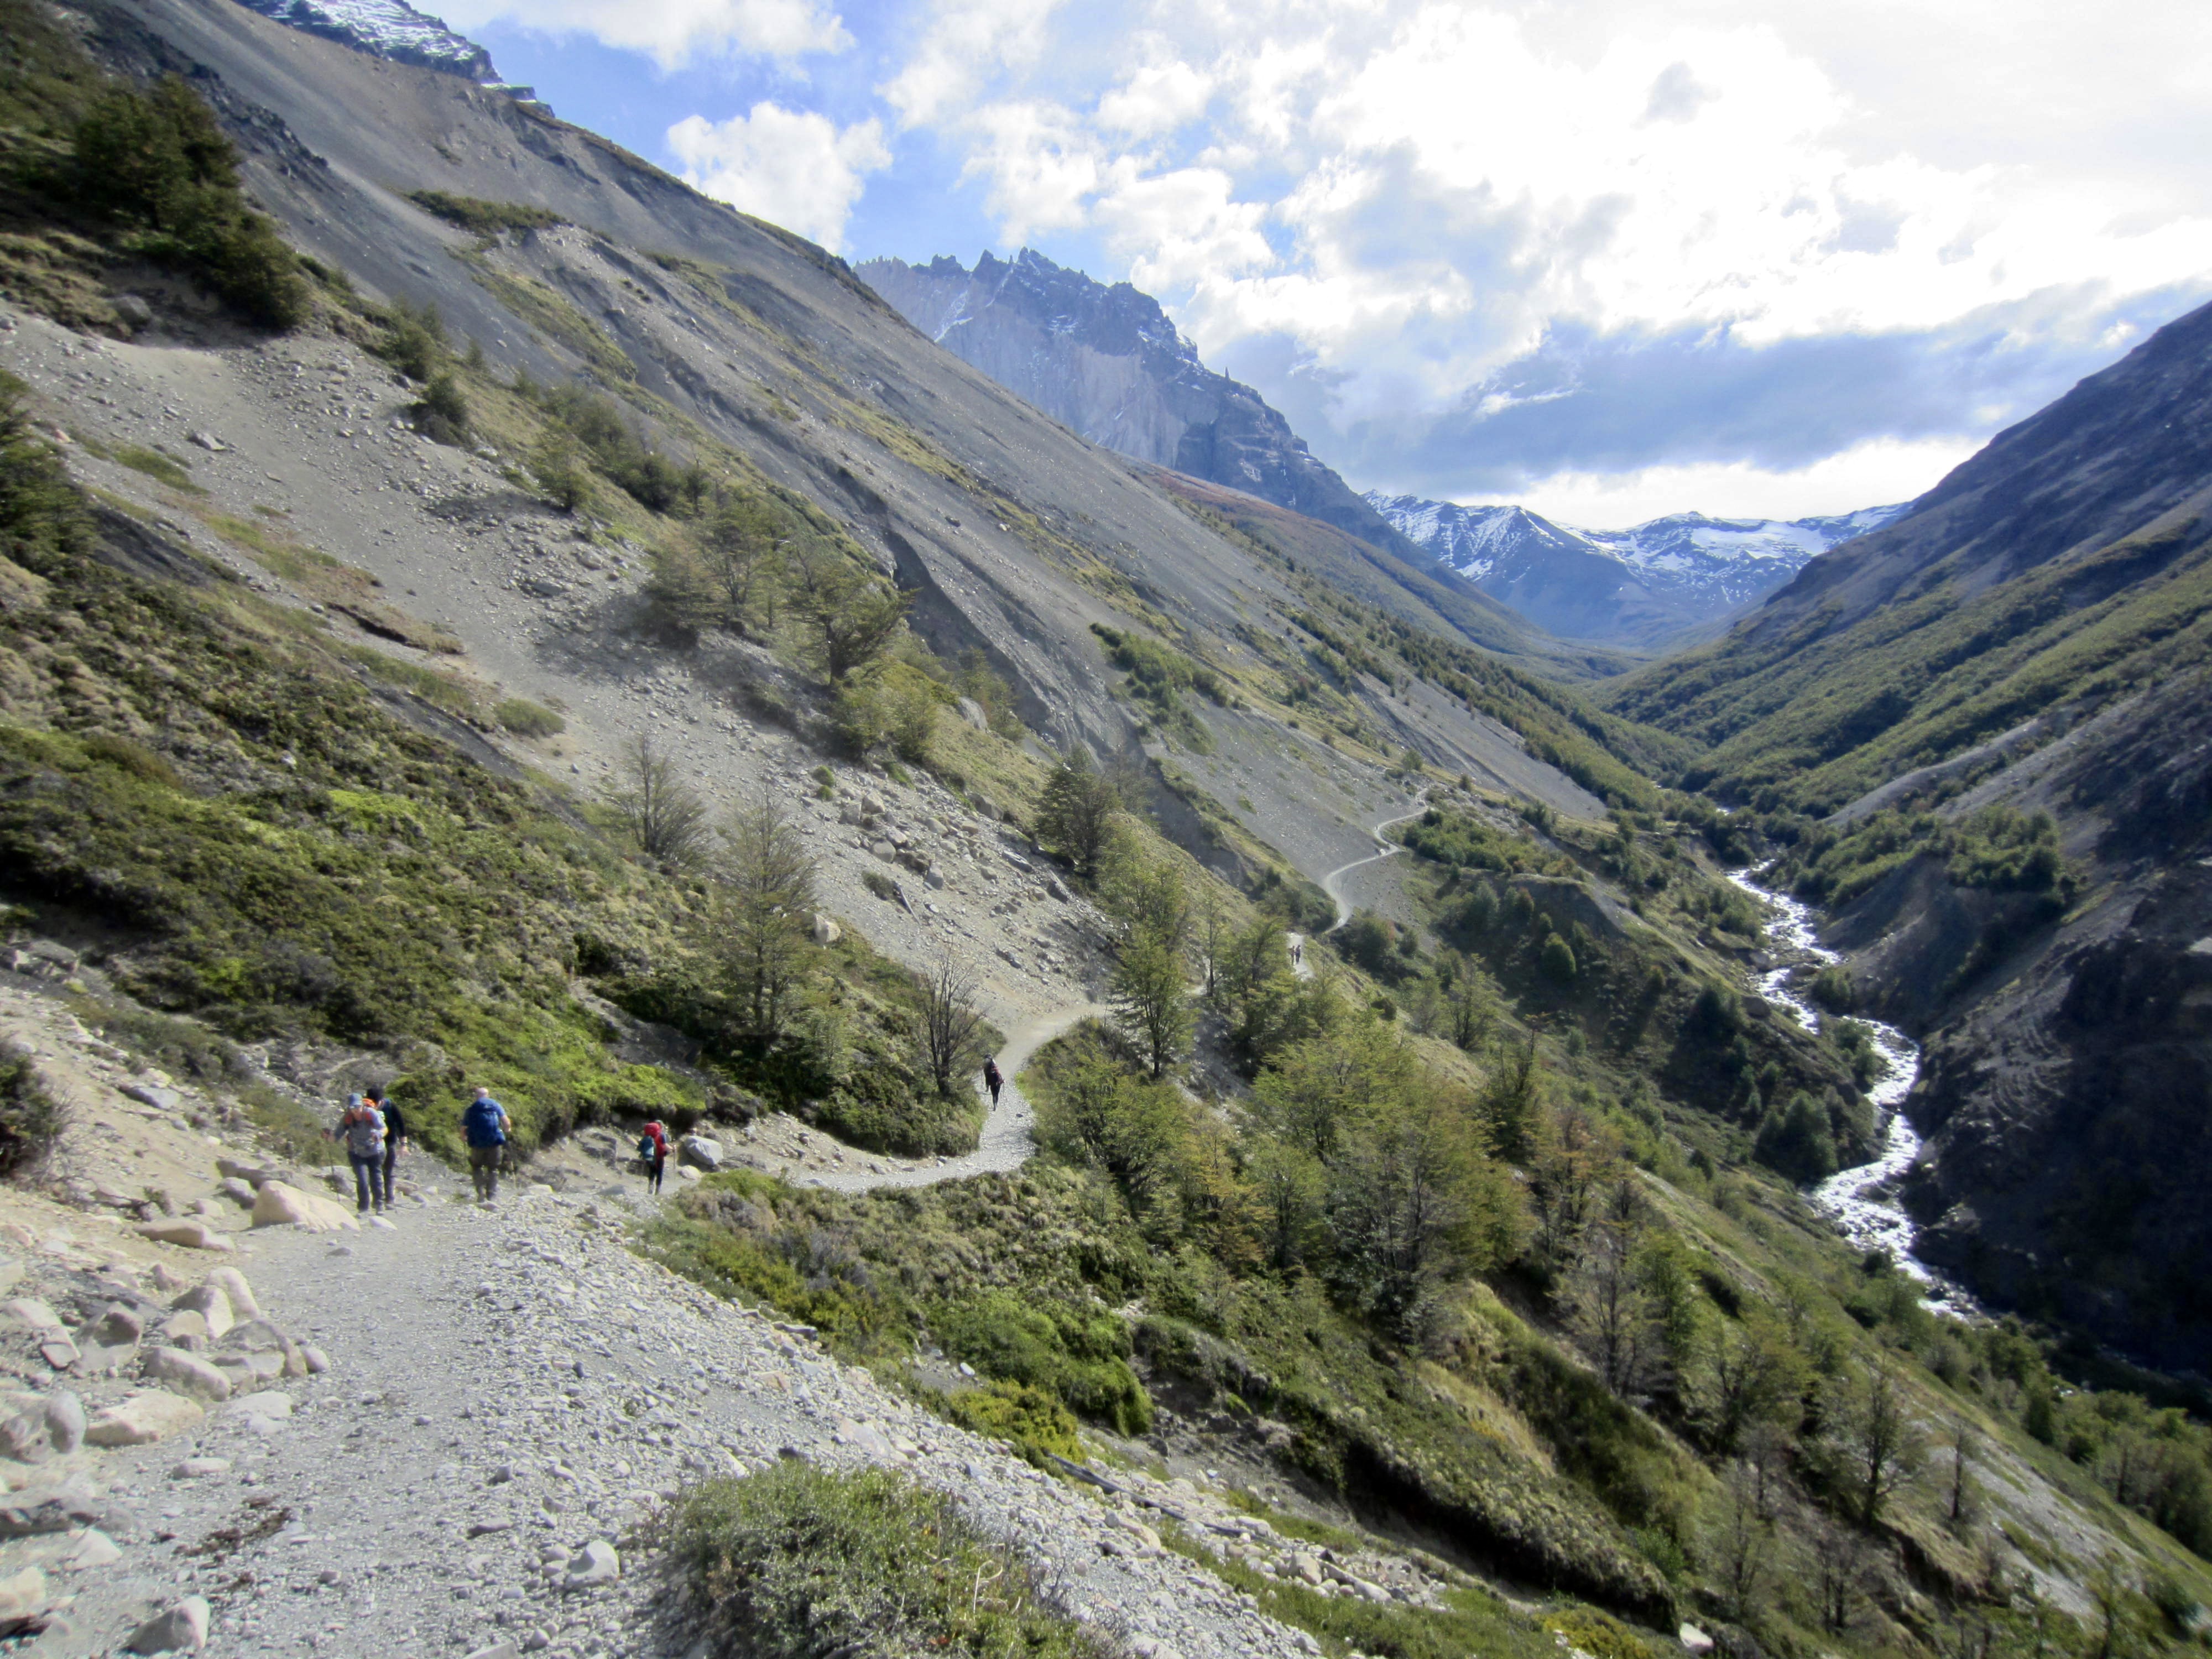
Following a night of intermittent rain and overhead gusts, we ate breakfast in our tents and didn’t get out of camp until nearly 10:00am. A muddy trail led us southeasterly up the Los Perros River Valley, with views back toward Lake Dickson.
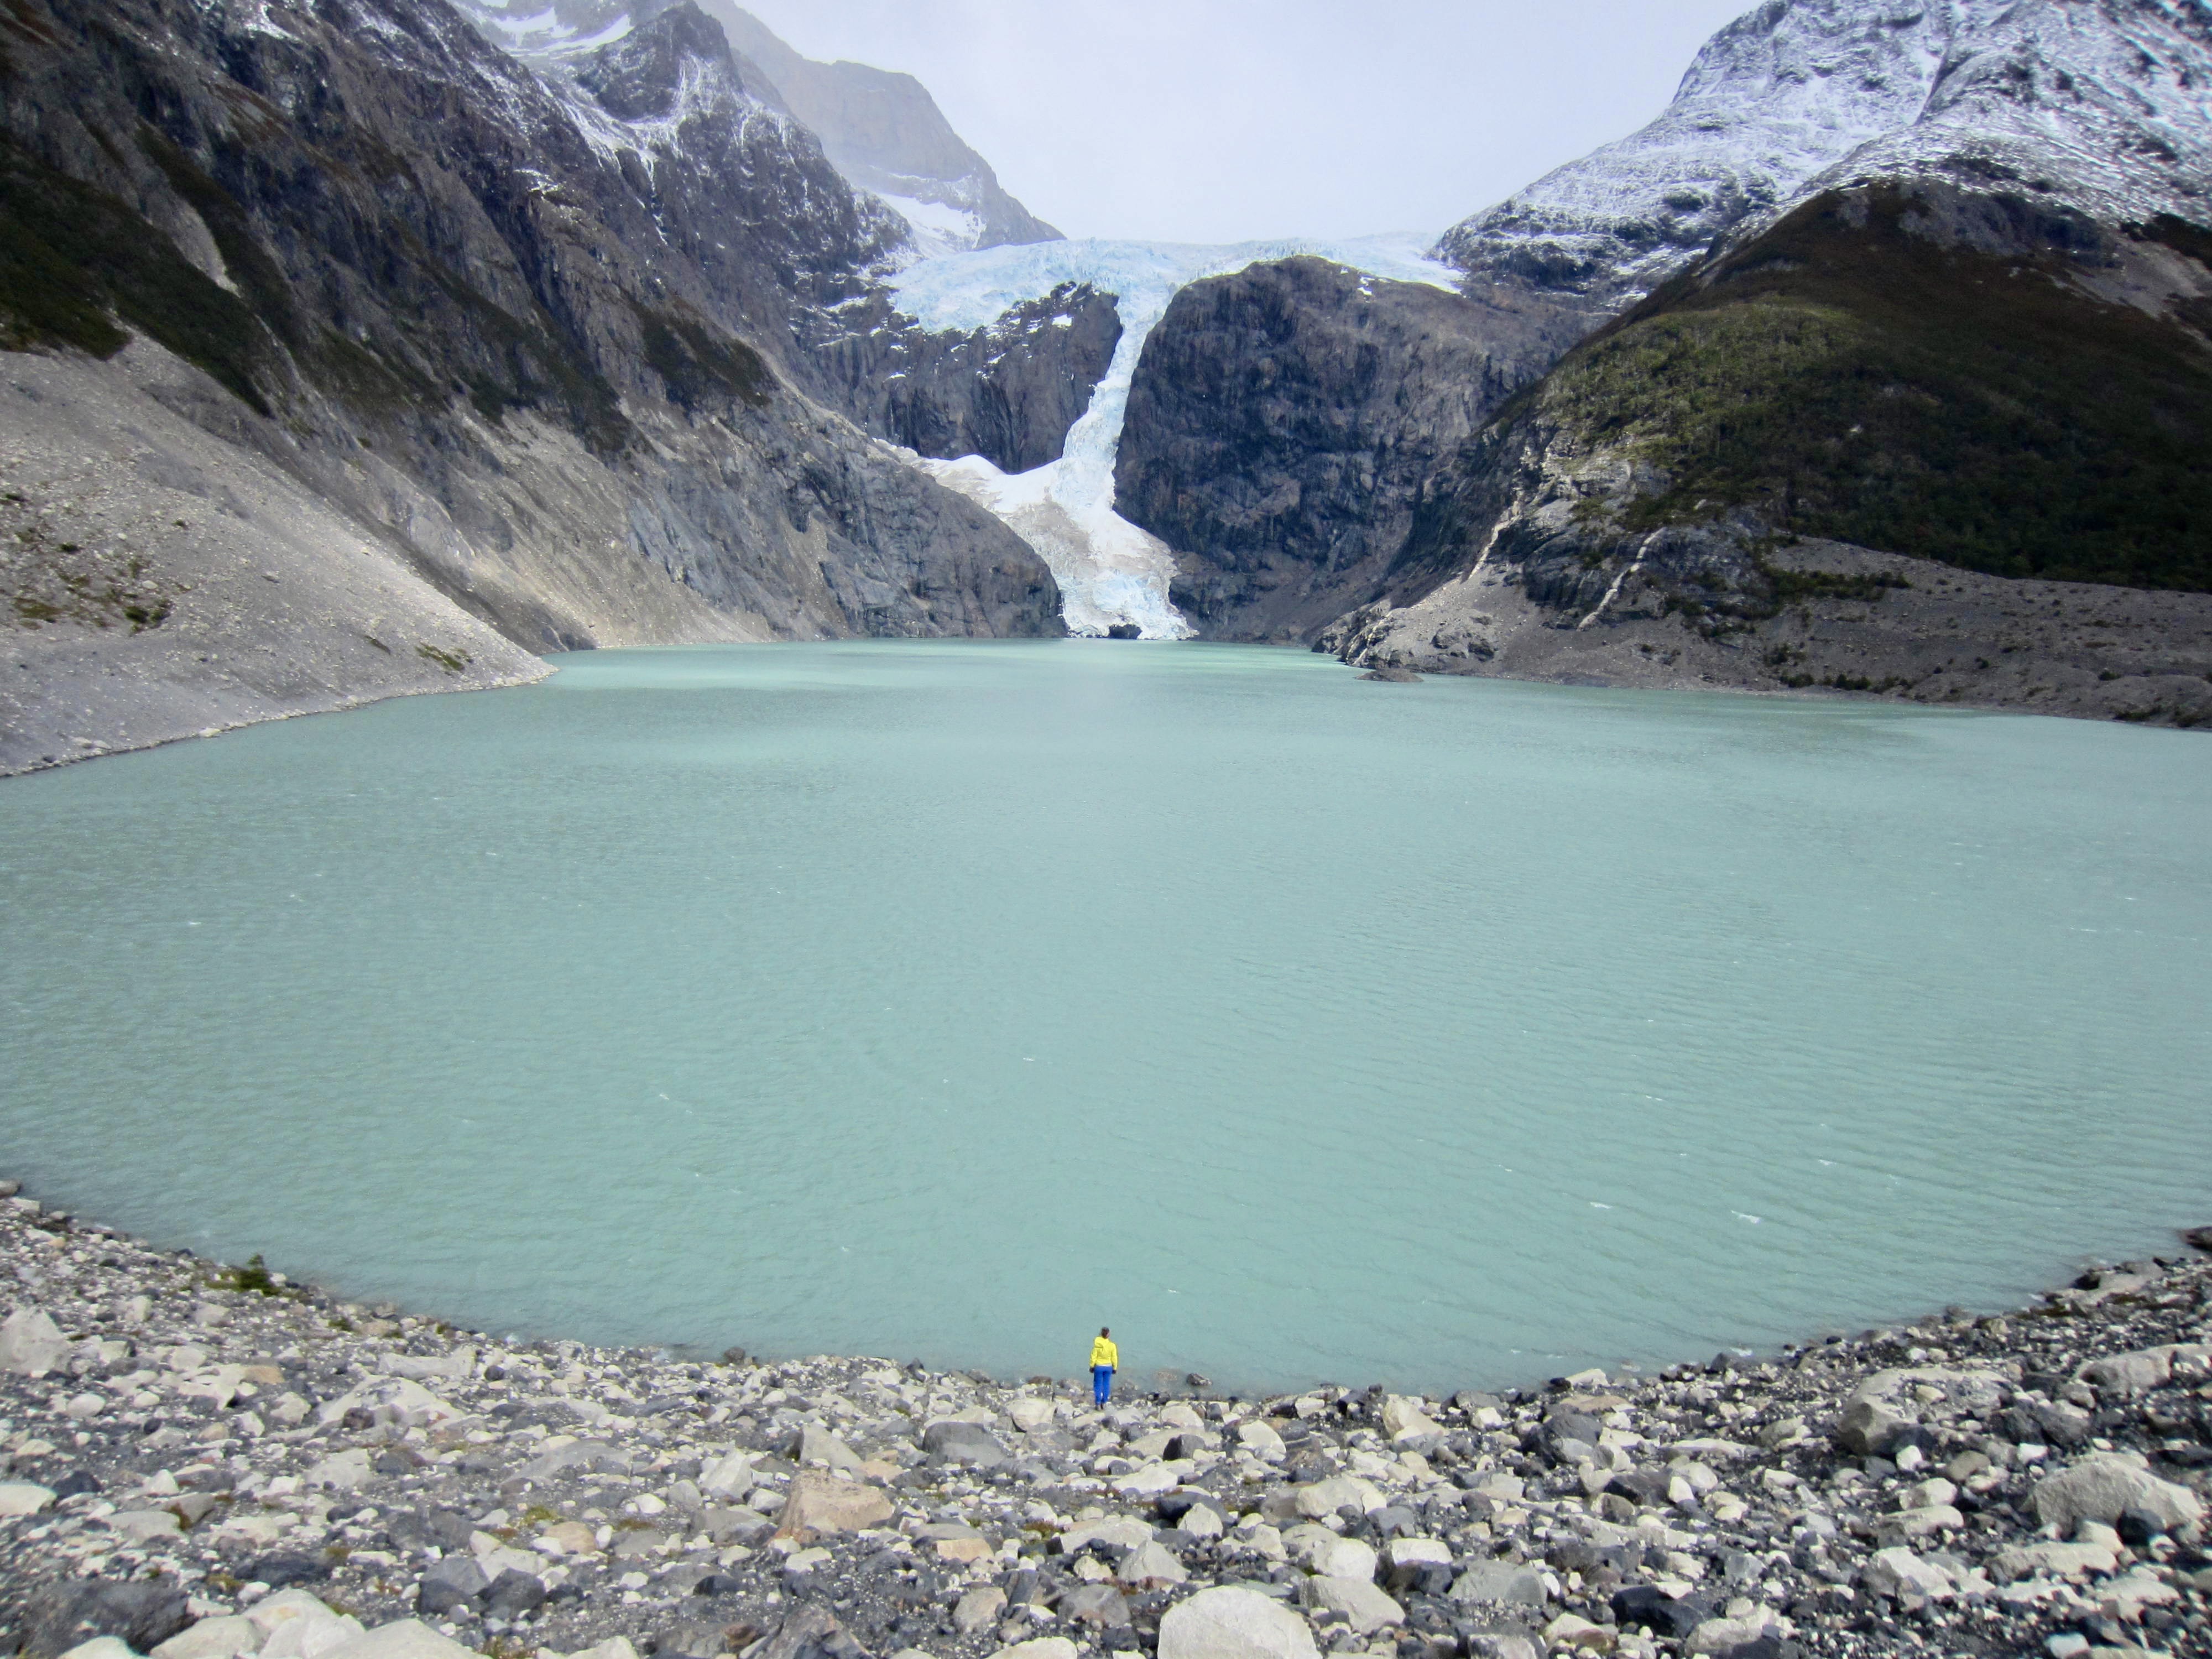
Upon crossing an east fork of the river, the trail turned southwestward and continued up the west fork at a gentle grade. A short but steep climb in mid-afternoon brought us to the crest of a moraine overlooking Lake Los Perros and the Los Perros Glacier icefall. Although it had been drizzly and calm all day, we were blasted by strong winds on this moraine—our first real taste of Patagonian winds—and my raincover was ripped off my backpack. I was able to run down the moraine and retrieve it, but Patagonia’s warning had been delivered!

We finished our day with a short hike over to Los Perros Camp, which is tucked into forest at the base of a steep hillside. This is a small and uninspiring campsite that necessitates all tents to be pitched closely together. The camp amenities are limited (cold showers only, for example), but it does have a decent indoor public kitchen and a nice veranda.

Because the traverse from Los Perros Camp to Grey Camp is the most difficult day of the “O-W” Circuit, the park rangers here require that all trekkers leave camp by 7:00am—no exceptions. This minimizes the possibility of slow hikers getting benighted at John Garner Pass during bad weather. In preparation for an early start, the entire campsite was quiet by 8:30pm.
Approximate daily stats: 5.4 hrs elapsed; 7.1 mi / 11.5 km traveled; 1800 ft / 550 m gained; 650 ft / 200 m lost.
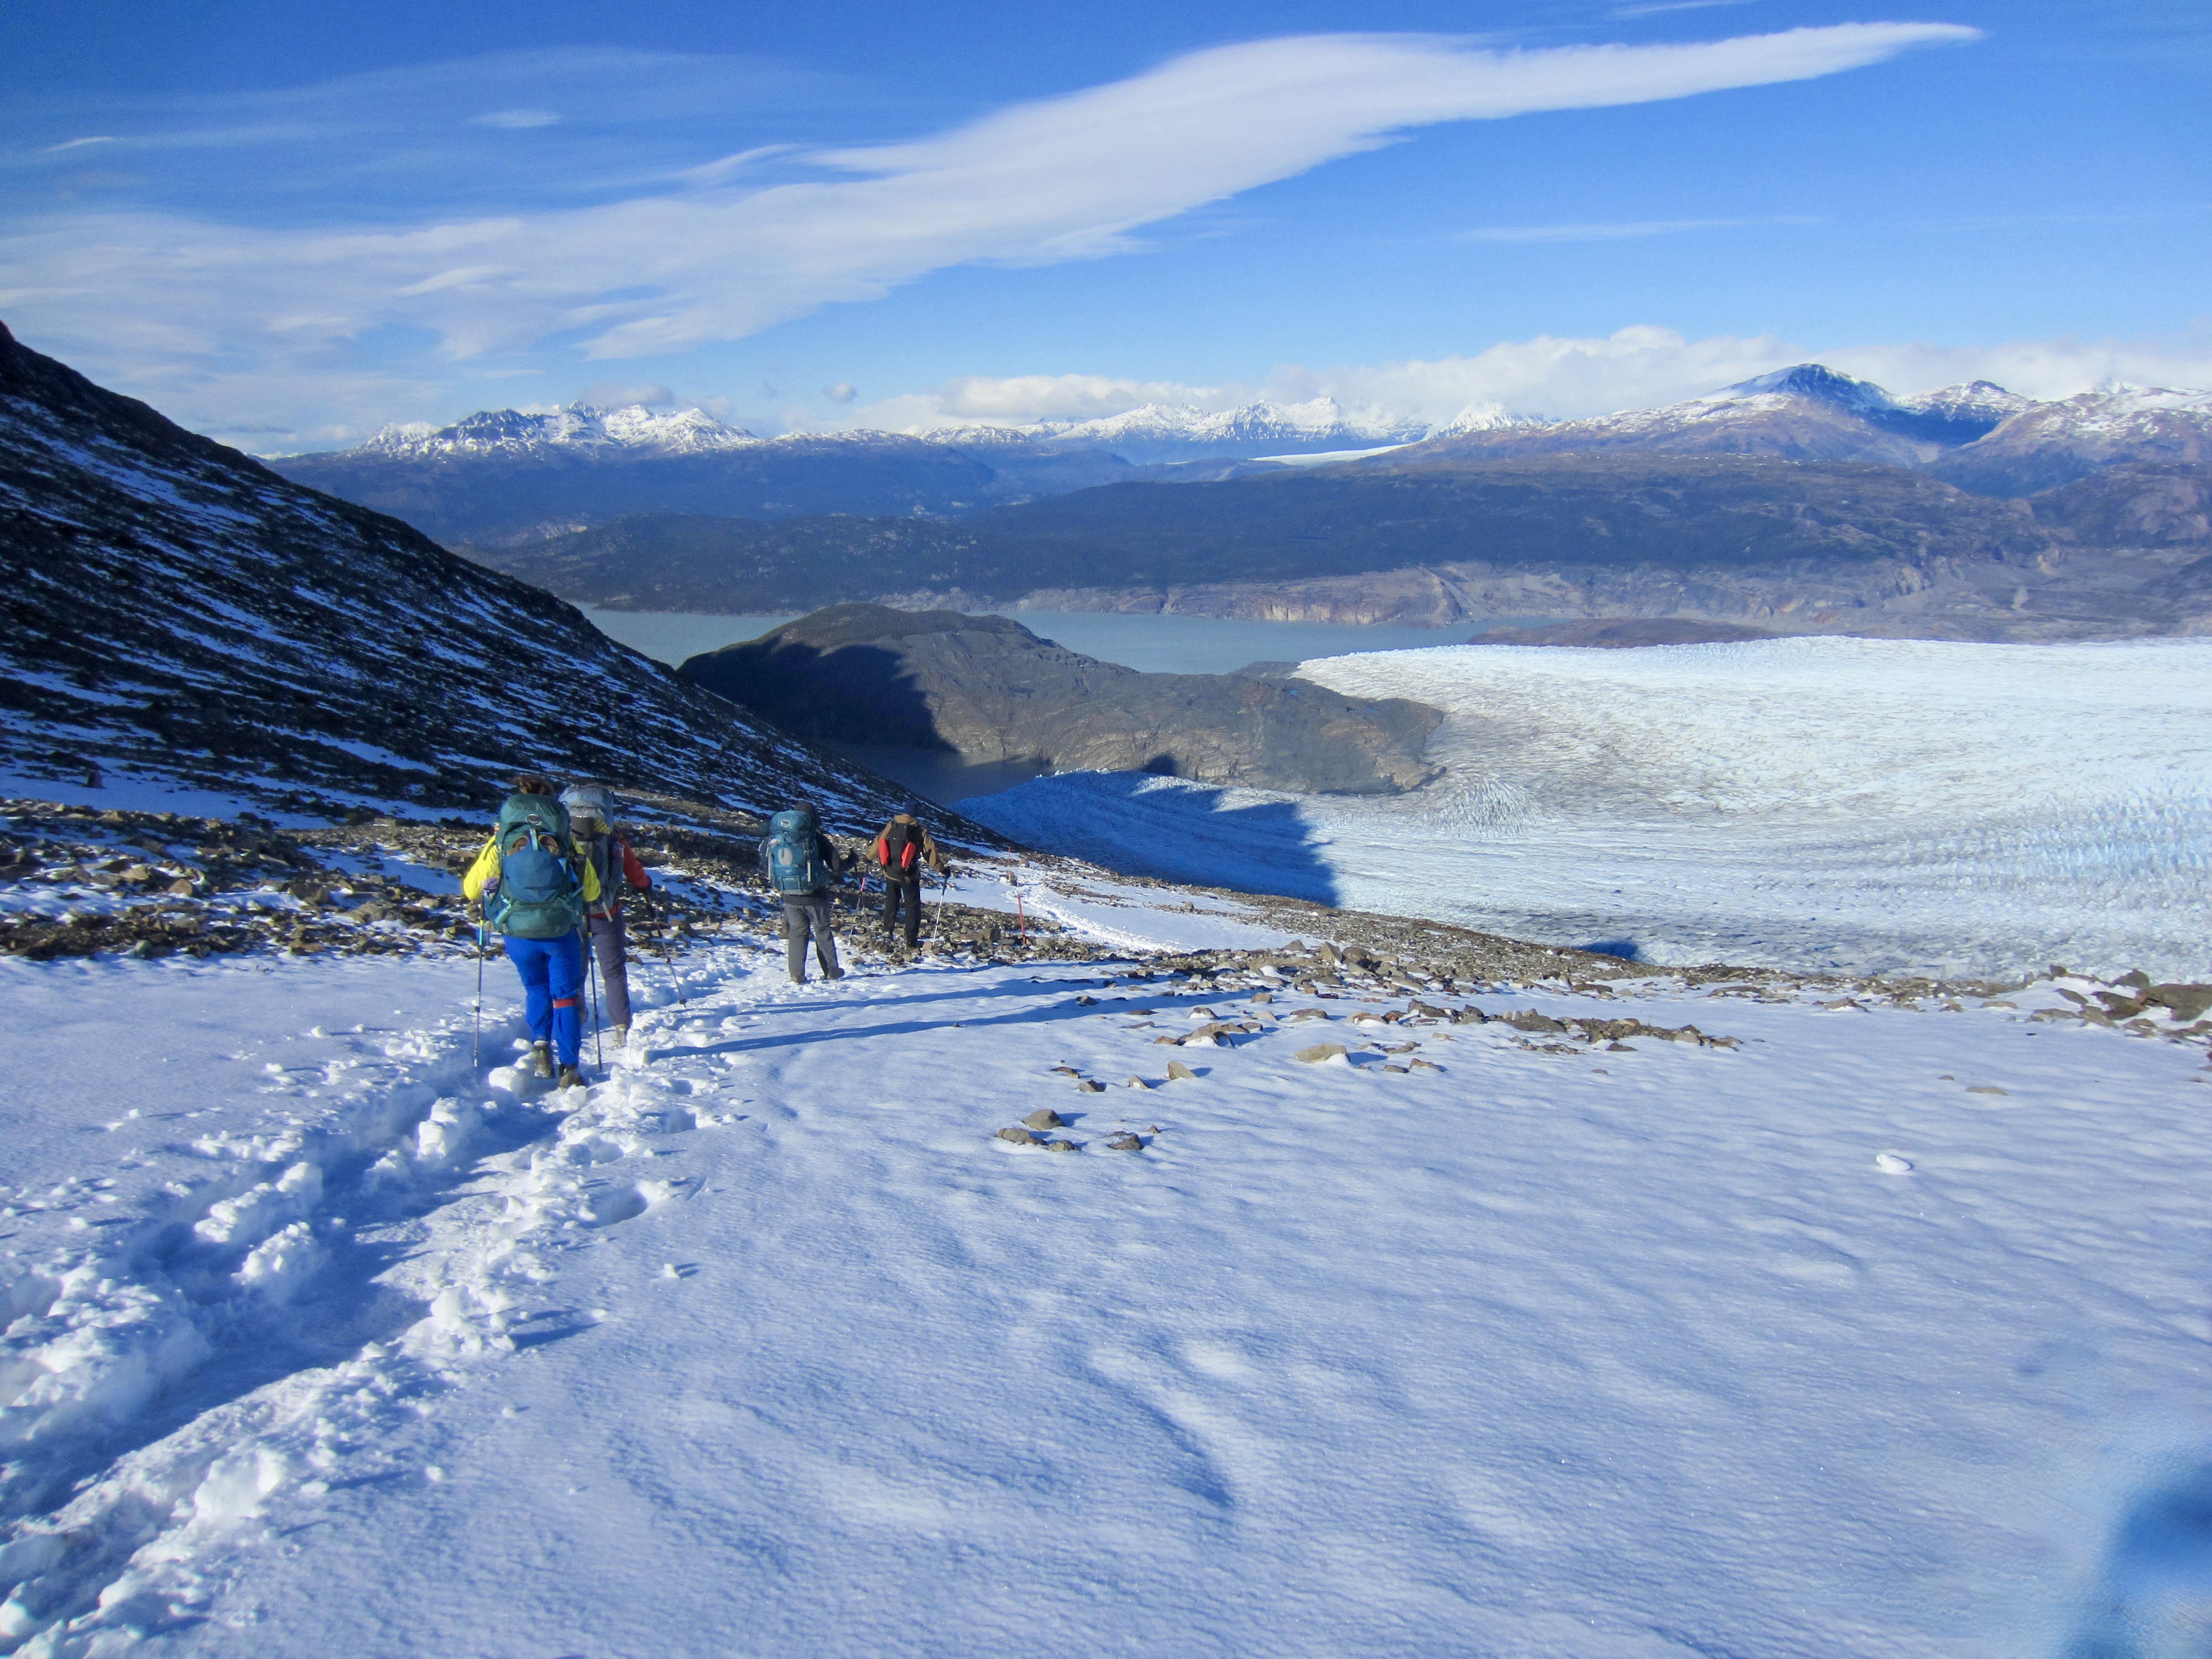
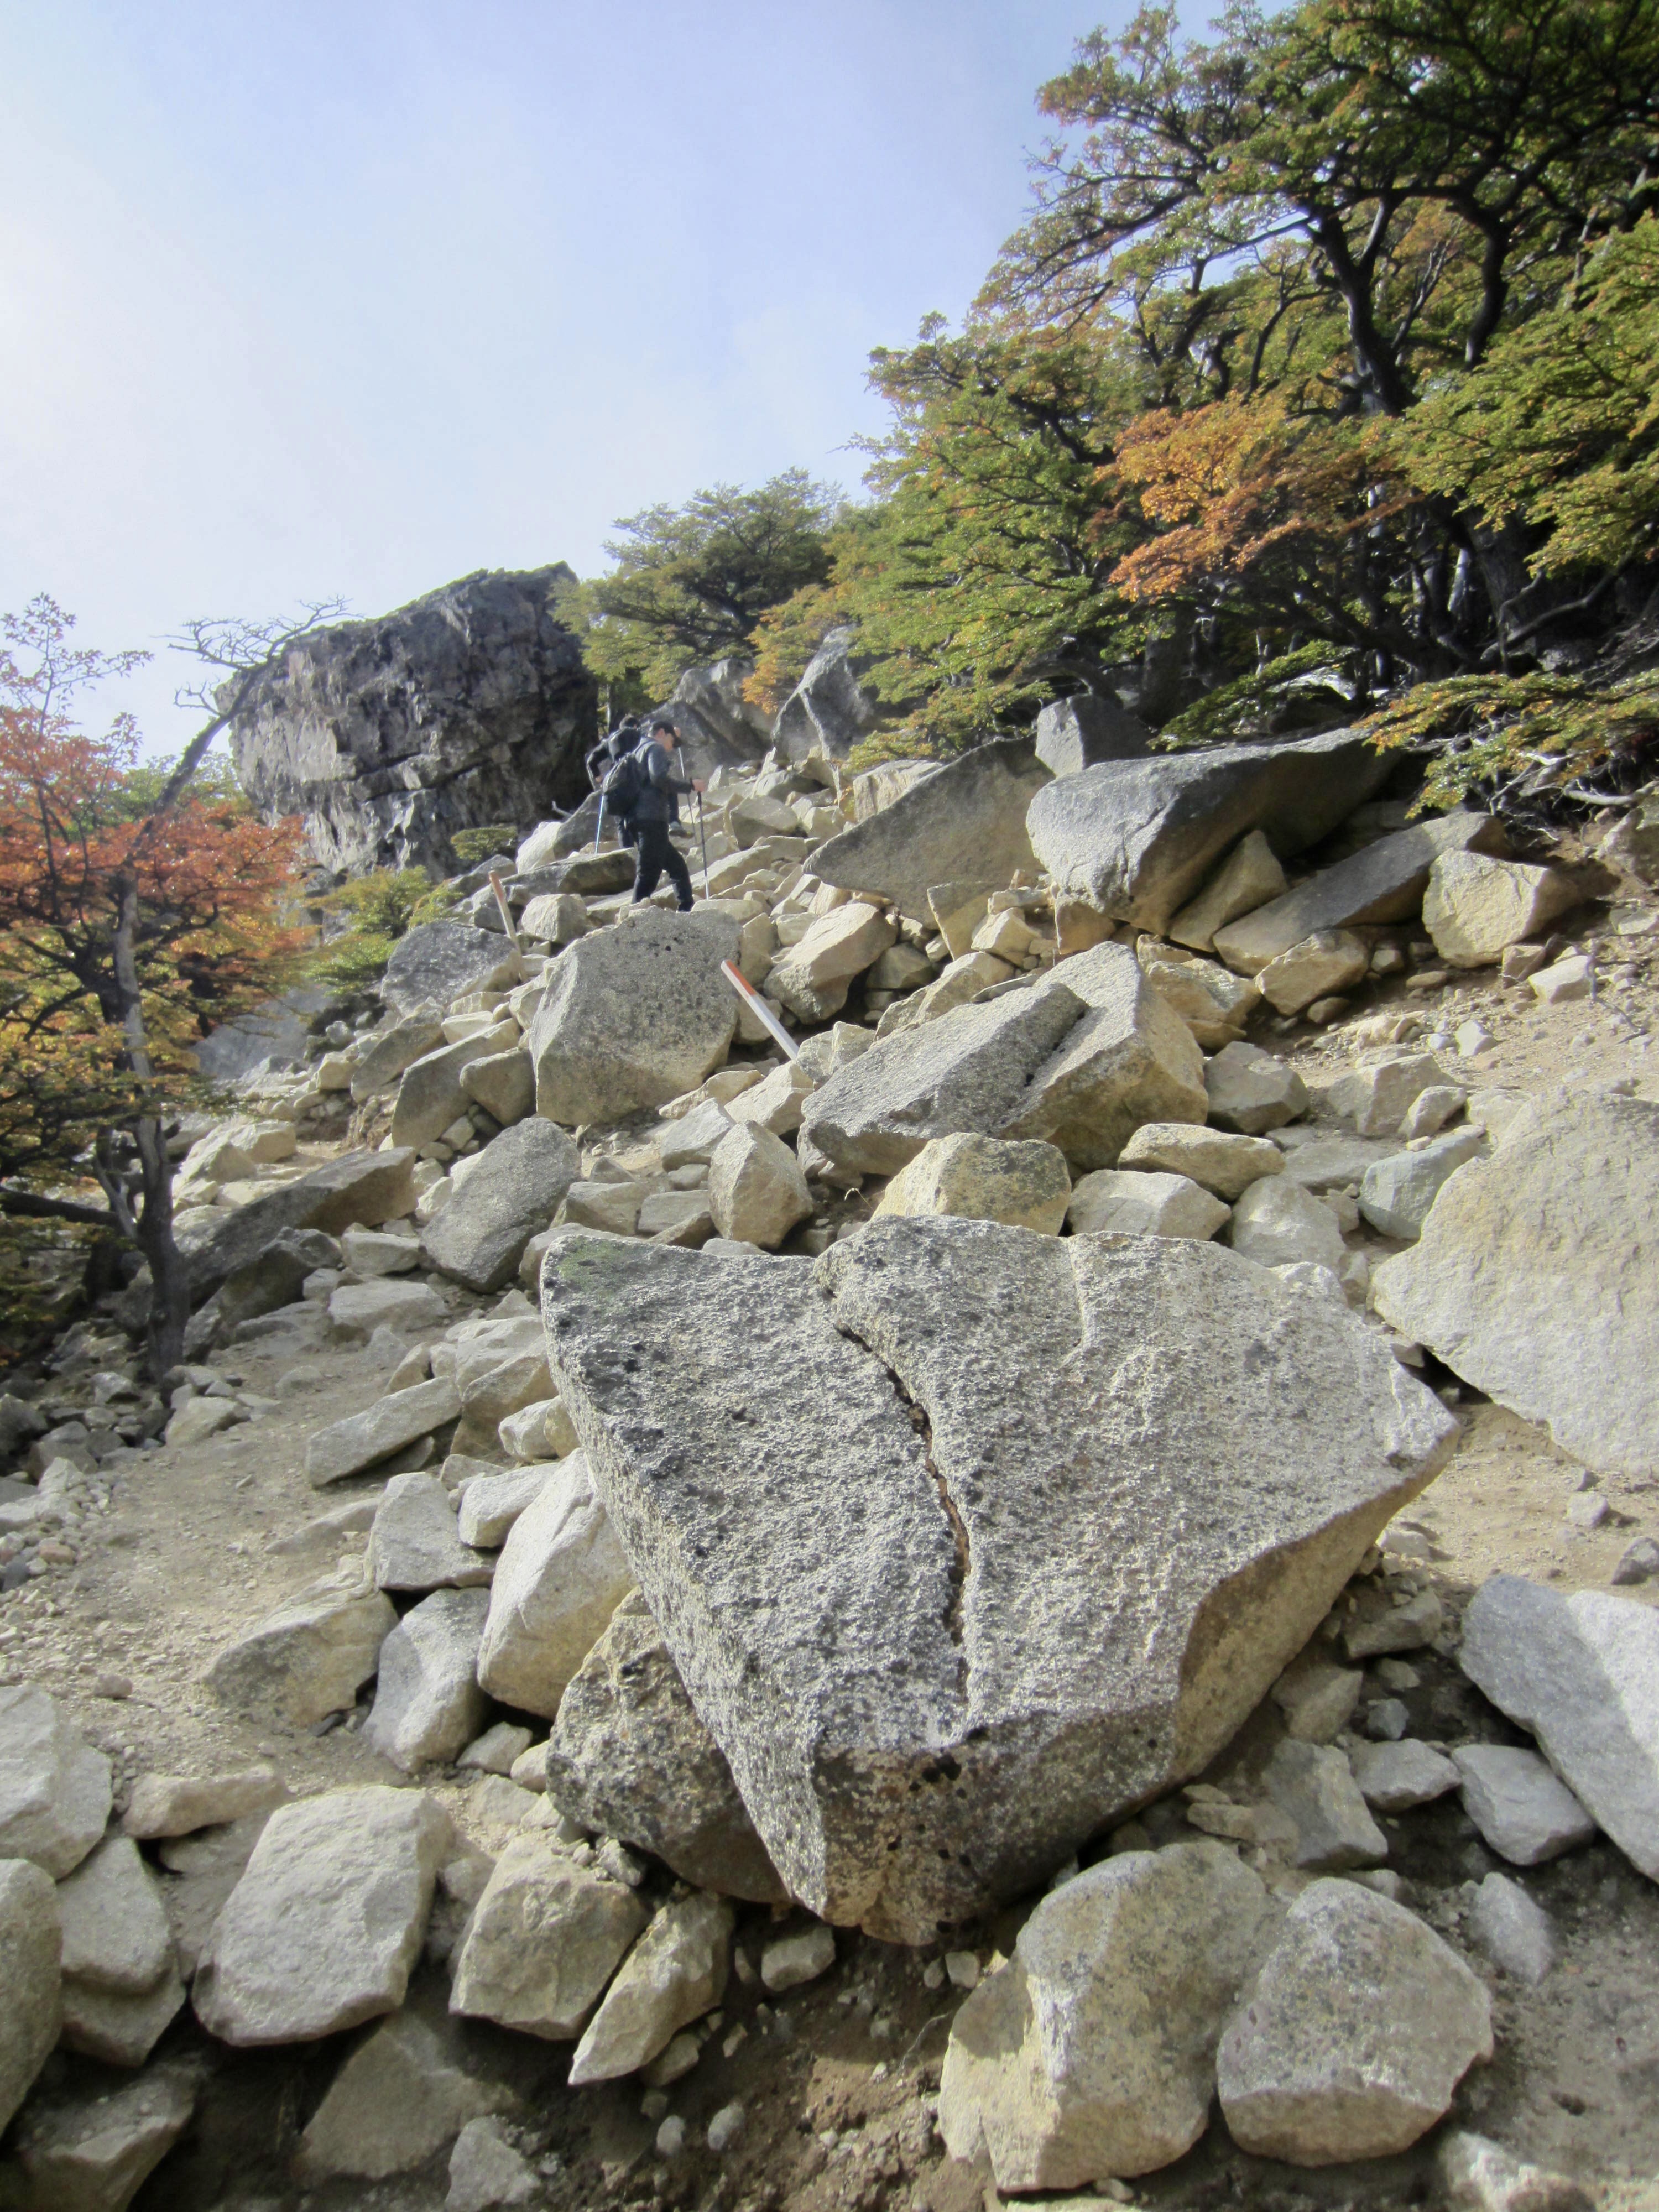
Day 4: Los Perros Camp to Grey Camp
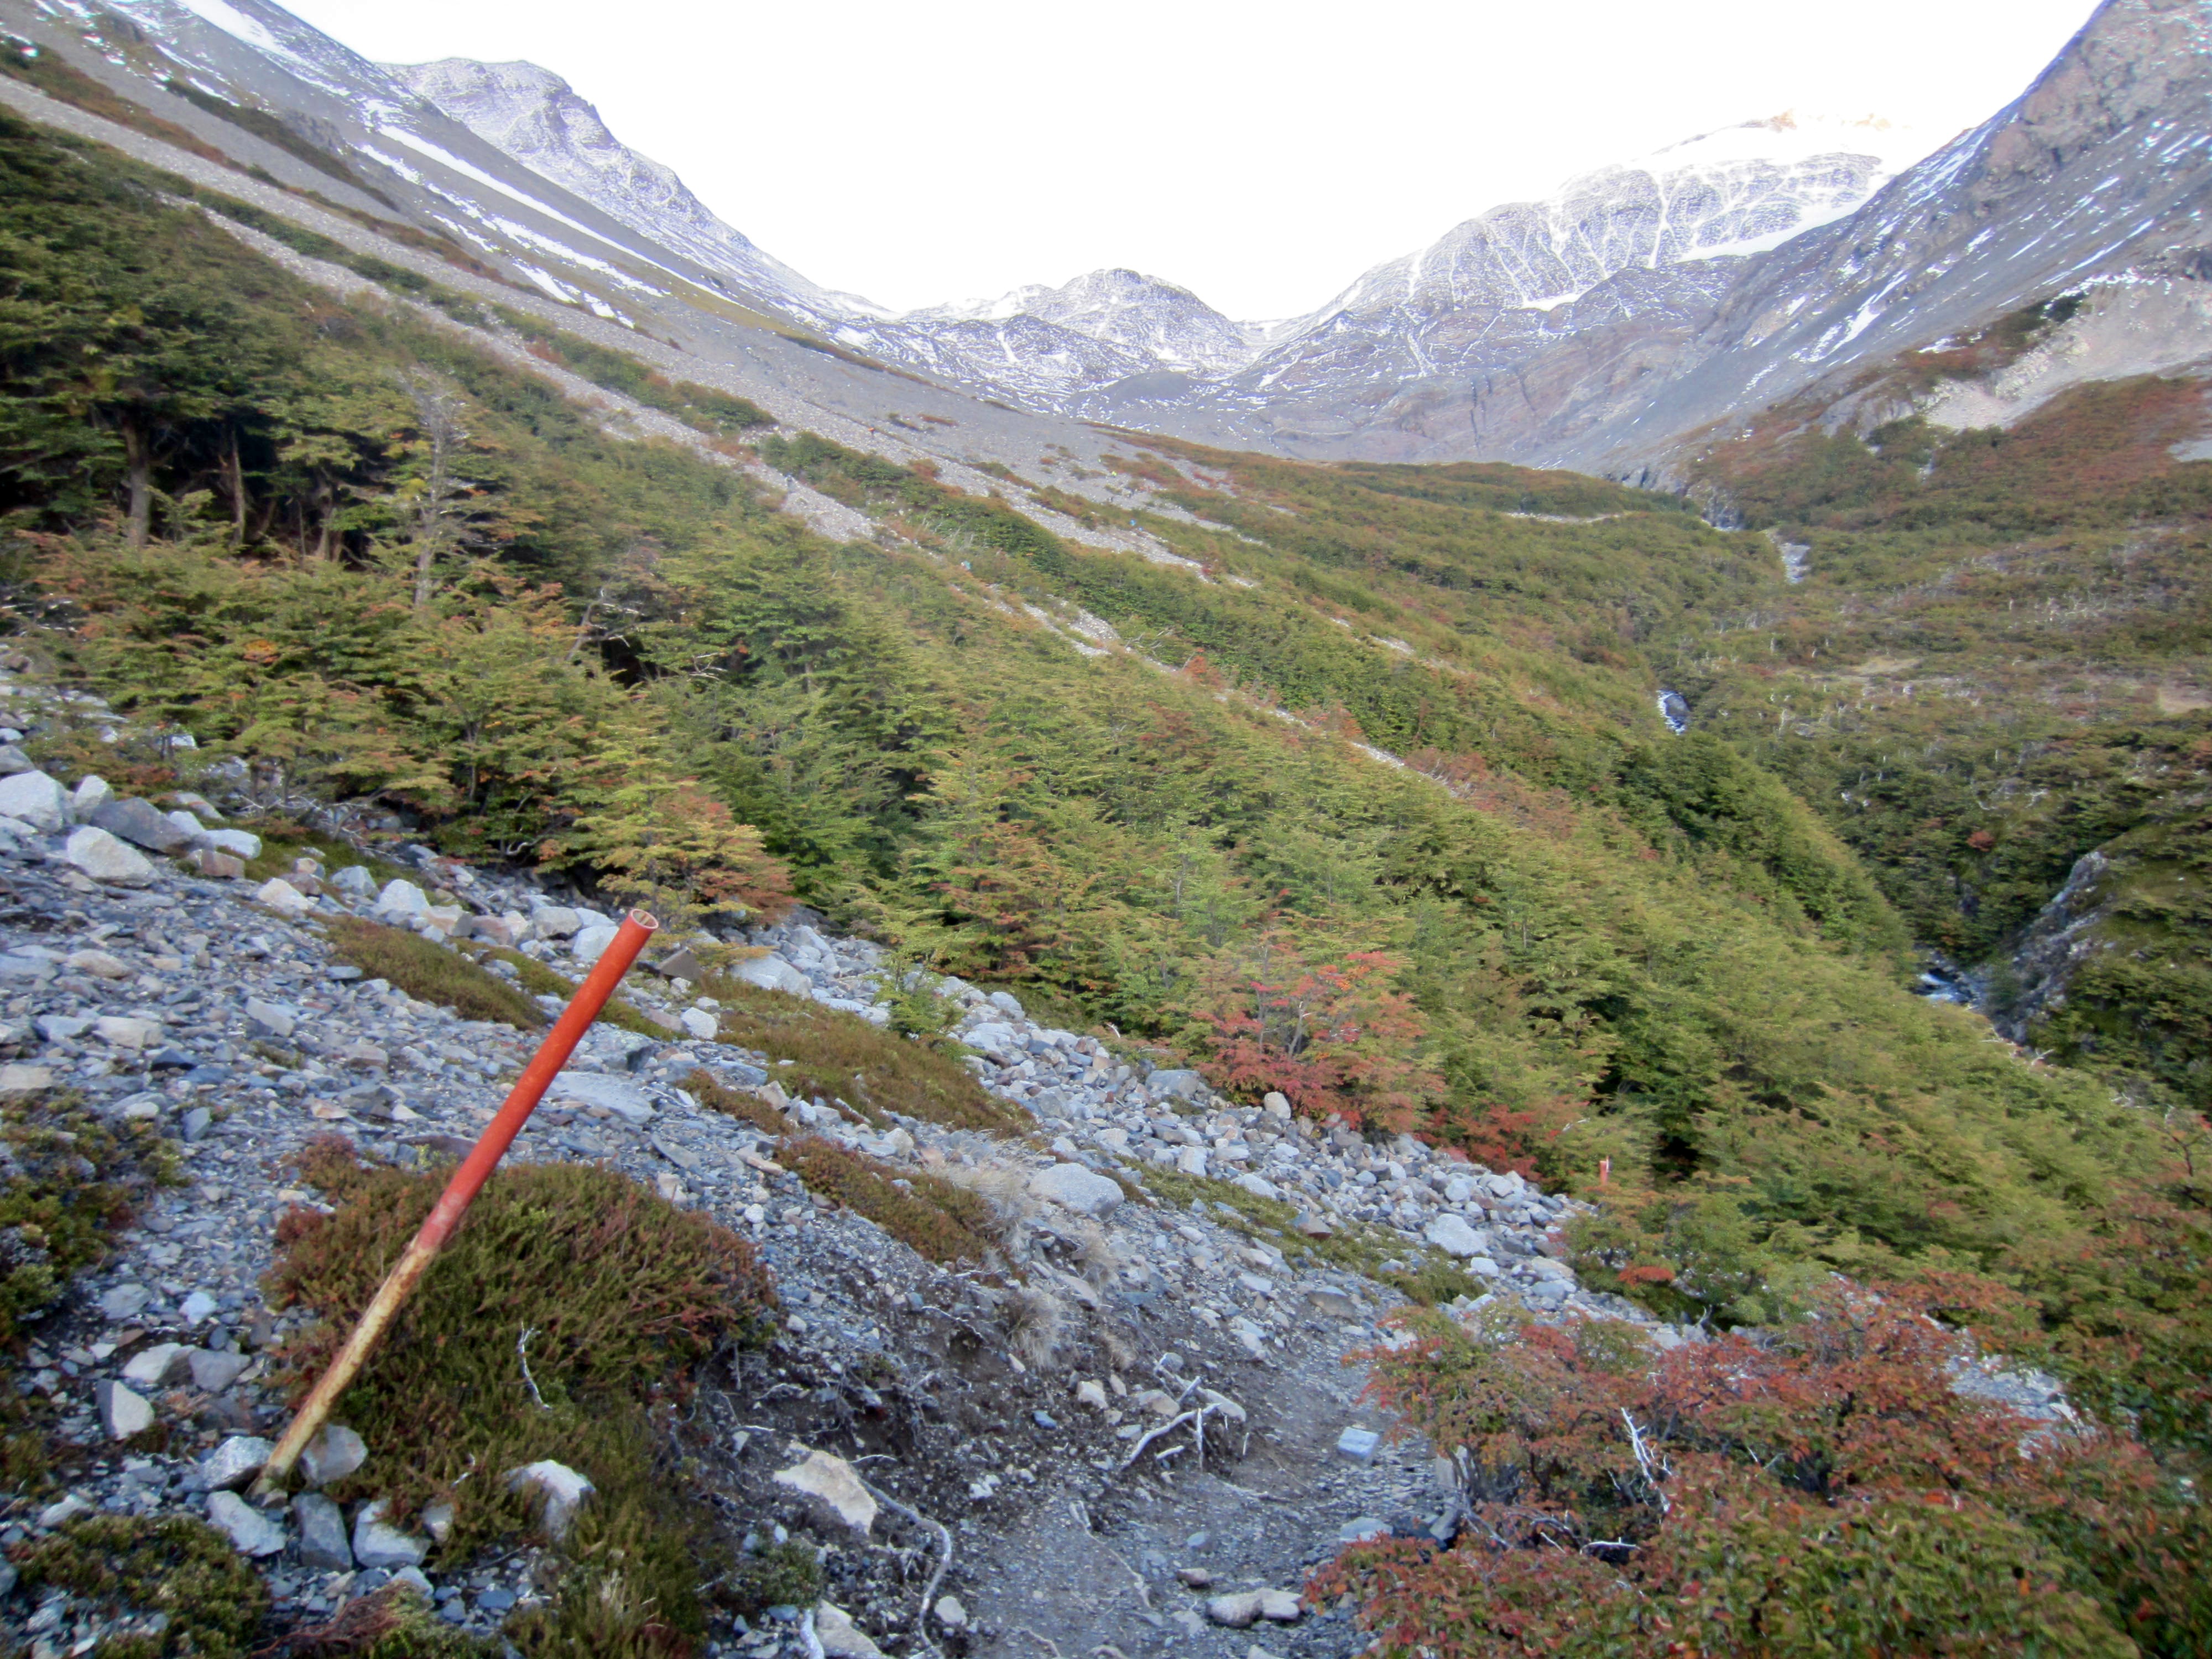
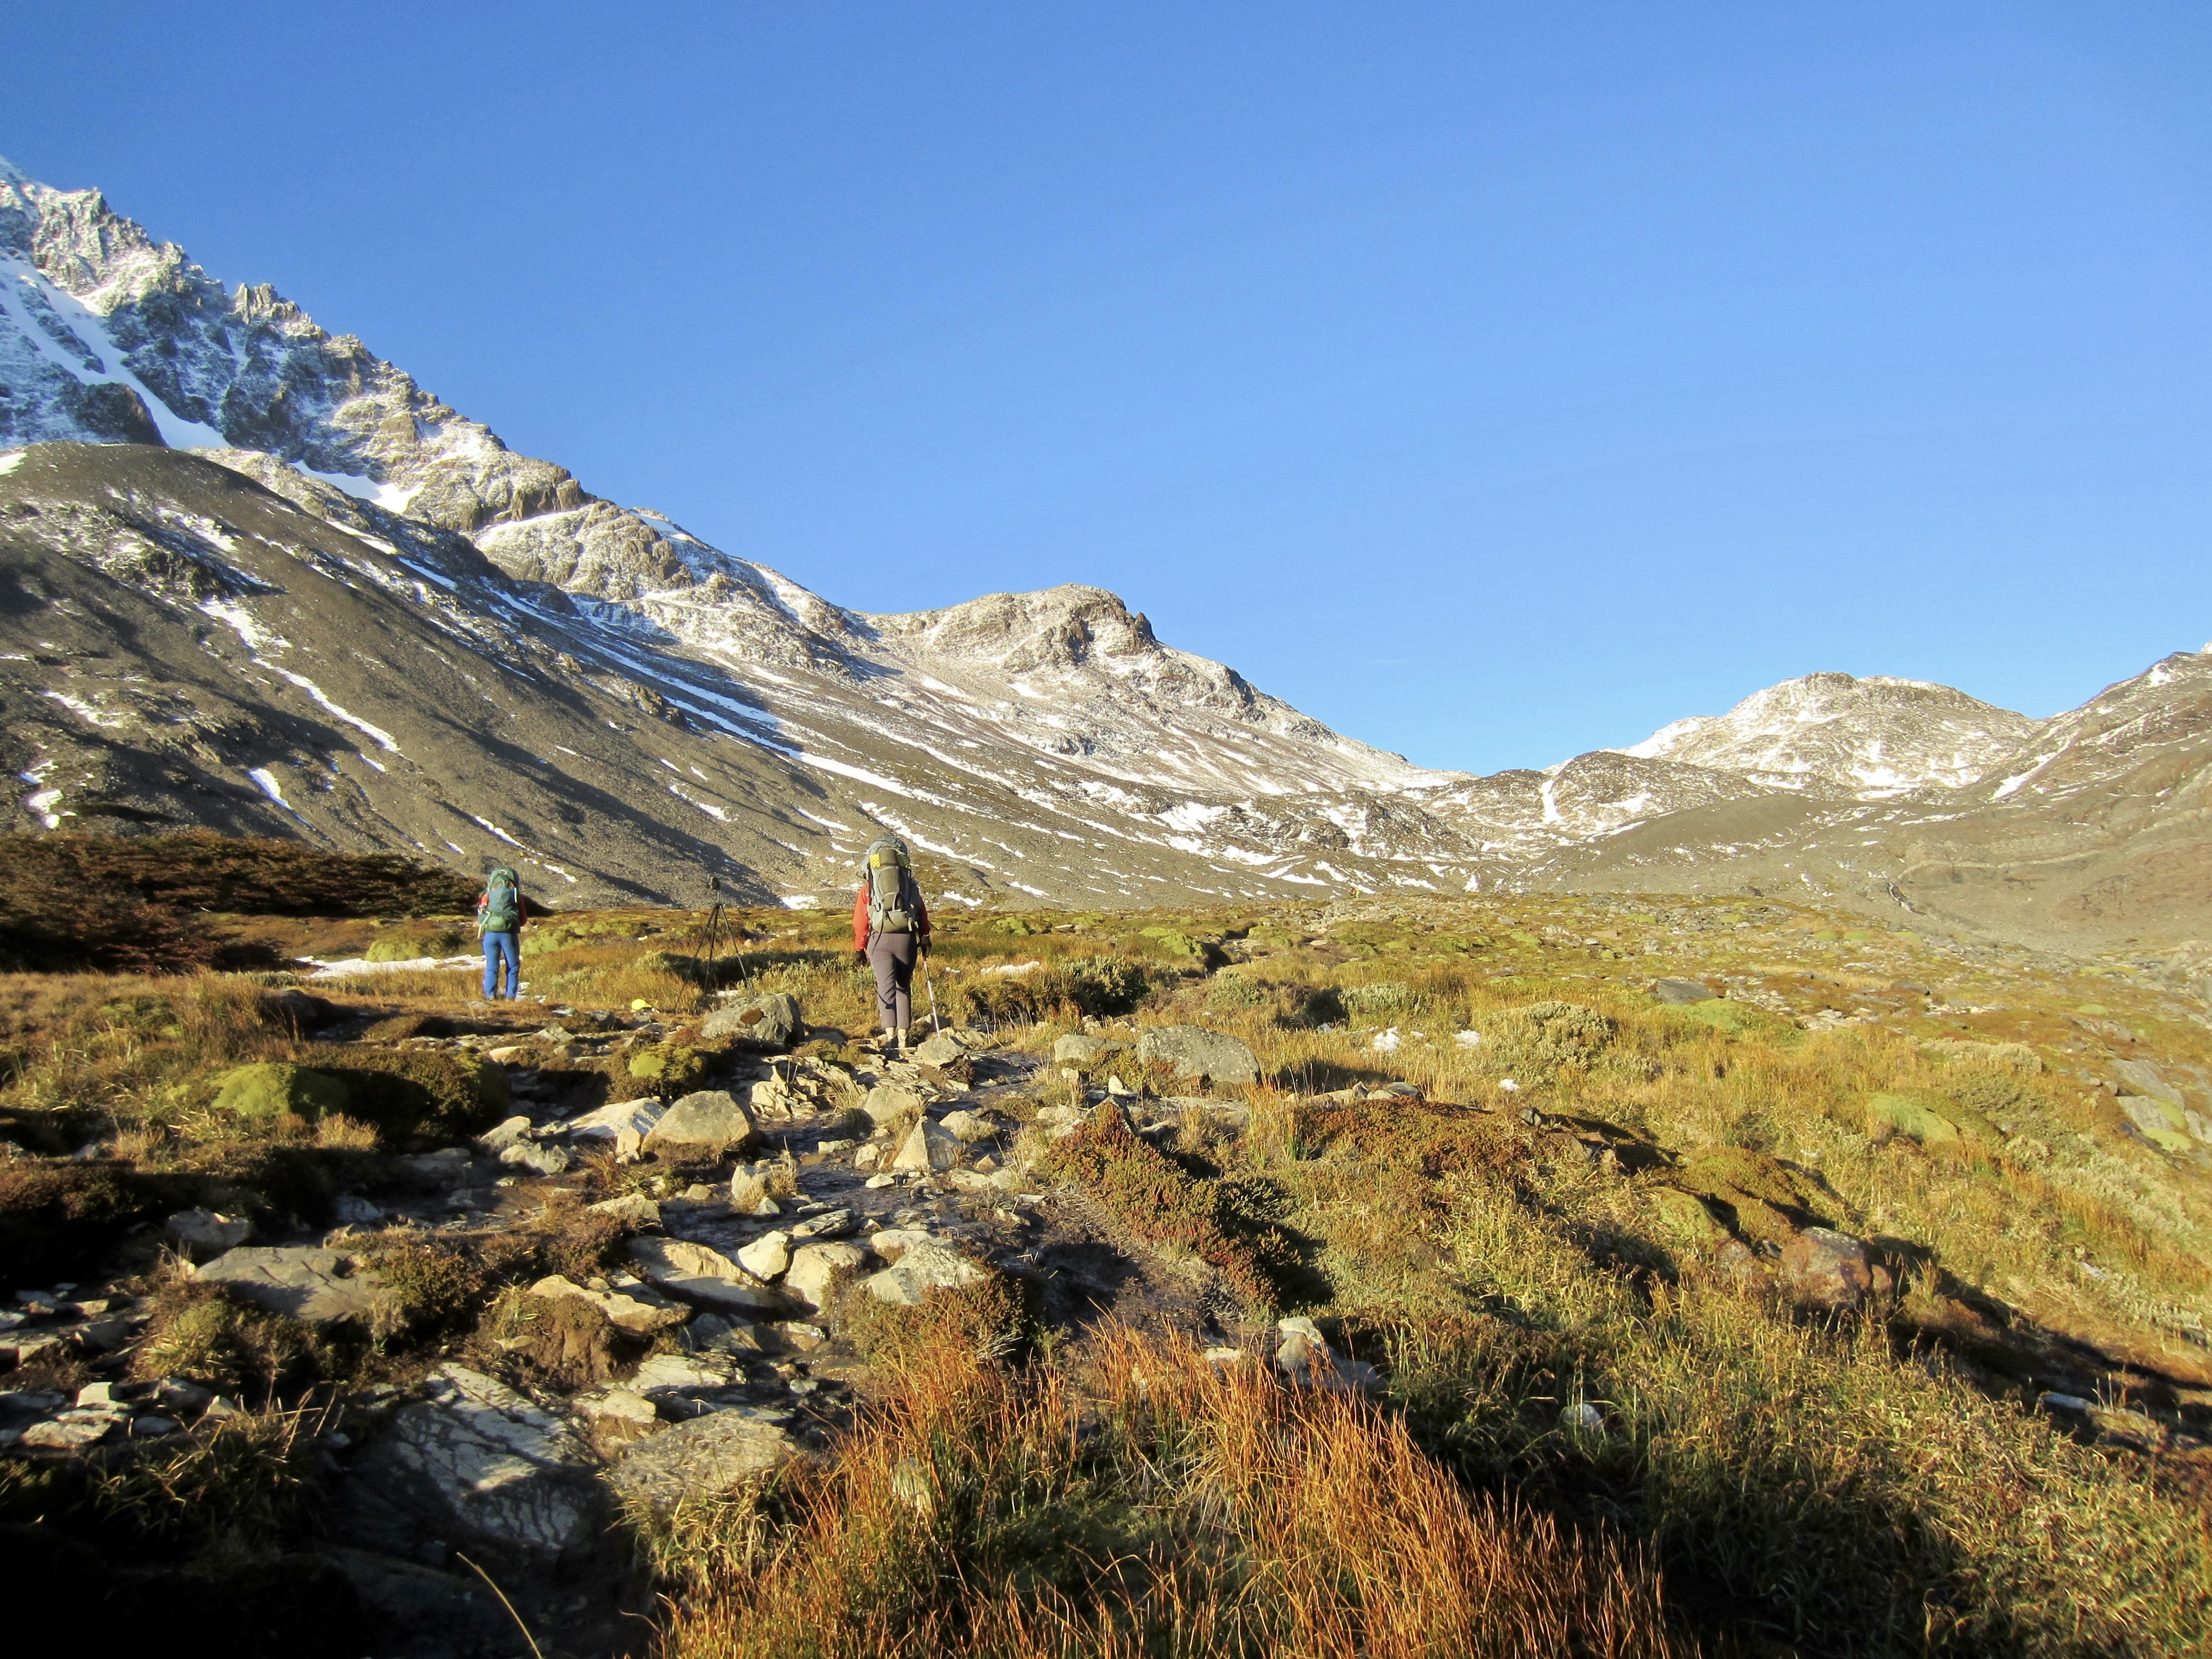
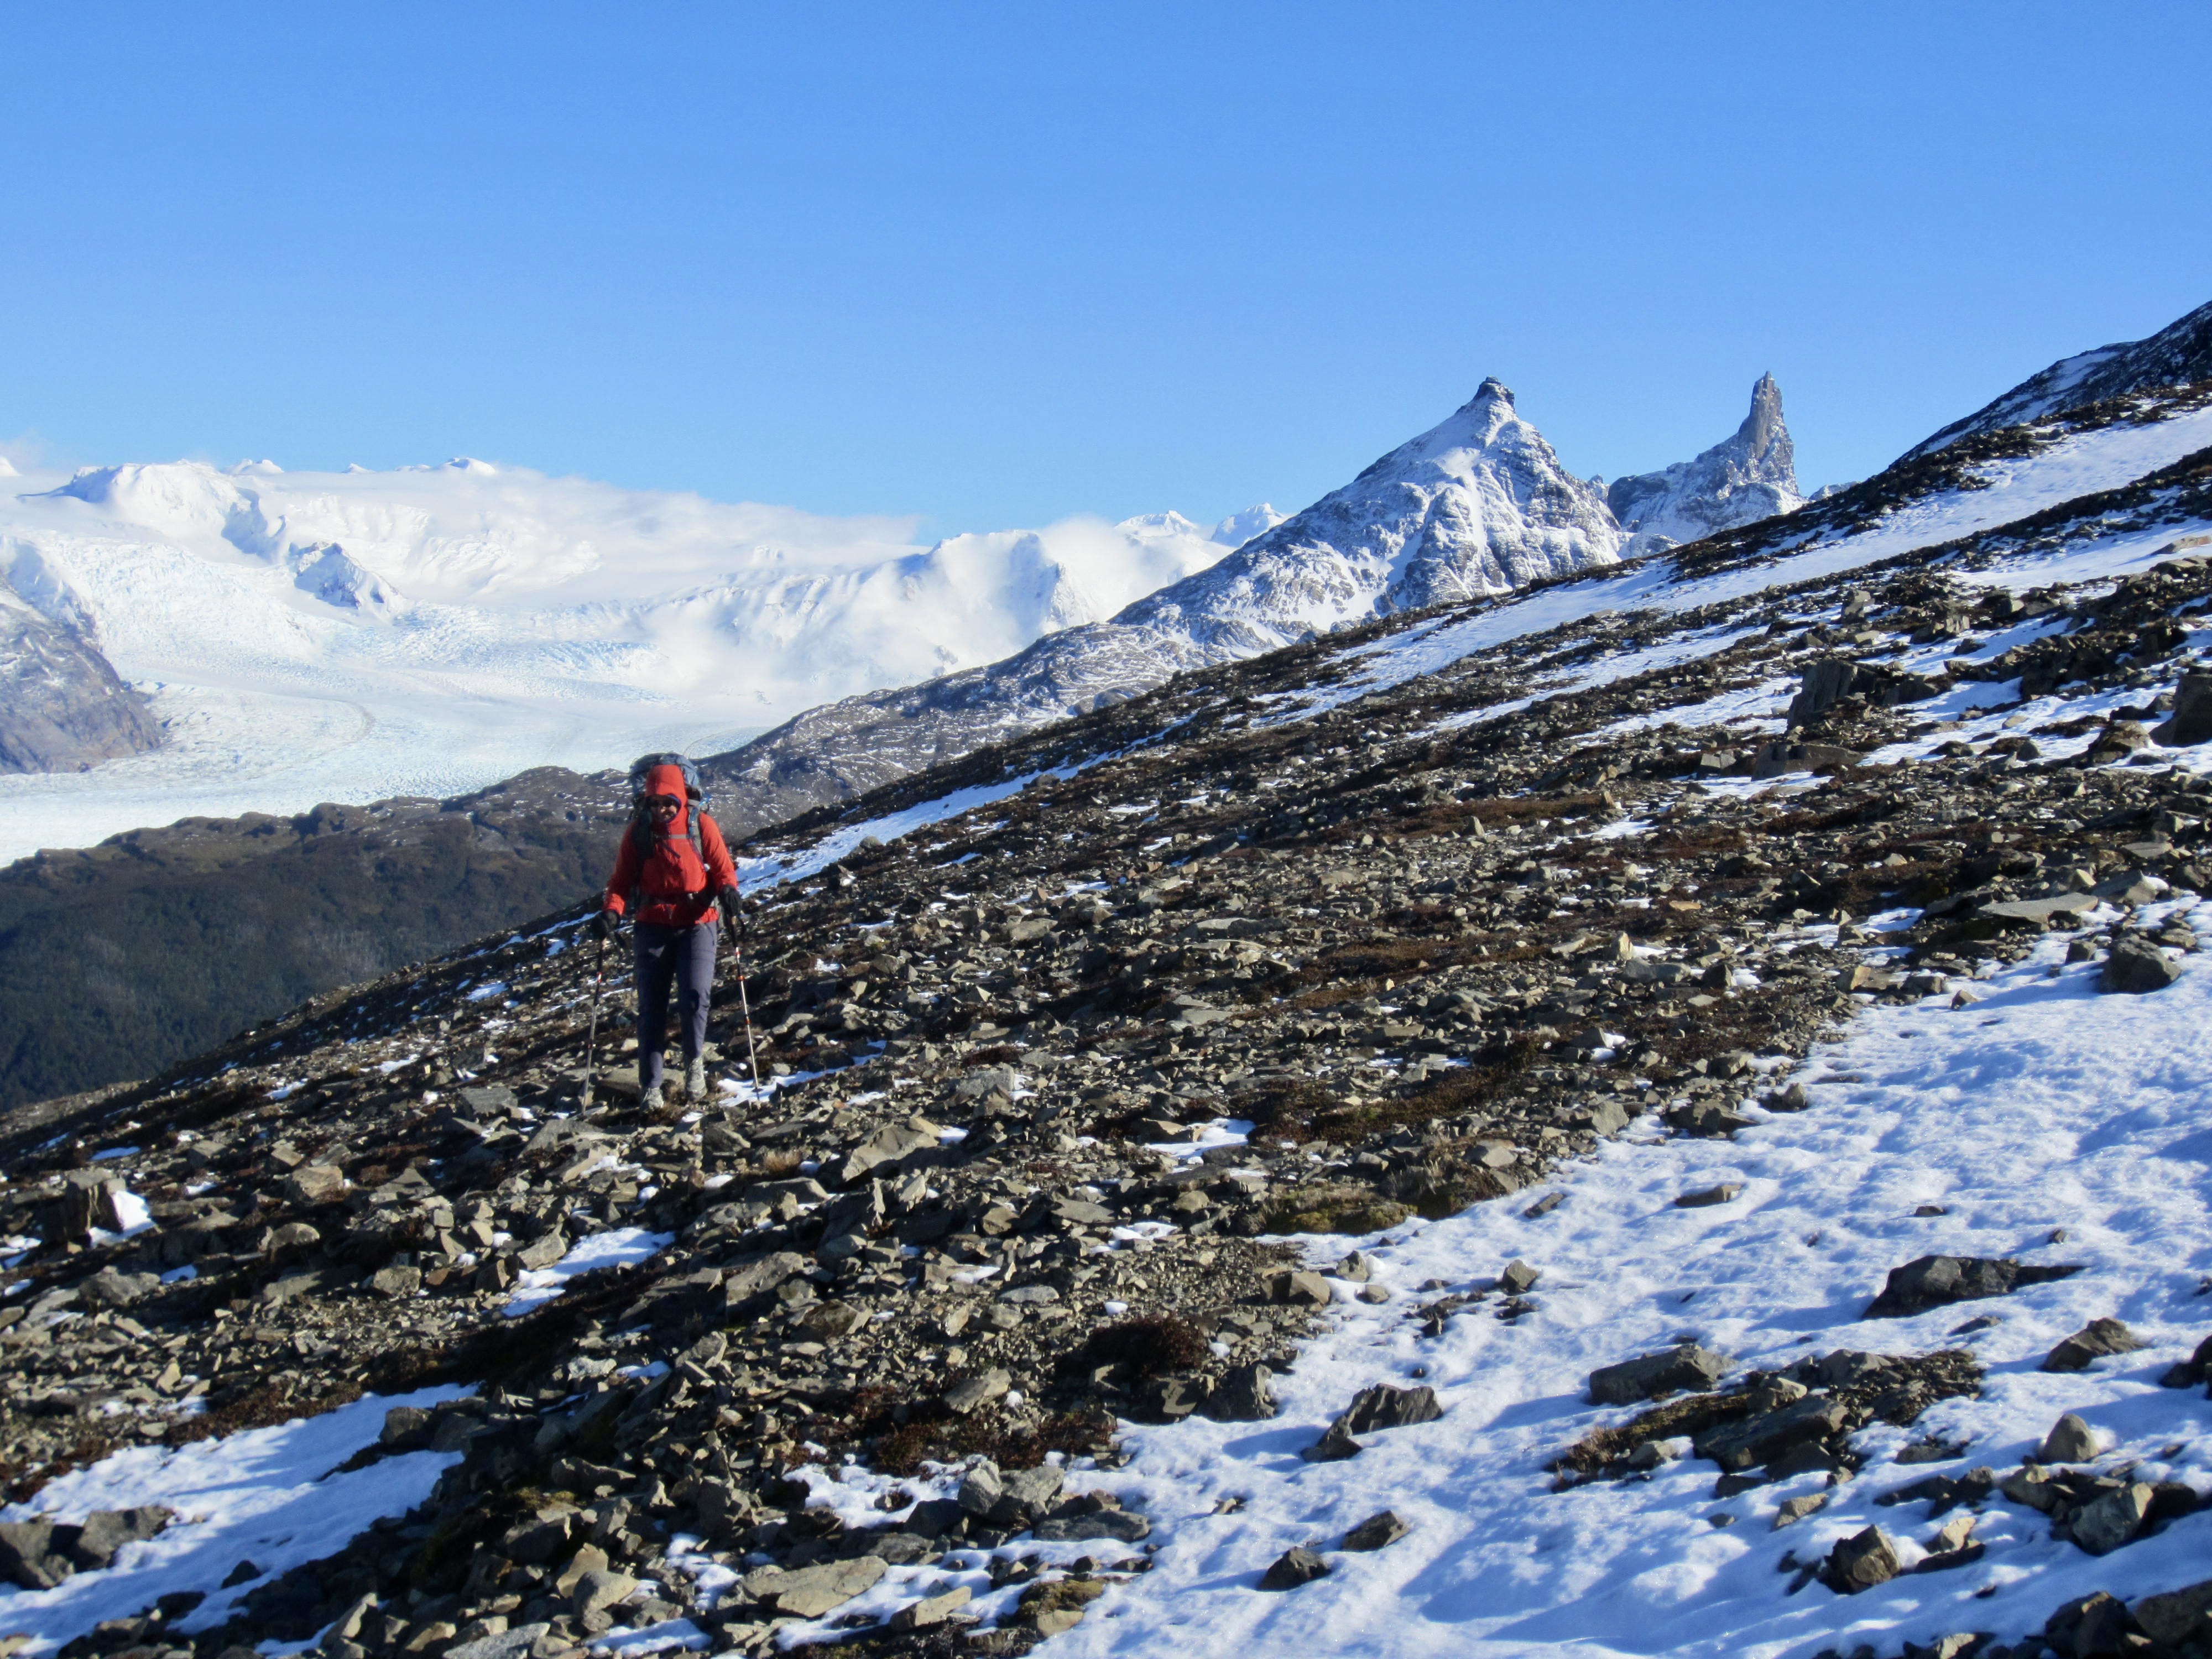
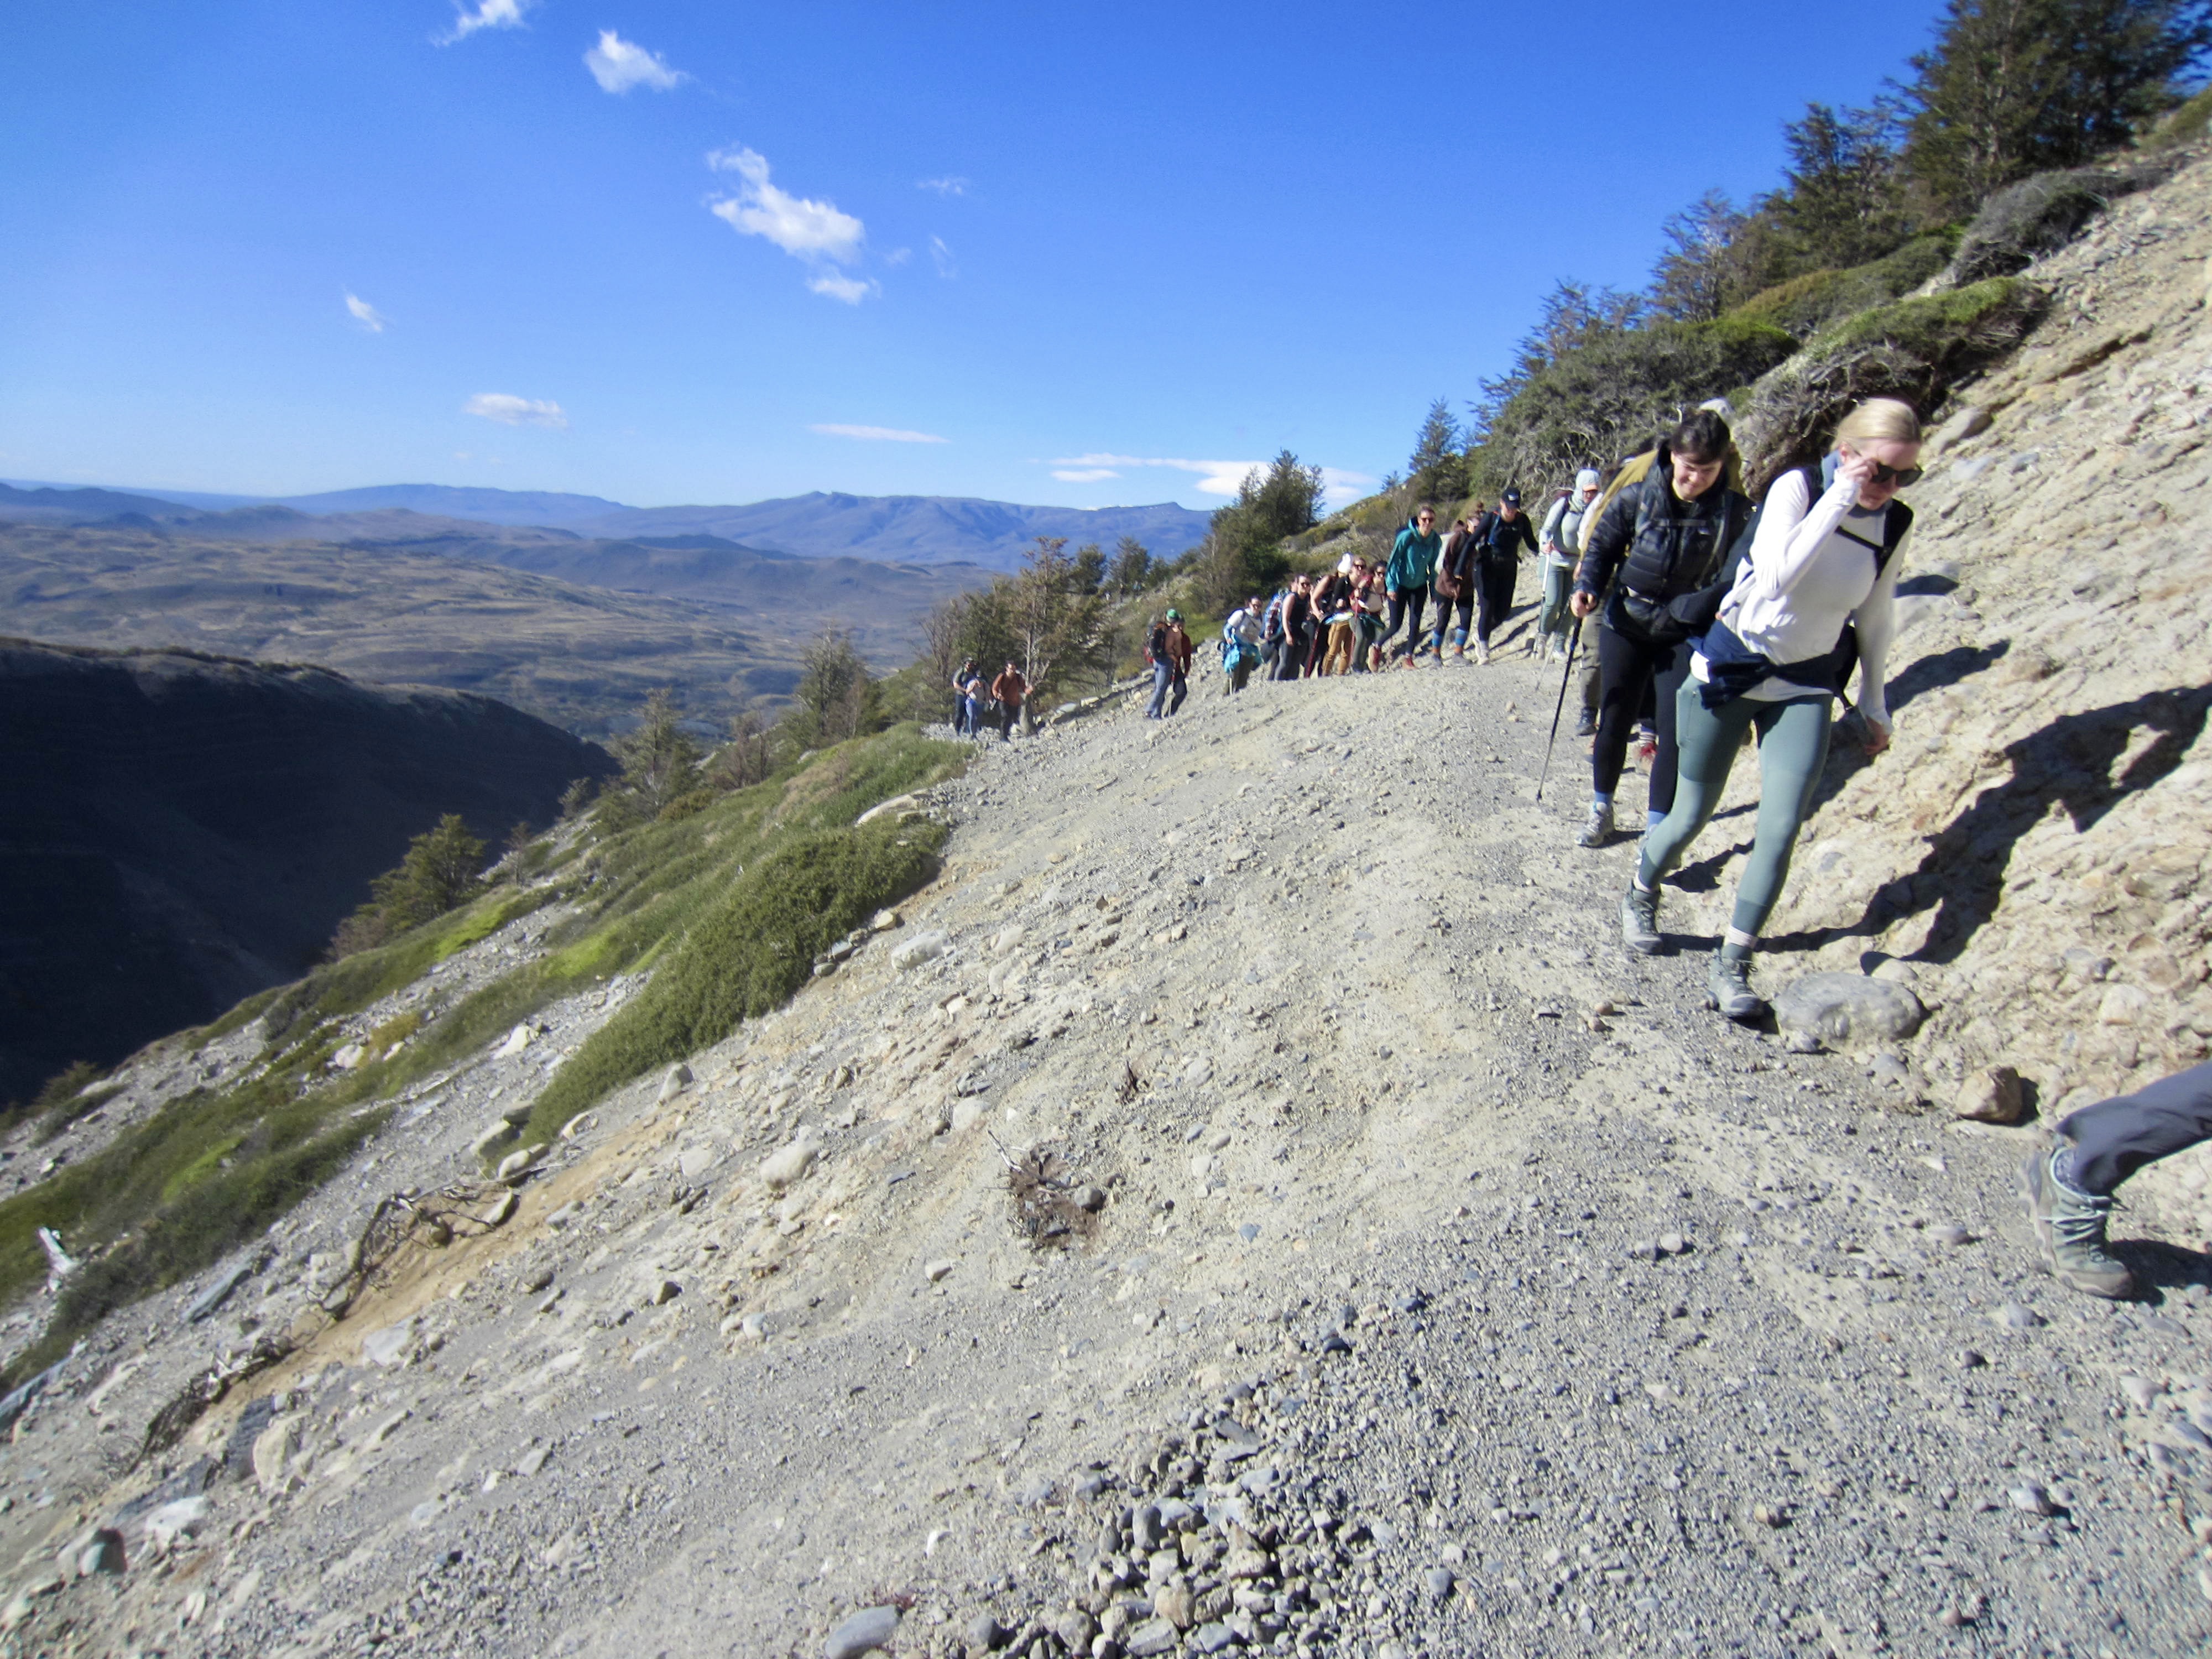
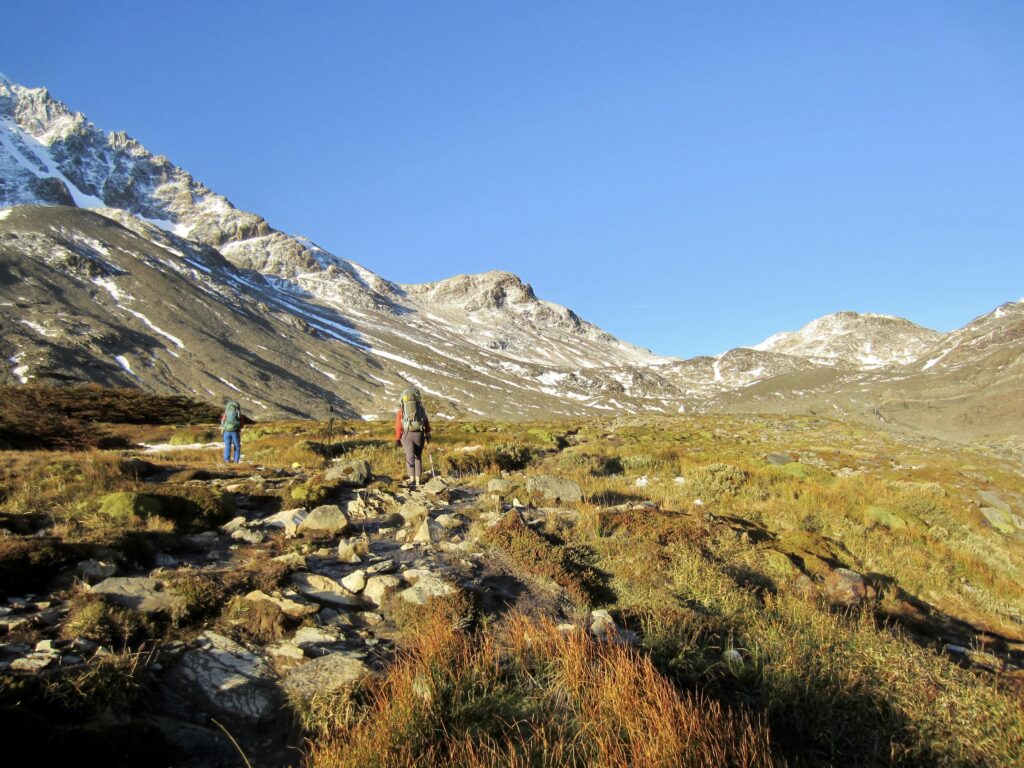
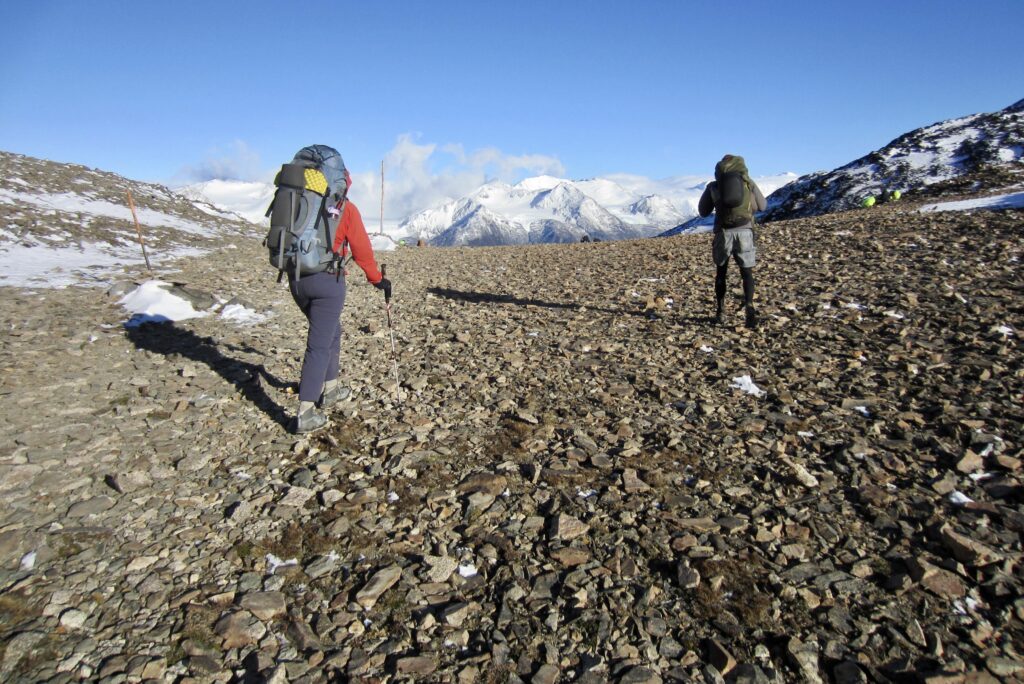
Alarms could be heard throughout camp at 6:00am, and everyone quickly went about dressing, eating, and packing. Eileen, Brooke, and I were on the move at 7:00am sharp and found ourselves in a tight line of other headlamp-clad trekkers. We hiked steeply uphill on a slippery, rocky, rooty, muddy trail—probably the worst segment of trail on the entire circuit, and not made easier by having to travel in the dark. After an hour of steady ascent, we gained the crest of a minor rib and got our first view of John Garner Pass at the head of a long, upland valley.

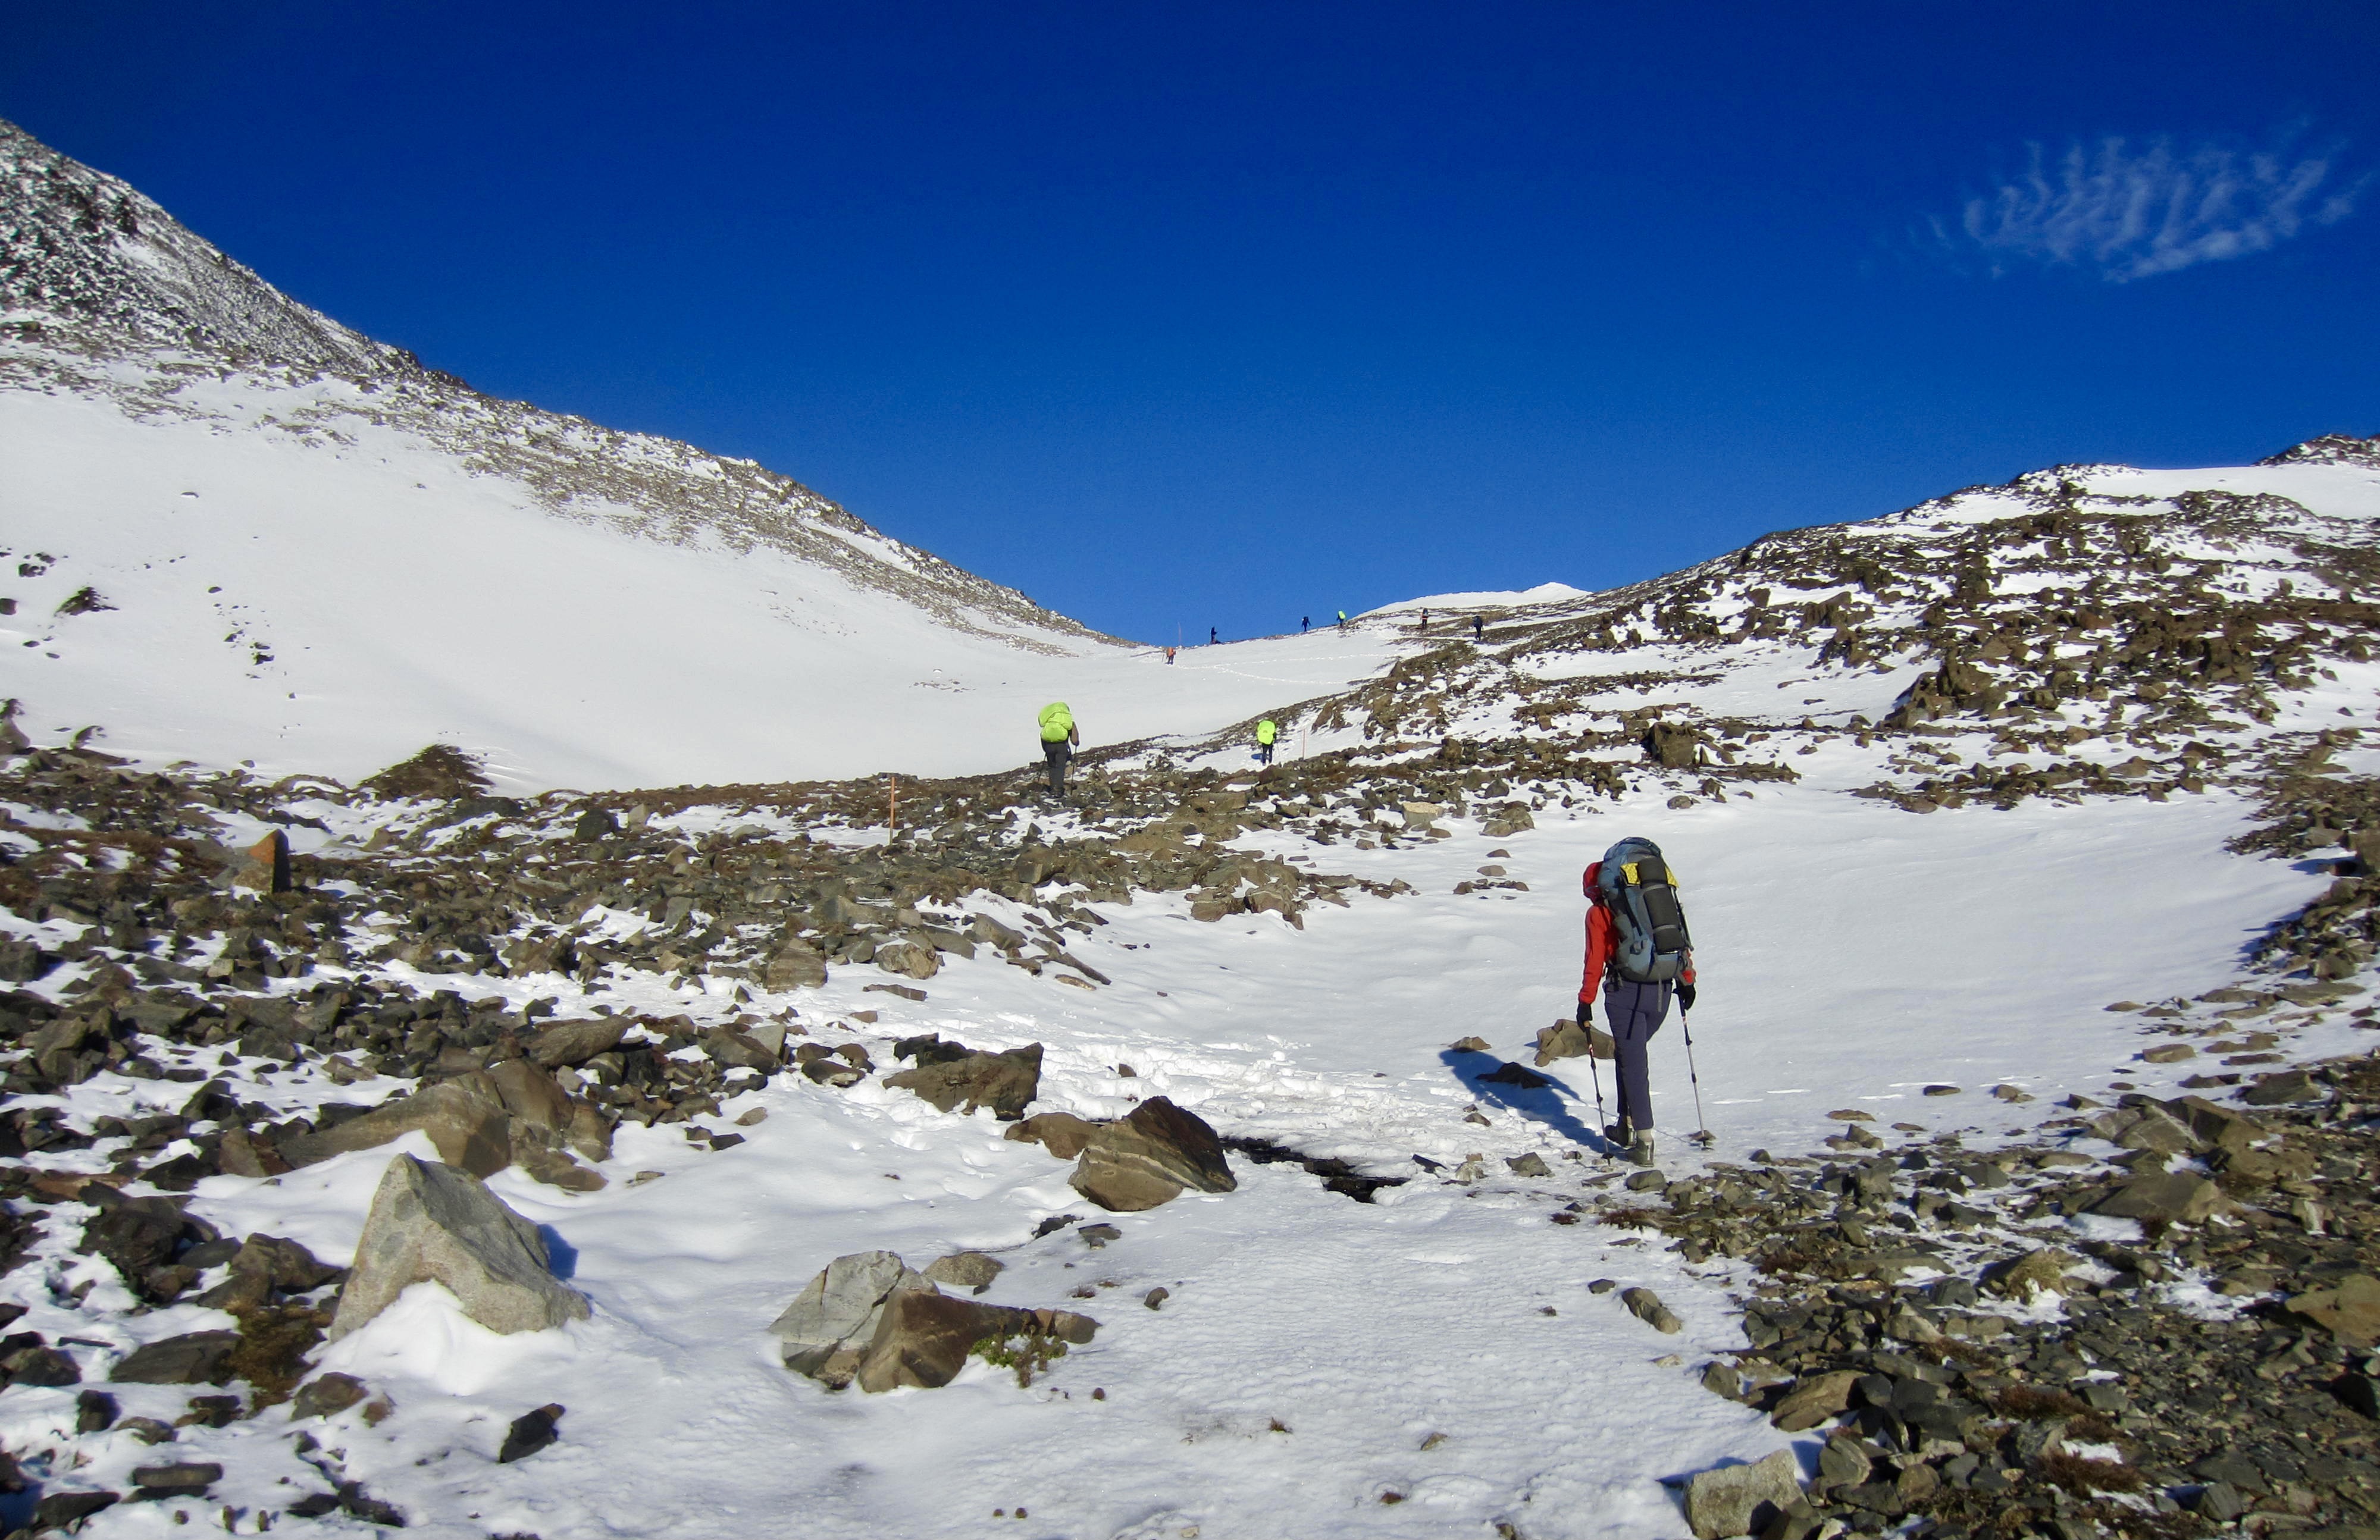
The trail proceeded on an up-and-down traverse through brush patches and over morainal ribs, then entered an area of grass and rock. By all accounts, foul weather seems to be the norm in this alpine terrain (yesterday’s group was caught in a full-on blizzard!), but we were delighted to have a cloudless blue sky overhead. Dozens of other trekkers were visible ahead and behind.
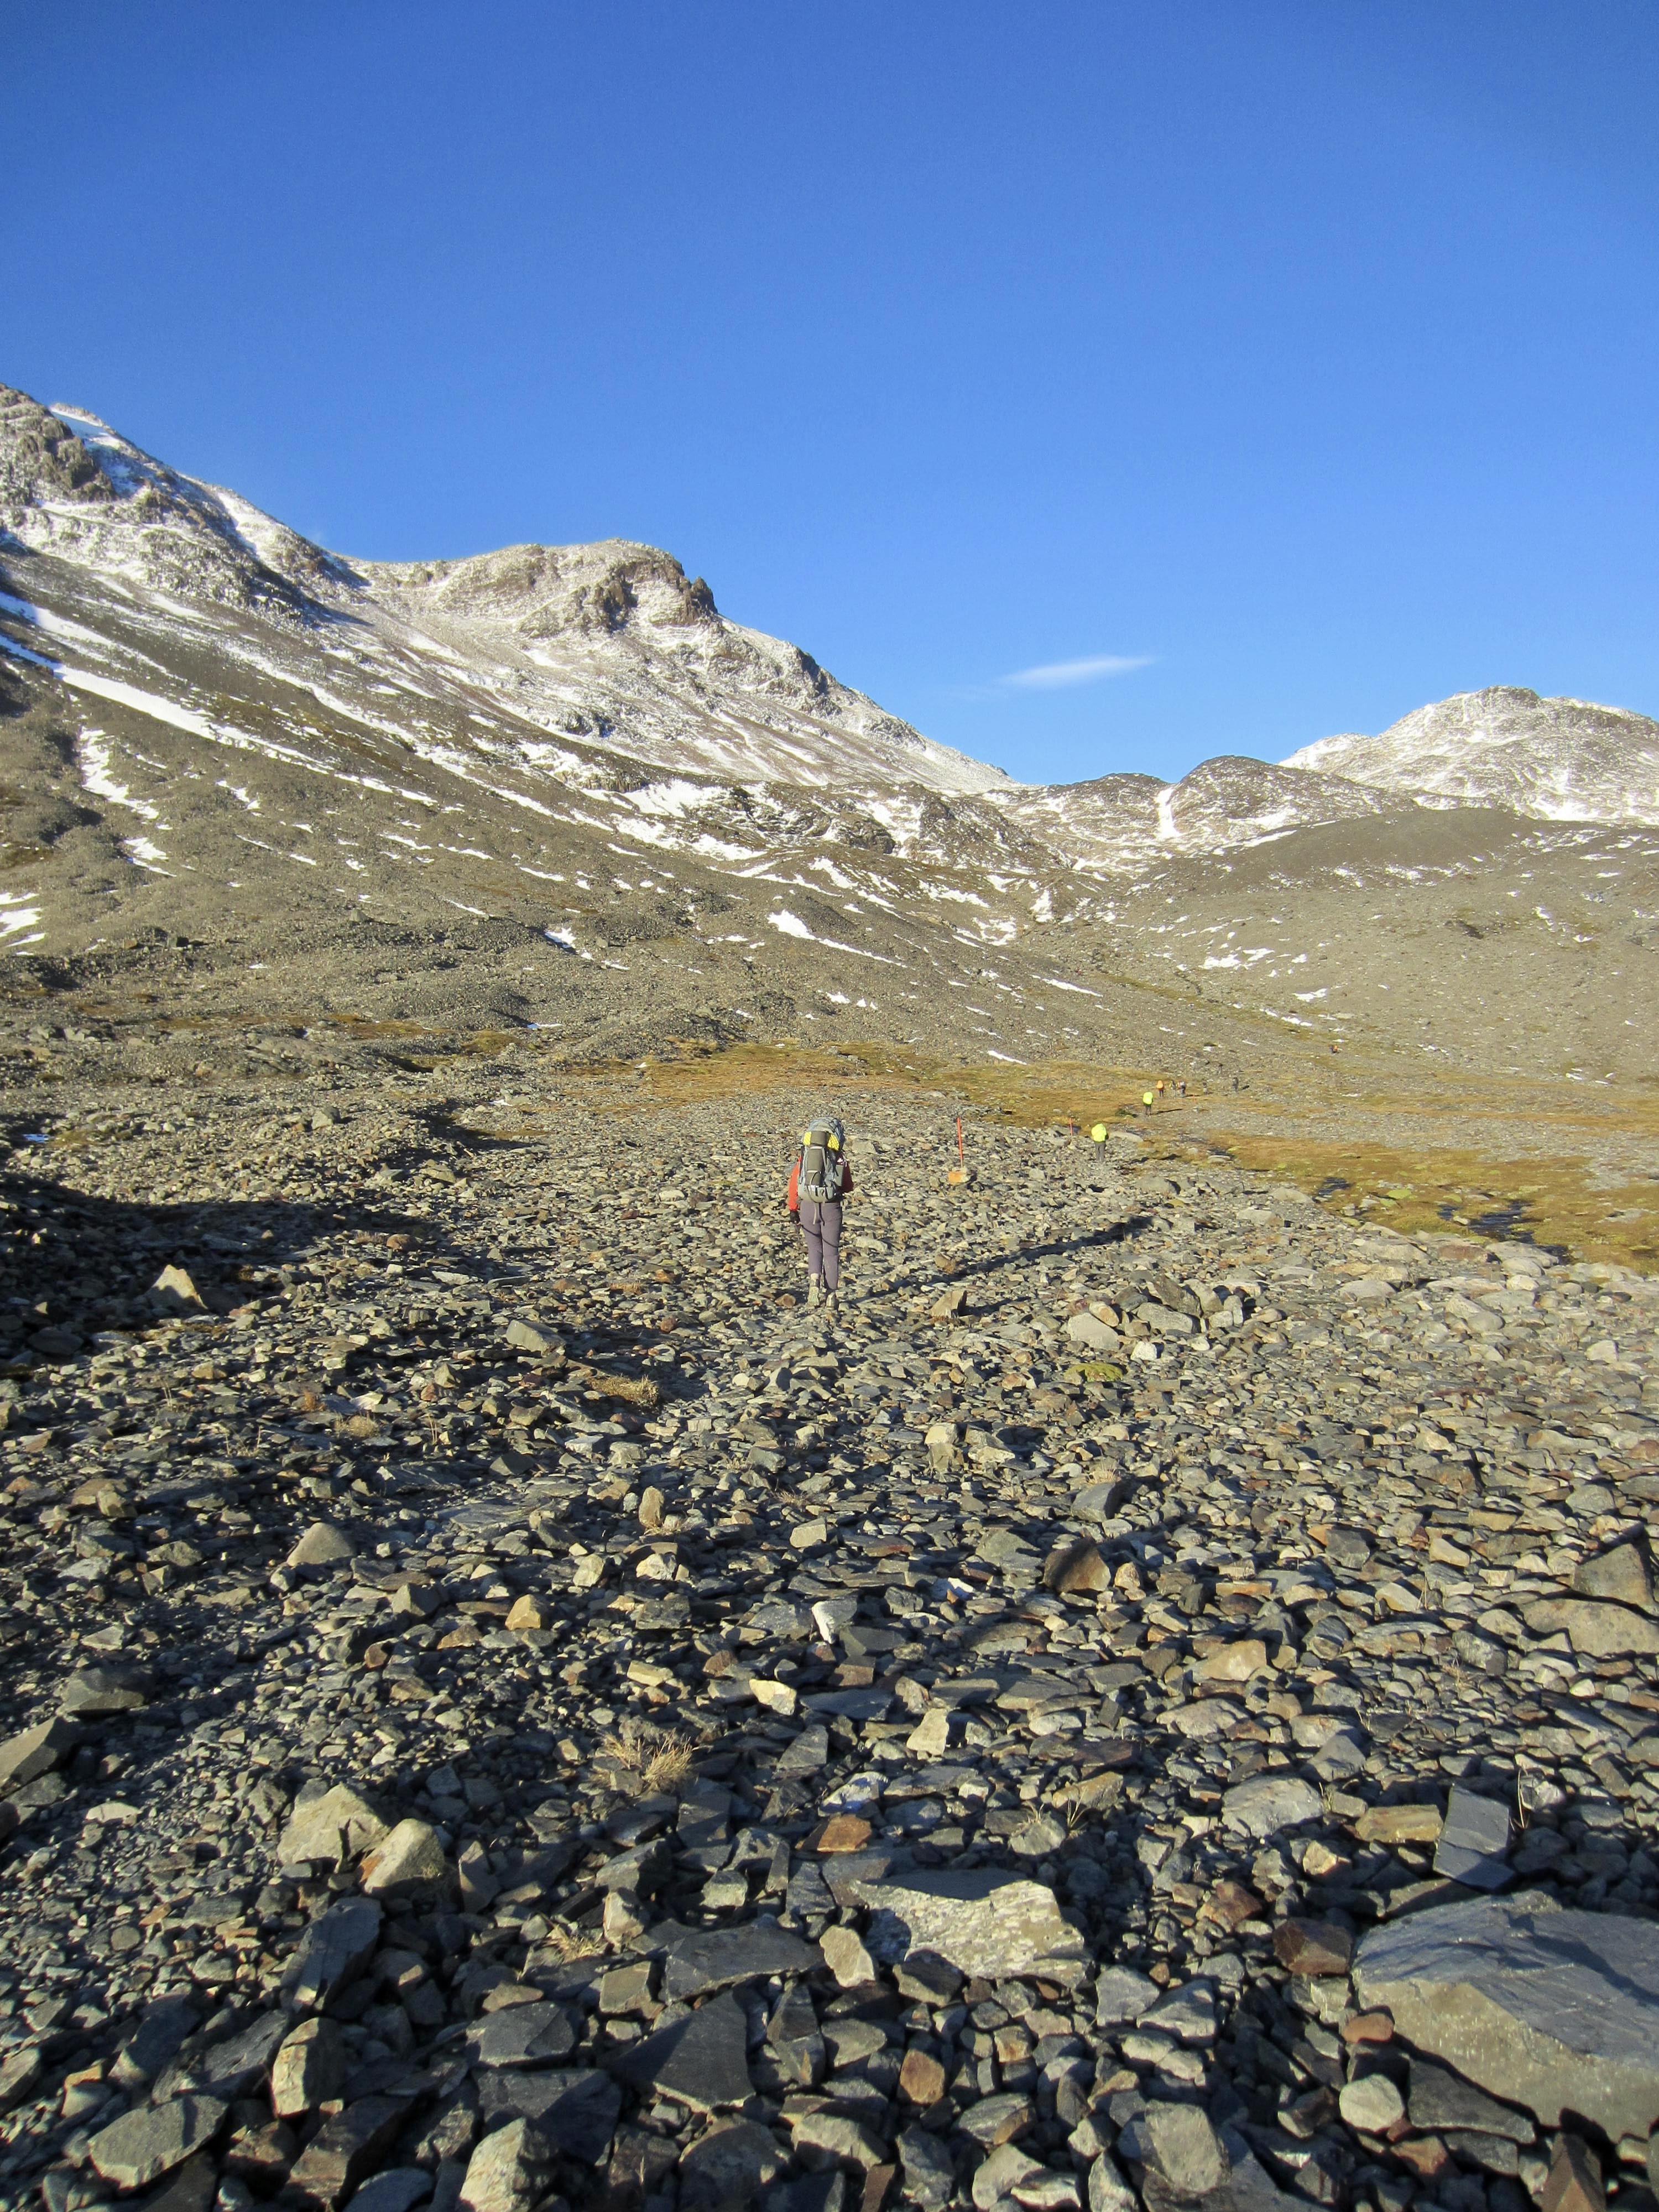
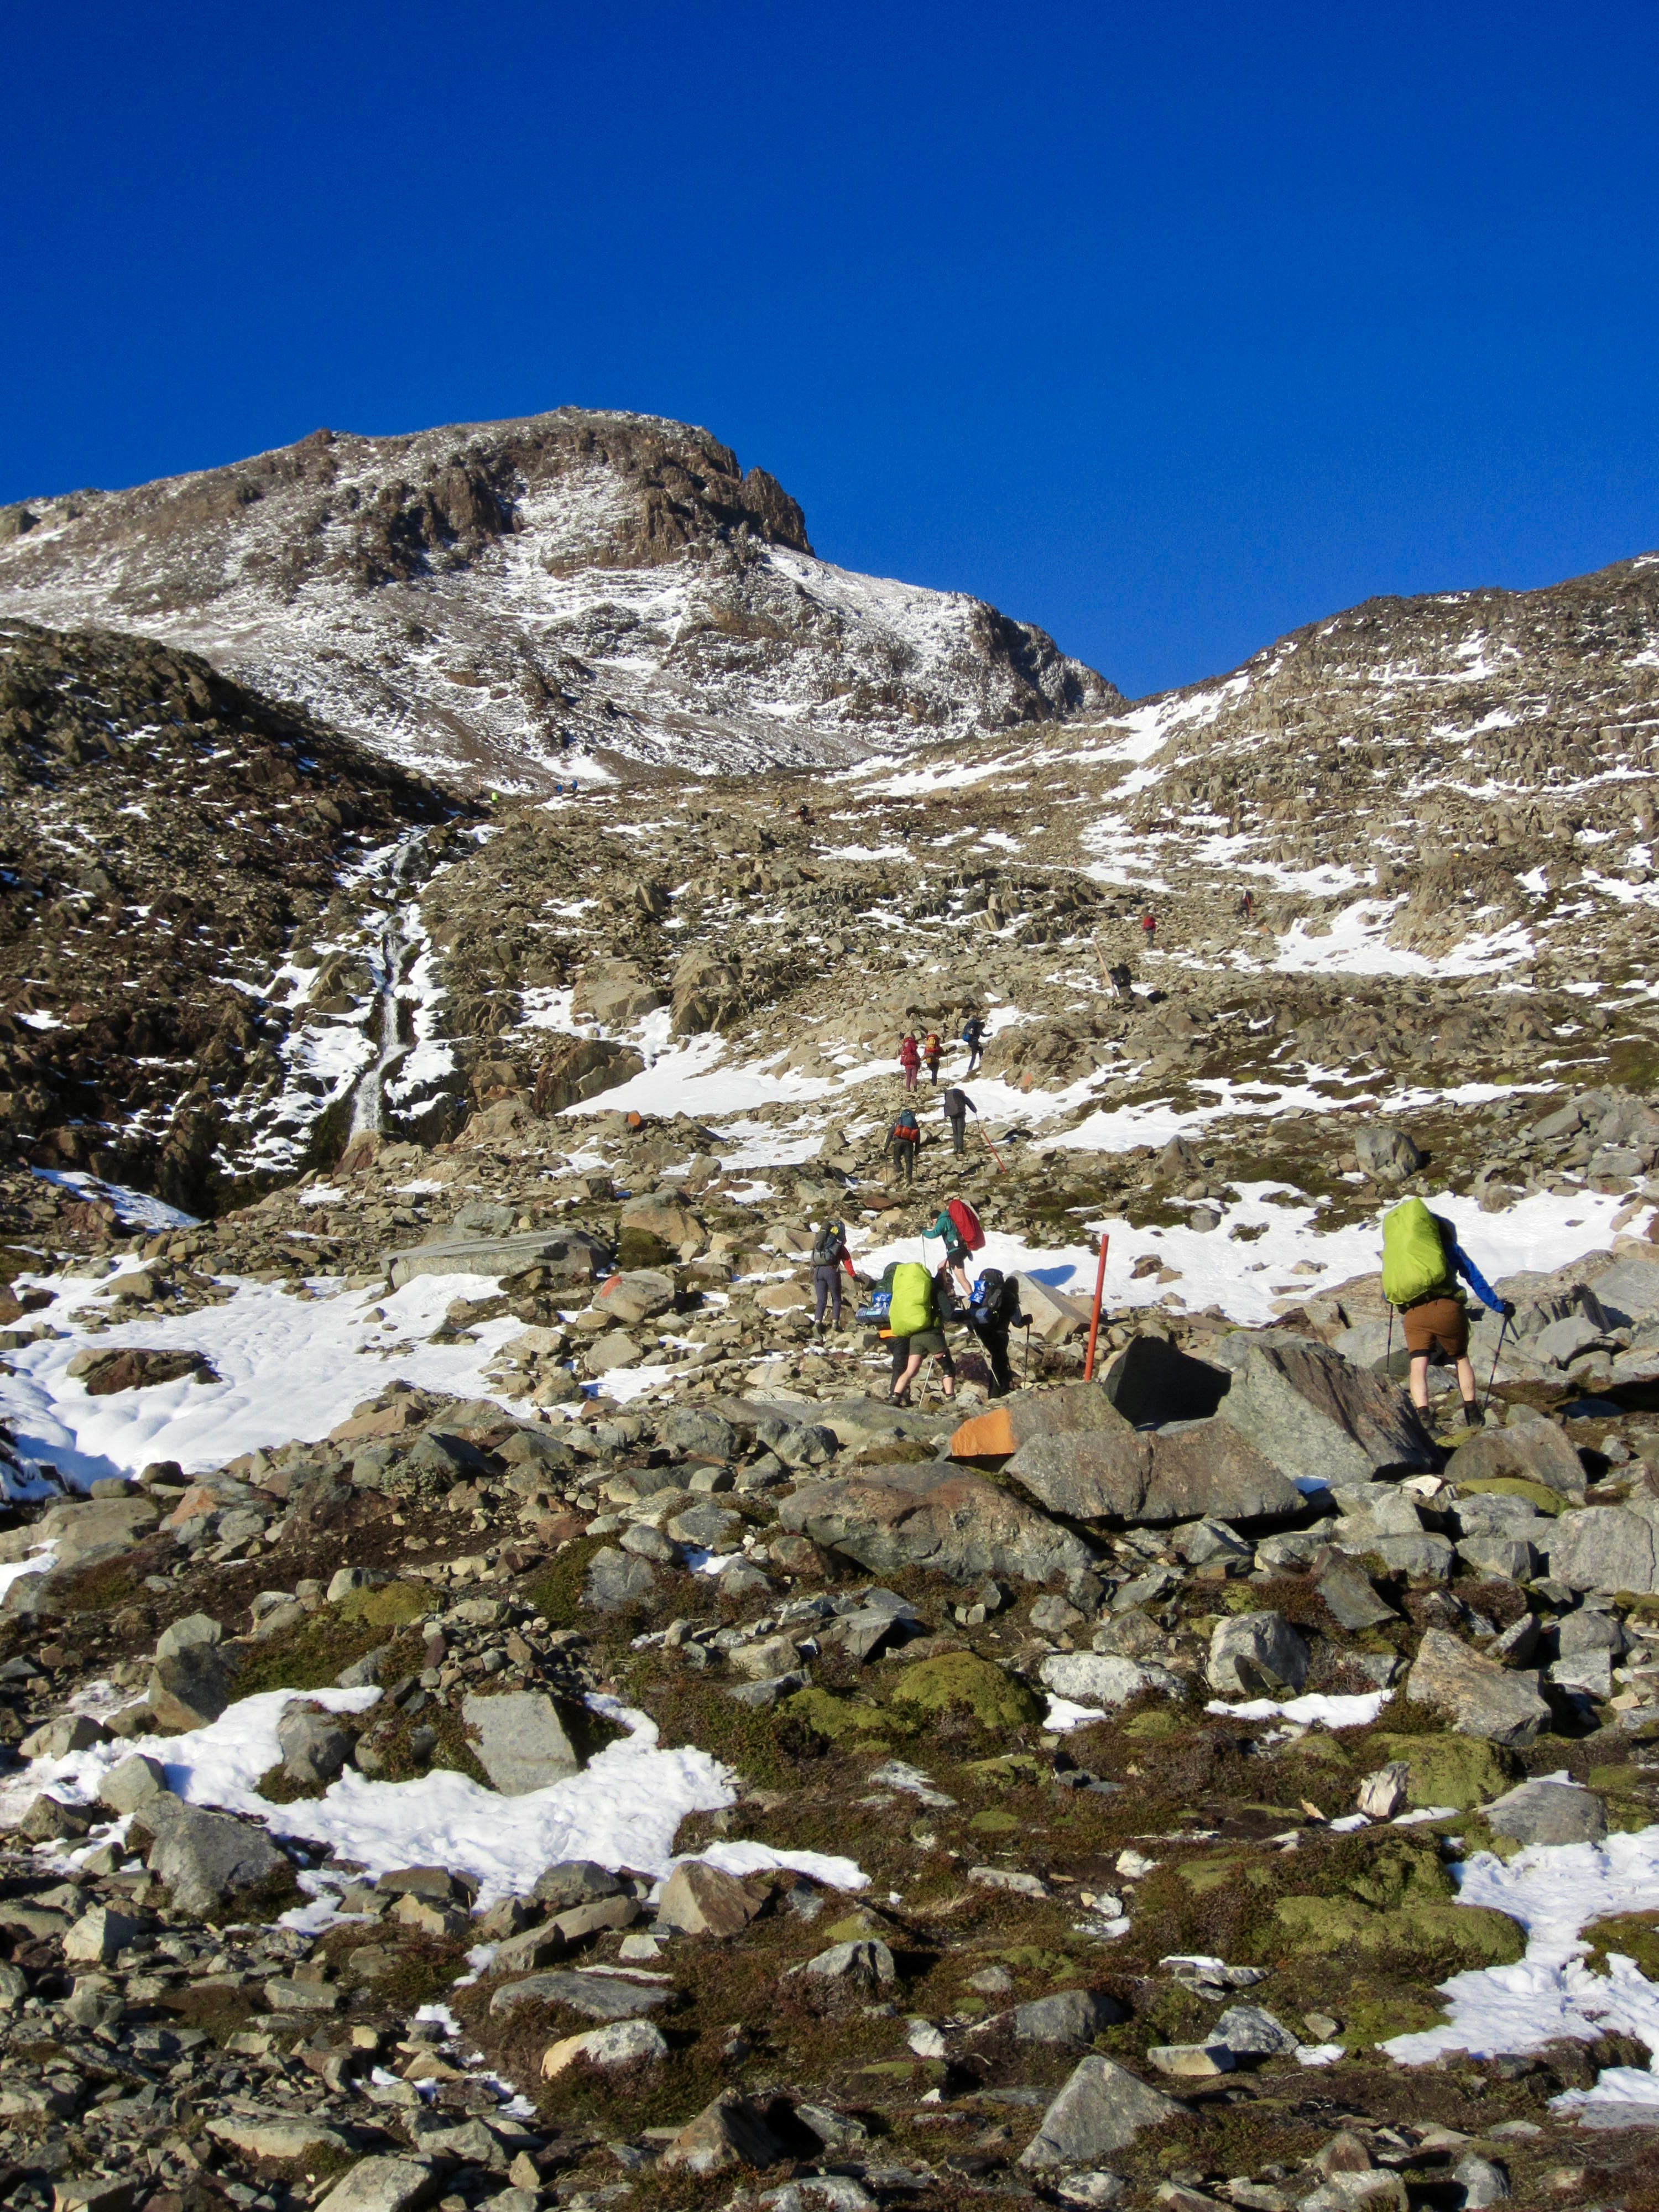
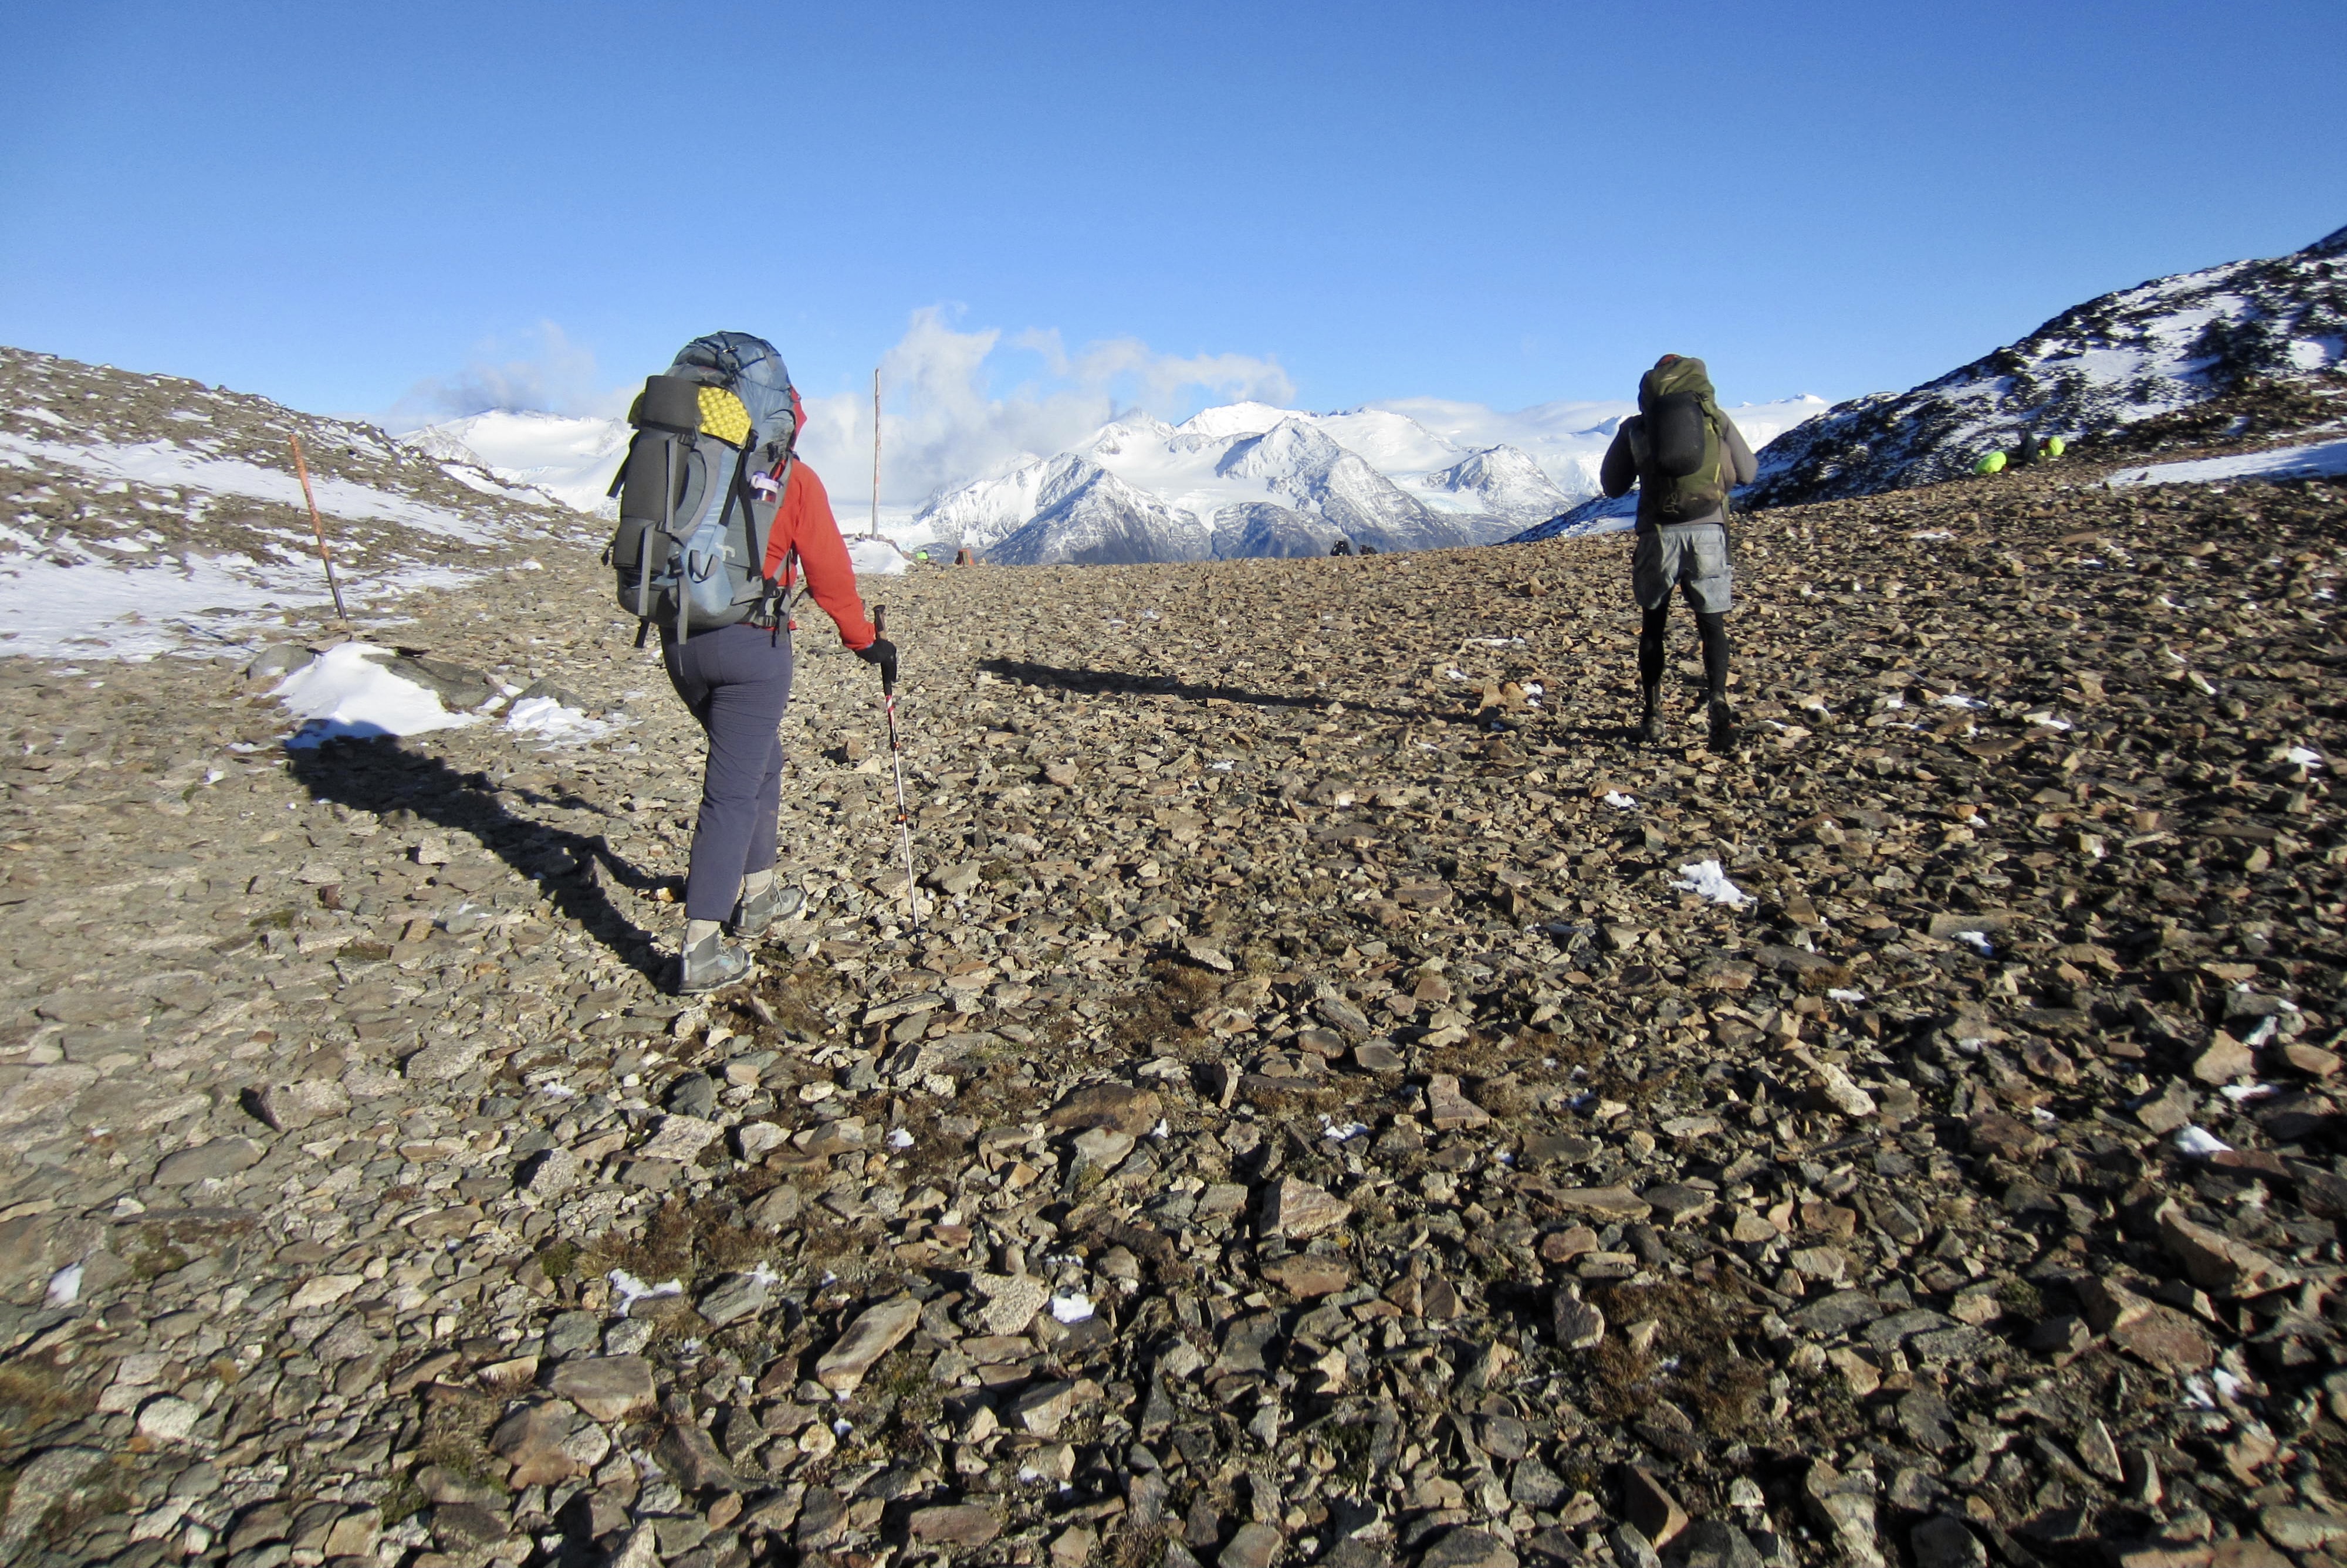
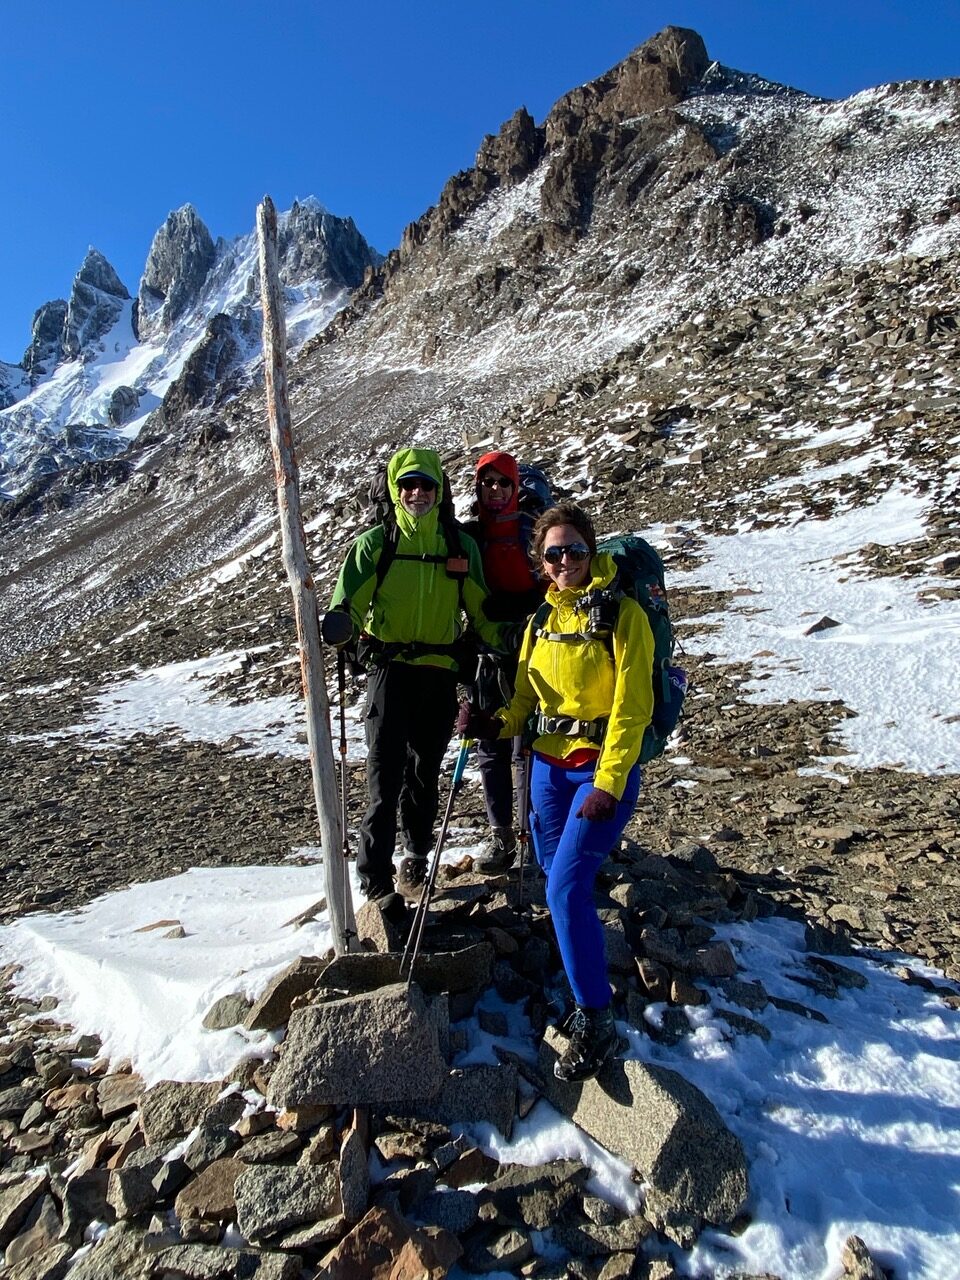
The uppermost portion of trail was covered by residual snow and ice, but the morning sun was pleasantly warm. Eileen, Brooke, and I reached John Garner Pass at 9:50am (2.8 hours from camp), representing the middle of our peloton. The wind blowing over the pass was surprisingly moderate for such an exposed location.


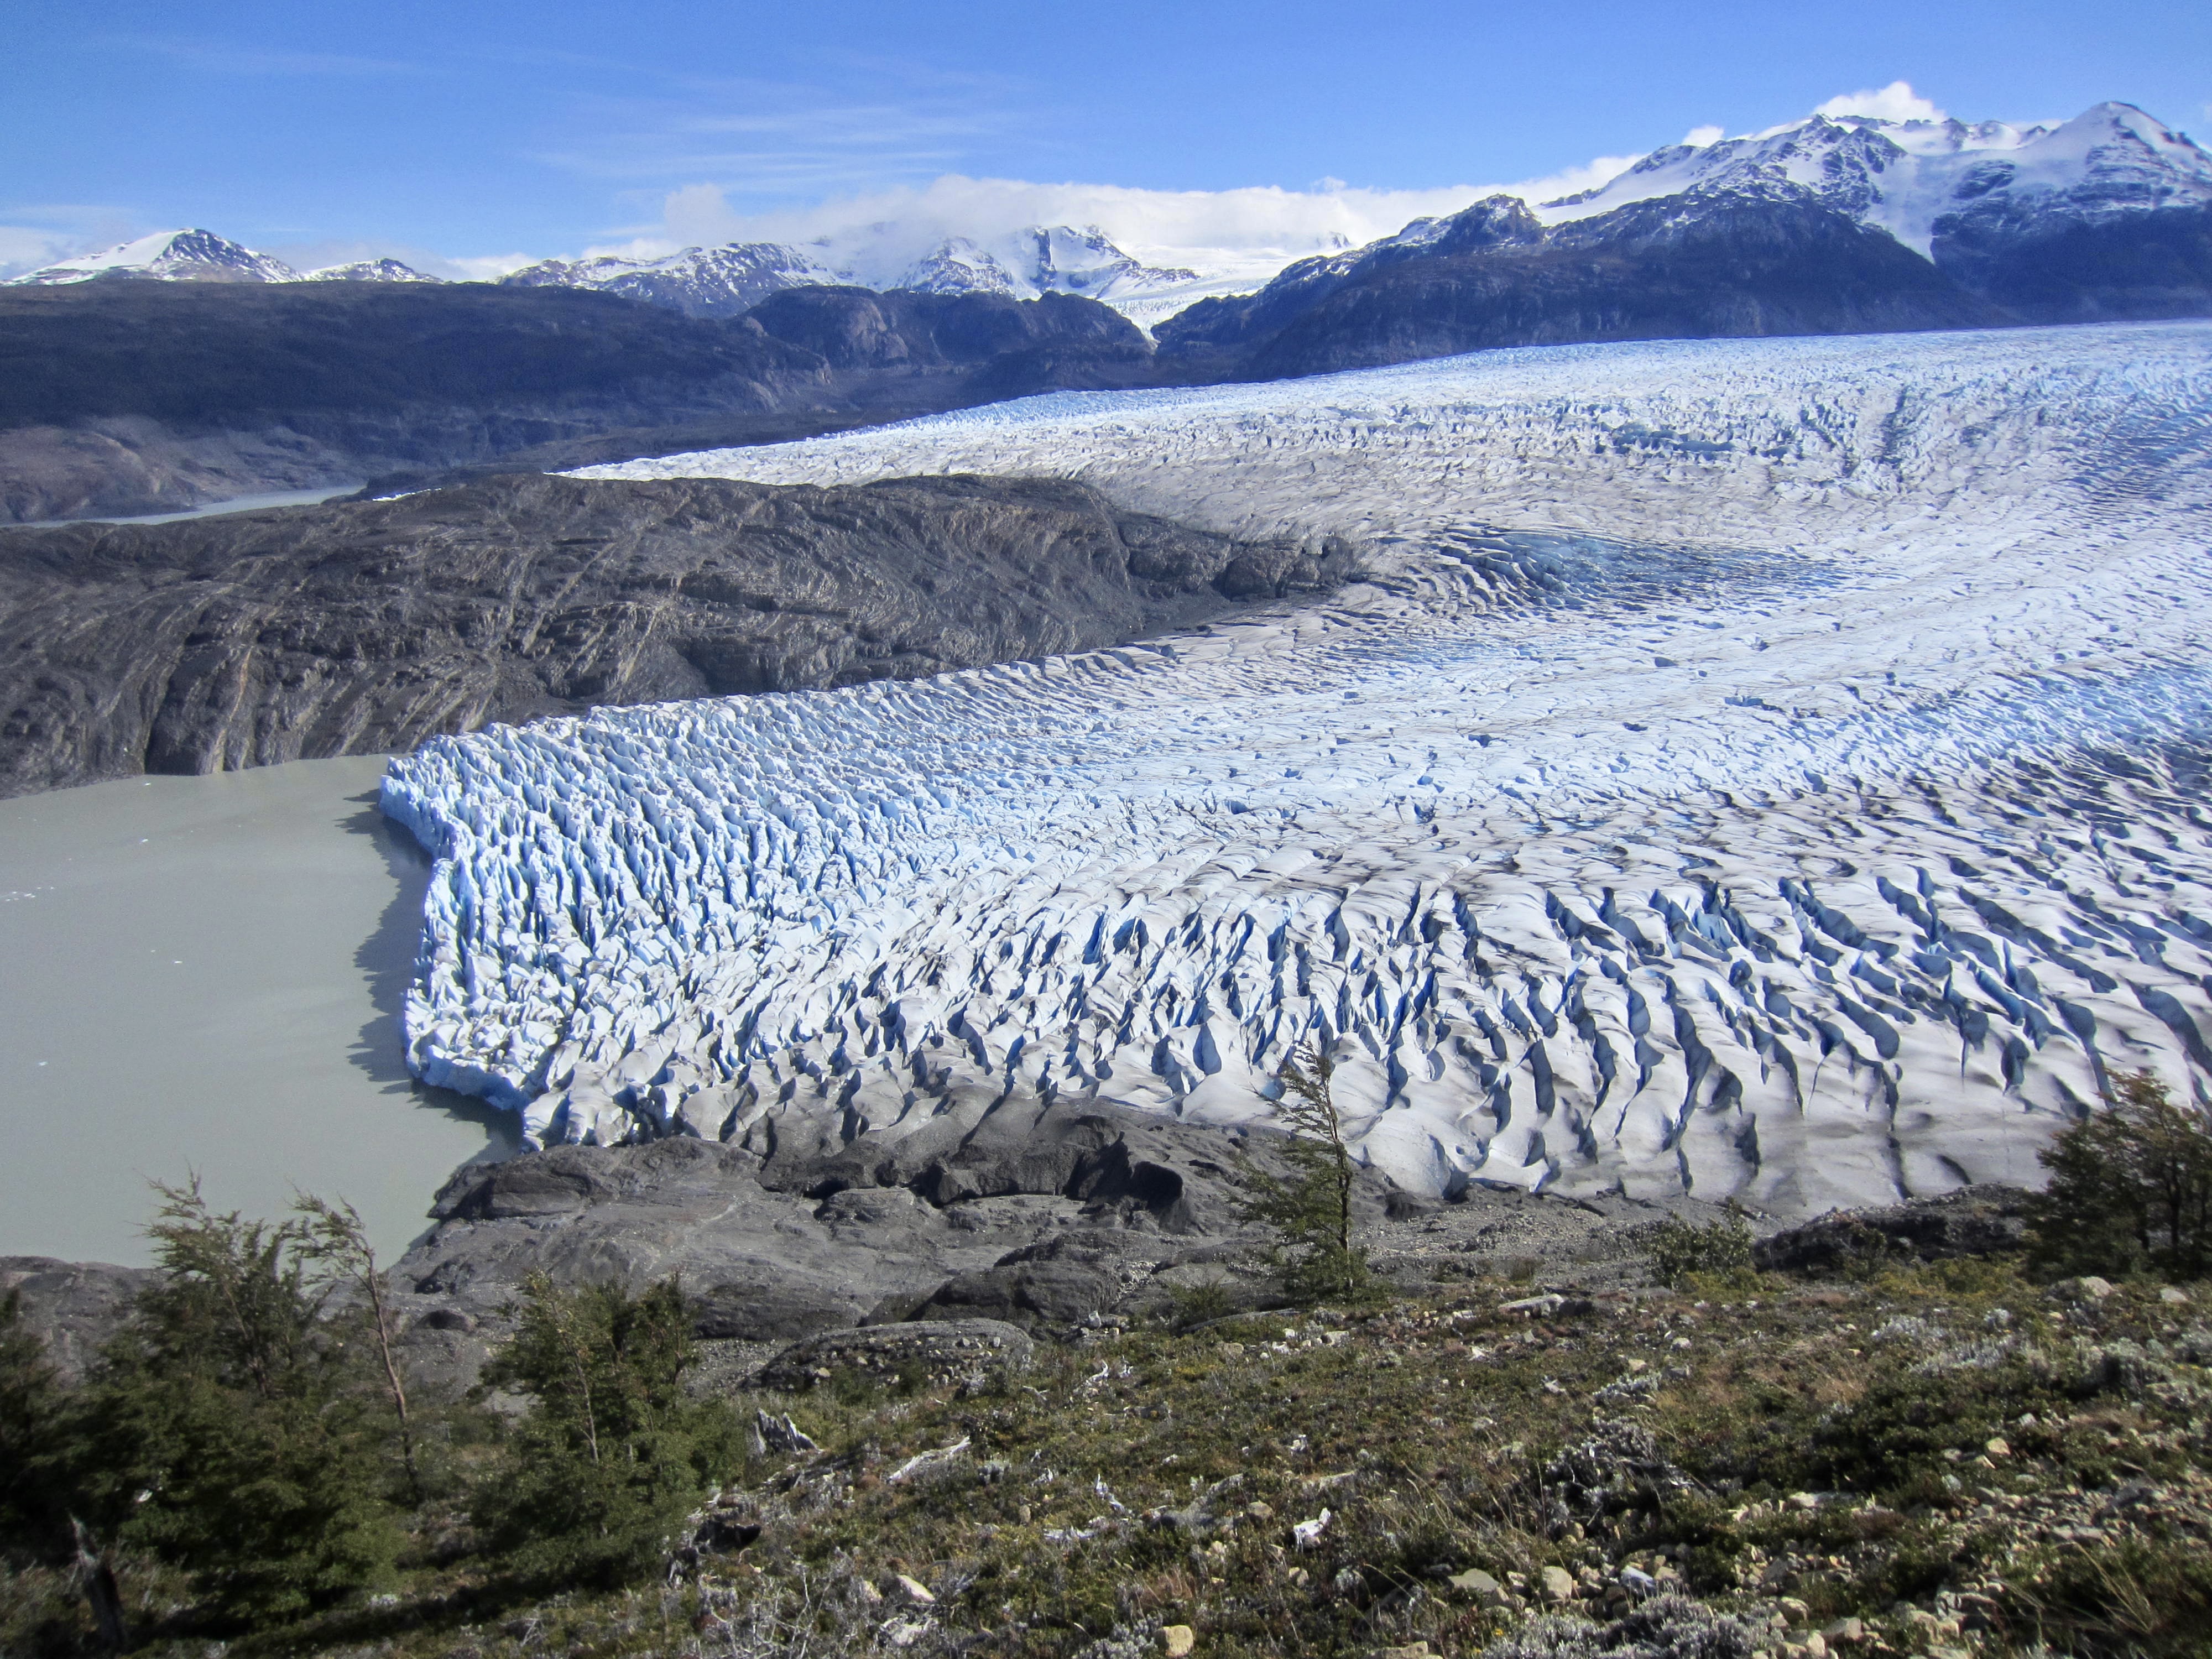
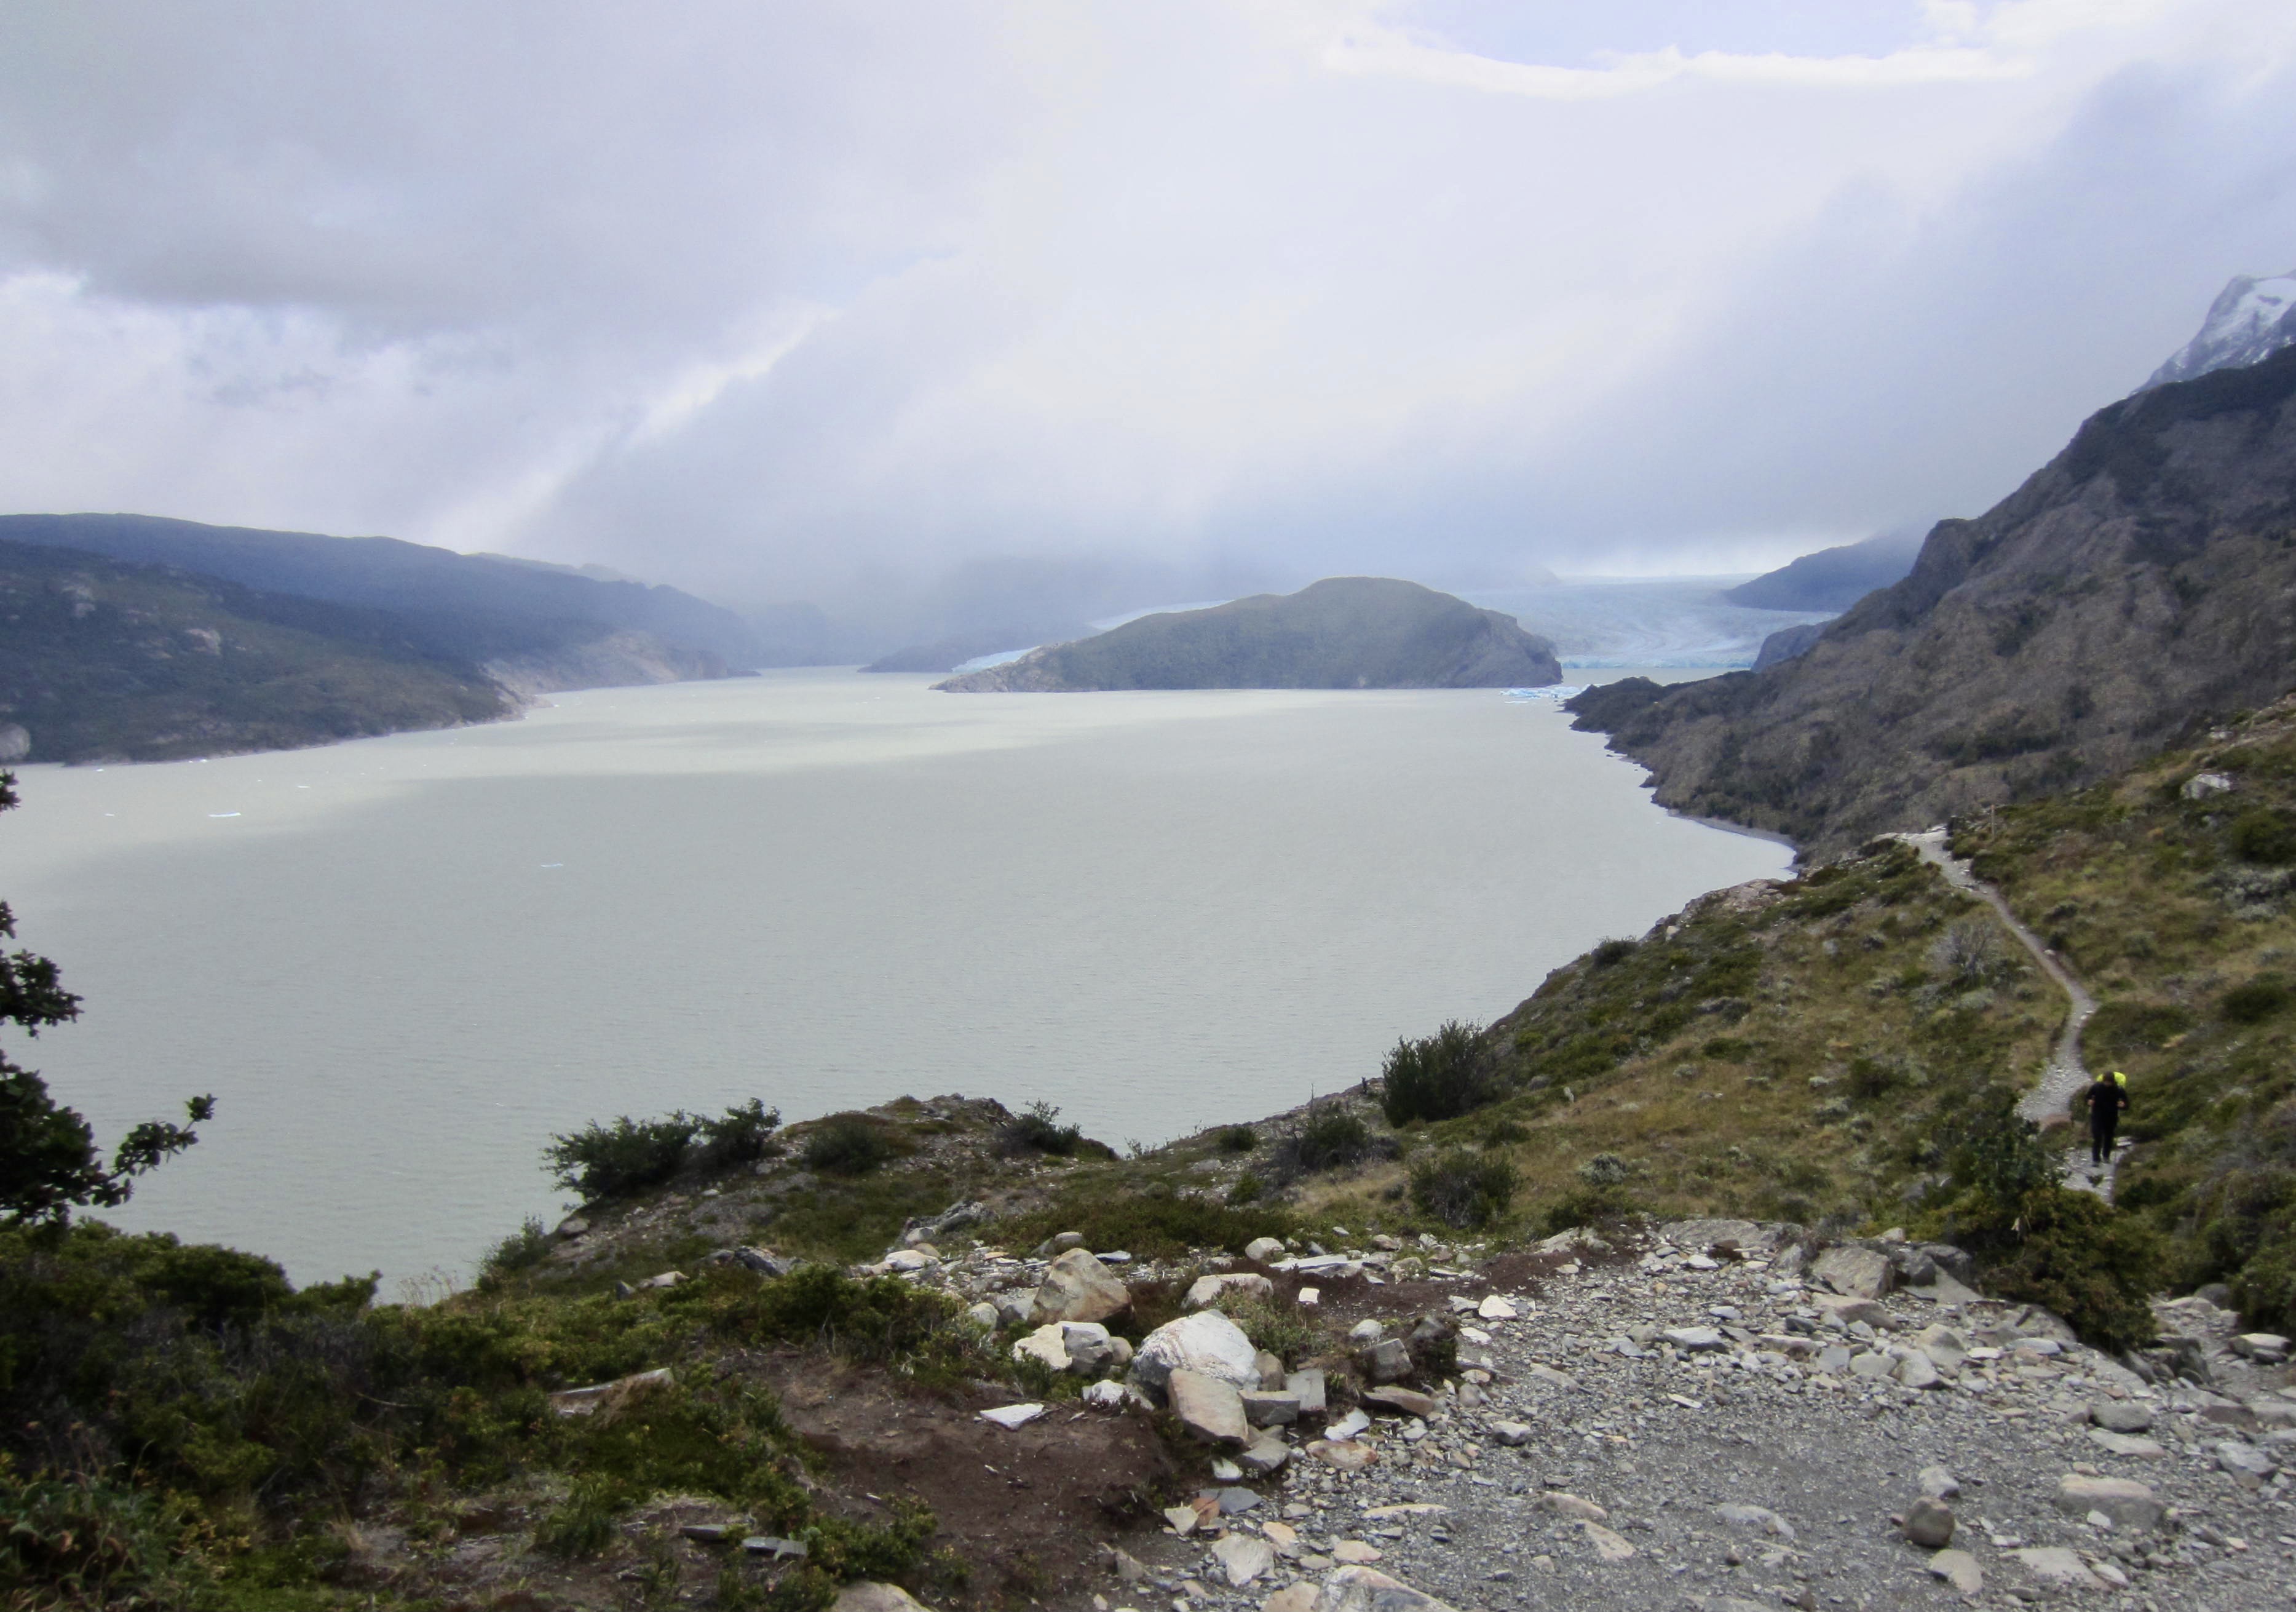
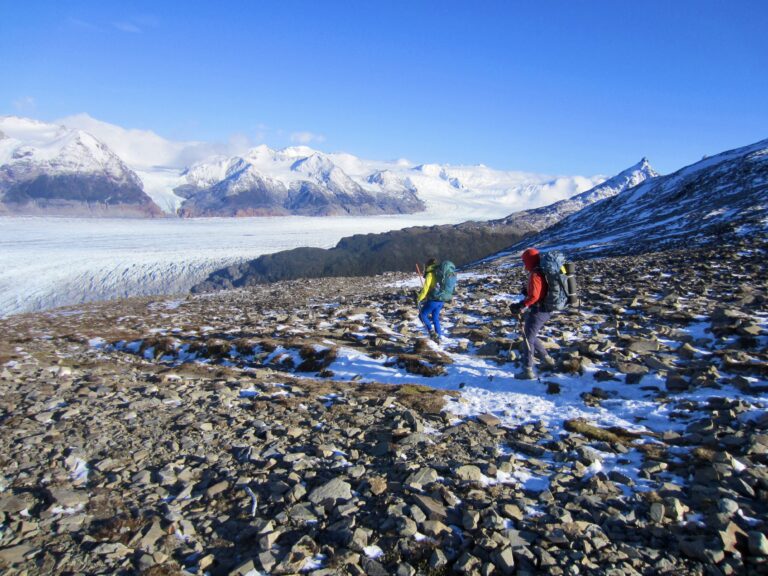
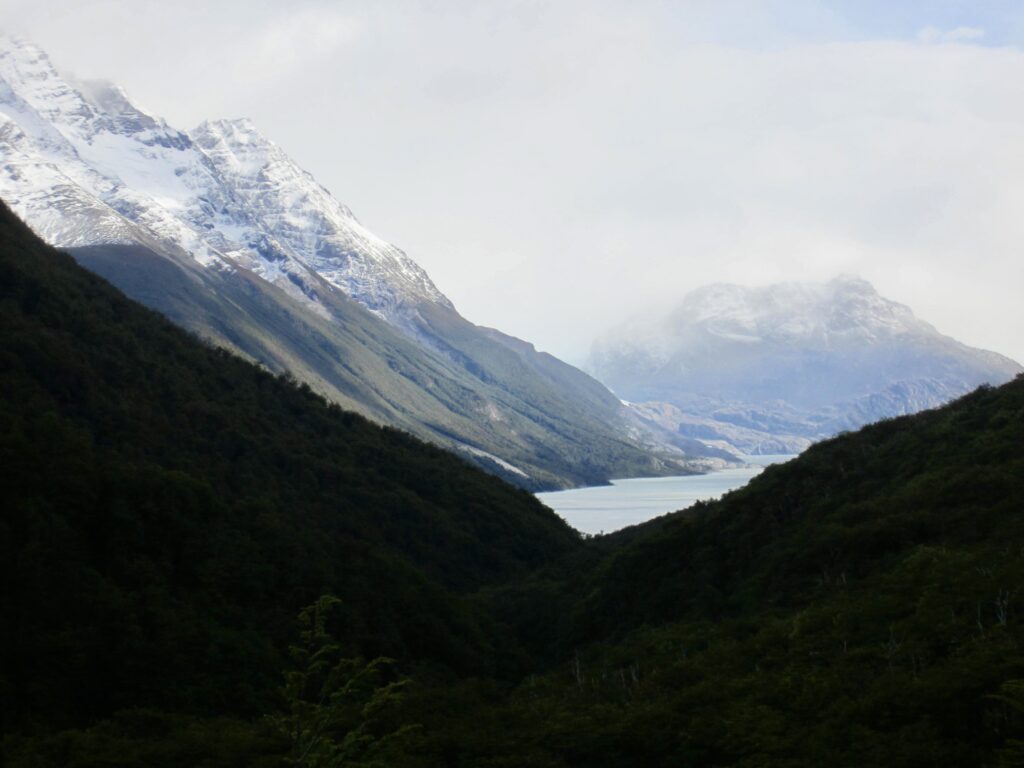
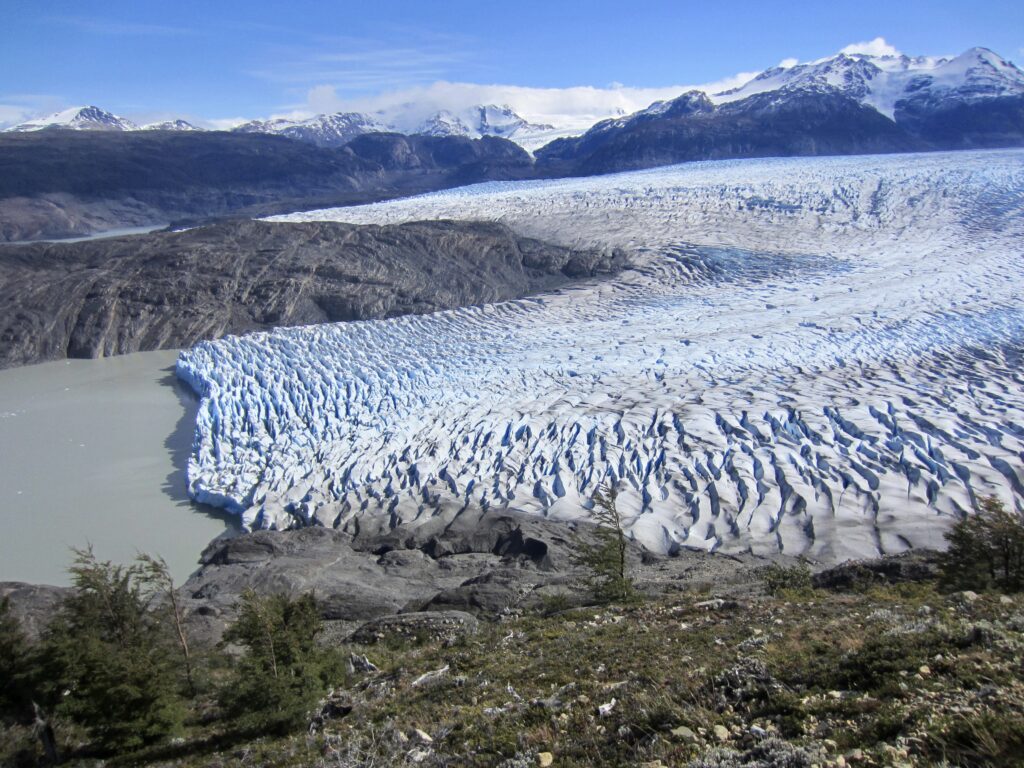
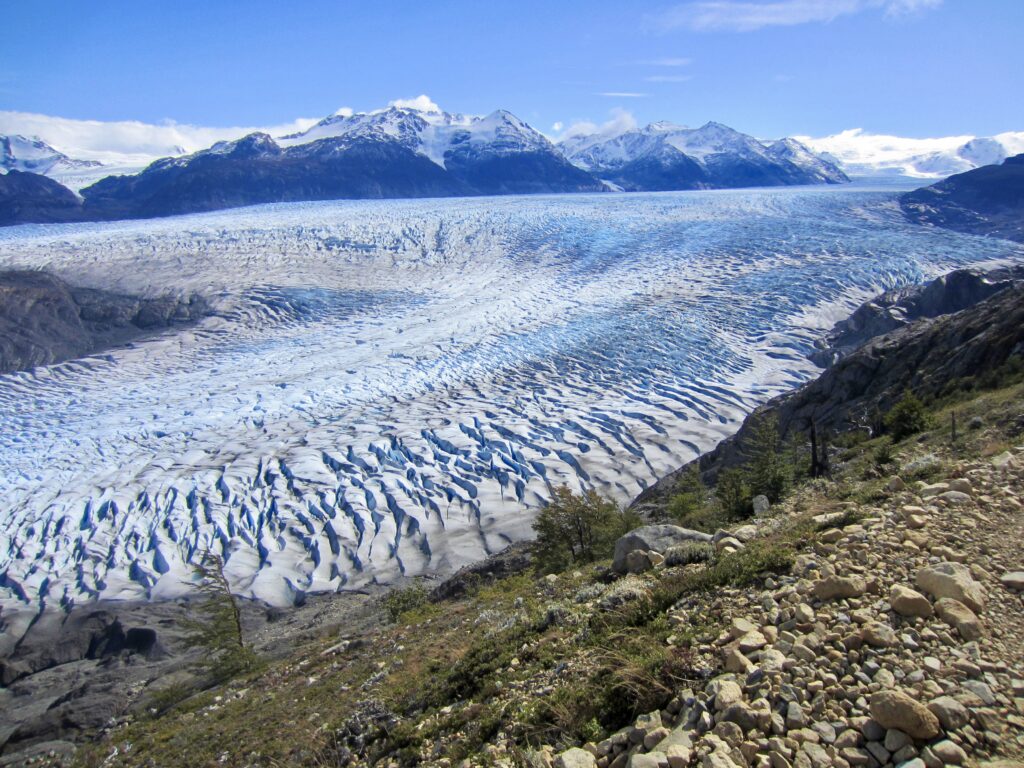
As we crossed over the pass and began descending to the west, the astoundingly long Grey Glacier came into full view. This low-elevation valley glacier emanates from the enormous Southern Patagonian Ice Field and flows southward for about 17 miles / 28 kilometers into Lake Grey.


From John Garner Pass down to treeline, the trail was covered by ice and rock-hard snow, creating treacherous conditions. We slowly and carefully picked our way downhill along with other trekkers, slipping and sliding and wishing we had micro-spike crampons. Once in the forest, the trail became very steep, slightly muddy, and still slippery. It was a relief to finally hit the long segment of trail that traverses southerly above the Grey Glacier. We made brief stops at Paso Ranger Station and the nearby Grey Glacier Viewpoint.
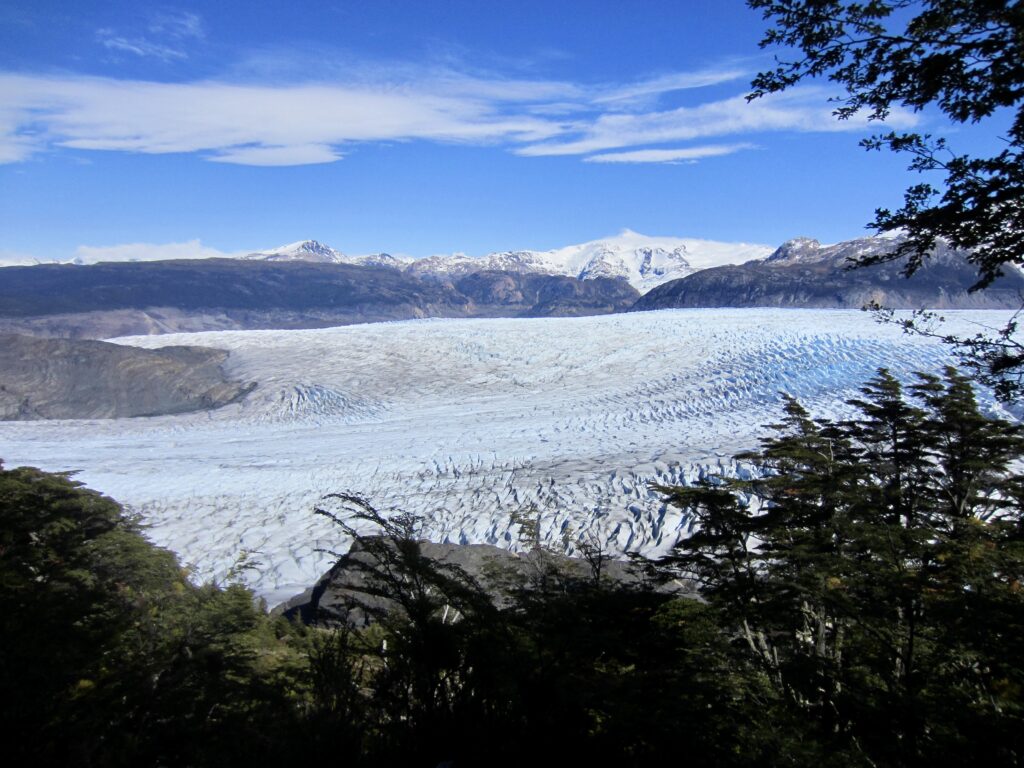
Our afternoon was filled with a variety of visual treats, dominated by the highly textured surface of the Grey Glacier closely below us. This view was interrupted only by a trio of long, swaying suspension bridges across deep ravines.

By the time we reached the third bridge, we began encountering numerous day-hikers coming up from Grey Camp or Paine Grande Camp. This is the transition from the “O” Trek to the “W” Trek, and these hikers represented the initial cusp of “W” trekkers doing one of their three standard sidetrips.
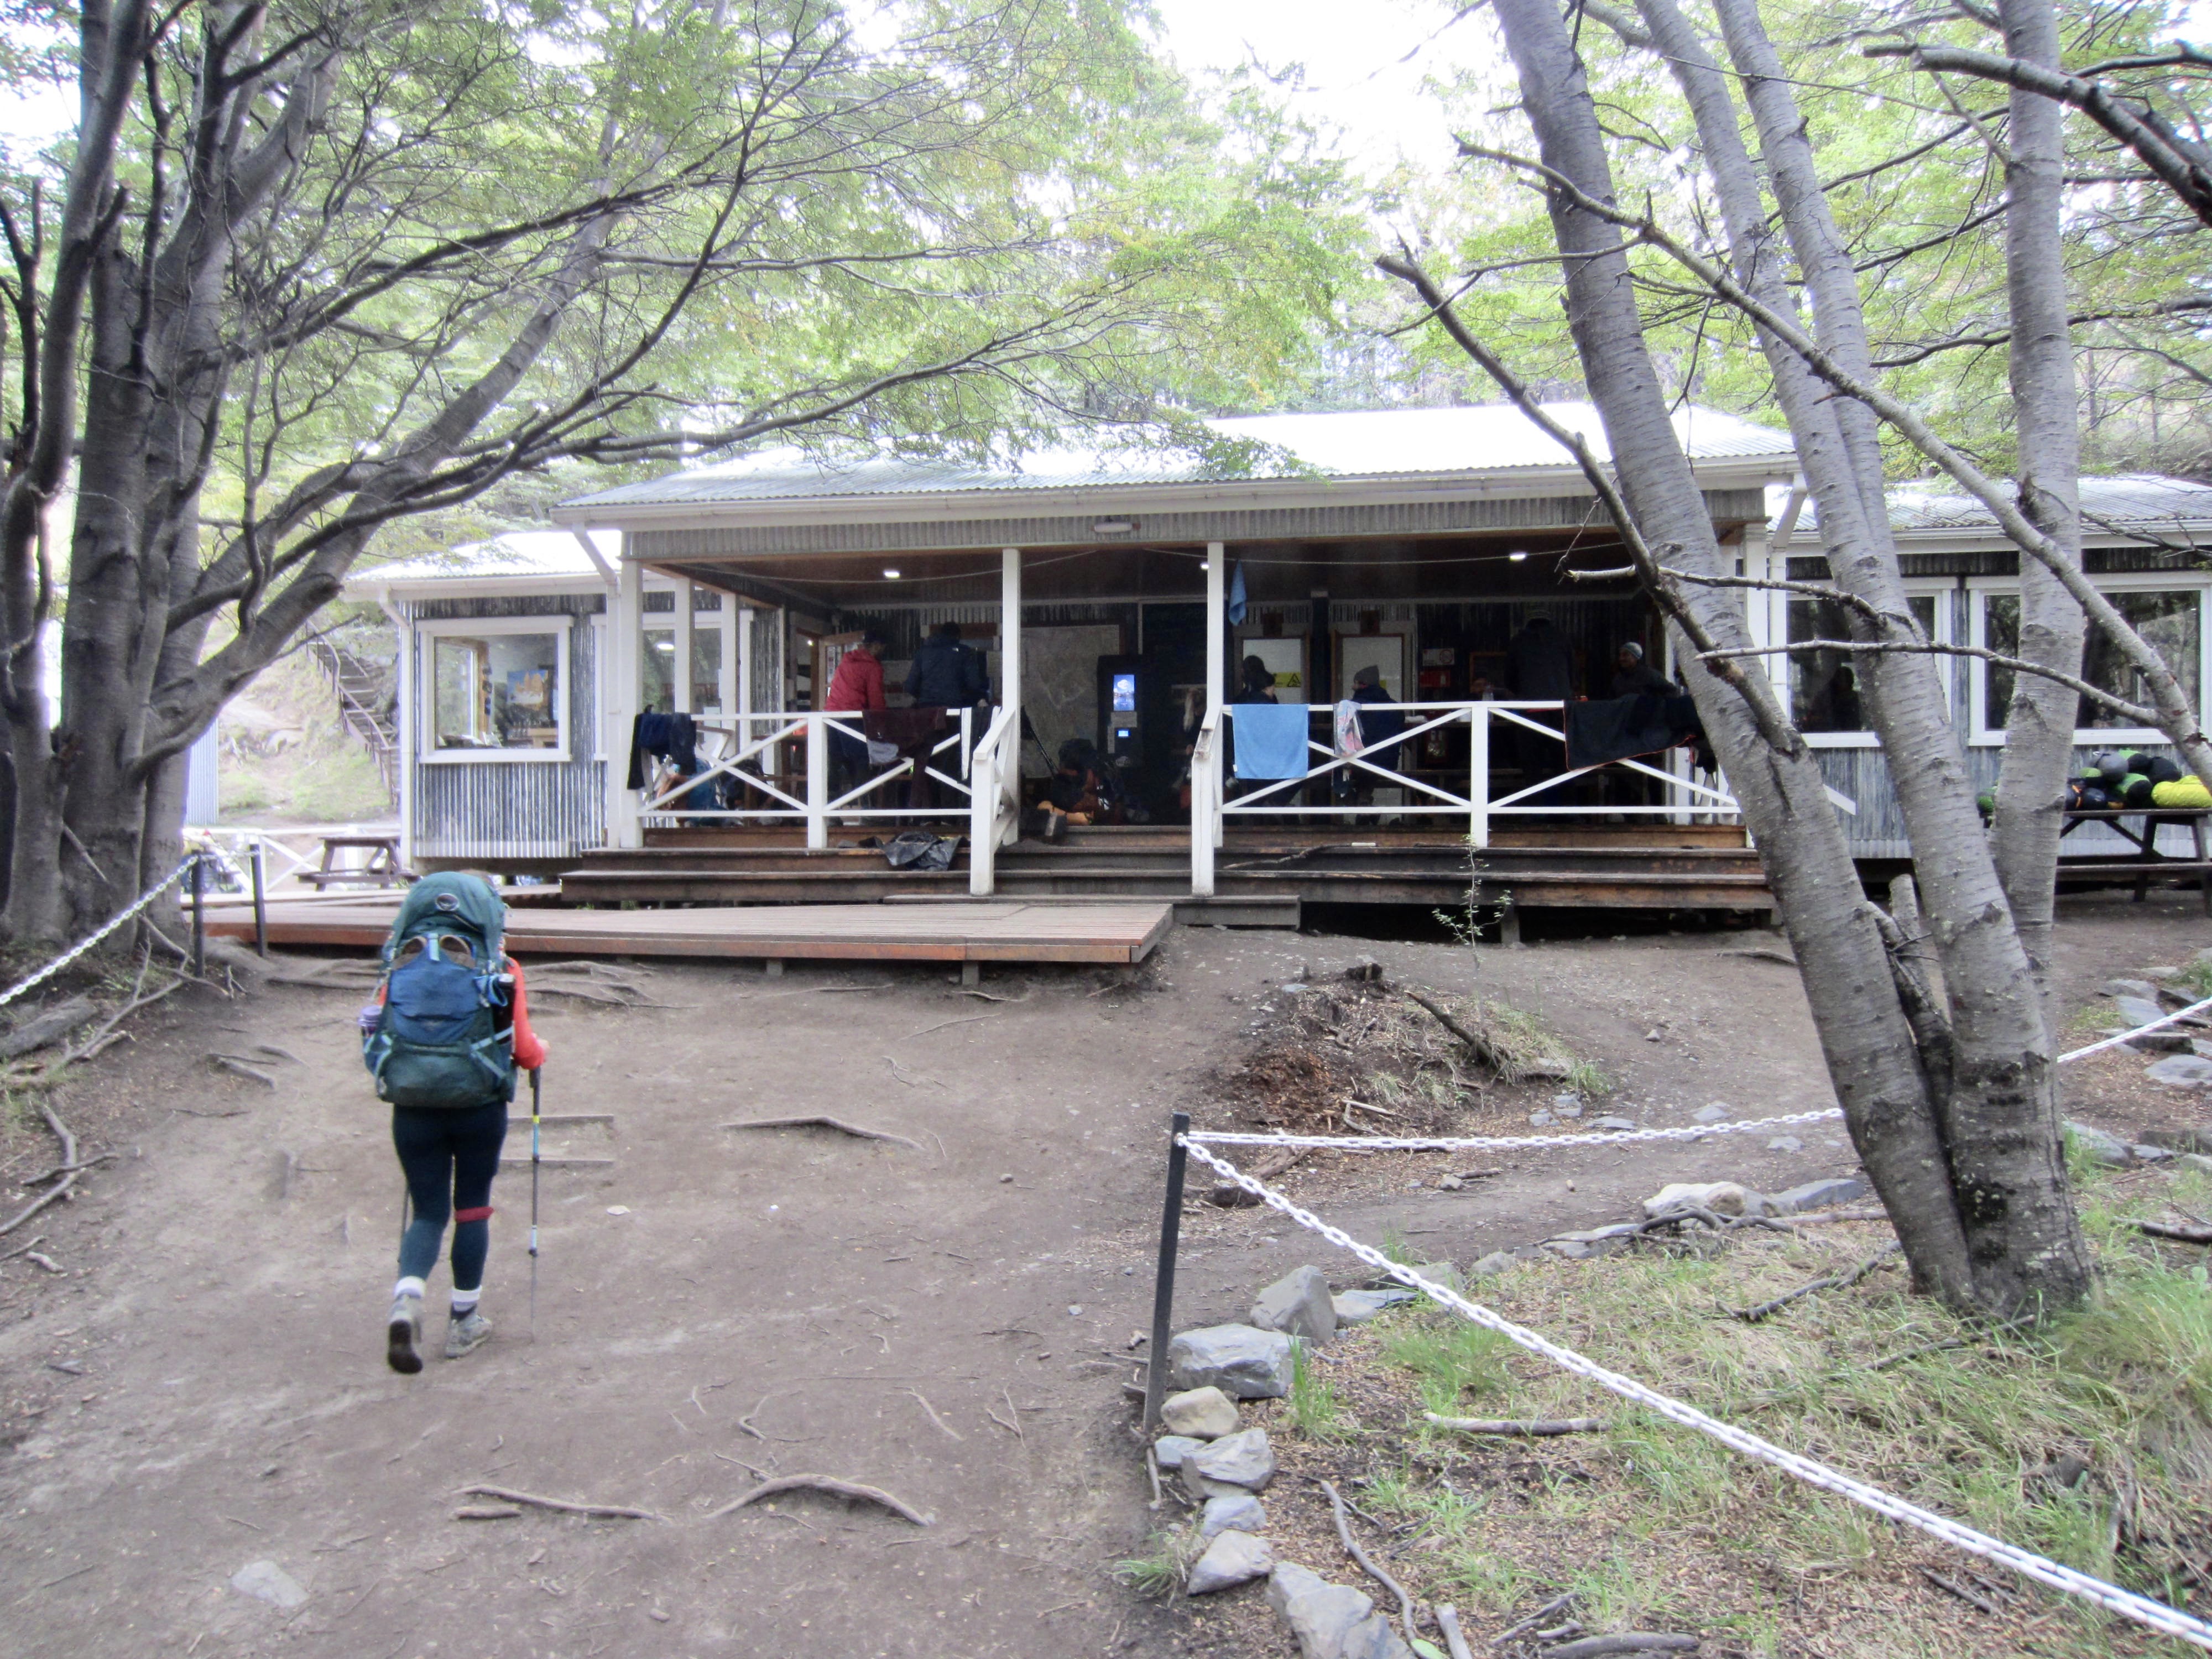
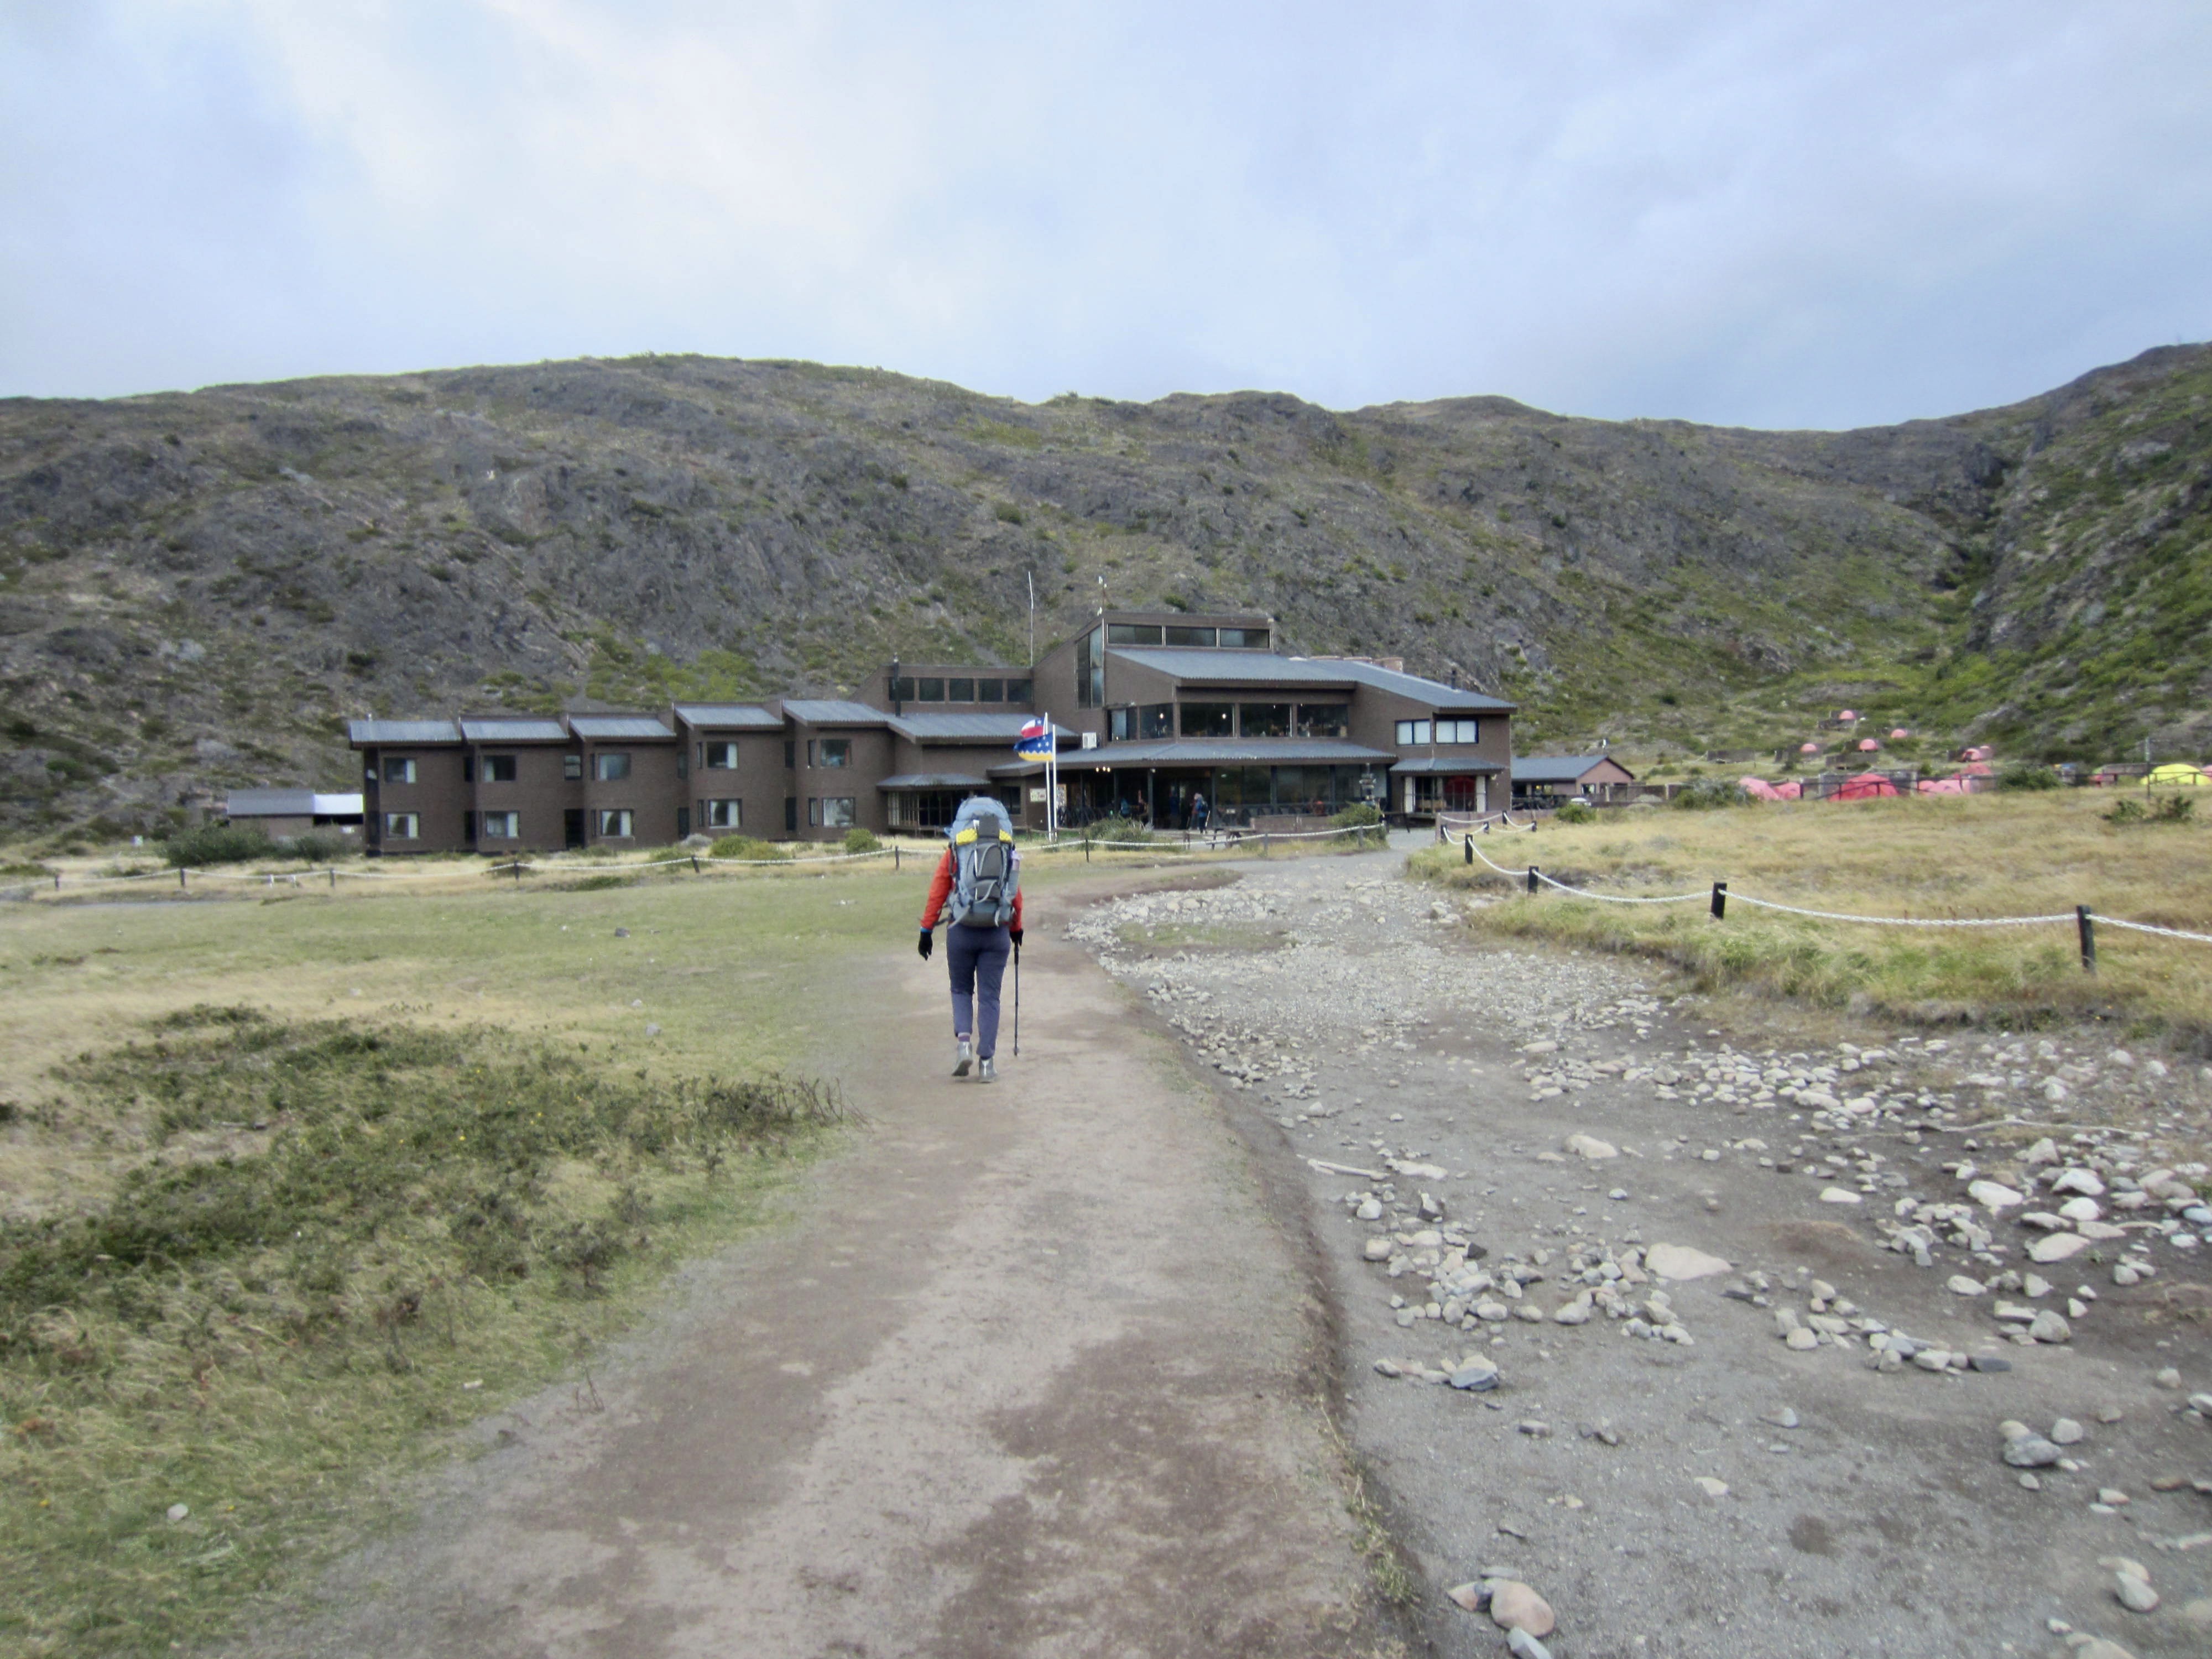
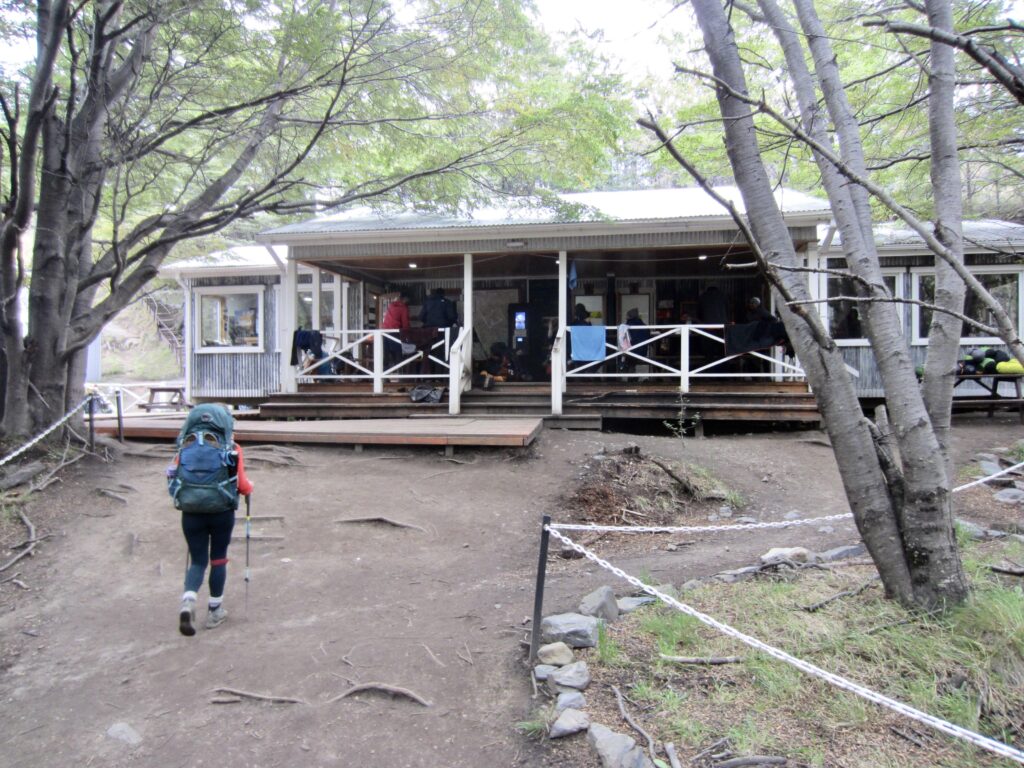
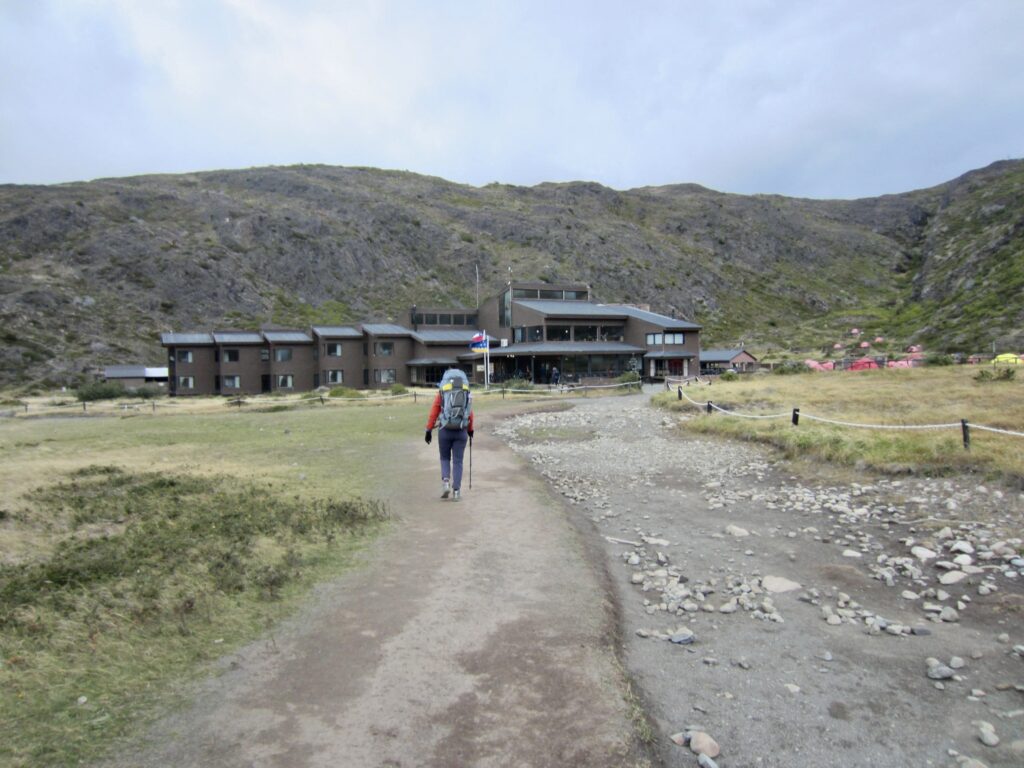
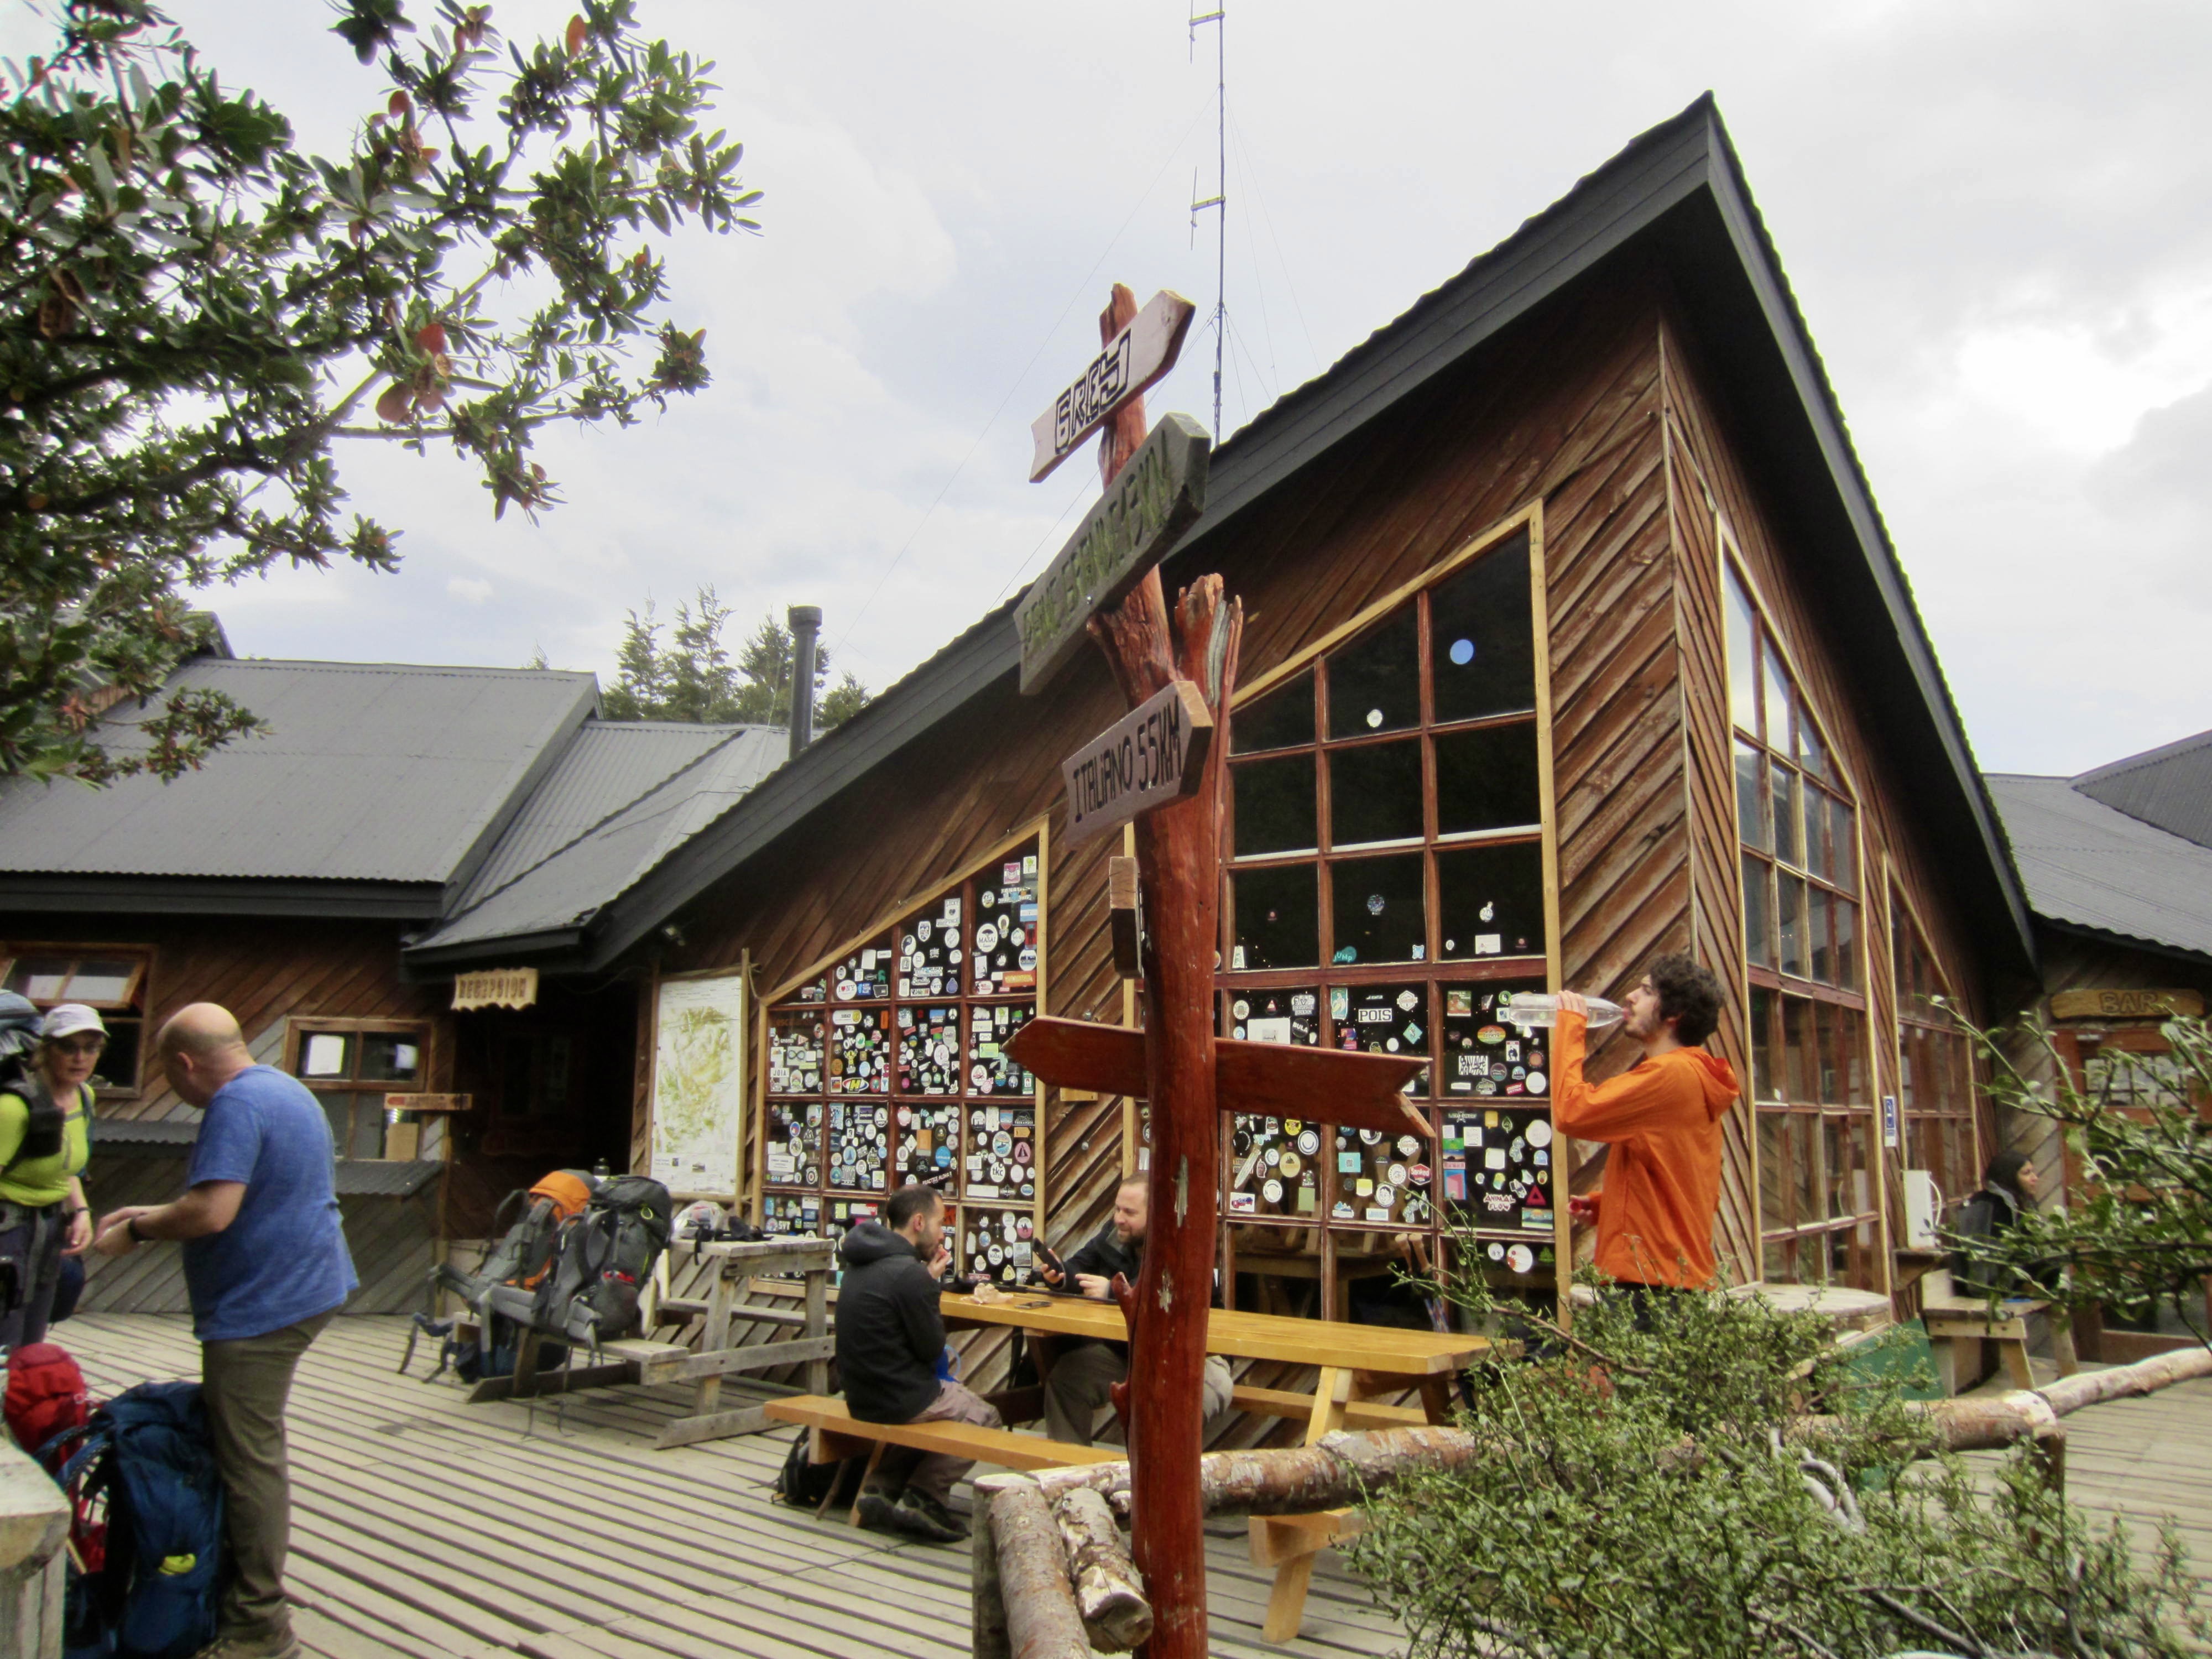
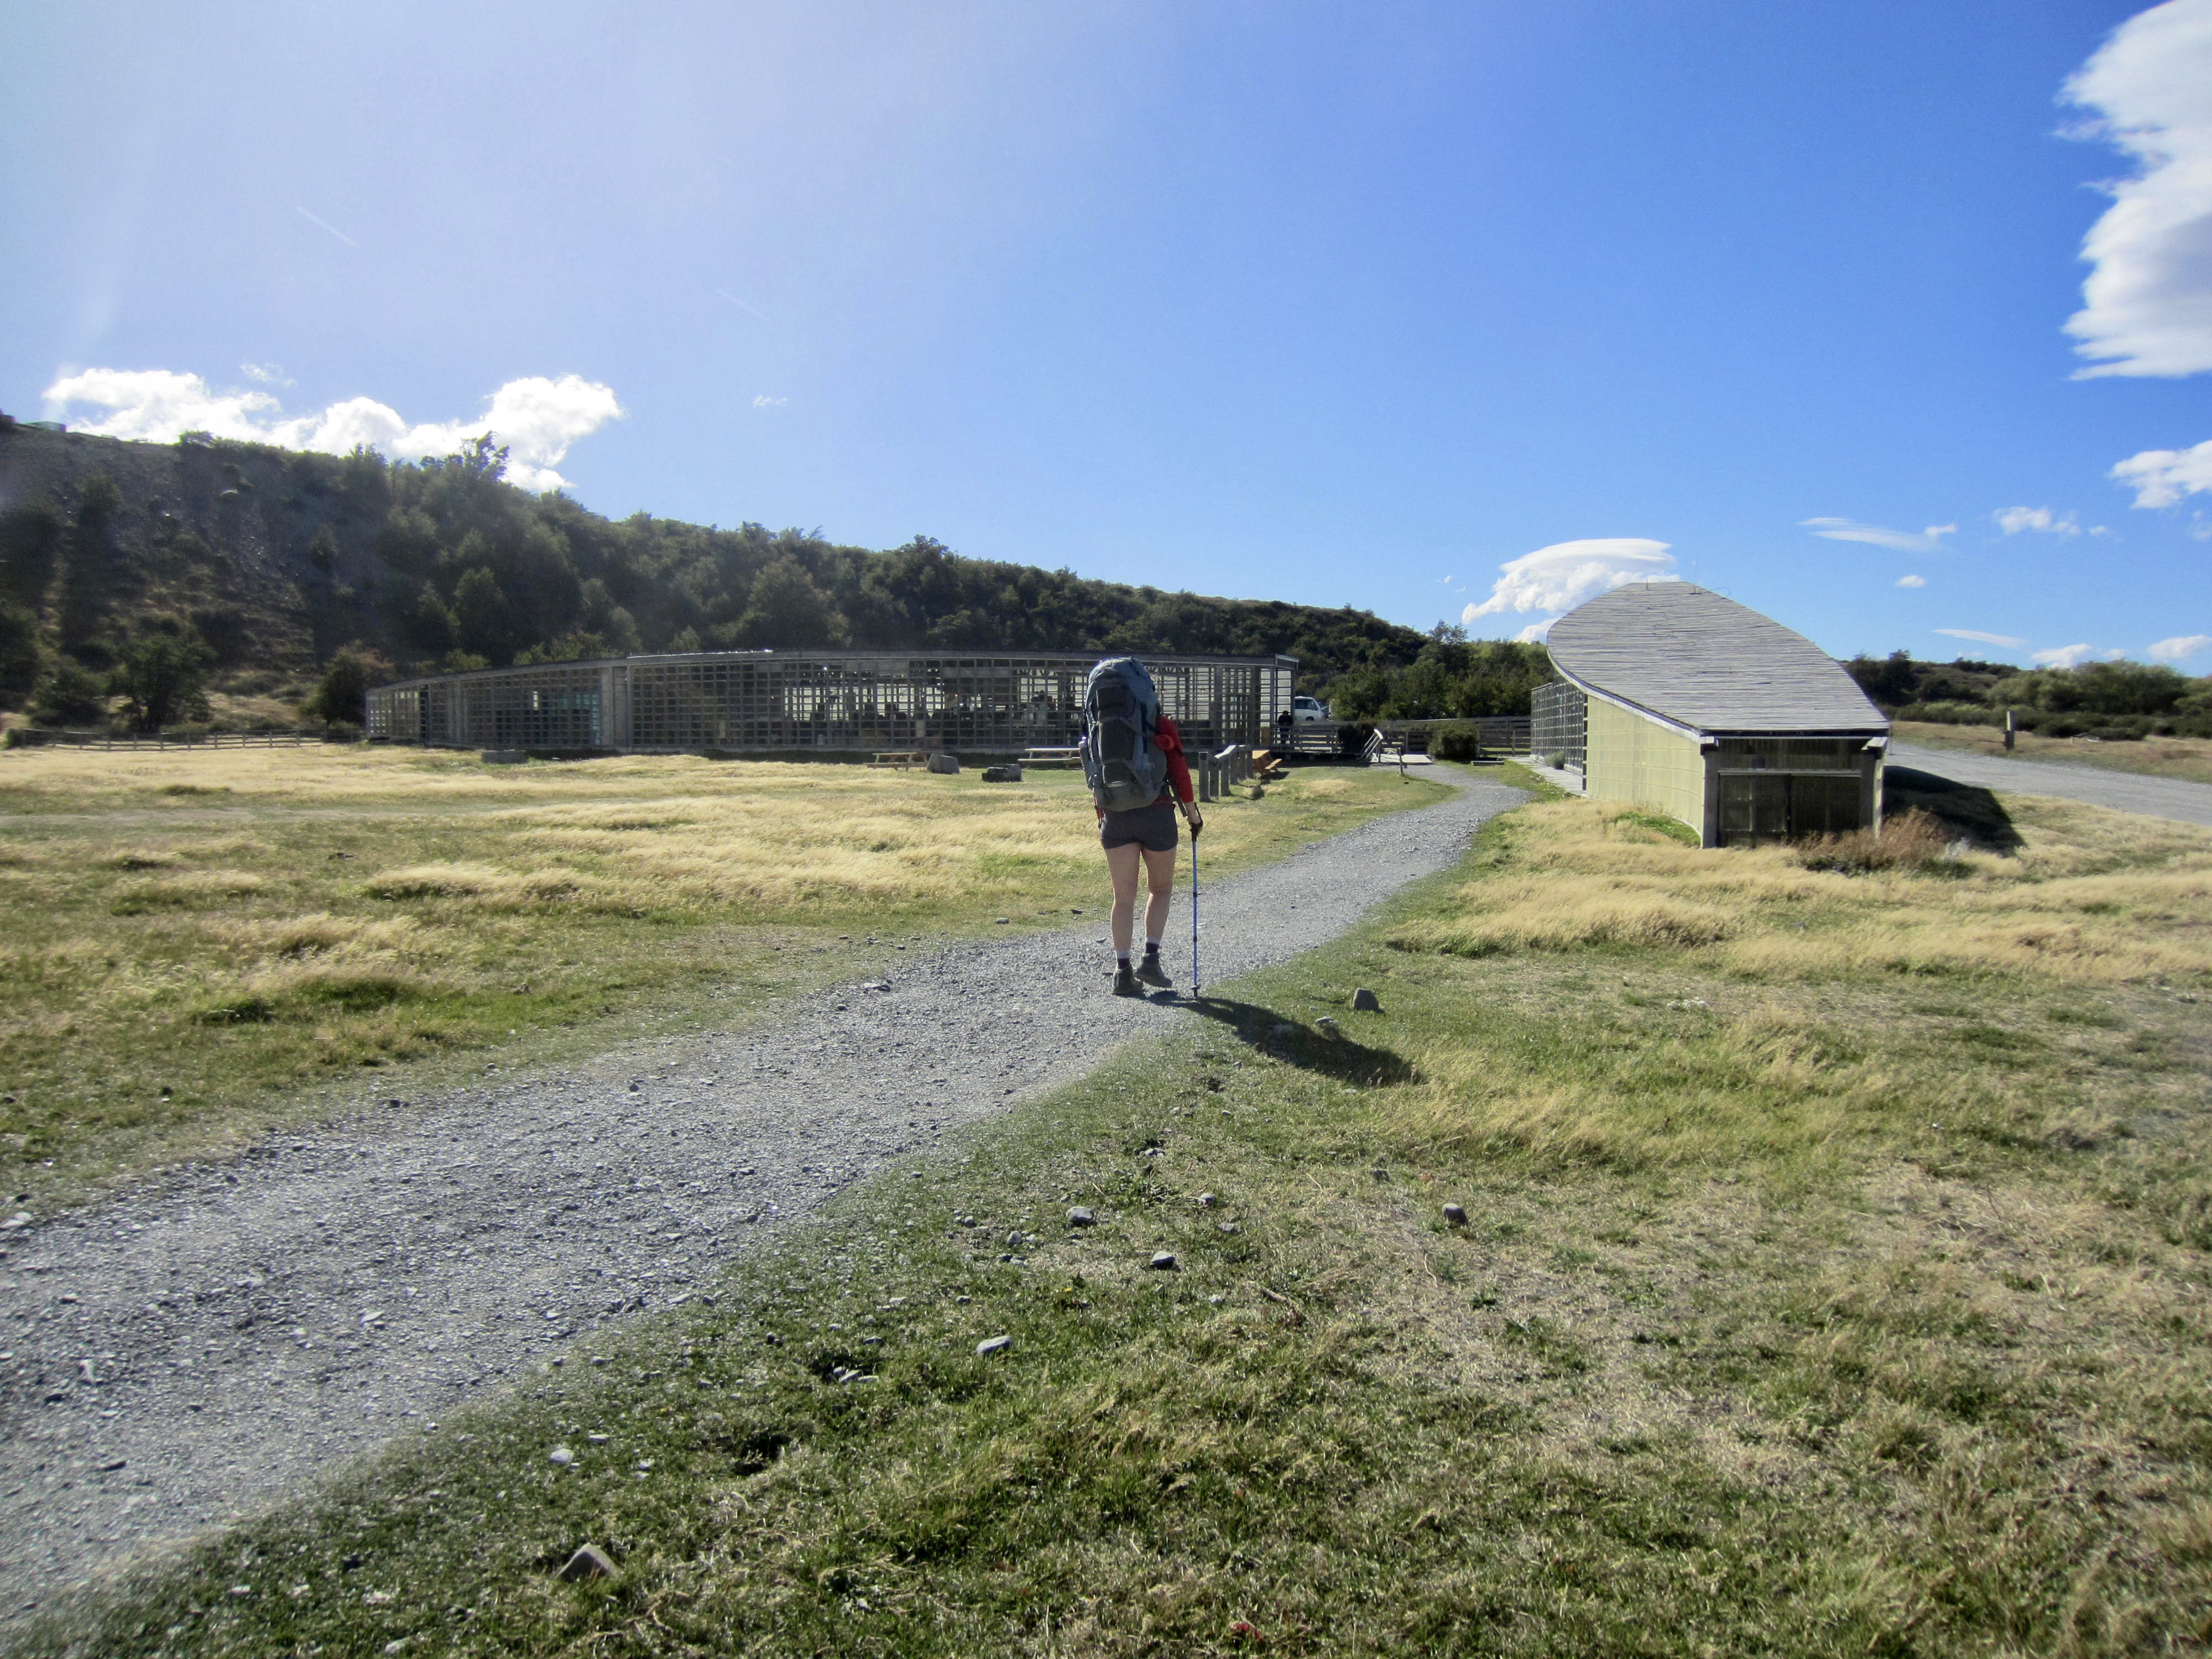
In late afternoon, we strolled into sprawling expanse of Grey Camp. Compared to the rustic nature of our previous three campsites, this felt like an actual village, with modern buildings housing a restaurant and lodge. We checked in at the registration window, pitched our tents in the forest, and cooked dinner on the veranda.


…
Approximate daily stats: 10.3 hrs elapsed; 9.1 mi / 14.6 km traveled; 3300 ft / 1000 m gained; 4900 ft / 1490 m lost.
Day 5: Grey Camp to Paine Grande Camp
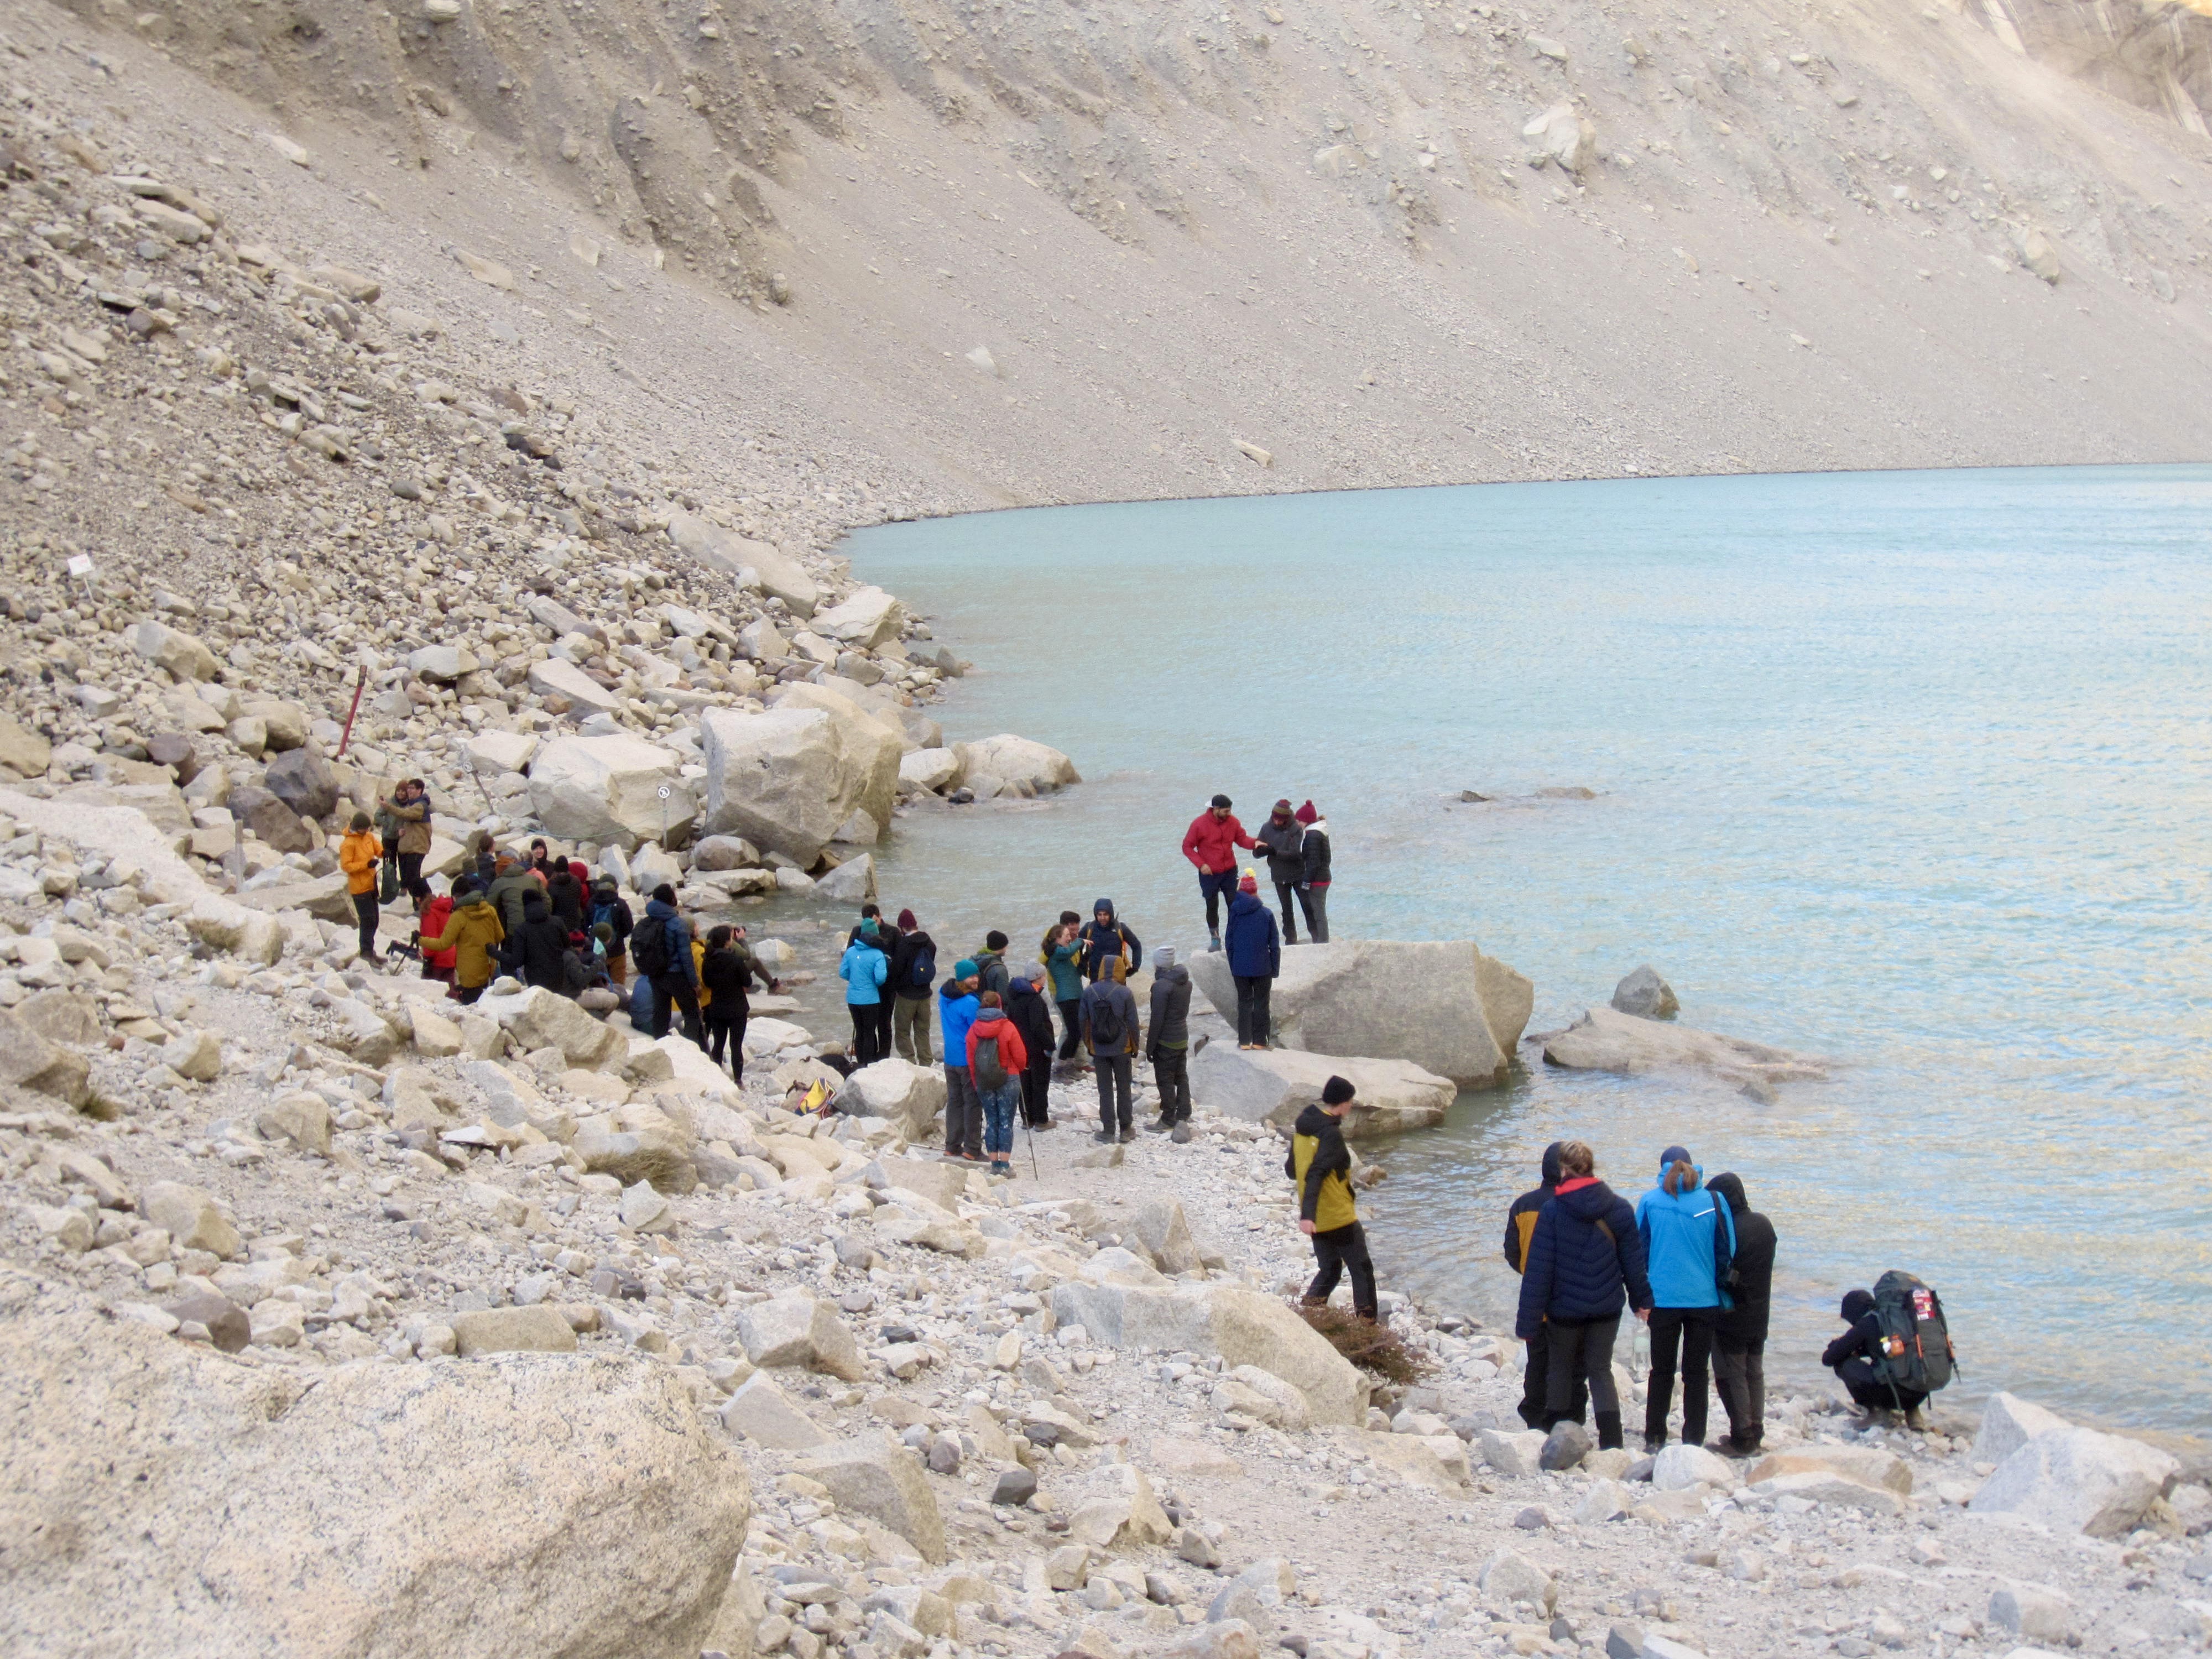
When Eileen and I awoke in the morning, Brooke had already packed up and left camp; she needed an early start to catch the Lake Pehoe catamaran at Paine Grande Camp. Knowing that we had an easy day ahead, Eileen and I enjoyed a leisurely breakfast and then made a short sidetrip over to a popular viewpoint on the shore of Lake Grey. This viewpoint gives a close look at icebergs that have collected into a small harbor on the lake.


While packing up back at Grey Camp, Eileen discovered that her trekking poles had been stolen from our tent site! This frustrating event cast a shadow on our day but served as a good reminder that we had now fully transitioned from the relatively quiet and neighborly “O” trail to the relatively busy and un-neighborly “W” trail. Trekkers beware.
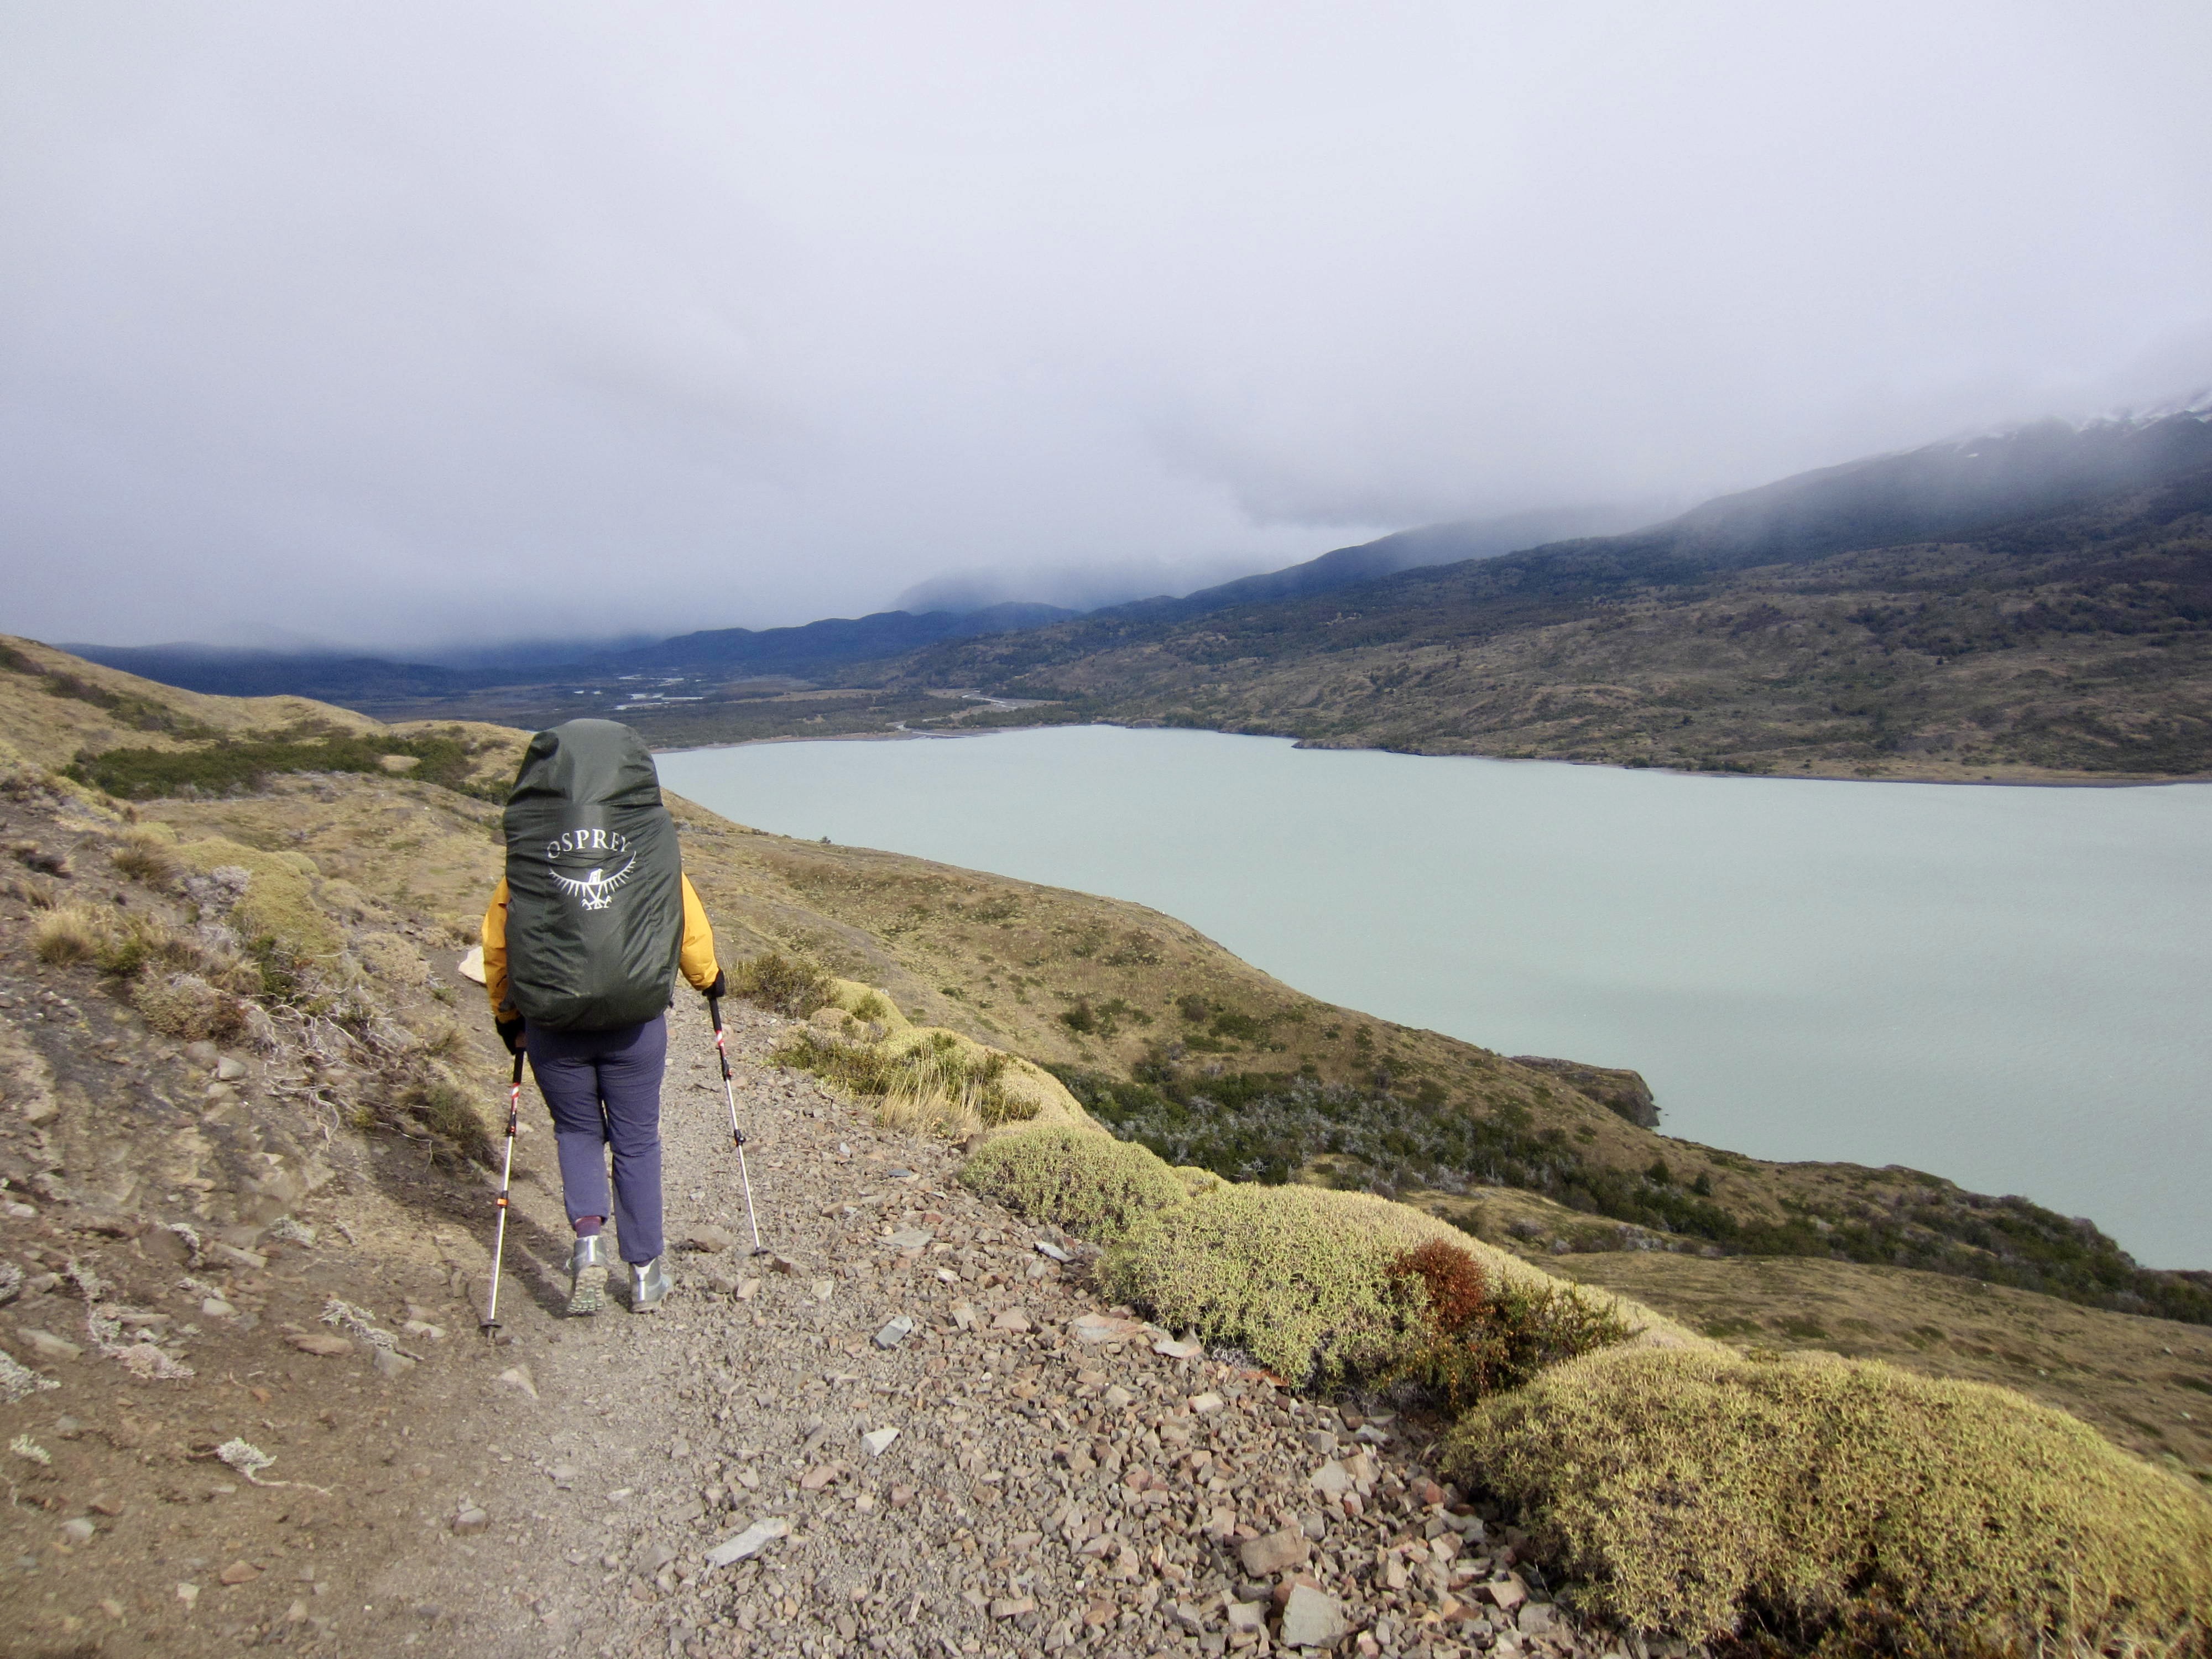
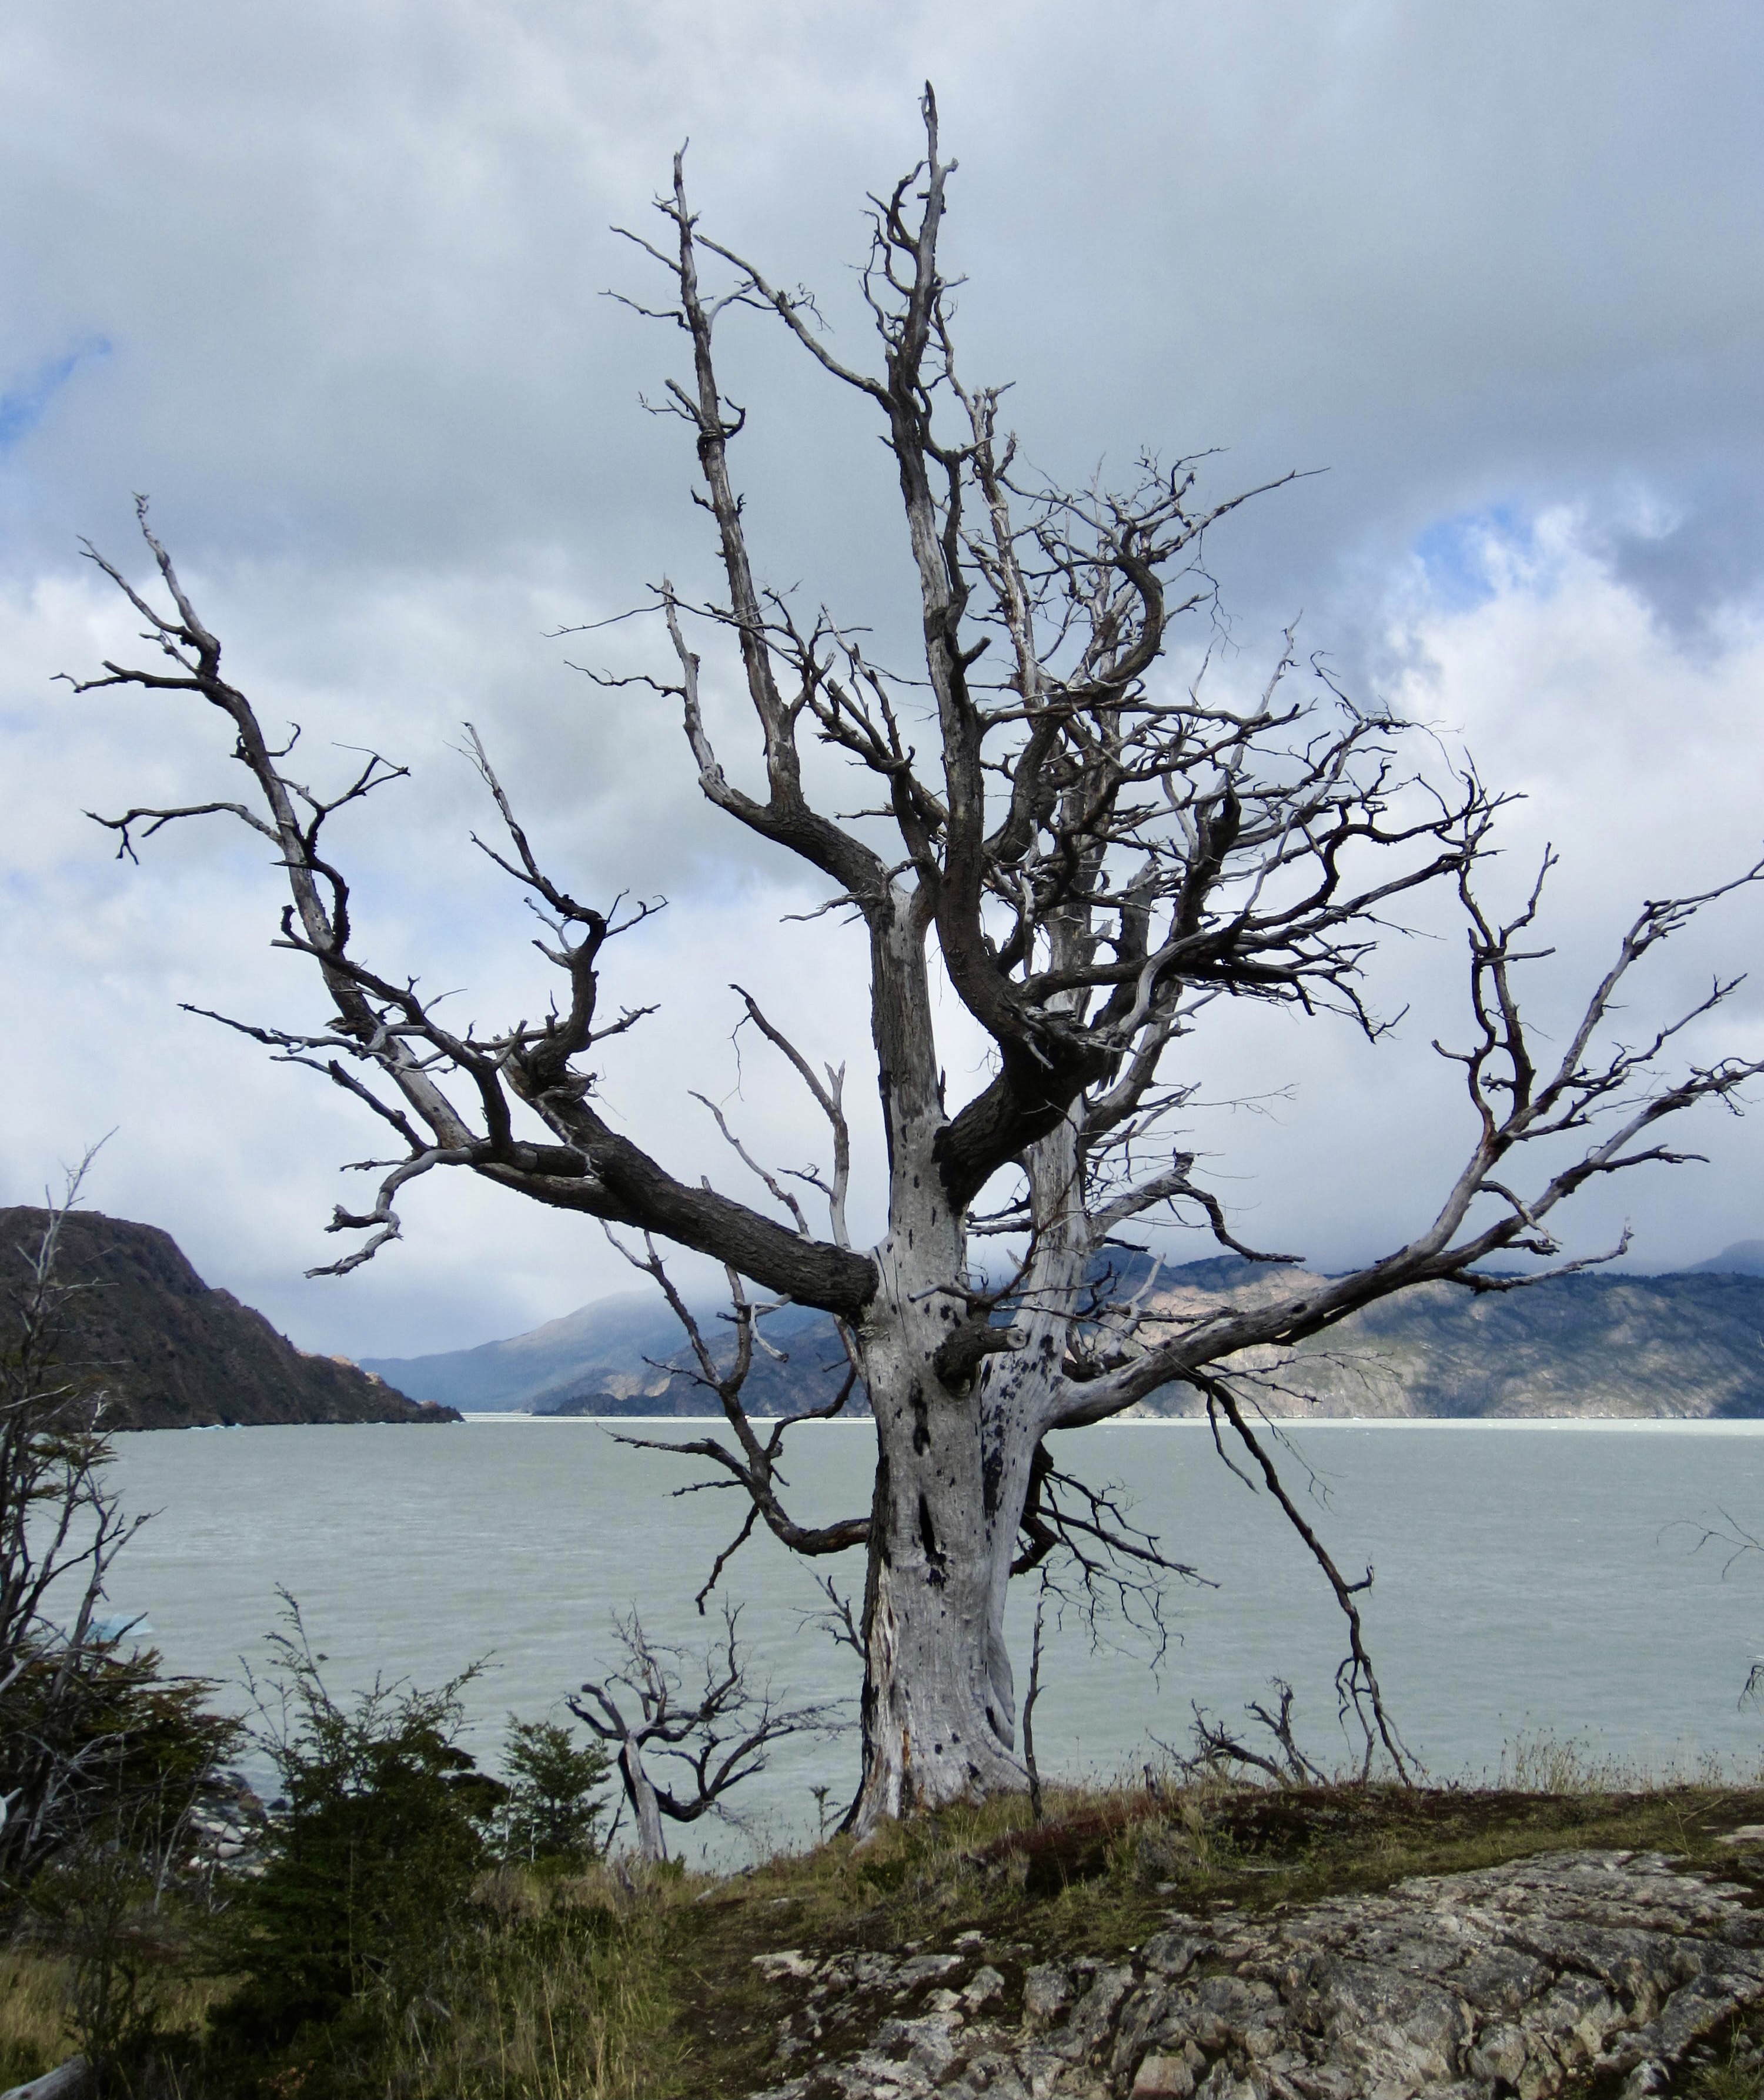
It was nearly noon before we left Grey Camp, having secured Eileen a loaner trekking pole from the lost & found box. Our exit trail made a gradual climb above Lake Grey and took us across several high knobs subjected to strong winds. We were knocked back and forth like drunken sailors, giving us our first experience at hiking in a Patagonian wind. The stormy sky above, the austerely gray water below, and the weather-beaten trees around us added to the feeling of an inhospitable environment.

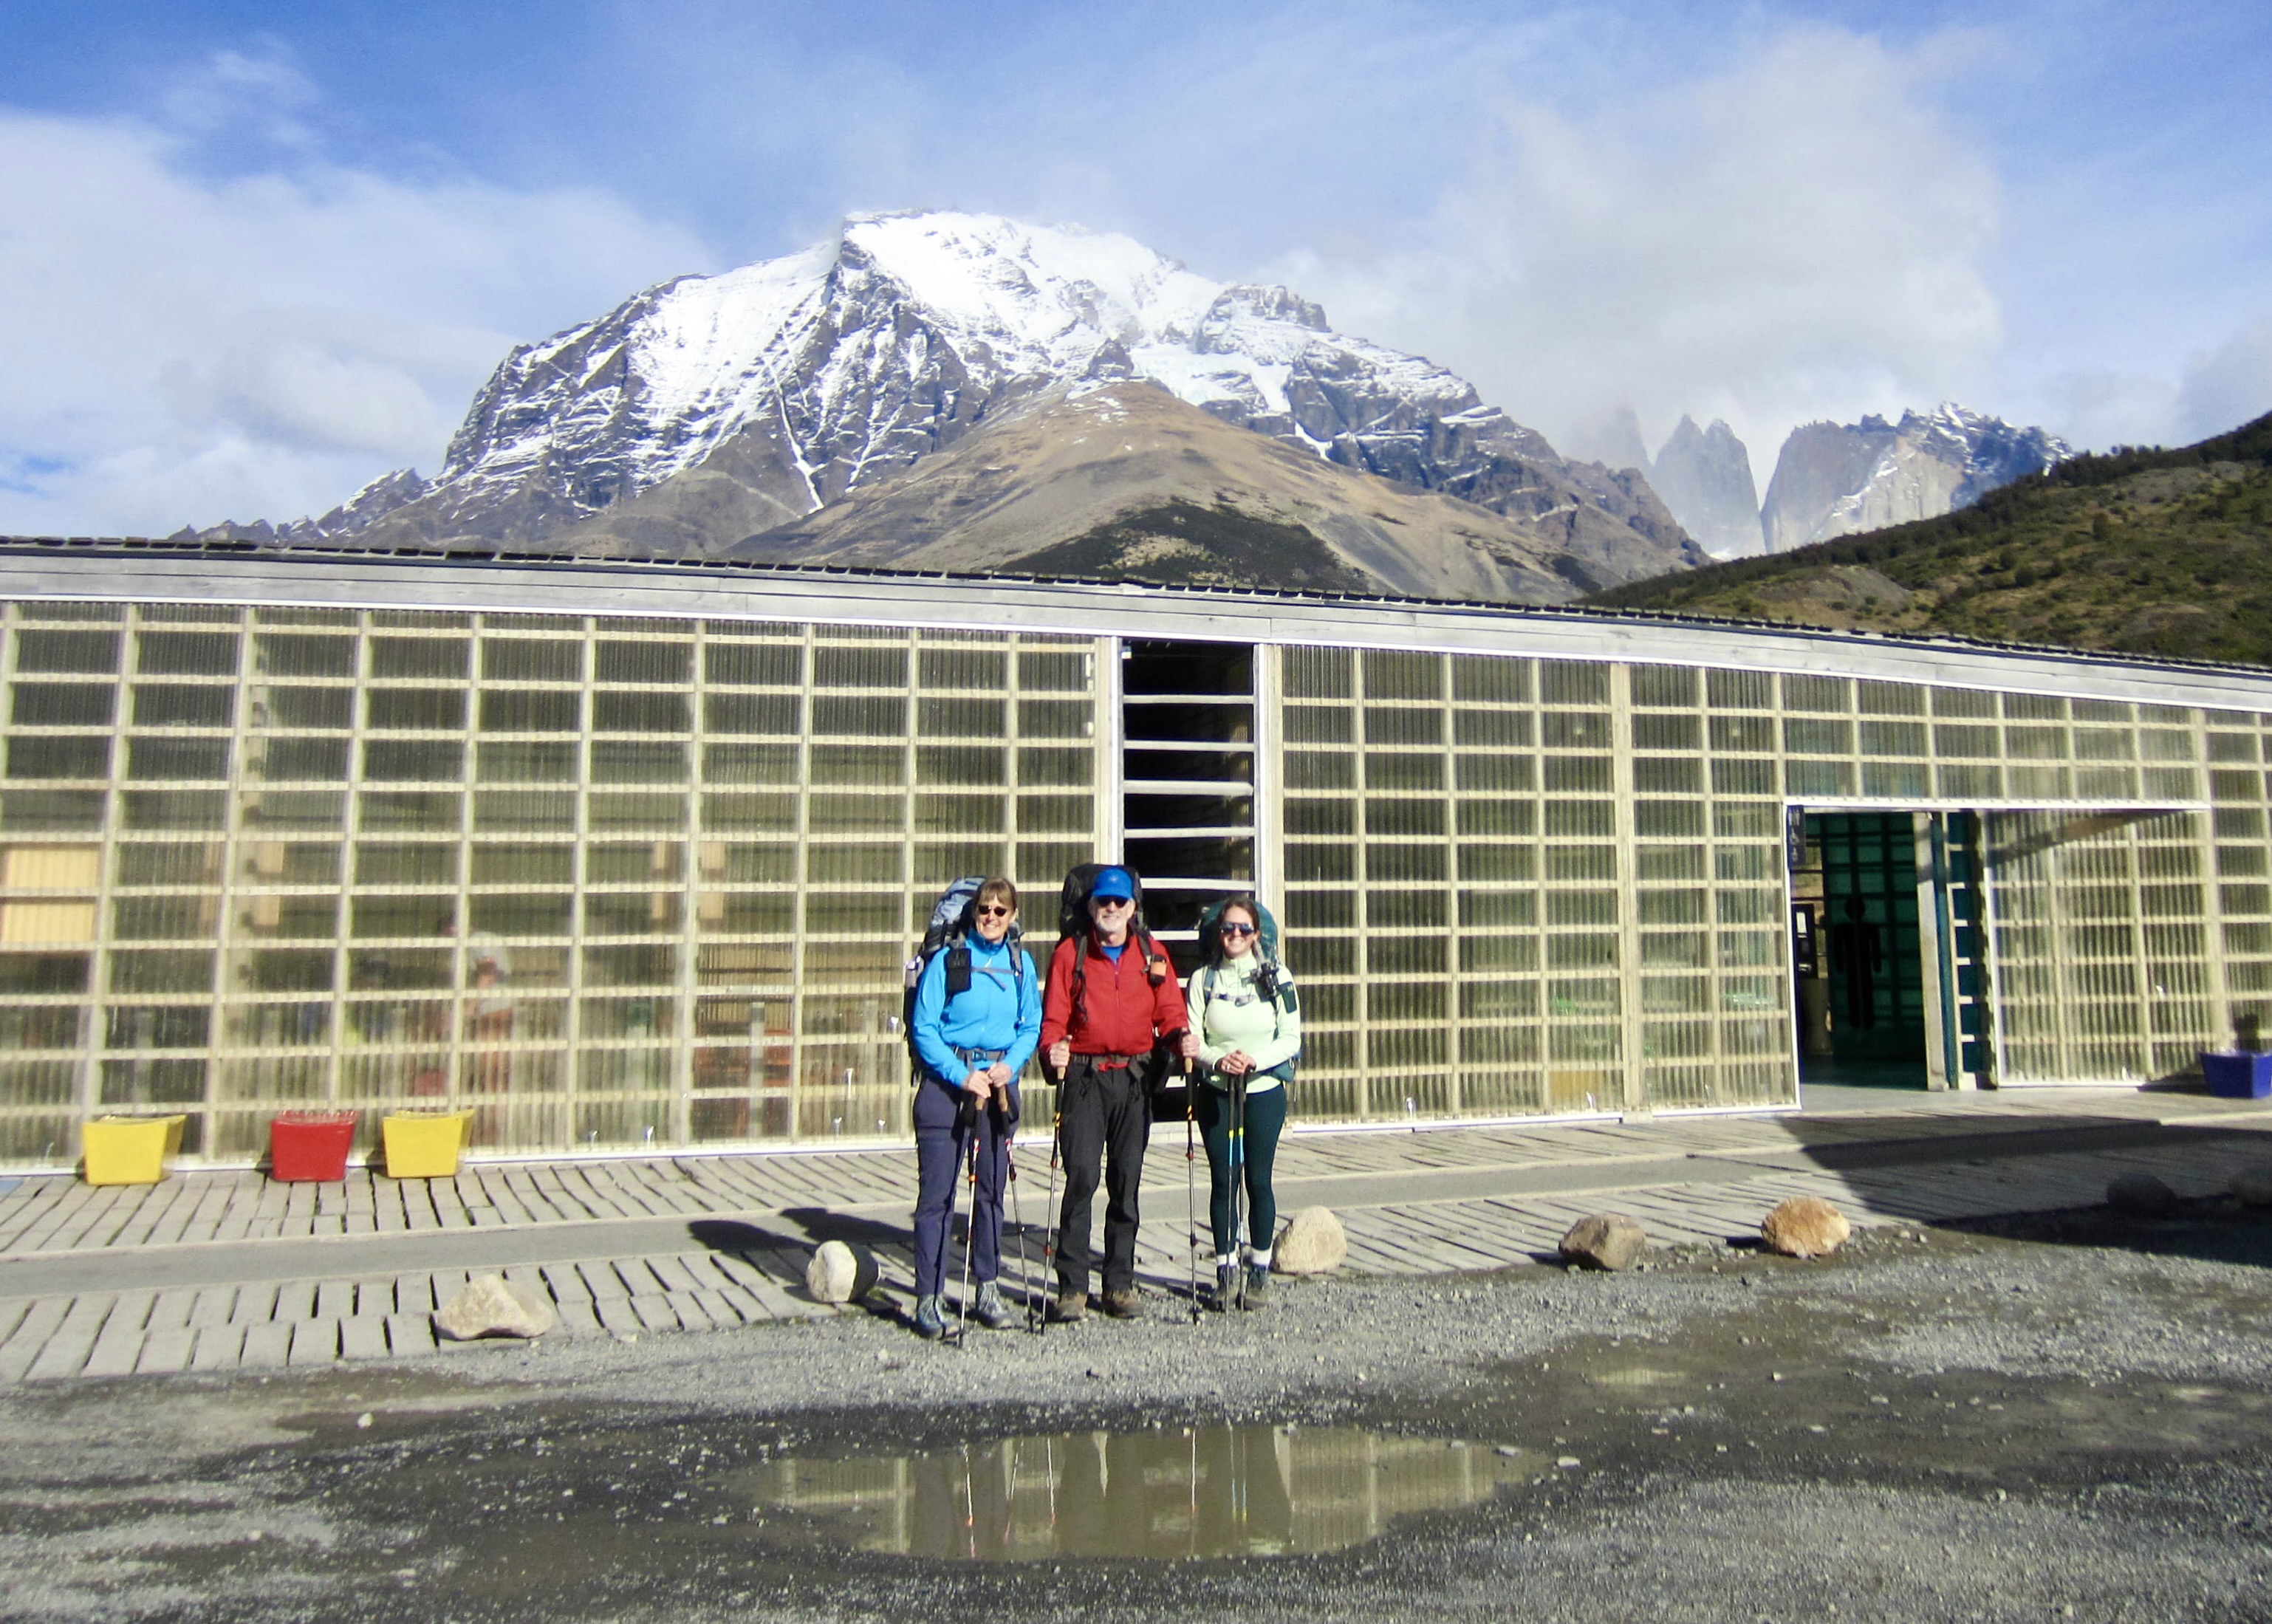
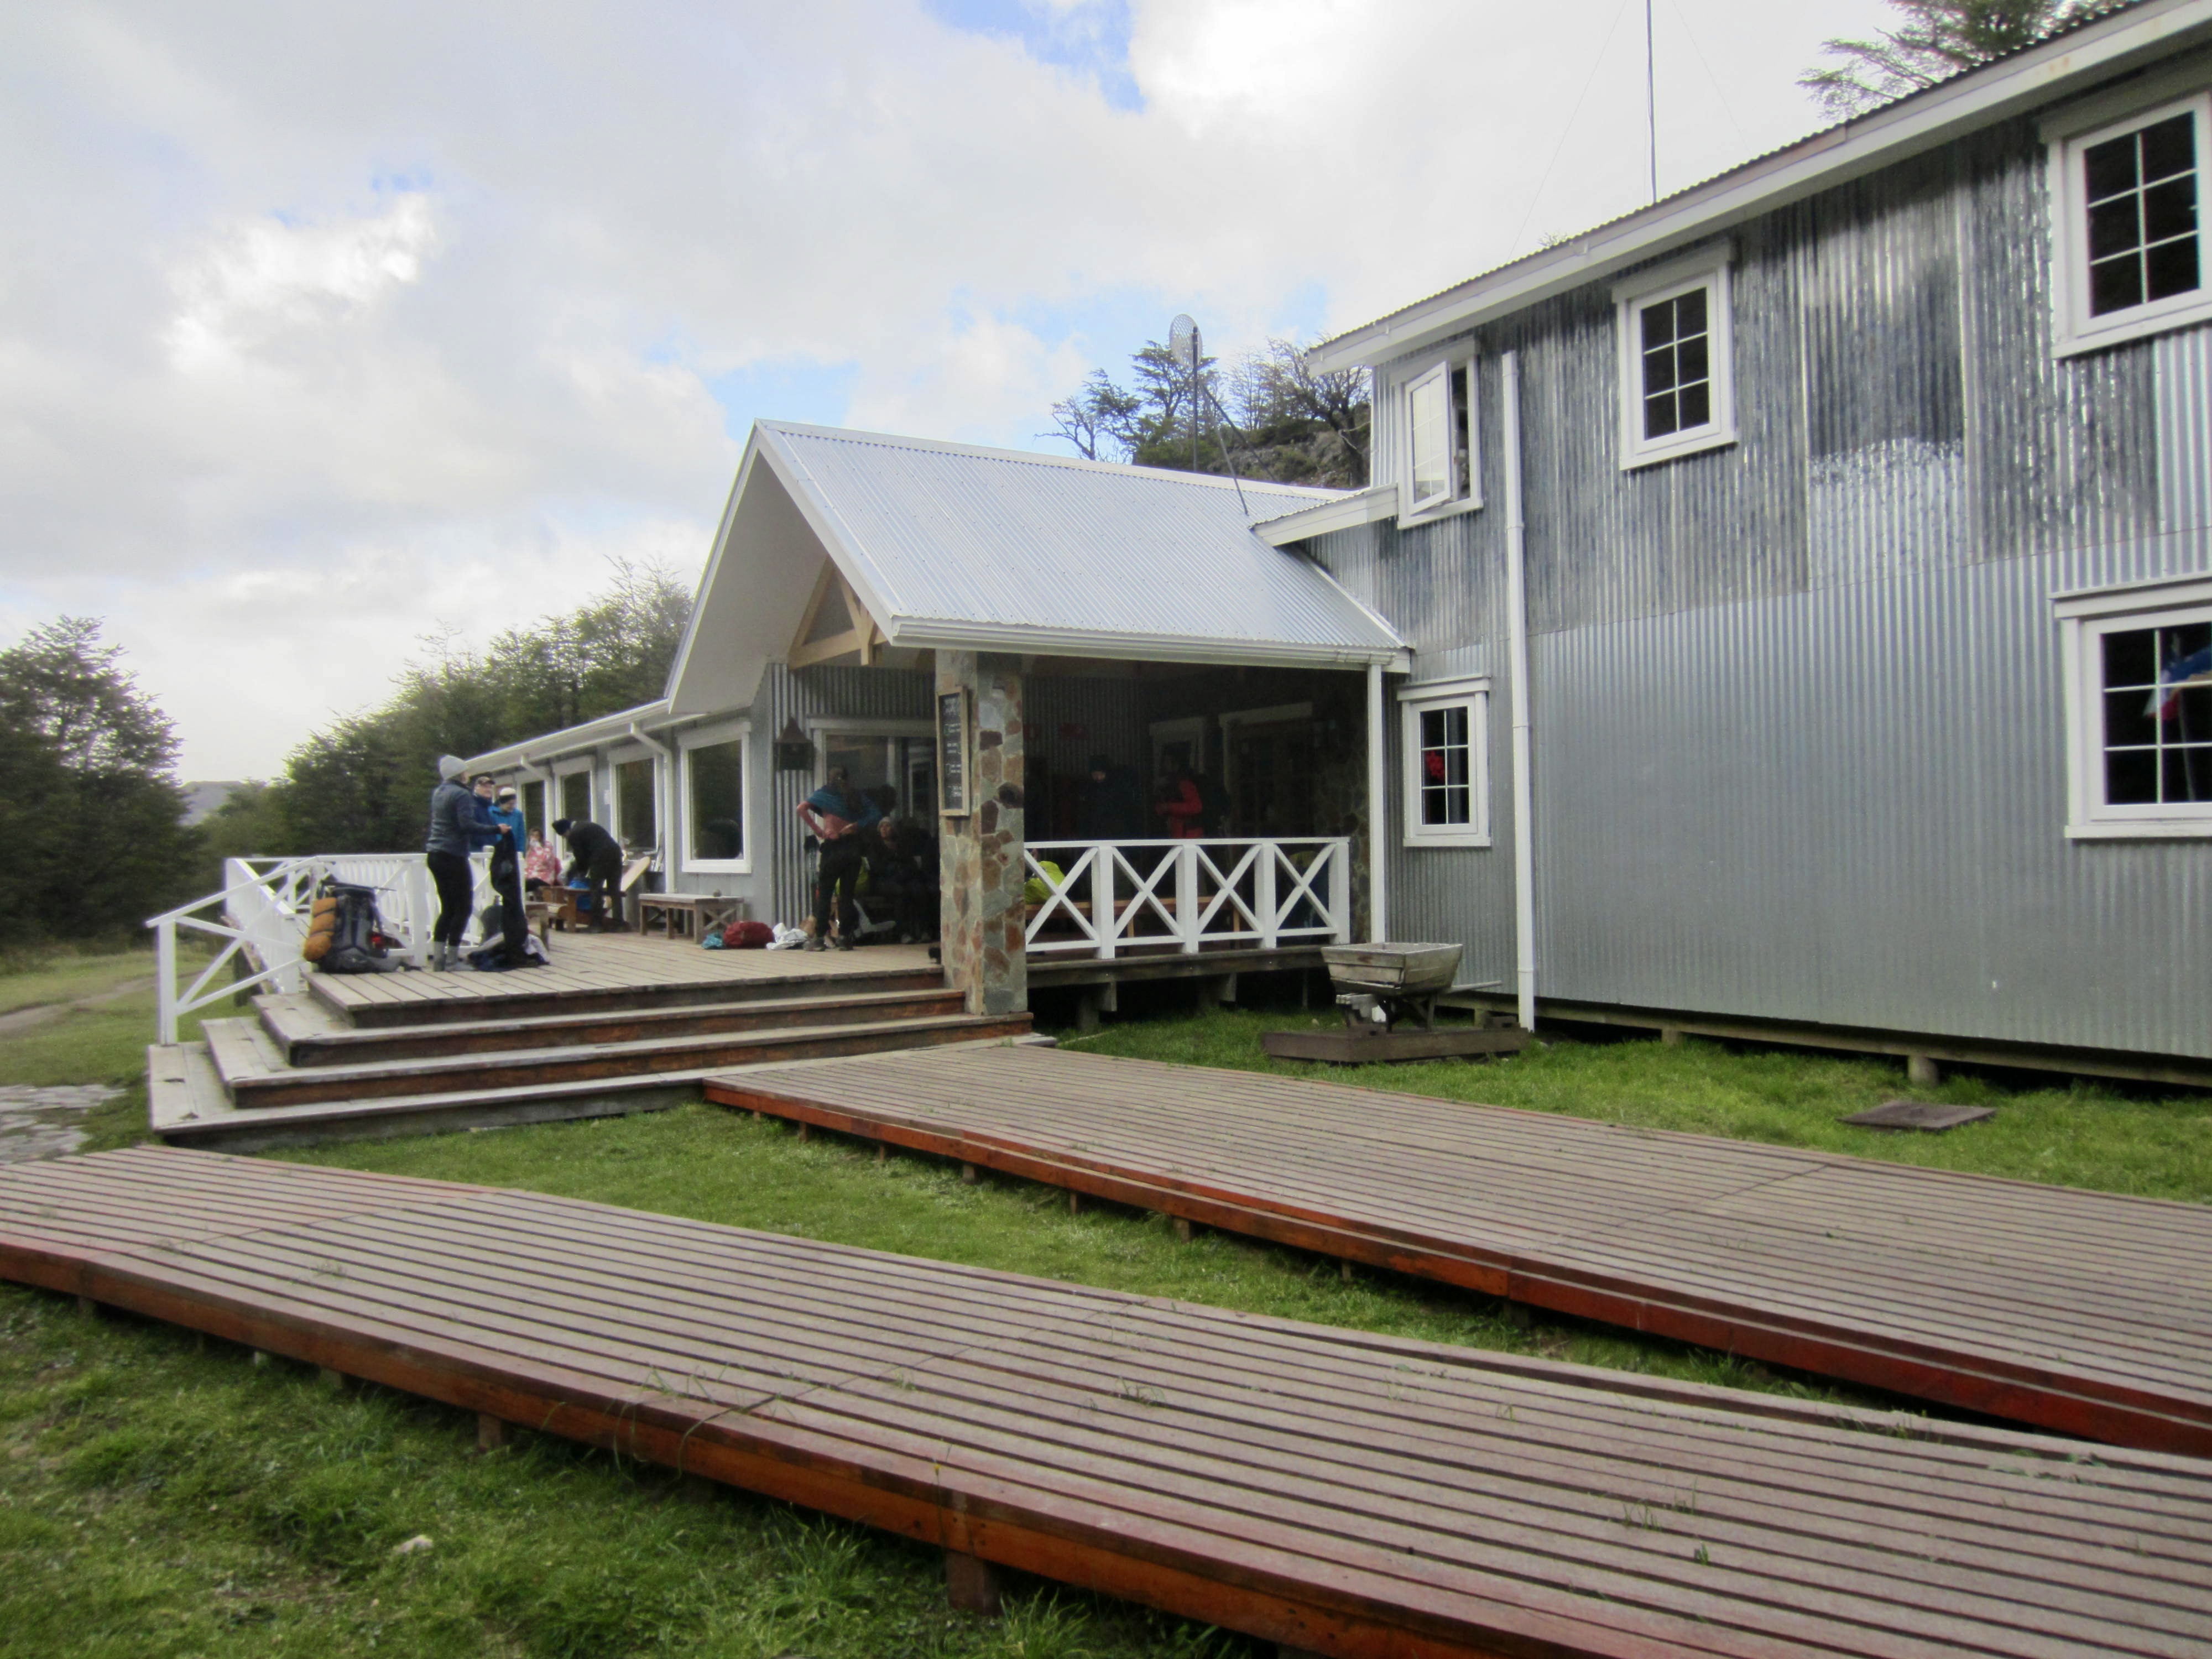
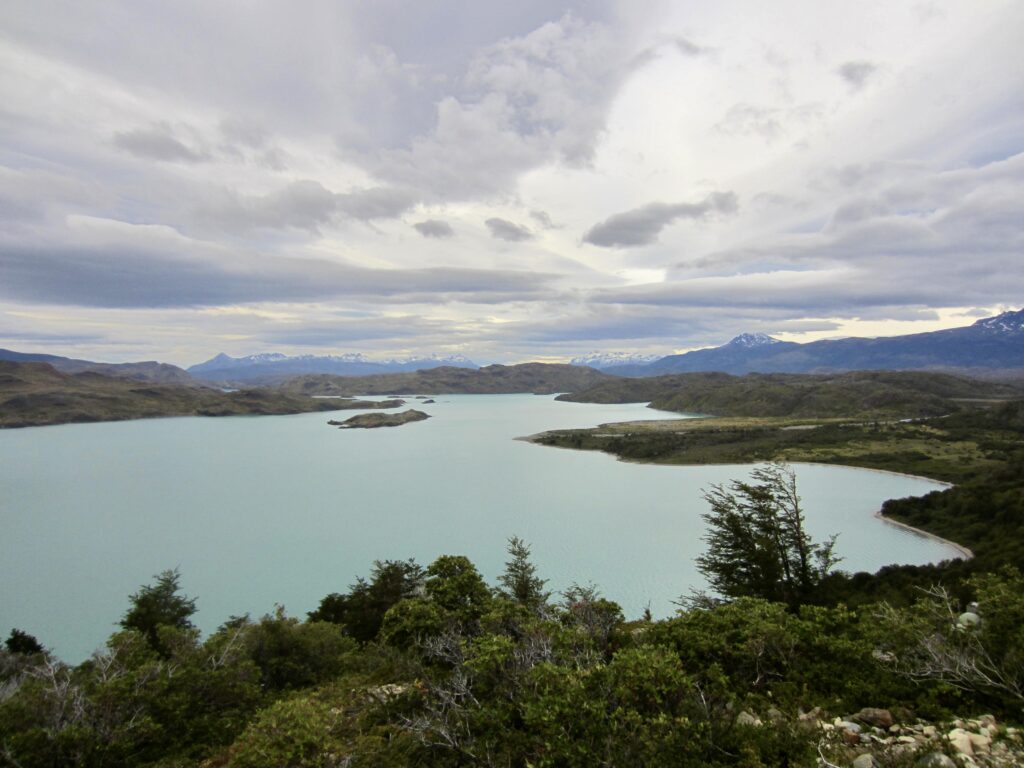
After crossing over the highest knob and passing Lake Los Patos, the trail angled down to Paine Grande Camp, which sits in a huge meadow on the shore of Lake Pehoe. The large, two-story lodge here gives this campsite an even more civilized appearance than Grey Camp, but it is more exposed to wind and rain.
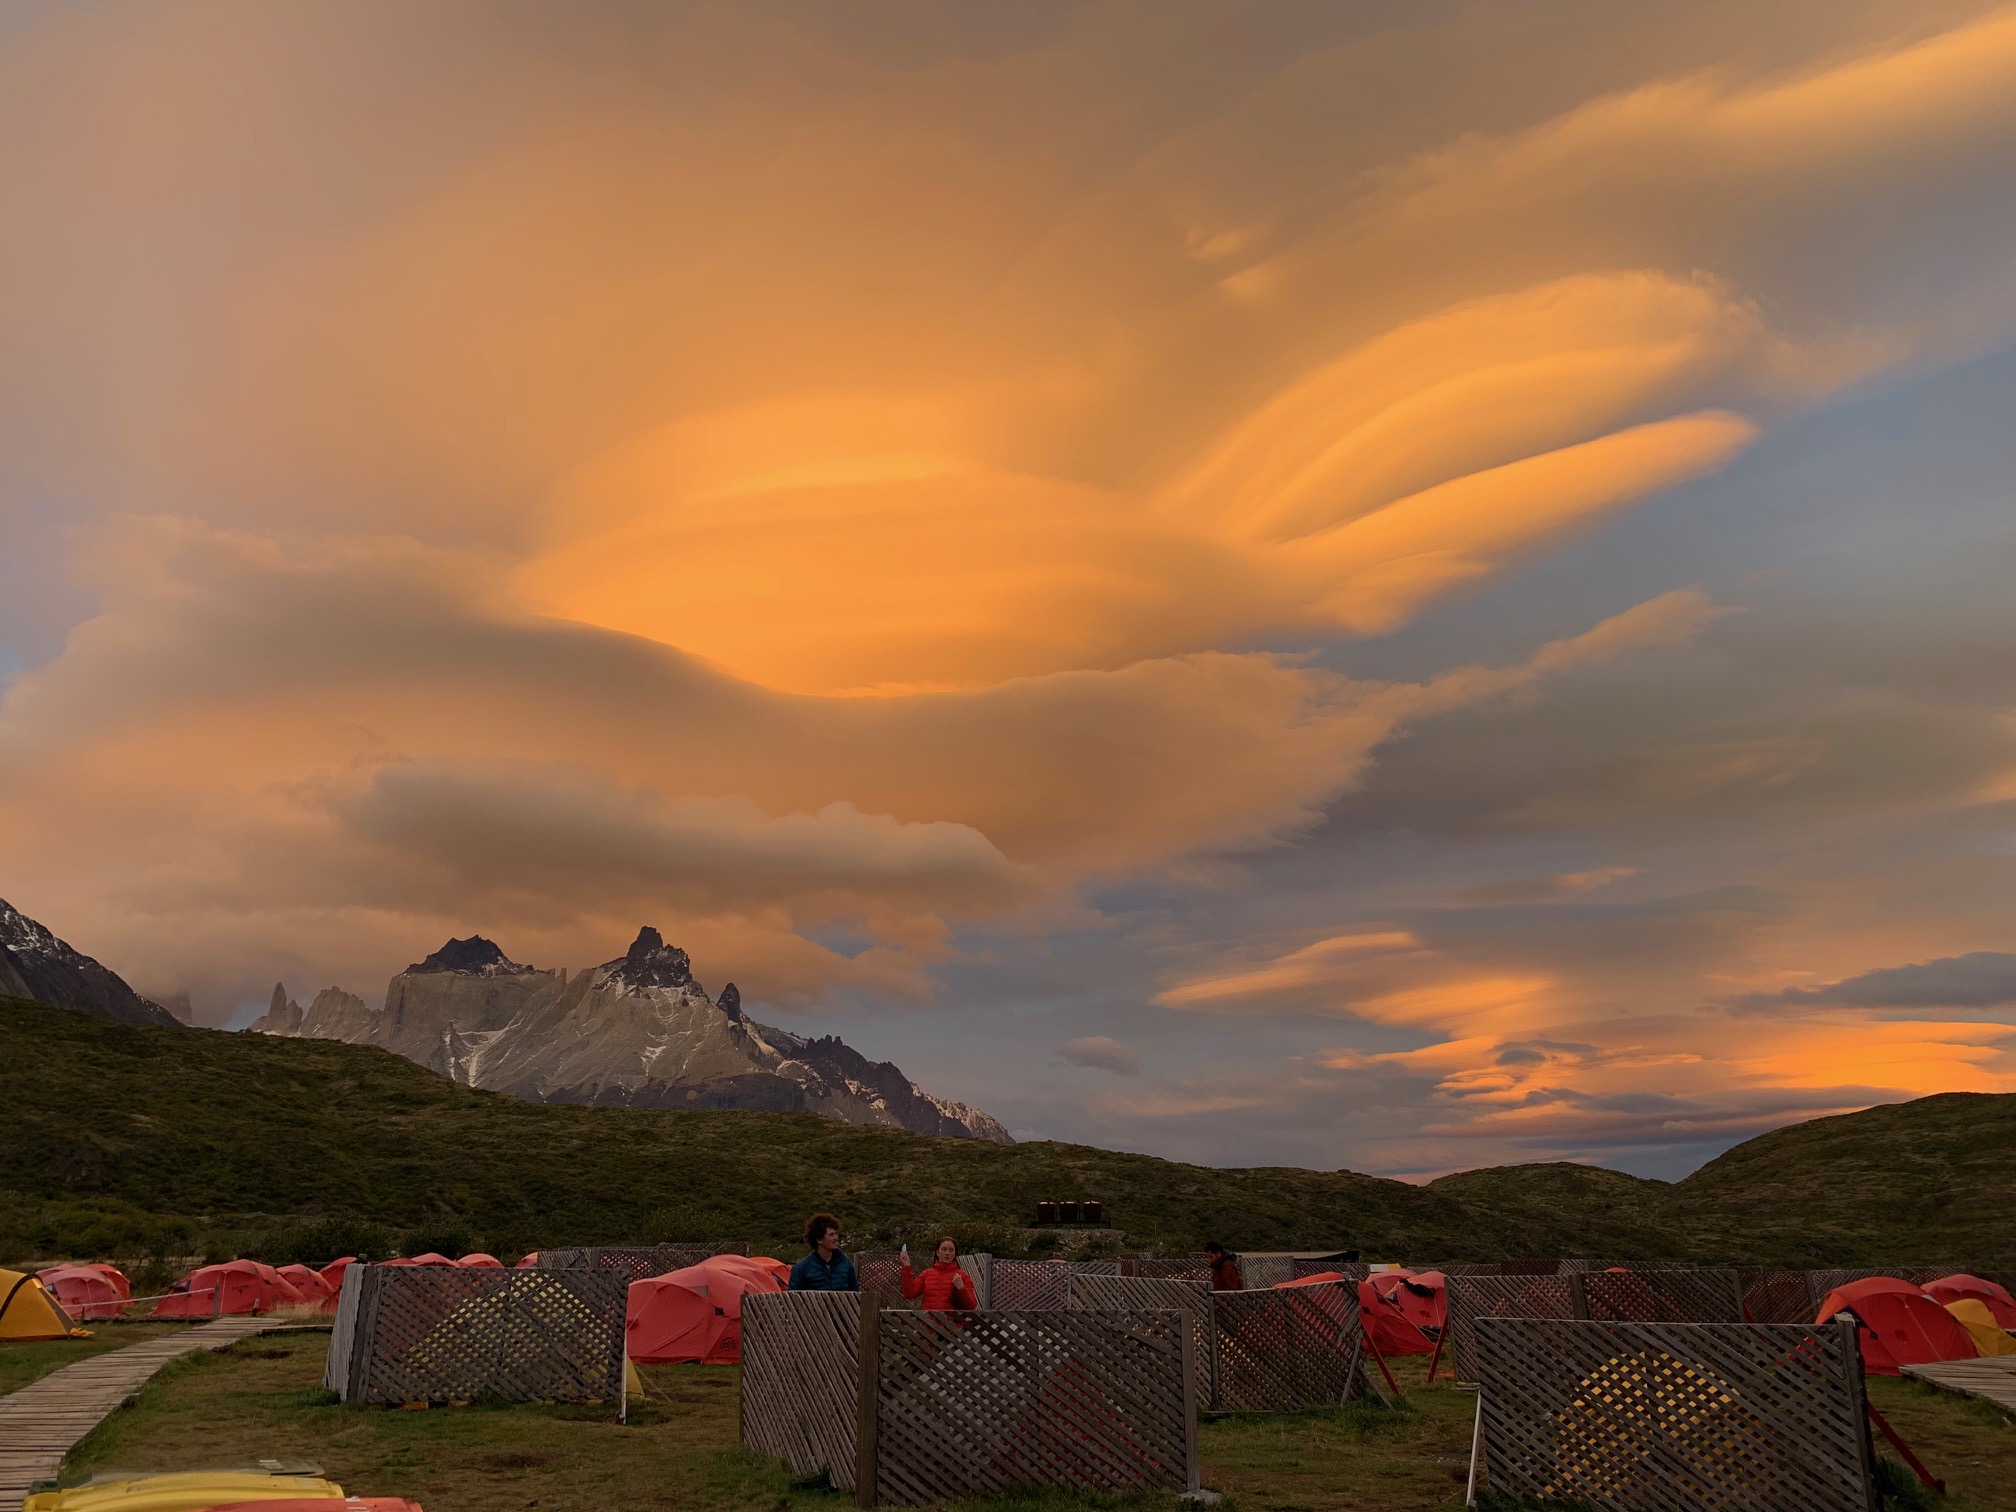
We tucked our tent against a two-sided windscreen in the open meadow, taking great care to anchor the floor and guylines. It was likely to be a windy night. We then took refuge inside the lodge’s cafe for the remainder of the afternoon.
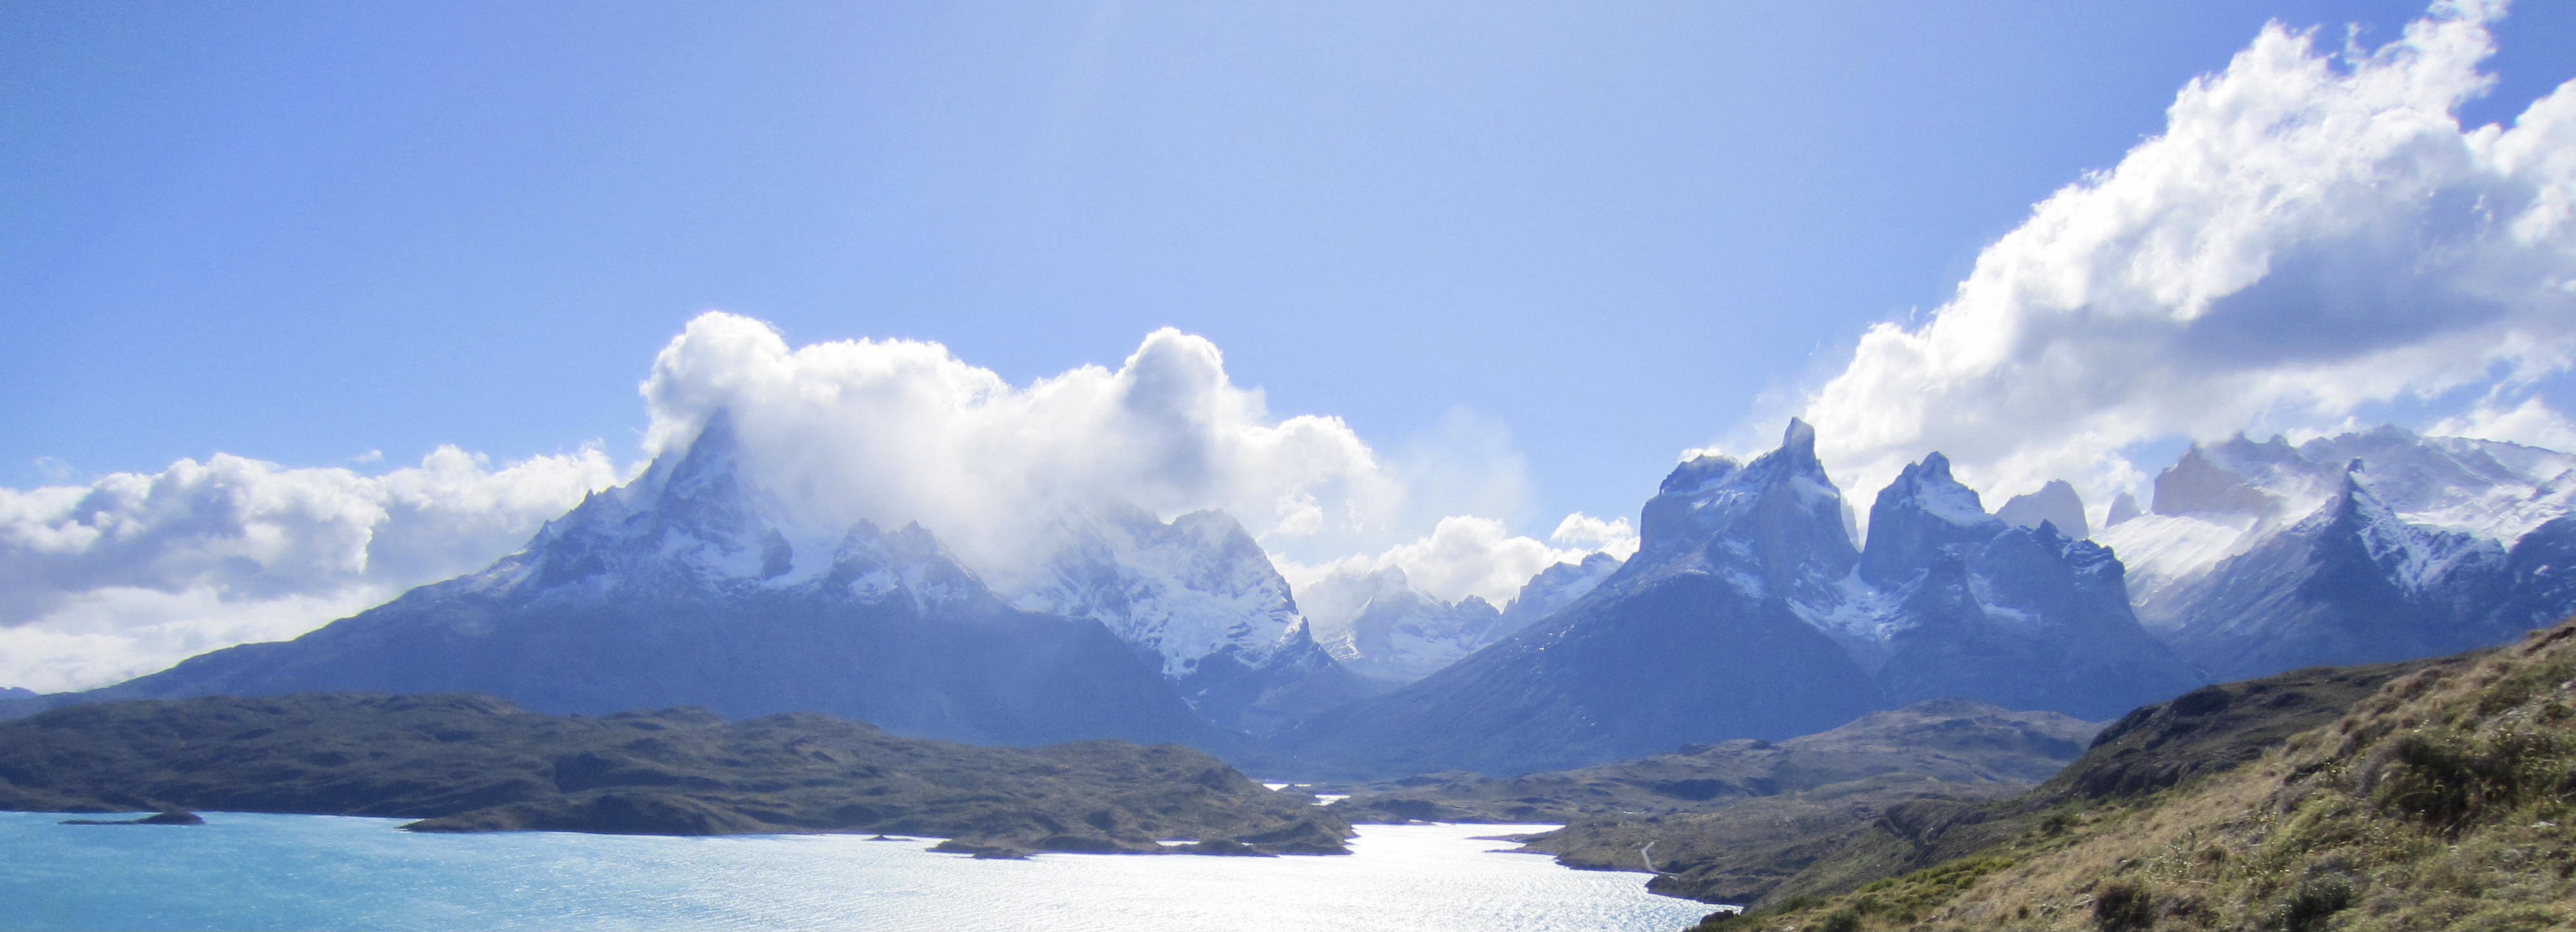
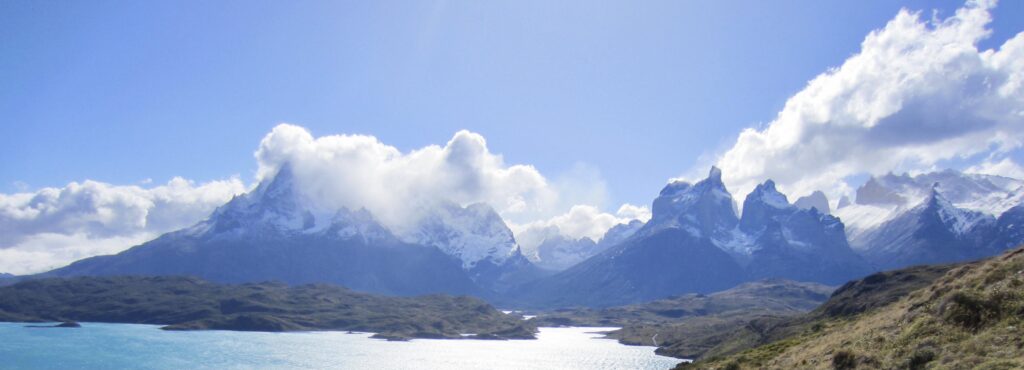
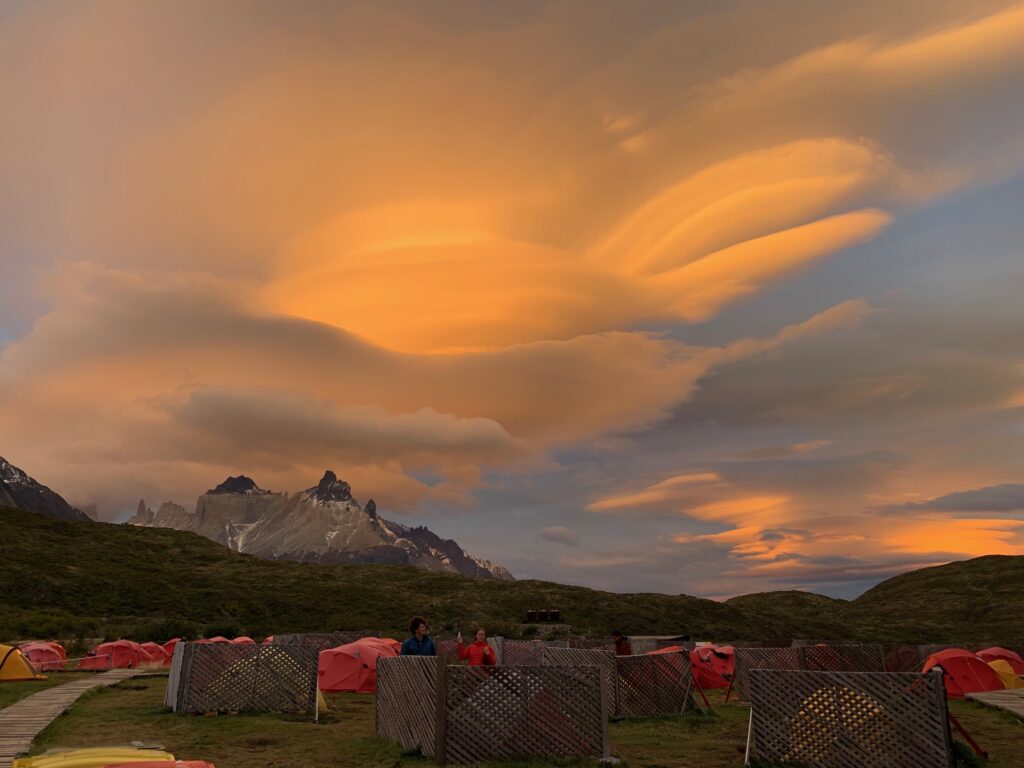
For dinner, we took shelter inside the public kitchen building adjacent to our tent site. This is the largest and nicest of all campsite kitchens on the “O-W” Circuit and feels like many of the kitchen buildings in New Zealand. A dramatic sunset view of orange clouds hovering over the famous Cuernos del Paine further enhanced the ambience of our dinner.
…
Approximate daily stats: 4.0 hrs elapsed; 7.8 mi / 12.6 km traveled; 1650 ft / 500 m gained; 1750 ft / 530 m lost.
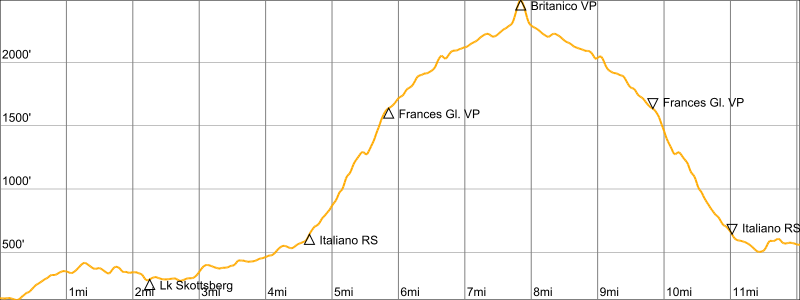
Day 6: Paine Grande Camp to Frances Camp + Britanico VP
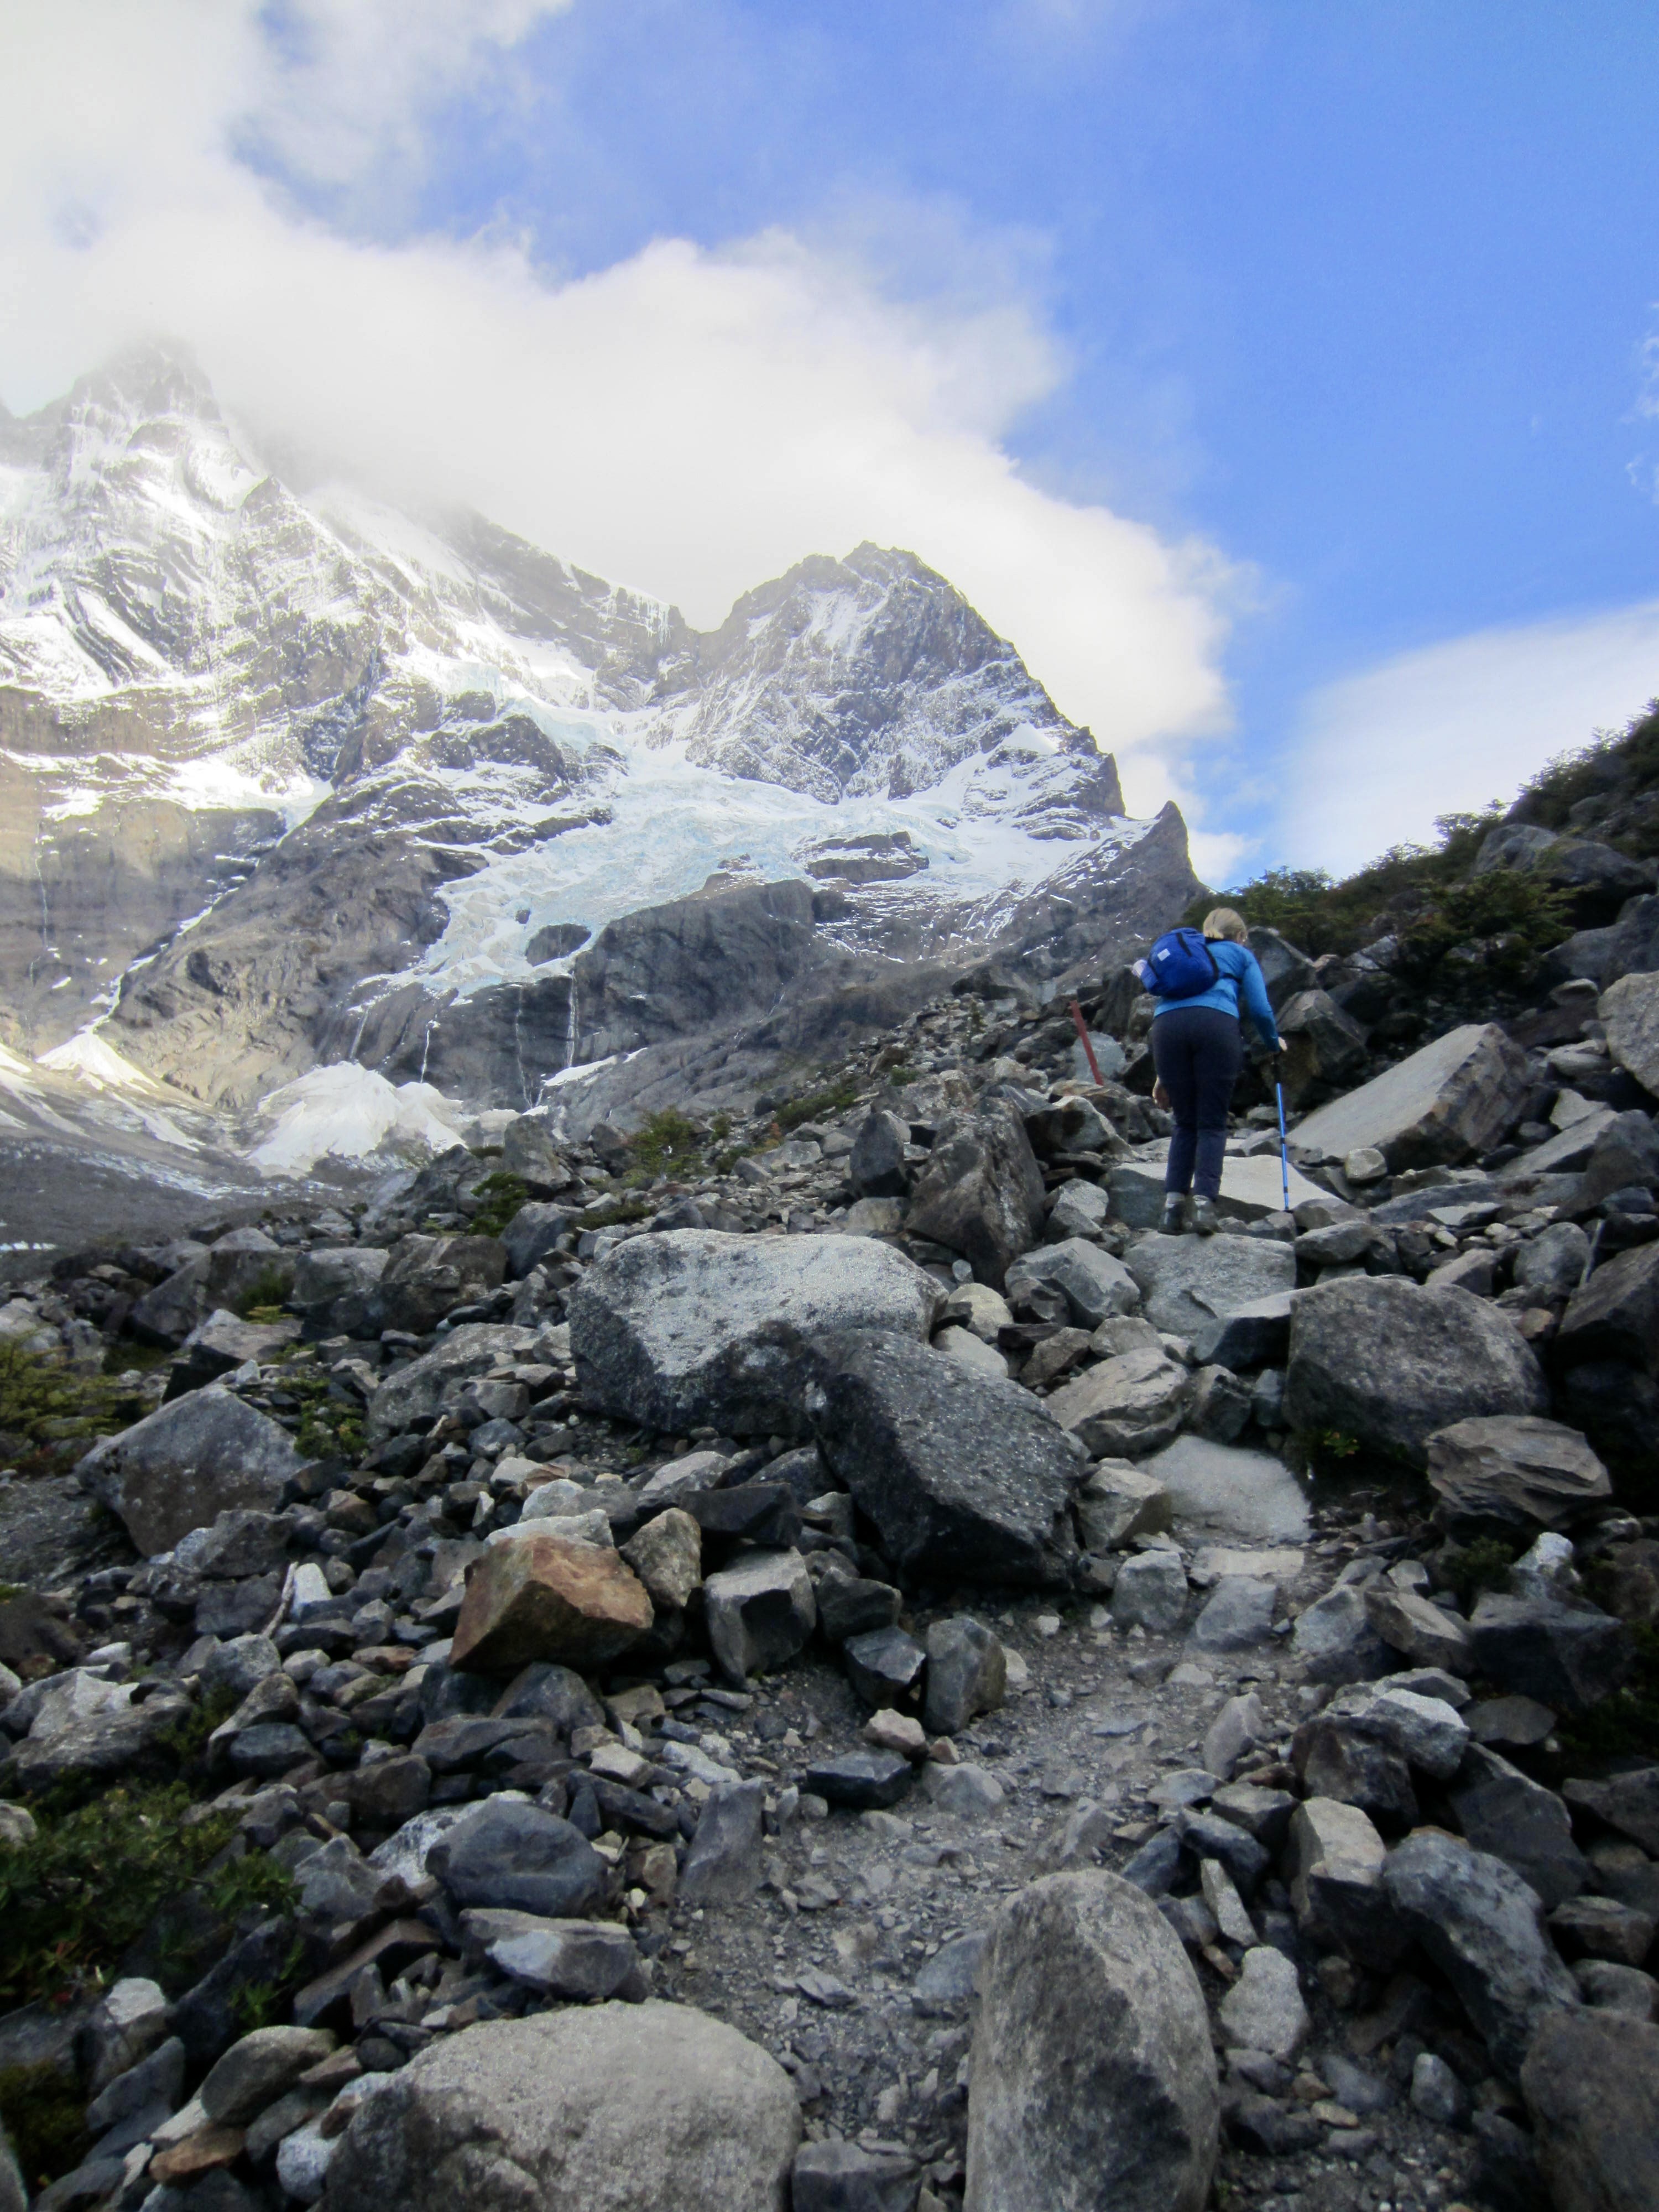
Eileen and I had another full day ahead of us, so we were up at 6:00am while the campsite was still dark and quiet. We were on the trail by first light, hiking below the sharp peaks of Cerro Paine Grande and above the shore of Lake Skottsberg.

After crossing the Frances River on a long suspension bridge, we arrived at Italiano Ranger Station—a former CONAF campsite. We stashed our backpacks at the ranger station, along with dozens of other trekkers, and then headed northward up the Frances River Valley on a primitive trail.
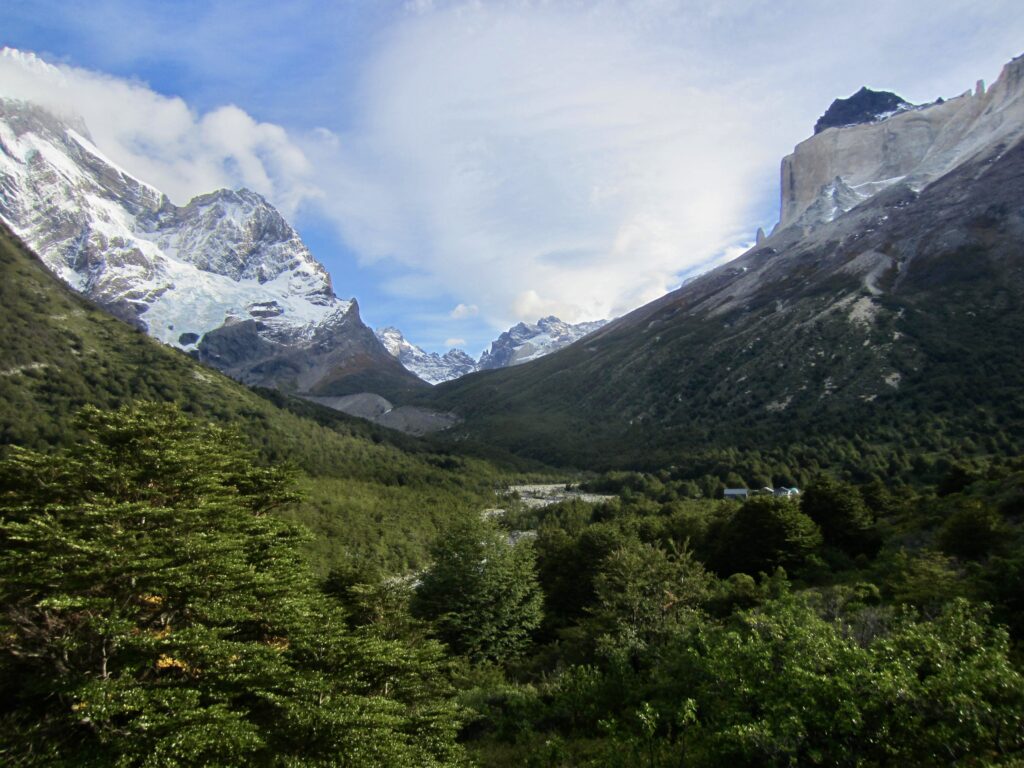

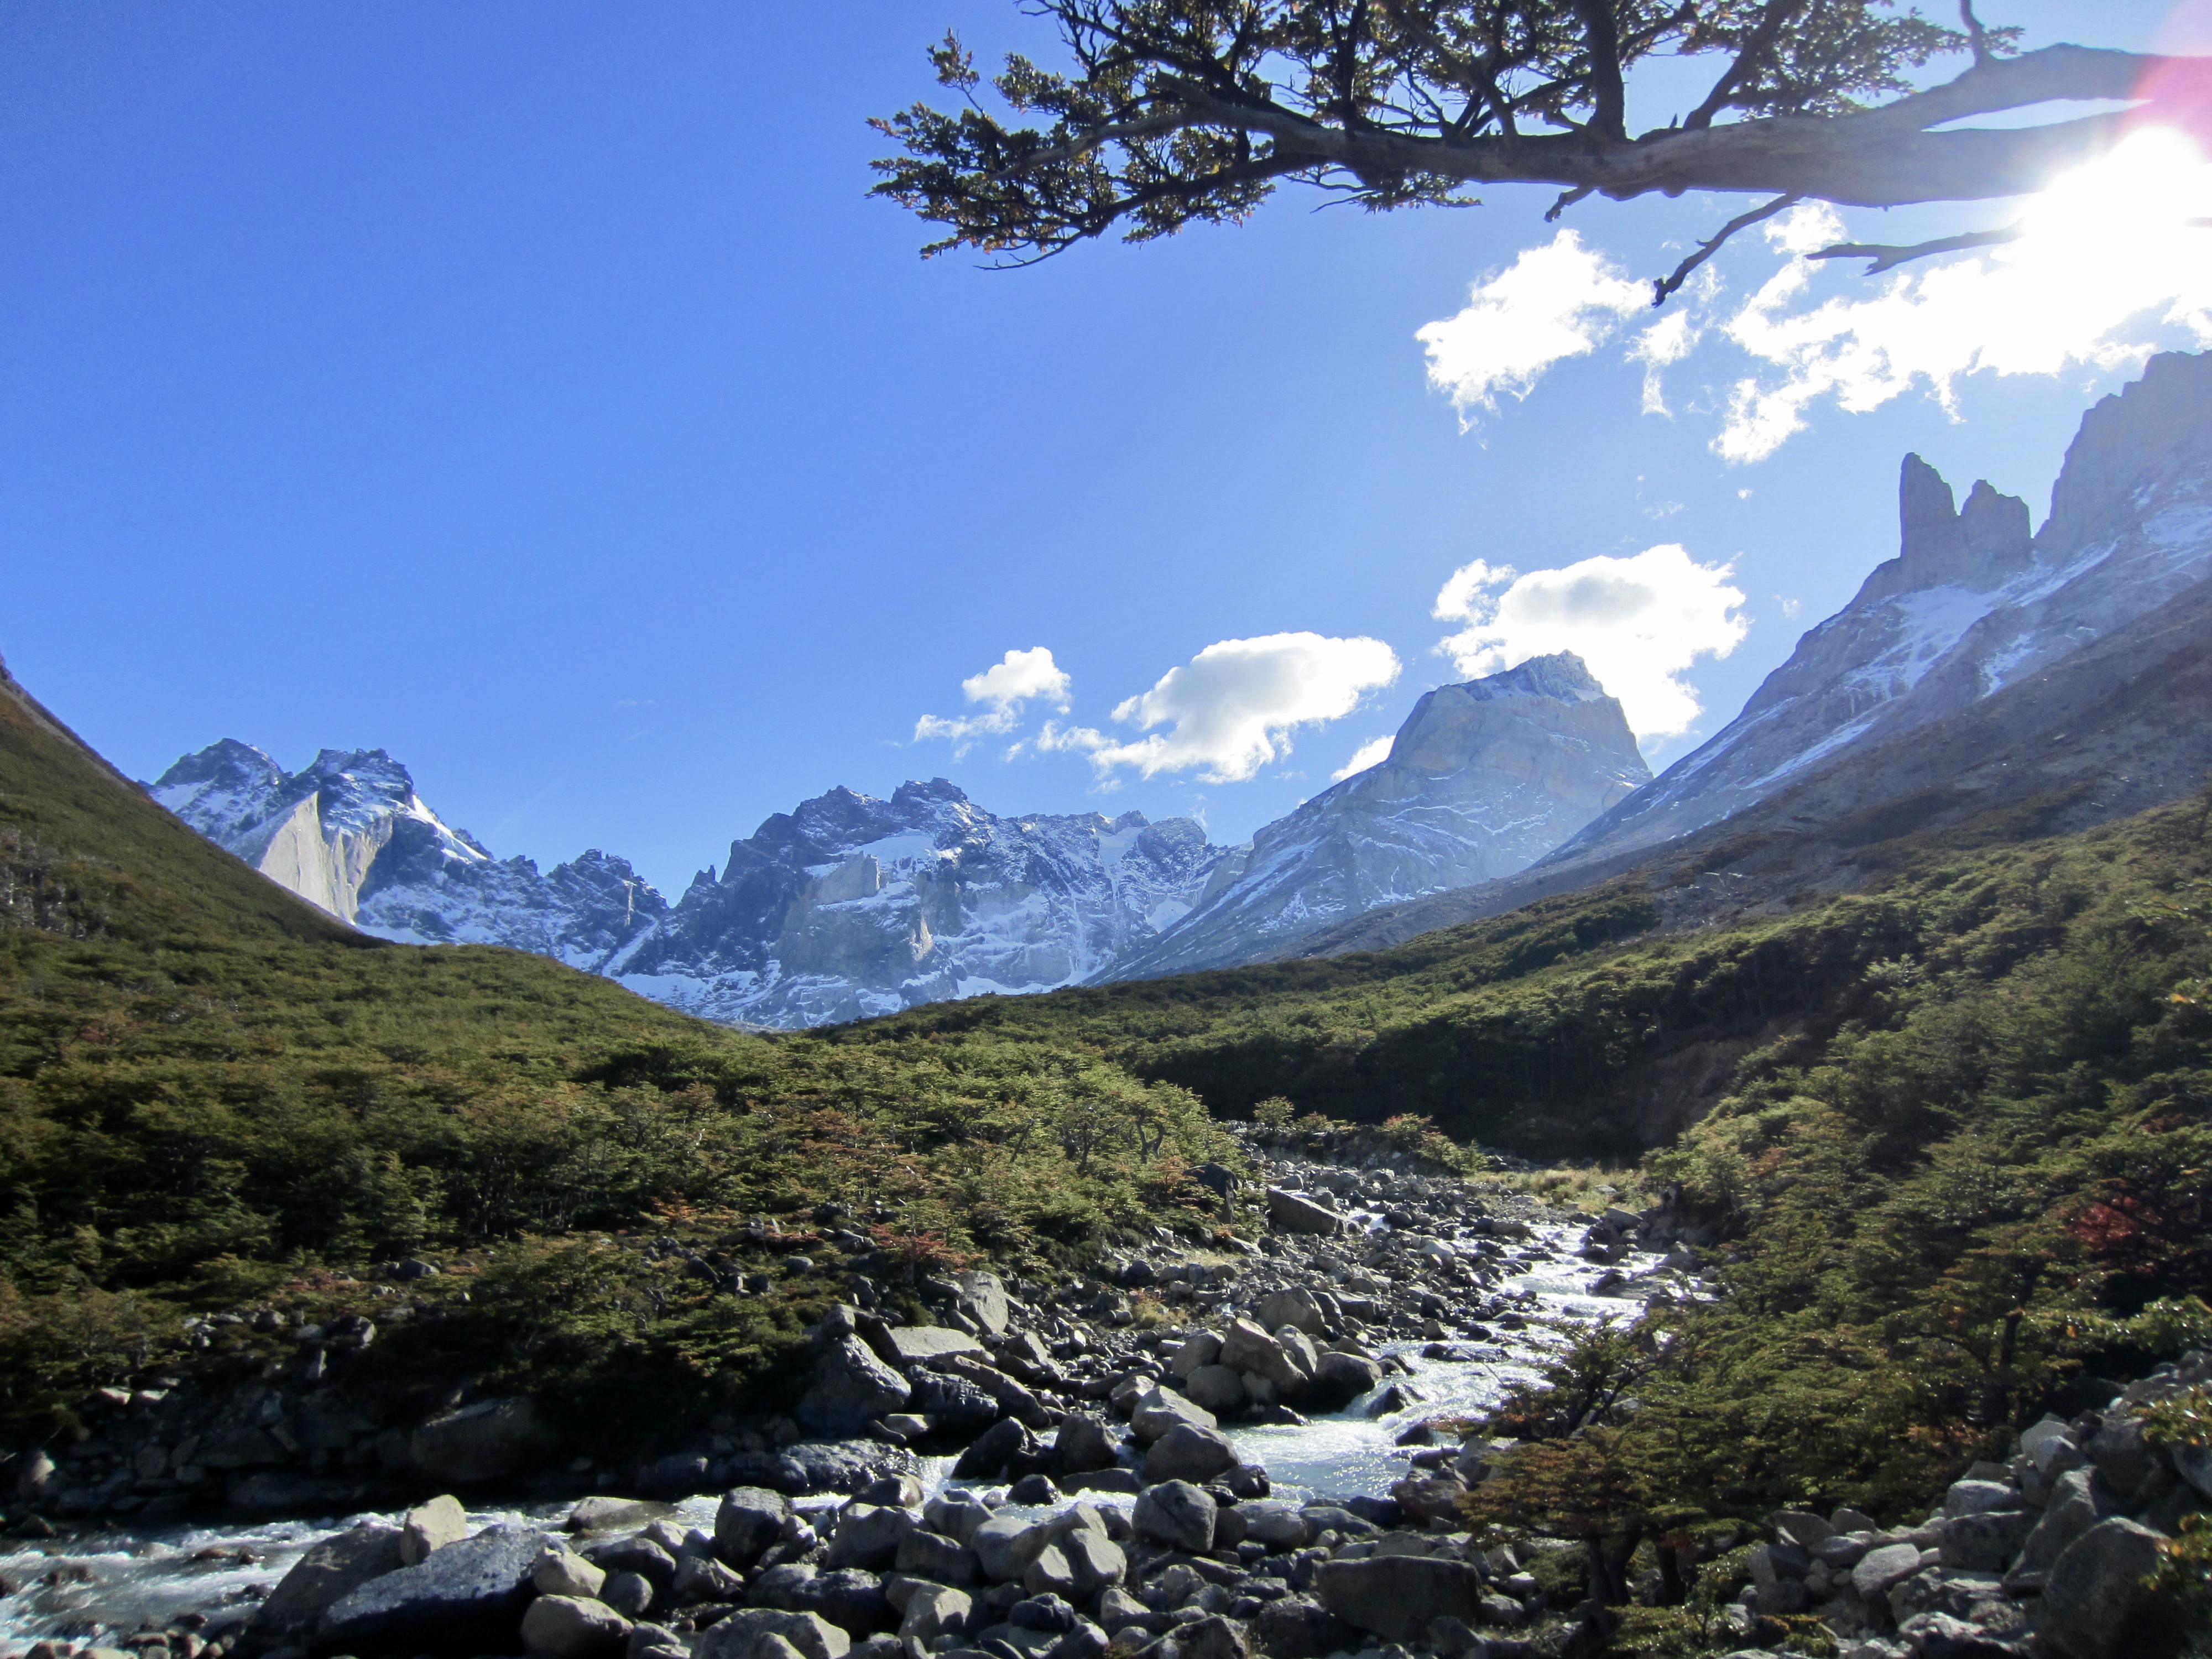
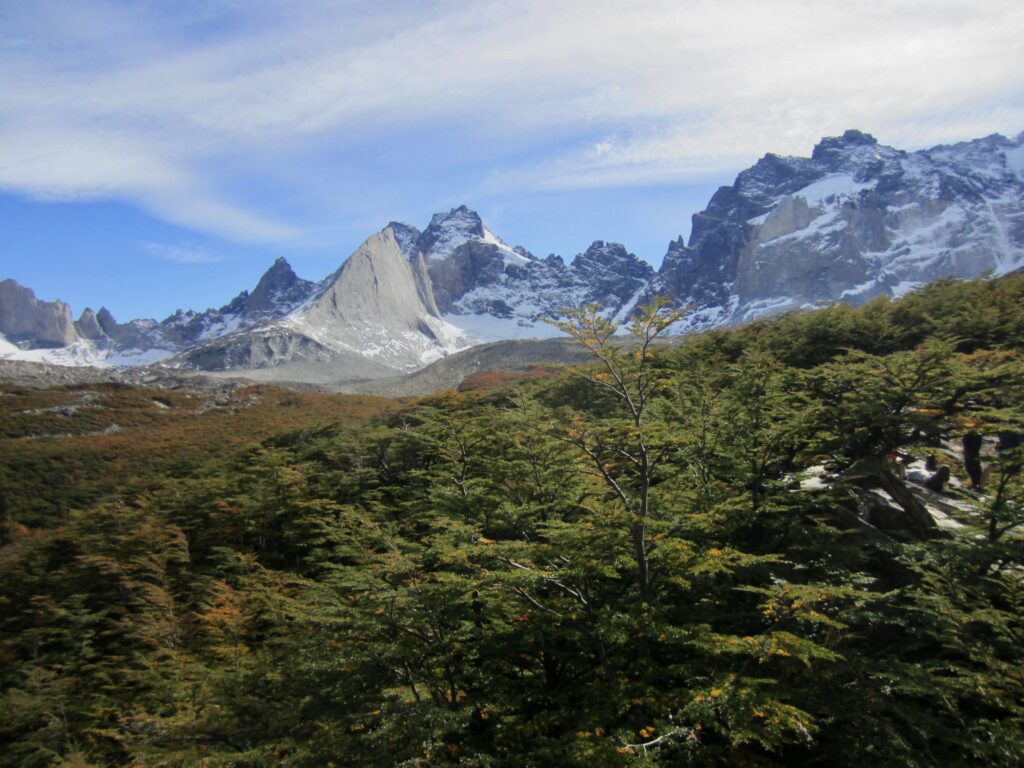
We passed through dense beech forest before entering open, rocky terrain in the upper valley. At the top of an old lateral moraine, we paused at Frances Viewpoint to ogle the massive east face of Cerro Paine Grande.
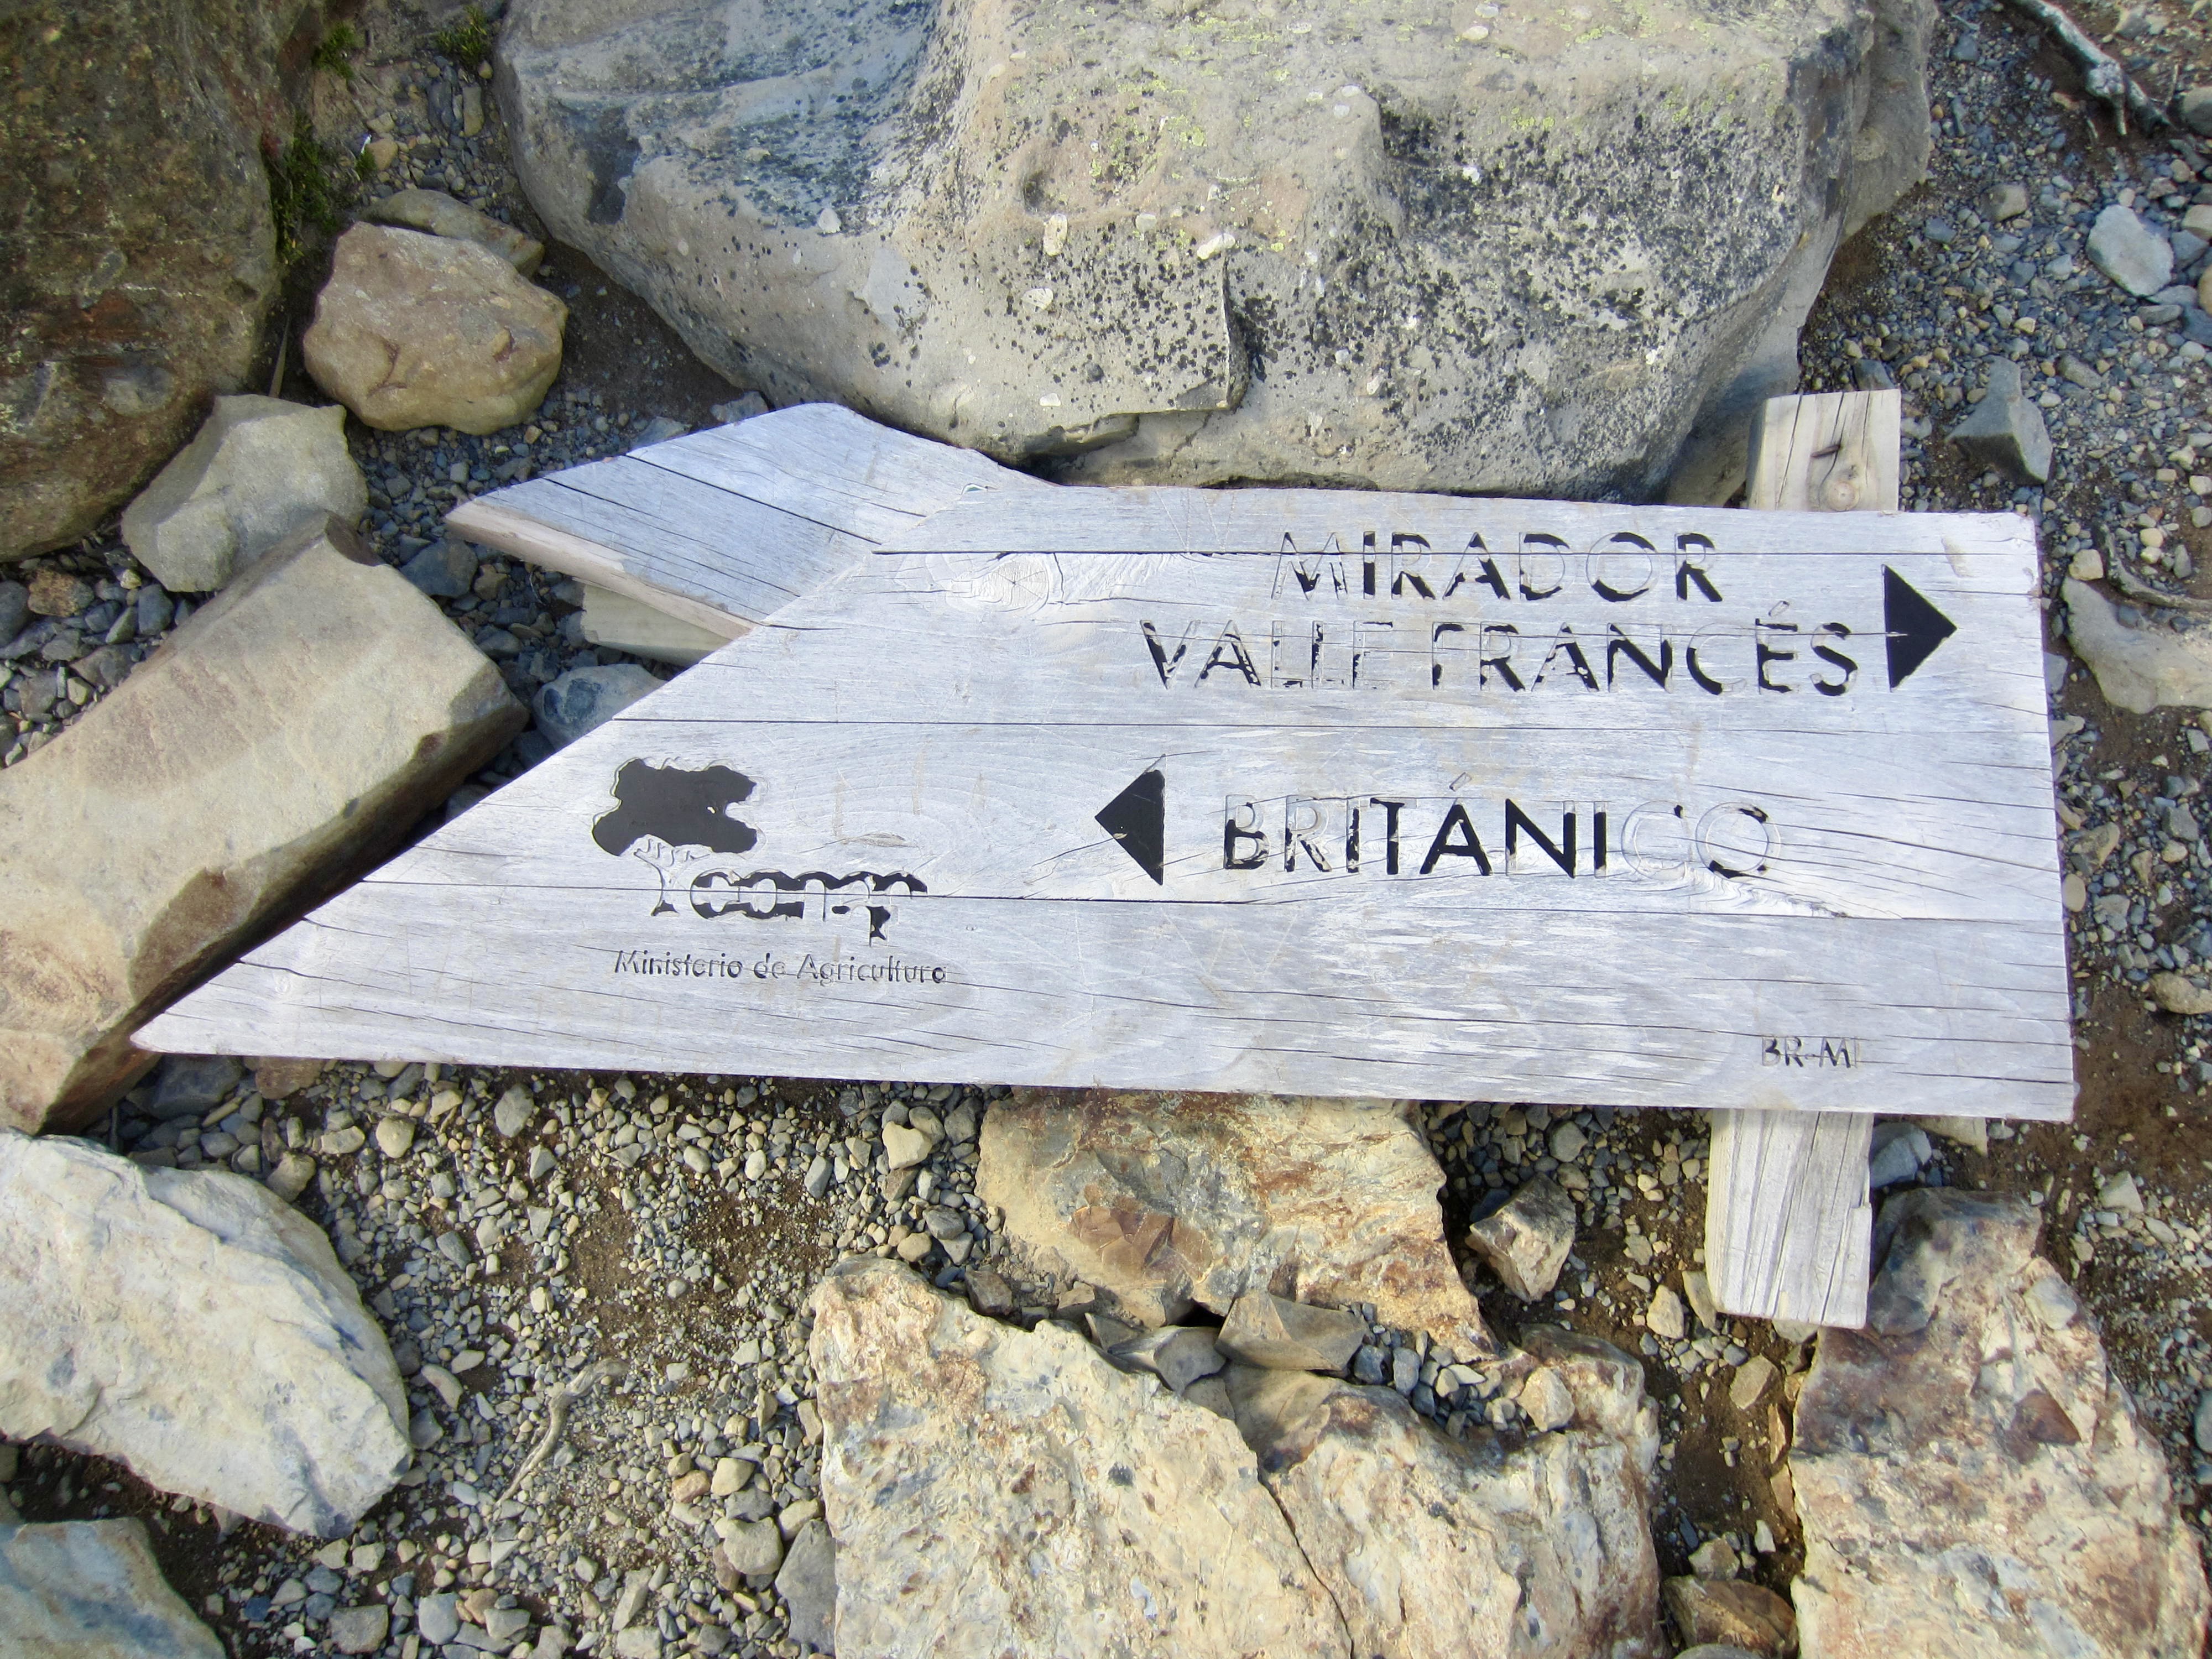
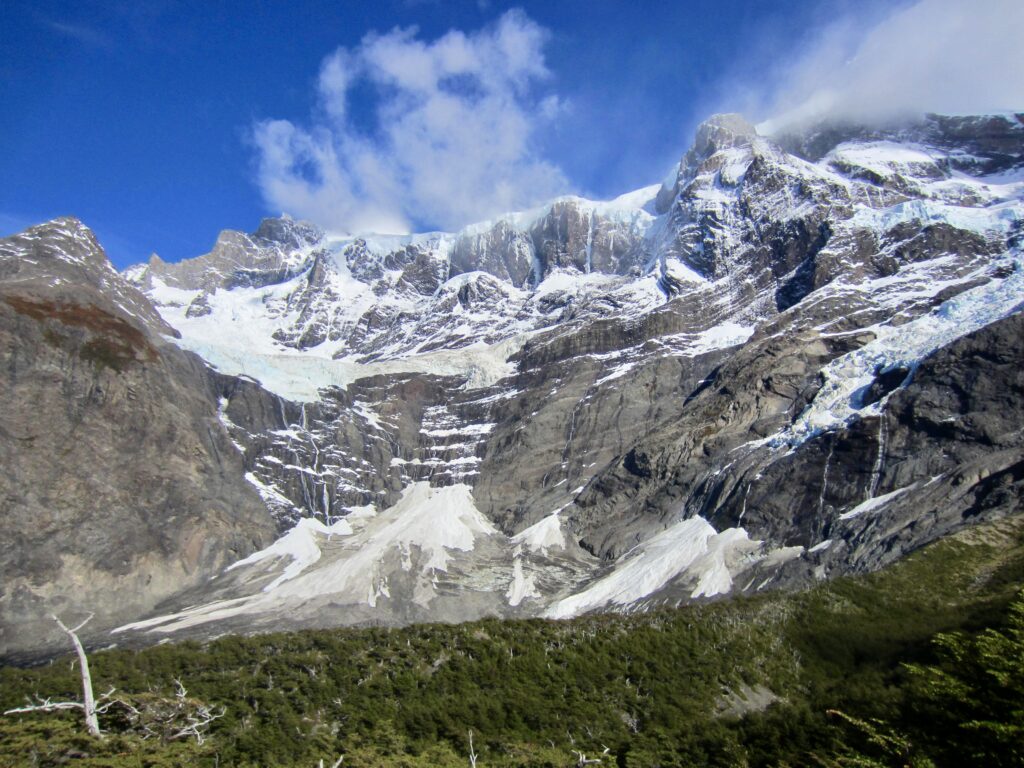
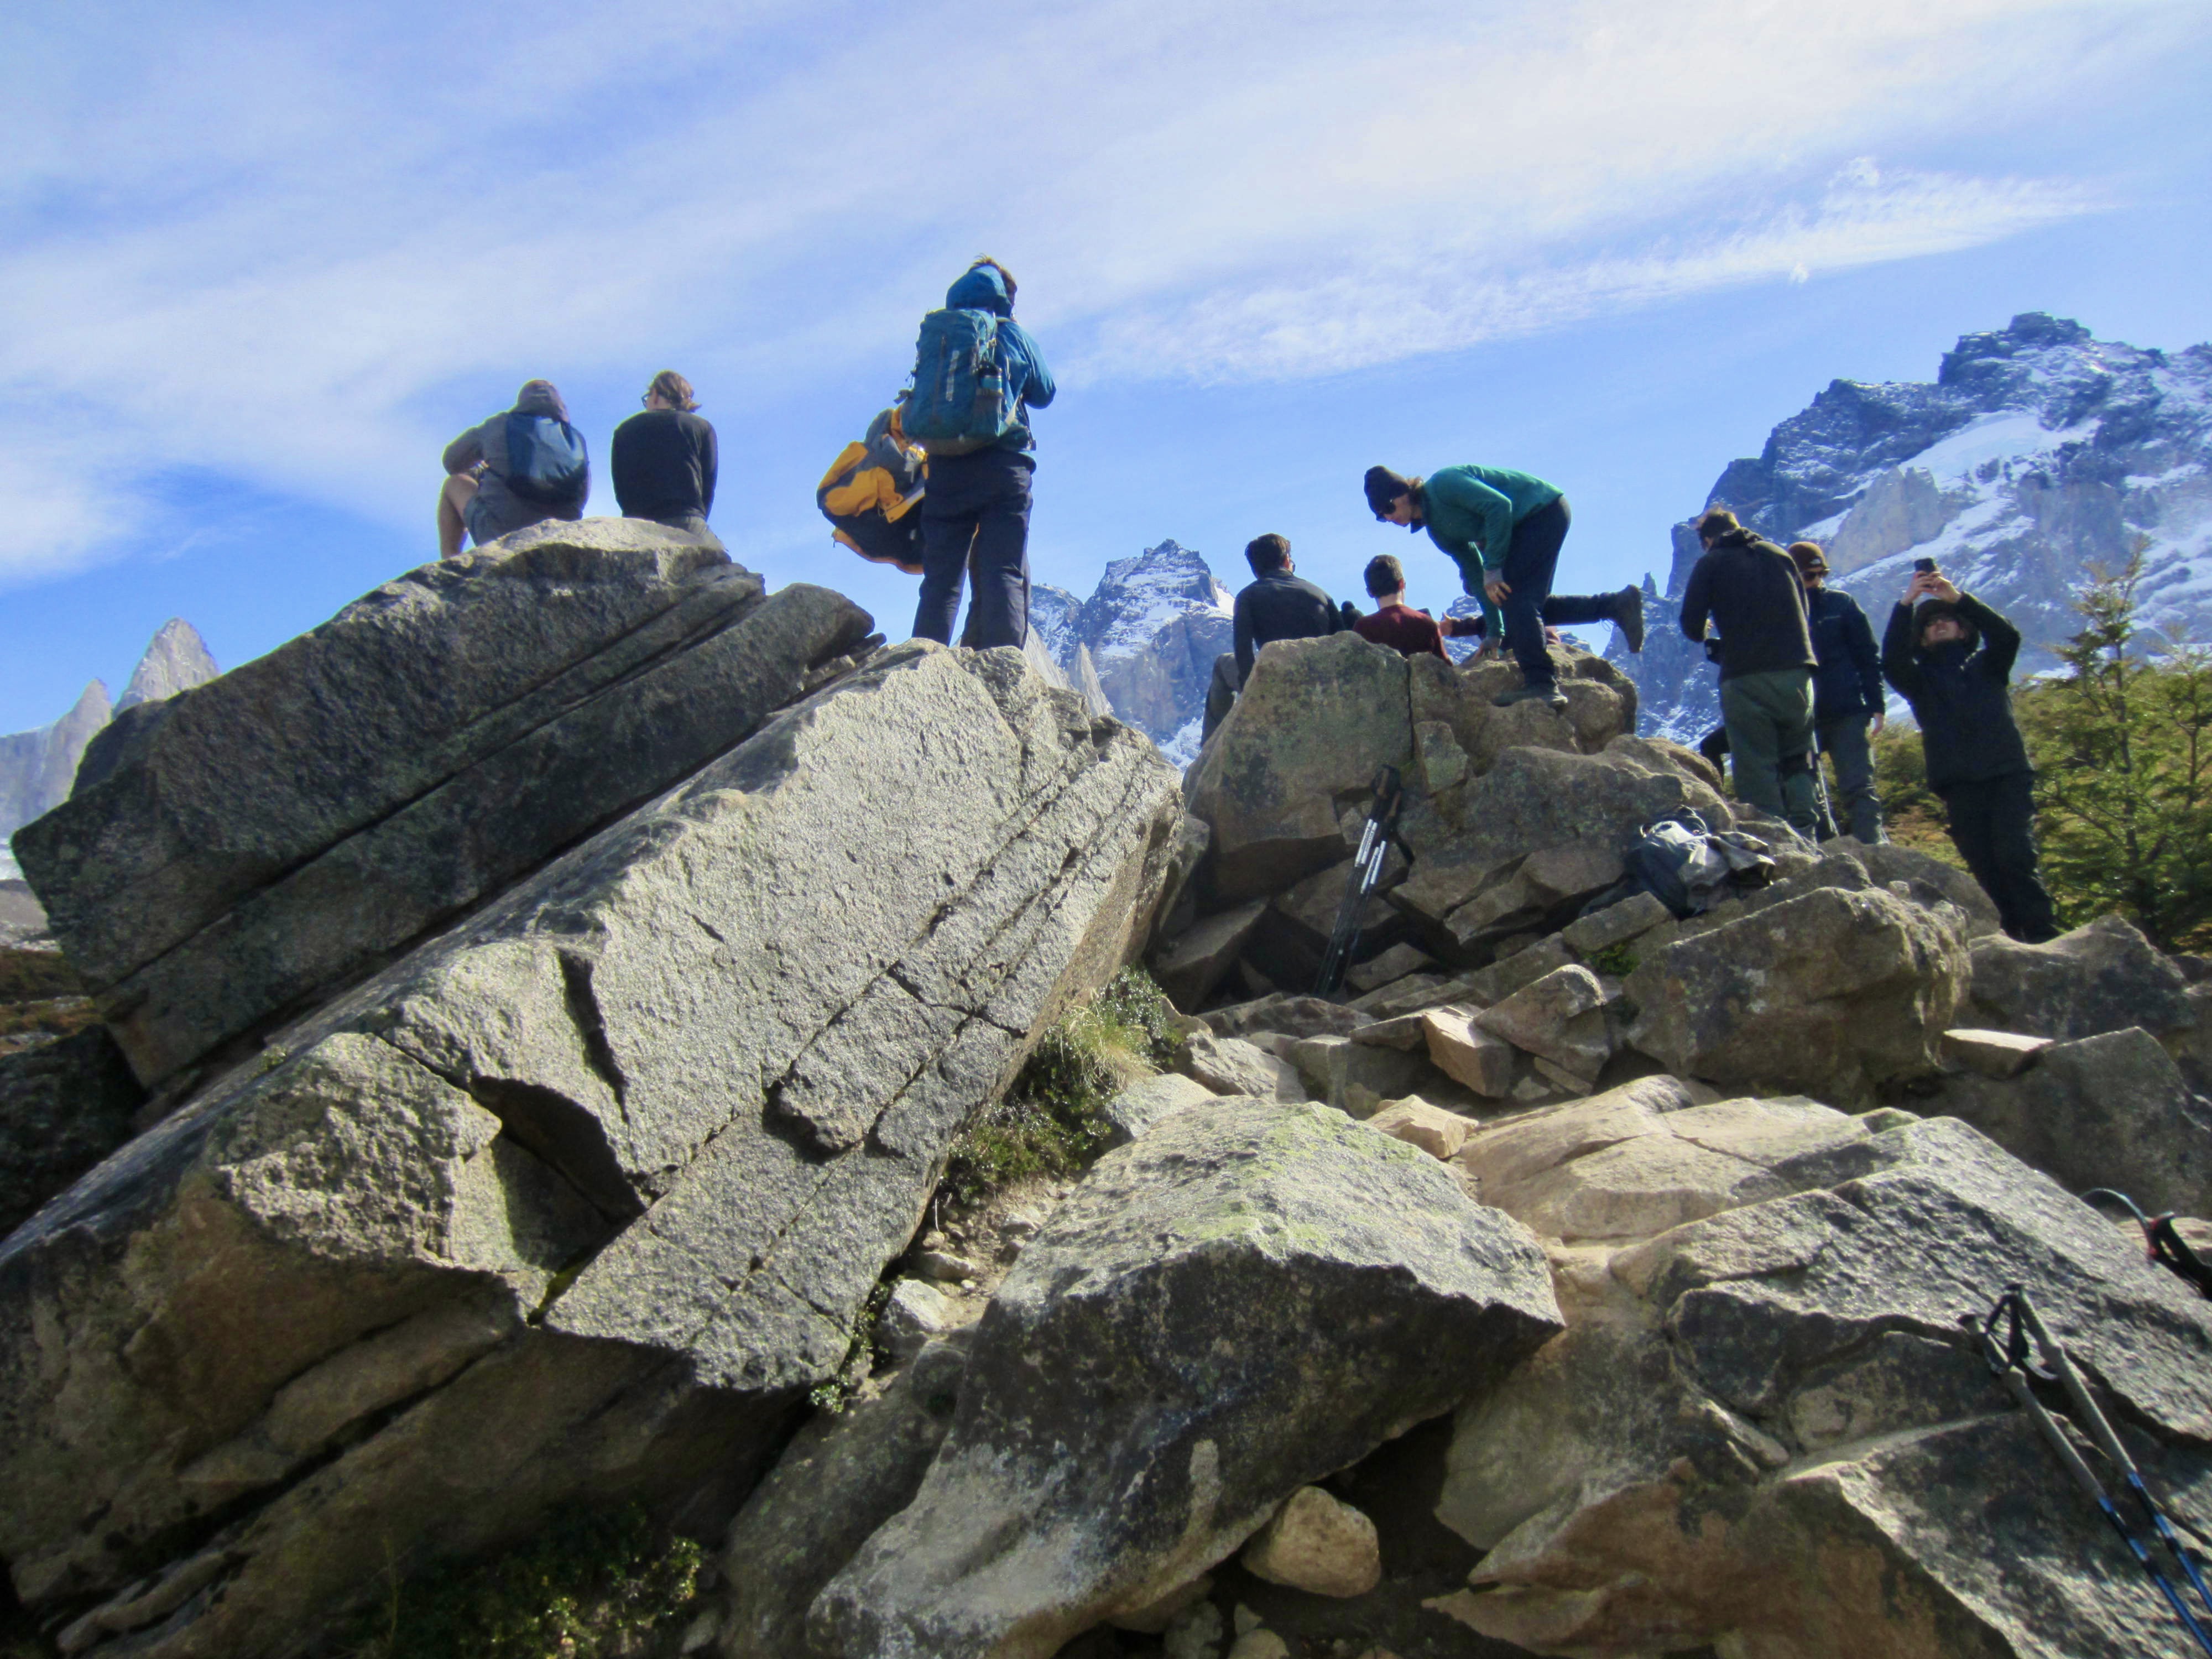
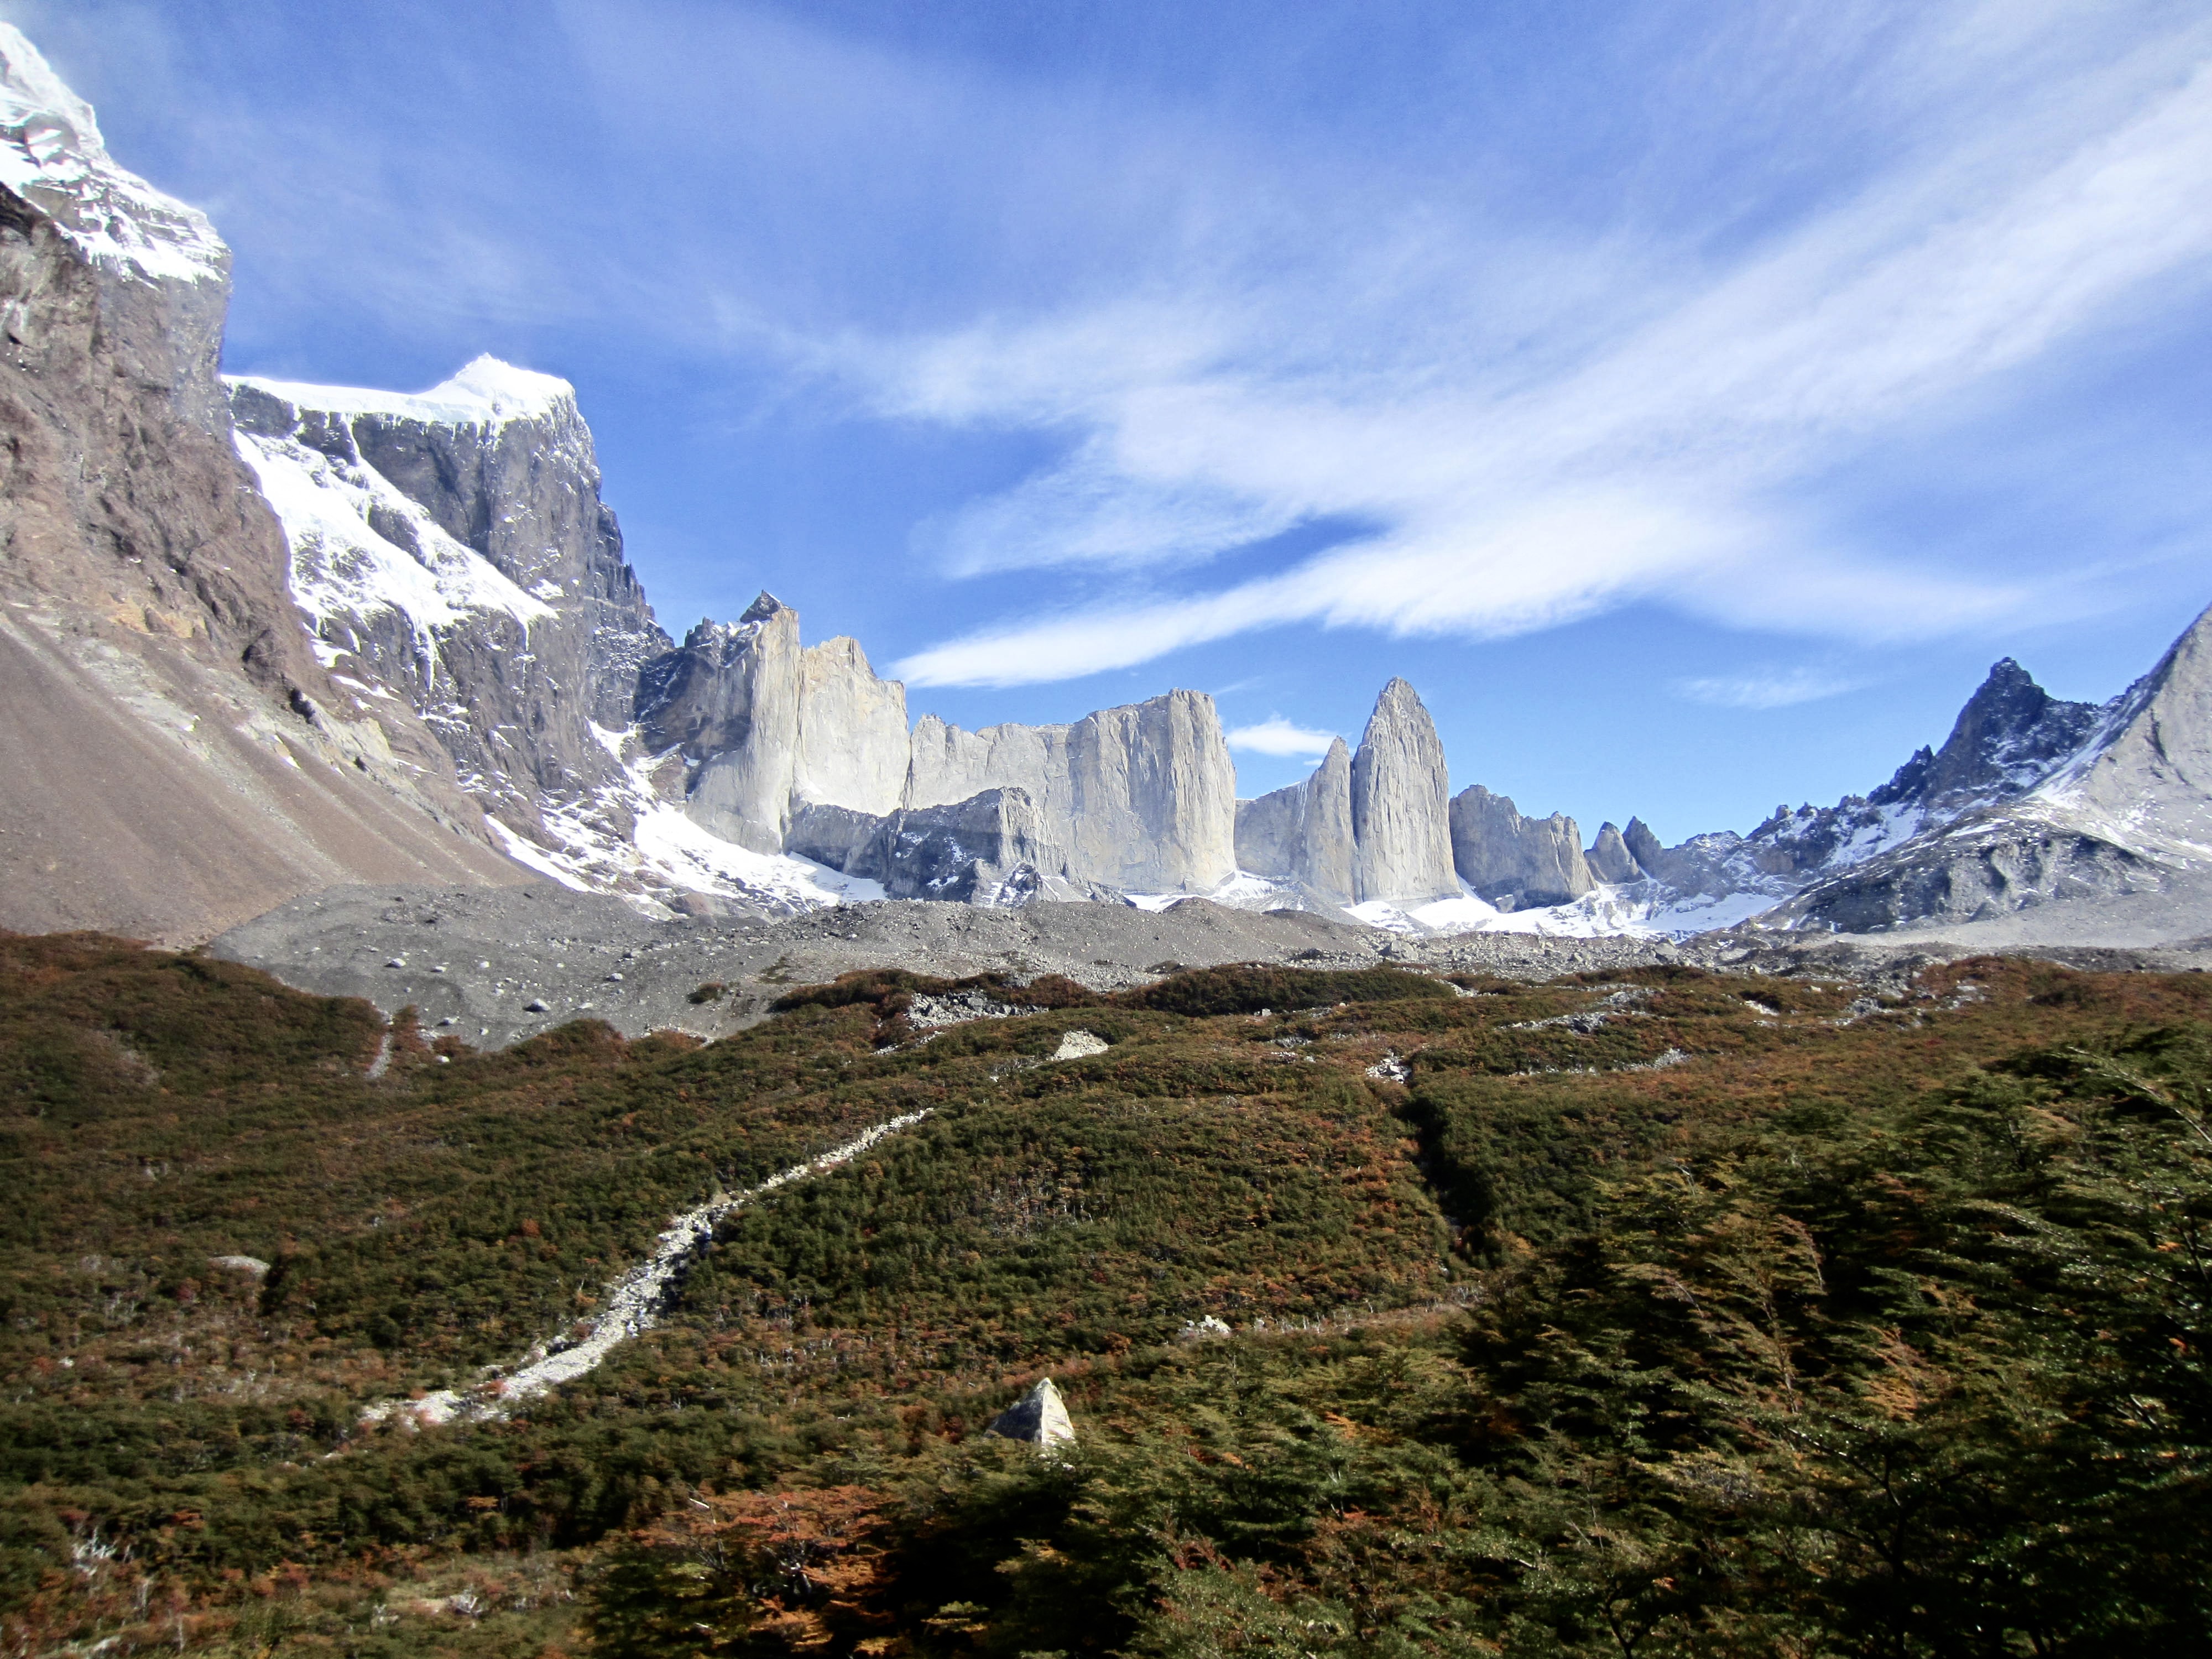
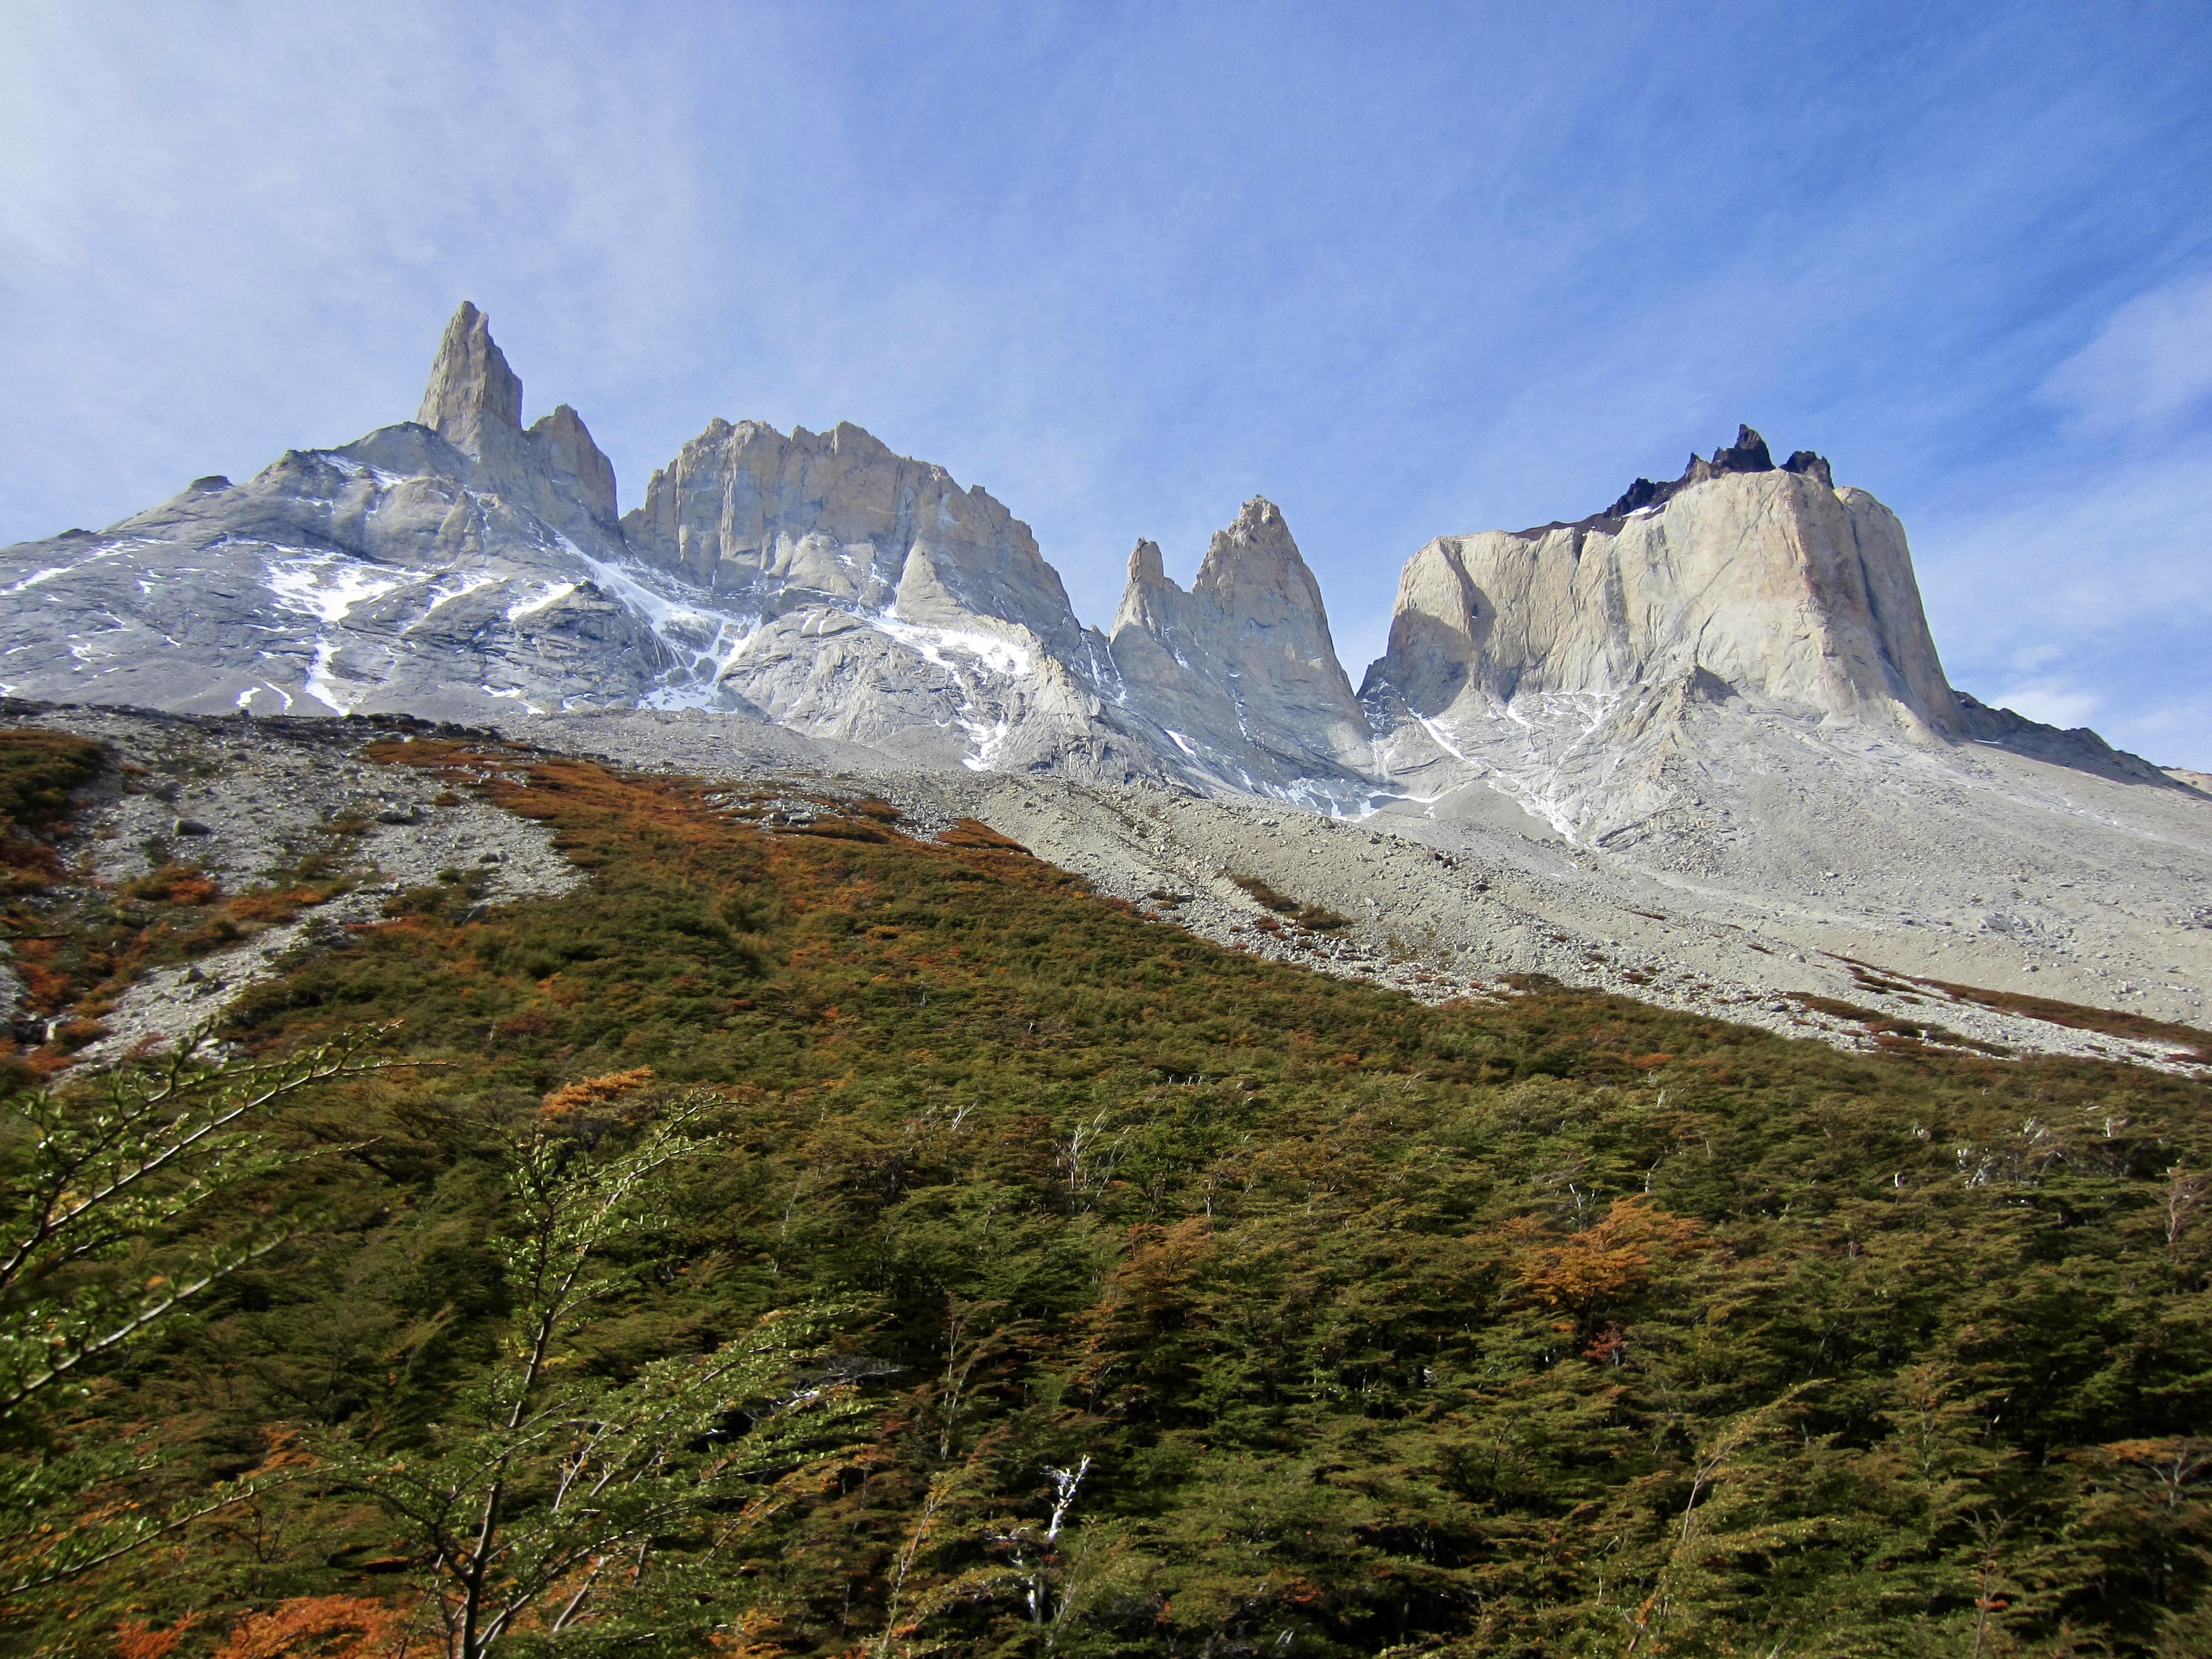
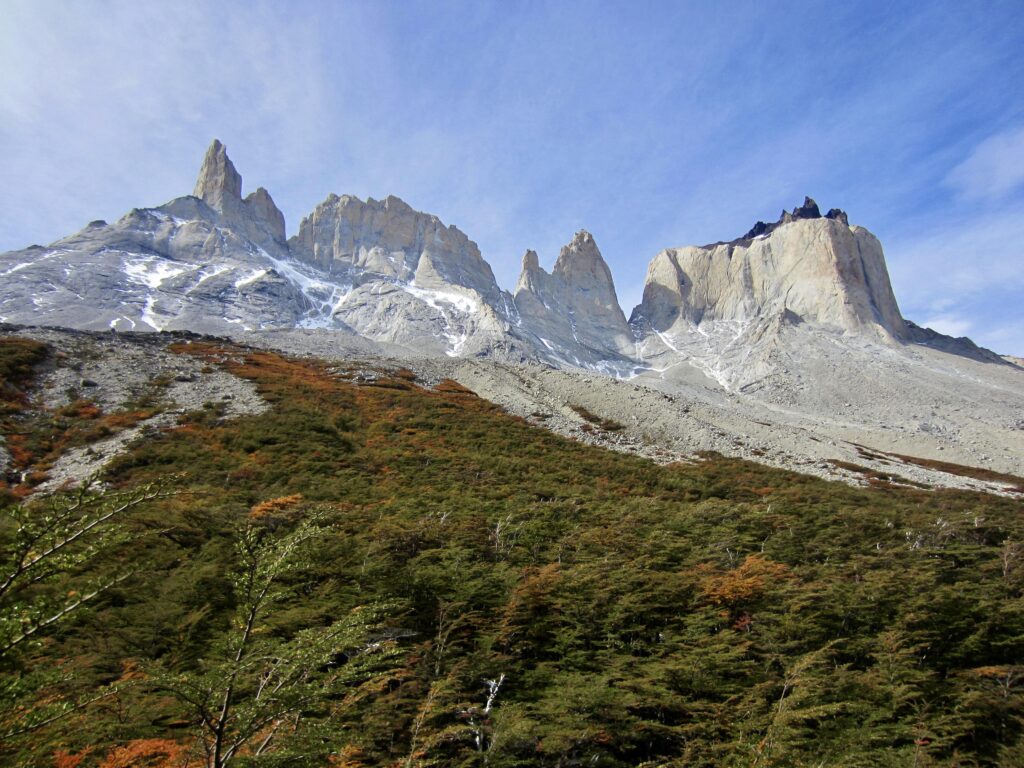
Continuing up-valley, we began seeing a cirque ringed with granite walls and sharp peaks. A final short but very steep and bouldery trail scramble took us to a rocky hump known as Britanico Viewpoint. This was formerly known as Lower Britanico Viewpoint, but Upper Britanico Viewpoint has been officially closed—presumably on a permanent basis due to safety concerns—so there is now only one Britanico Viewpoint.

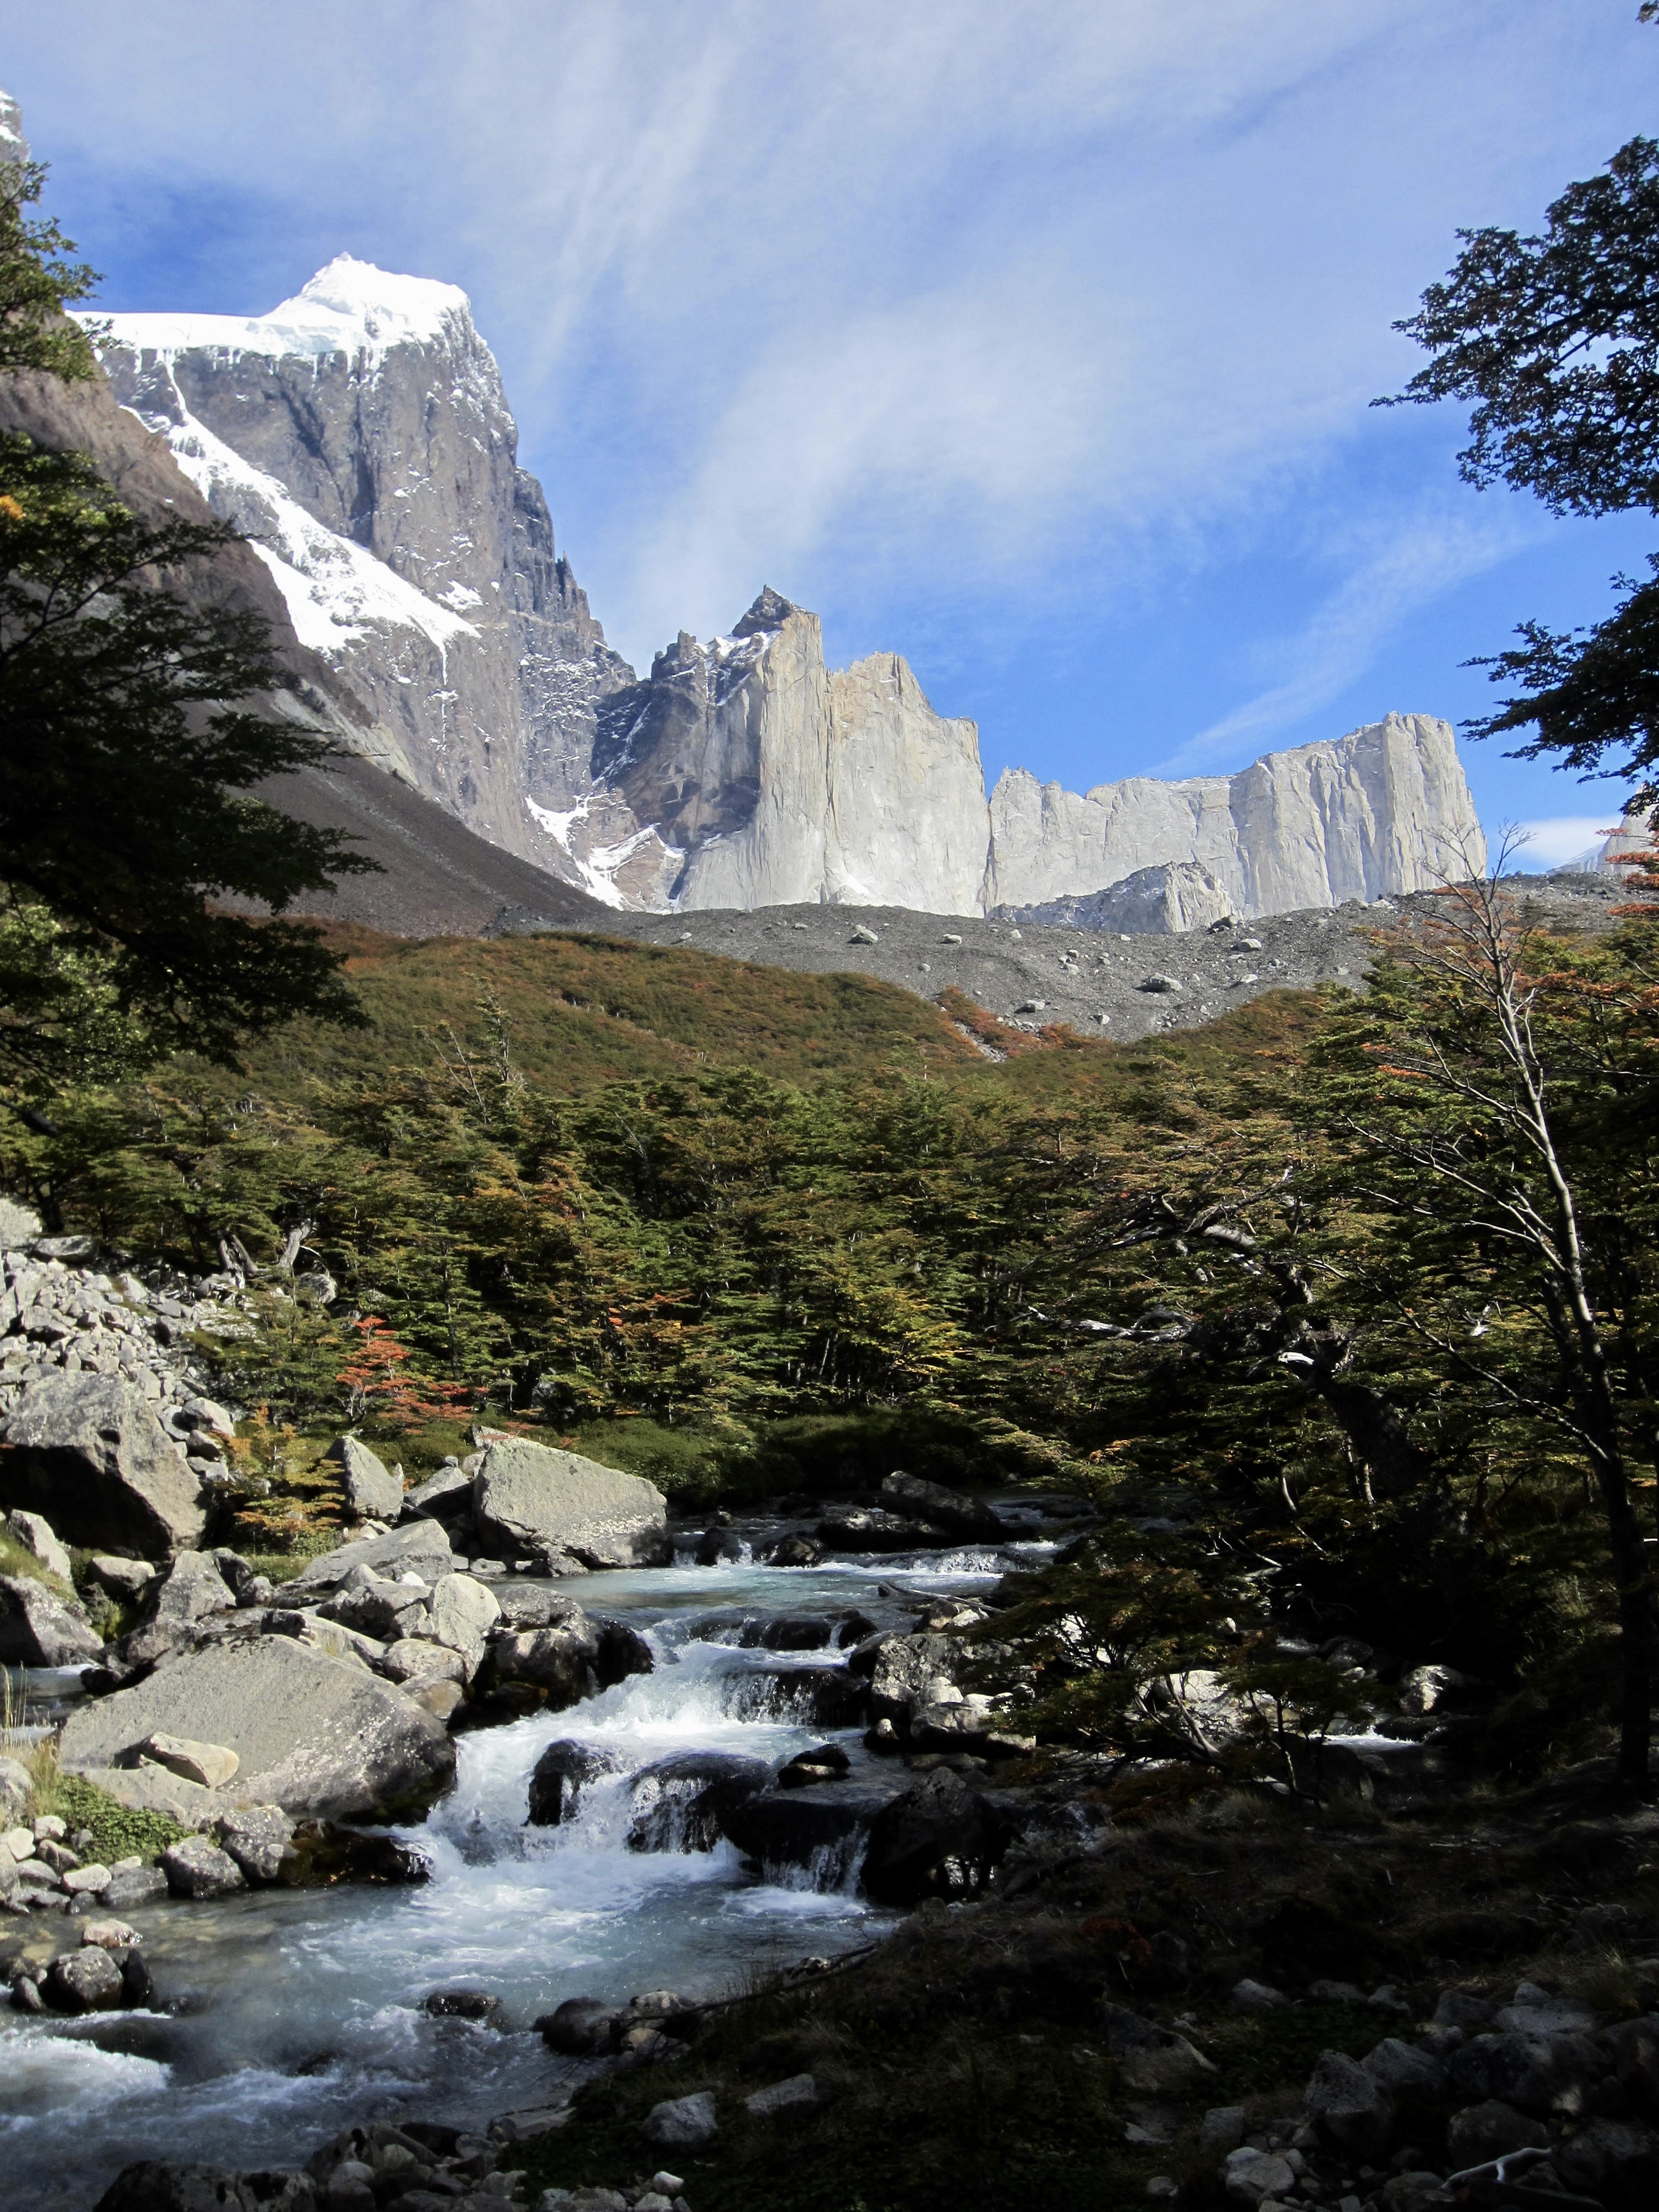

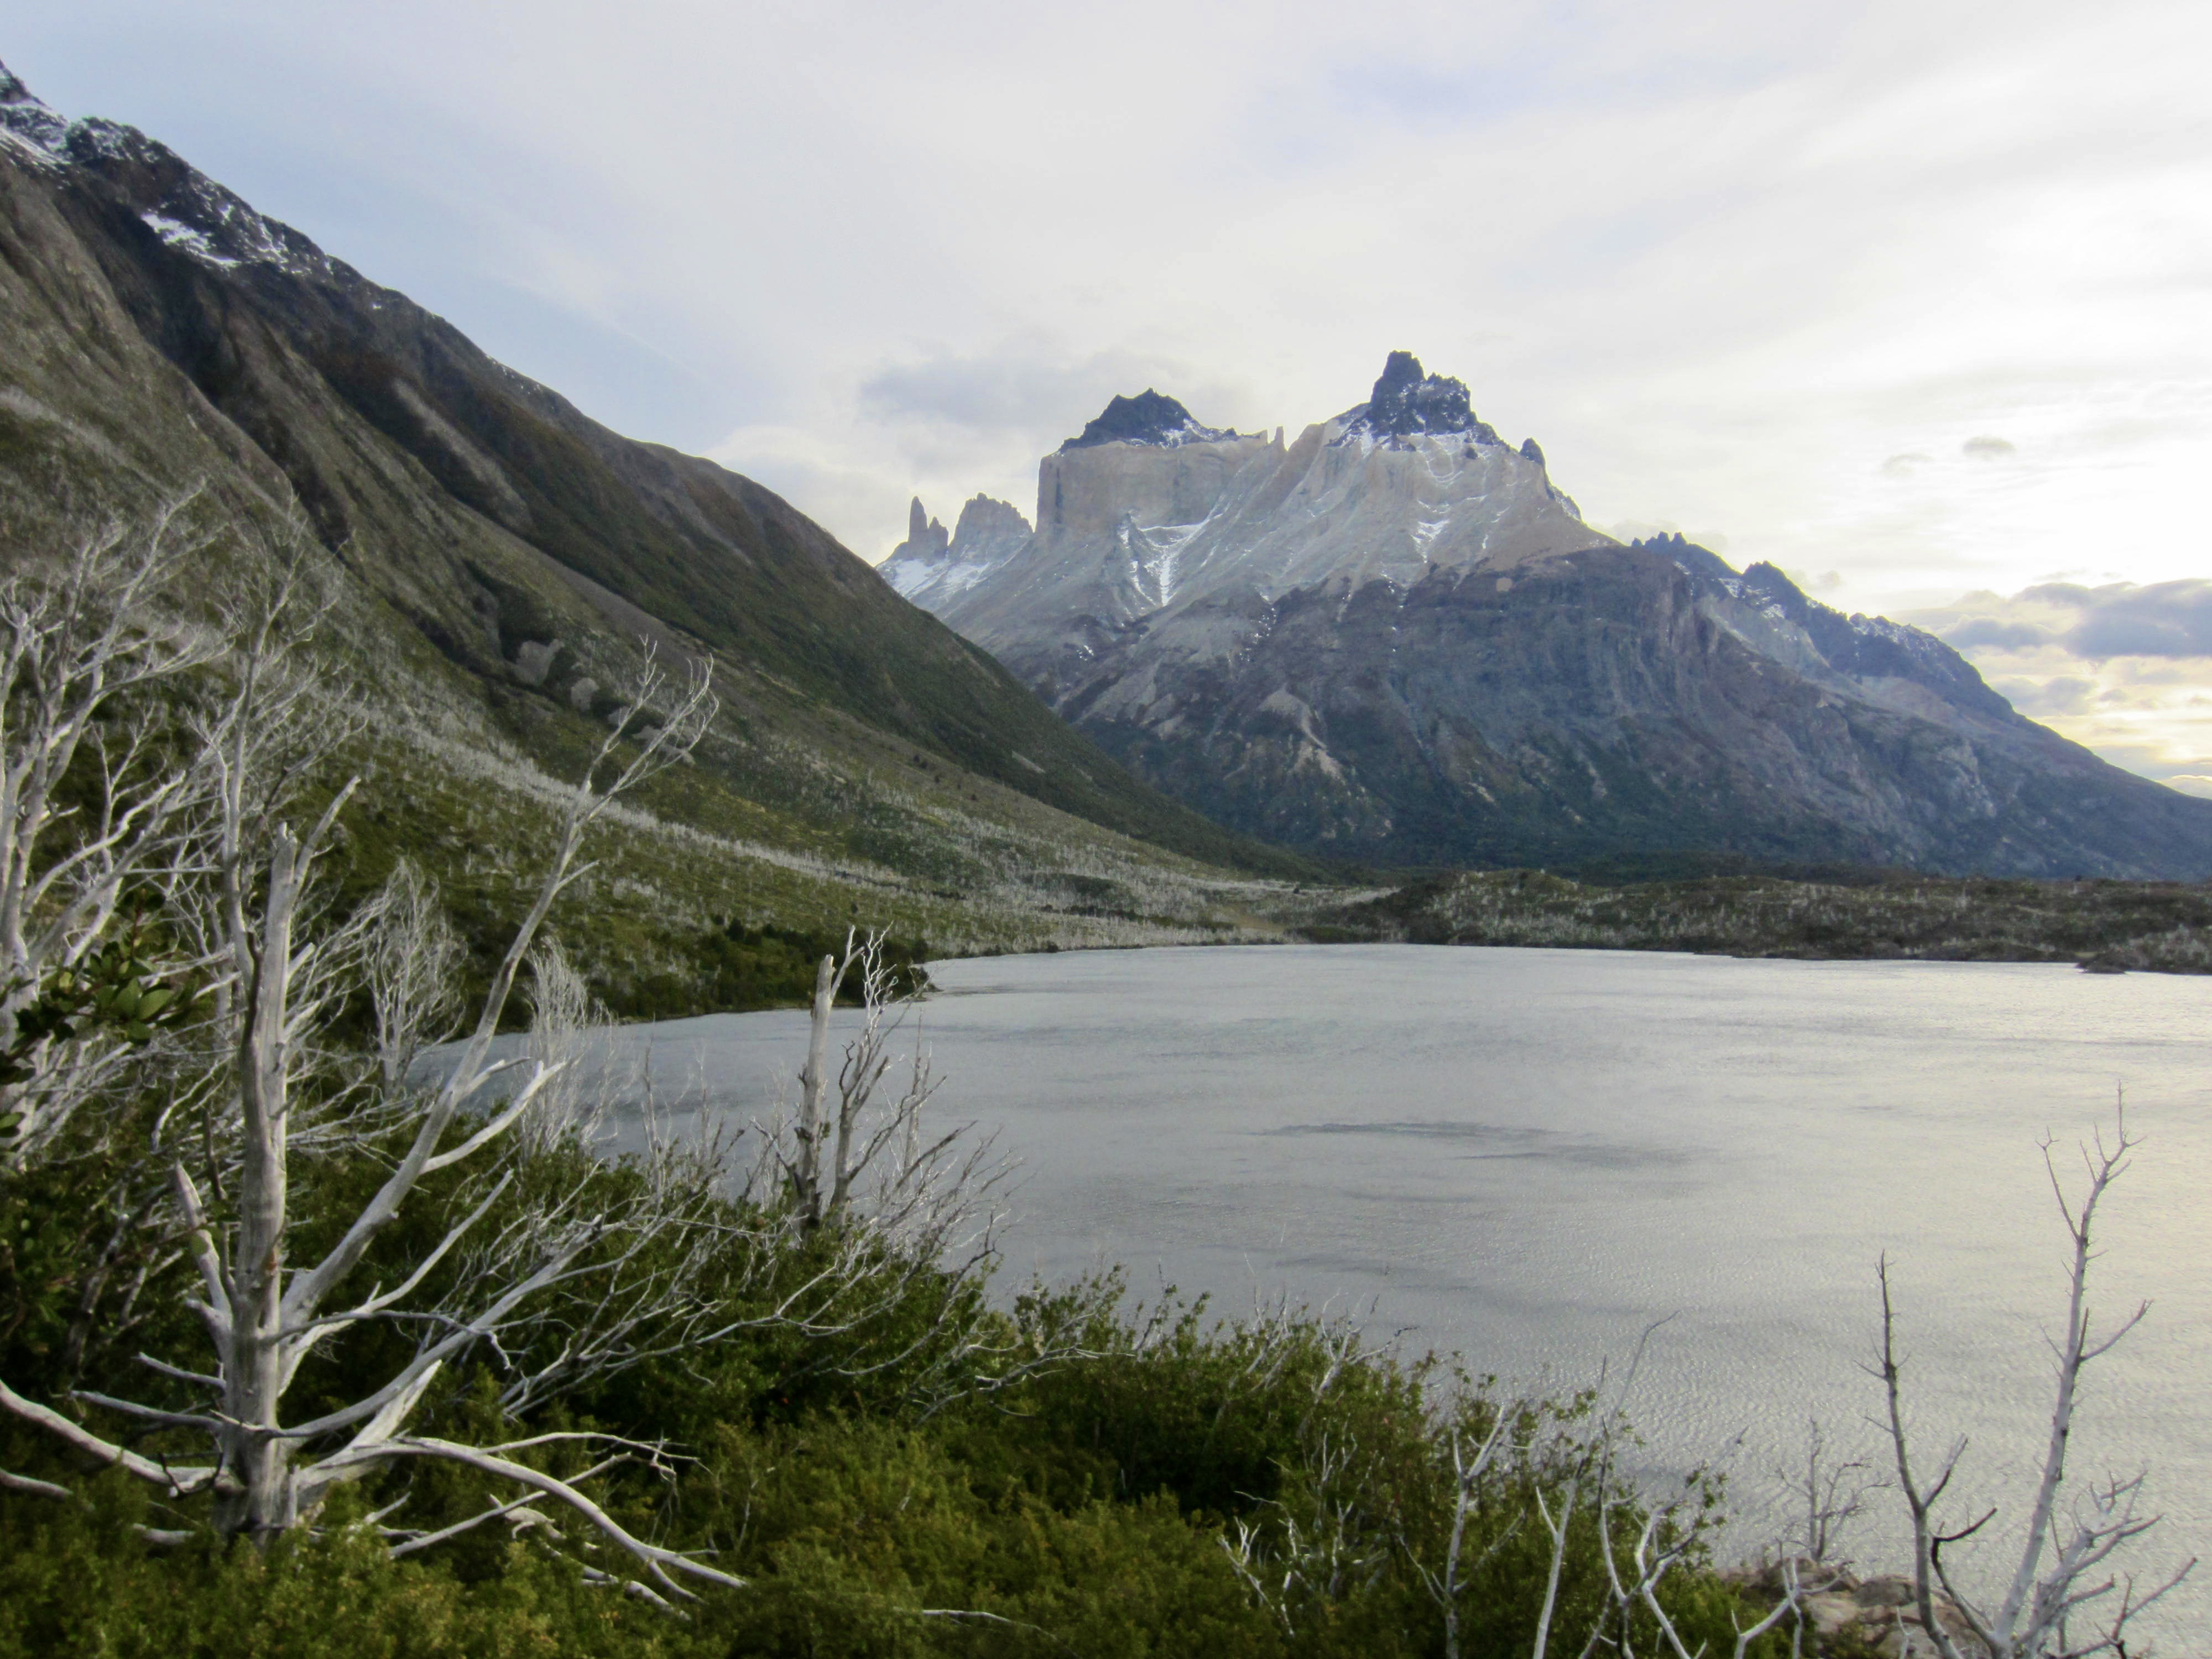
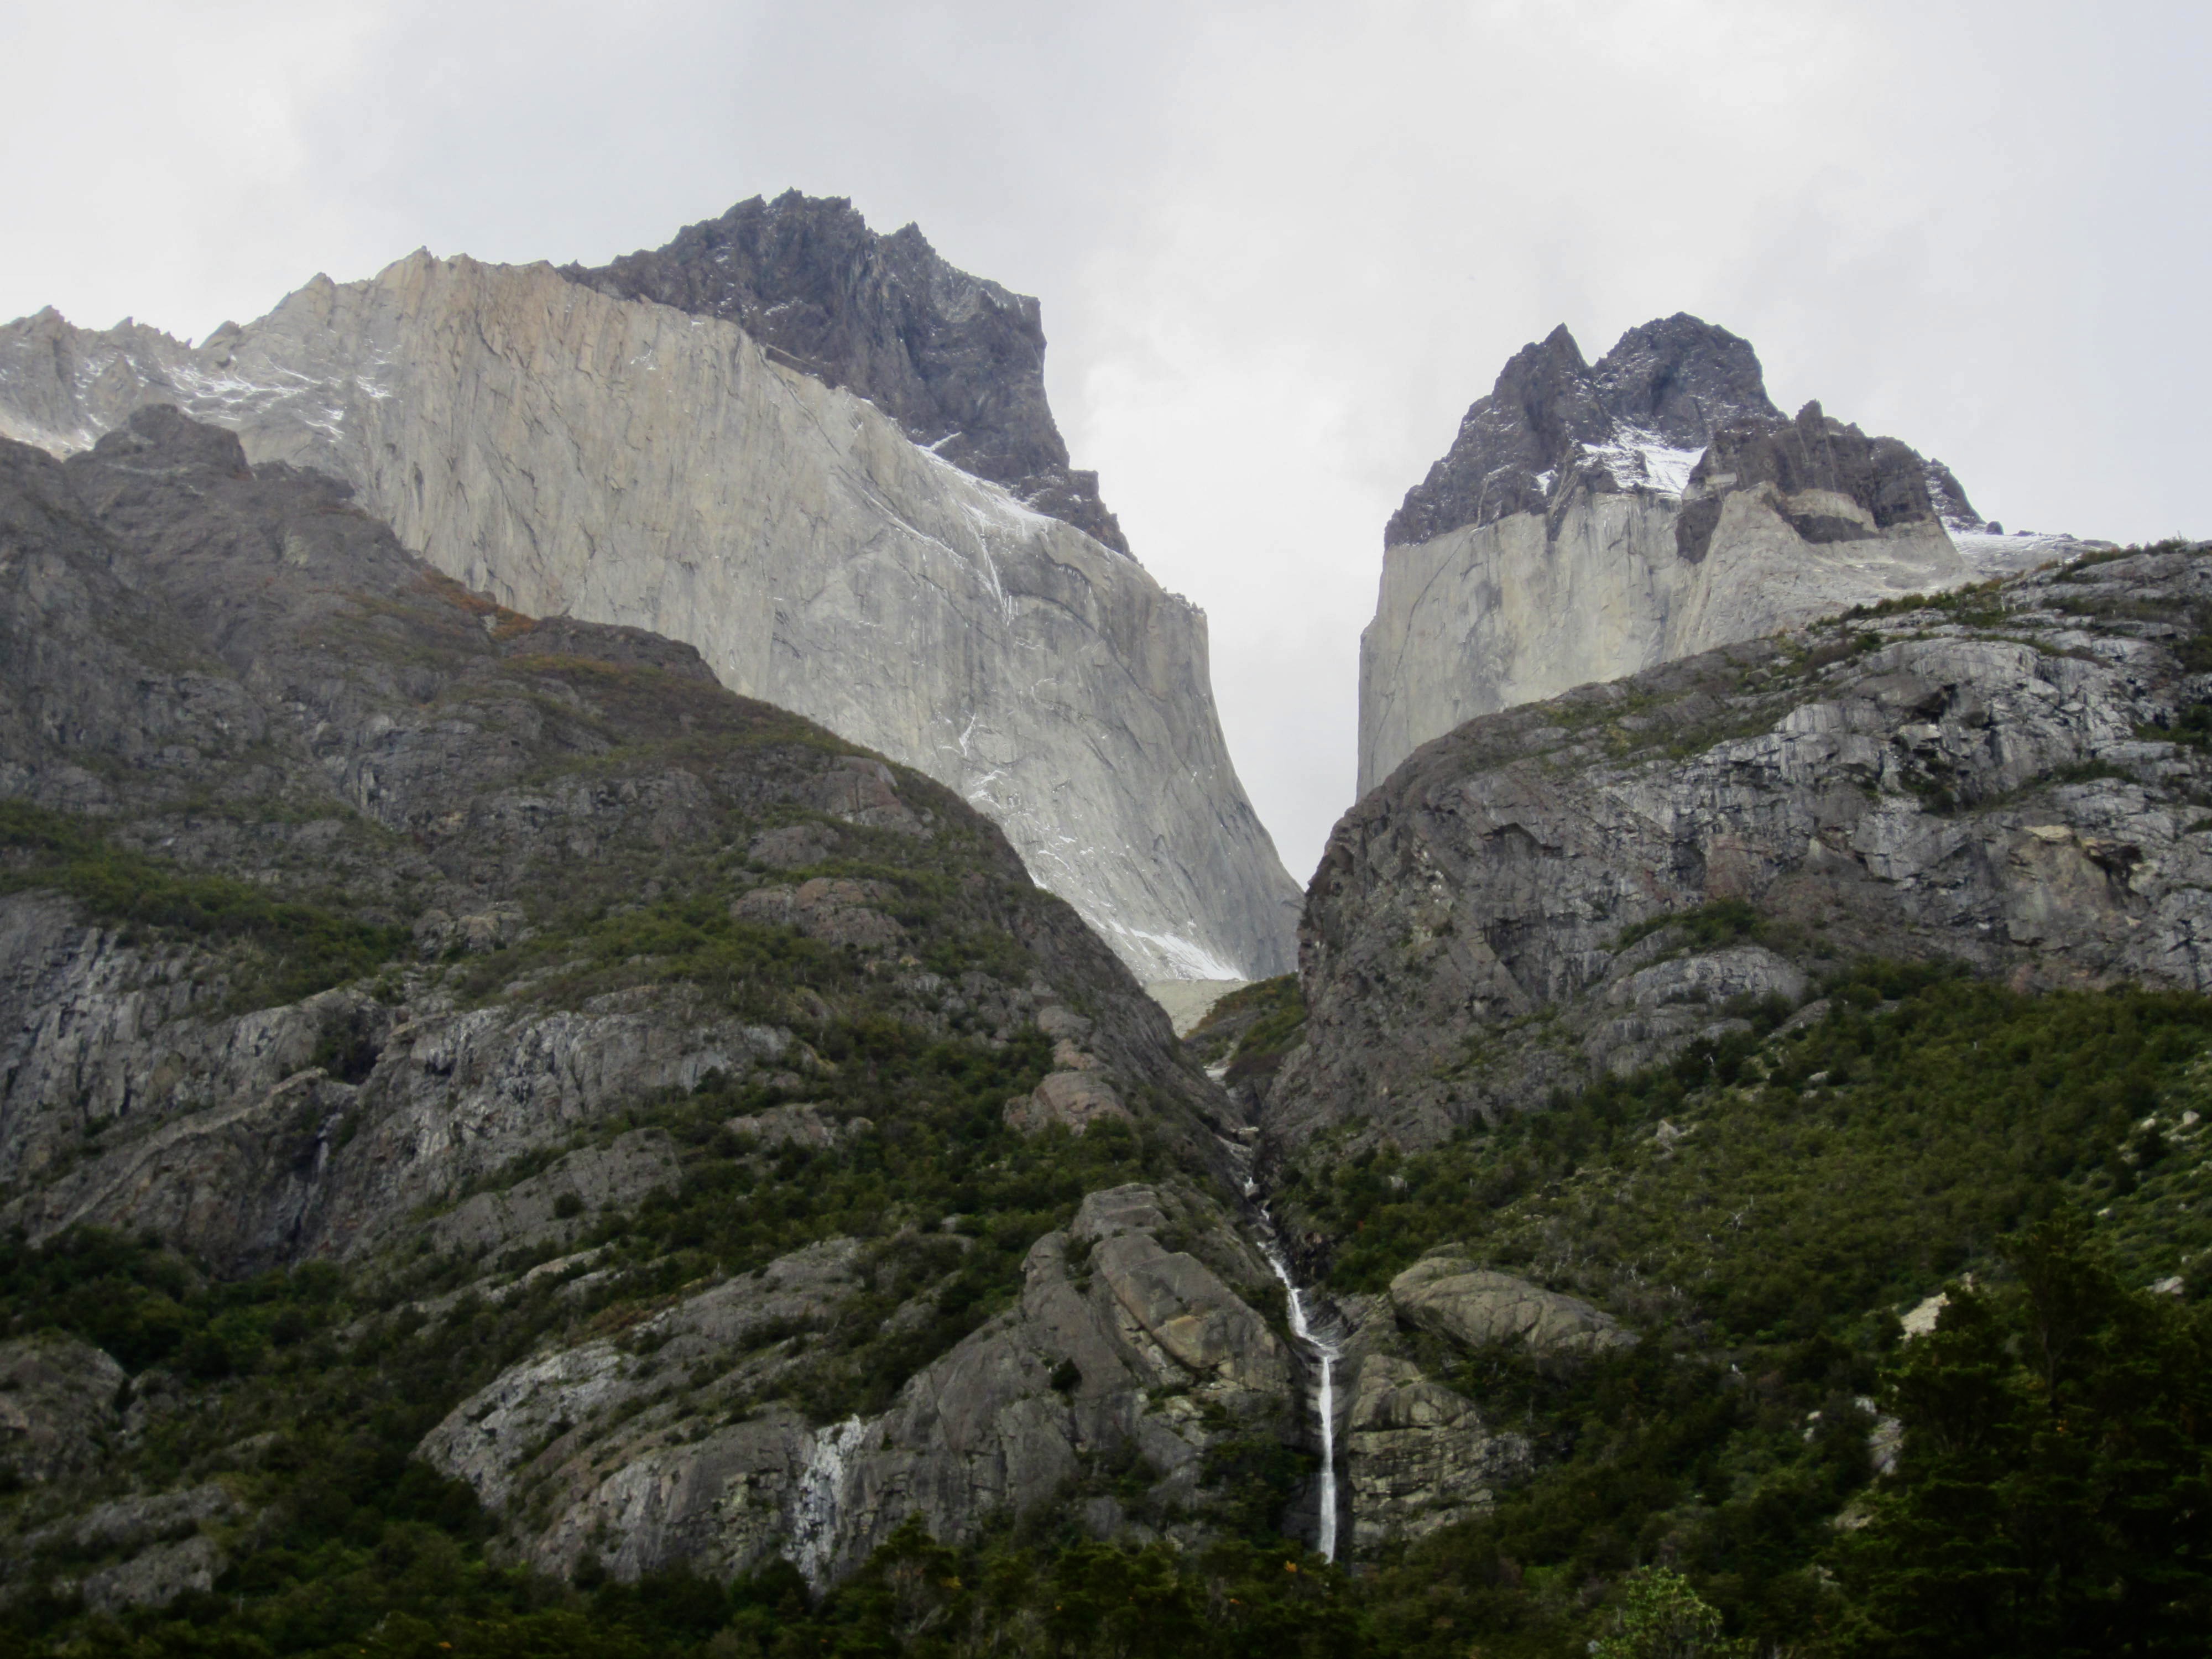
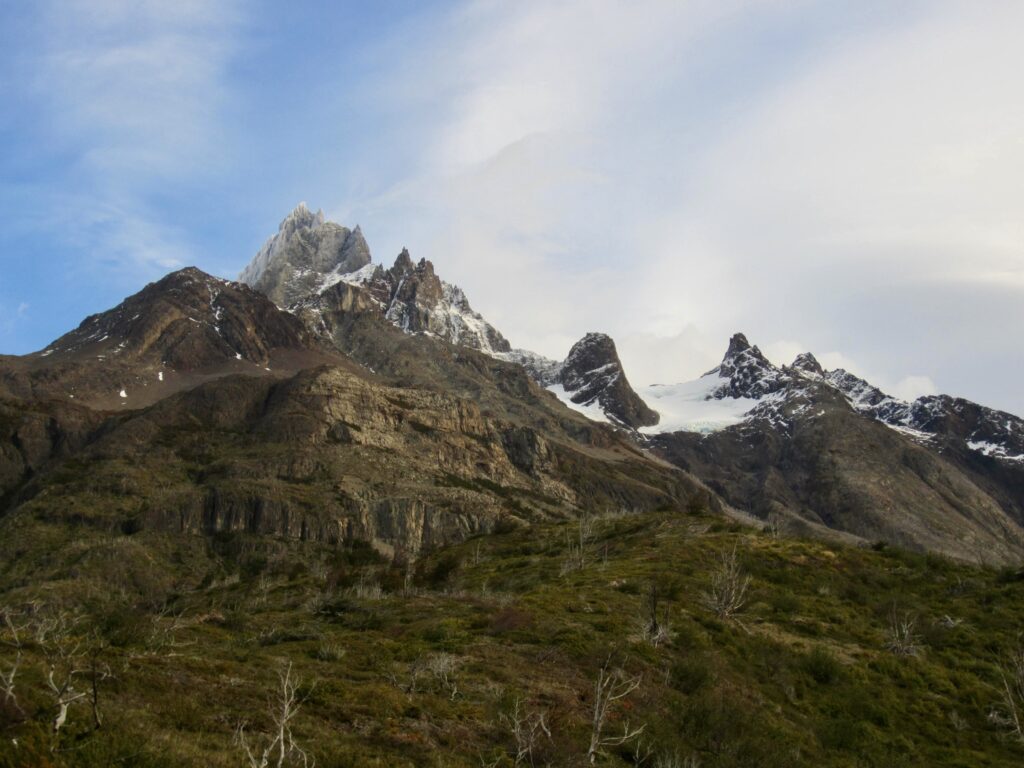
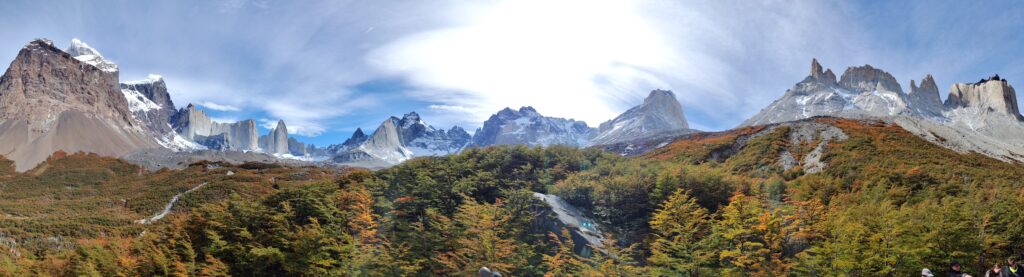
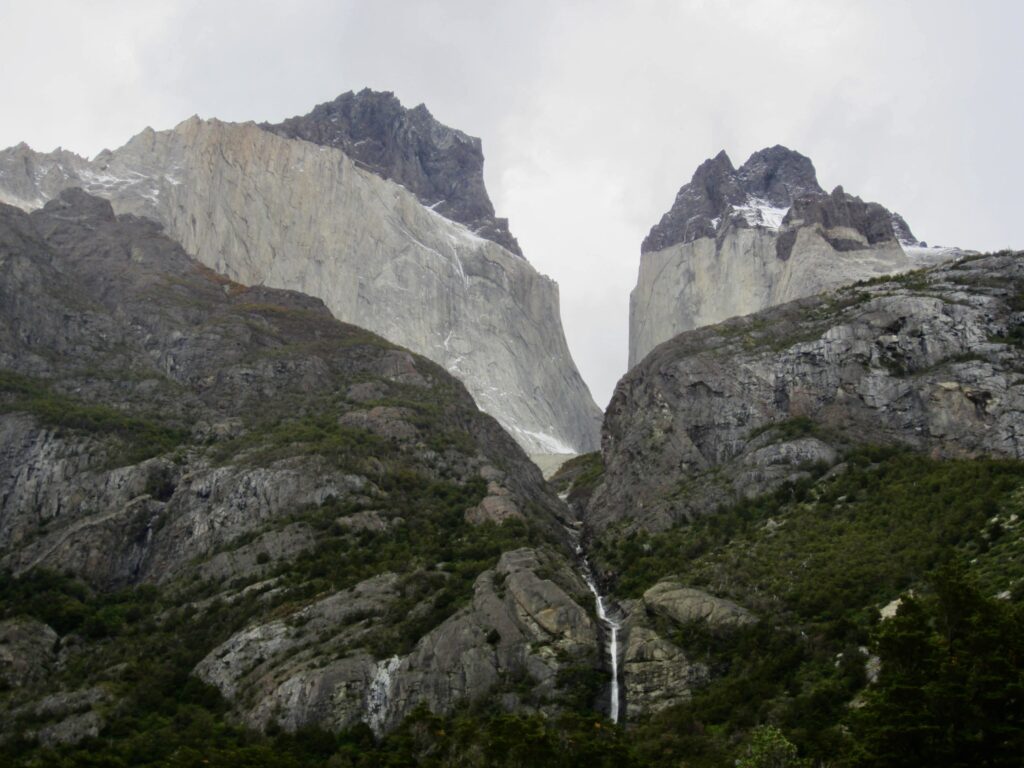
From this fabulous viewpoint, the entire Frances Cirque can be clearly seen. To the left are the sheer granitic walls and sharp summits of Cerro Catedral (“the cathedral”) and Aleta del Tiburon (“the shark’s fin”); toward the middle are the rugged peaks of Cerro Trono Blanco (“the white throne”); and to the right are the distinctive black-topped Cuernos del Paine (“horns of the Paine”).

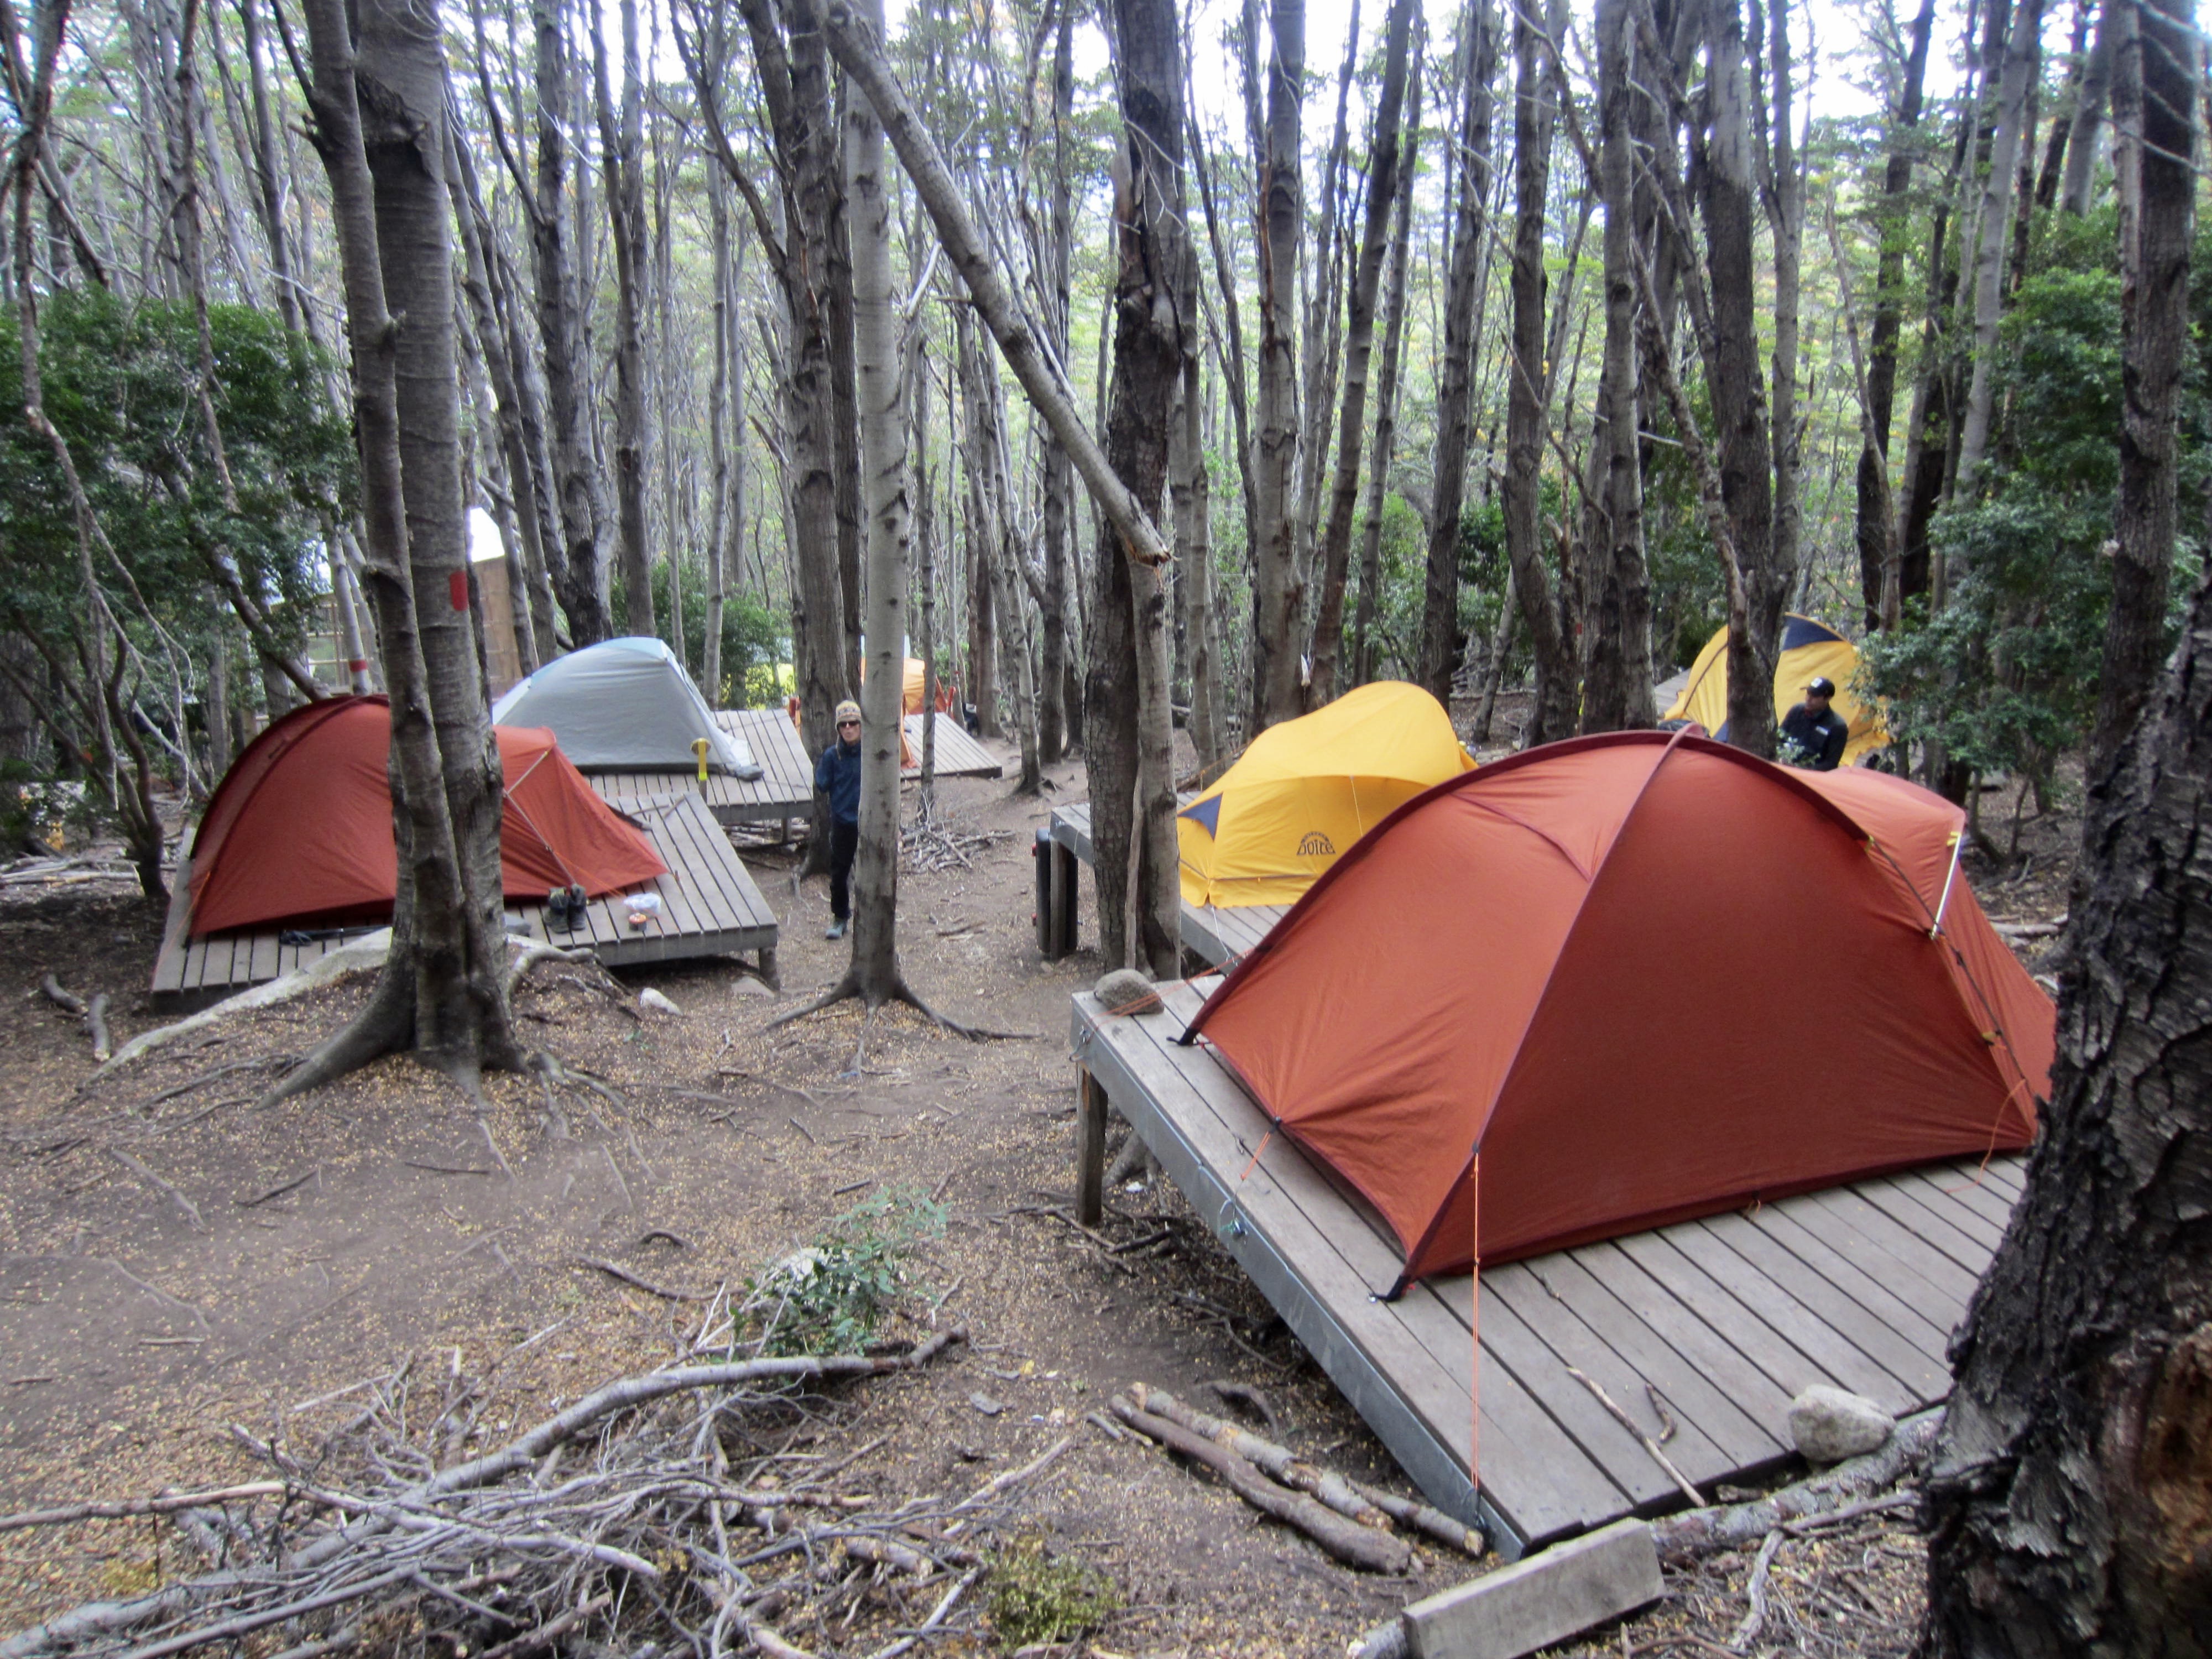
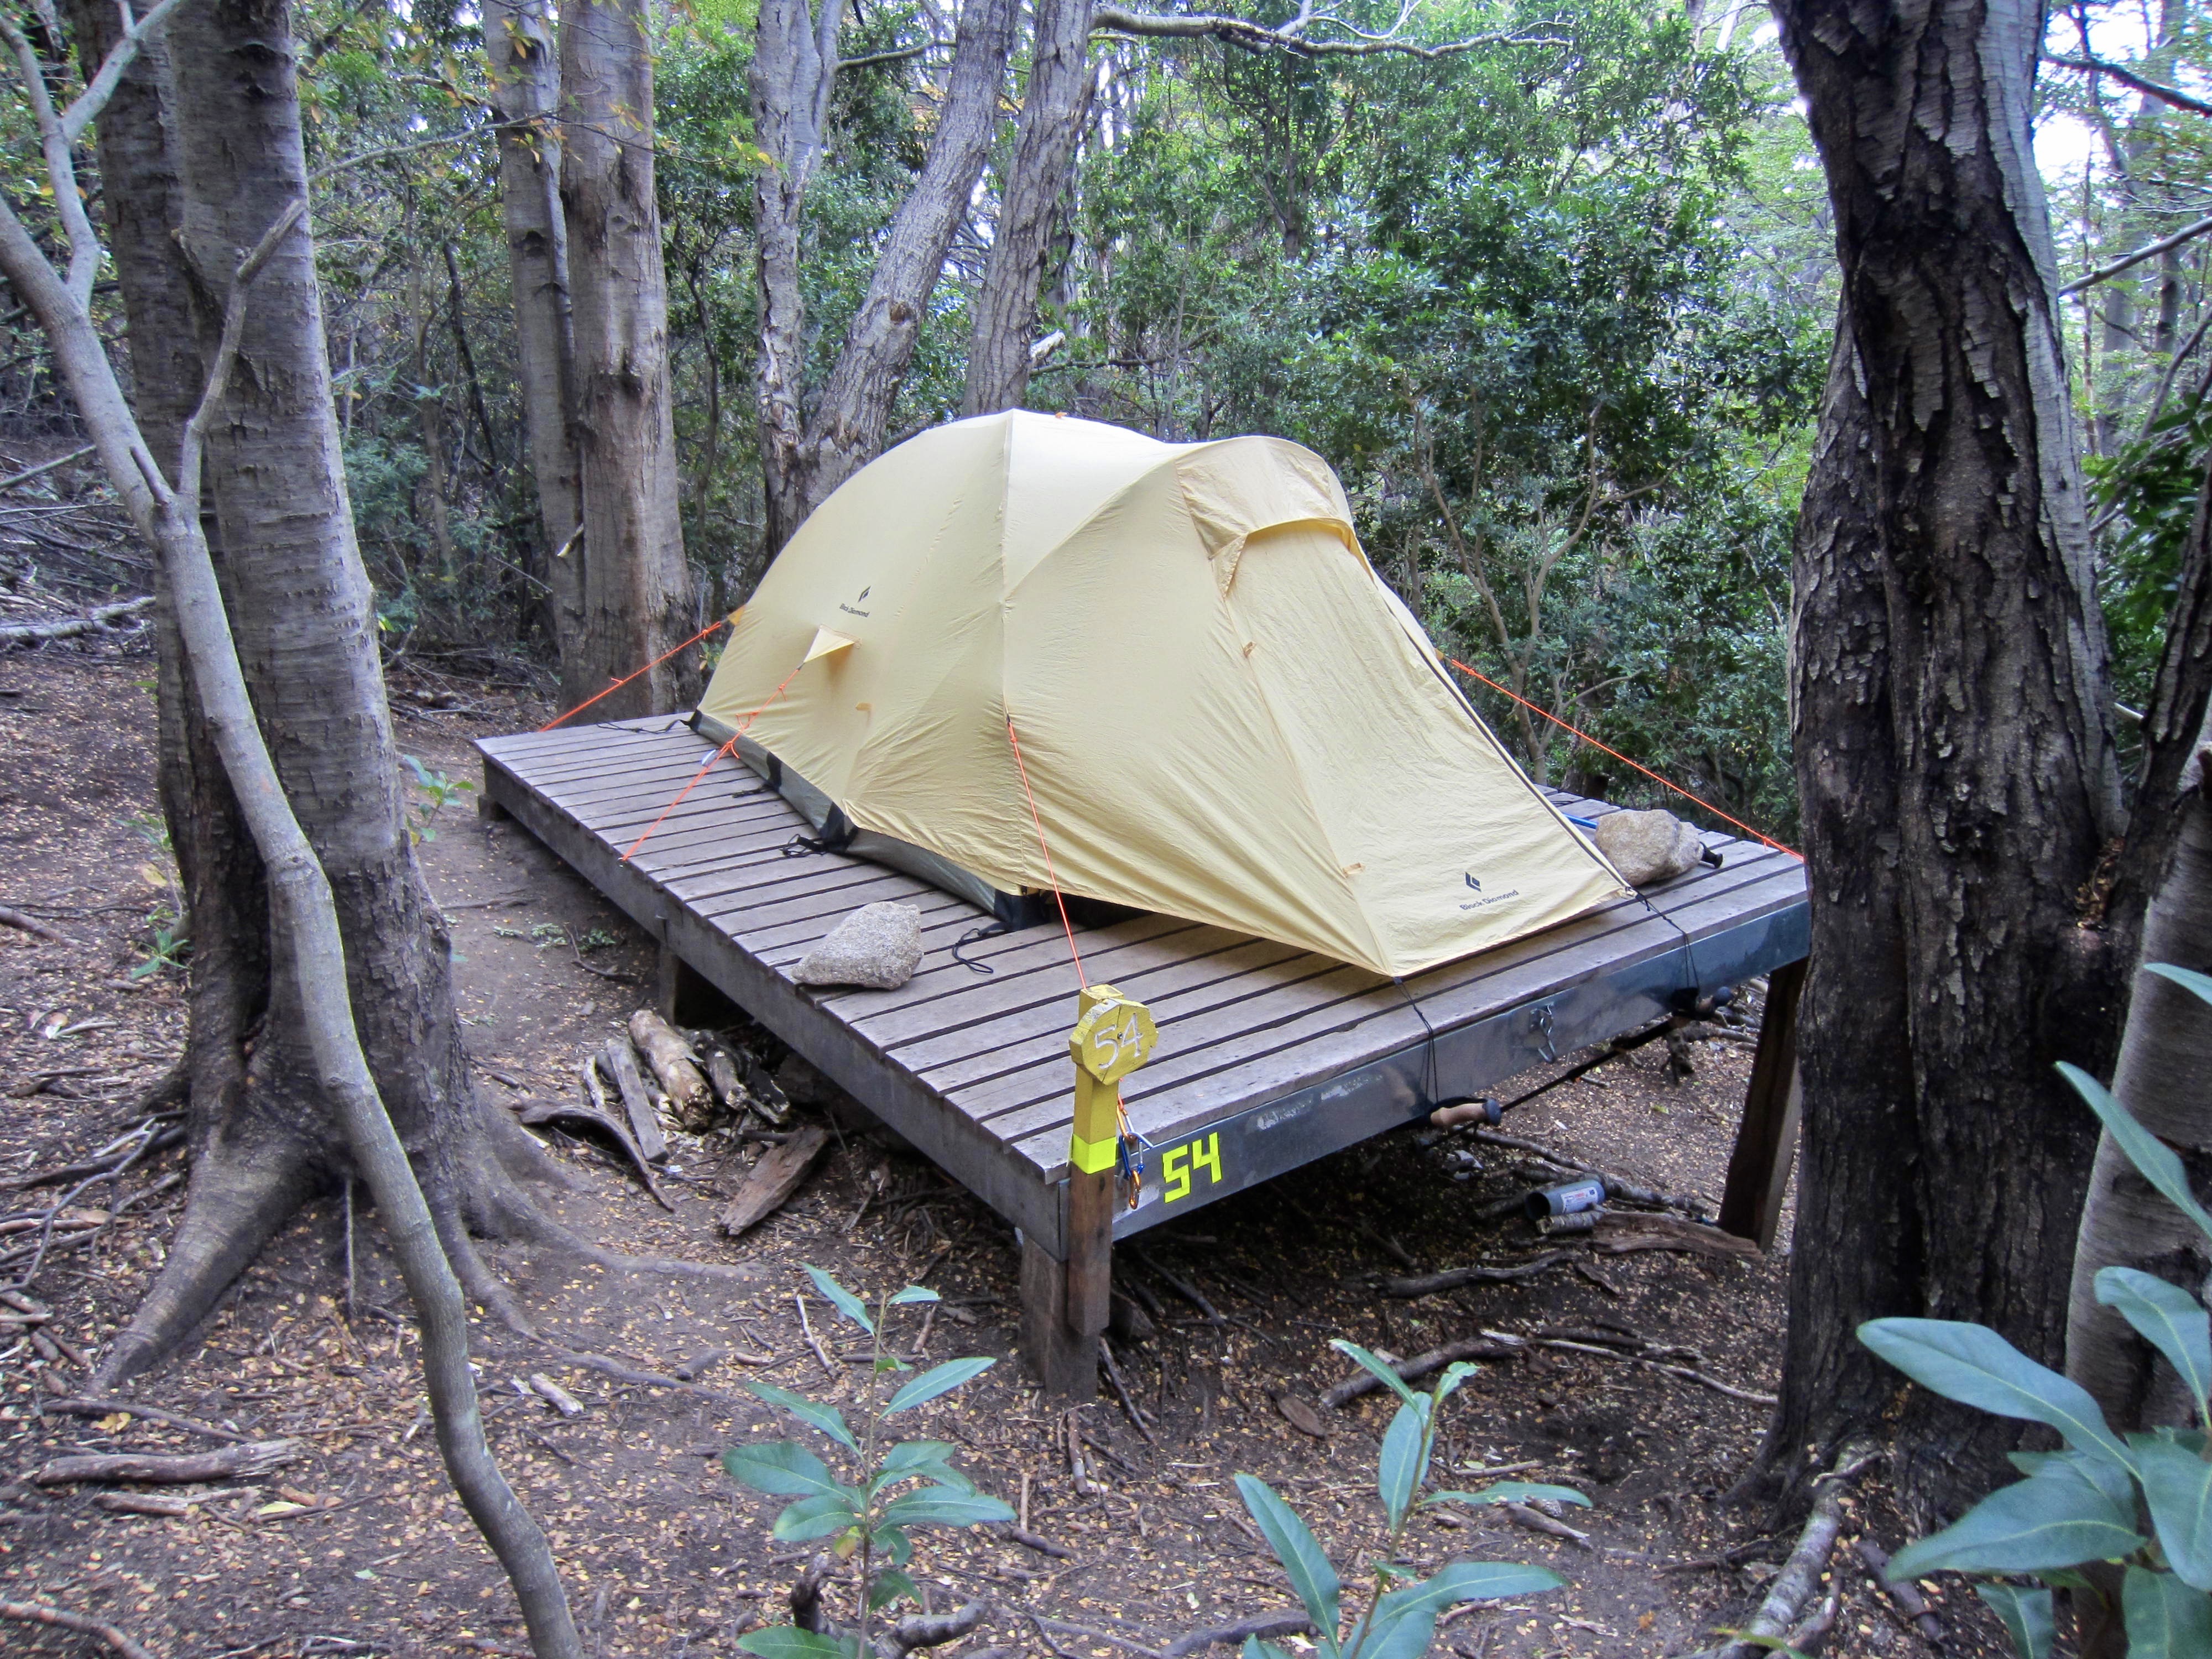
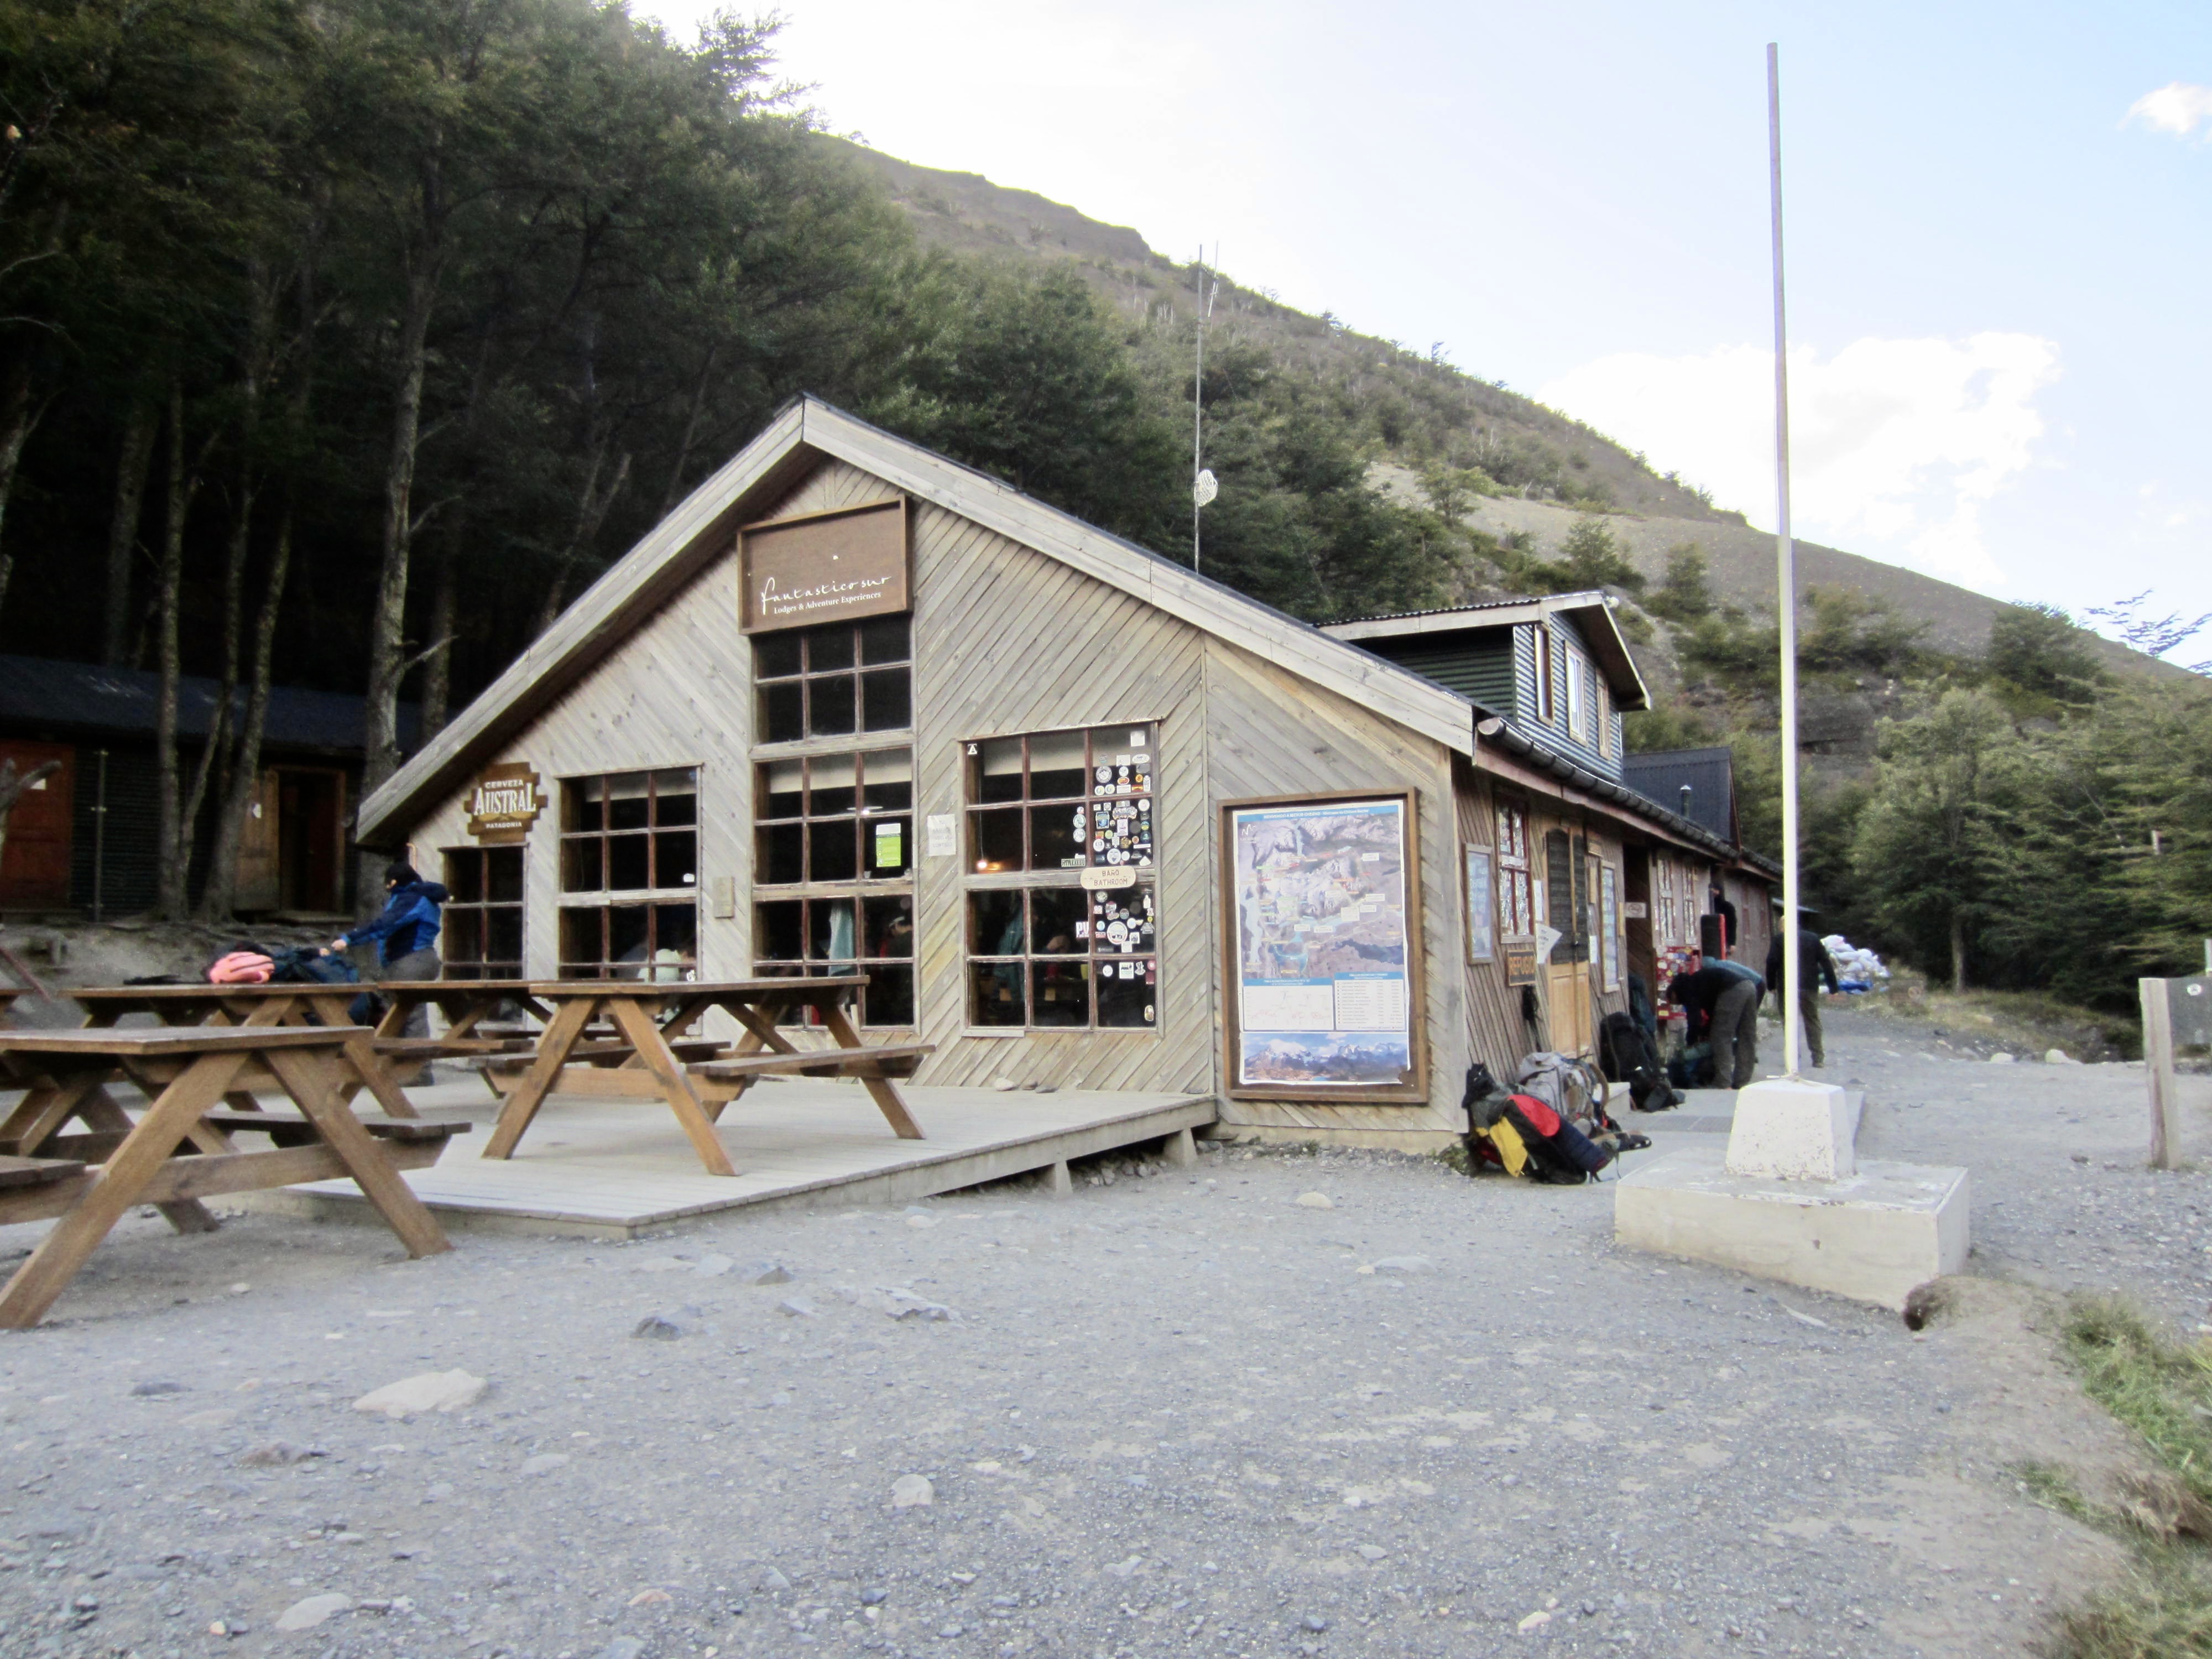
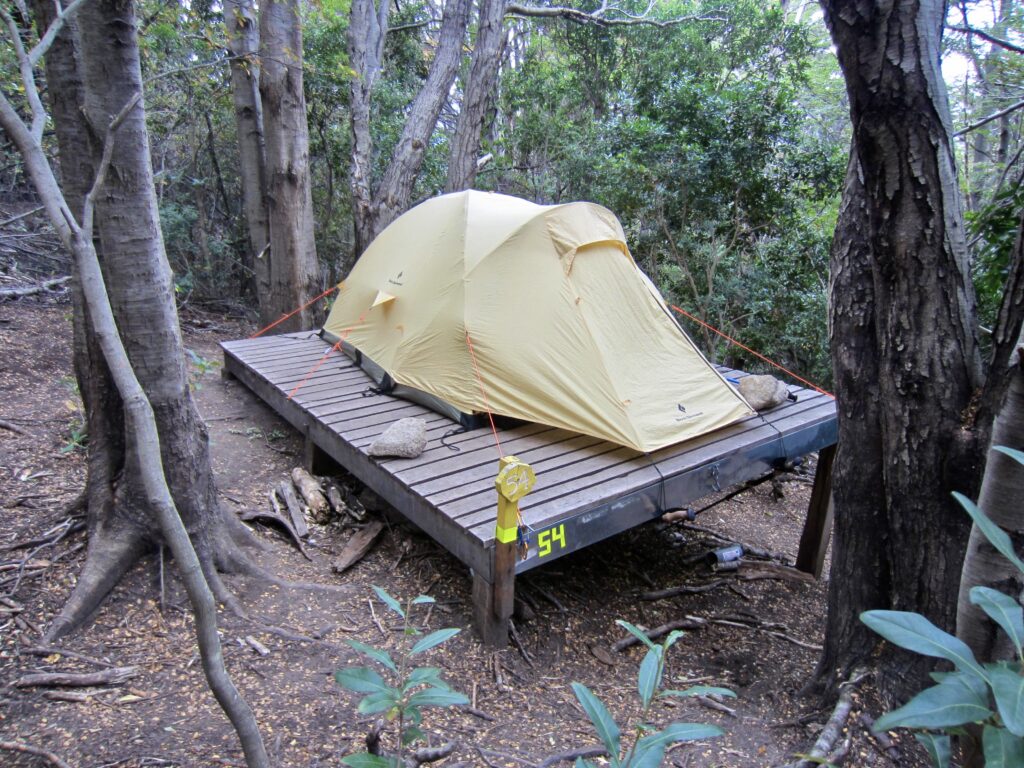
We were back at Italiano Ranger Station by 4:00pm (5.8 hours RT), quickly retrieving our backpacks and heading easterly on the trail. Within a half-hour, we arrived at Frances Camp, which is situated on a steep, forested hillside above Lake Nordenskjold. Most of the tent sites here consist of elevated wooden platforms that stair-step up the hill. There are a few simple cooking shelters located among the tent platforms, and a very nice bathroom/shower facility is located near the middle of the campsite.


Eileen and I were on a half-board meal plan here, so we had to make a long walk downhill to reach the restaurant. By the time we had completed the downhill walk and return slog, it became our opinion that Frances Camp has the most inconvenient location on the “O-W” Circuit!
Approximate daily stats: 9.0 hrs elapsed; 12.1 mi / 19.4 km traveled; 3500 ft / 1070 m gained; 3050 ft / 930 m lost.
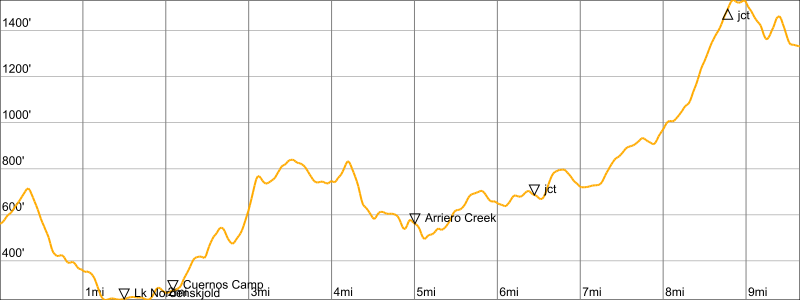
Day 7: Frances Camp to Chileno Camp
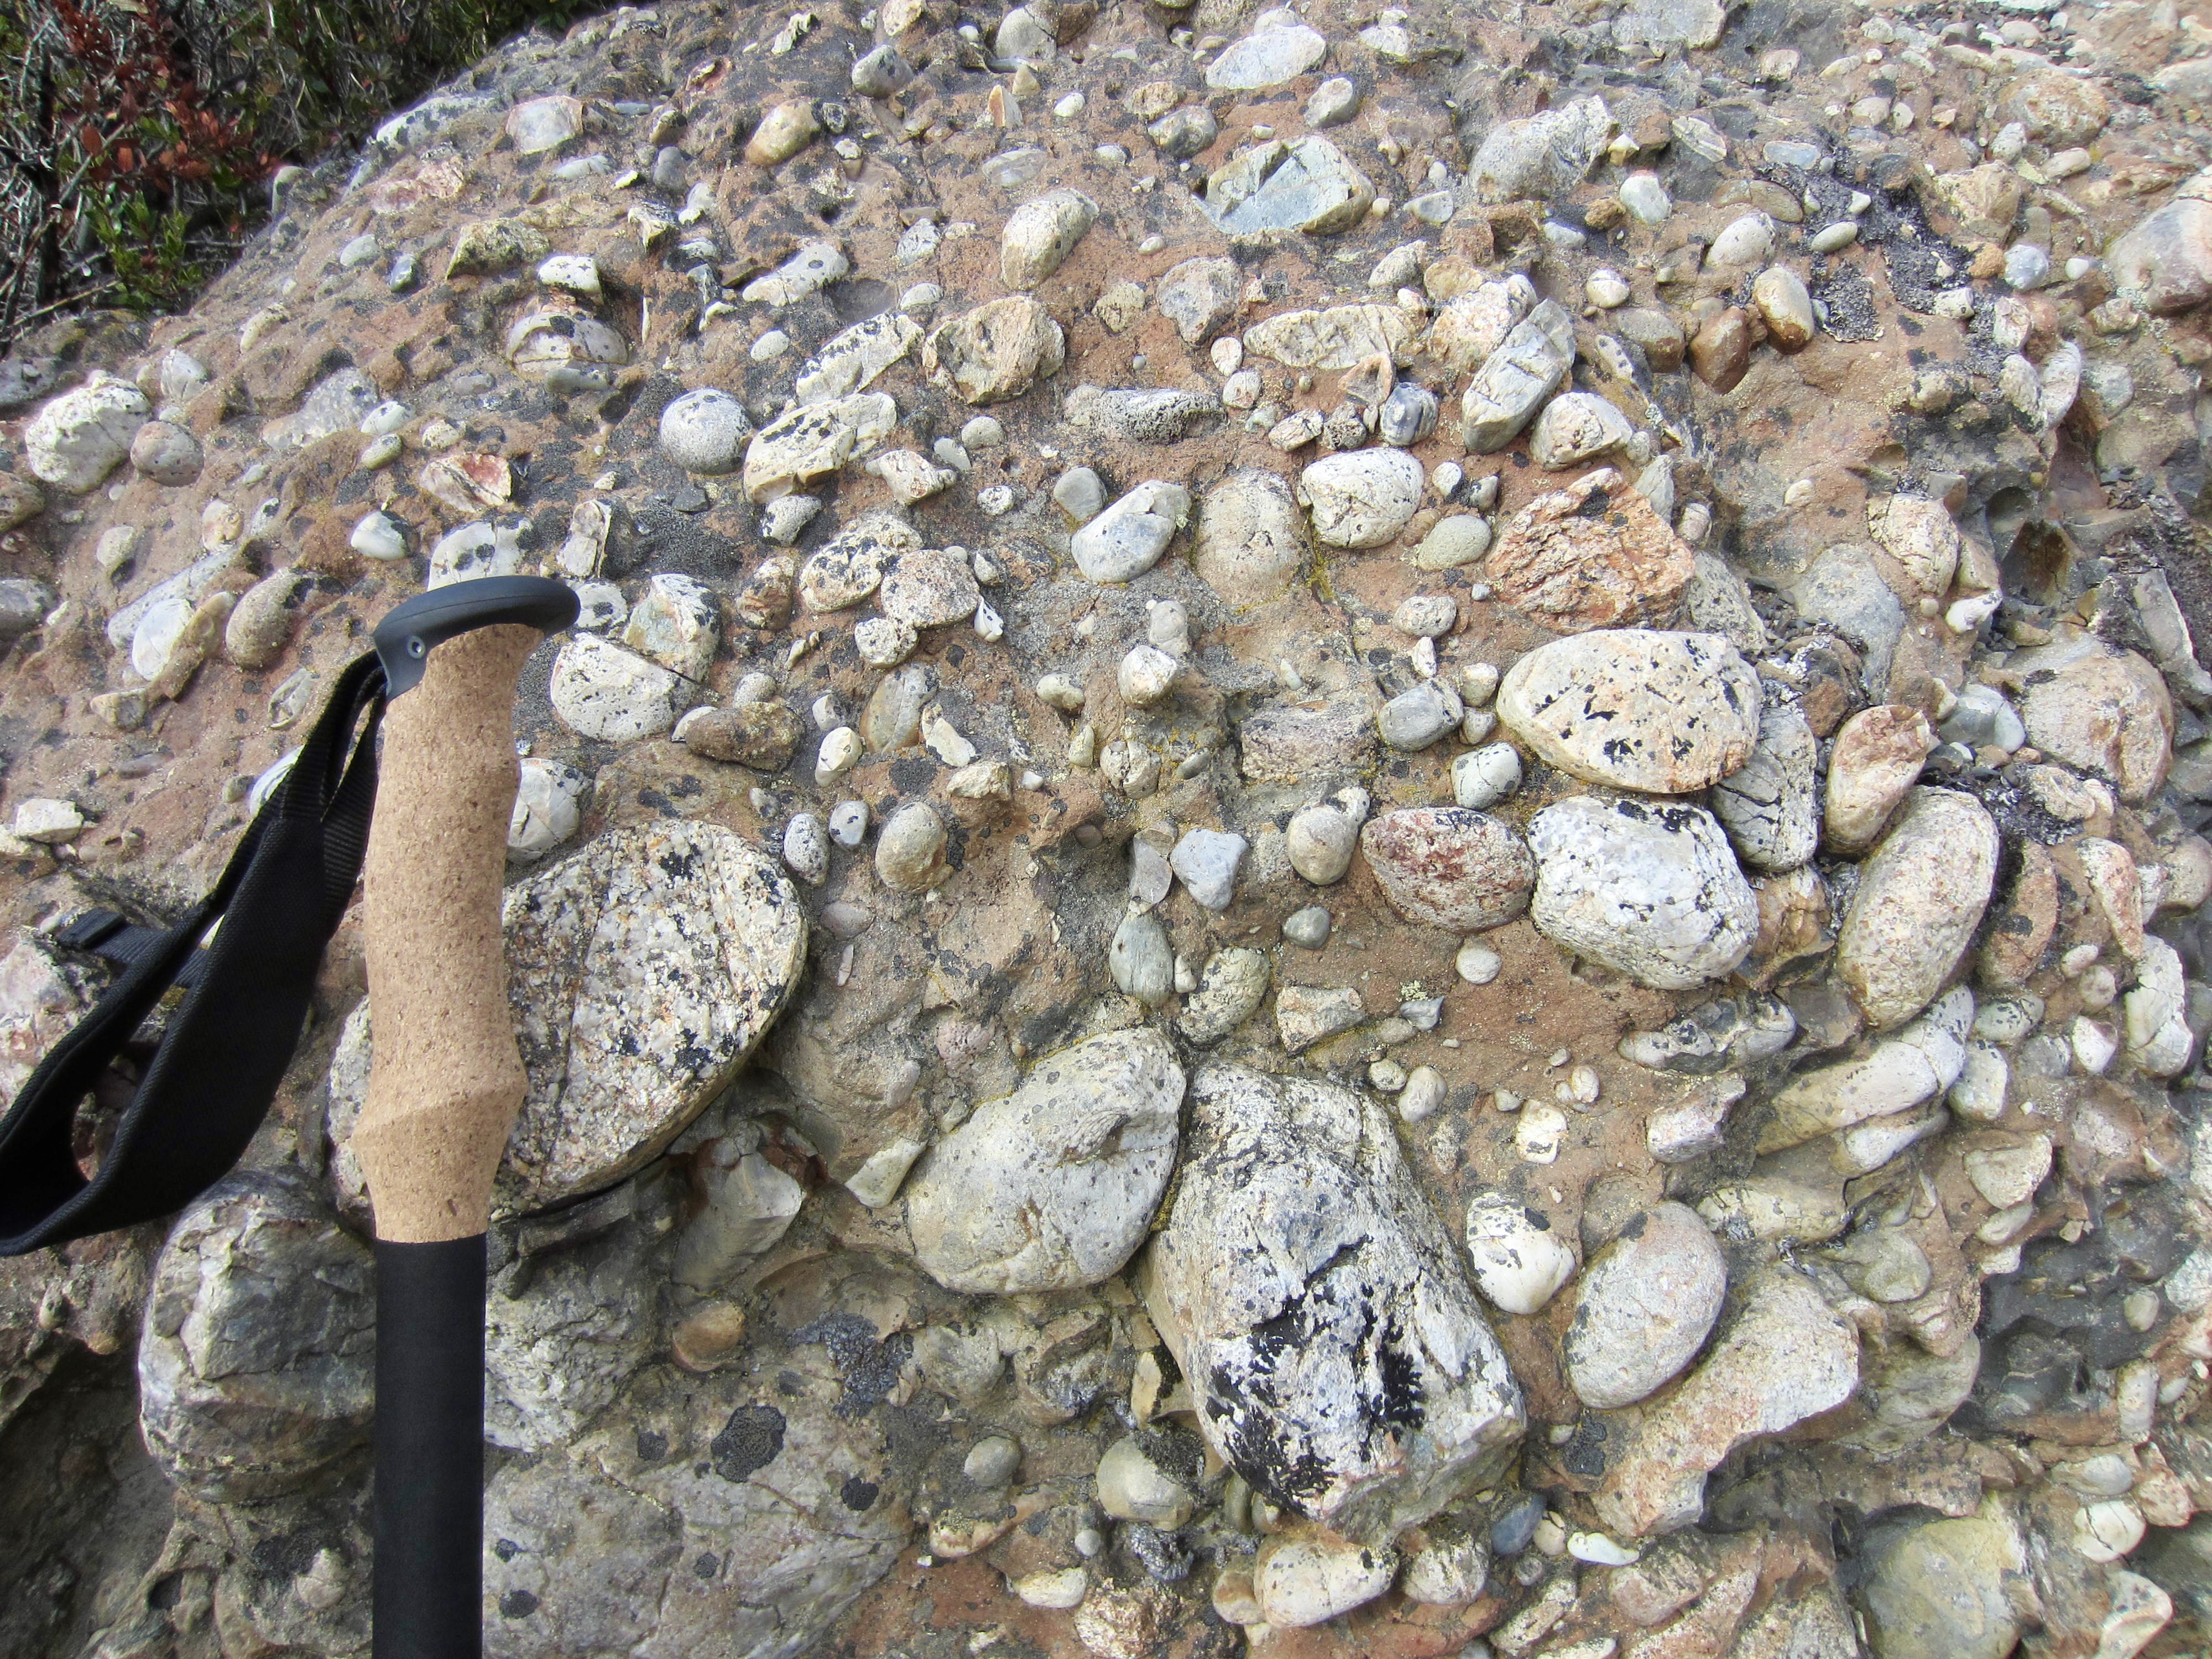
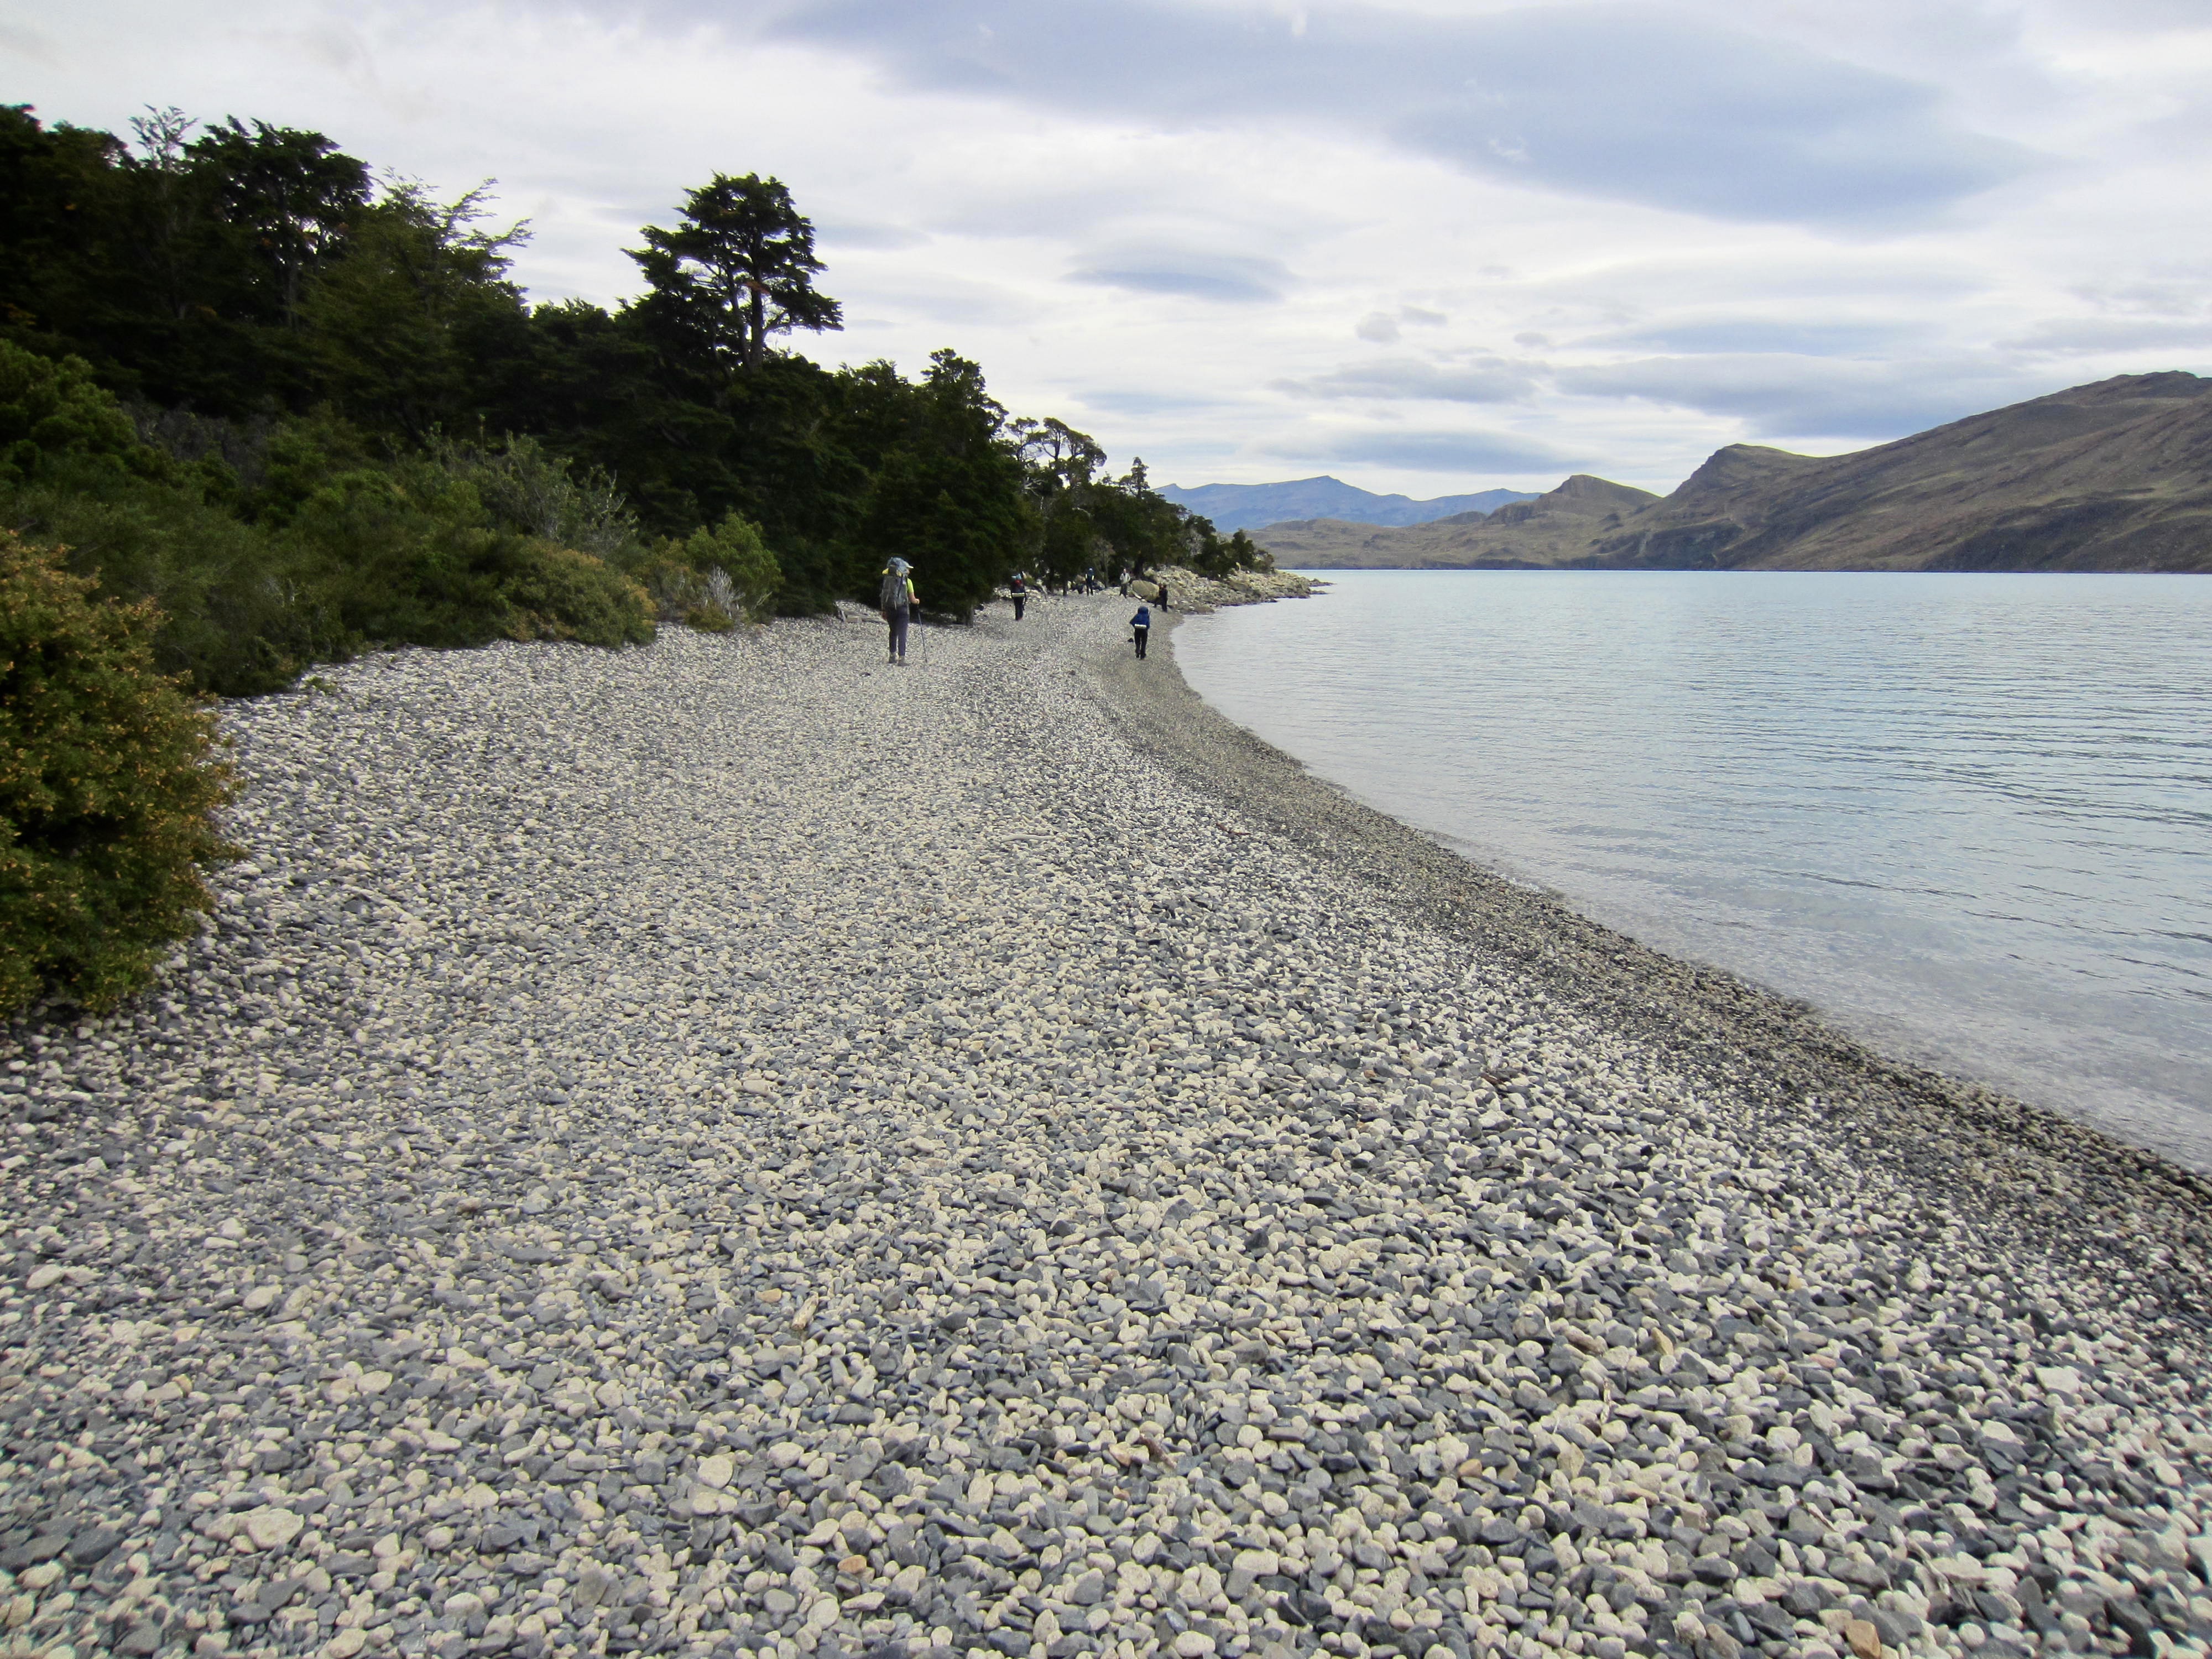
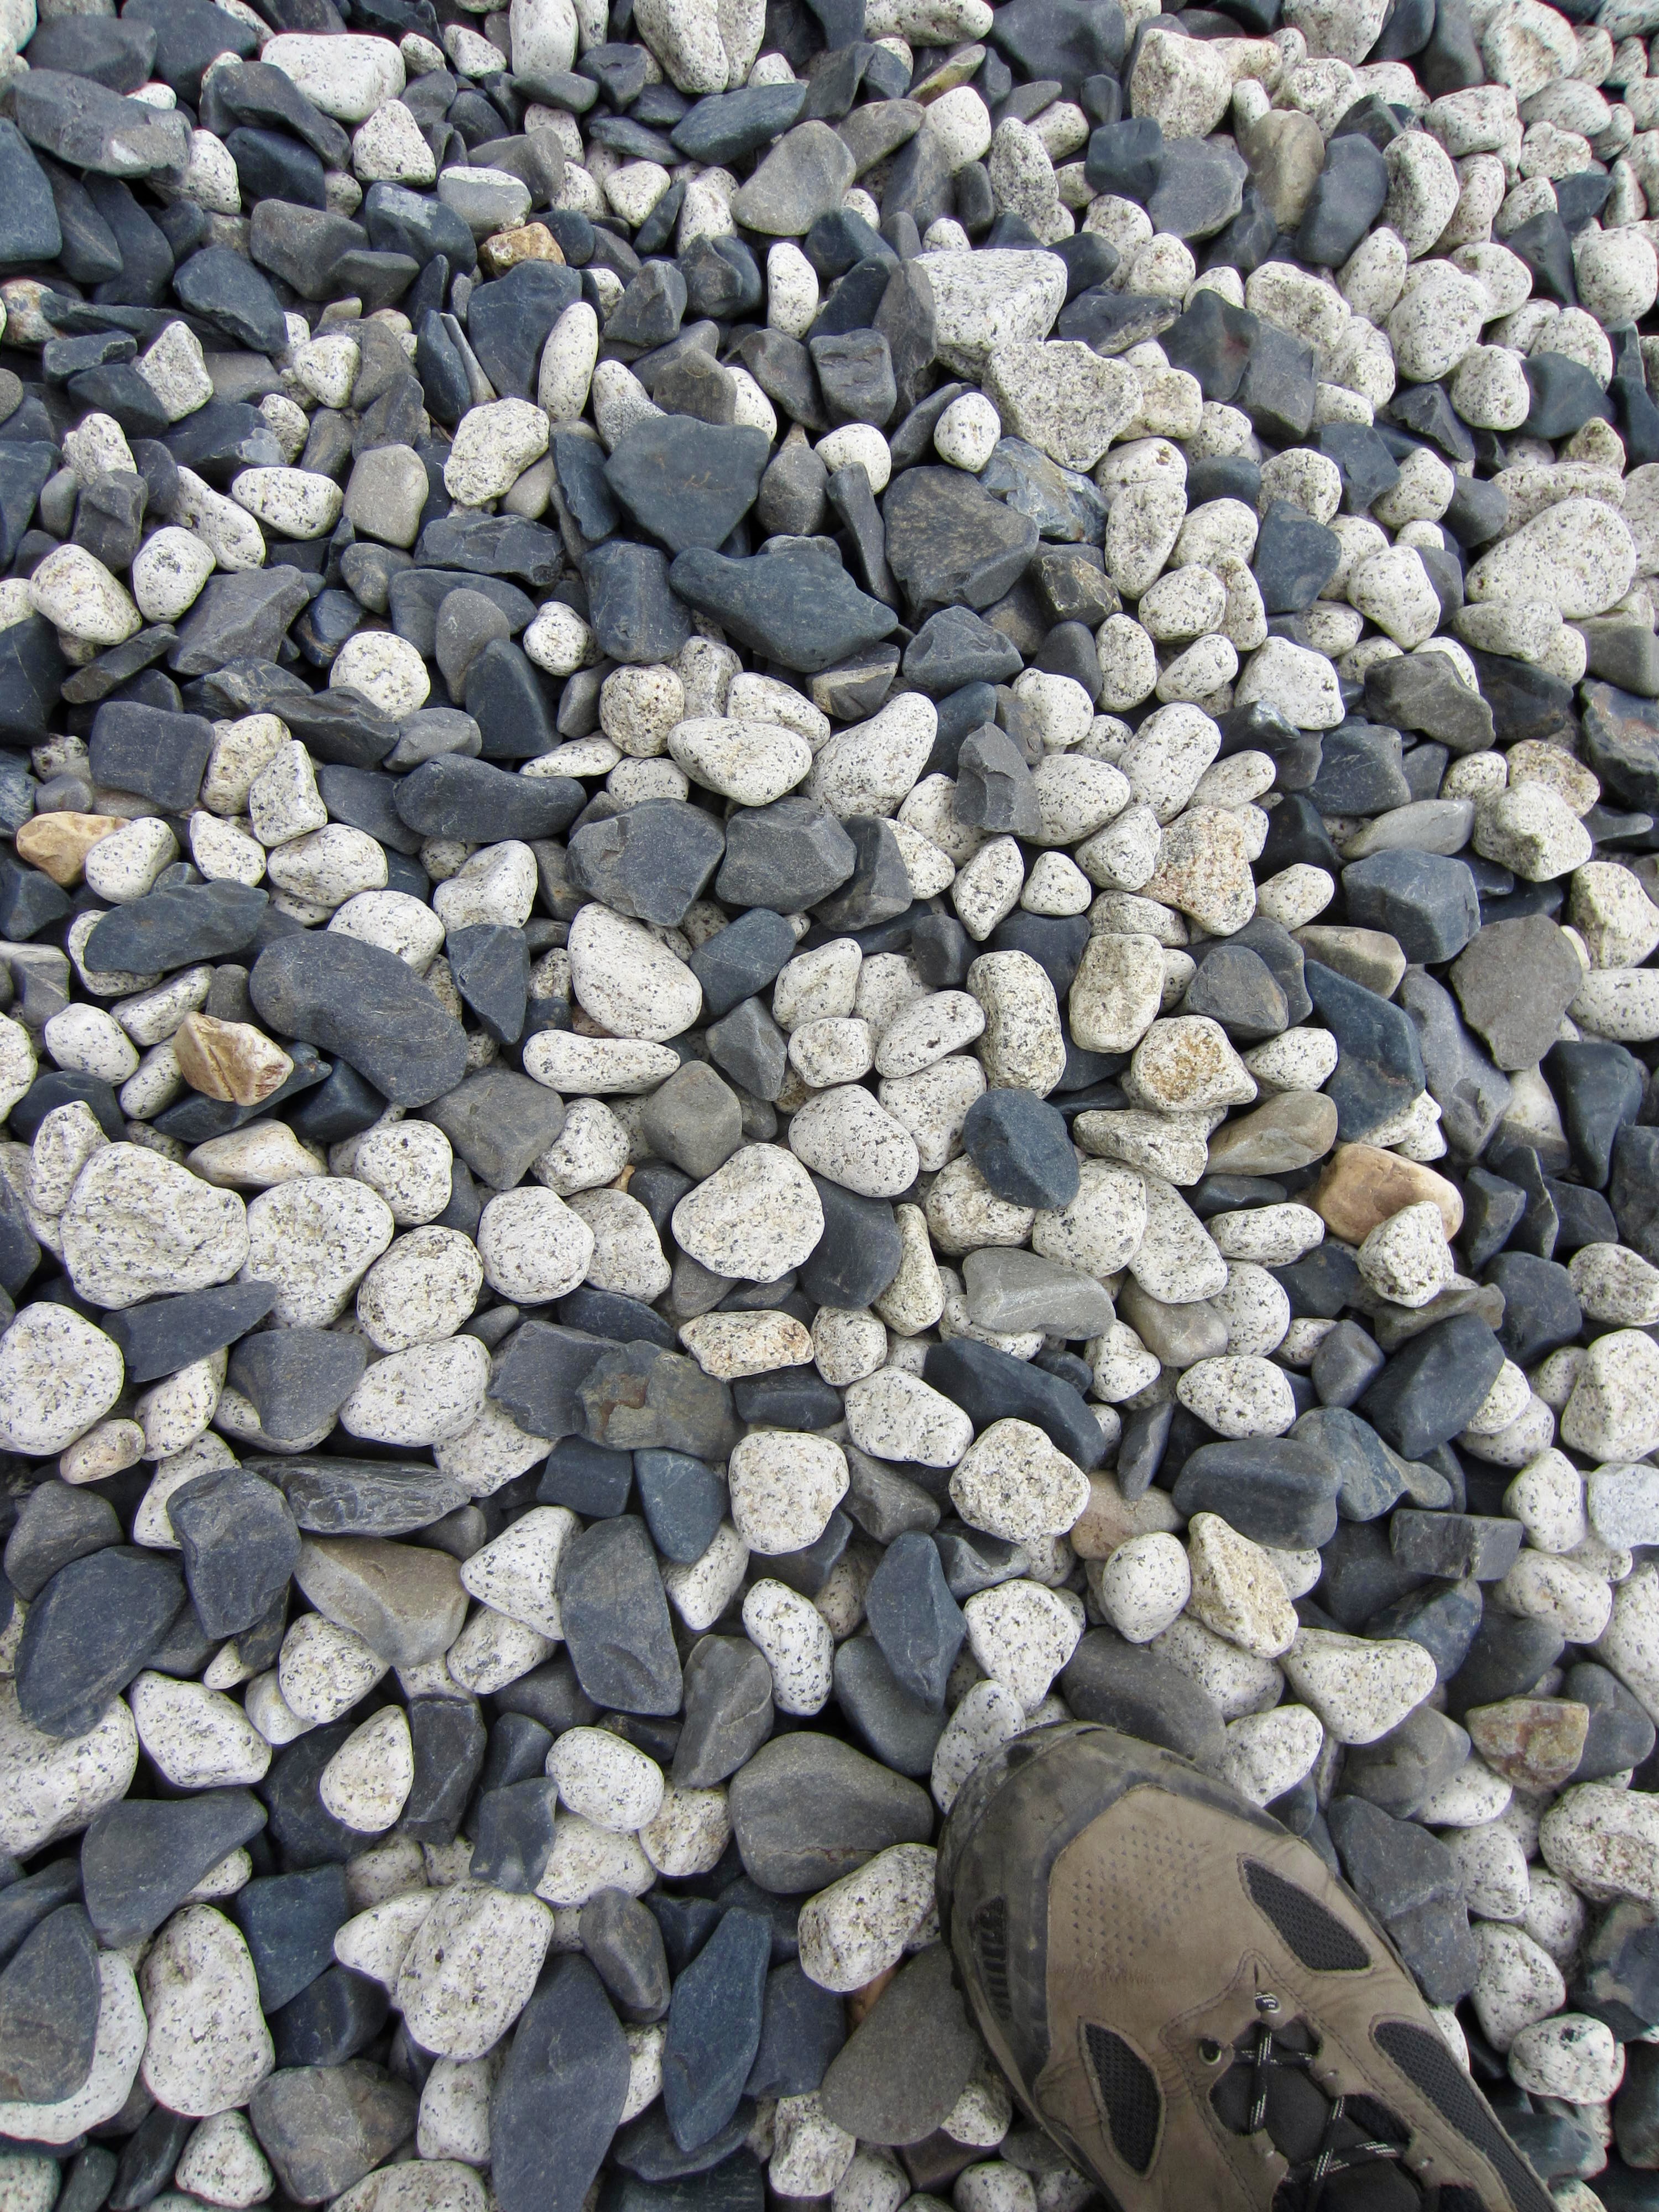
After a night that was almost freakishly calm by Patagonian standards, we tromped downhill for breakfast, then packed up and left shortly before 9:00am. The trail took us down to Lake Nordenskjold and along the gravelly beach for a short distance. This beach is composed of charcoal-gray and off-white stones that graphically reflect the distinctive geology of the Cuernos del Paine directly above, where light-colored granitic rock is sandwiched between dark-colored sedimentary rock.
We soon passed Cuernos Camp—one of the most popular campsites on the “O-W” Circuit—and continued hiking northeasterly on a high traverse above Lake Nordenskjold. Throughout the morning, there was a steady stream of trekkers traveling in the opposite direction. No doubt, these were people doing the “W” Trek from east to west.

We crossed Arriero Creek on a suspension bridge and quickly came to a junction near Lake Inge. Here, the right fork goes downhill to Central Camp, Las Torres Hotel, and the Torres Welcome Center, whereas the left fork goes uphill to Chileno Camp. We took the left fork, which initially wanders through rolling grassland and then climbs steeply to another junction with a well-beaten trail coming up from Central Camp. Proceeding straight ahead, the now-combined trail led us over a local high point known as Windy Pass—yes, it was truly windy there—and on a descending traverse above the Ascencio River.

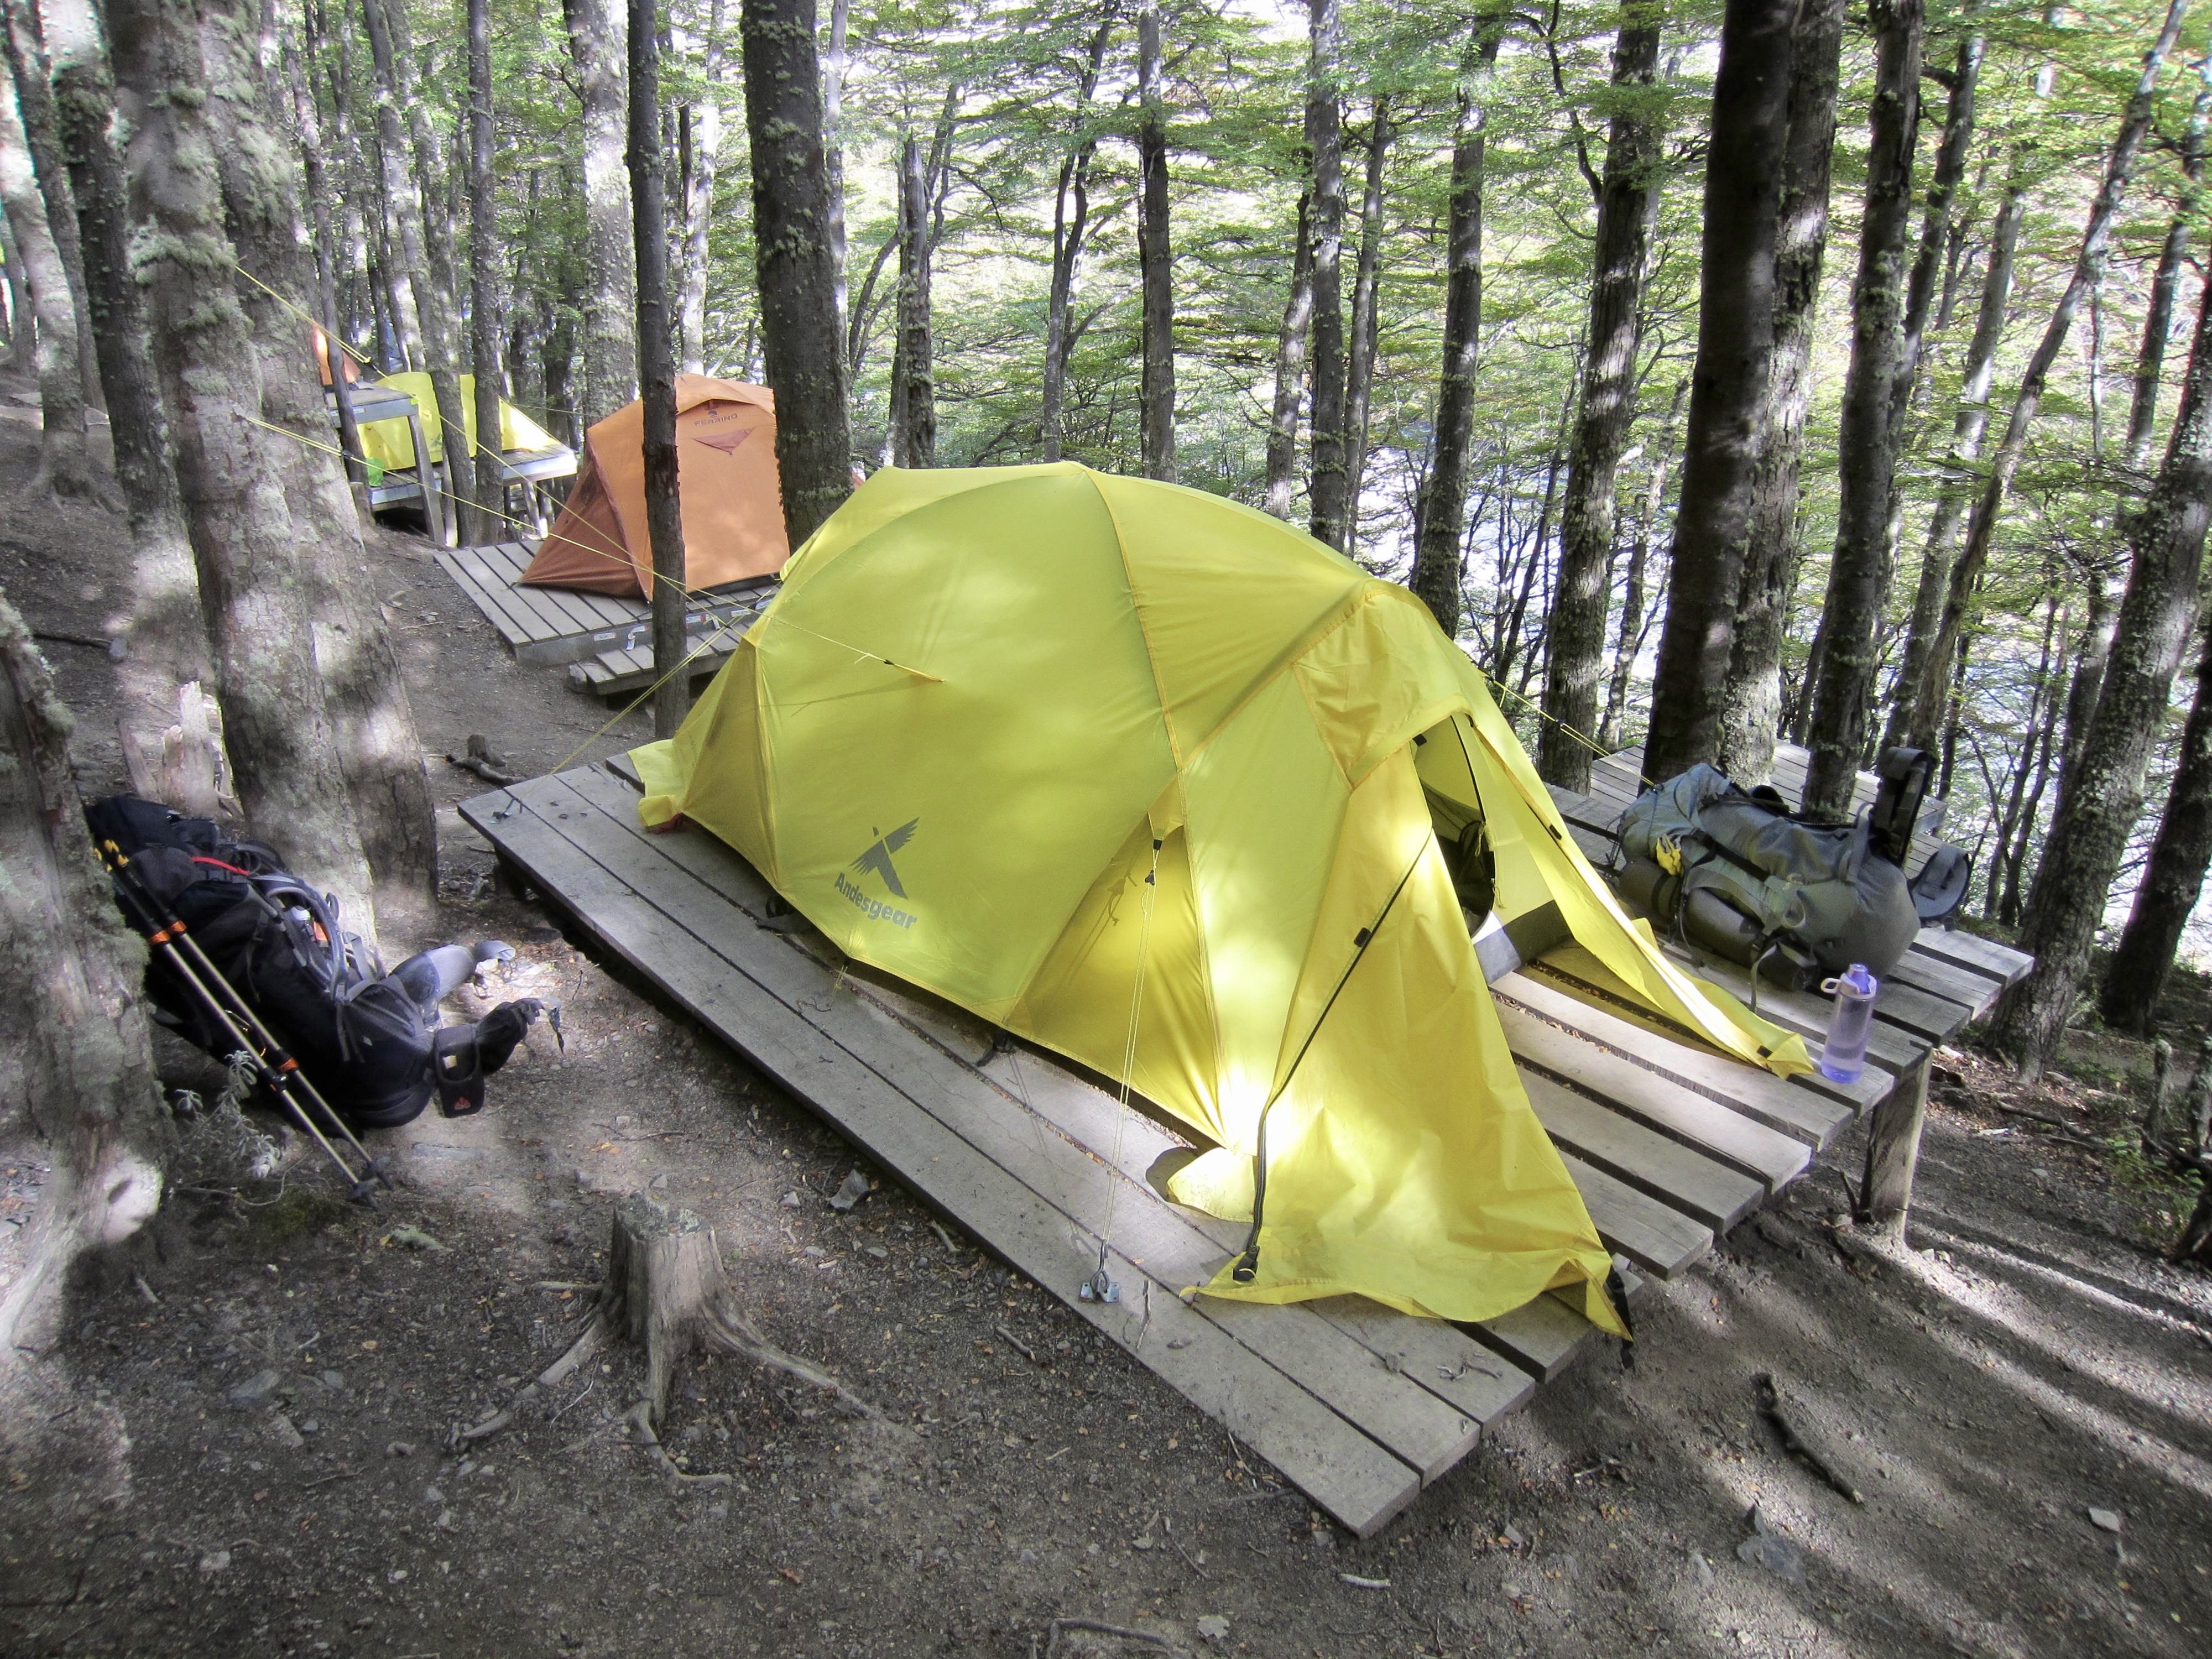
Immediately after crossing the Ascencio River on a sturdy bridge, we arrived at Chileno Camp in mid-afternoon. We had intended to camp here in our own tent, as usual, but the lack of any available tent sites forced us to use one of their pre-pitched rental tents. It was quite expensive but would save us some valuable time in the morning. All rental tents on the “O-W” Circuit are double-wall, four-season models of various brands.


Once again being on a half-board meal plan here, Eileen and I ate dinner in the lodge. All of our catered meals had been tasty and reasonably priced, and this one was no exception. We could definitely see the appeal of going with a half-board plan at every campsite.
Our itinerary for tomorrow called for a very early departure and a headlamp hike up to Torres Base Viewpoint. The registration clerk had firmly recommended starting no later than 5:20am (based on typical ascent times and on the current sunrise schedule), so we had our summit packs ready to go and were in bed by 8:30pm.
Approximate daily stats: 6.8 hrs elapsed; 9.7 mi / 15.5 km traveled; 2500 ft / 760 m gained; 1700 ft / 520 m lost.
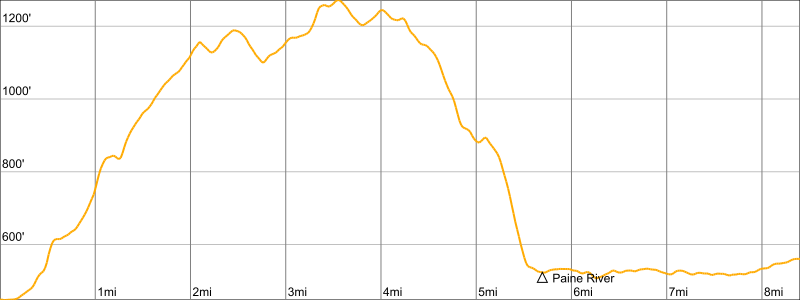
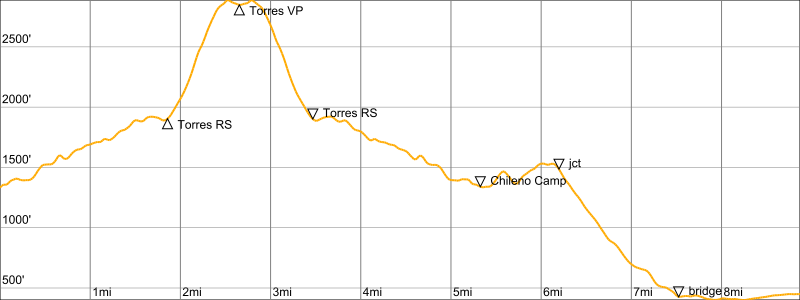
Day 8 (AM): Torres Base VP Sidetrip
Eileen and I awoke at 4:30am, delighted to see a starry sky overhead. We joined a dozen or more other early-risers in the lodge for a full breakfast, which the staff had graciously put out for us. Backpacks were allowed to be stashed in the lodge while we made the sidetrip hike up to Torres Base Viewpoint. At 5:20am—precisely on the recommended schedule—we left camp with summit packs. Our trail led us across the Ascencio River and then on an undulating traverse through beech forest until we reached a spur trail leading over to Torres Ranger Station. Beyond this junction, the trail becomes steep and rough.

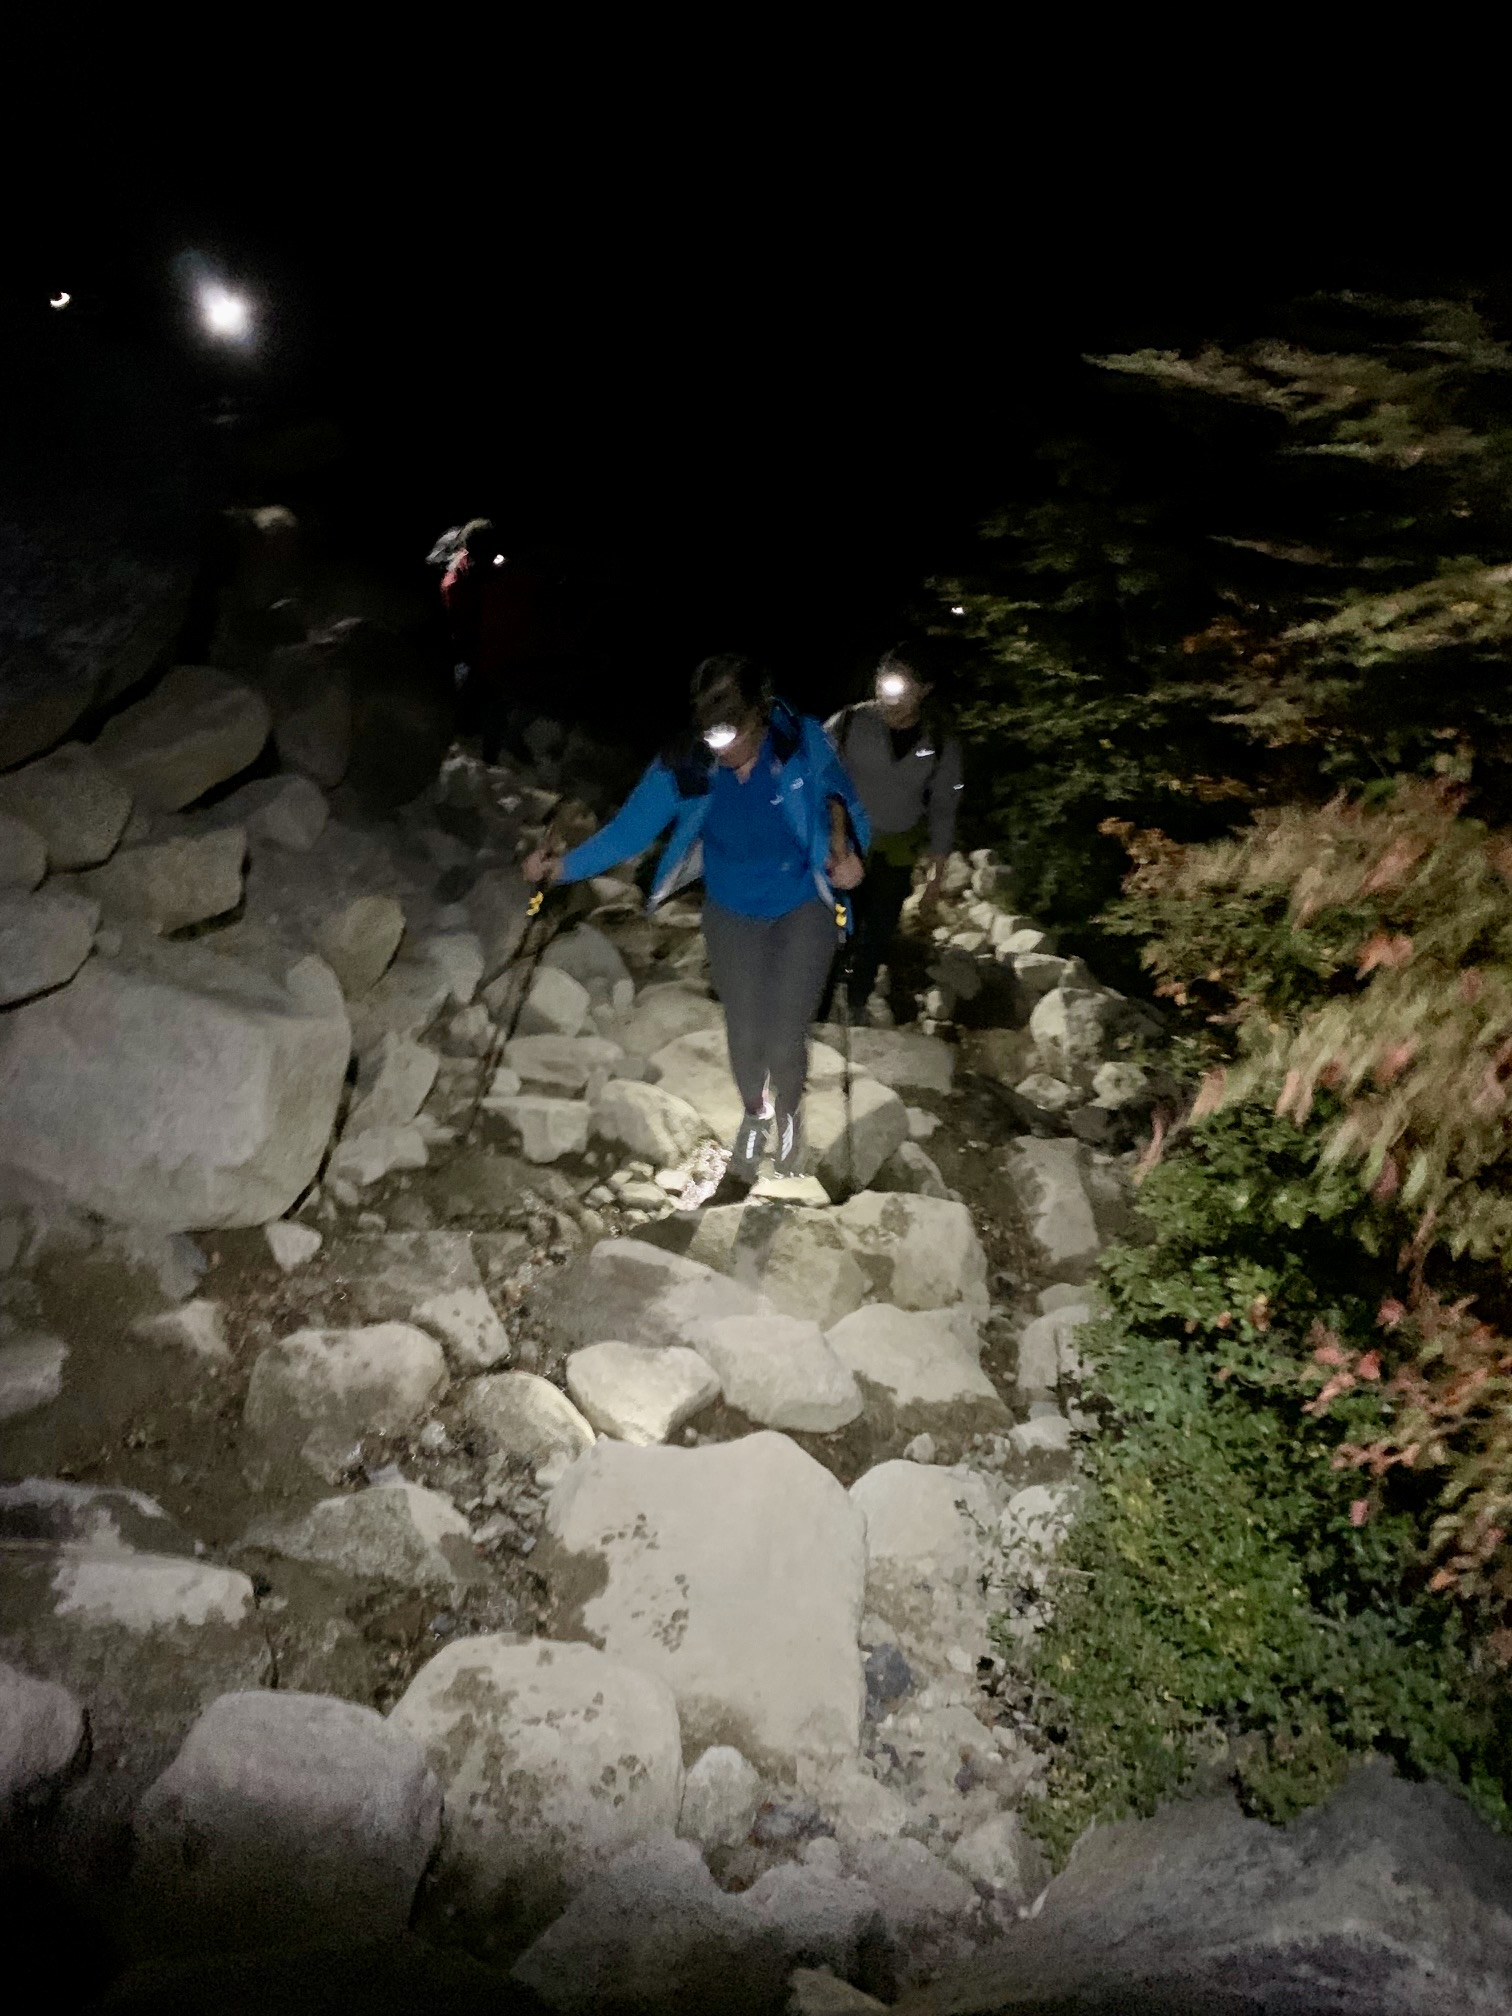
We soon broke out of the forest and began ascending an exposed moraine slope. A cold wind blew across this slope, and a long line of headlamps could be seen extending far above and far below. Near the top of the moraine, the trail was forced to wiggle around large boulders that made it difficult to follow in the darkness. General confusion prevailed here, creating a chaotic scene with headlamps scattered around the hillslope and numerous people shouting out directions.
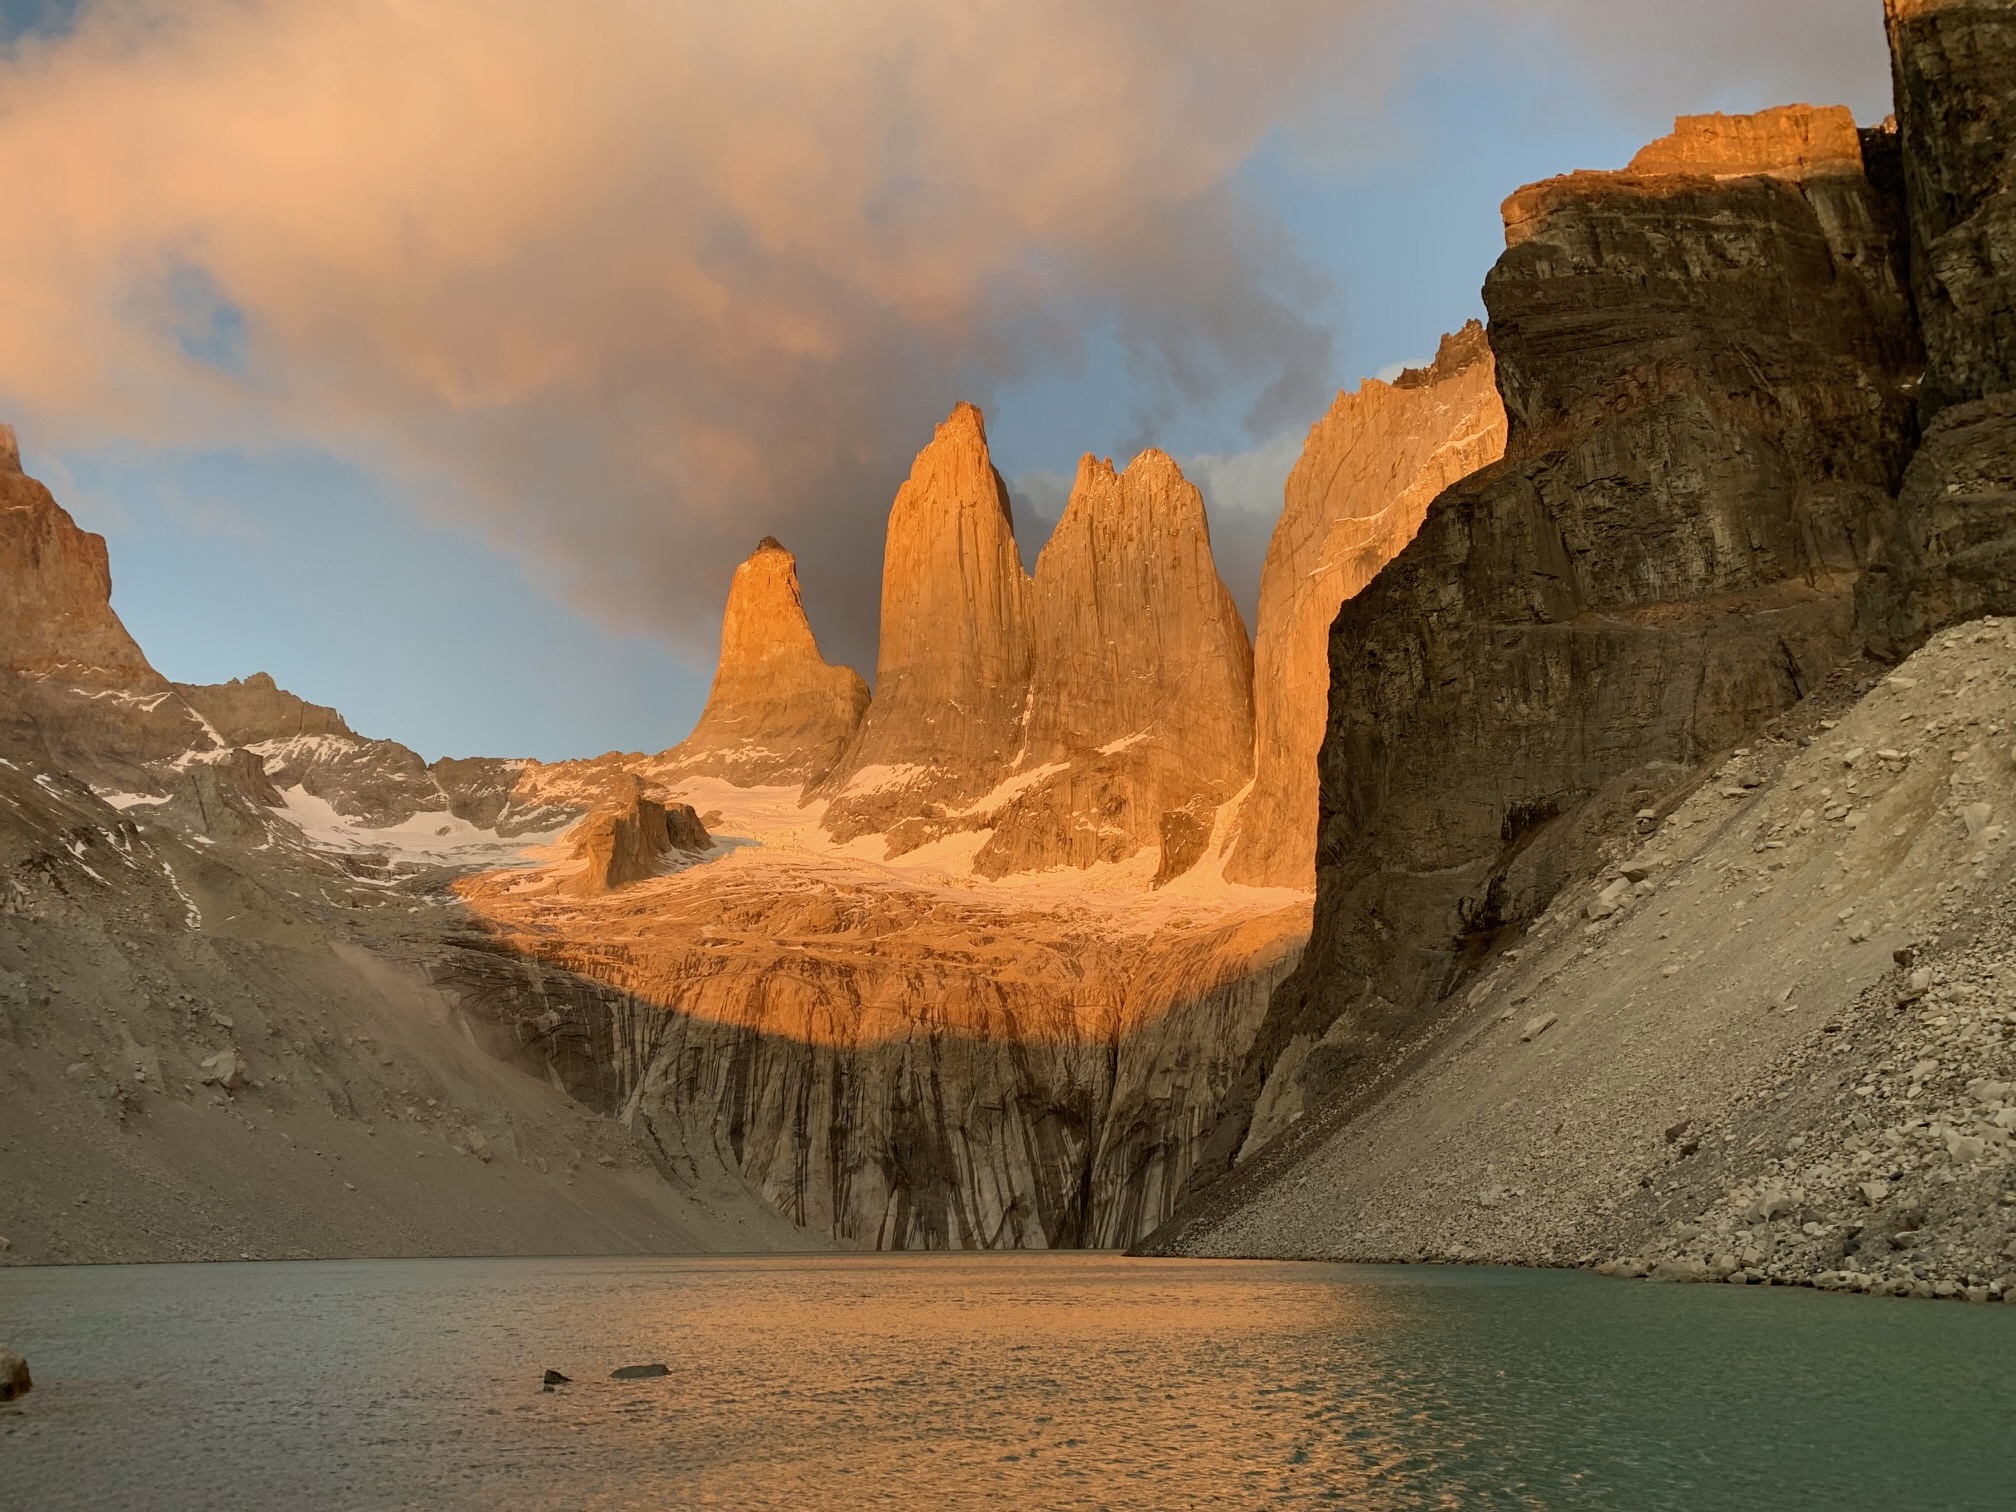
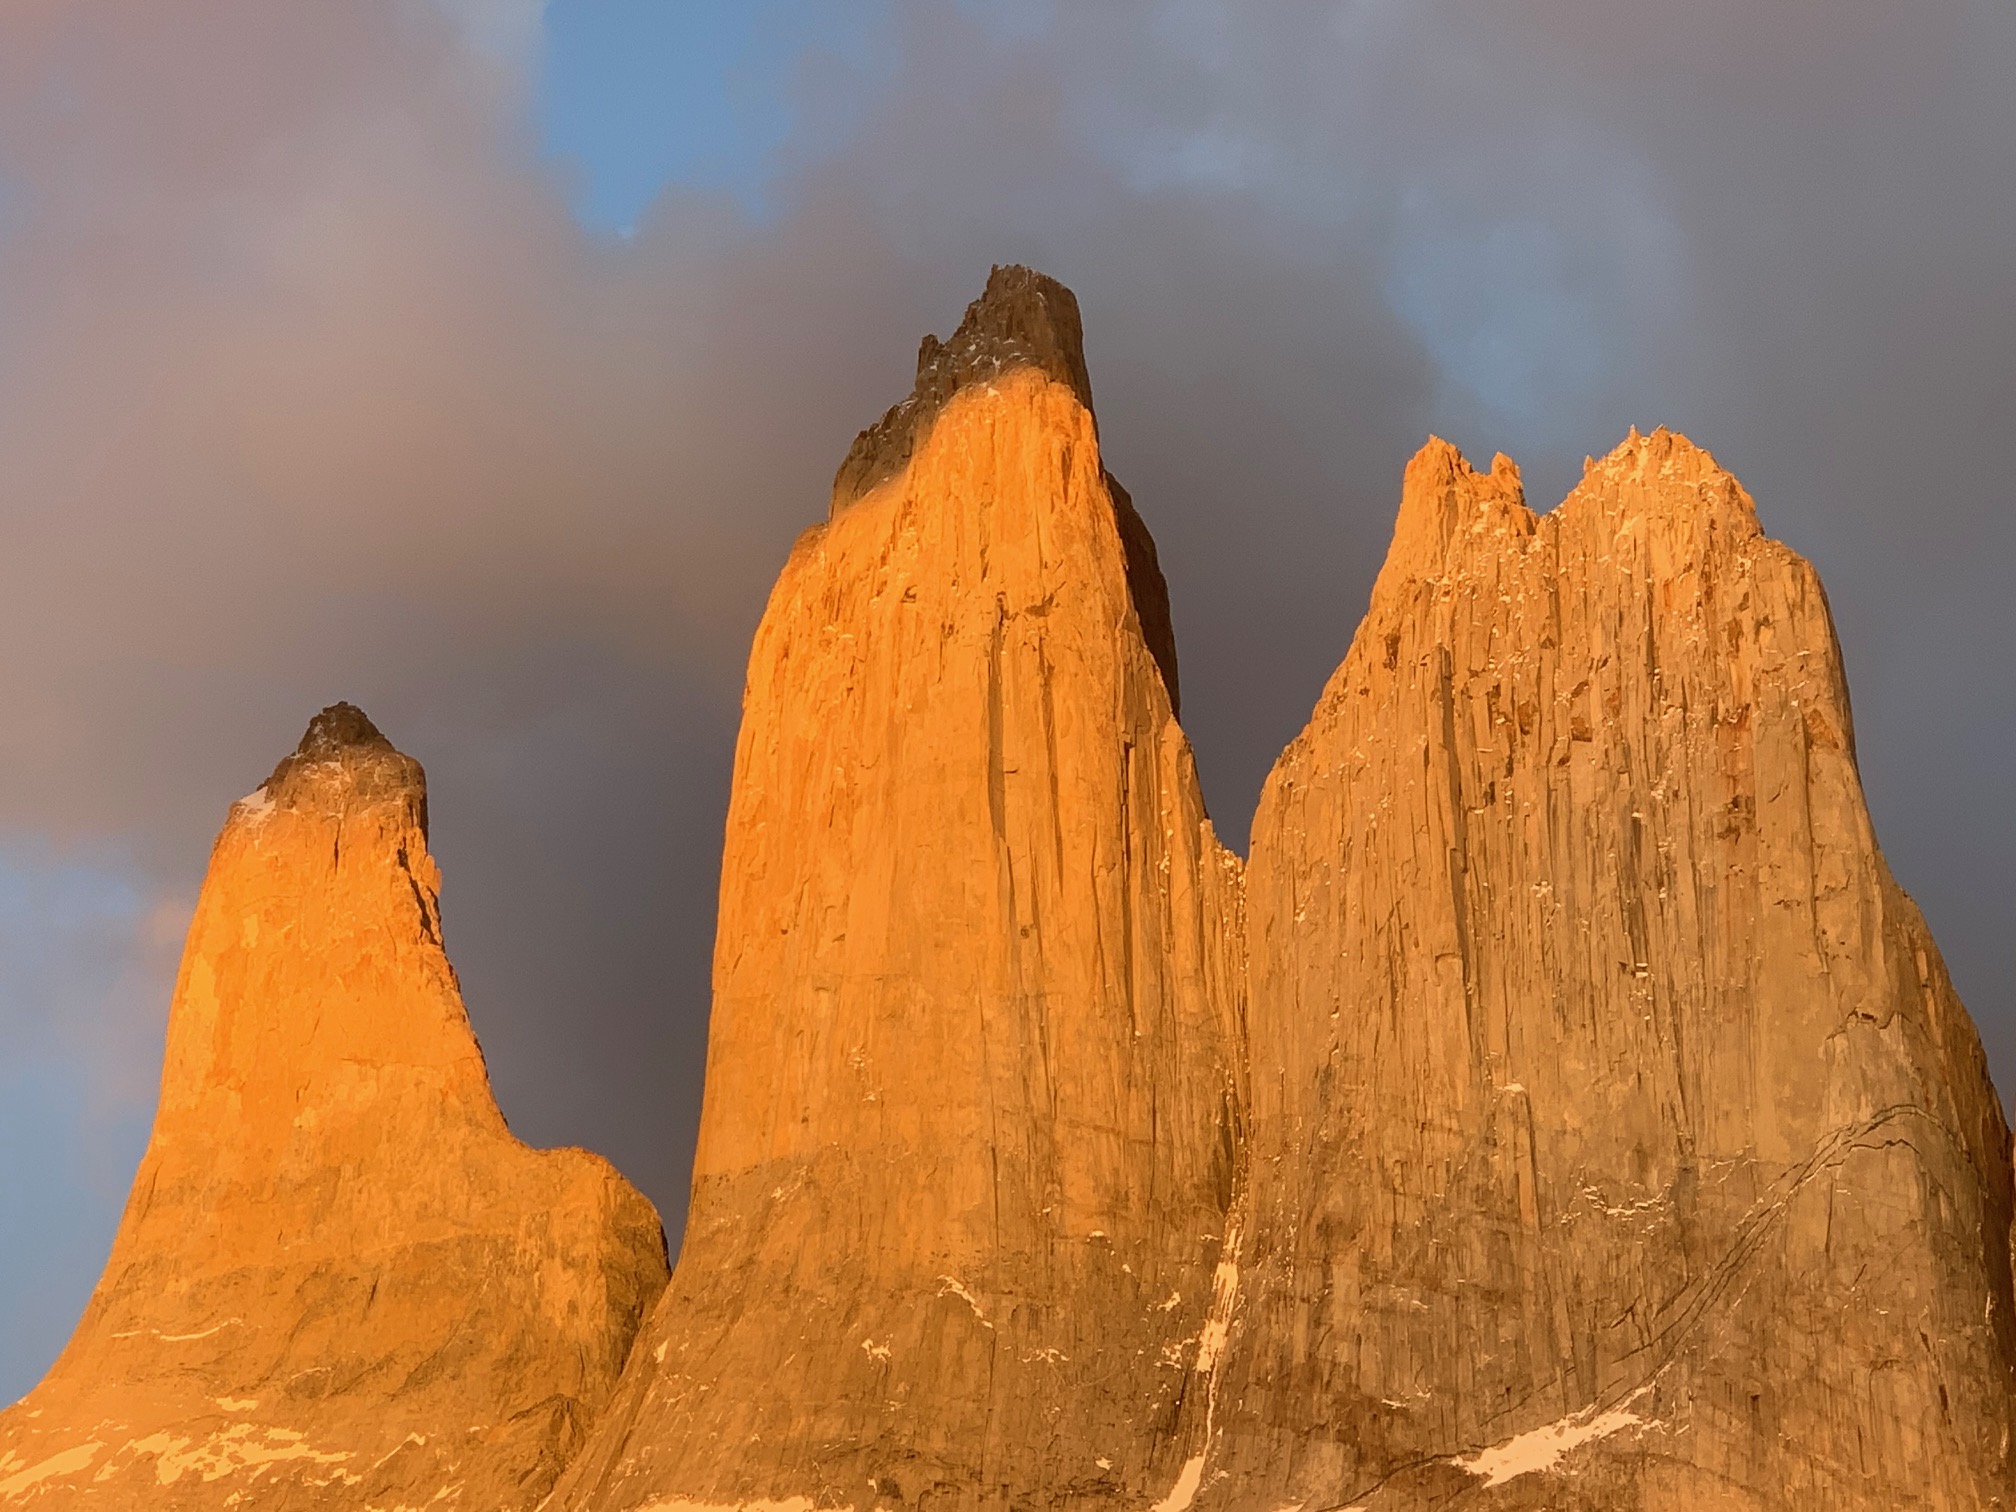
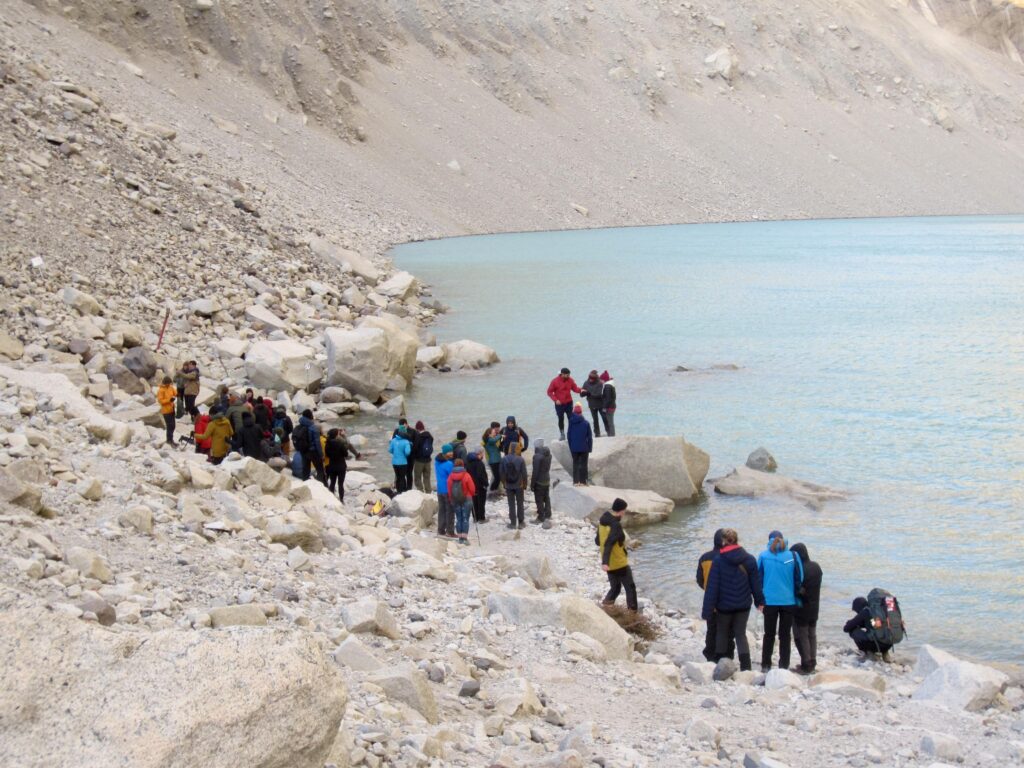
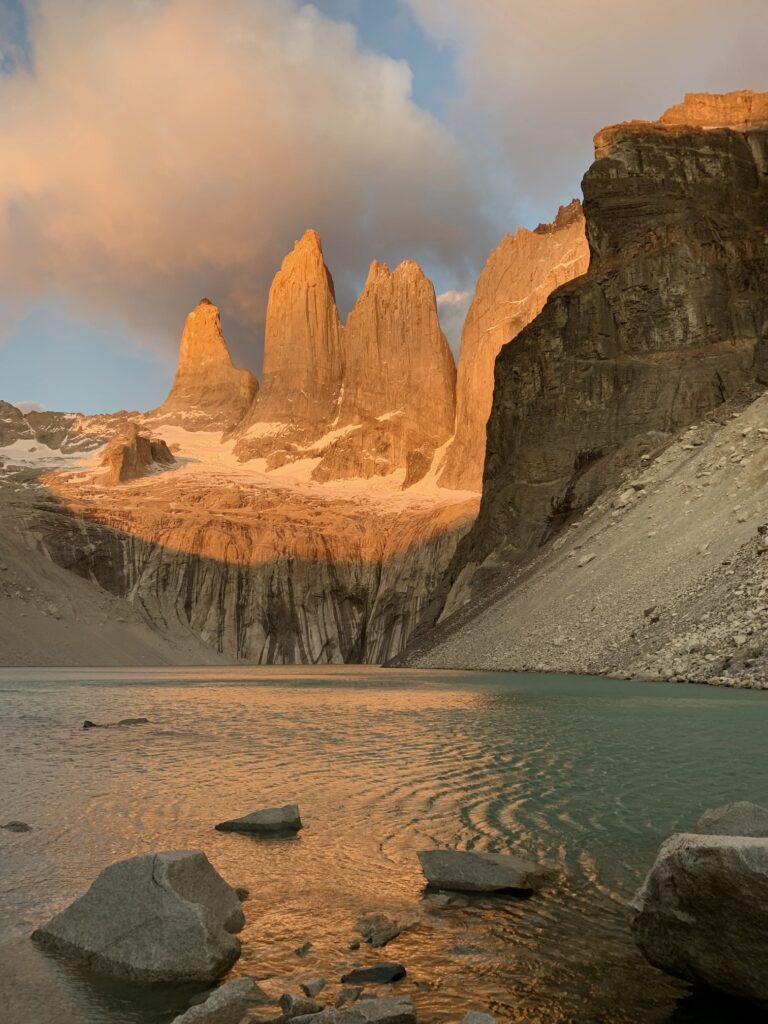
Eileen and I eventually found our way to the shore of Lake Torres at 7:10am, just as the first hint of dawn turned the western sky from black to gray. Along with 50 or 60 other visitors, we bundled up and waited for the eagerly anticipated sunrise. By 8:00am, the three iconic granite towers comprising the Torres del Paine were fully visible in the morning light, but clouds obscured the sun and canceled the alpenglow that truly brings these towers to life. Oh well, they were still visually striking. The lakeside crowd finished taking pictures, then began preparing to leave.
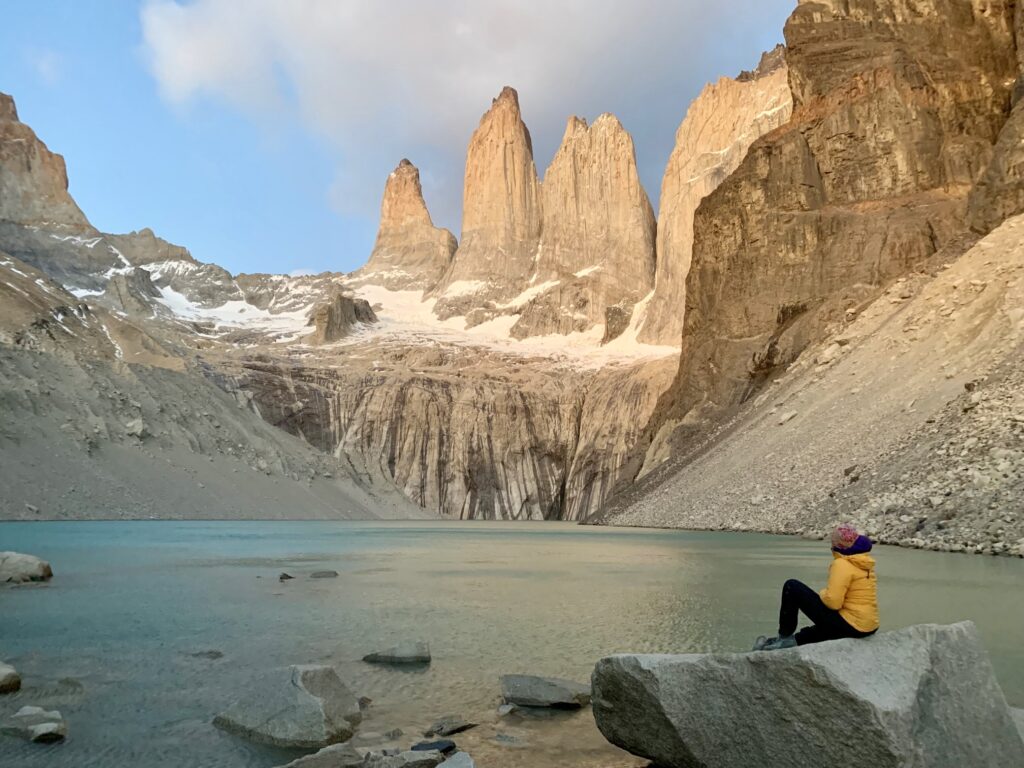
Then, very suddenly and unexpectedly, the granitic towers turned to a vivid gold color! This splendorous event re-energized the crowd, and a party atmosphere filled the lake basin for nearly an hour.


Around 9:00am, there was a mass exodus from the lake. Eileen and I returned to Chileno Camp, where we enjoyed post-sidetrip drinks in the lodge with our “O-W” comrades.
Day 8 (PM): Chileno Camp to Torres Welcome Center
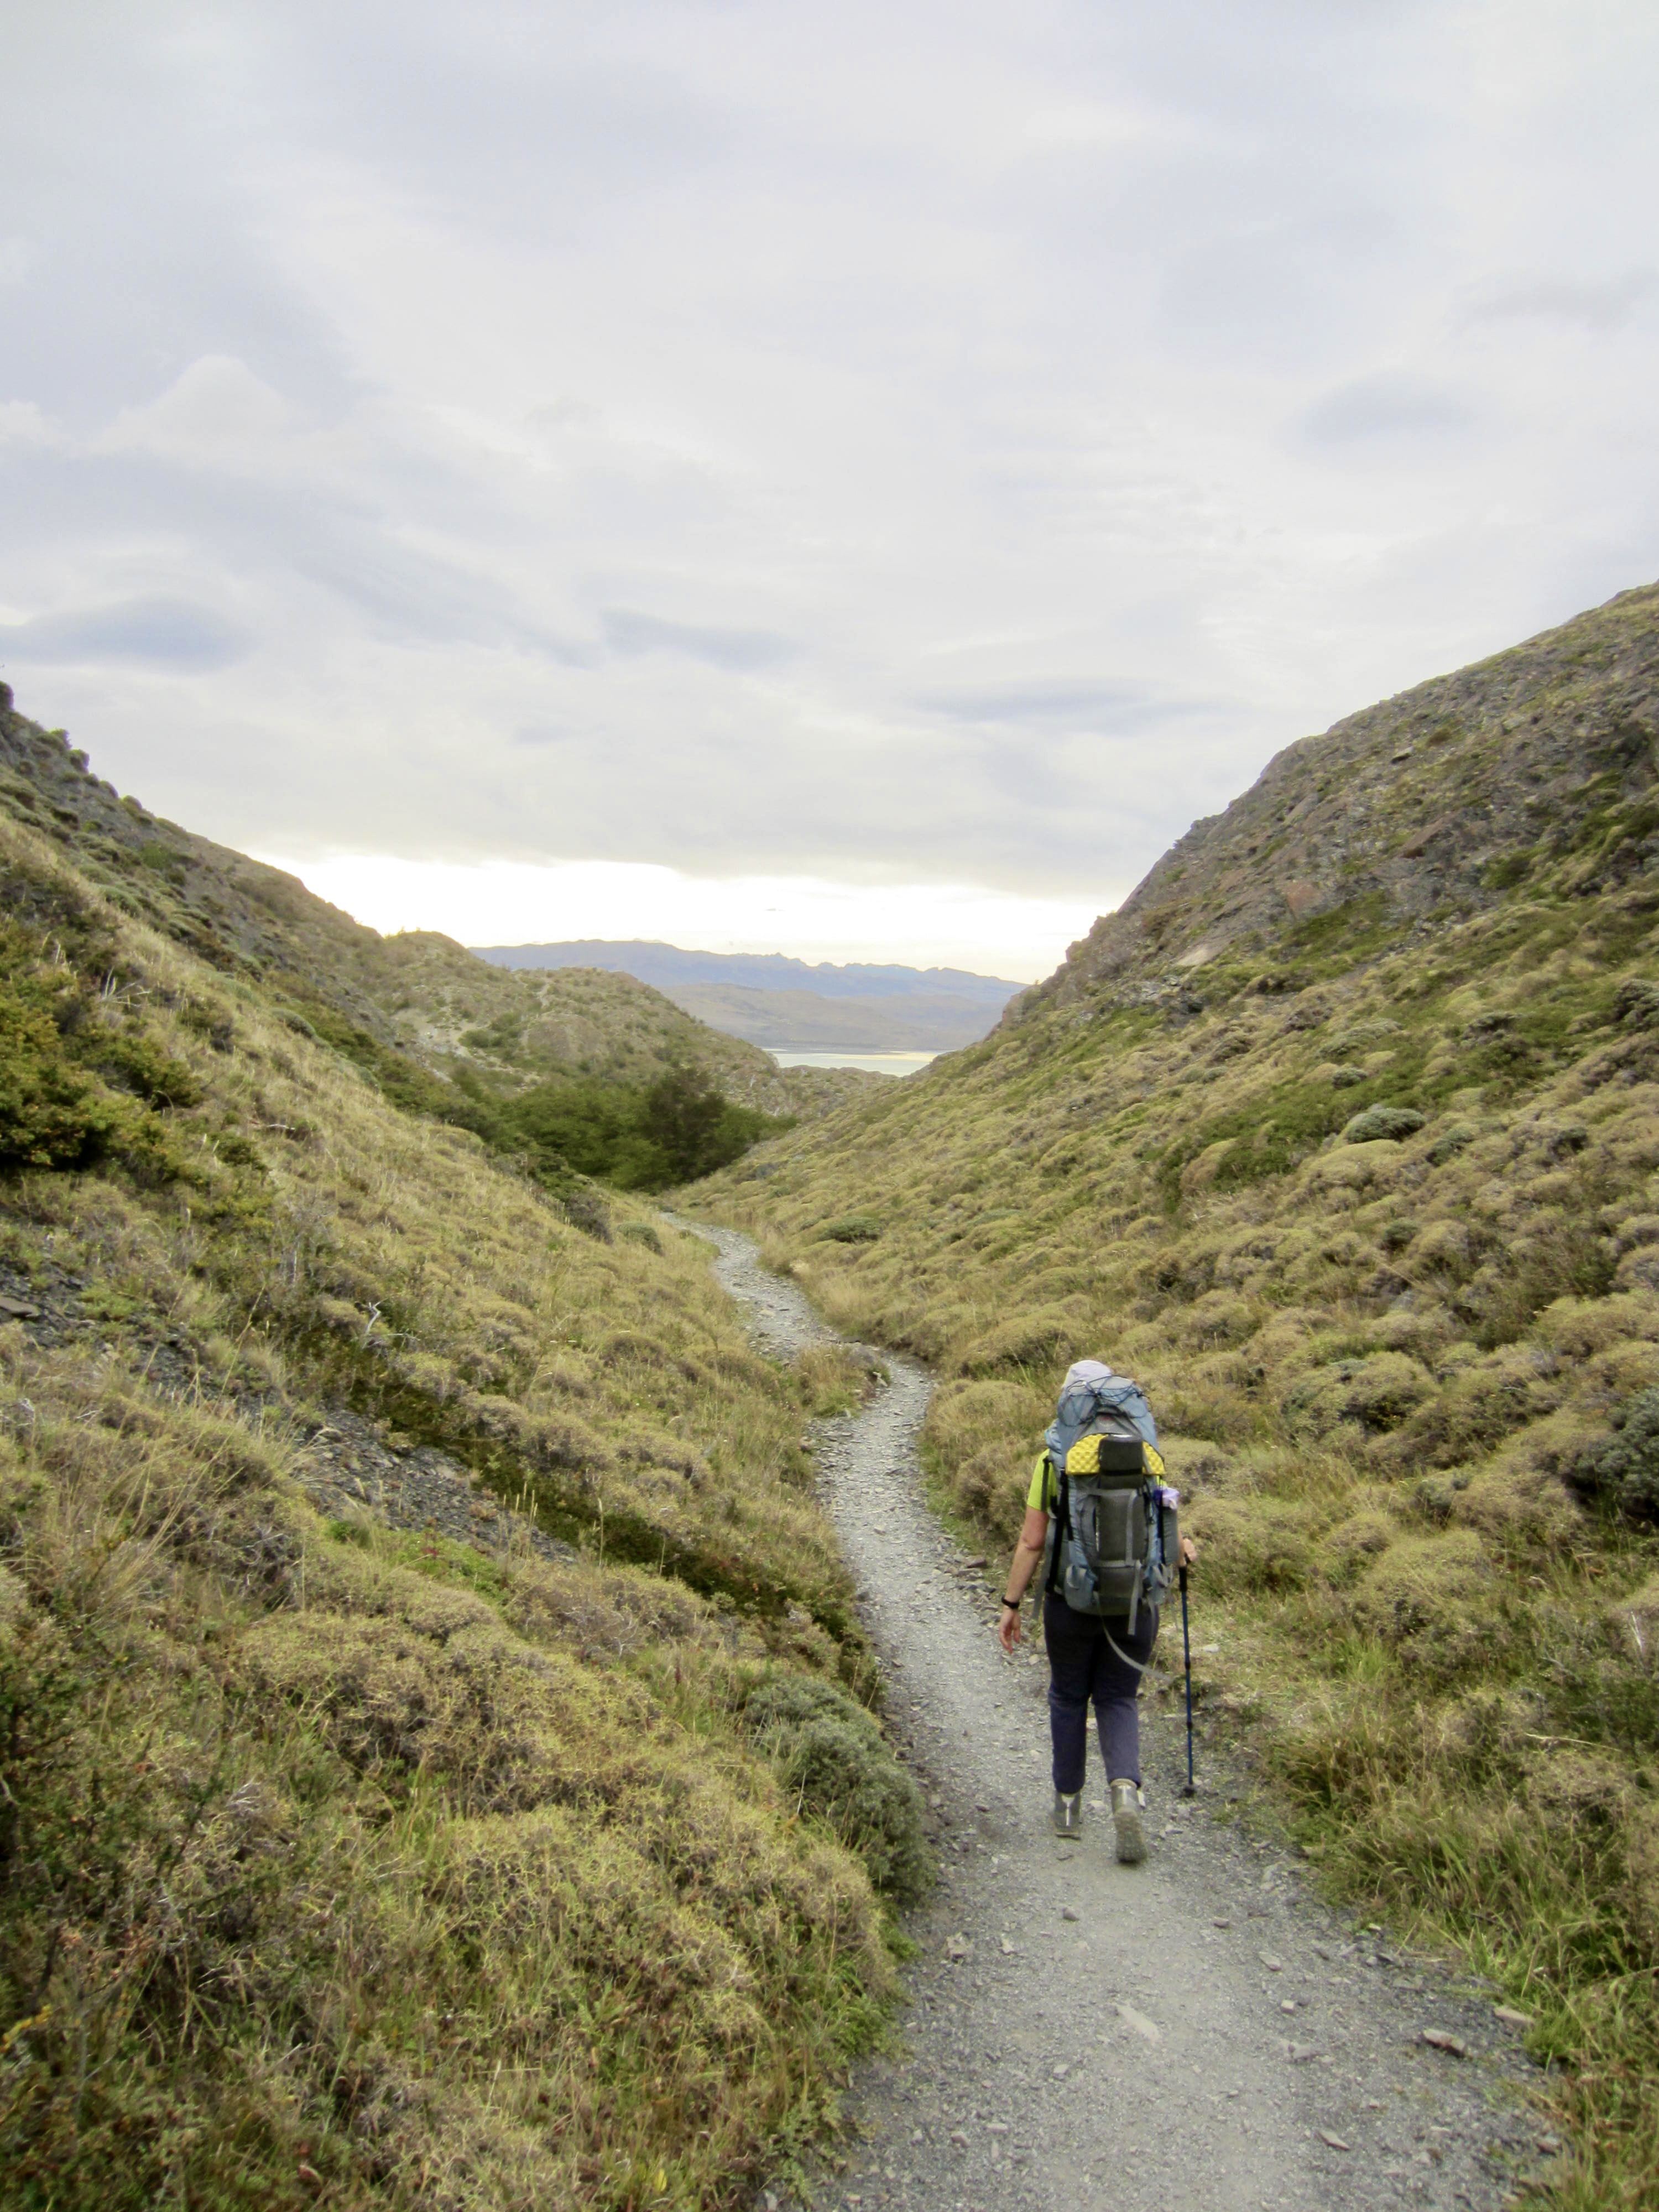
Shortly before noon, Eileen and I shouldered our backpacks and headed down the trail to Torres Welcome Center. It was somewhat shocking to pass several hundred day-hikers coming up the trail. If we held any doubt about the popularity of Torres Base Viewpoint, the pilgrimage that we witnessed here put those doubts to bed!
After crossing over Windy Pass, we descended the steep and badly eroded trail into the Paine River Valley. An easterly march along the valley floor took us to Torres Welcome Center, where we ended our fantastic “O-W” Circuit with the remainder of our peloton.
…
Approximate daily stats: 7.9 hrs elapsed; 8.9 mi / 14.3 km traveled; 3400 ft / 1040 m gained; 4350 ft / 1330 m lost.
Gear Comments
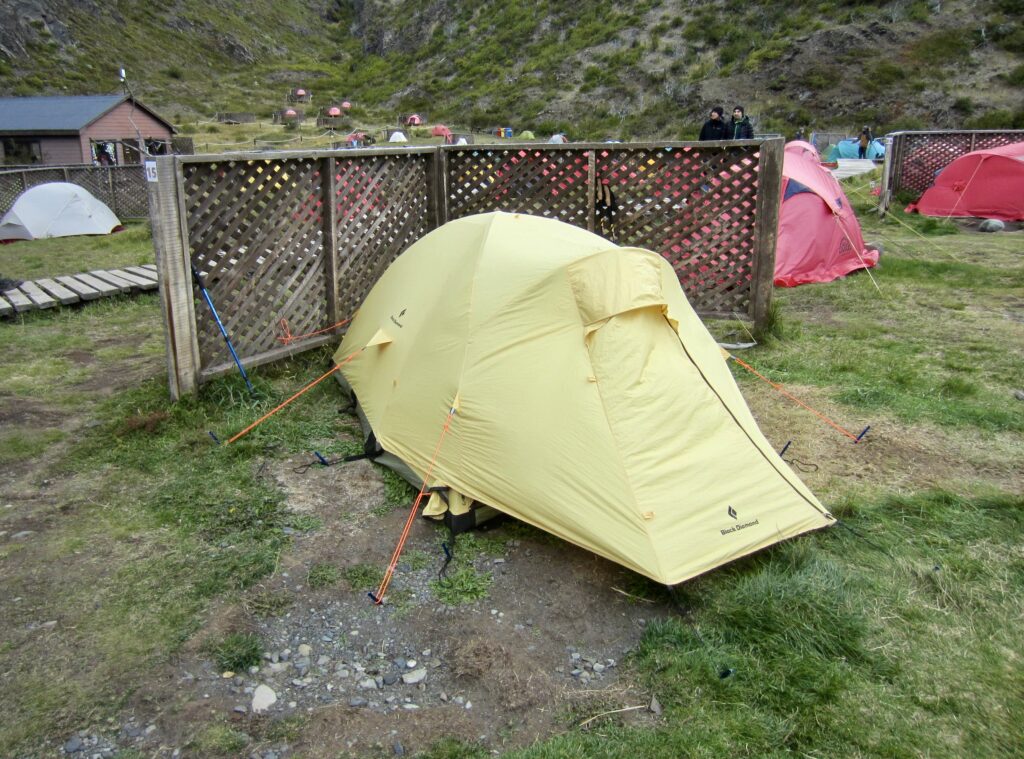
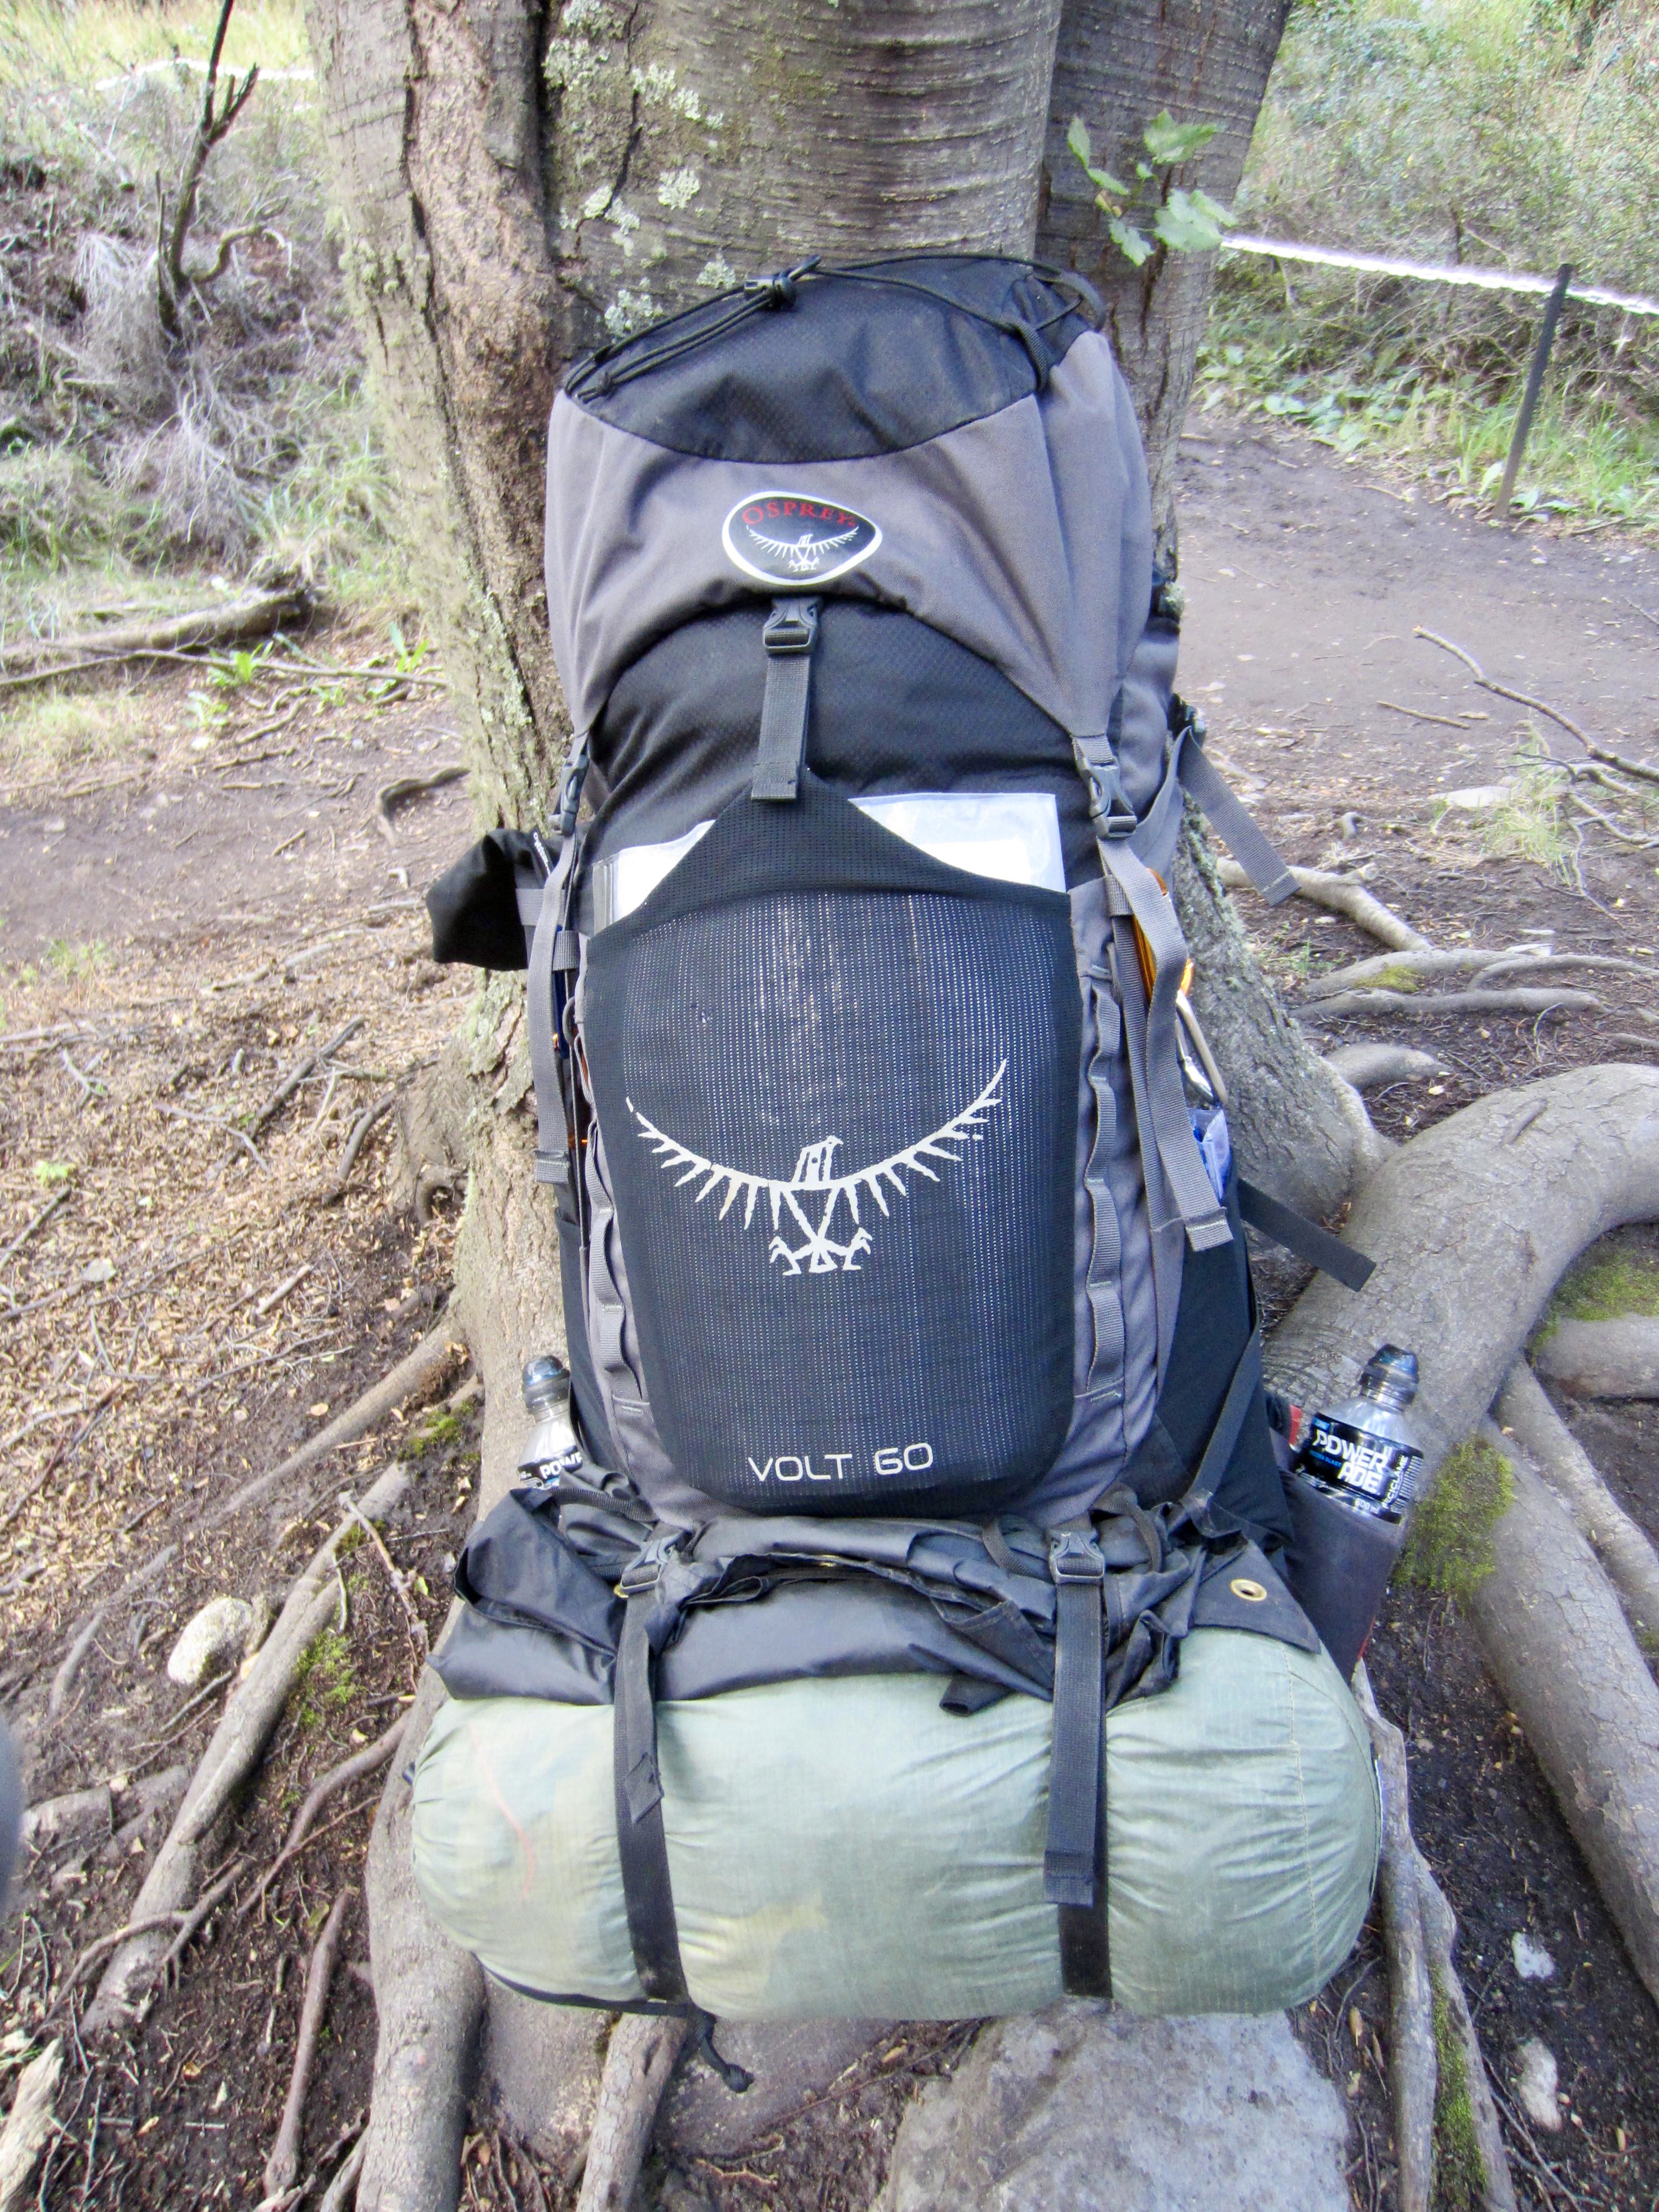
Patagonia is famous for its extremely strong winds, so all tents, clothing, and other gear must be designed, modified, or managed to handle such conditions. There are countless tales of trekkers who have had unsecured gear blown away by sudden gusts, and I can imagine that all of this lost gear has collected into a giant “raft” floating around the South Pacific Ocean!
A four-season tent is desirable, but a three-season tent will suffice as long as it has plenty of staking points and guylines. Eileen and I used a three-season, single-wall Black Diamond tent rigged with eight ground-level staking points and six additional guylines. It held up to the wind very nicely but later faltered in a heavy rain—a harsh reminder that Patagonia is also known for its rain.
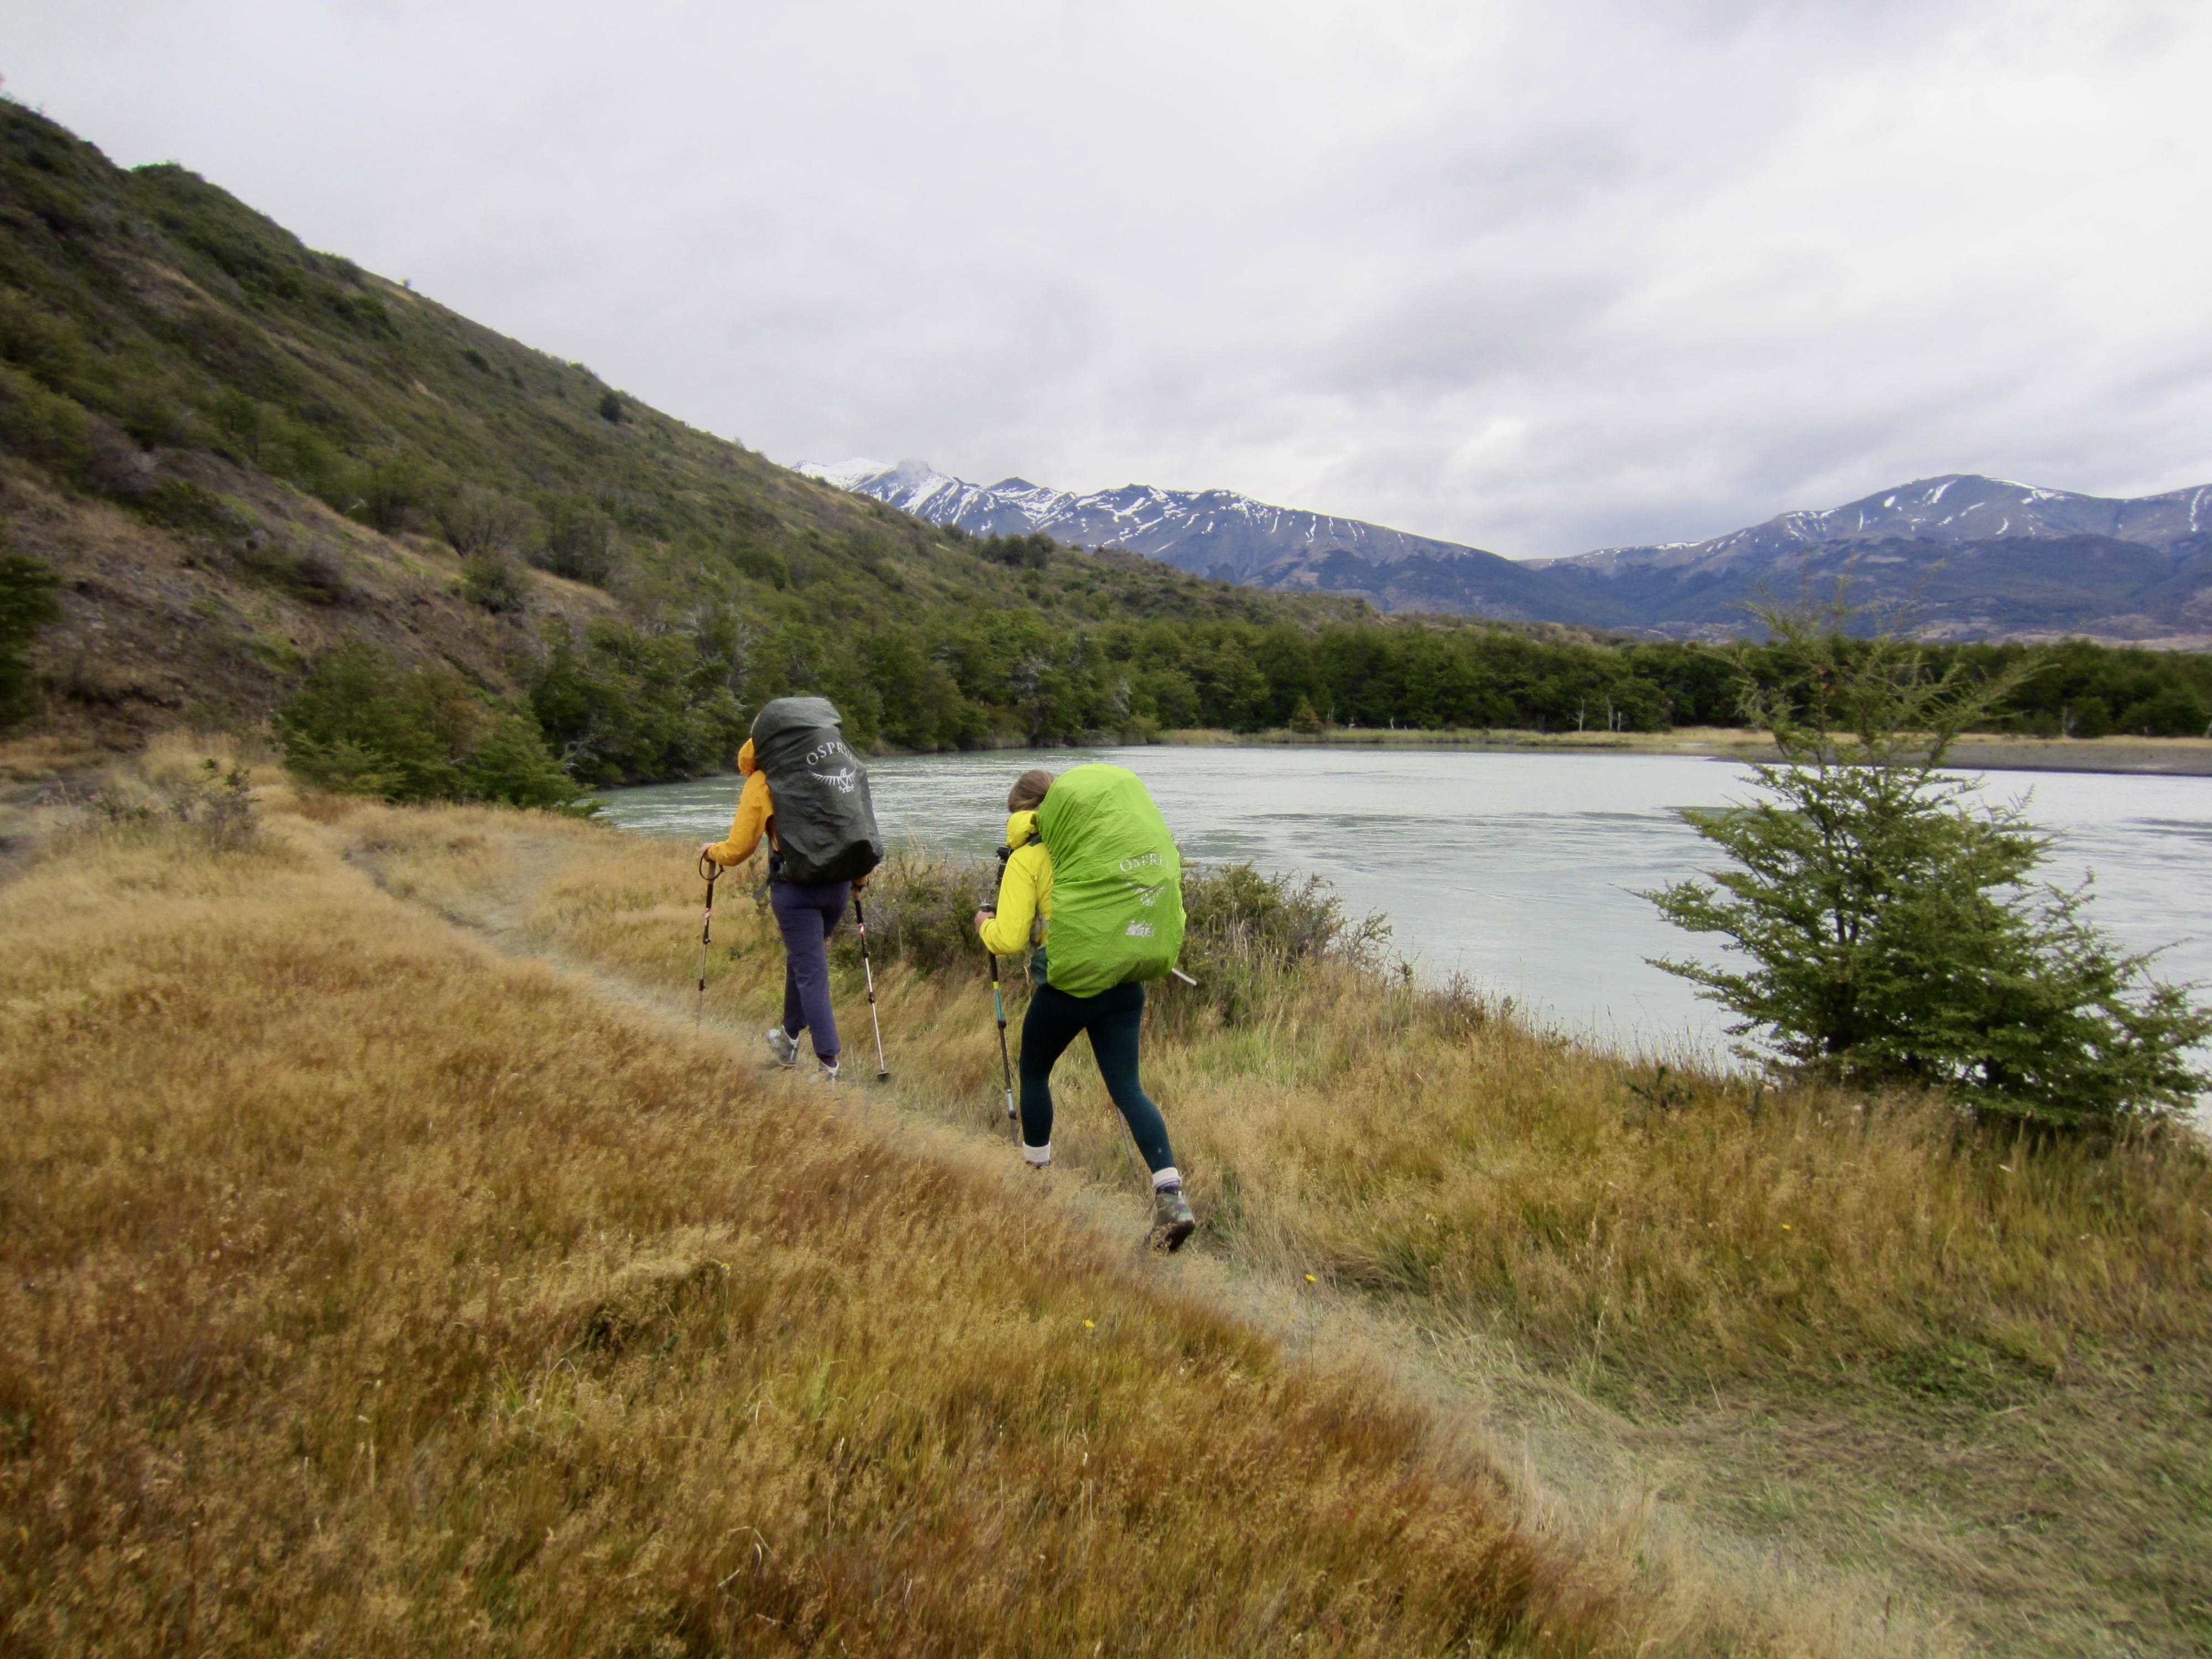
Backpack rain covers are very beneficial for keeping gear dry on rainy days. Beware, though, that a rain cover must be securely attached to the backpack, lest it be whipped away by a strong wind (I learned this the hard way). Likewise, billed hats are particularly susceptible to wind gusts, so they must be attached to one’s head in some fashion. My personal solution was to wear a hooded windcheater at all times and to be ready to quickly pull my hood up at any moment. In fact, I found that a good windcheater was my most useful clothing item.
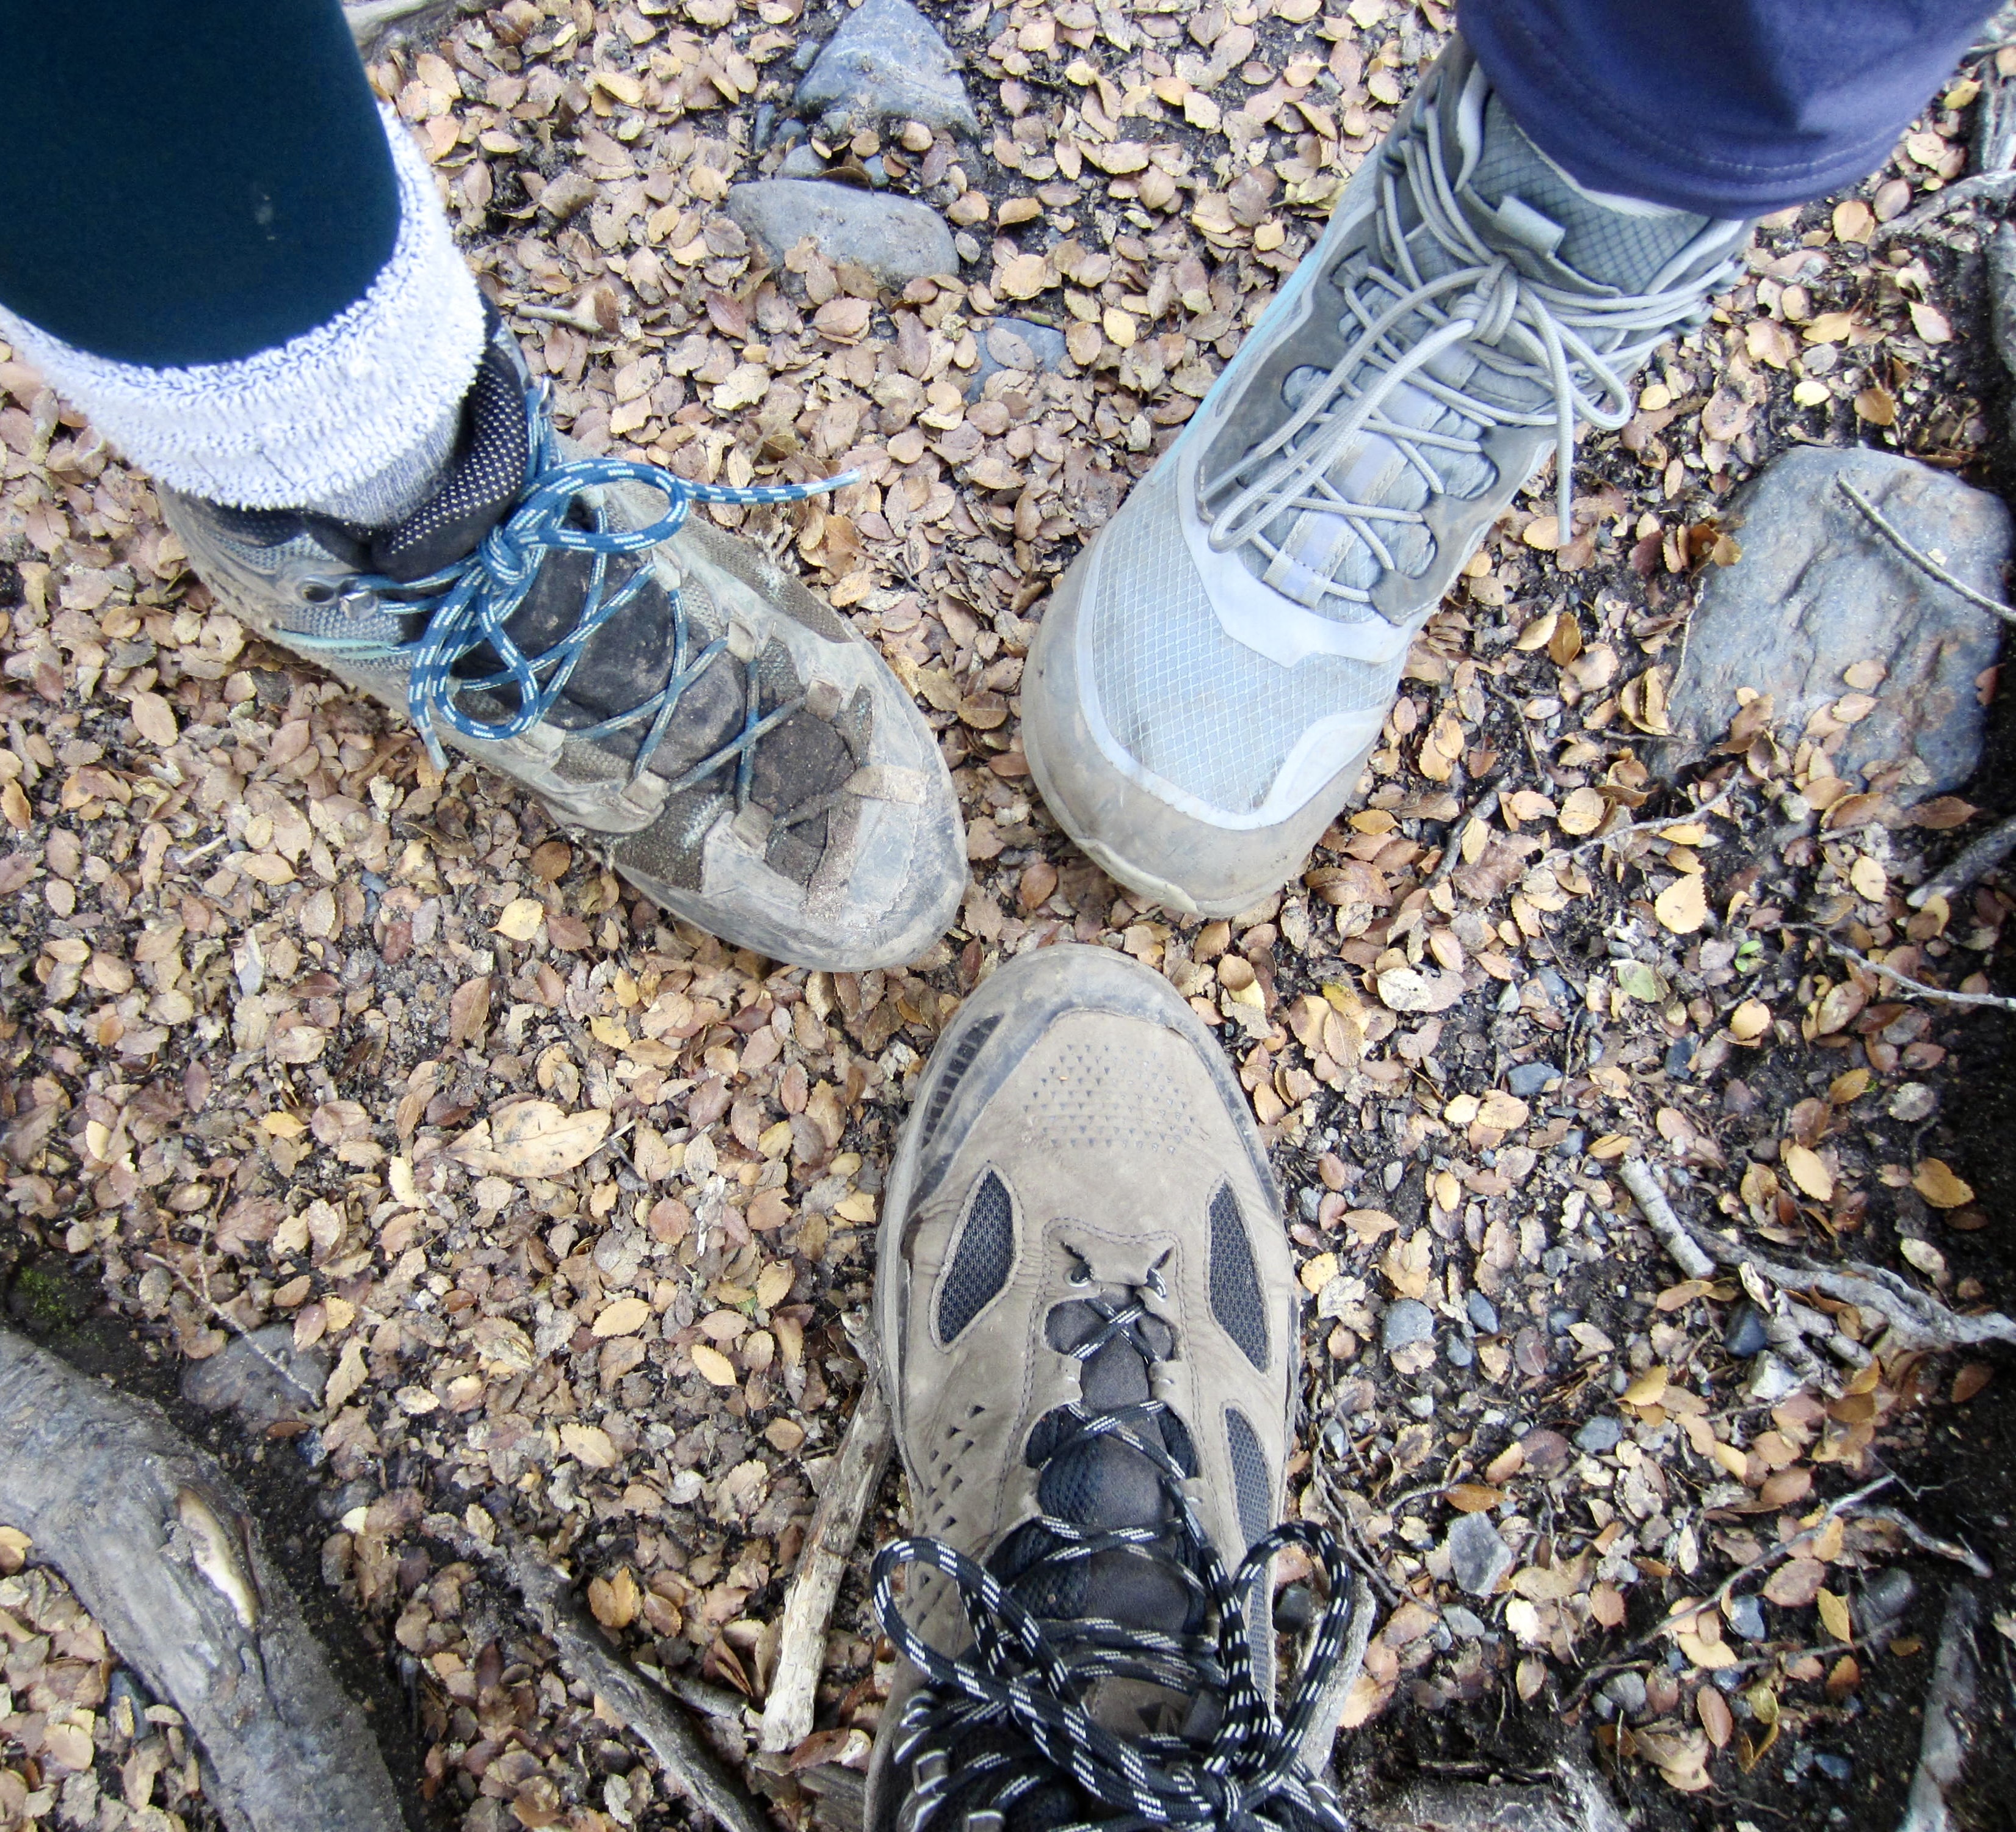
Footwear is mostly a matter of personal preference but must be able to handle a wide range of trail conditions, including slippery roots, loose rocks, muddy bogs, and water puddles. Low-top shoes are not recommended. In our group, Eileen wore lightweight hiking boots, I wore midweight hiking boots, and Brooke wore lightweight mountaineering boots. We were each happy with our respective choice. In addition, we all took camp shoes to wear in the huts, lodges, and kitchens.
For a complete discussion of gear recommendations and requirements for the “O-W” Circuit, as well as a detailed packing list, see my separate page here:
>>> Gear Comments & Packing List for “O-W” Trekking Circuit.
…
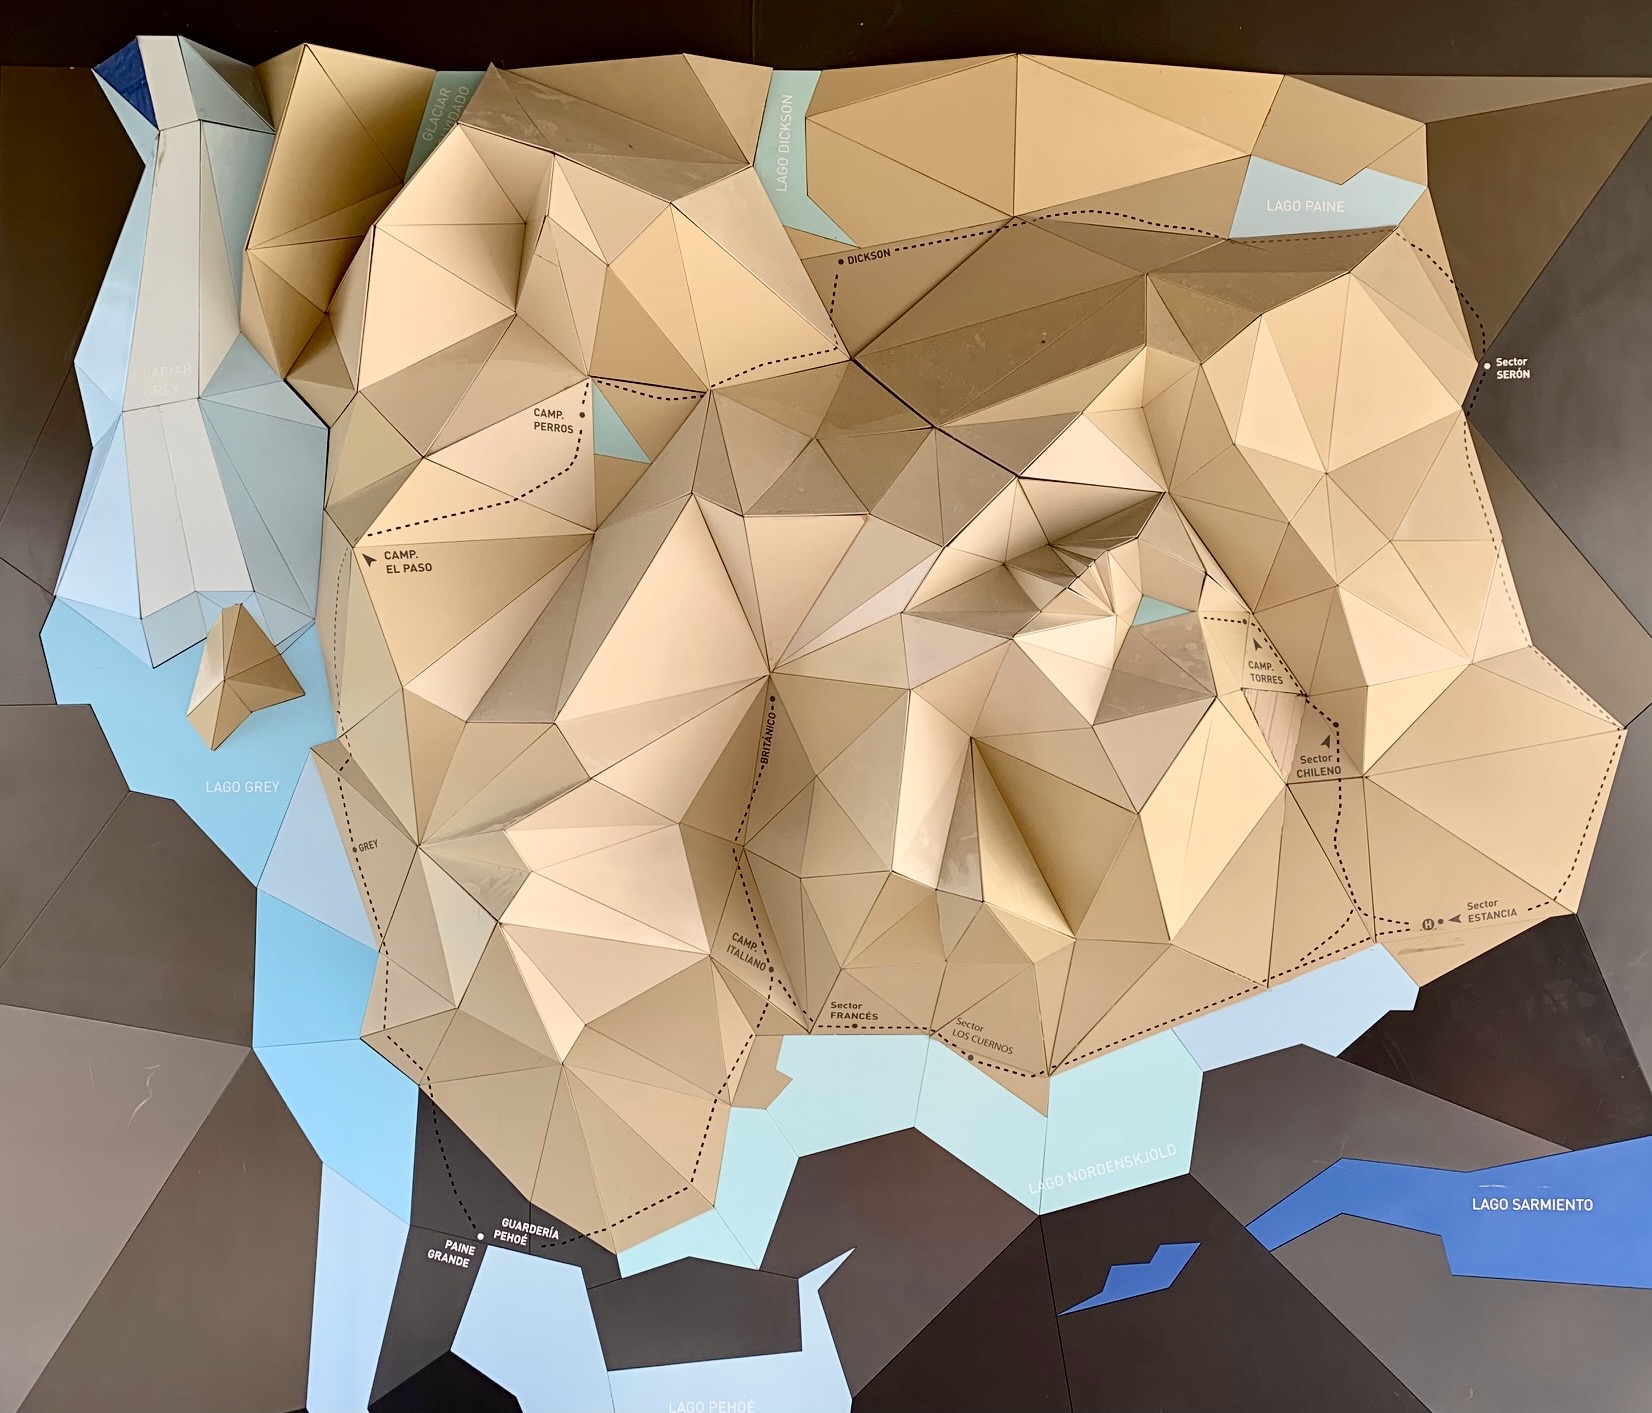
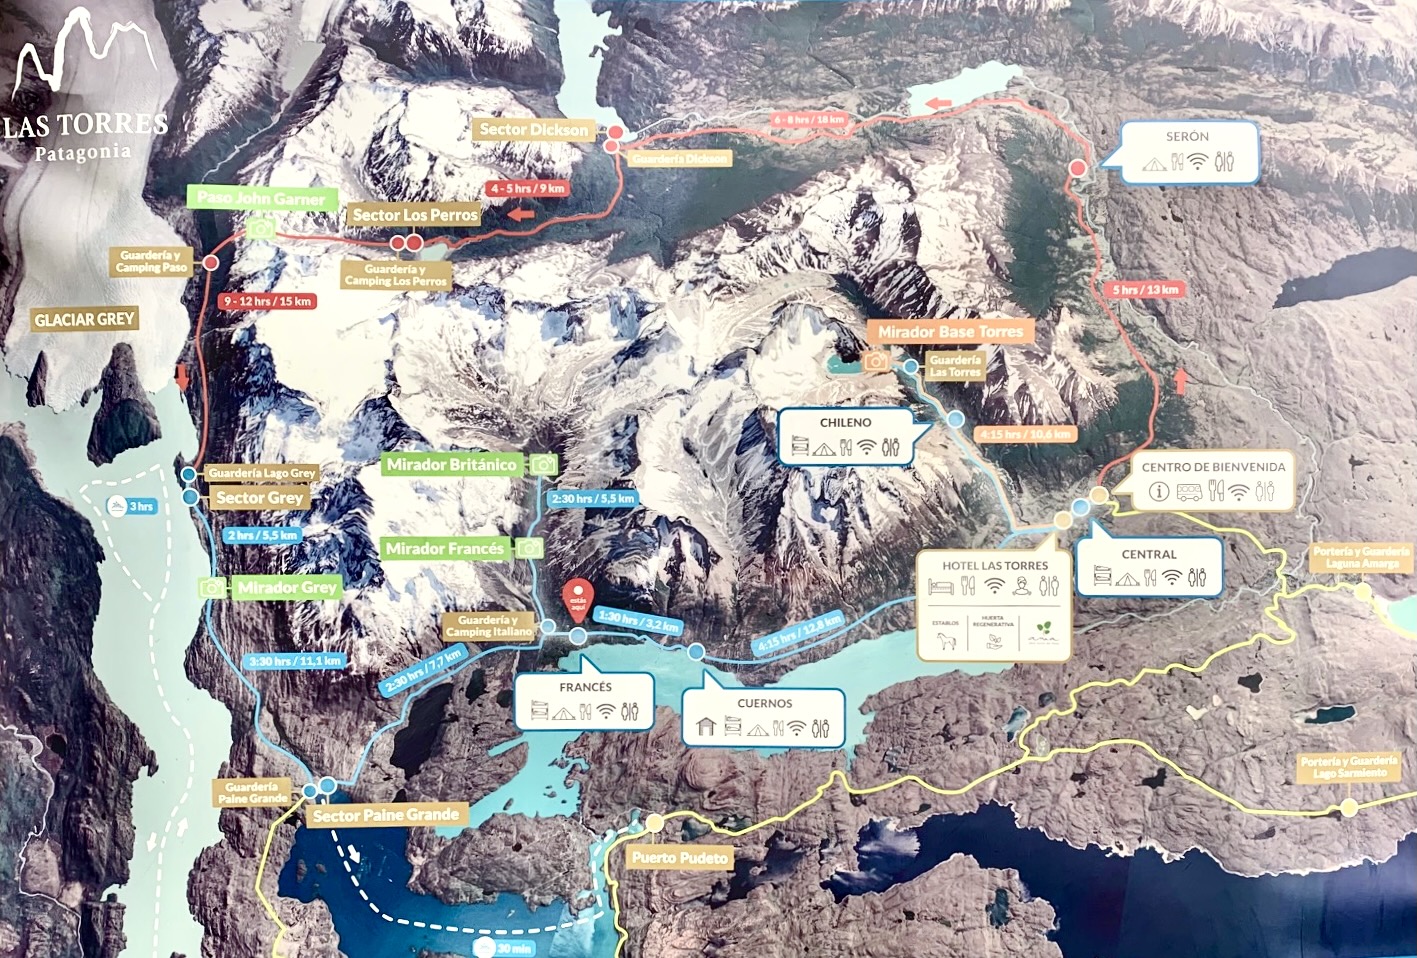
Route Map & Profiles
…
…
…
…
…
…
…
…
…
…
Photo Gallery
Click to enlarge…