Originally Posted: May 2022
Updated: October 2025
Rug-Making Methods, Shapes, Materials & Procedures
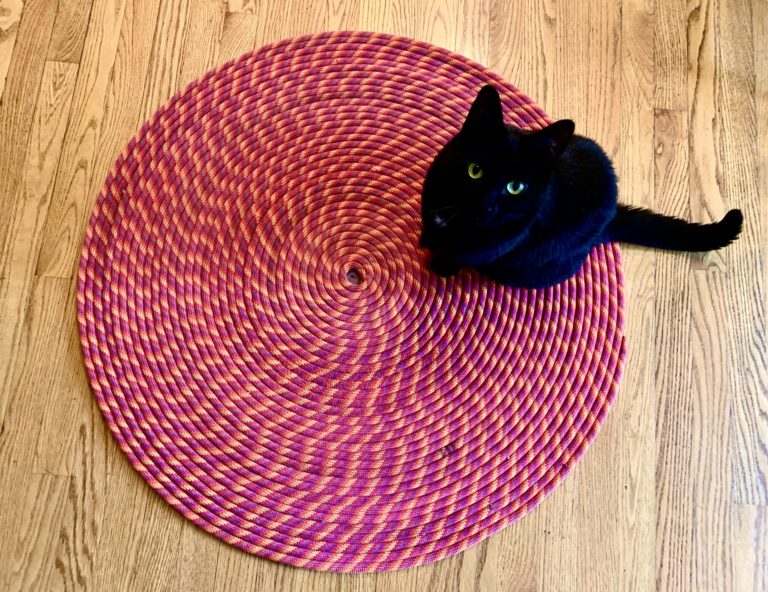
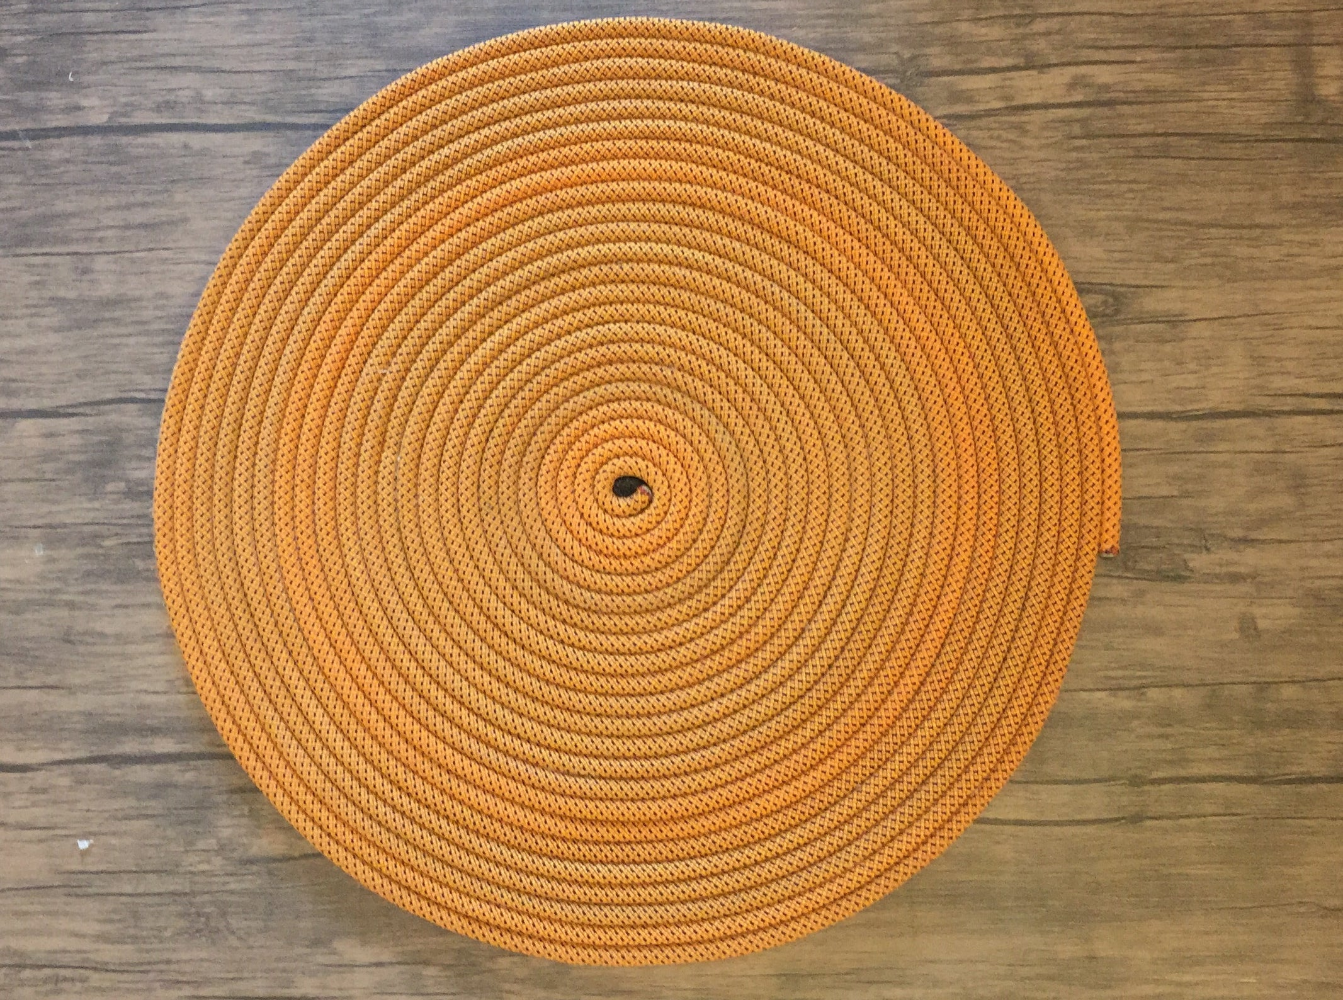
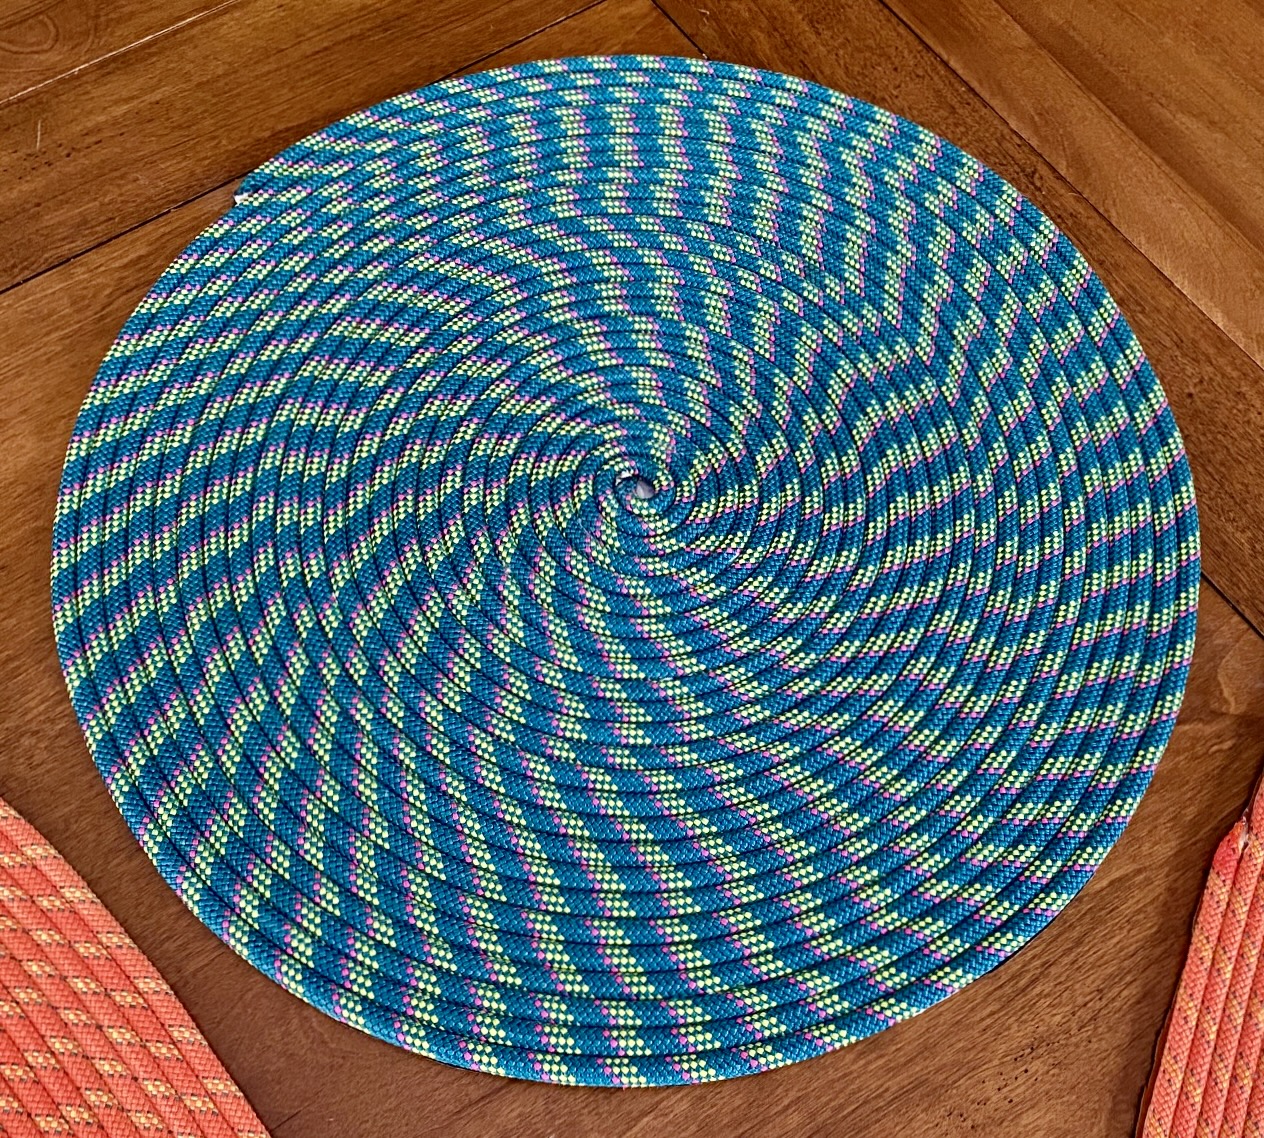
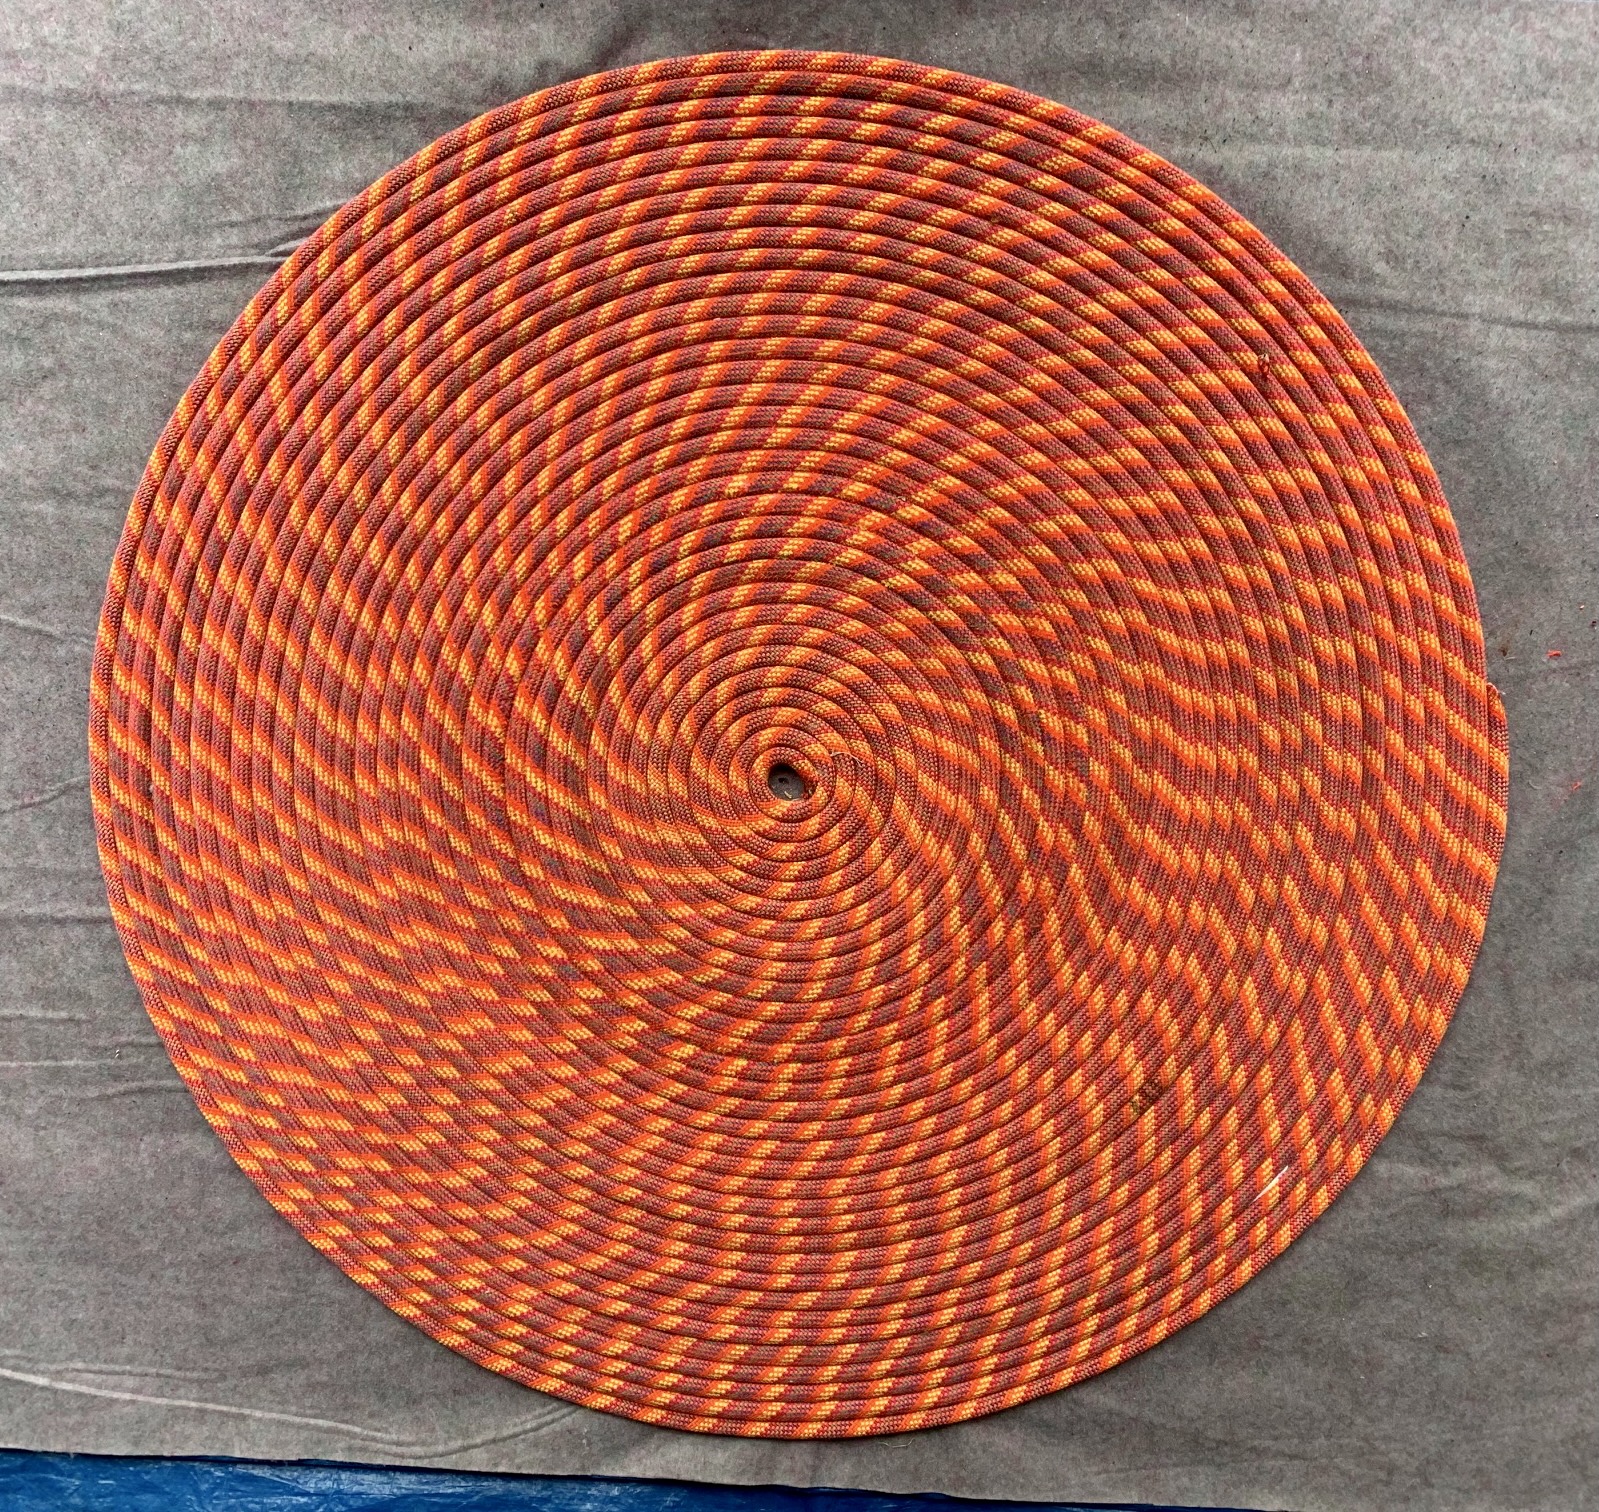
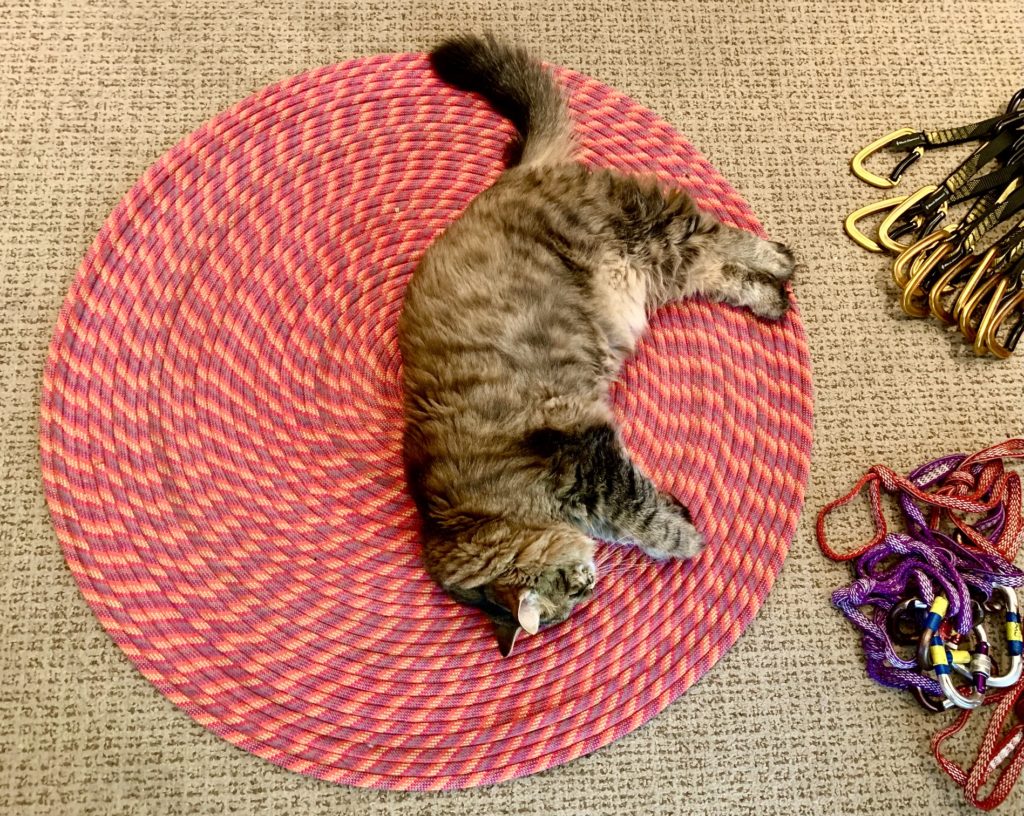
Round Spiral Climbing-Rope Rugs
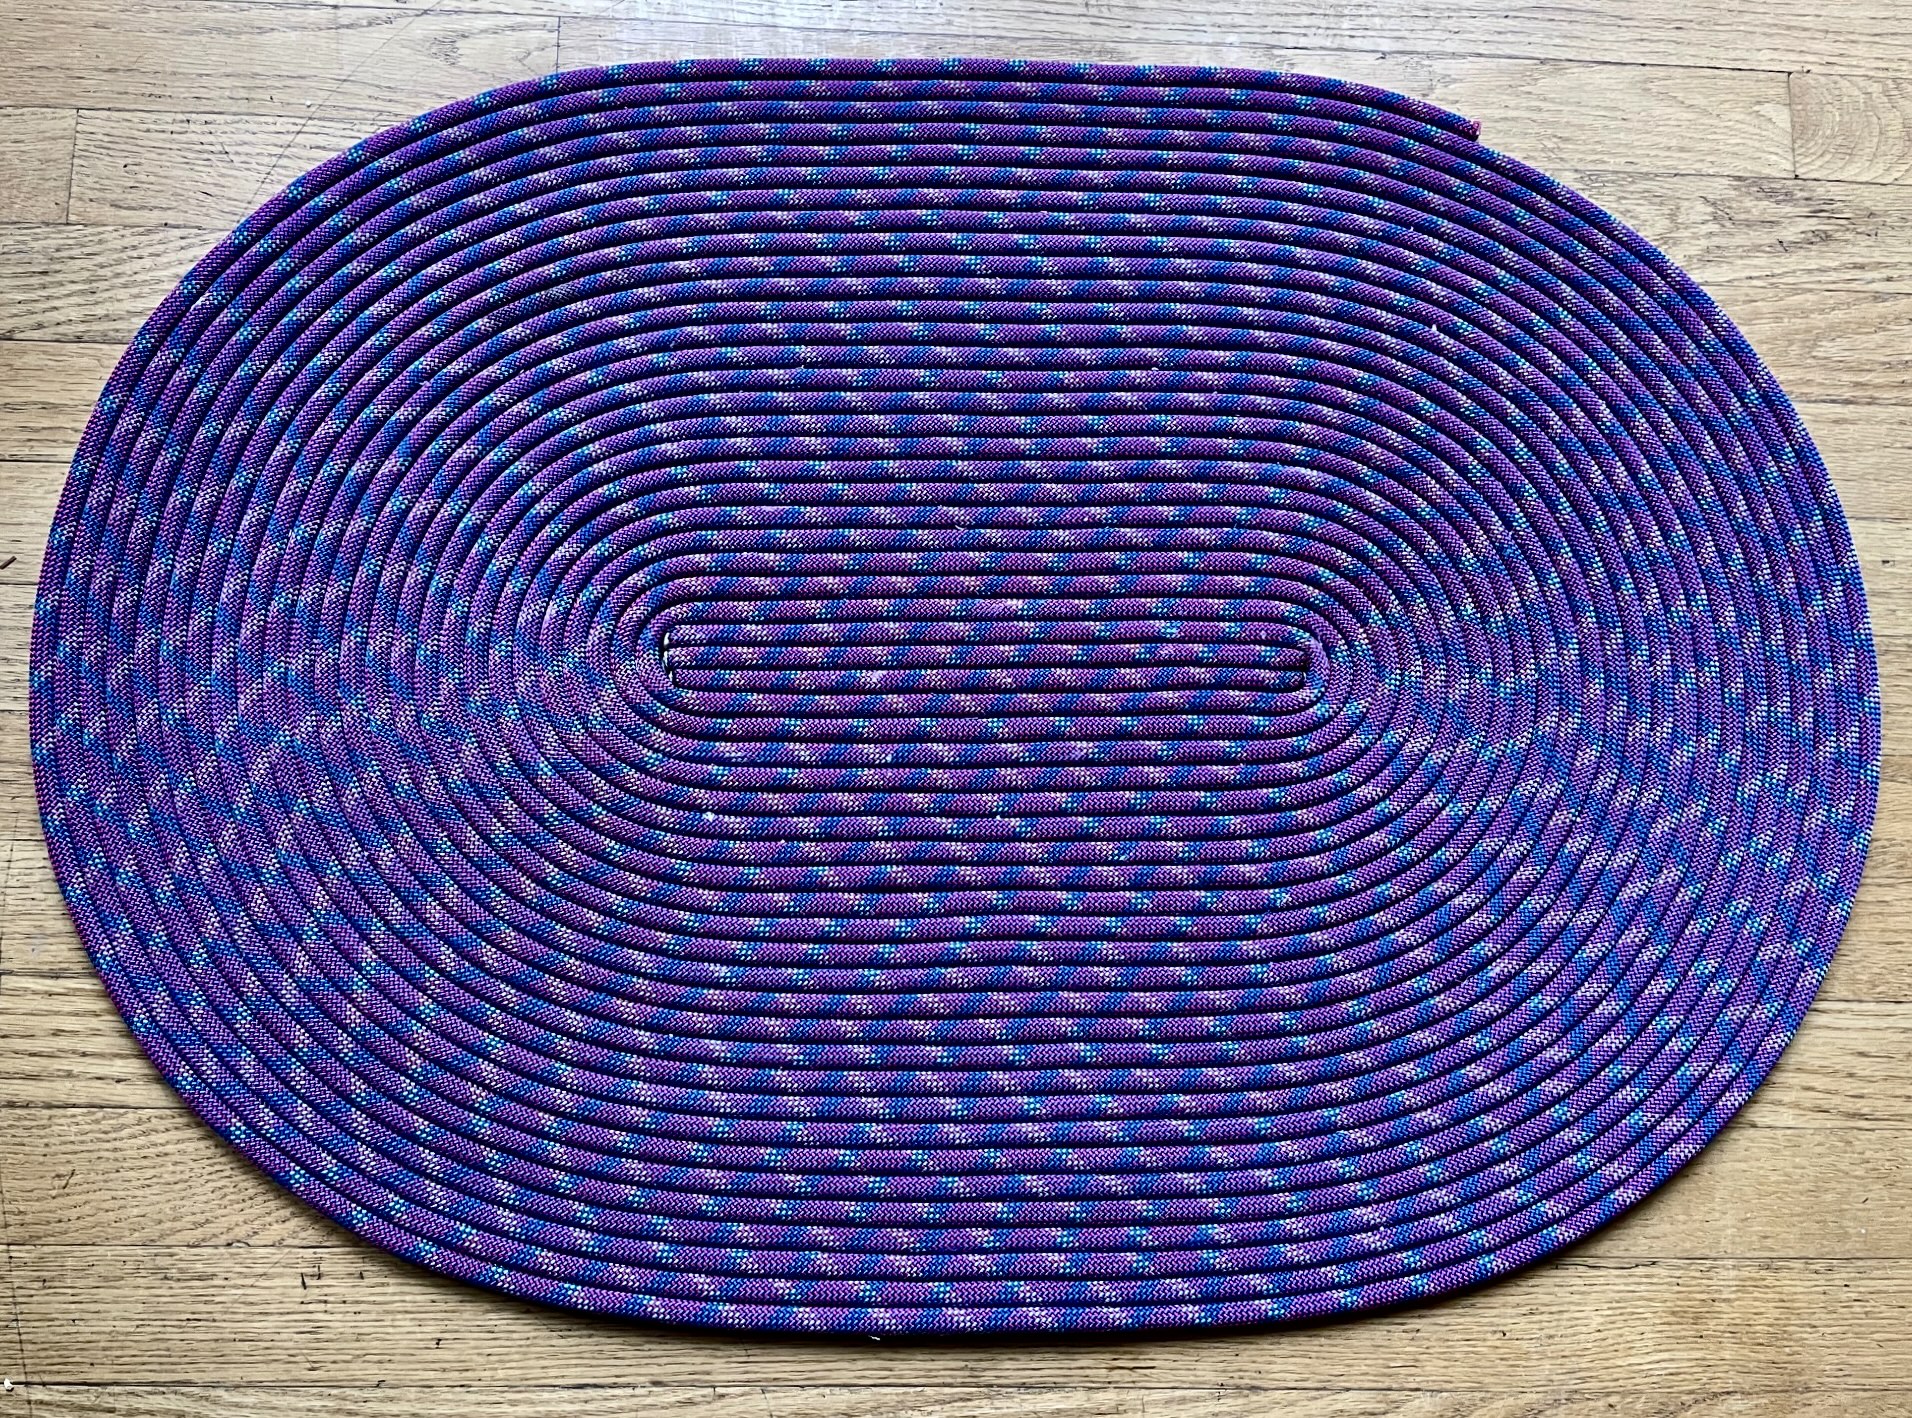
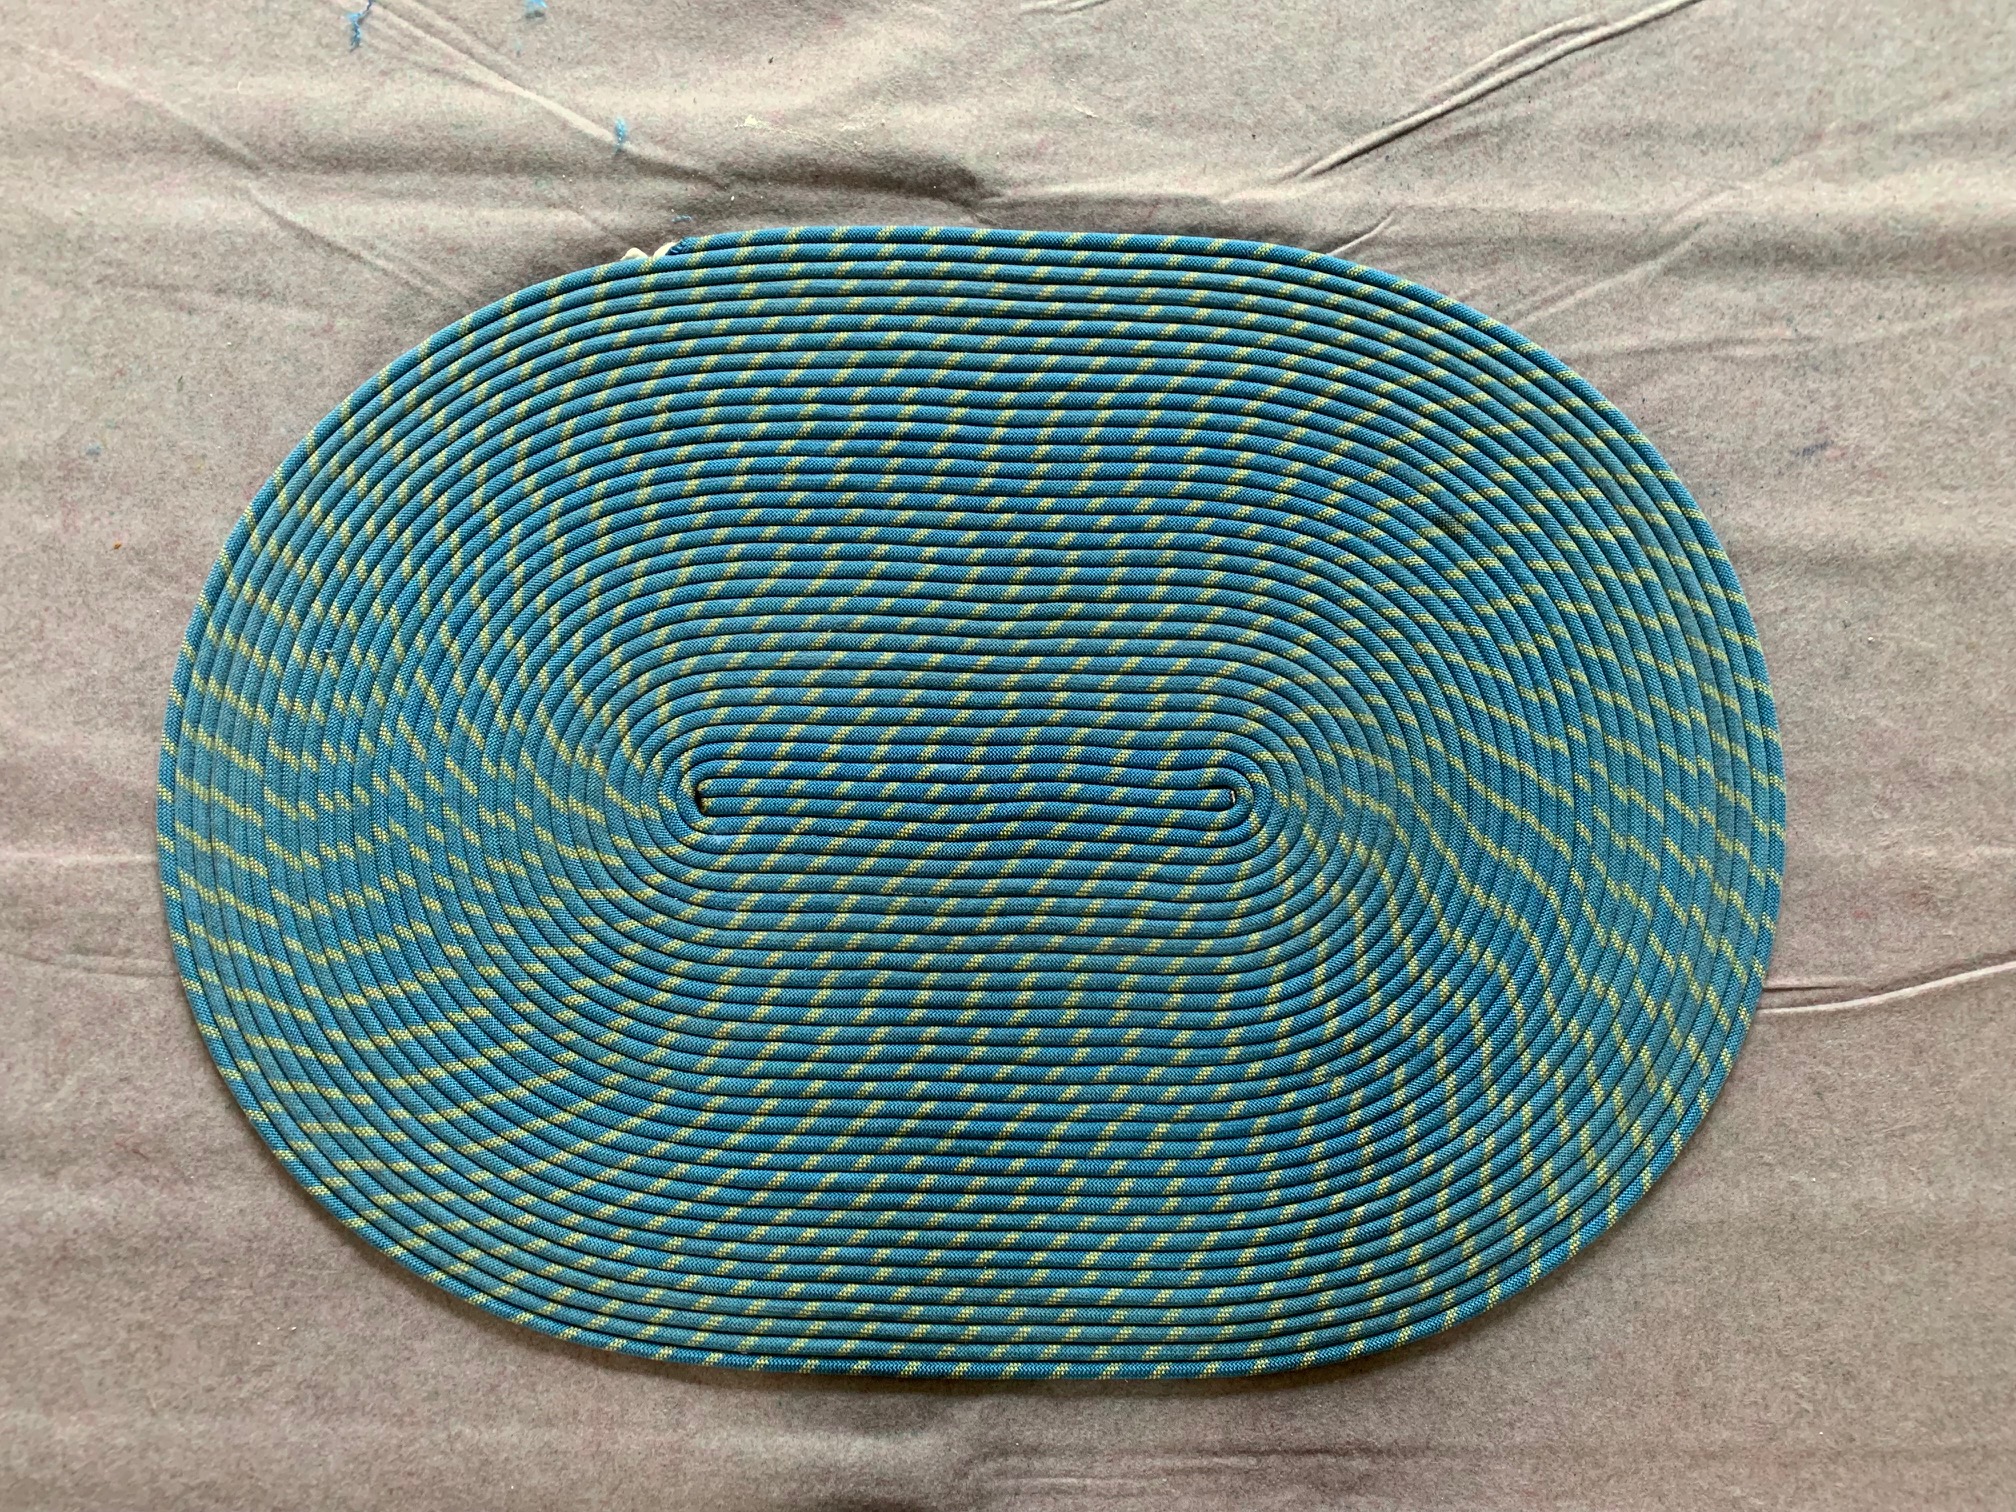
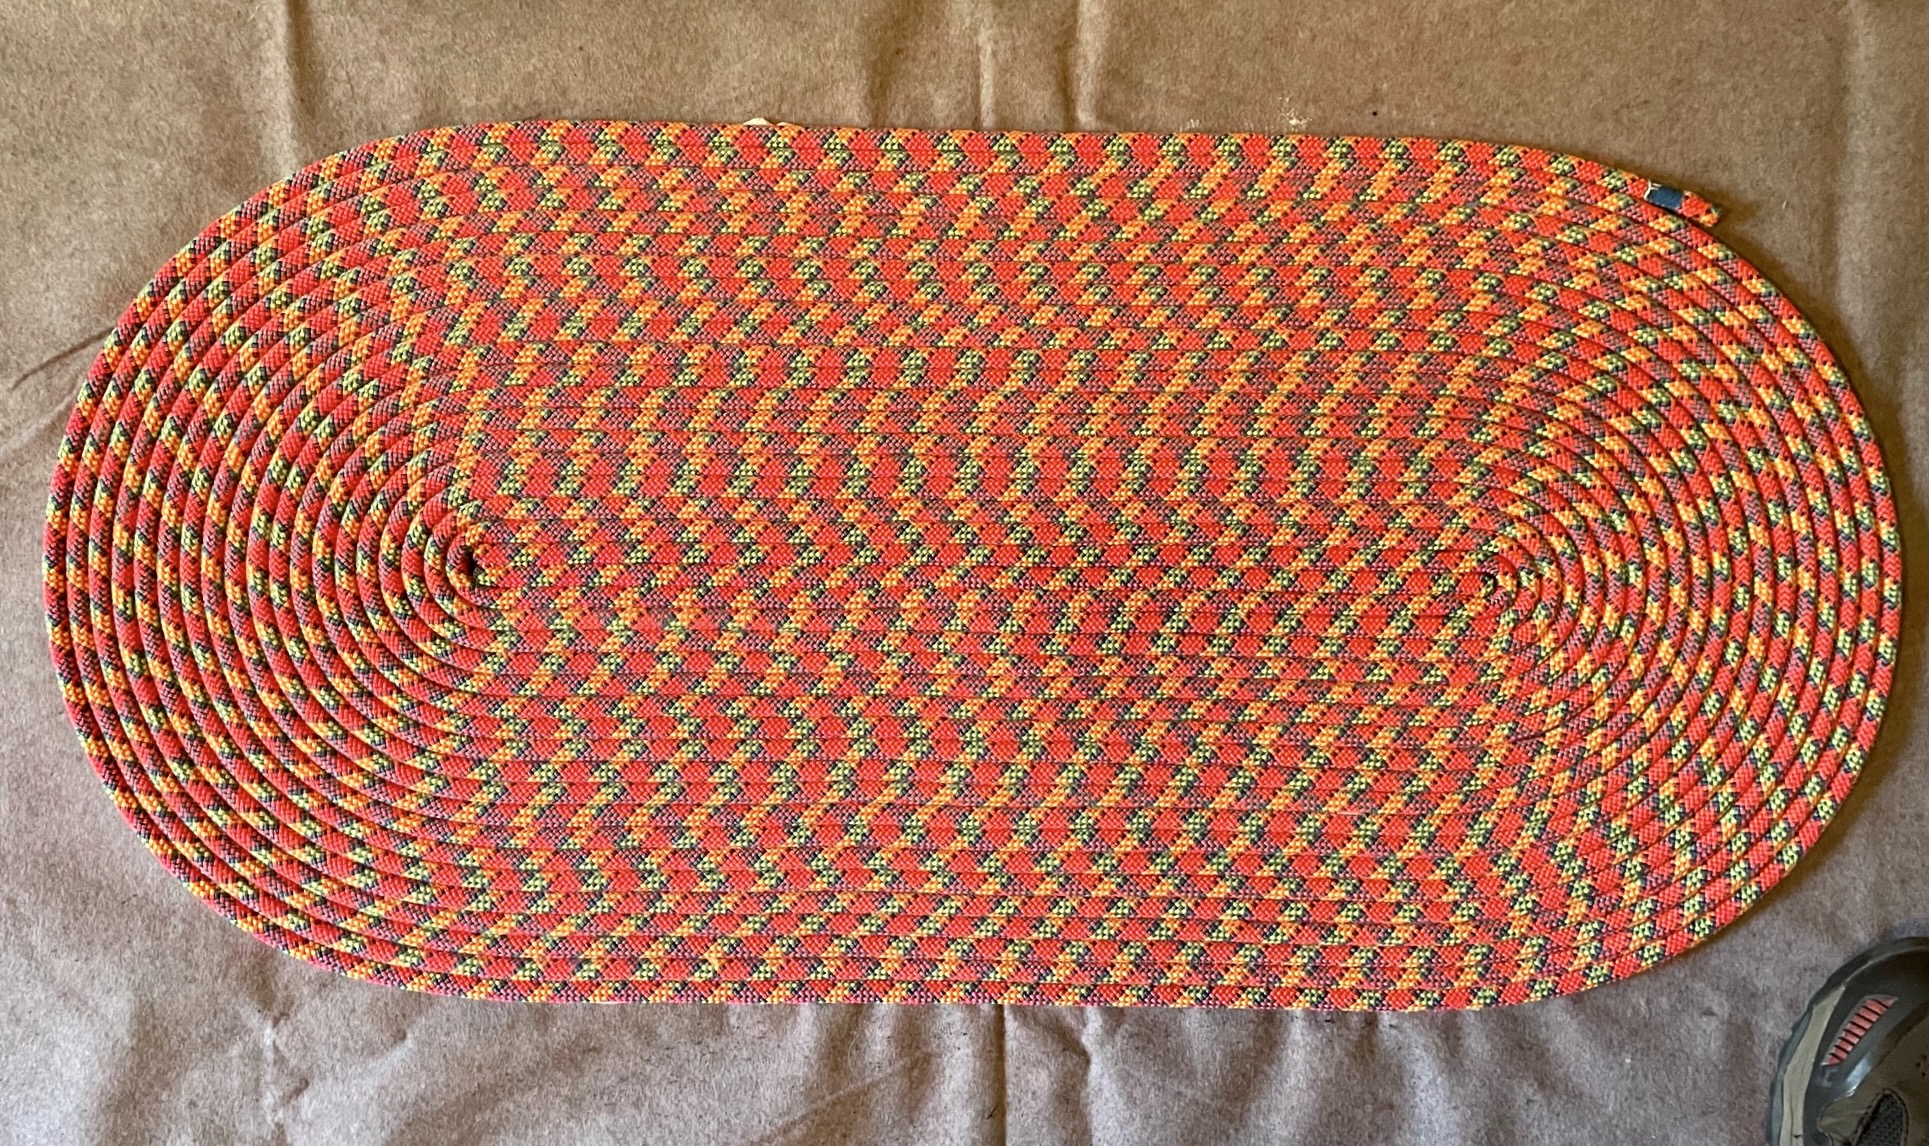
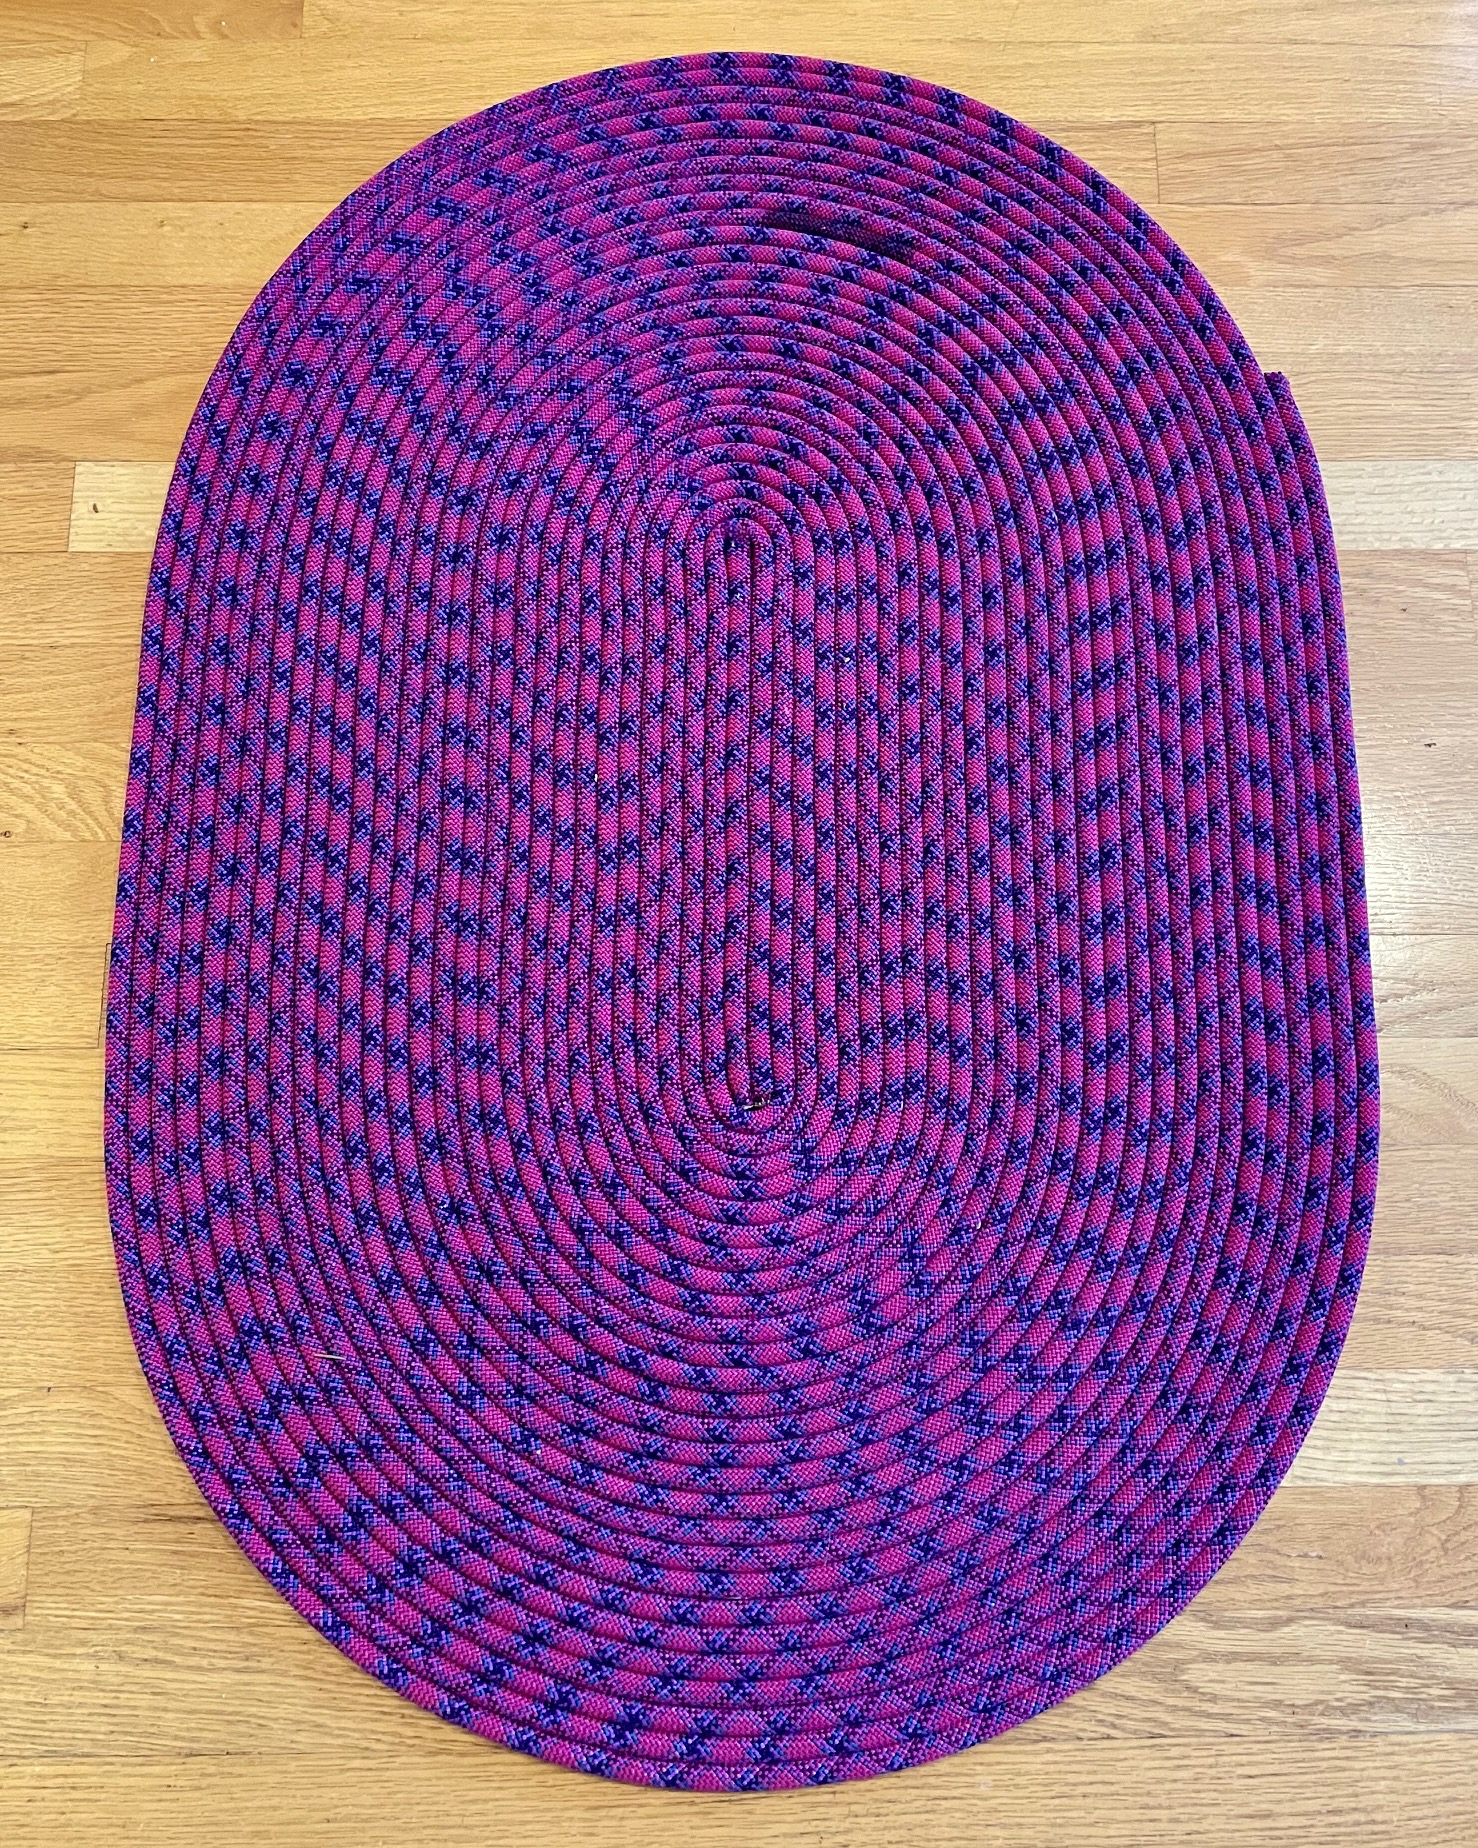
Oval Spiral Climbing-Rope Rugs
Affiliate Disclosure: The following text may contain some affiliate links, which means that if you purchase something I’ve linked to, I might get a small commission at no additional cost to you. Be assured, though, that I mention only items that I routinely use or would recommend to a friend.
Introduction
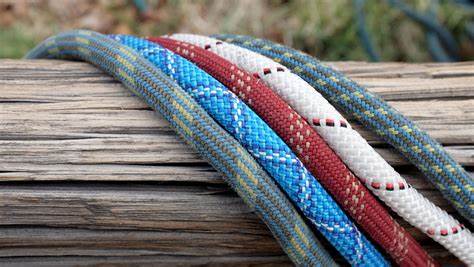
Any climber who has been engaged in the sport for a decade or more probably owns at least one old rope that has been retired from active duty. Maybe it’s a thick cragging rope, or a mid-size alpine rope, or even a skinny glacier rope. In any case, you no longer trust the rope to hold a fall, but it still holds a lot of good memories. I owned several such ropes: One was an orange 11-mm “fattie” that started life as a 60-meter cragging rope but got shortened to 50 meters or so after suffering some rockfall damage. Another was a blue 10.5-mm “sportie” that measured a full 60 meters long. A third one was a 35-meter scramble rope. All of these had served me well through many years of climbs, rappels, and lowerings, but I hadn’t used them in years. Not wanting to just throw them out, I decided to make some rope rugs.
Rope-Rug Methods & Shapes
A little internet research revealed two primary methods for making a rope rug. One method involves a relatively complex braiding pattern that results in a rectangular or oblong rug. The other method involves a relatively simple spiral pattern that results in a circular or oval rug. I chose the spiral method because it seemed more appropriate for my limited craft skills, and I liked the fact that the finished rug lies completely flat, which makes it easy to vacuum.

…
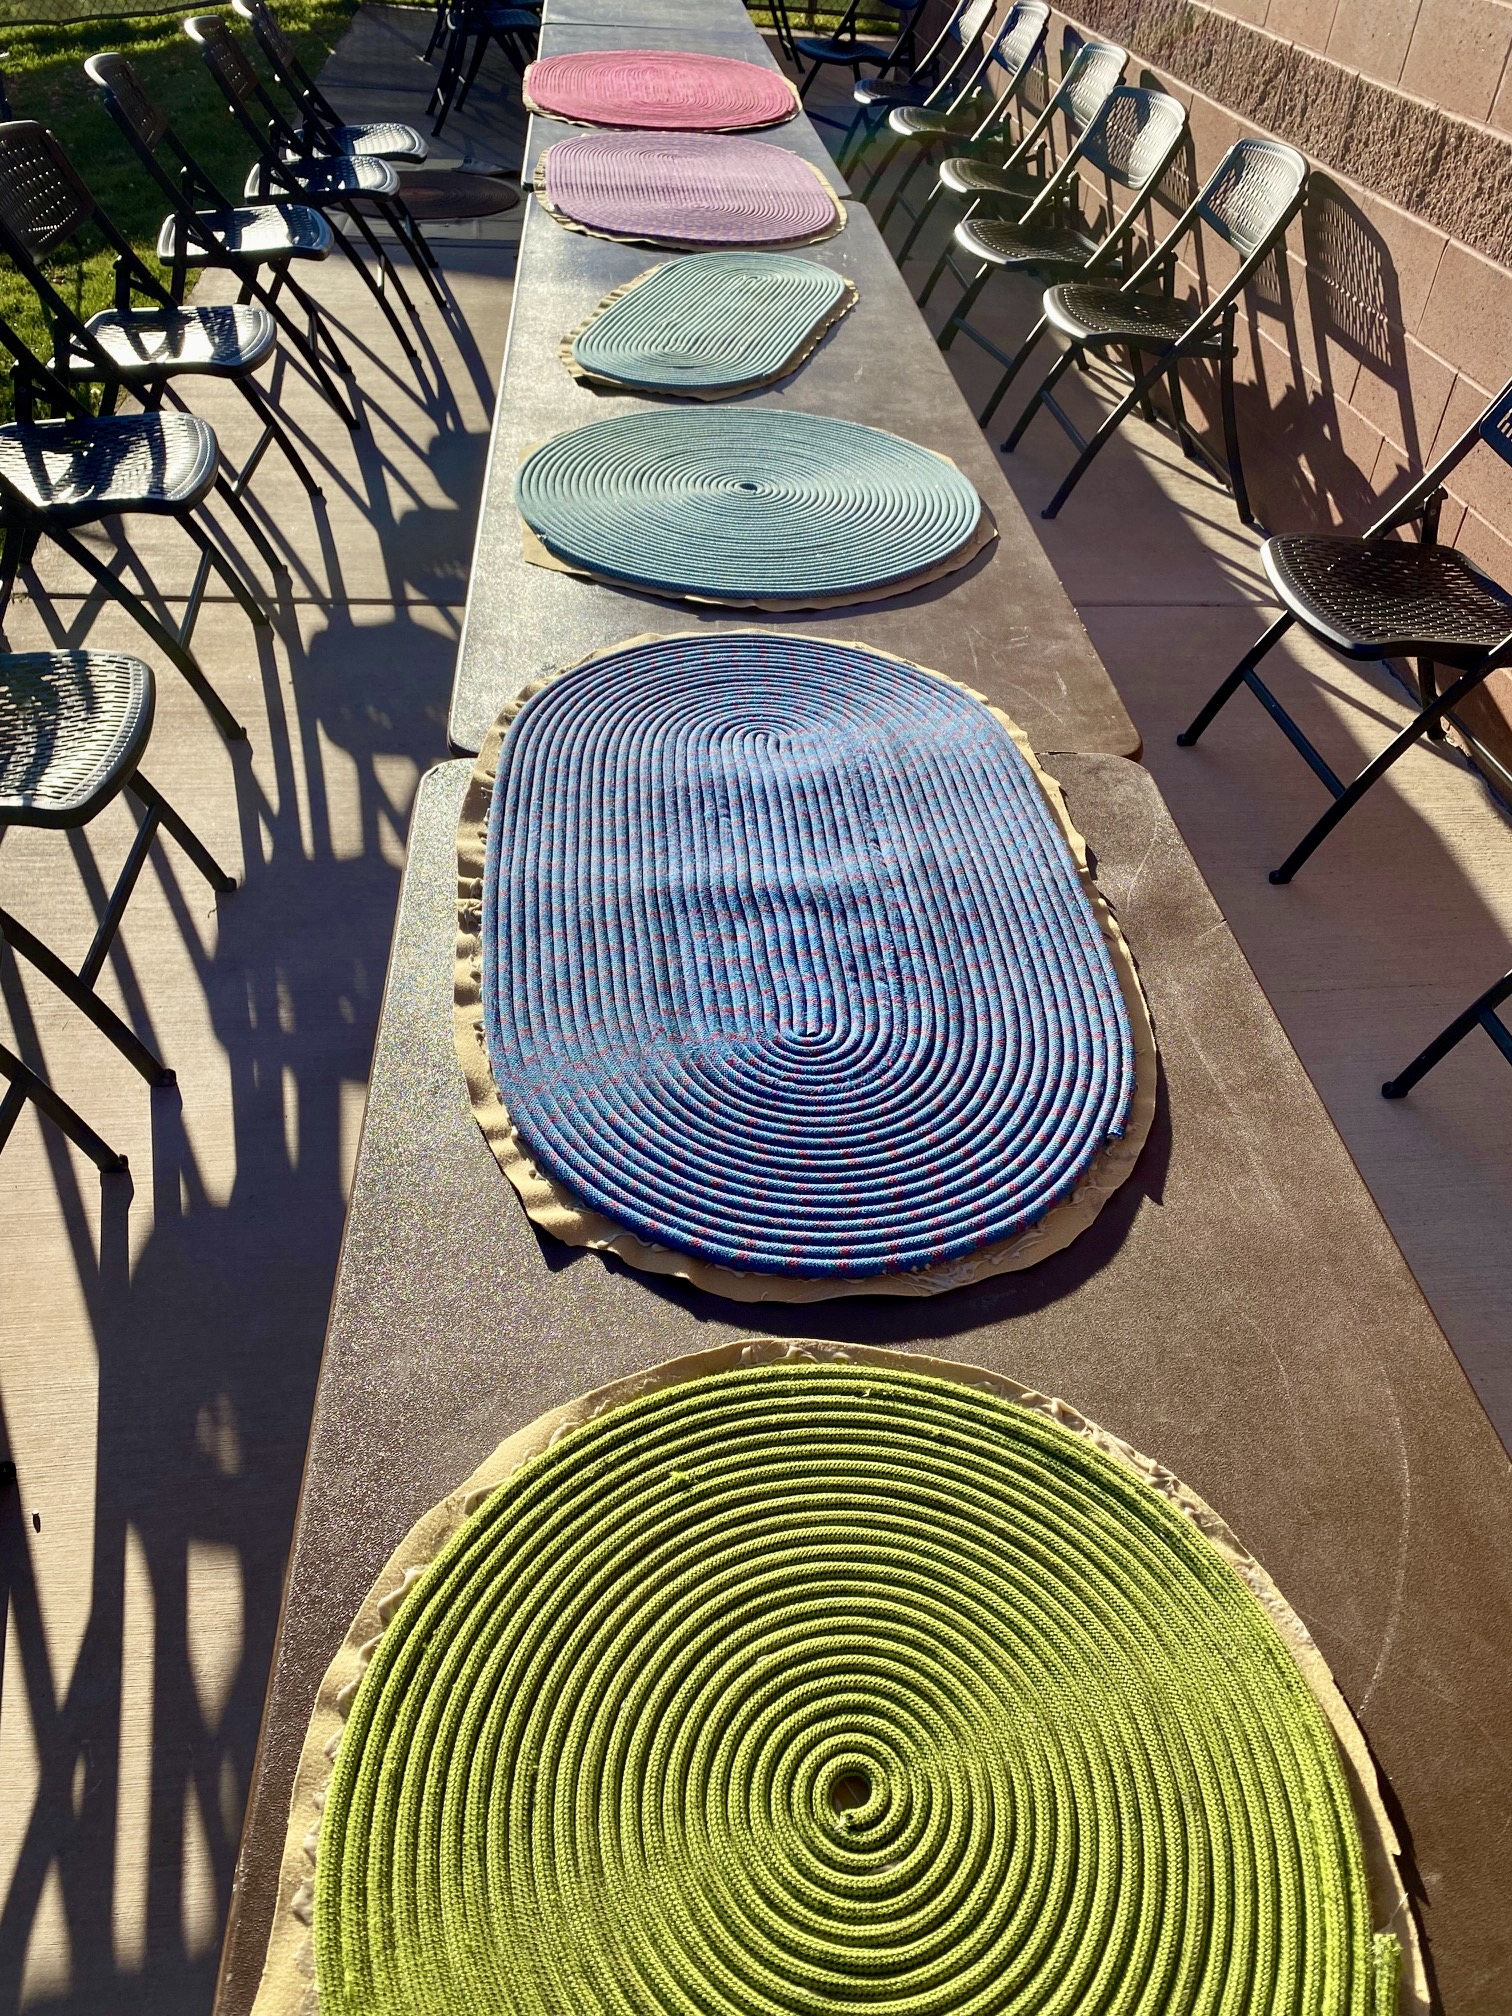
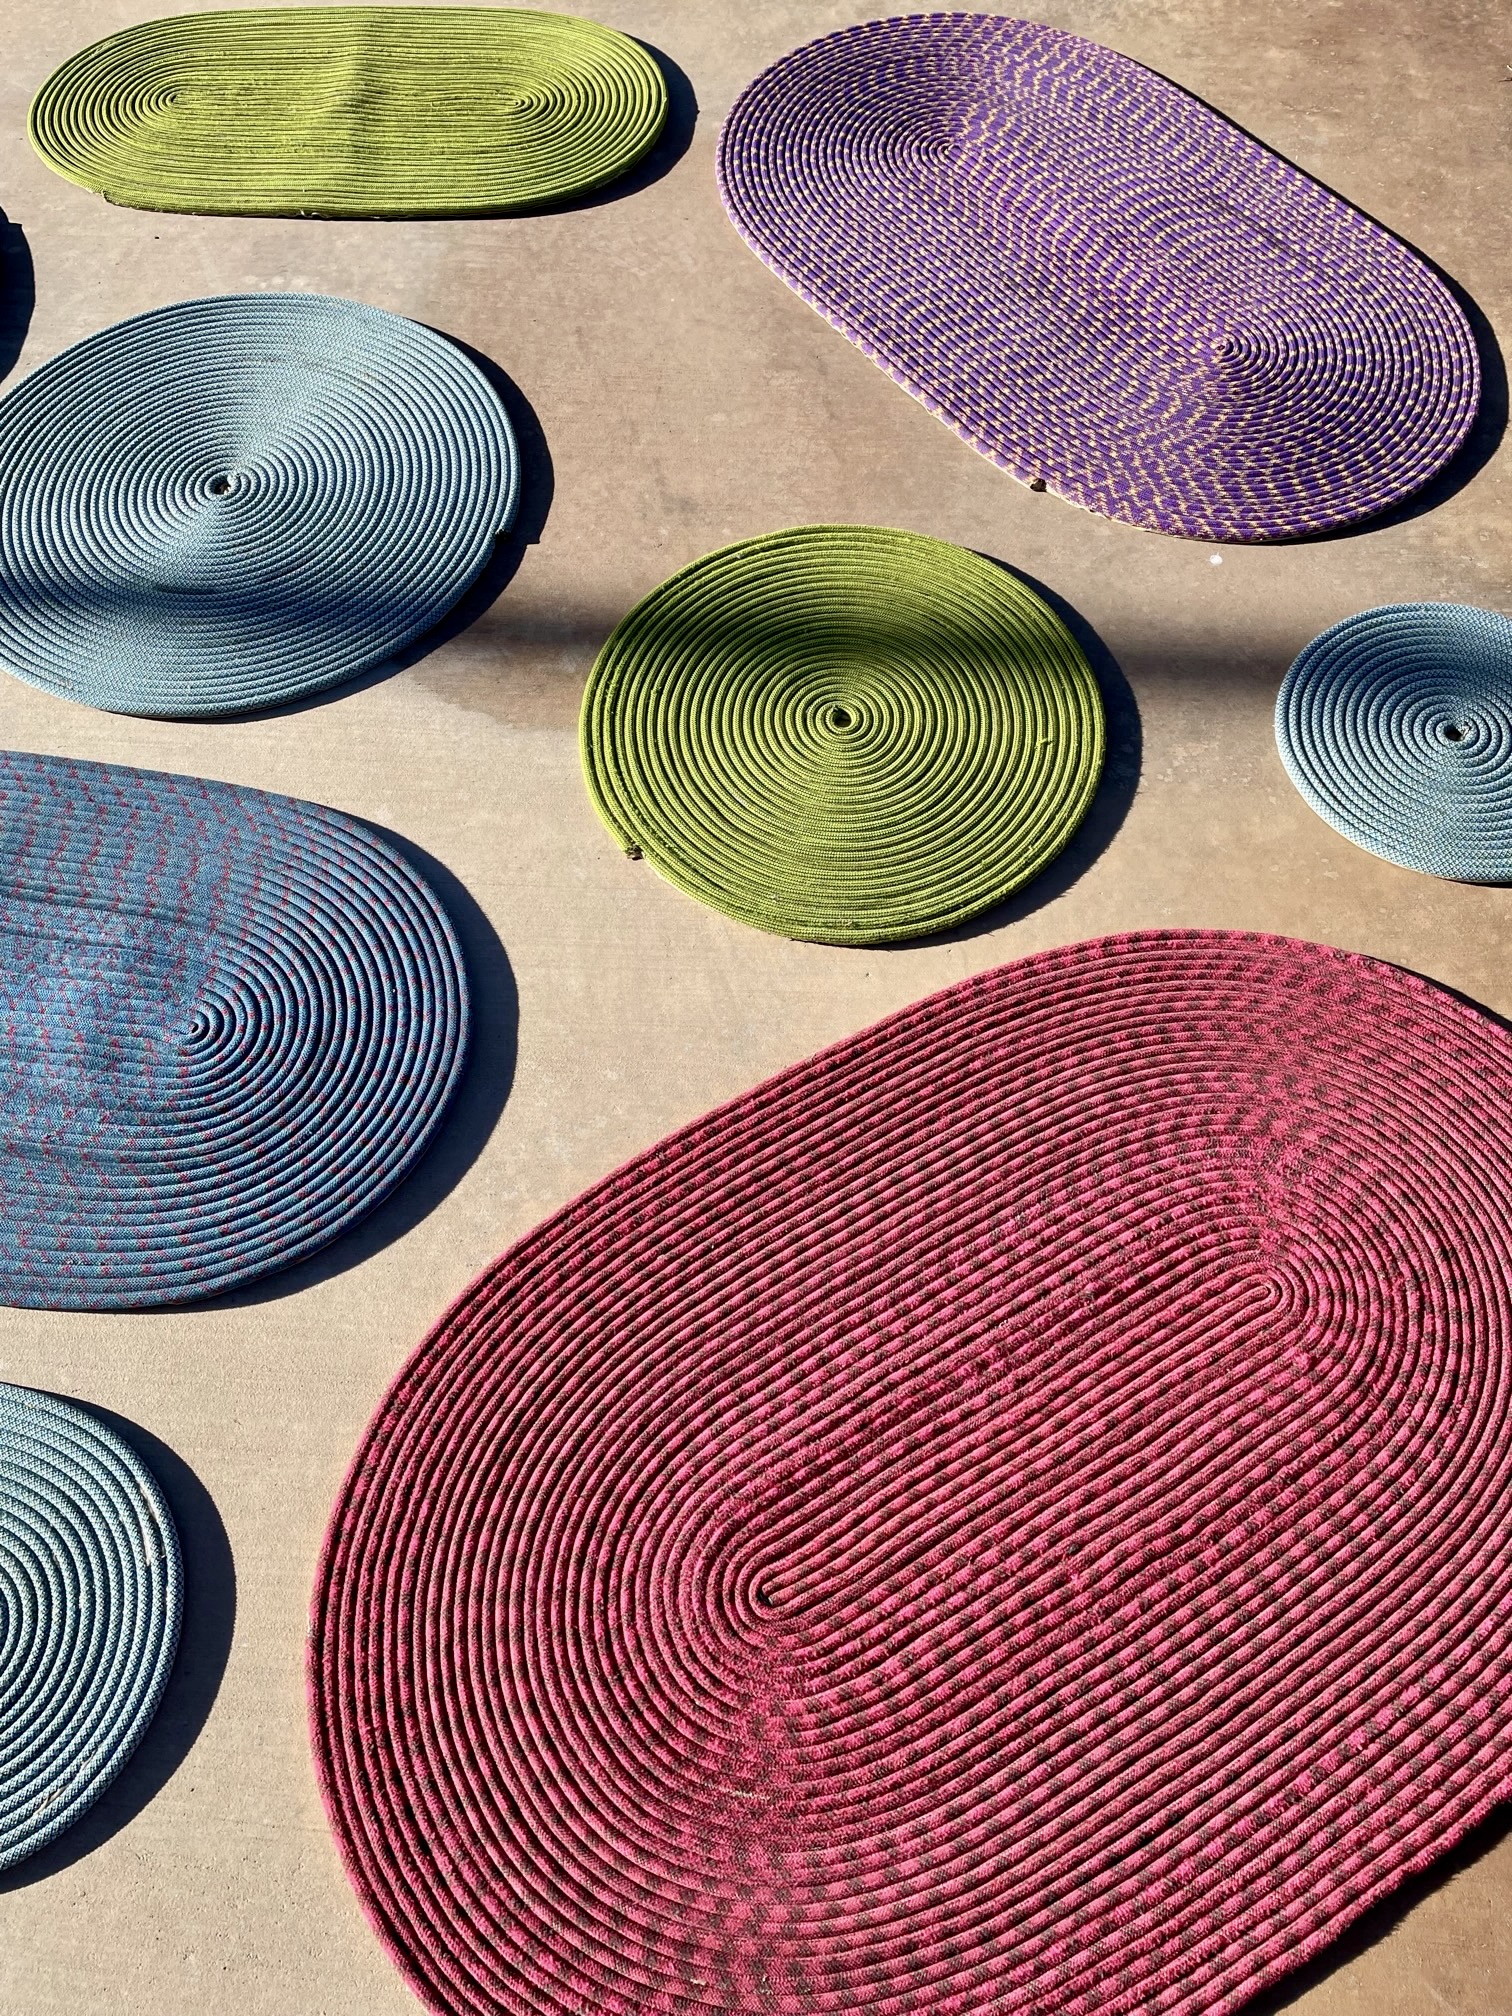
My initial spiral rug-making projects were so successful, I later made use of some additional decommissioned climbing ropes. Over the past several years, I’ve constructed three round spiral rope rugs and five oval spiral rope rugs. Some of the oval rugs were fairly large and slightly elongated, whereas others were smaller and more distinctly elongated. In all cases, the results have always been fun and interesting. I even appreciate the fact that the middle mark on a rope gives the finished rug an extra splash of character.
There are various materials and procedures that can be used to create spiral rope rugs. Furthermore, the procedures for round spirals are slightly different than for oval spirals. The specific materials and procedures that I’ve used to construct my rugs are described below.
.
…
Spiral Rug Materials & Preparation
Rope: Pretty much any size and length of rope can be utilized for a spiral rug. I’ve used ropes ranging from 8 to 11mm in diameter, and from 20 to 70 meters long. My finished round rugs have ranged from 20 to 36 inches wide, and my finished oval rugs have ranged from 17×30 inches to 28×40 inches. Obviously, in all cases, a thinner rope would create a smaller rug, and a longer rope would create a larger rug.
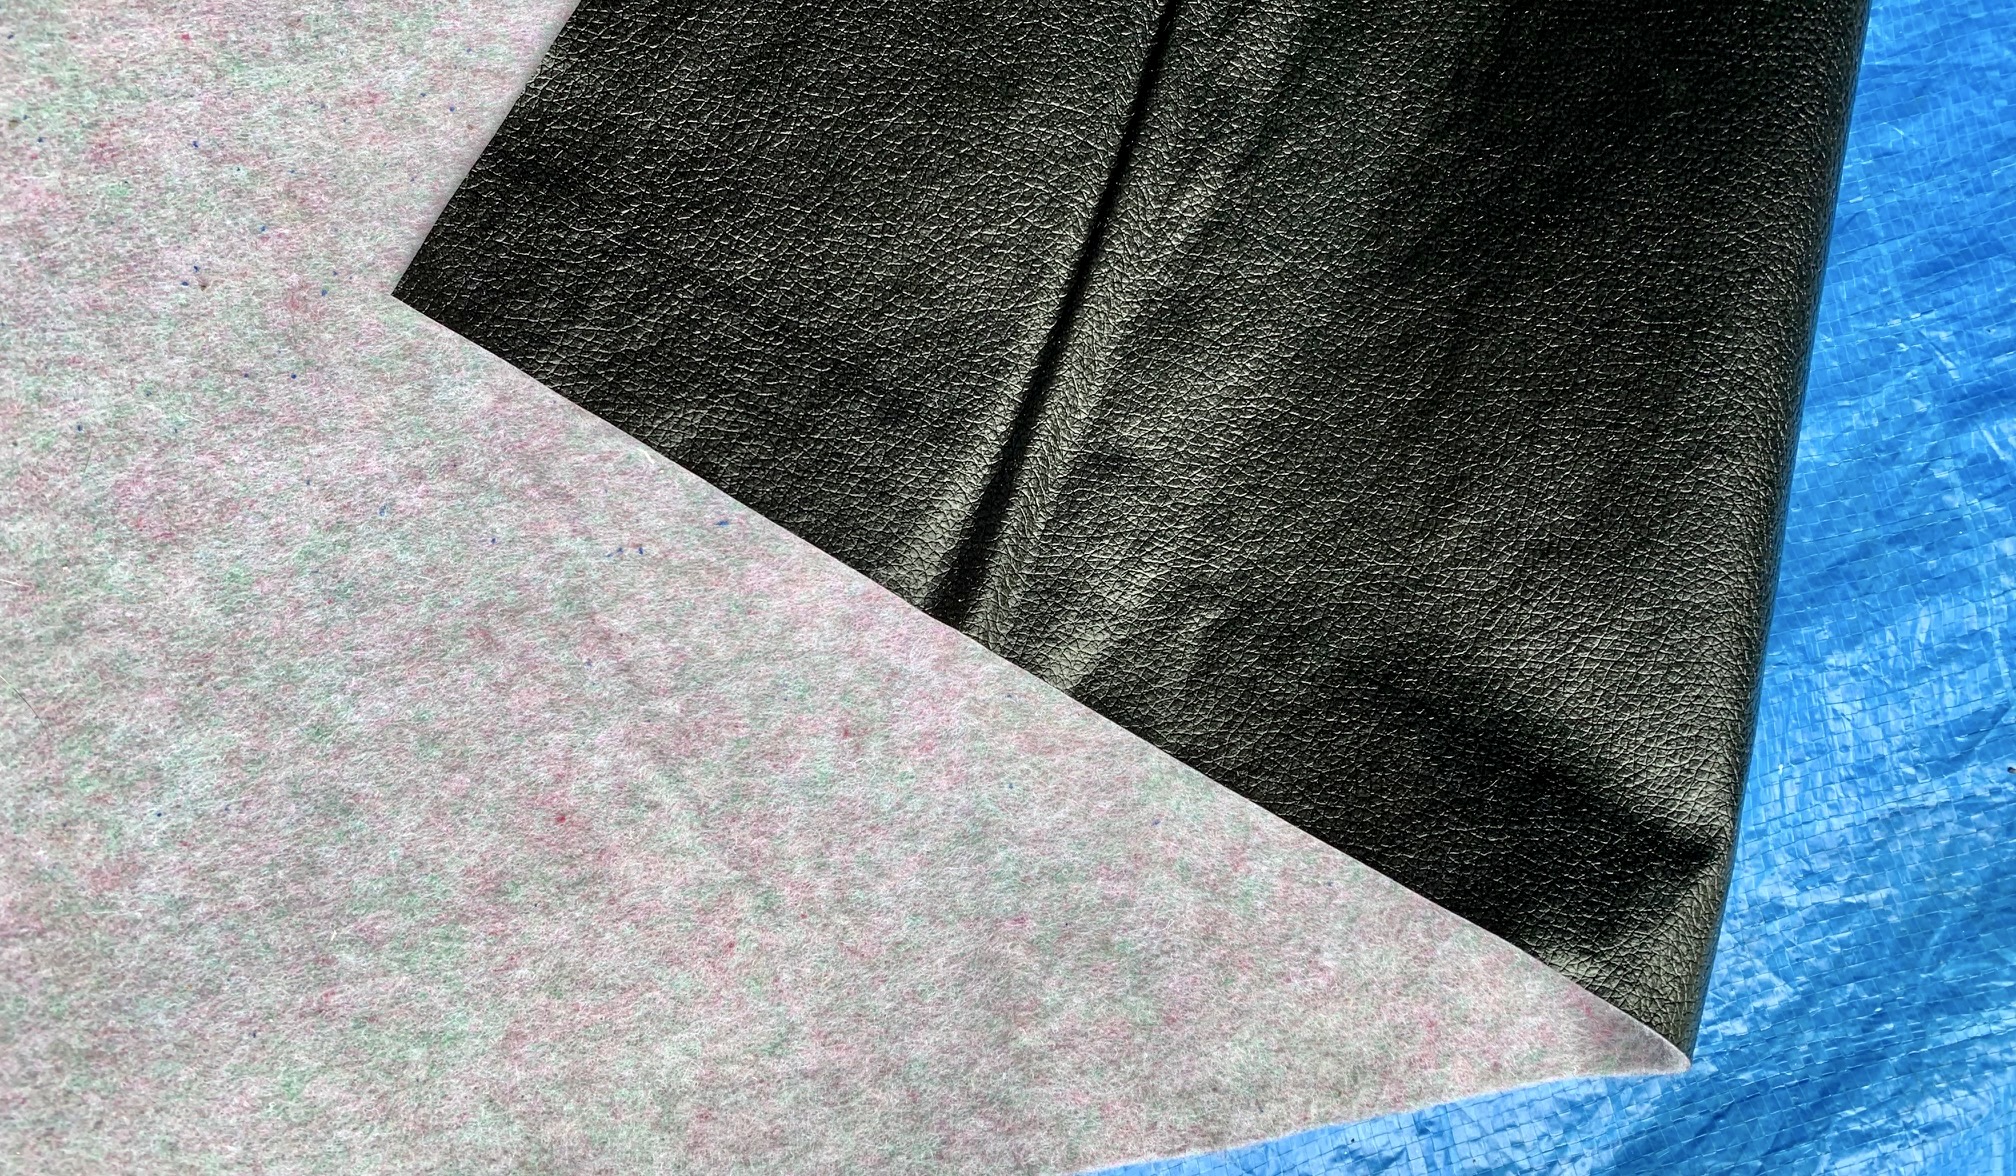
Backing Fabric: My spiral rug method involves gluing the rope to a backing fabric, and for this purpose I choose a laminated vinyl upholstery material (commonly referred to as Naugahyde) from a fabric store. The outer surface is very slick but provides a moderately slip-resistant interface with smooth wood or tile floors, whereas the inner surface is fuzzy and provides a good bond with glue. (I’ve found that glue does not adhere very well to the slick side.) Alternatively, you could use any sturdy woven fabric, such as canvas or sailcloth.
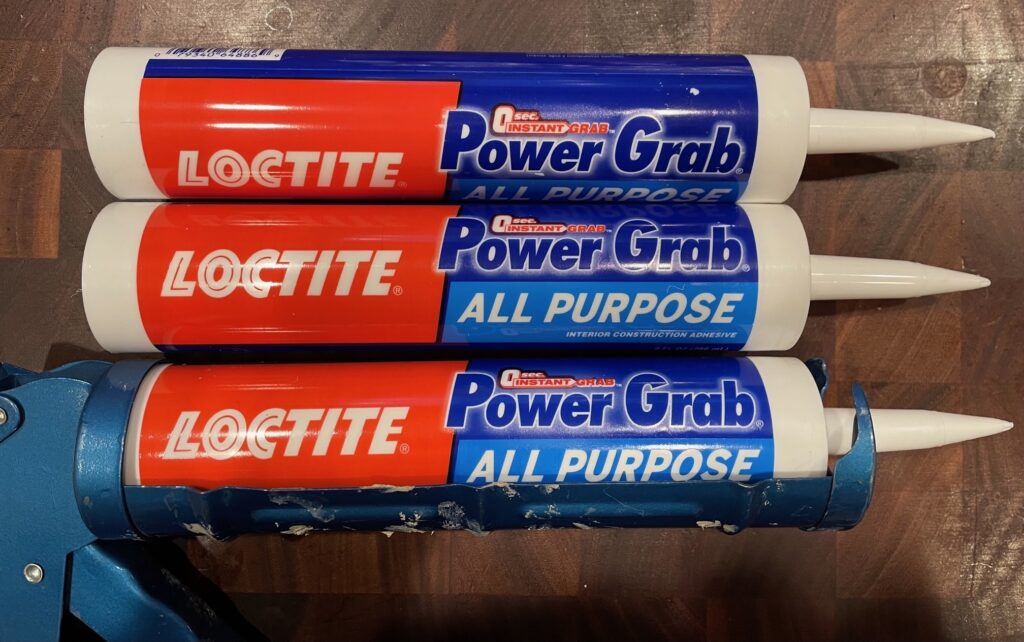
Glue: There are numerous brands of adhesive that could be used to glue the rope onto the backing fabric. I prefer Loctite Power Grab All-Purpose or Heavy-Duty construction adhesive, which can be purchased from most hardware stores. It is applied with a caulking gun, and clean-up requires only soap and water (avoid adhesives that require strong solvents for clean-up). For my larger rugs, I end up using approximately one-and-a-half to two full tubes of adhesive. My smaller rugs have needed only one tube.
…
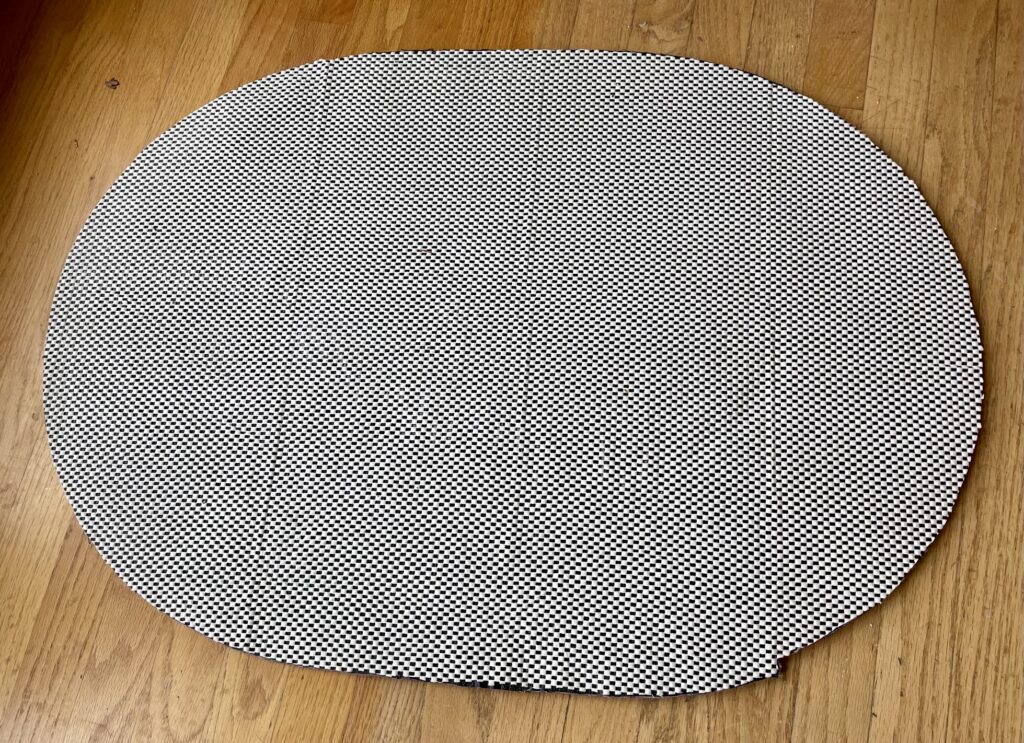
Anti-Skid Mat: Regardless of whether you intend to use your rug on a smooth floor (such as tile, vinyl, or hardwood) or on a carpeted floor, you can greatly enhance the slip-resistance by glueing an anti-skid mat to the bottom of the backing fabric. I purchased a large piece of Veken matting, used a spray adhesive to attach it to the bottom of my rug, and then trimmed it to fit. This has been very effective at keeping my rugs in place.
…
Washing: Because most old climbing ropes are pretty dirty, start by washing your rope. An easy way to do this is to gather the rope into a daisy chain and then loosely wrap the chain around the central agitator of your top-loading washer (or simply place it into your front-loading washer). Set the machine on a “regular” or “heavy duty” wash cycle and add a generous amount of detergent (any laundry detergent is fine; there is no need to buy a special rope wash). If the rope is really dirty, send it through two wash cycles. When done washing, lay the rope out to dry for several days.

…
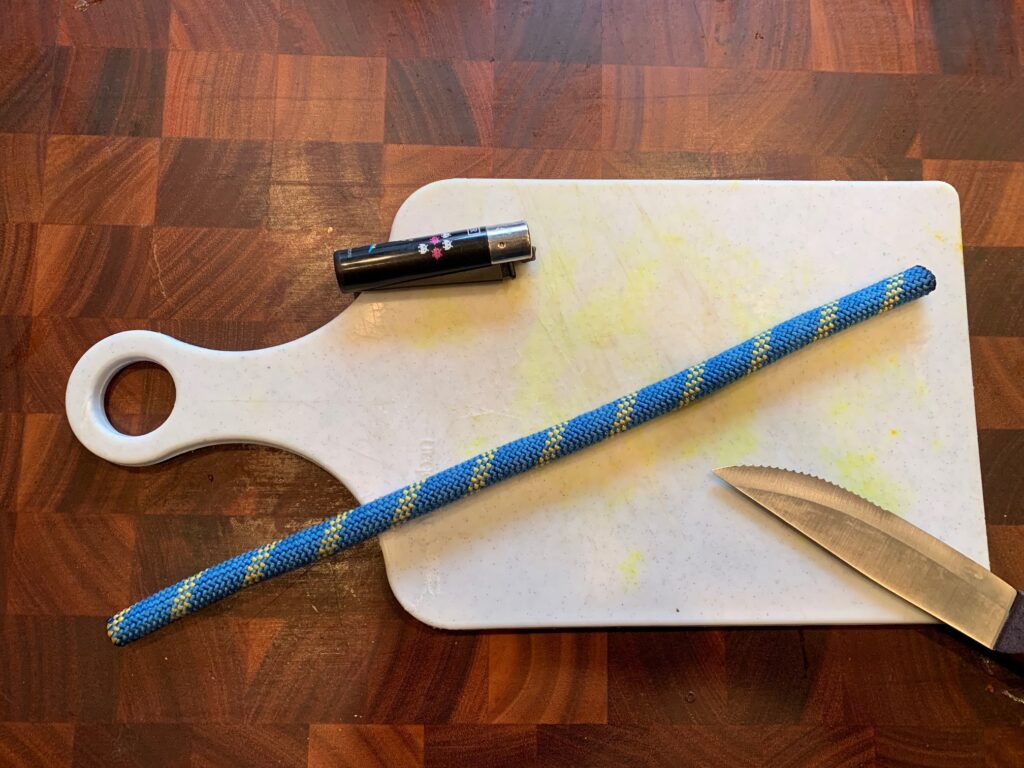
End Trimming: If either end of your rope is frizzy or funky, cut it off to create a clean end. The ideal way to cut a rope is to use a hot-blade cutter, but most of us don’t have one of those; instead, just use a sharp knife to cut and a cigarette lighter or match to fuse the fibers. Before cutting and fusing, wrap a few turns of electrical tape around the rope, as this will help keep the fibers tightly together.
Procedure for Making a Round Spiral Rope Rug
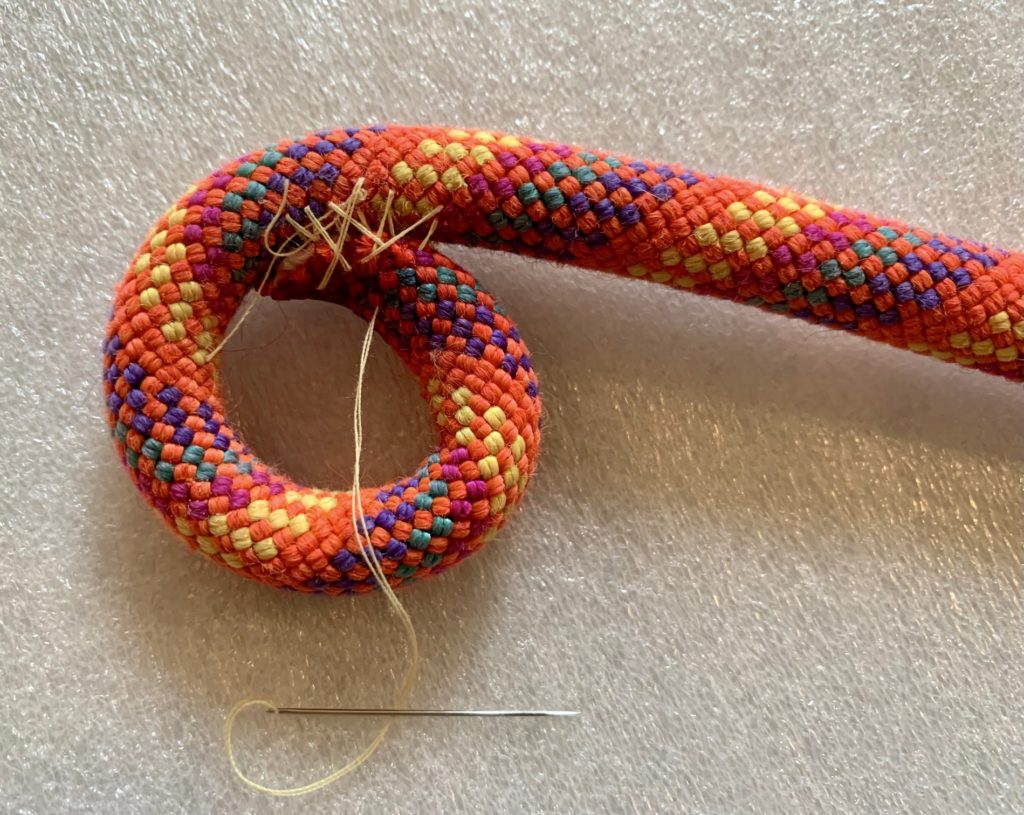
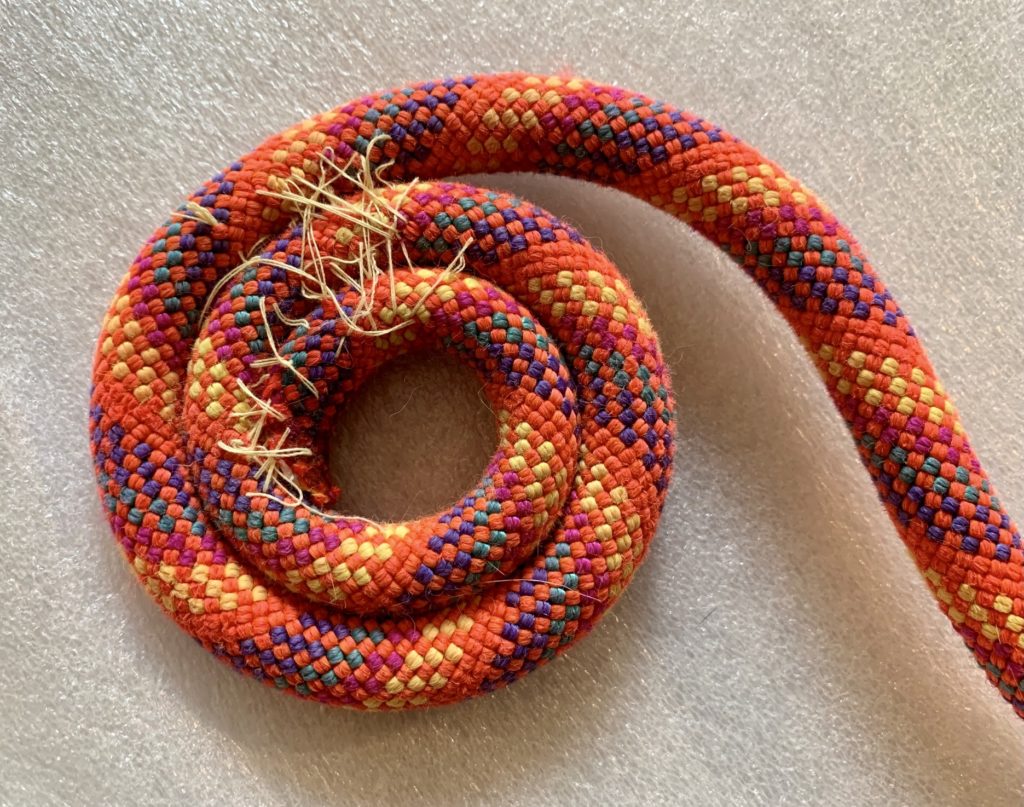
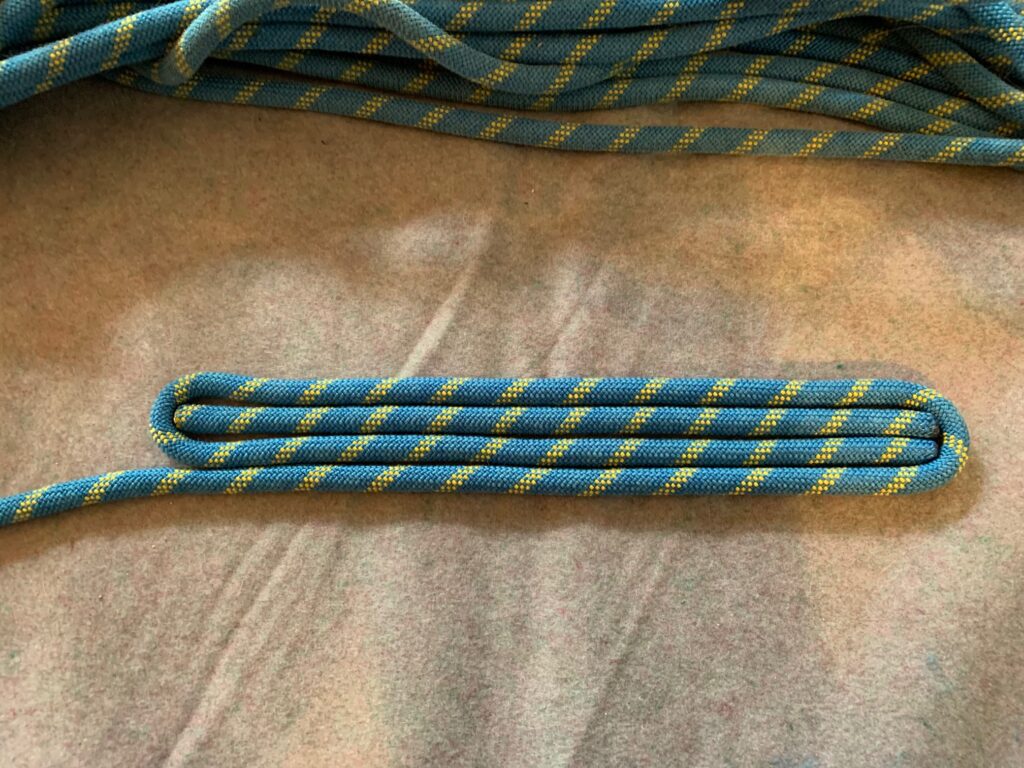
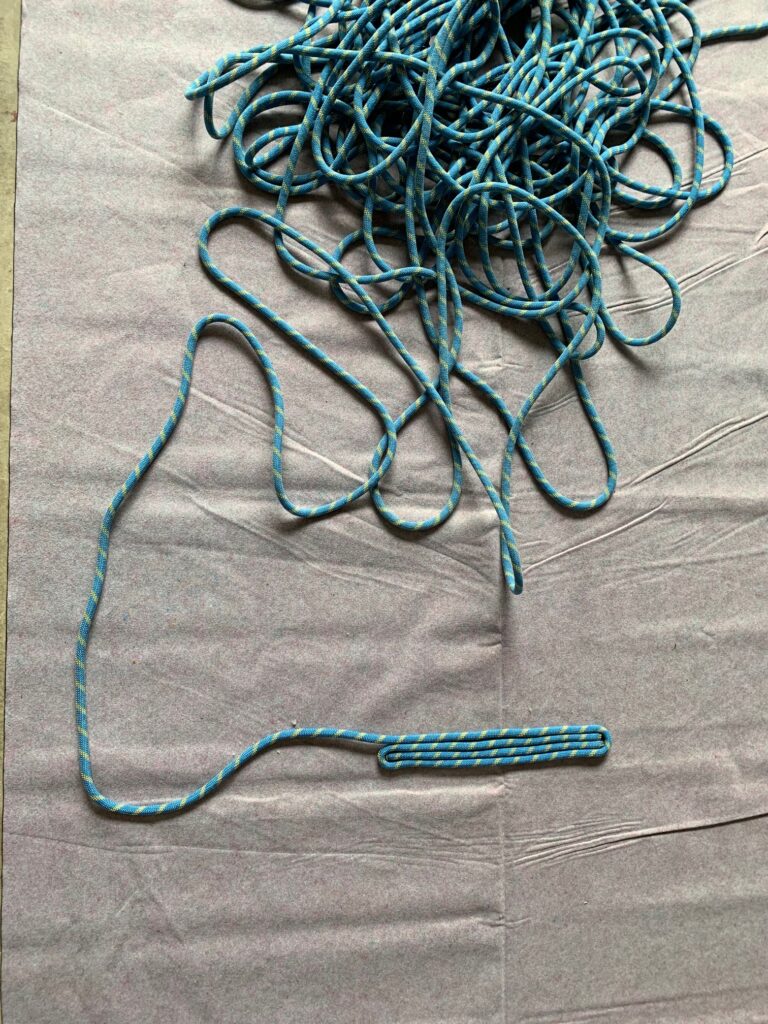
Step 1: Thick climbing ropes tend to be somewhat stiff, so it is usually necessary to stitch together the first few coils. Begin by cutting the end of the rope at a 45-degree angle so that you can make one very tight coil, then stitch it with a few turns of thread or dental floss that pass through the rope’s outer sheath. Next, create a couple more coils and stitch them together. The goal is to use just enough stitches to maintain several tight coils. Don’t worry about making the stitches look good; they will be hidden underneath the finished rug.
…
…
…
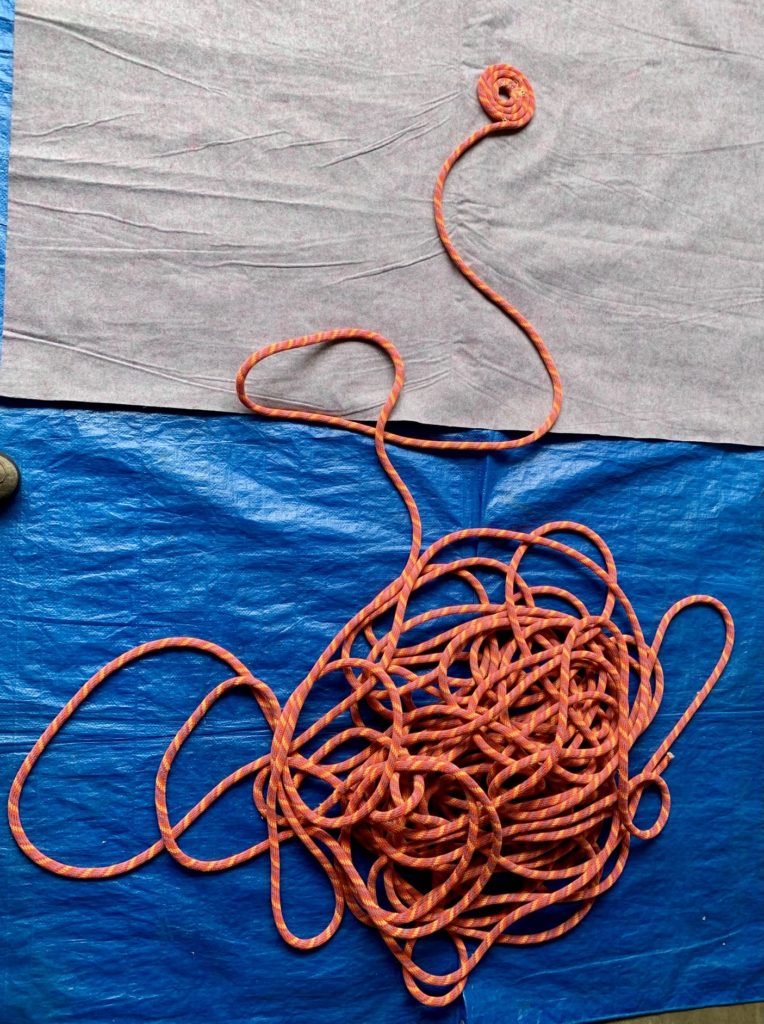
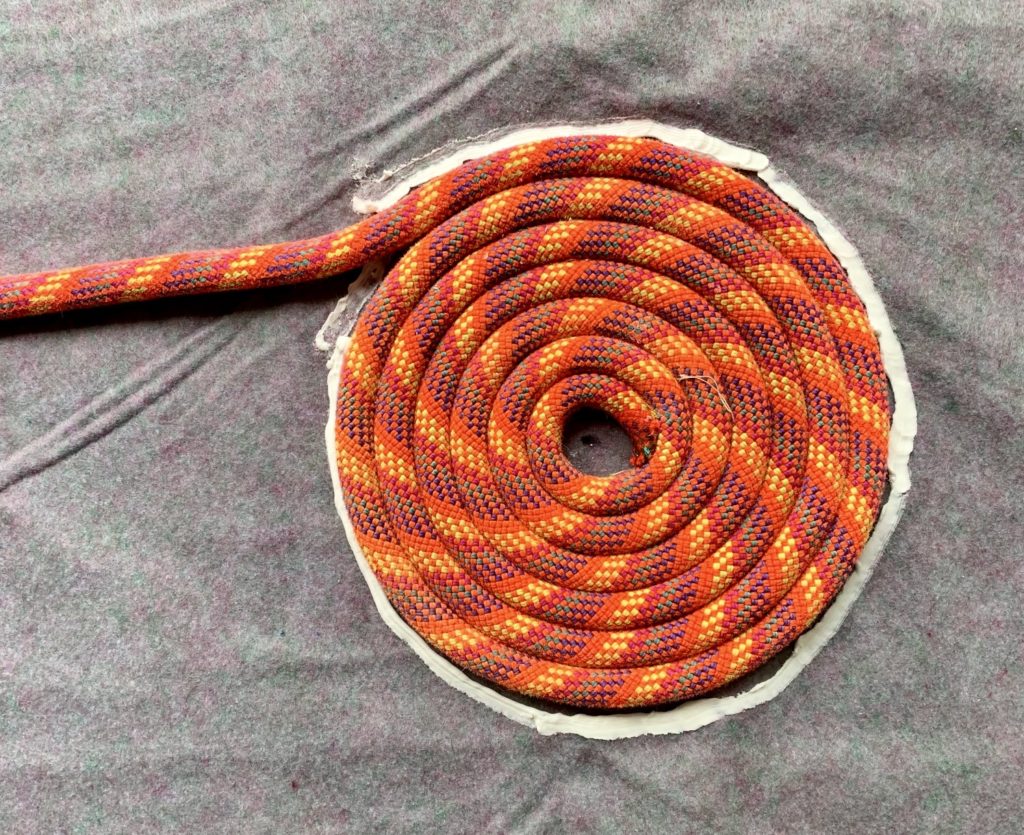
Step 2: Place your backing fabric on a hard floor, large table, or other flat working surface. Spread a layer of glue onto the center of your backing fabric and then press the initial rope coils onto the glue. The remainder of the rope should be flaked out to allow pulling it without tangles.
…
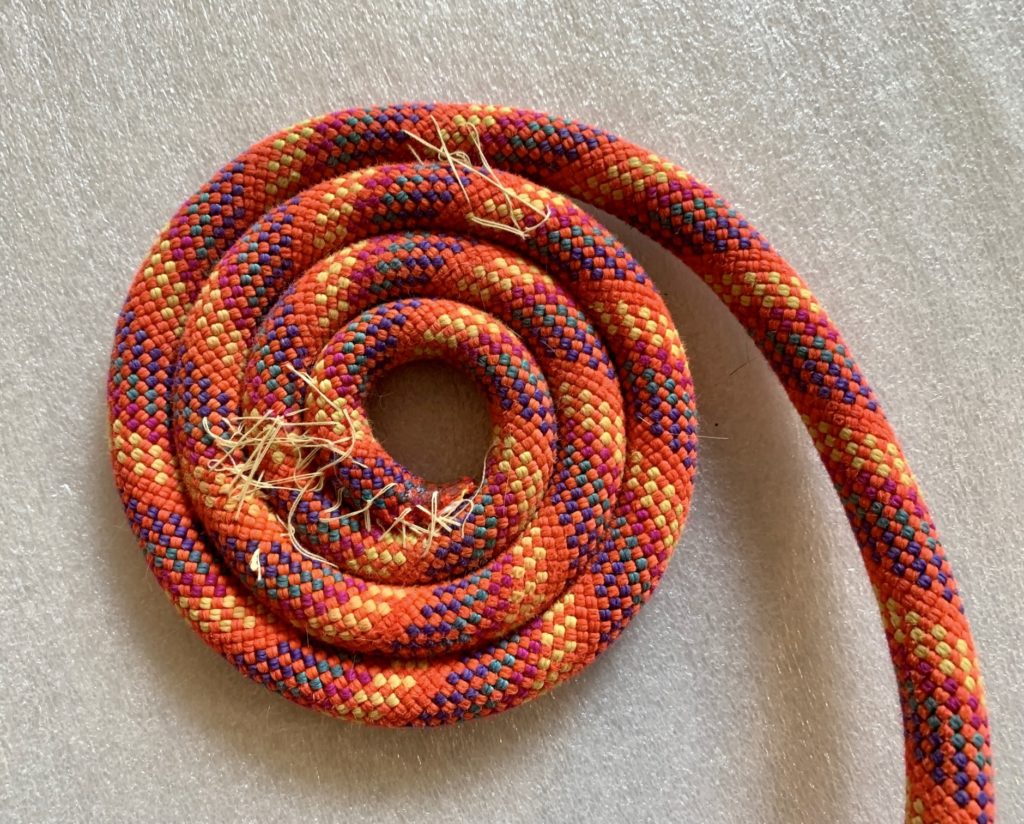
Step 3: Put down a bead of glue around the perimeter of the initial coils and then make another full coil with the rope. Firmly press the new coil down and into the previous coil. Repeat this process of putting down a glue bead and making a tight rope coil until you either reach the end of the rope or come to the edge of the backing fabric.
…

…
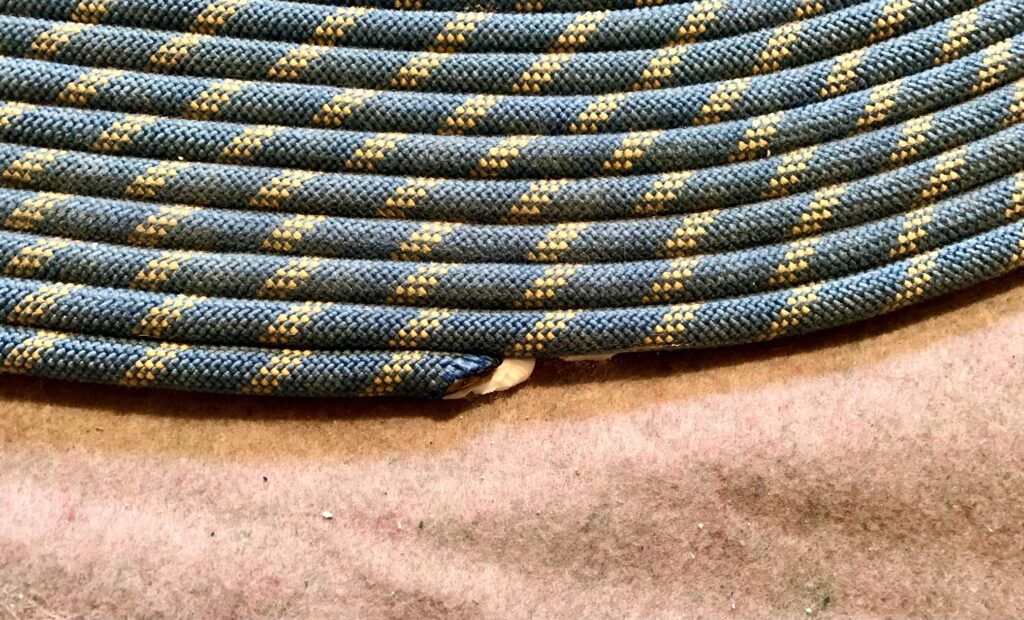
Step 4: For a nice finish, cut off the end of the rope at a 45-degree angle and fuse it with a lighter or match, then glue the beveled end firmly against the previous coil. Step back and let the glue dry for a day or two.
…
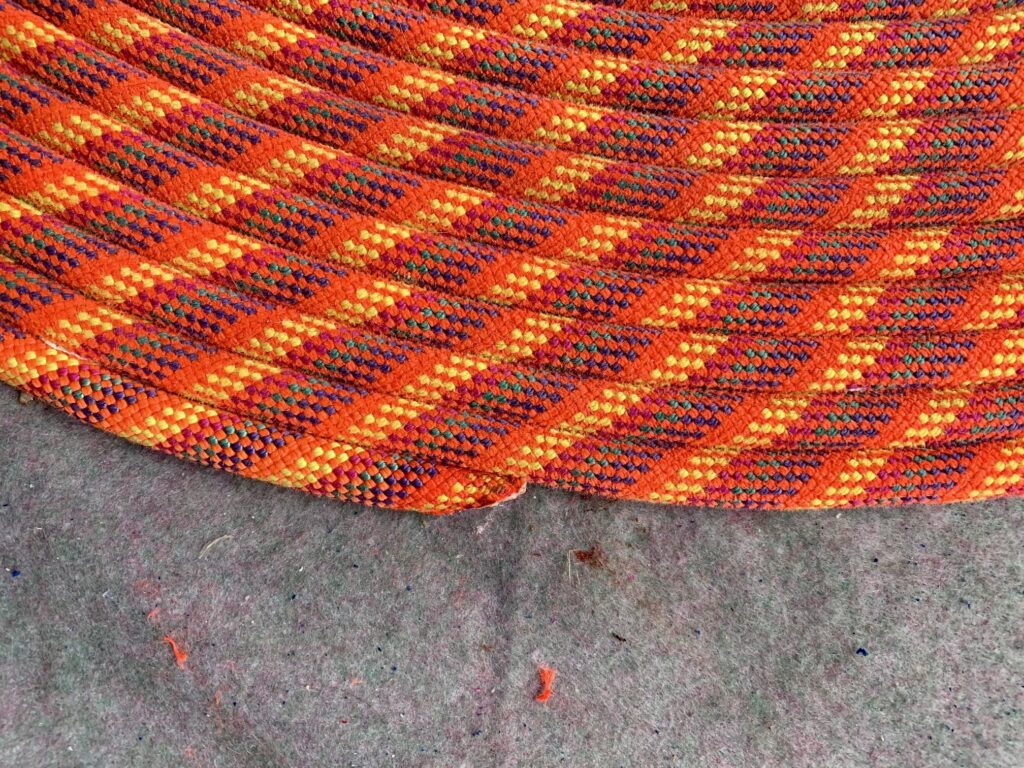
Step 5: Once the glue has dried, use scissors to coarsely cut around the perimeter of the rug. You don’t need to create a clean edge; just cut off the bulk of the excess backing fabric.
…
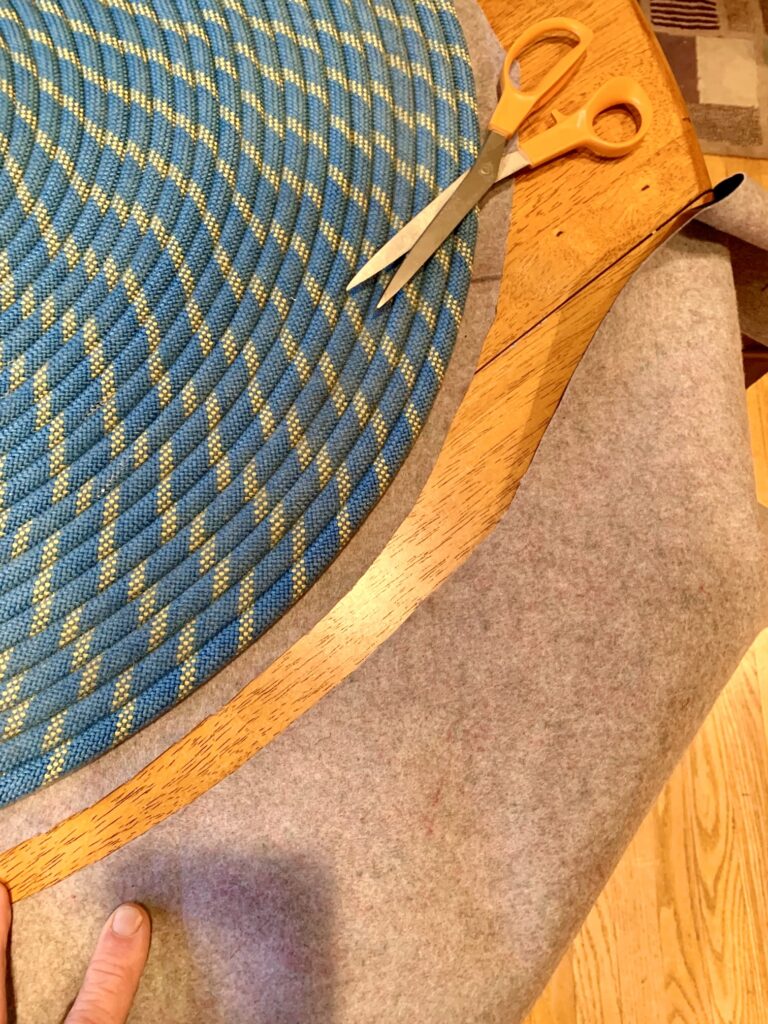
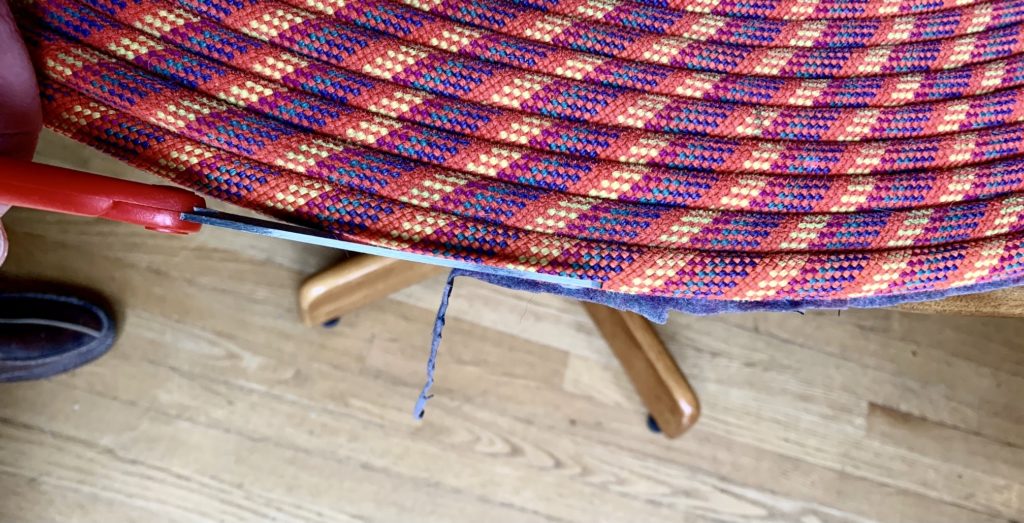
Step 6: Carefully cut around the perimeter of the rug again to trim off the ragged edge of the backing fabric. For this fine trimming, I found it advantageous to let the rug slightly overhang a tabletop so that I could angle my scissors underneath the rope coil.
…
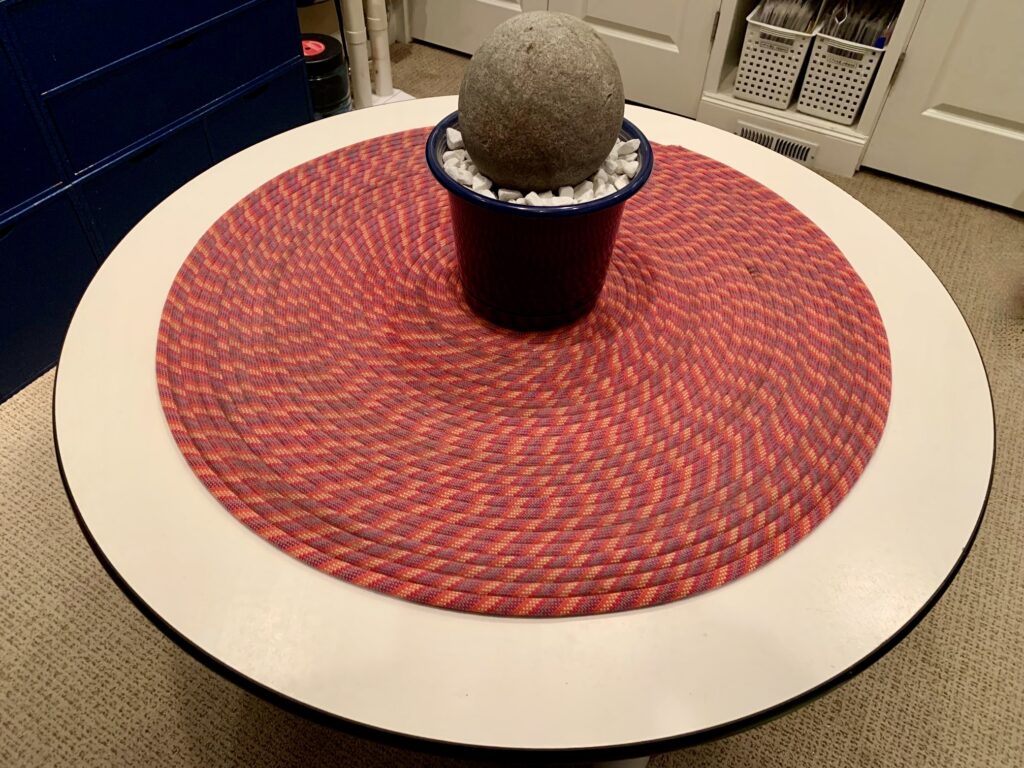
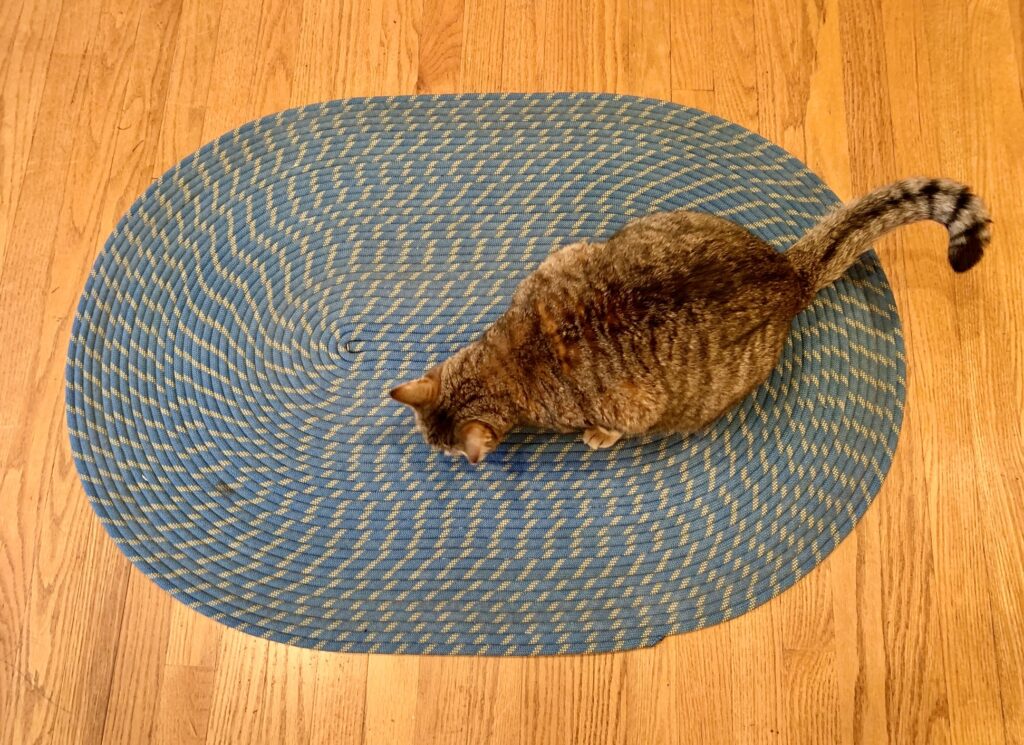
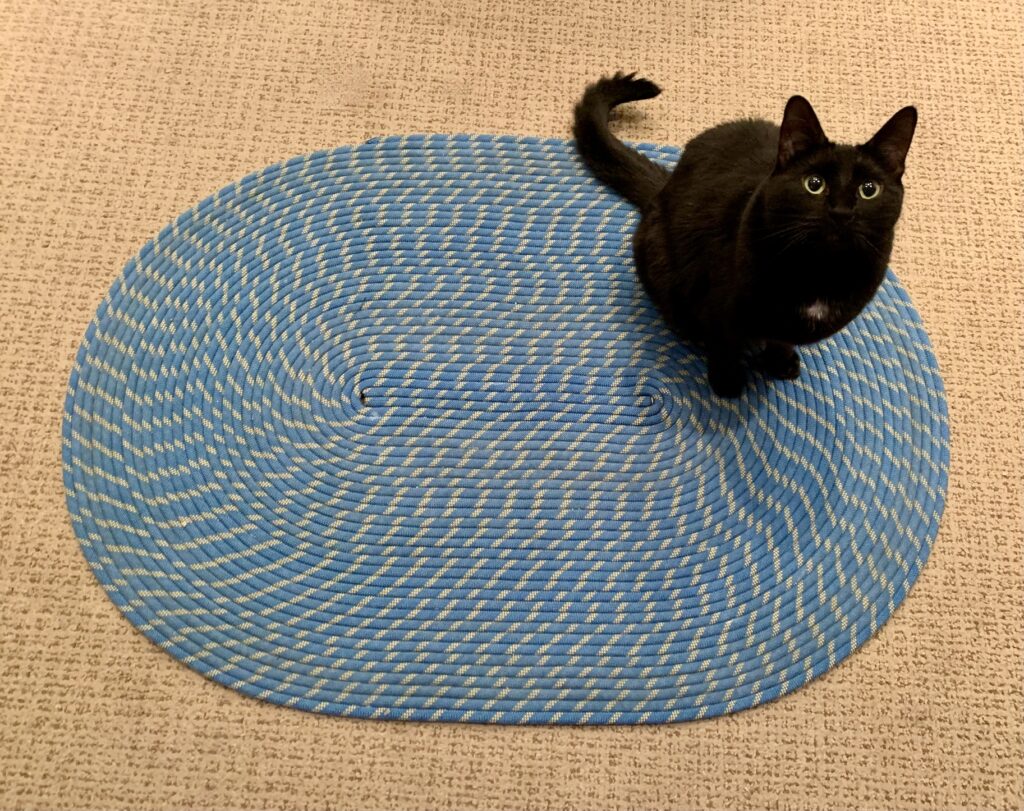
Step 7: Place your new rope rug on the floor and enjoy! Or think of another use. For example, I use two sizes of round rugs as a decorative table topper.
…
…
Procedure for Making an Oval Spiral Rope Rug
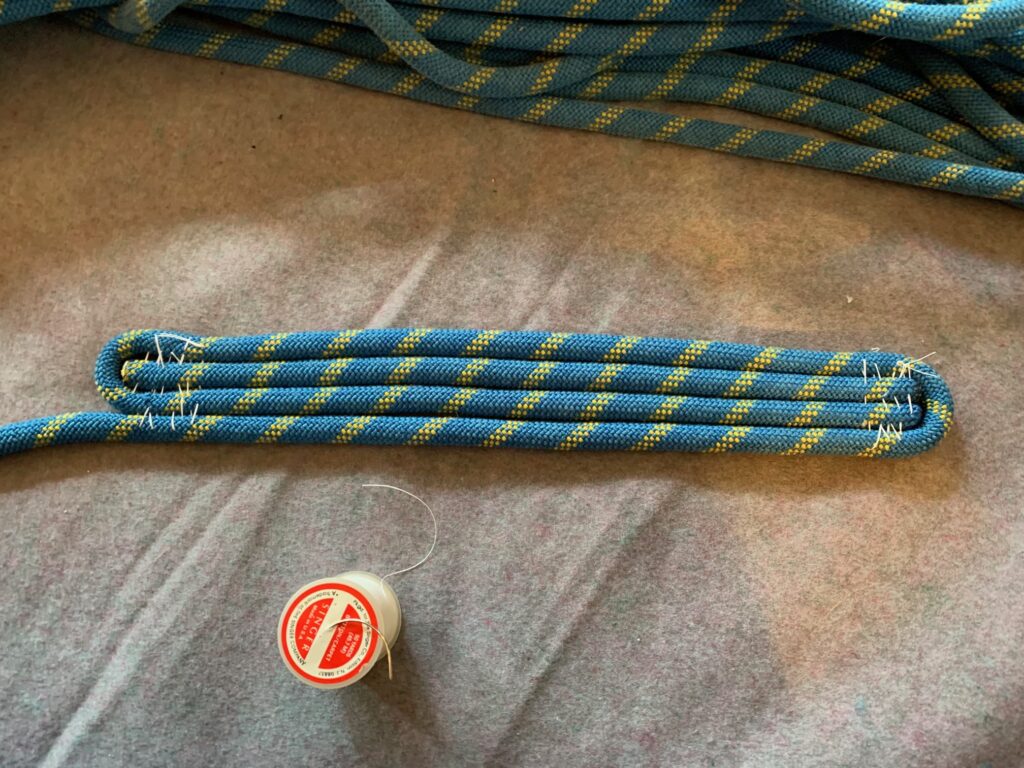
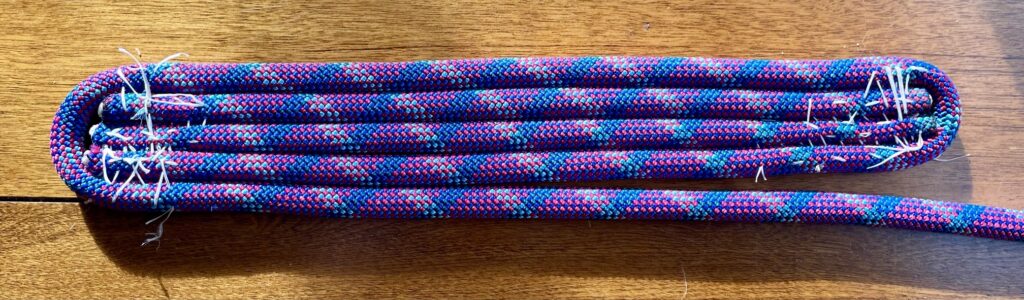
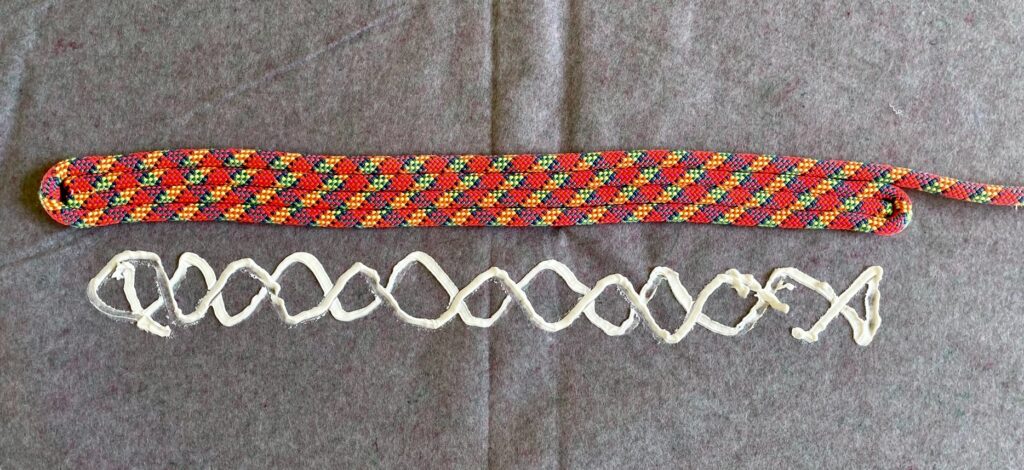
Step 1: Thick climbing ropes tend to be somewhat stiff, so it is usually necessary to incorporate a slug, or spacer segment, into the center of the rug. This slug consists of a short segment cut from either end of the rope. The length of the slug is important because it will dictate the length-to-width ratio of the finished rug. Specifically, the slug length will approximately equal the difference between the length and width. For one of my larger rugs, I used a 13-inch slug, which resulted in a 40-inch by 28-inch oval with my 60-meter rope. For one of my smaller rugs, I used a 20-inch slug, which resulted in a 34-inch by 17-inch oval with my 35-meter rope. If you want a less-elongated oval, use a shorter slug; if you want a more-elongated oval, use a longer slug. In all cases, be sure to fuse all cut ends using a lighter or match.
…
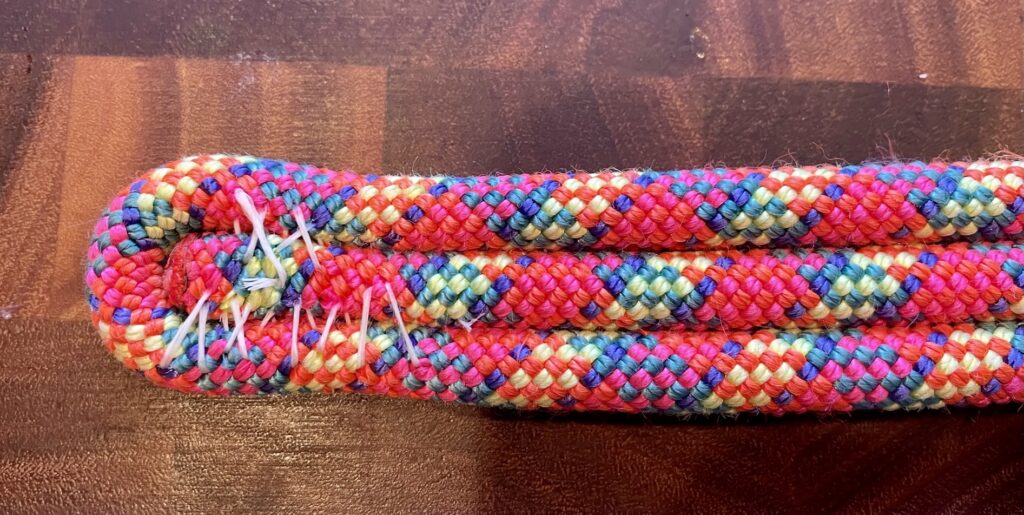
Step 2: Place your slug on a table and wrap the climbing rope around it tightly, being careful to match up the rope’s end with the slug’s end. One-and-a-half full wraps, as shown in the photos below, should be adequate. Next, stitch the rope wraps onto the slug, using several turns of thread that pass through the rope’s outer sheath. The goal is to use just enough stitches to maintain a tight wrap. Don’t worry about making the stitches look good; they will be hidden underneath the finished rug.
…
…
…
If your rope is so stiff that it doesn’t readily bend around a single slug, then use two slugs side-by-side. This allows the rope to make a larger radius of curvature. I found it necessary to use a double slug for one of my oval rugs.
…
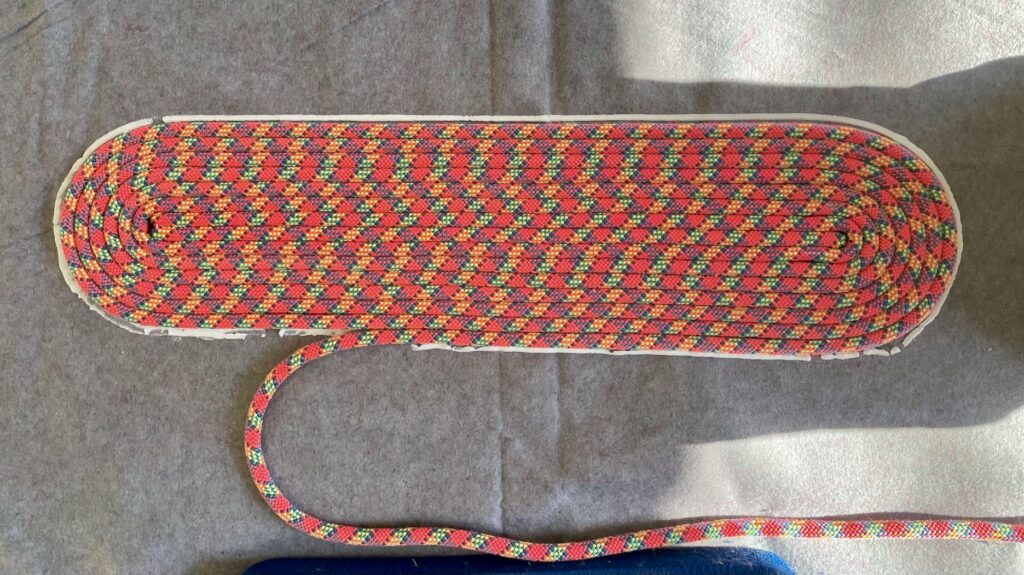
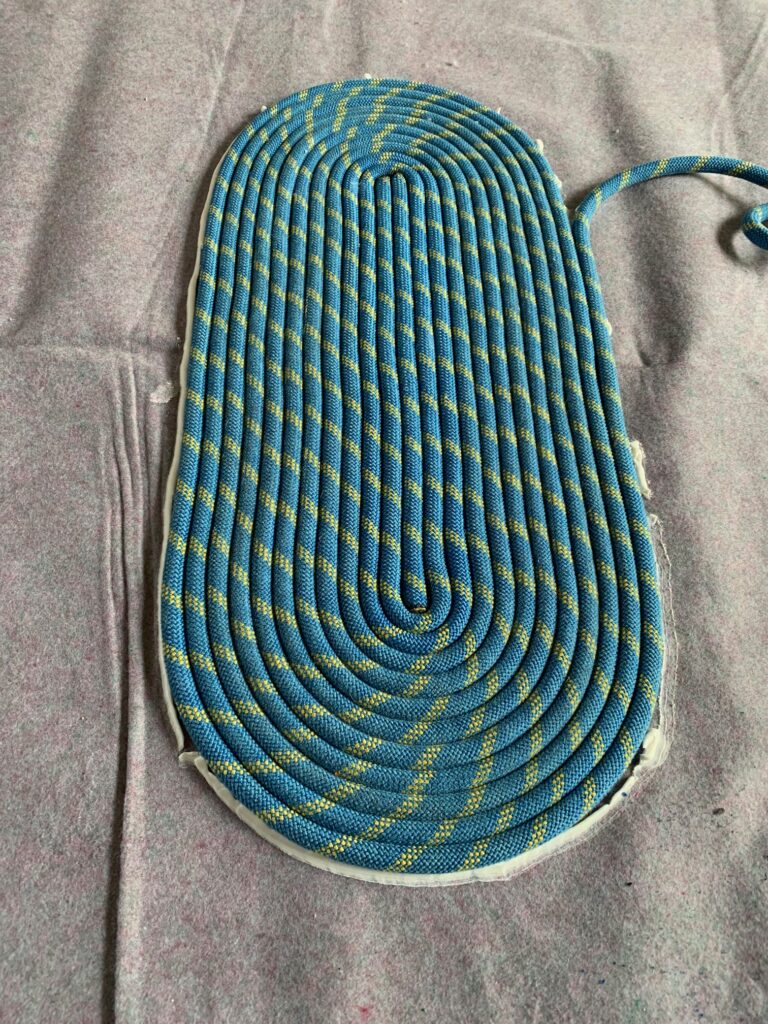
Step 3: Place your backing fabric on a hard floor, large table, or other flat working surface. Spread a layer of glue onto the center of your backing fabric and then press the initial rope wraps onto the glue. The remainder of the rope should be flaked out to allow pulling it without tangles.
…
…
Step 4: Put down a bead of glue around the perimeter of the initial wraps and then make another full wrap with the rope. Firmly press the new wrap down and into the previous wrap. Repeat this process of putting down a glue bead and making a tight rope wrap until you either reach the end of the rope or come to the edge of the backing fabric.
…
…
…
Step 5: Finish the end of the rope by cutting it at a 45-degree angle and fusing it with a lighter or match, then glue the beveled end firmly against the previous wrap. Step back and let the glue dry for a day or two.
…
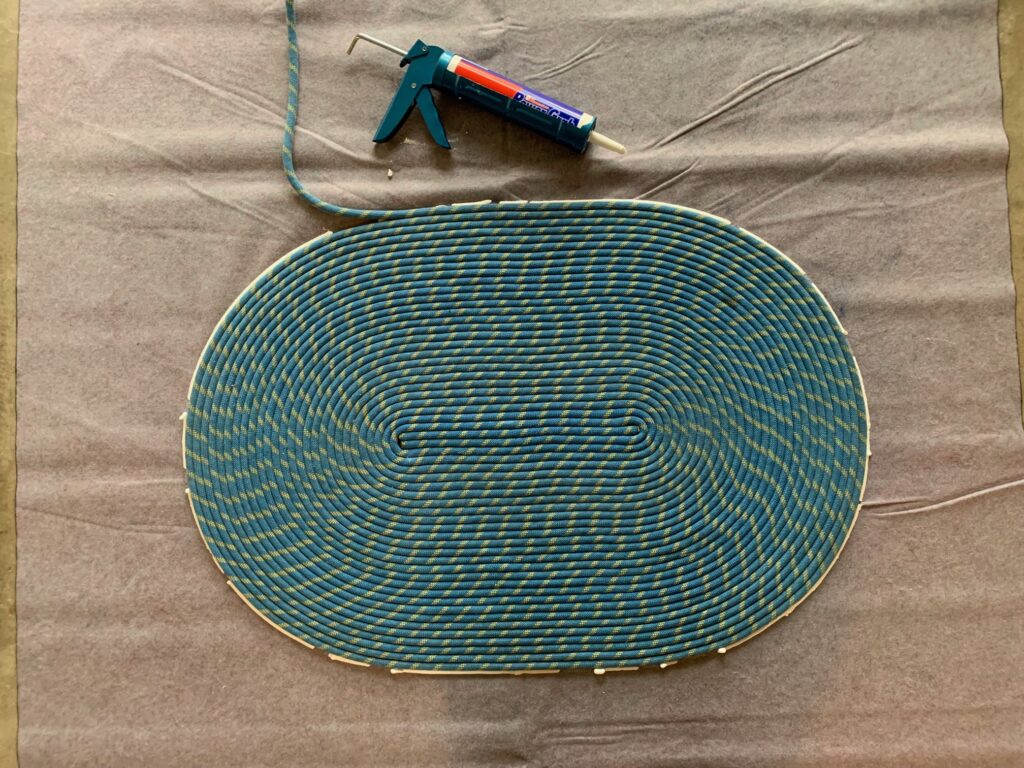
Step 6: Once the glue has dried, use scissors to coarsely cut around the perimeter of the rug. You don’t need to create a clean edge; just cut off the bulk of the excess backing fabric.
…
Step 7: Carefully cut around the perimeter of the rug again to trim off the ragged edge of the backing fabric. For this fine trimming, I found it advantageous to let the rug slightly overhang a tabletop so that I could angle my scissors underneath the rope coil.
…
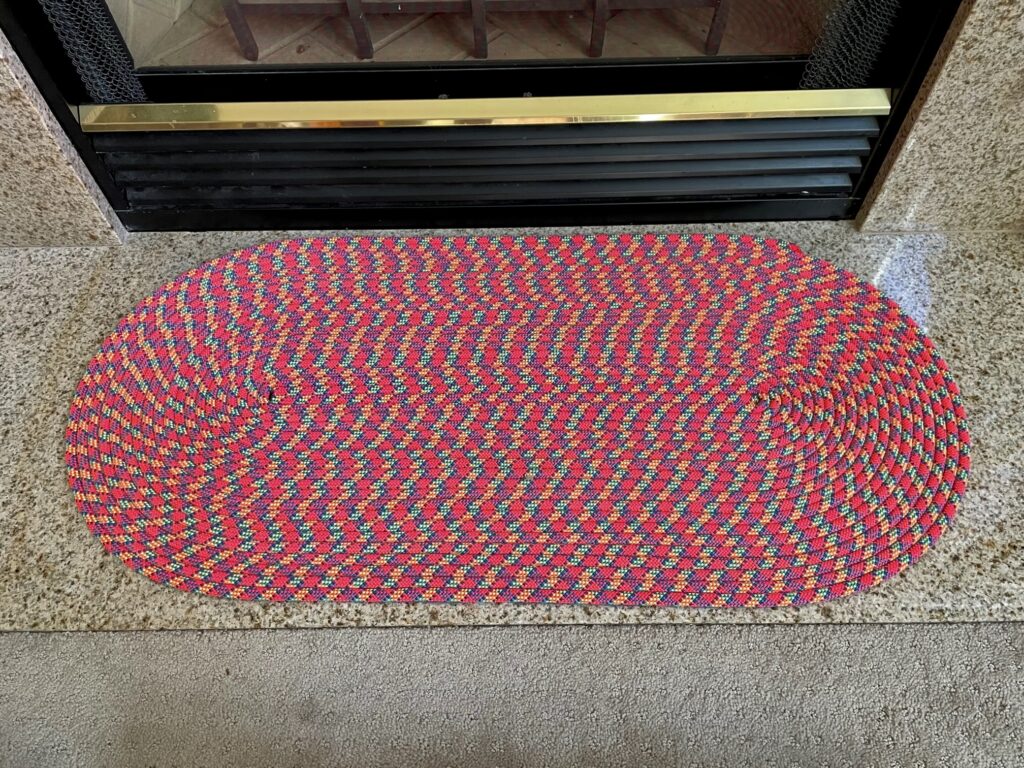
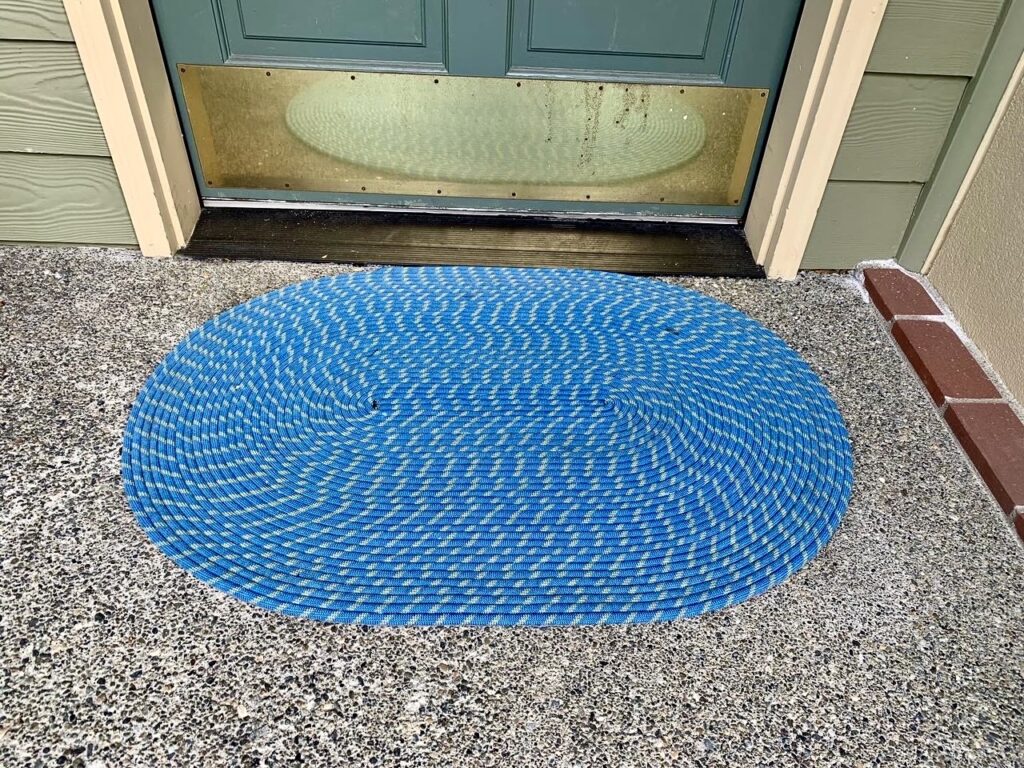
Step 8: Place your new rope rug on the floor and enjoy! Or think of other uses. For example, I’m using a large oval as a front door mat, and using a small oval as a fireplace hearth mat.
…
…
…
…
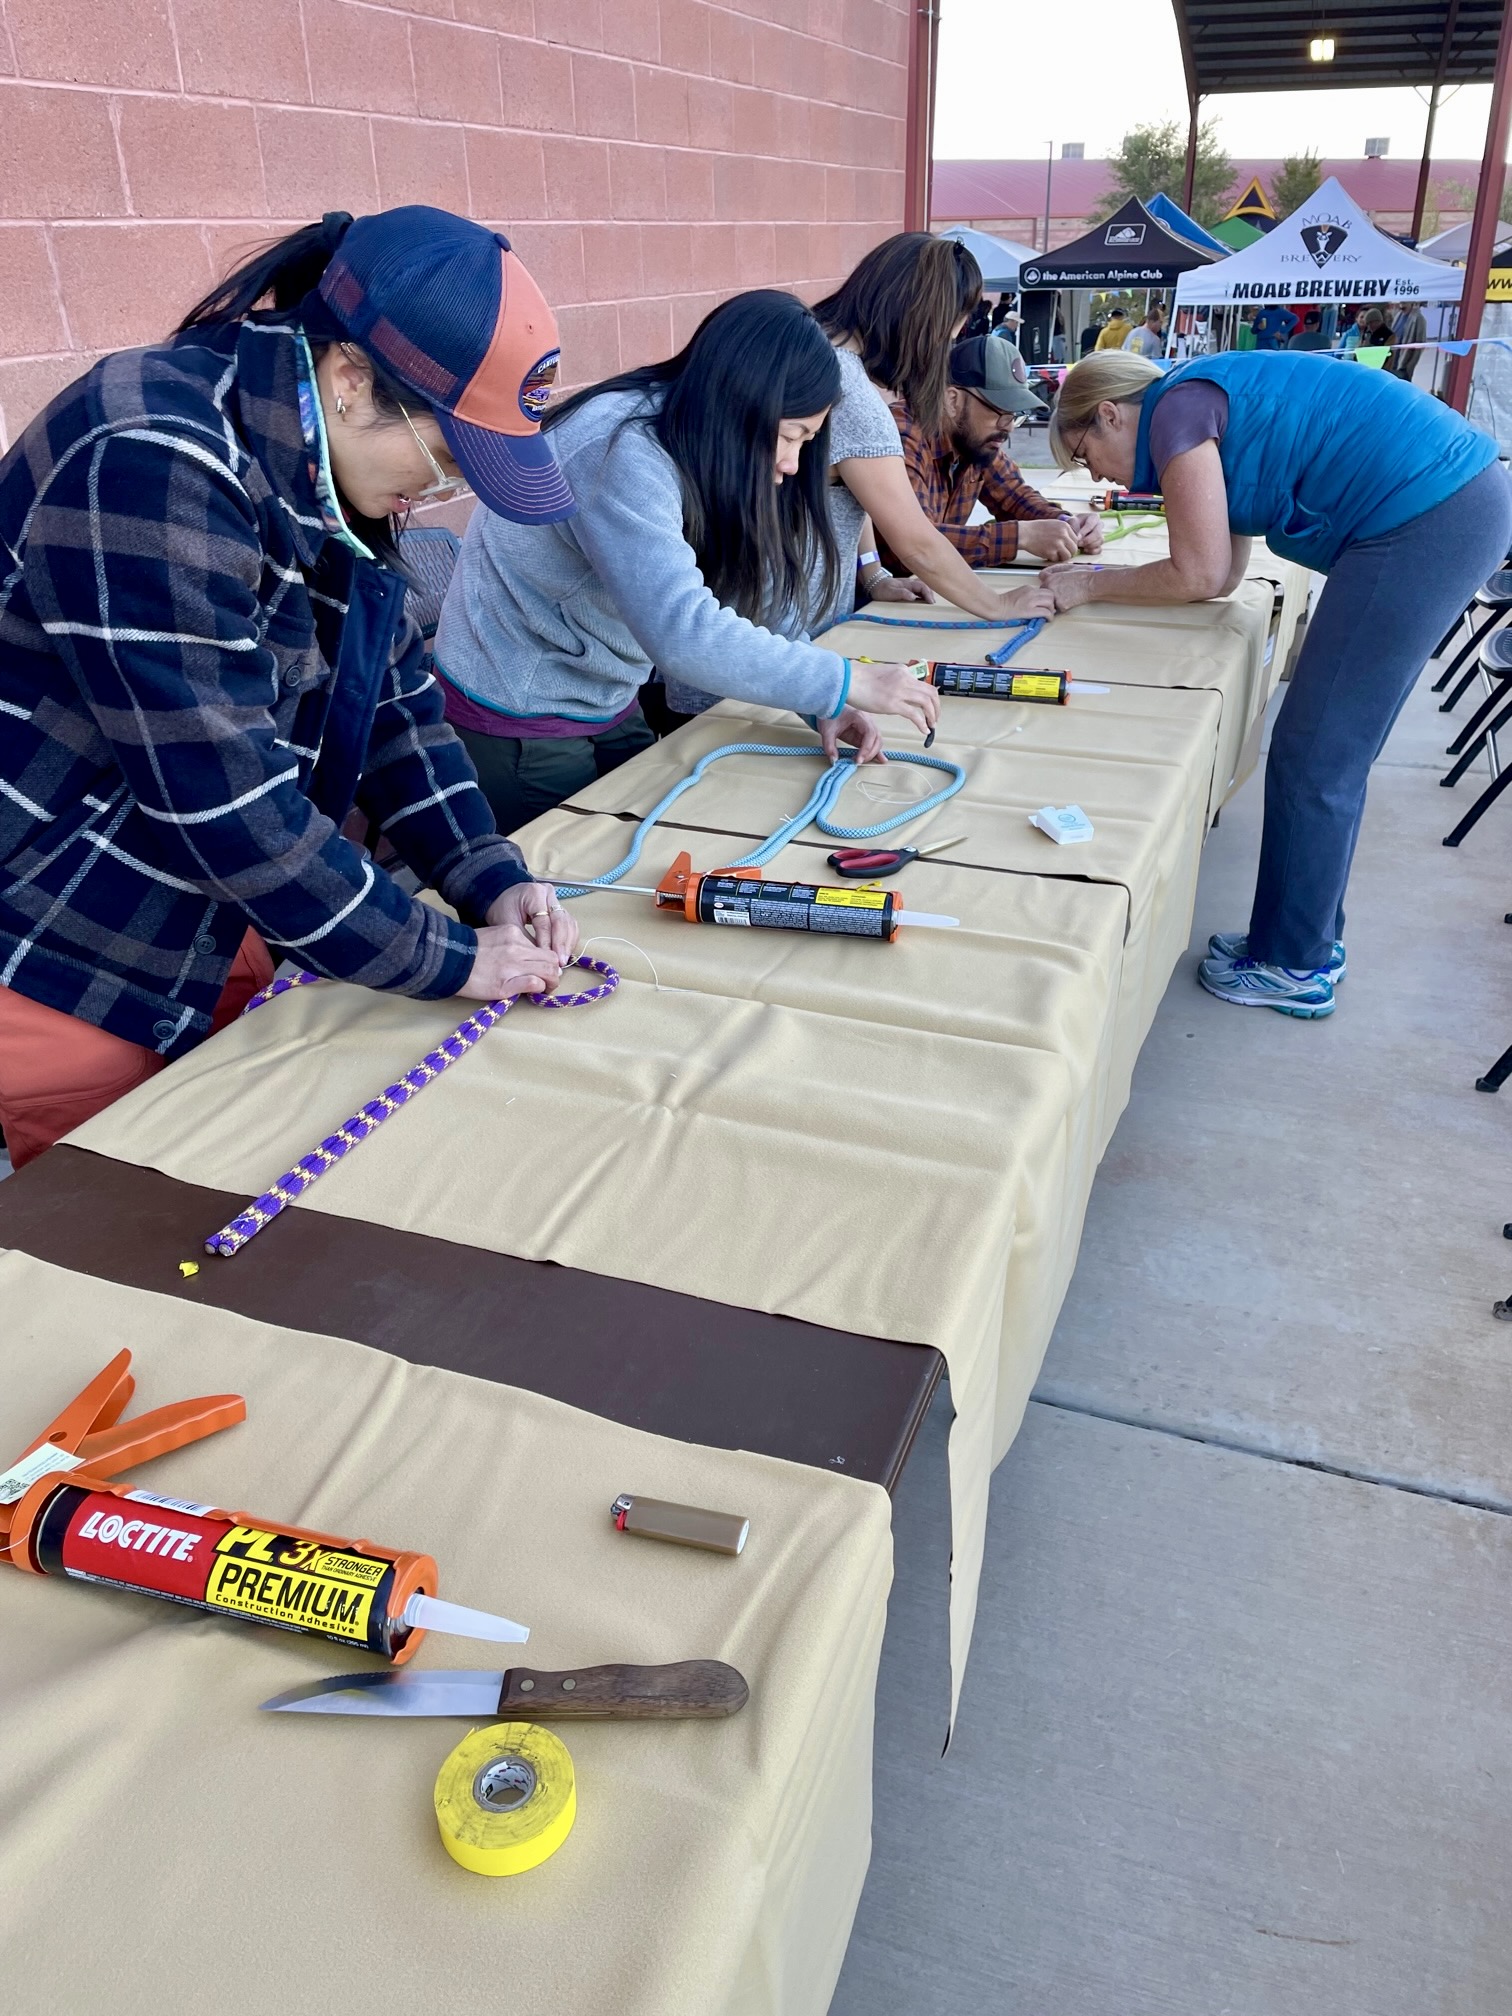
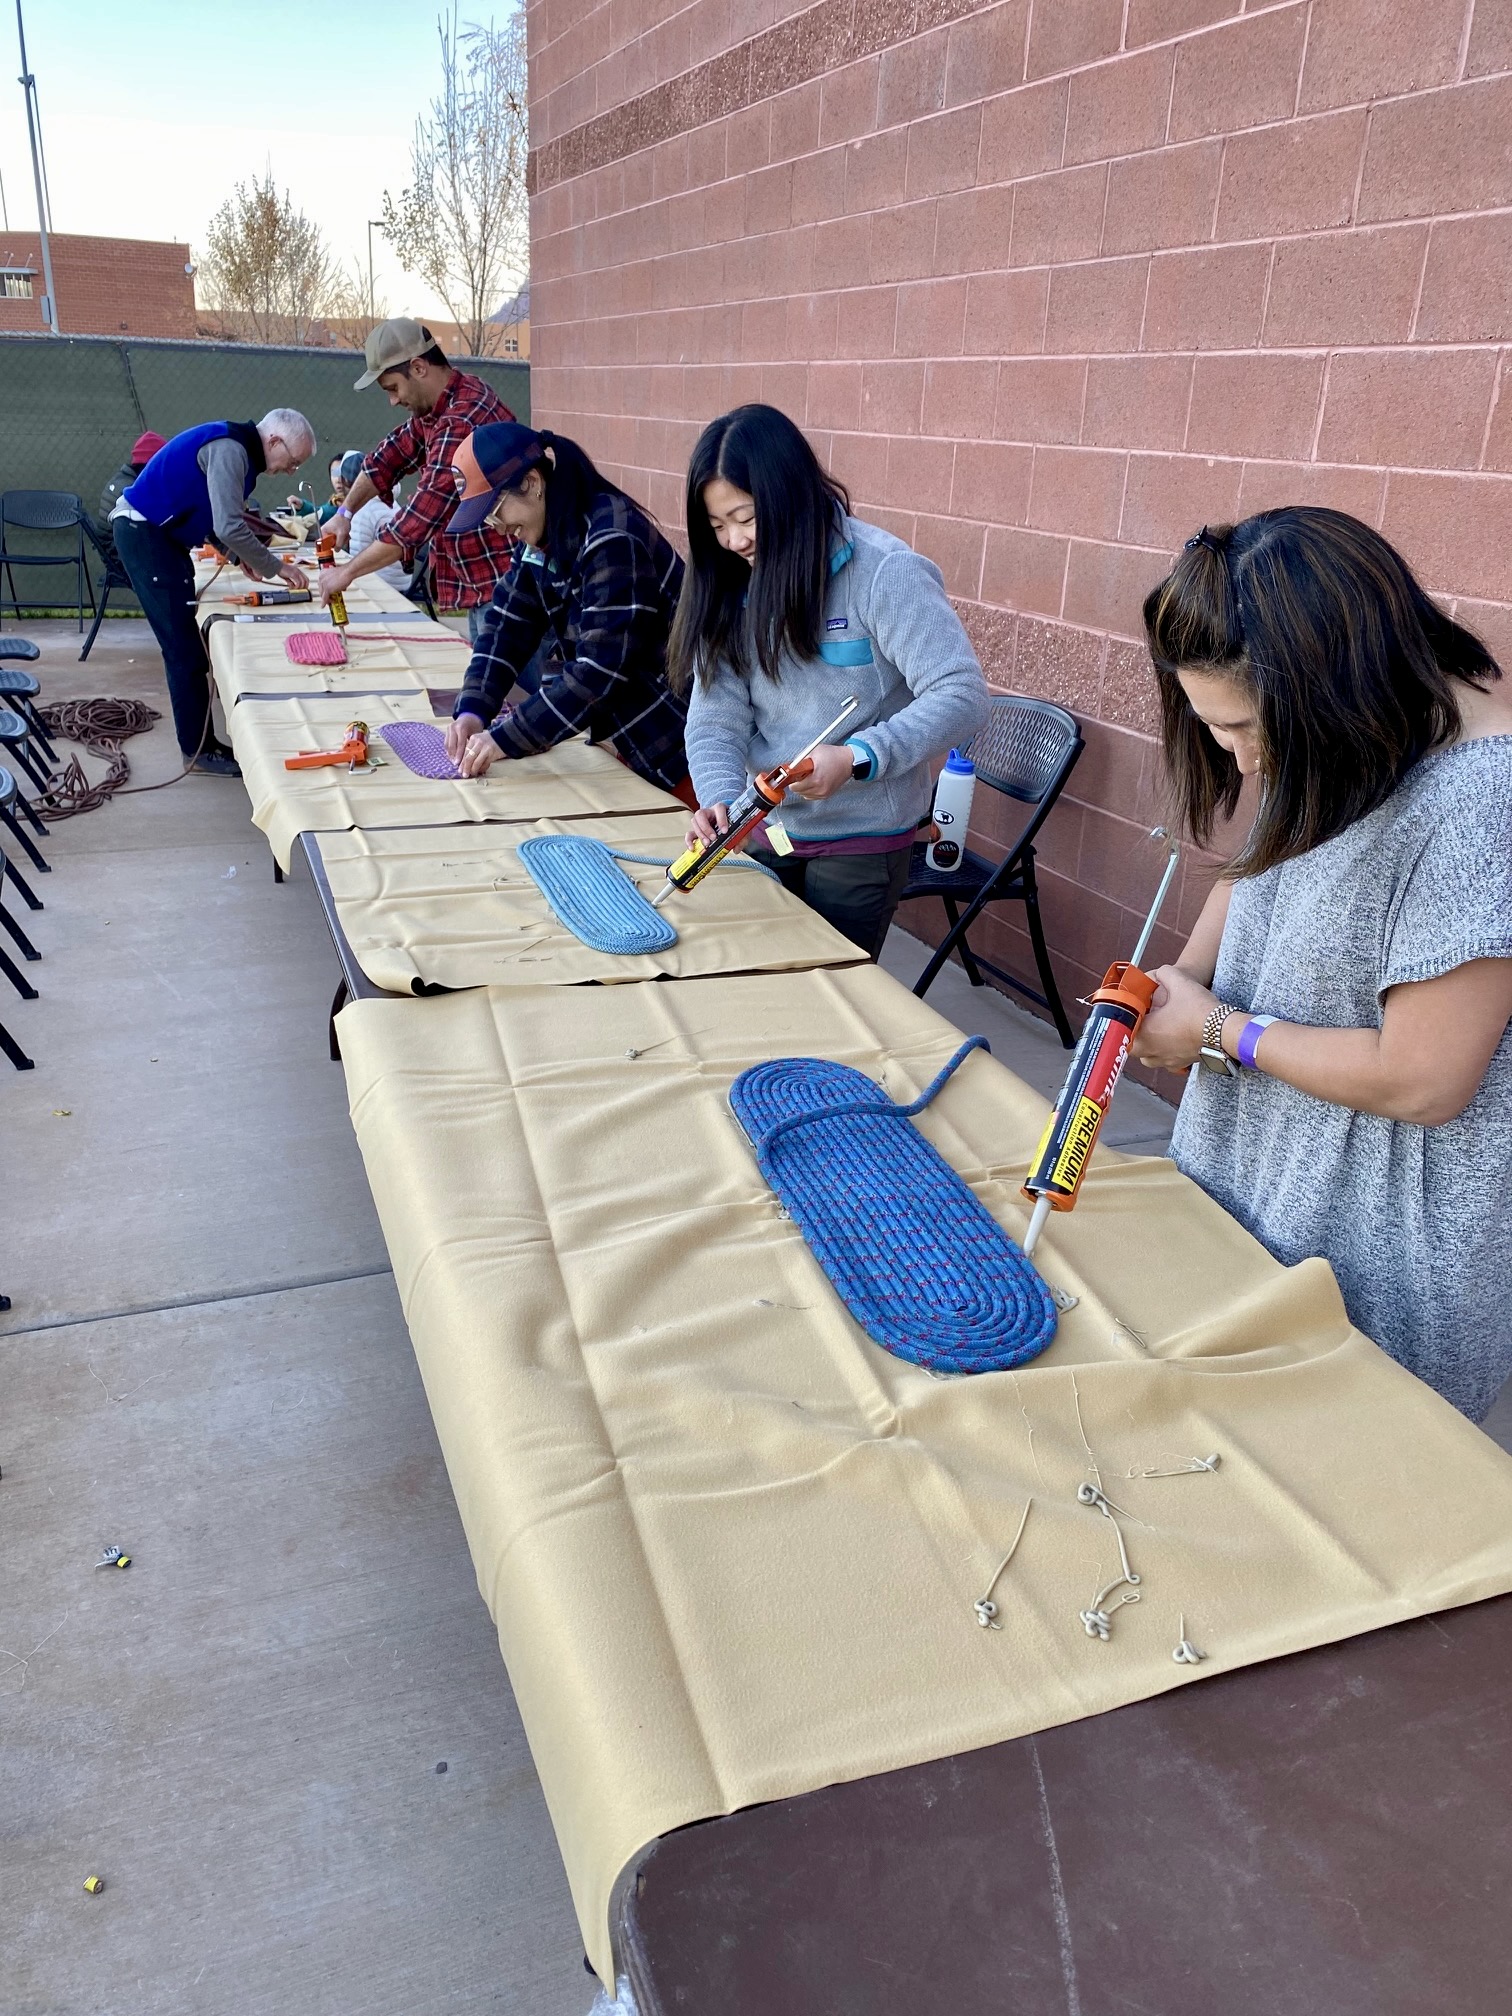
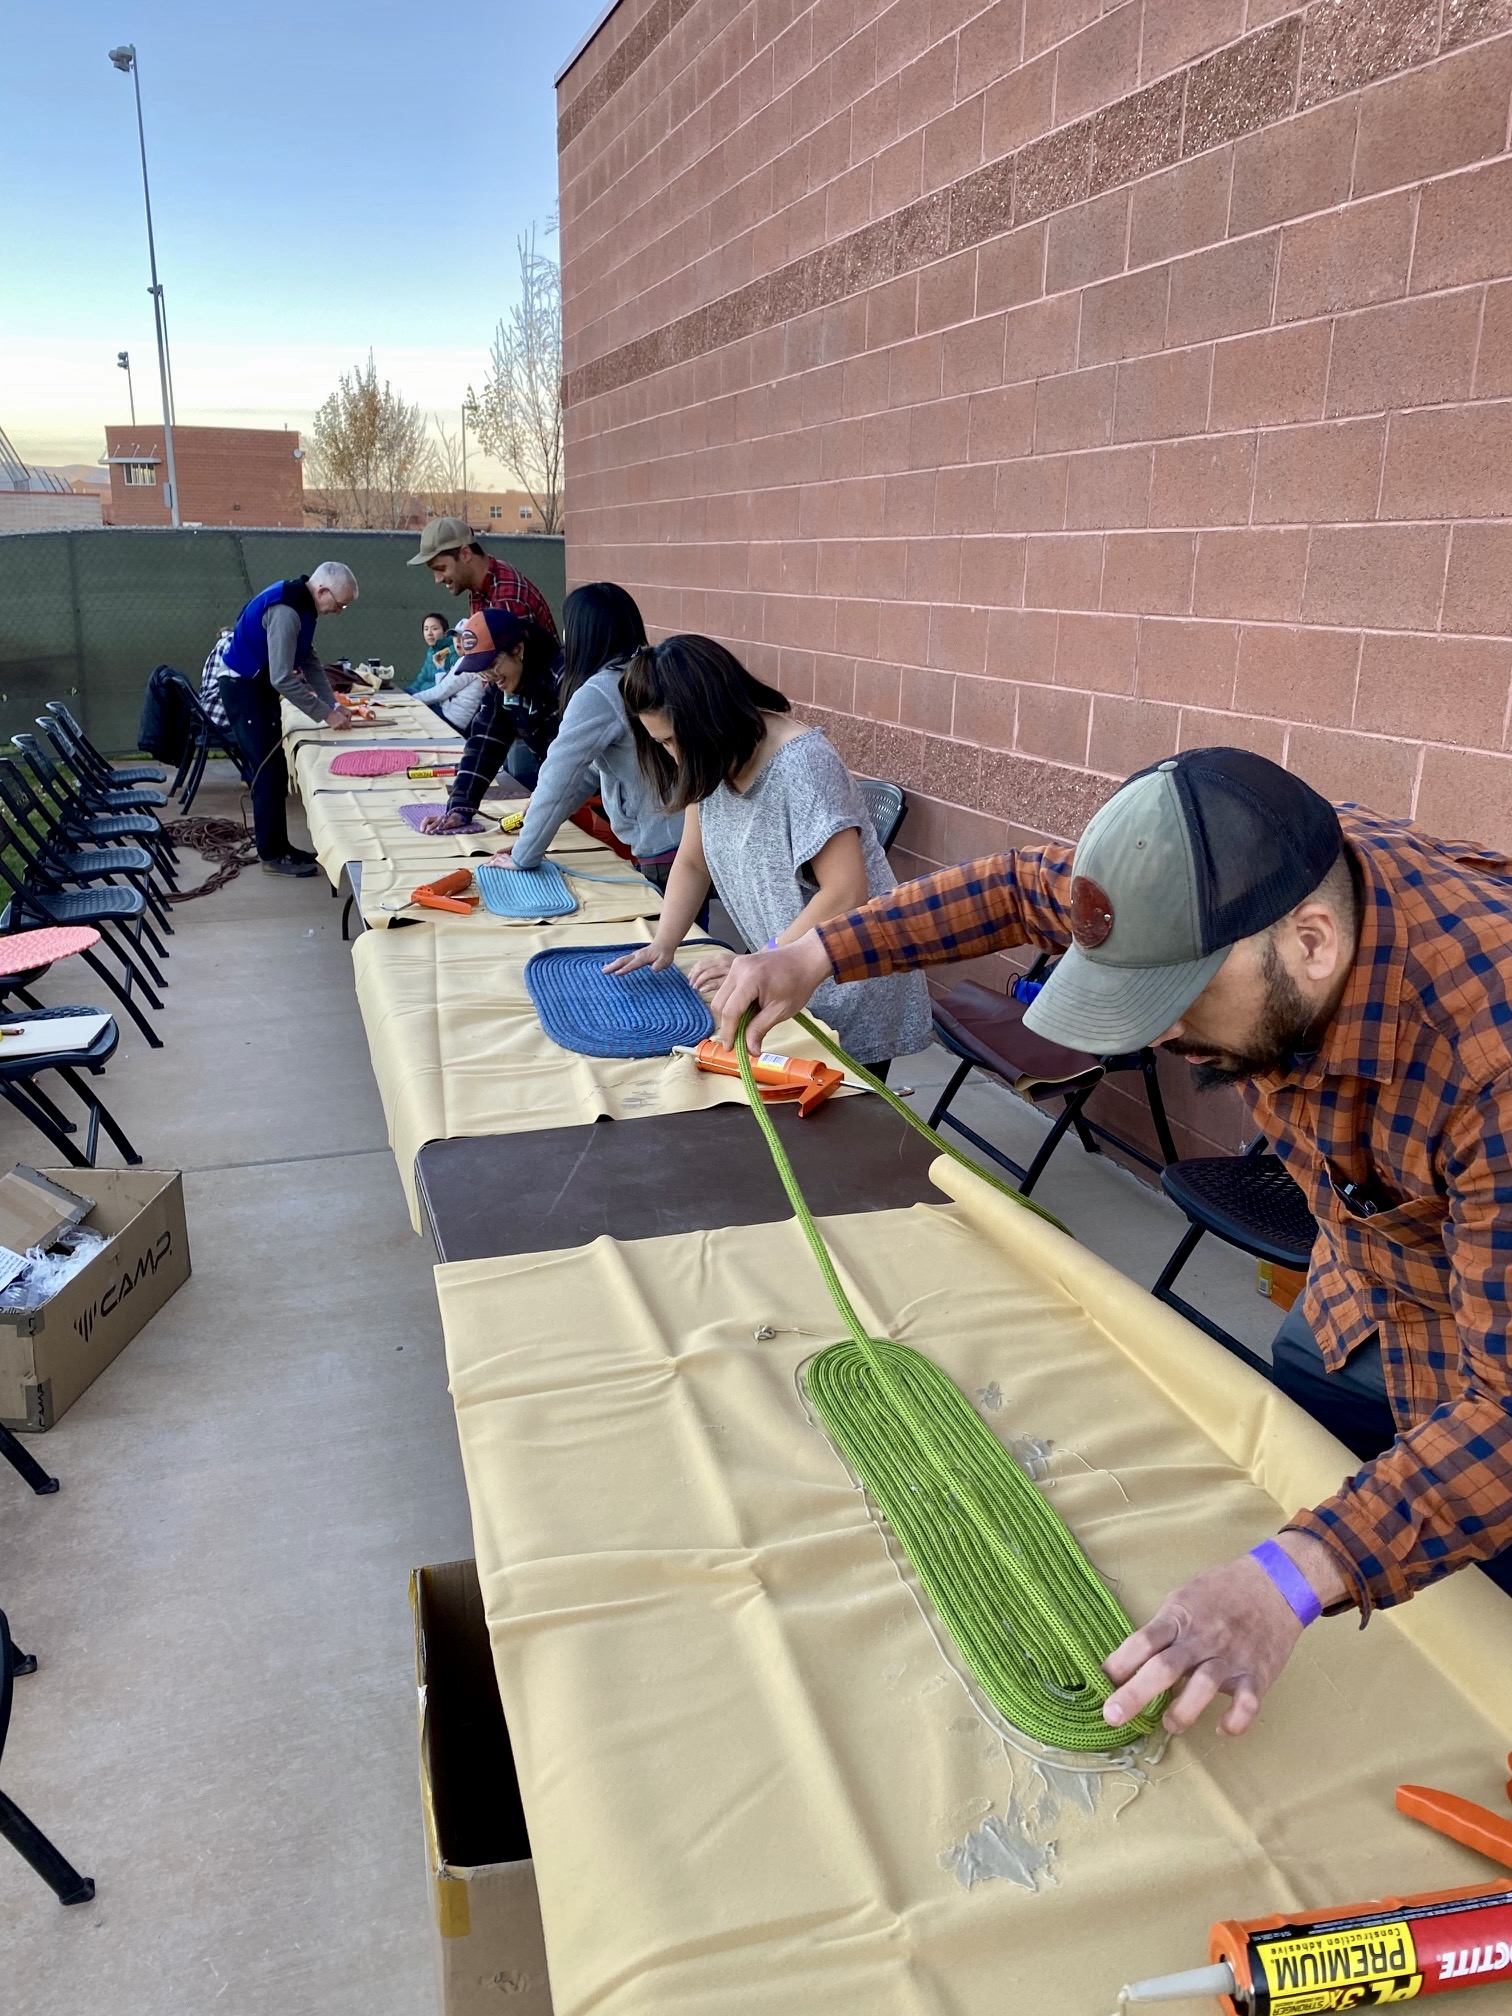
Moab Rug-Making Clinic
In November 2023, I gave a rope-rug-making clinic at the American Alpine Club’s annual Craggin’ Classic weekend event in Moab, Utah. Our enthusiastic group of climbers made eight rugs of different sizes, shapes, and colors. It was a lot of fun and we all learned a lot. Click to enlarge the photos below…
…
<<< ————– >>>
Return to Trailcat Tips homepage
Return to Gear Reviews, Packing Lists & Trailcat Tips homepage