Originally Posted: May 2022
Updated: August 2024
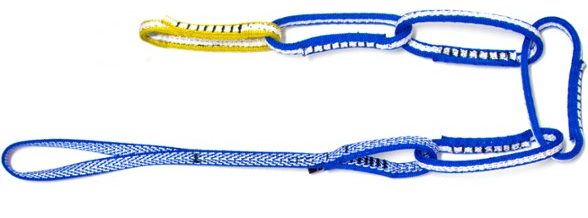
Manufactured climbing tethers have become quite popular in recent years. The trend was started by Metolius when they introduced their Personal Anchor System (PAS), which comprises a series of full-strength sewn loops that form a webbing chain. Similar products were subsequently introduced by Black Diamond, Camp, and other companies. In use, you girth-hitch one end onto the two tie-in loops of your harness, and then you can select the effective tether length by clipping more or fewer loops in the chain. All of these products offer the high strength of a sewn runner combined with the adjustability of a conventional (but relatively weak) sewn daisy chain.
.
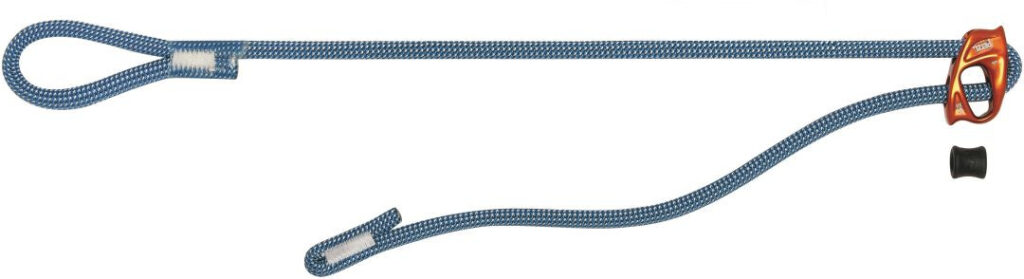
More recently, Petzl introduced their Connect-Adjust Lanyard, which comprises a length of dynamic rope with a loop on one end and an aluminum locking device that slides up and down the rope. In use, you girth-hitch the end onto the belay loop of your harness, and then you can select the effective length by moving the locking device to a desired point on the rope. This system allows for quick and infinite adjustment over the maximum length of about 35 inches, whereas the PAS-type tethers allow for only incremental length adjustments (in approximately 4-inch increments).
.
Before continuing, let’s clarify some terminology. Although Metolius’ trade names Personal Anchor System and PAS have come to be used rather generically for all related products, these terms are really misnomers. Such products are actually personal tethers rather than personal anchors. In climbing situations, an anchor consists of something firmly affixed to a mountain or crag, such as a bolt and hanger drilled into a rock face, a piton driven into a crack, a sling tied around a tree or boulder, an ice screw inserted into a frozen waterfall, or a snow picket hammered into a glacier. A tether, on the other hand, is a short length of webbing or cord that connects a climber to an anchor. We are clearly talking about tethers in this context.
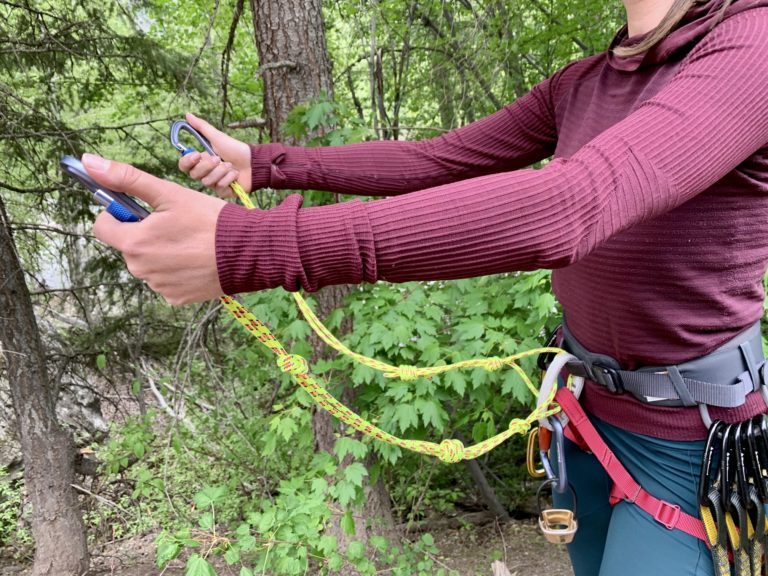
A significant disadvantage of all aforementioned commercial tethers is that they must be girth-hitched to the harness, and these hitches are somewhat bulky. Furthermore, if using a pair of tethers in order to create redundancy, the double girth hitches get very bulky. This raises the question of whether to keep the tethers permanently girth-hitched—a bulky option—or to tie a new girth hitch on each pitch—an inconvenient option. Because neither option seems appealing to me, I prefer to make my own cord tethers that are permanently tied onto my harness. By using accessory cord rather than webbing or rope and by eliminating girth hitches, I greatly reduce the bulk, even with double tethers. The cost is much lower, too; one of my homemade tethers costs about $7, whereas the commercial tethers cost about $40 to $50 dollars each (excluding carabiners).
.
A long-running debate in the climbing community has been the matter of where a personal tether should attach to a harness. Should it be attached to the tie-in loops or to the belay loop? One well-accepted rule of thumb is that soft materials (ropes, slings, and cords) should be attached to the tie-in loops, whereas hard materials (carabiners and quicklinks) should be attached to the belay loop. There are exceptions to every rule, of course, and individual climbers will need to make their own decisions. I will only state that my homemade tethers are intended to run through both tie-in loops, where they are most secure and least intrusive.
.
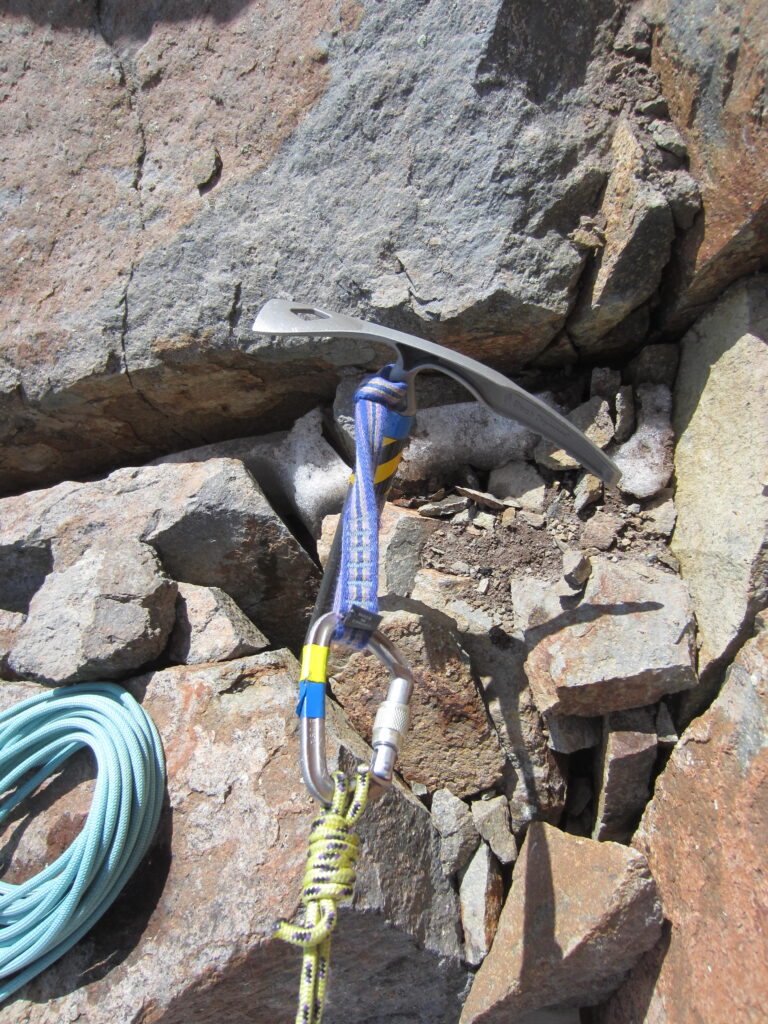
I use my personal tethers for all of my climbing ventures, including sport crags, trad crags, alpine rock, and alpine snow. Specifically, I keep one tether (for minimal weight) on my alpine harness and two tethers (for redundancy) on my crag harness. They provide a simple and convenient means of attaching myself to a belay anchor, toprope anchor, or rappel anchor, and I will often clip a tether to my ice axe for purposes of a quick self-belay when installing a picket or fluke on a steep snow slope. On more than one occasion, I’ve even clipped to my ice axe being used as a rock anchor at the top of a snow chute. During descents, I have used the tether as an extended rappel sling. In every situation, I was able to get myself arranged almost instantly, without having to fumble for a separate sling or fuss with a knot. As the old climbing axiom goes, “there is safety in speed.”
.
Materials for Making a Personal Tether
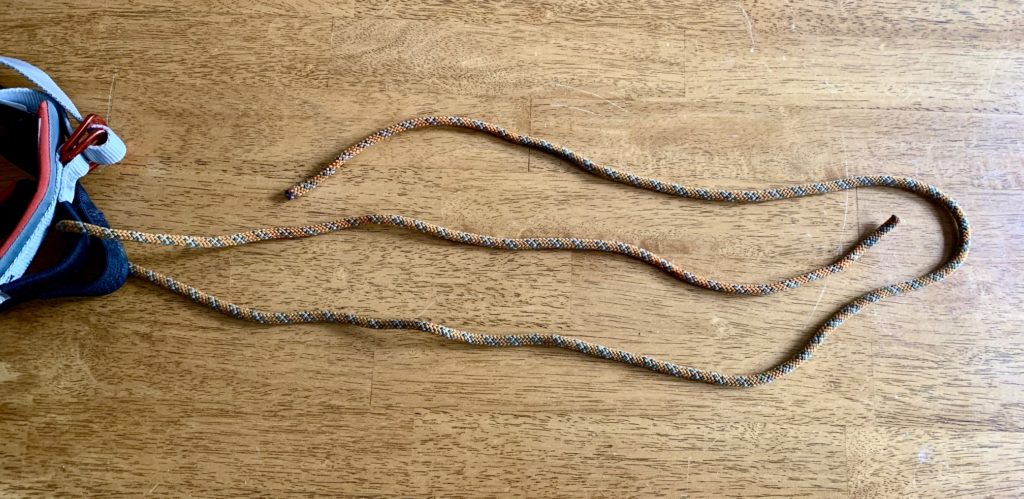
Tether Cord: For each tether, start with about 7 feet of 5mm to 6mm nylon accessory cord. (Avoid using any of the high-strength cords such as Dyneema or Spectra, because they do not hold knots well.) This cord length results in a finished tether length of about 28 inches, which roughly matches the length of my outstretched arm. I have found such a length to be appropriate for the vast majority of my climbing applications, such as hanging from a double-bolt anchor on a sport route, or clipping to my ice axe on a snow route. Climbers who prefer a shorter or longer tether should adjust the starting cord length accordingly, but the basic procedure is unchanged.

Tether Carabiner: My personal tether requires a dedicated carabiner for attaching to the anchor point. This carabiner remains on the end of the tether at all times and becomes part of the structure of the tether. It should be a compact, screw-gate, D-shaped locker that is slender enough to fit into the individual links of most anchor chains. My currently preferred carabiner is the Black Diamond HotForge screwgate.
Procedure for Making a Personal Tether
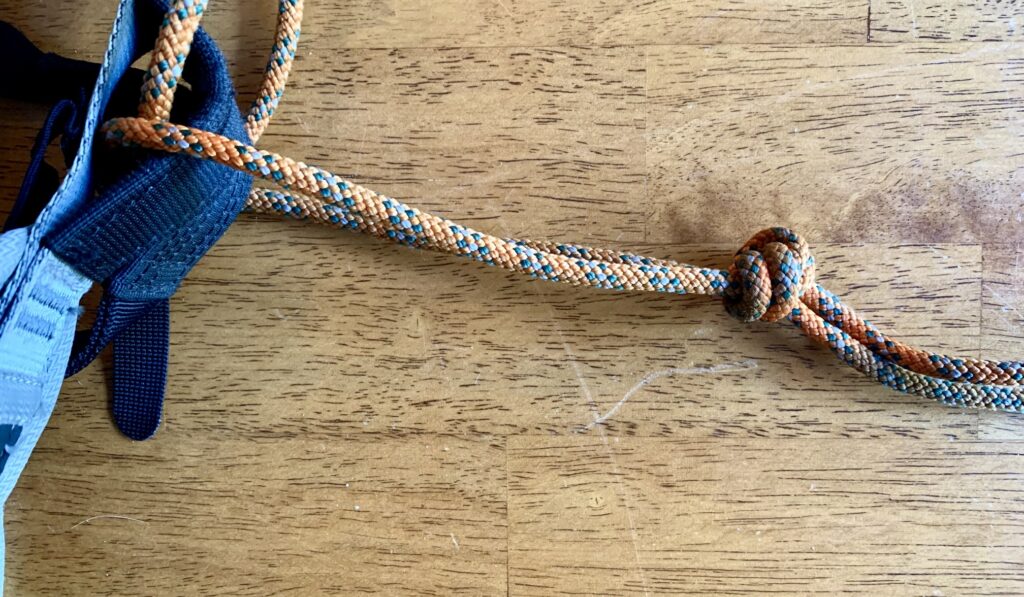
Step 1: Pass one end of the cord through both tie-in loops on your harness, then fold the cord into approximate thirds. It is important that the cord runs through both tie-in loops, not just the waist loop or the leg loop. Furthermore, do not feed the cord through just the belay loop; it does not possess enough durability for this type of tether attachment.
.
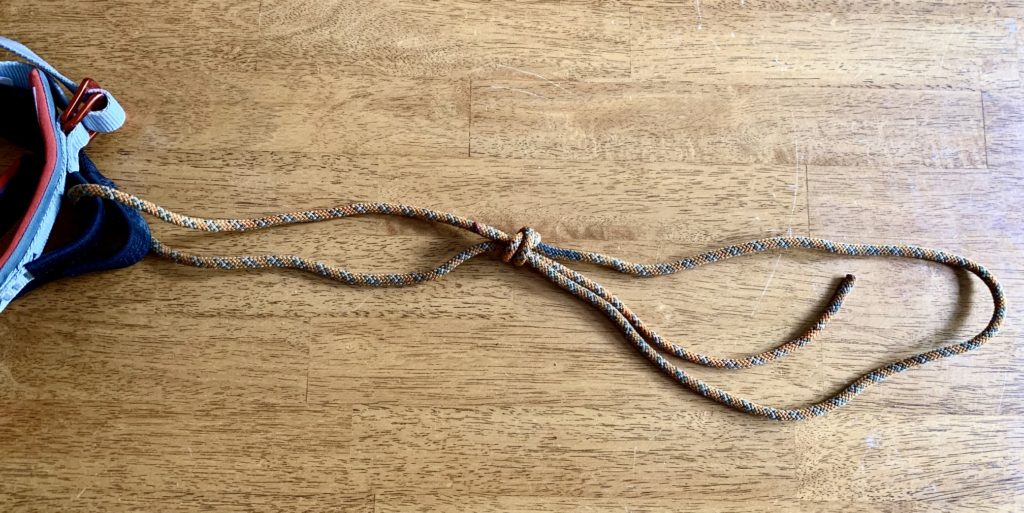
Step 2: Tie the ends of the cord together using a sliding double fisherman’s bend. This knot is identical to a conventional double fisherman’s bend except that the standing side of the cord is incorporated into the knot. Specifically, each end of the cord is wrapped around the standing part as well as the other working end. When completed, you will have an adjustable “dog-bone” sling.
.
.
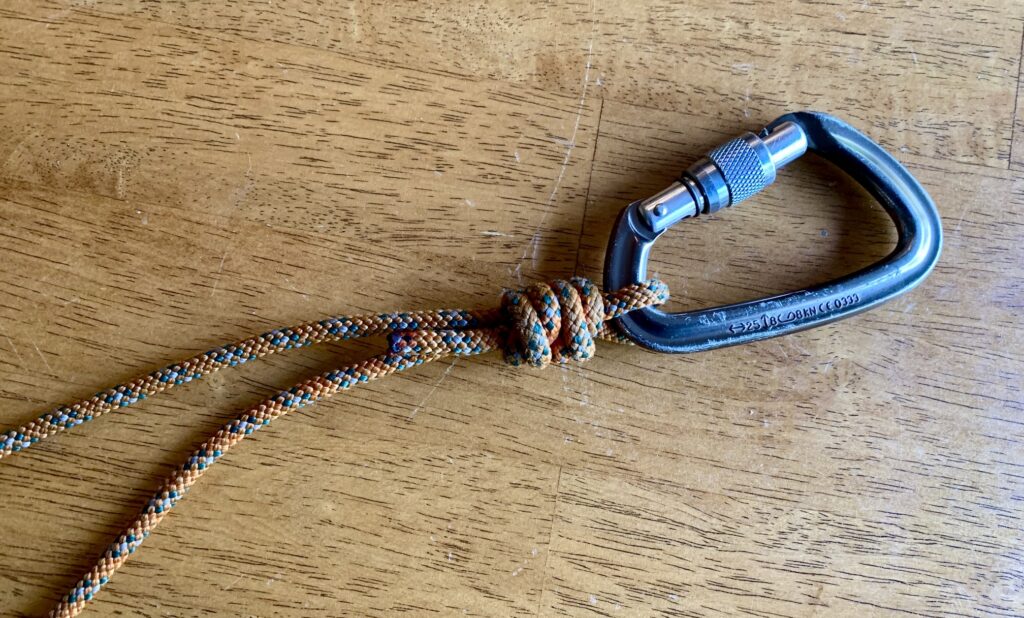
Step 3: Clip a locking carabiner into the far-end loop of the sling and slide the double fishermans bend outward until it cinches tightly against the carabiner. This holds the carabiner in a proper position on the tether, much like the rope-end carabiner of a sport-climbing quickdraw. Simultaneously, the carabiner maintains the integrity of the knot, and as such, it must remain attached to the end of the tether at all times.
.
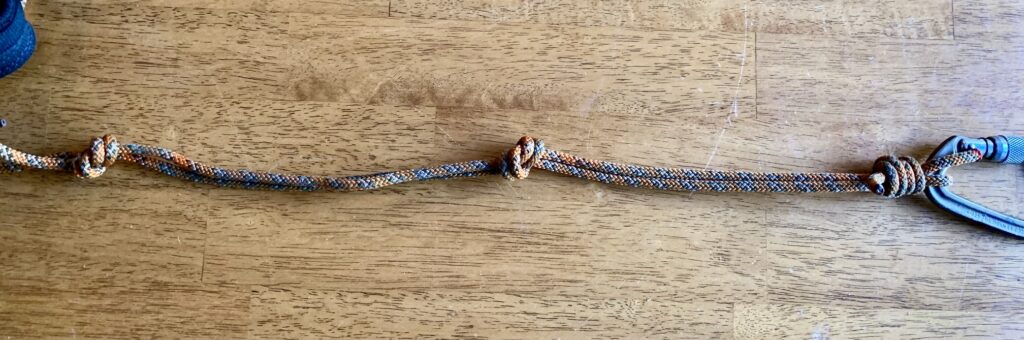
Step 4: Pull the sling taut and tie a simple overhand knot approximately 6 inches from the harness end. Make sure that both strands running between the overhand knot and the carabiner are equally taut. If necessary, adjust the overhand knot a bit to make this happen.
.
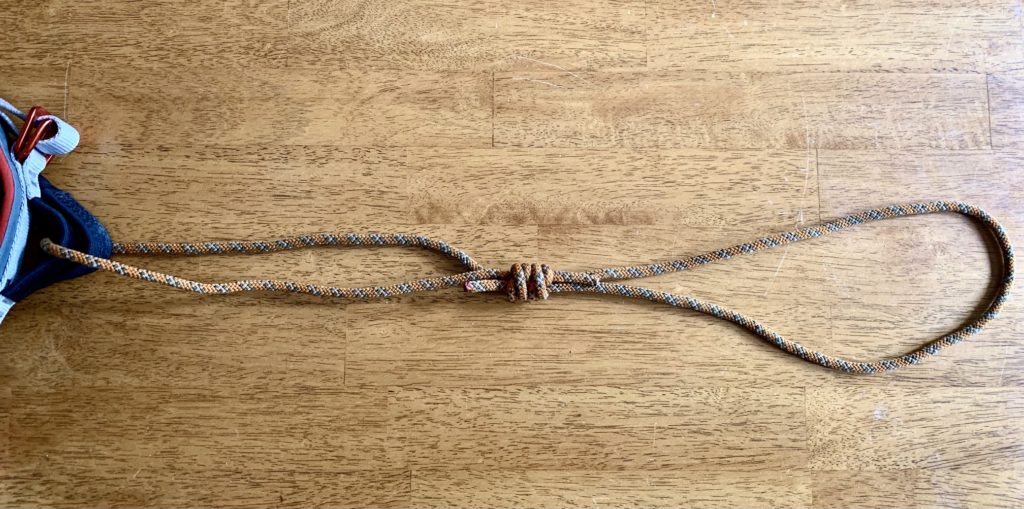
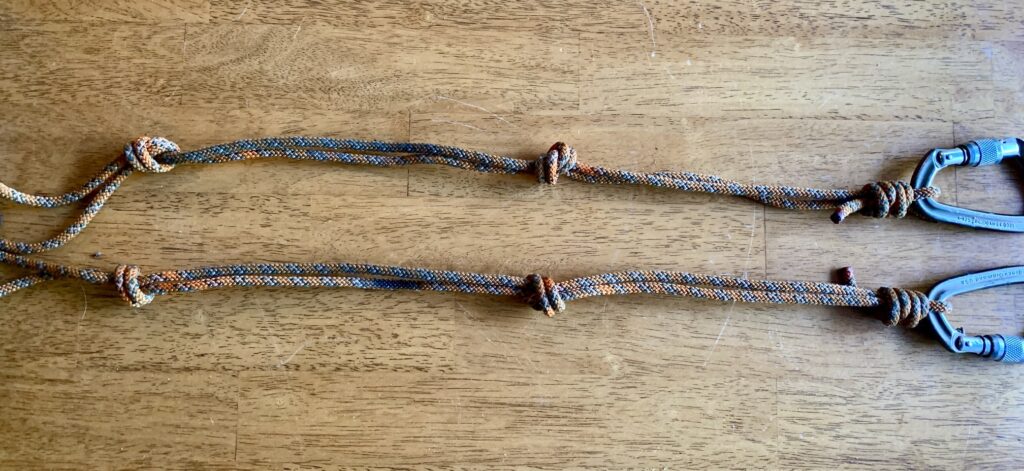
Step 5: Pull the strands taut again and tie a second overhand knot approximately 6 to 8 inches from the carabiner end of the sling. The exact location of this knot isn’t critical, but make sure that all strands coming out of the knot are equally taut. A completed tether is shown below. With use, you might find it beneficial to adjust the location of these knots, or to add a third knot.
.
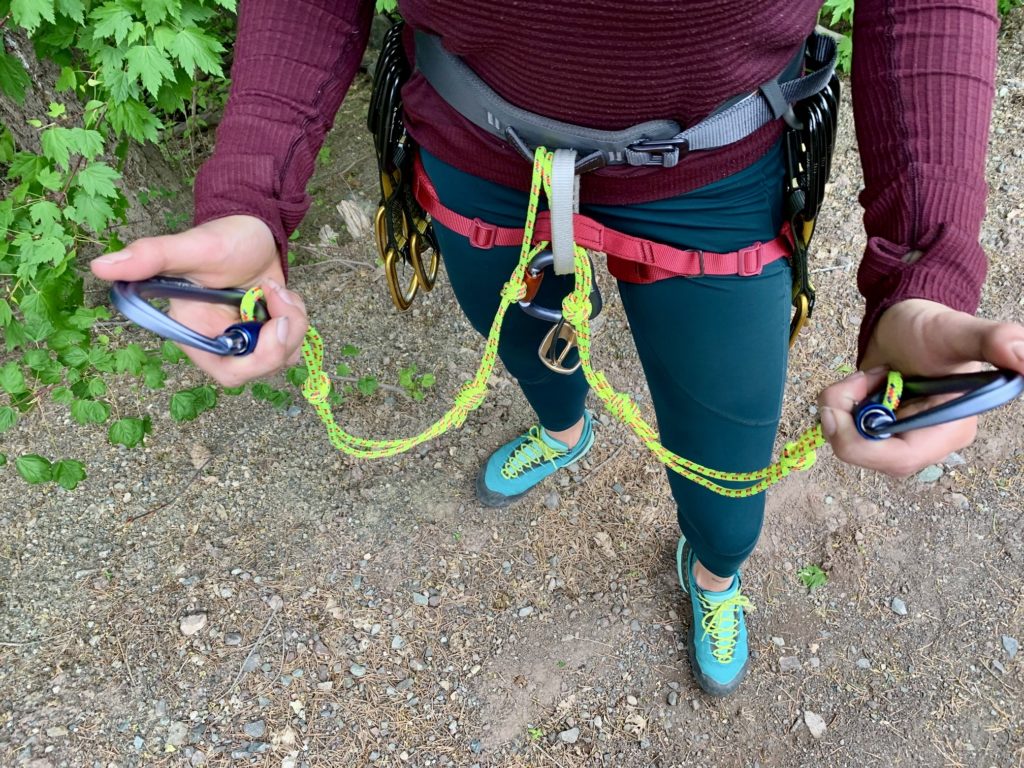
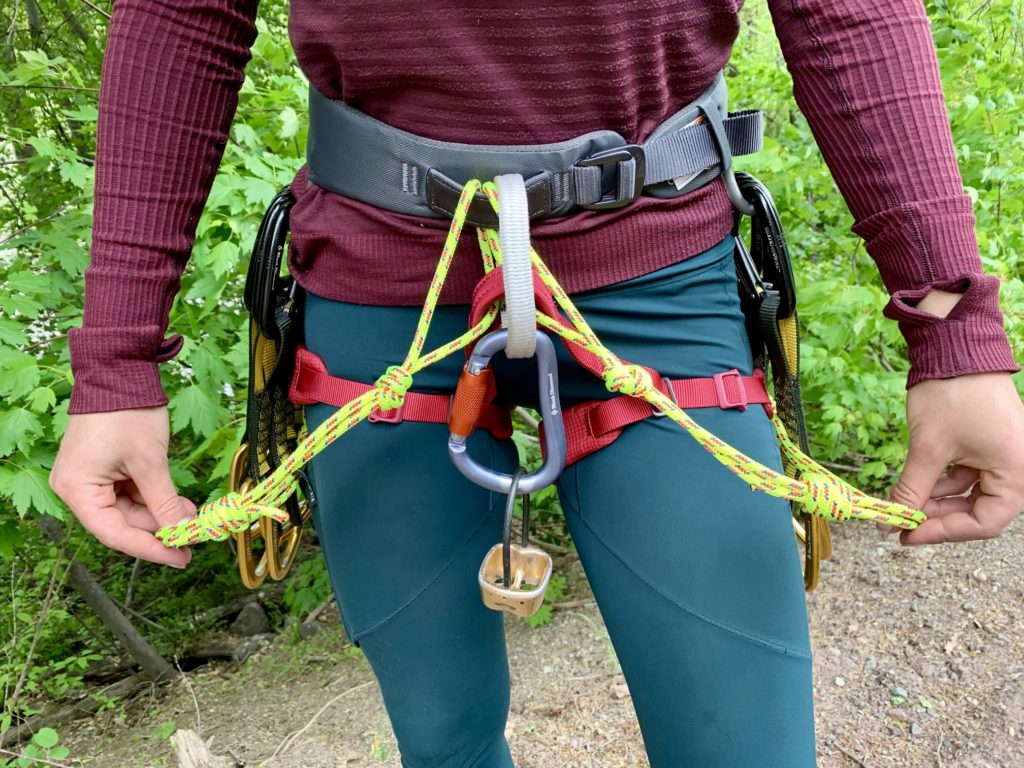
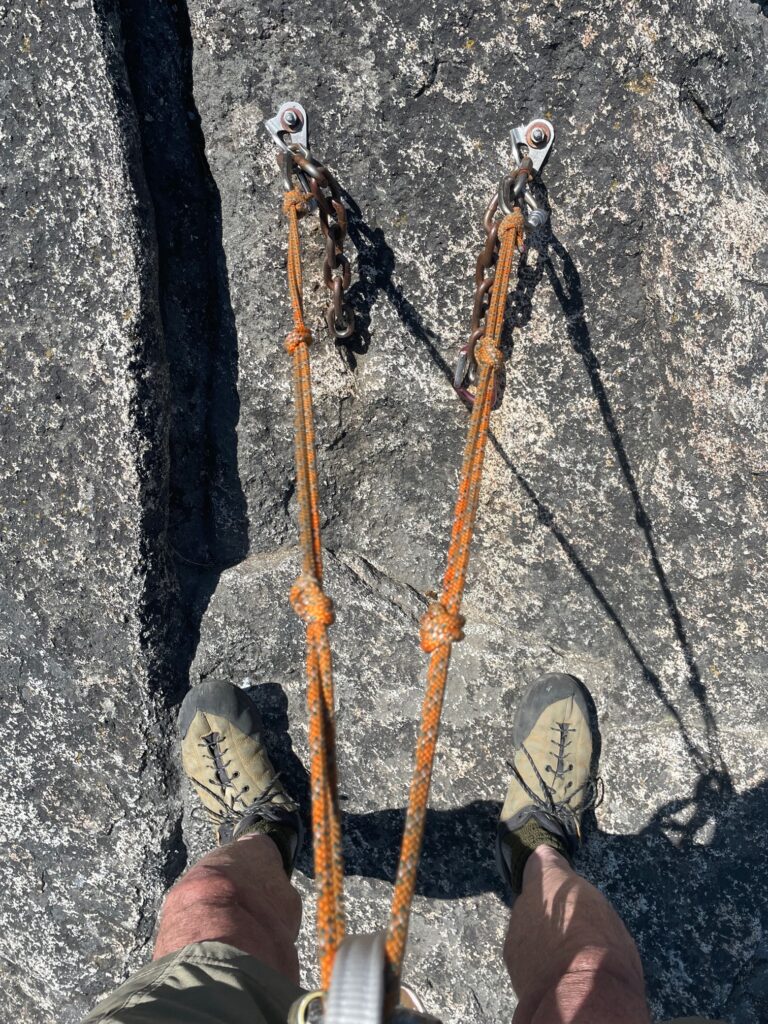
Double Tether Construction: As previously mentioned, I use two tethers on my crag harness because it allows me to clip to each side of a double-bolt anchor. This provides safety redundancy in the overall system, and the tethers form an acute triangle, which gives me a tad more lateral stability when hanging on a steep wall. For the second tether, simply follow the above-described construction procedure, being careful to match up all knots with those of the first tether.
.
.
Choking Up: In situations where I want a slightly shorter tether, I can “choke up” by clipping the carabiner onto the the far or middle overhand knot. For fine-tuning purposes, a temporary overhand knot can be tied at any desired location in the tether. If you want a tether with more permanent length-adjustment options, simply start with a longer piece of cord and then tie one or more additional knots in the tether. Whenever choking up, however, never unclip from the end of the tether; the carabiner must always stay tightly cinched onto the end of the tether.
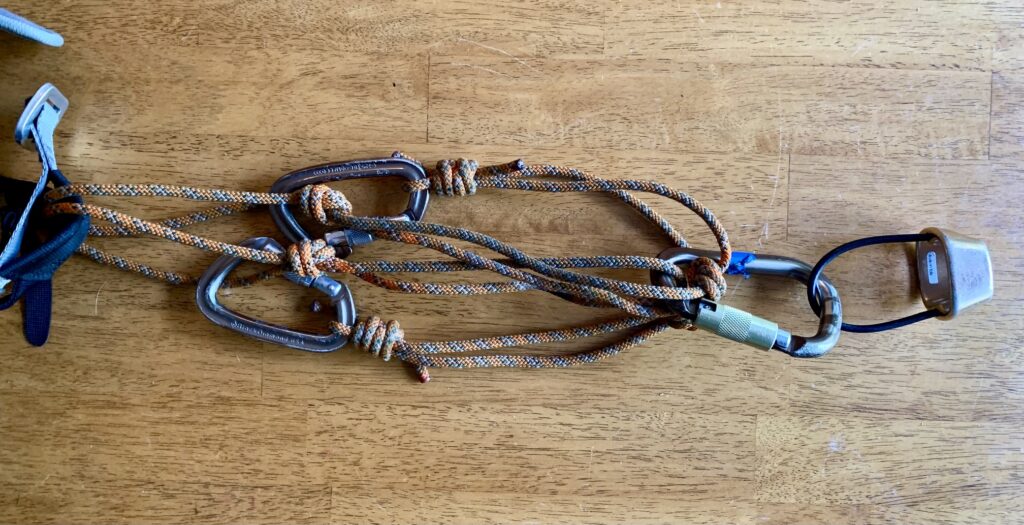
Rappelling Extension: A handy feature of some tether systems, including this one, is that the tethers can be used to create an extended rappel sling, thereby eliminating the need for a separate sling. For such a situation, simply clip your rappel device to an intermediate knot in the tether and then clip the end carabiner back to the belay loop or other convenient location. I typically clip my rappel device to both tethers for redundant strength, but this isn’t strictly necessary given the high strength of each tether compared to the low force imposed during a rappel.
.
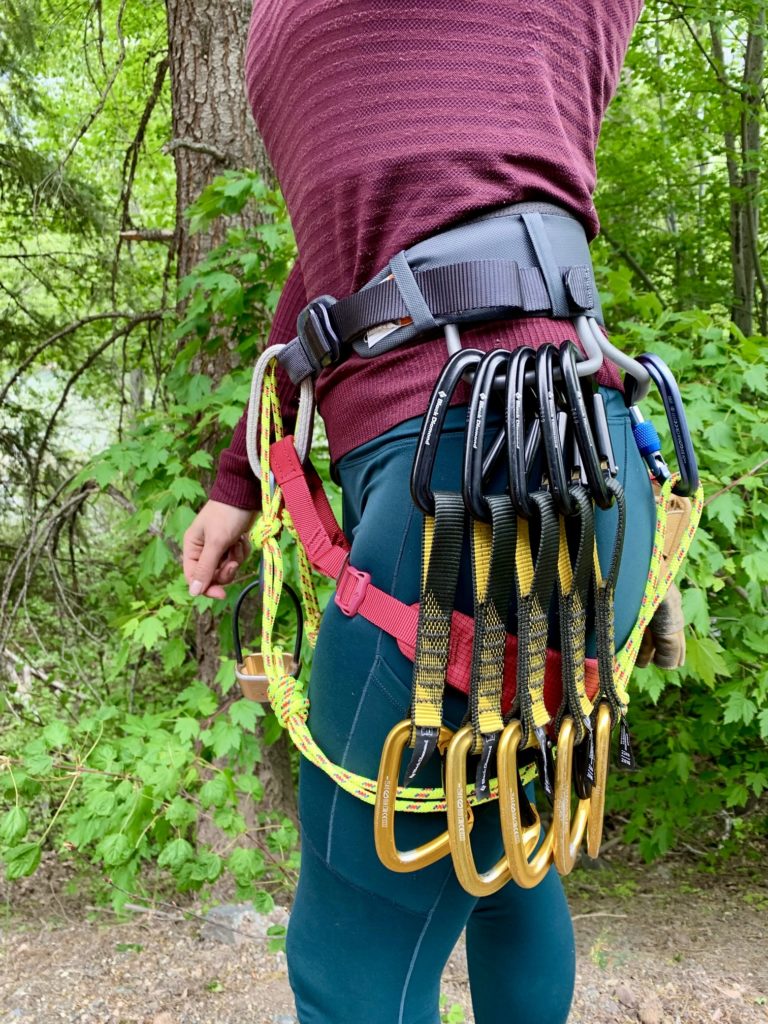
Storage: When not in use during a climb, I clip each tether to the rear gear loops on my harness. The length allows them to sit nicely behind quickdraws or other gear without hanging down too far. Obviously, you could choke it up by clipping an intermediate knot.
.
Caution: No tether system is intended to hold a significant fall, and this is especially true of static tether systems such as the one described above. A fall as short as 1 or 2 feet can impose surprisingly high shock loads on the anchor, on the climber, and on every system component in between. Consequently, it is important to keep the tether taut when you are attached to an anchor. If you can’t keep the tether taut, choke up on it by clipping an intermediate knot or, alternatively, change your body position to put tension on it.
…
Affiliate Disclosure: The preceding text contains some affiliate links, which means that if you purchase something I’ve linked to, I might get a small commission at no additional cost to you. Be assured, though, that I mention only items that I currently use or would recommend to a friend.
<<< ————– >>>
Return to Trailcat Tips homepage
Return to Gear Reviews, Packing Lists & Trailcat Tips homepage