Trip Date: August 19-21, 2024
Vicuna Peak Day Climb
Upper Coldwater River
Vicuna–Guanaco Saddle
Vicuna Peak (6880+ ft)
Trip Report Summary
Region: Canadian Cascades (British Columbia)
Sub-Region: Coquihalla Range
Area: Yale Land District
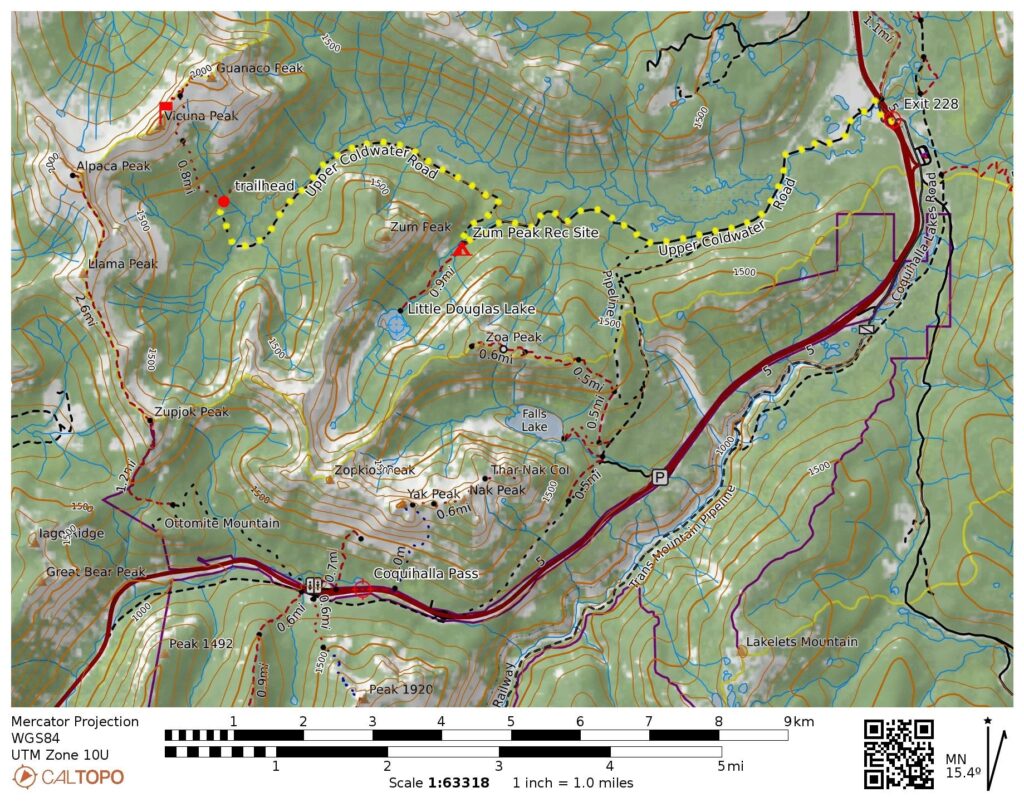
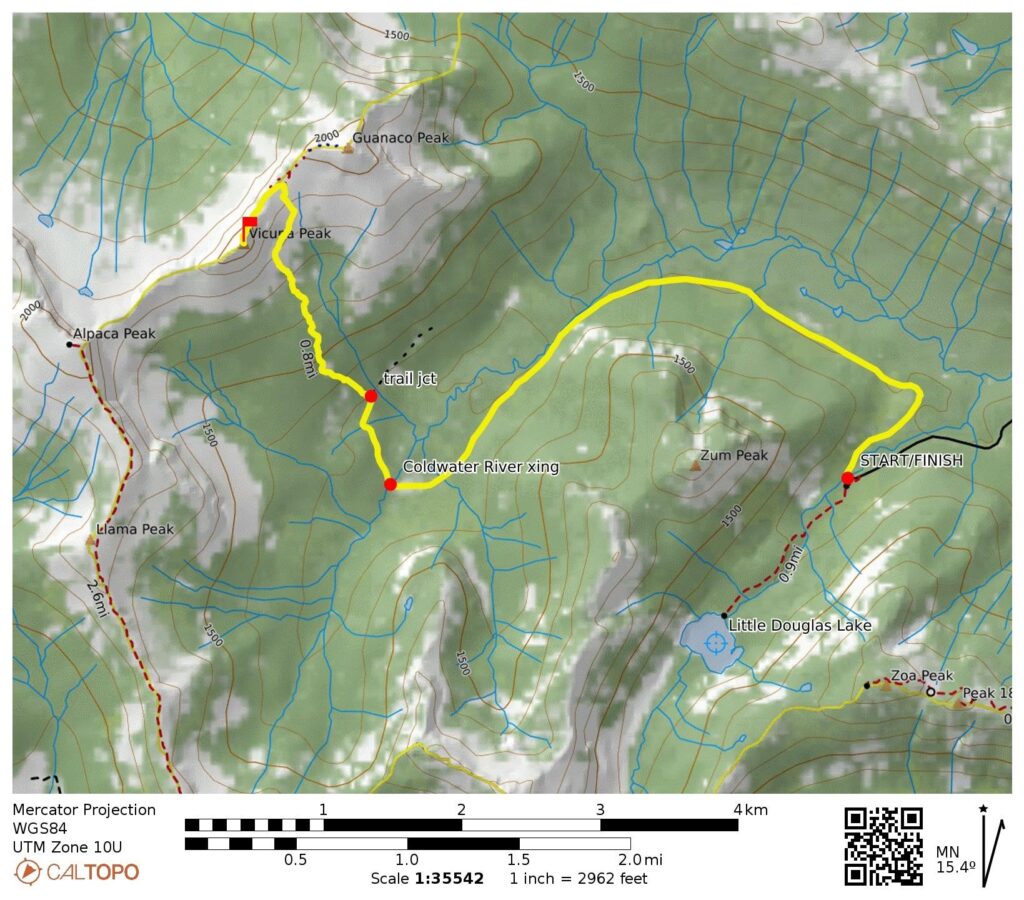
Starting & Ending Point: Zum Peak Recreation Site near Little Douglas Creek bridge (Elev. 4050 feet)
Way Points: Upper Coldwater River crossing & Vicuna–Guanaco Saddle Trailhead (road walk & road bushwhack); Vicuna Peak southeast face slab base & Vicuna–Guanaco Saddle (trail hike & trail scramble)
Summit: Vicuna Peak (rock scramble & rock climb via Northeast Ridge)
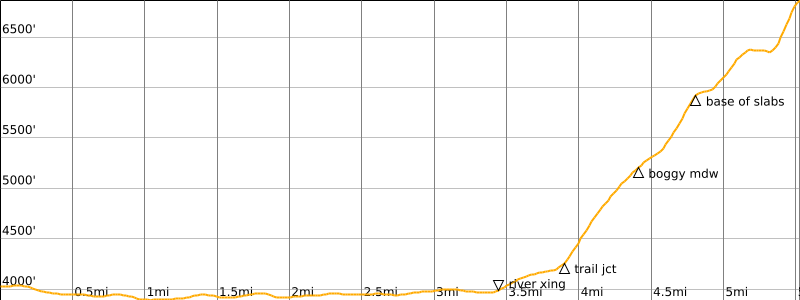
Approximate Stats: 11.6 miles traveled; 3200 feet gained & lost; 4.9 hours up; 4.8 hours down.
Trip Overview
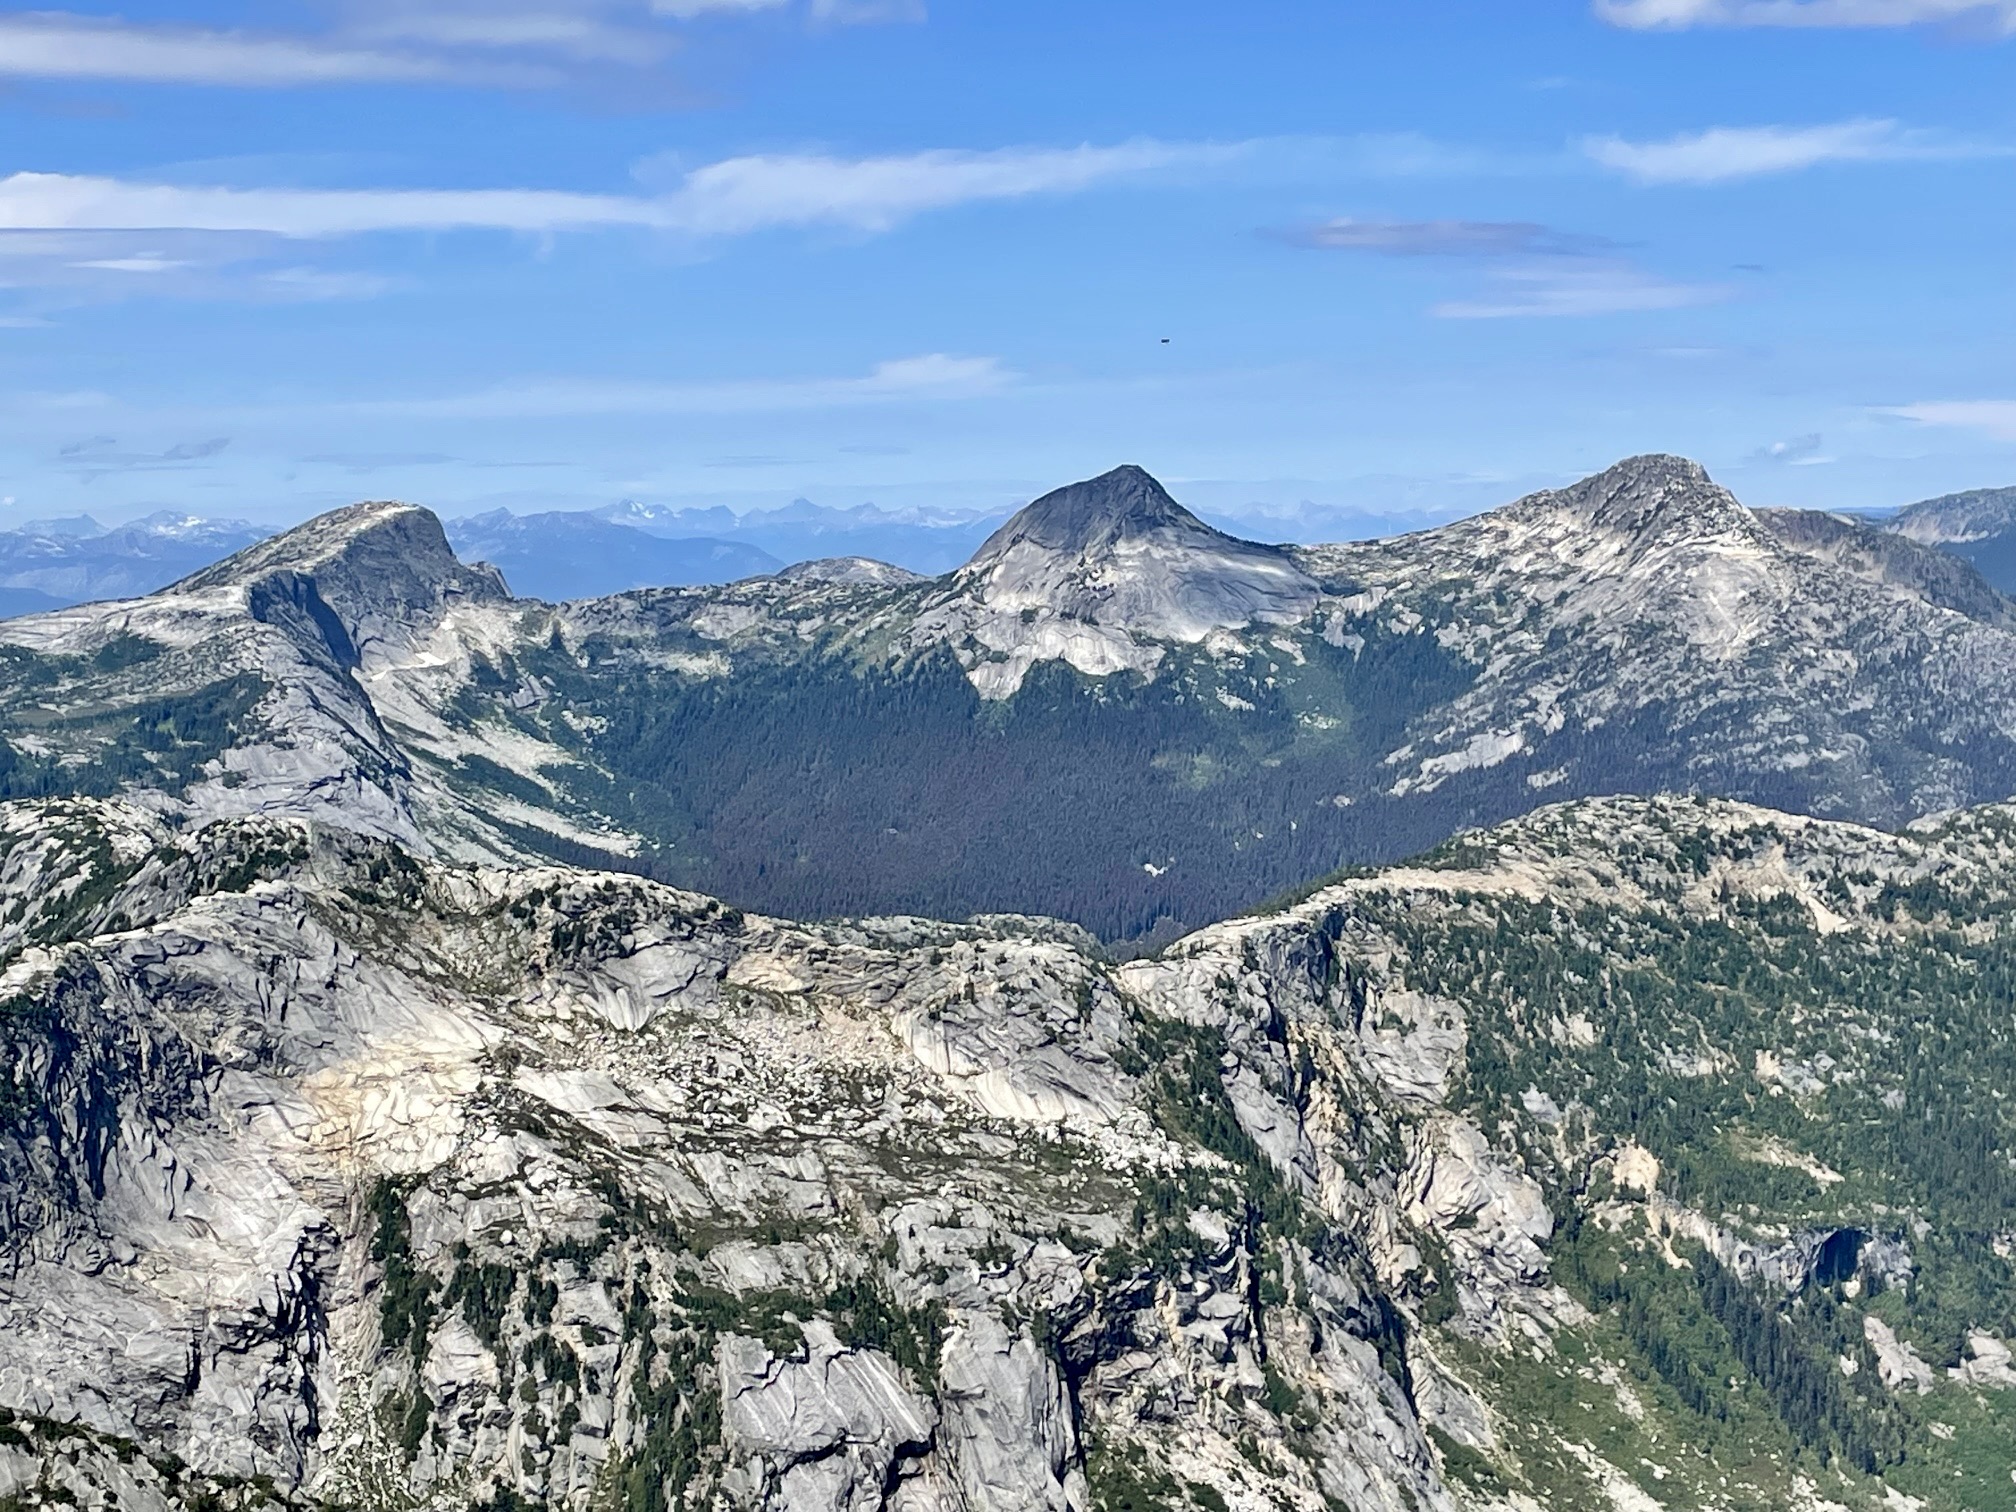
Vicuna Peak is a handsome wedge of granite situated about 4 miles north of Coquihalla Pass in the Canadian Cascades. It represents the highest and most visually impressive summit on a southwest–northeast trending ridge of granitic peaks whose names—Llama, Alpaca, Vicuna, and Guanaco—are derived from South American ruminant animals. Despite offering what is arguably the best semi-technical climb in the entire Coquihalla Range, Vicuna Peak seems to be relatively unknown outside of serious peak-bagger circles.
One reason for Vicuna Peak’s lack of fame might be the somewhat difficult access to its trailhead, which is located 9 miles up the Upper Coldwater River Road from the Britton Creek Rest Area on Coquihalla Highway 5 (at Exit 228). This old pipeline/logging road gets progressively rougher and more overgrown with distance from the highway, such that it eventually becomes undriveable. Many parties have used mountain bikes for the last portion of roadway, but some later reported that bikes hindered the trek as much as they helped.
.
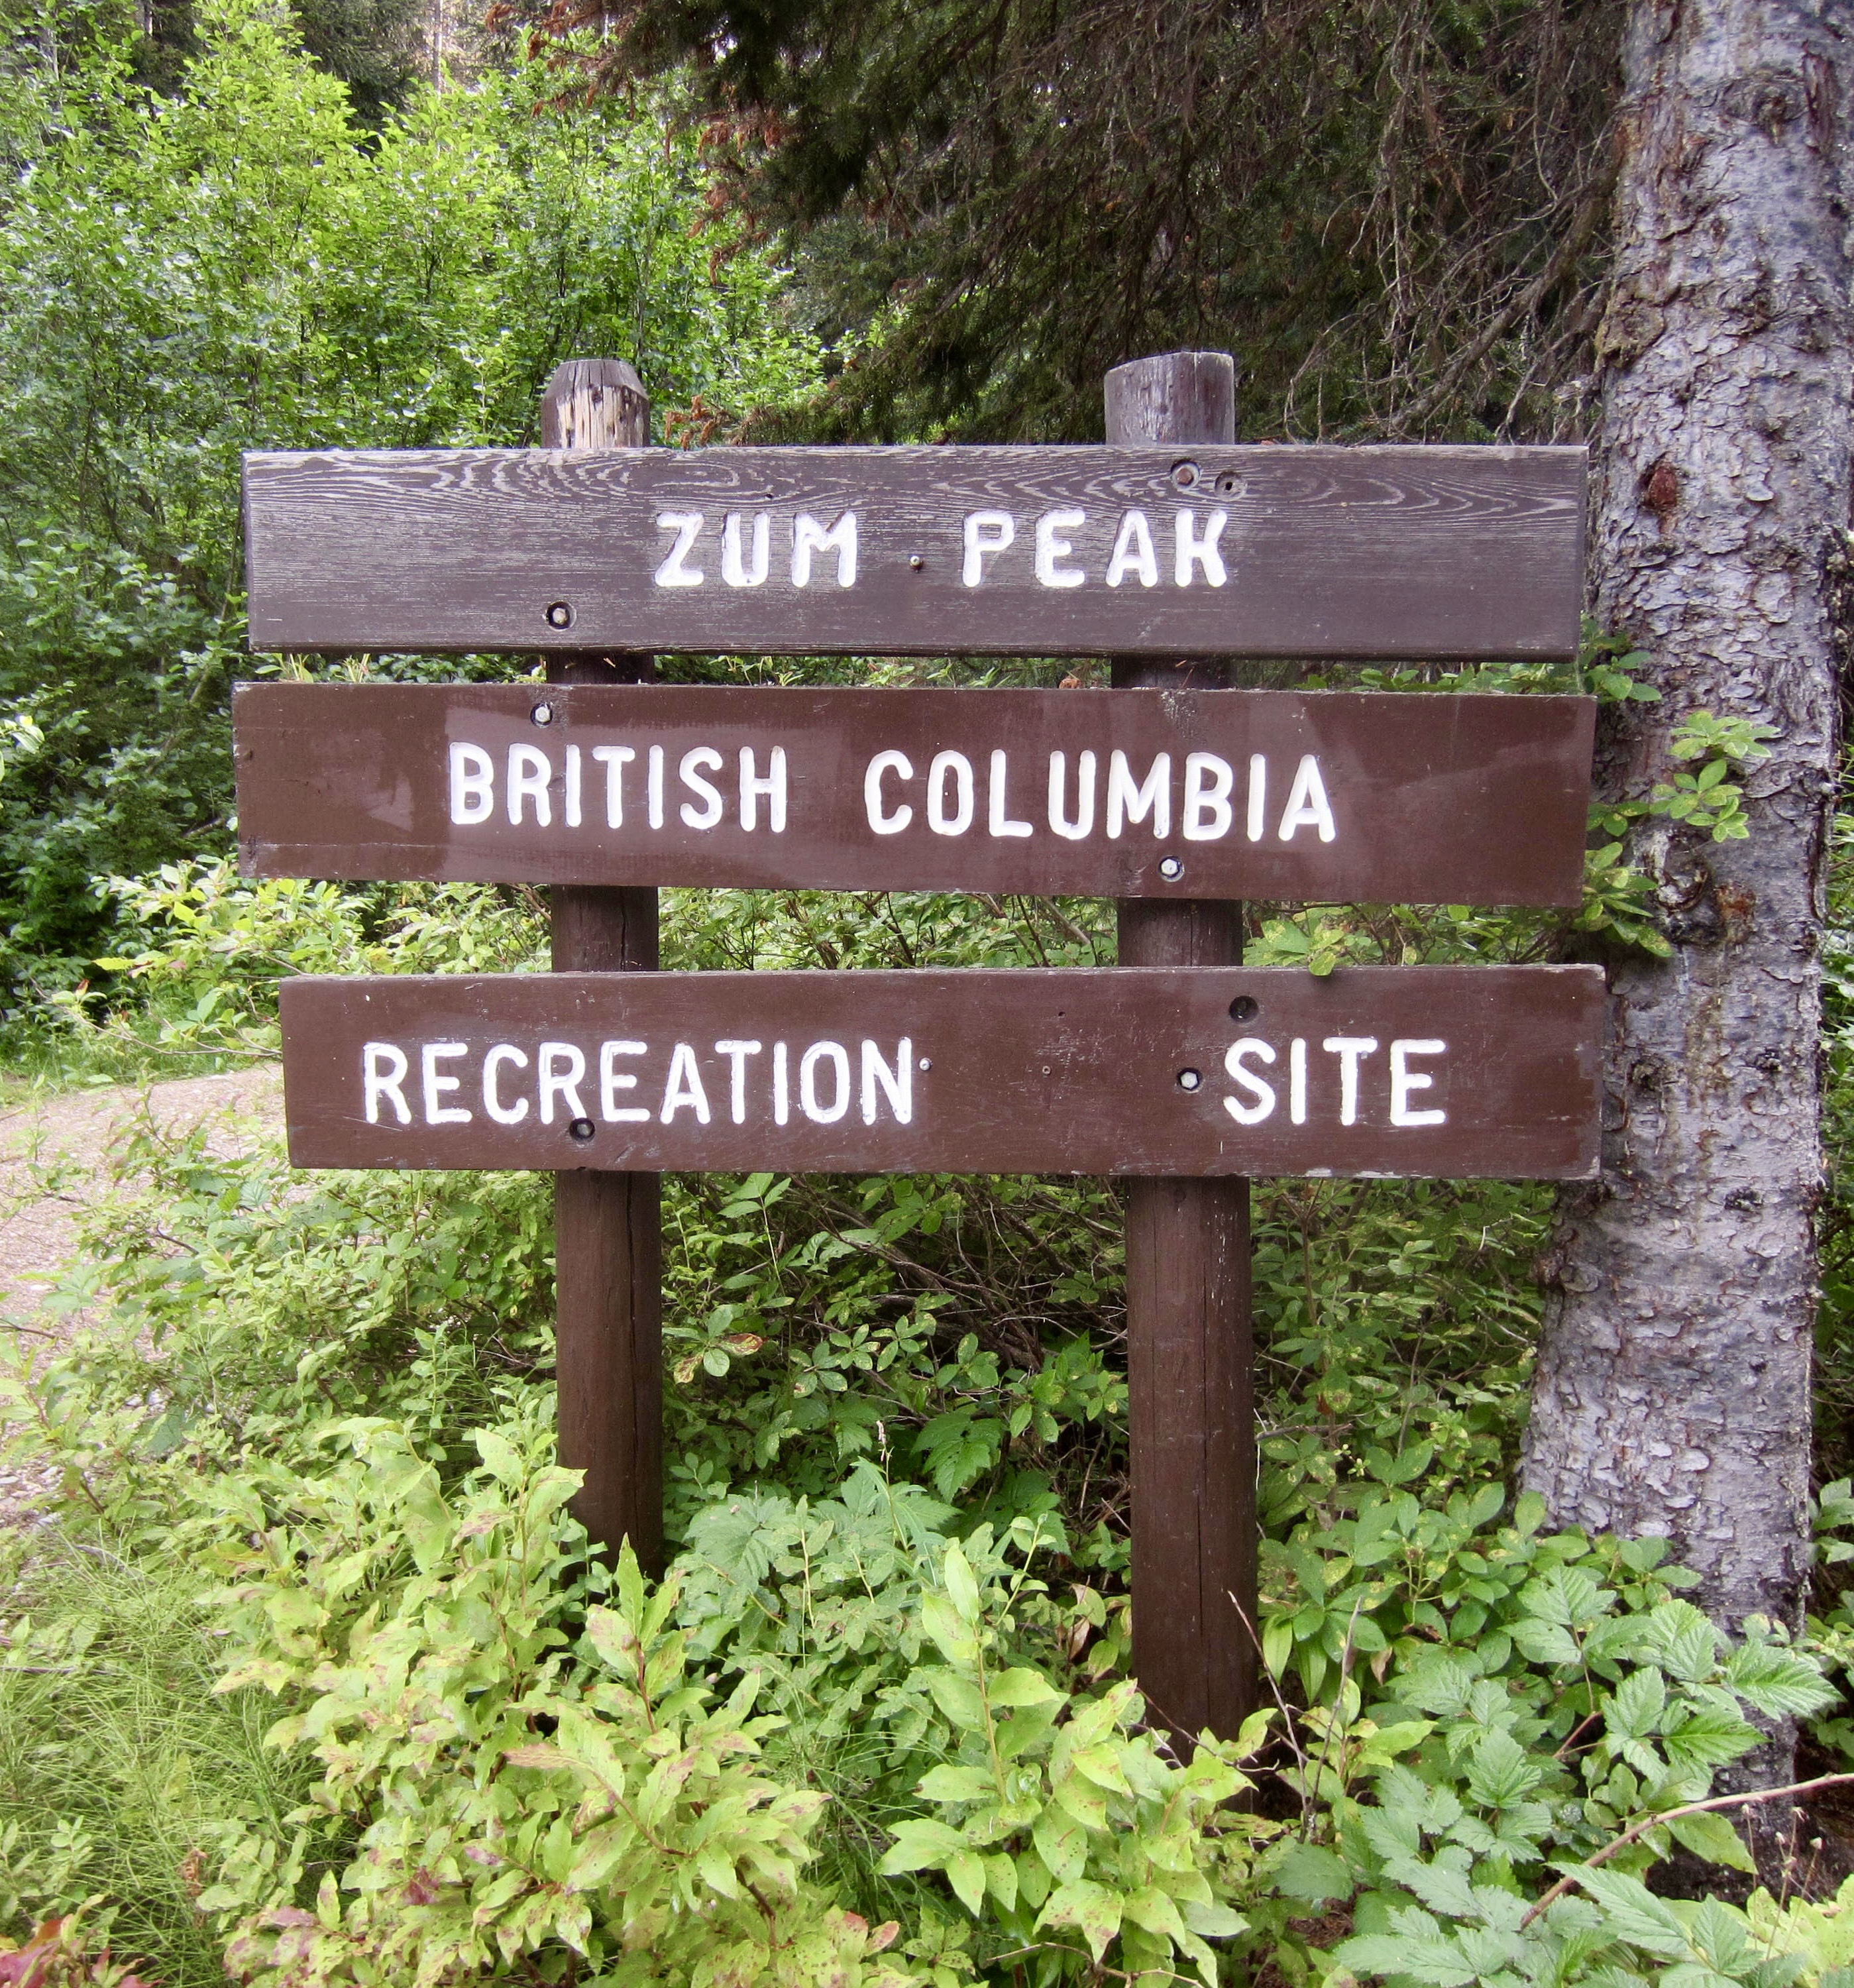
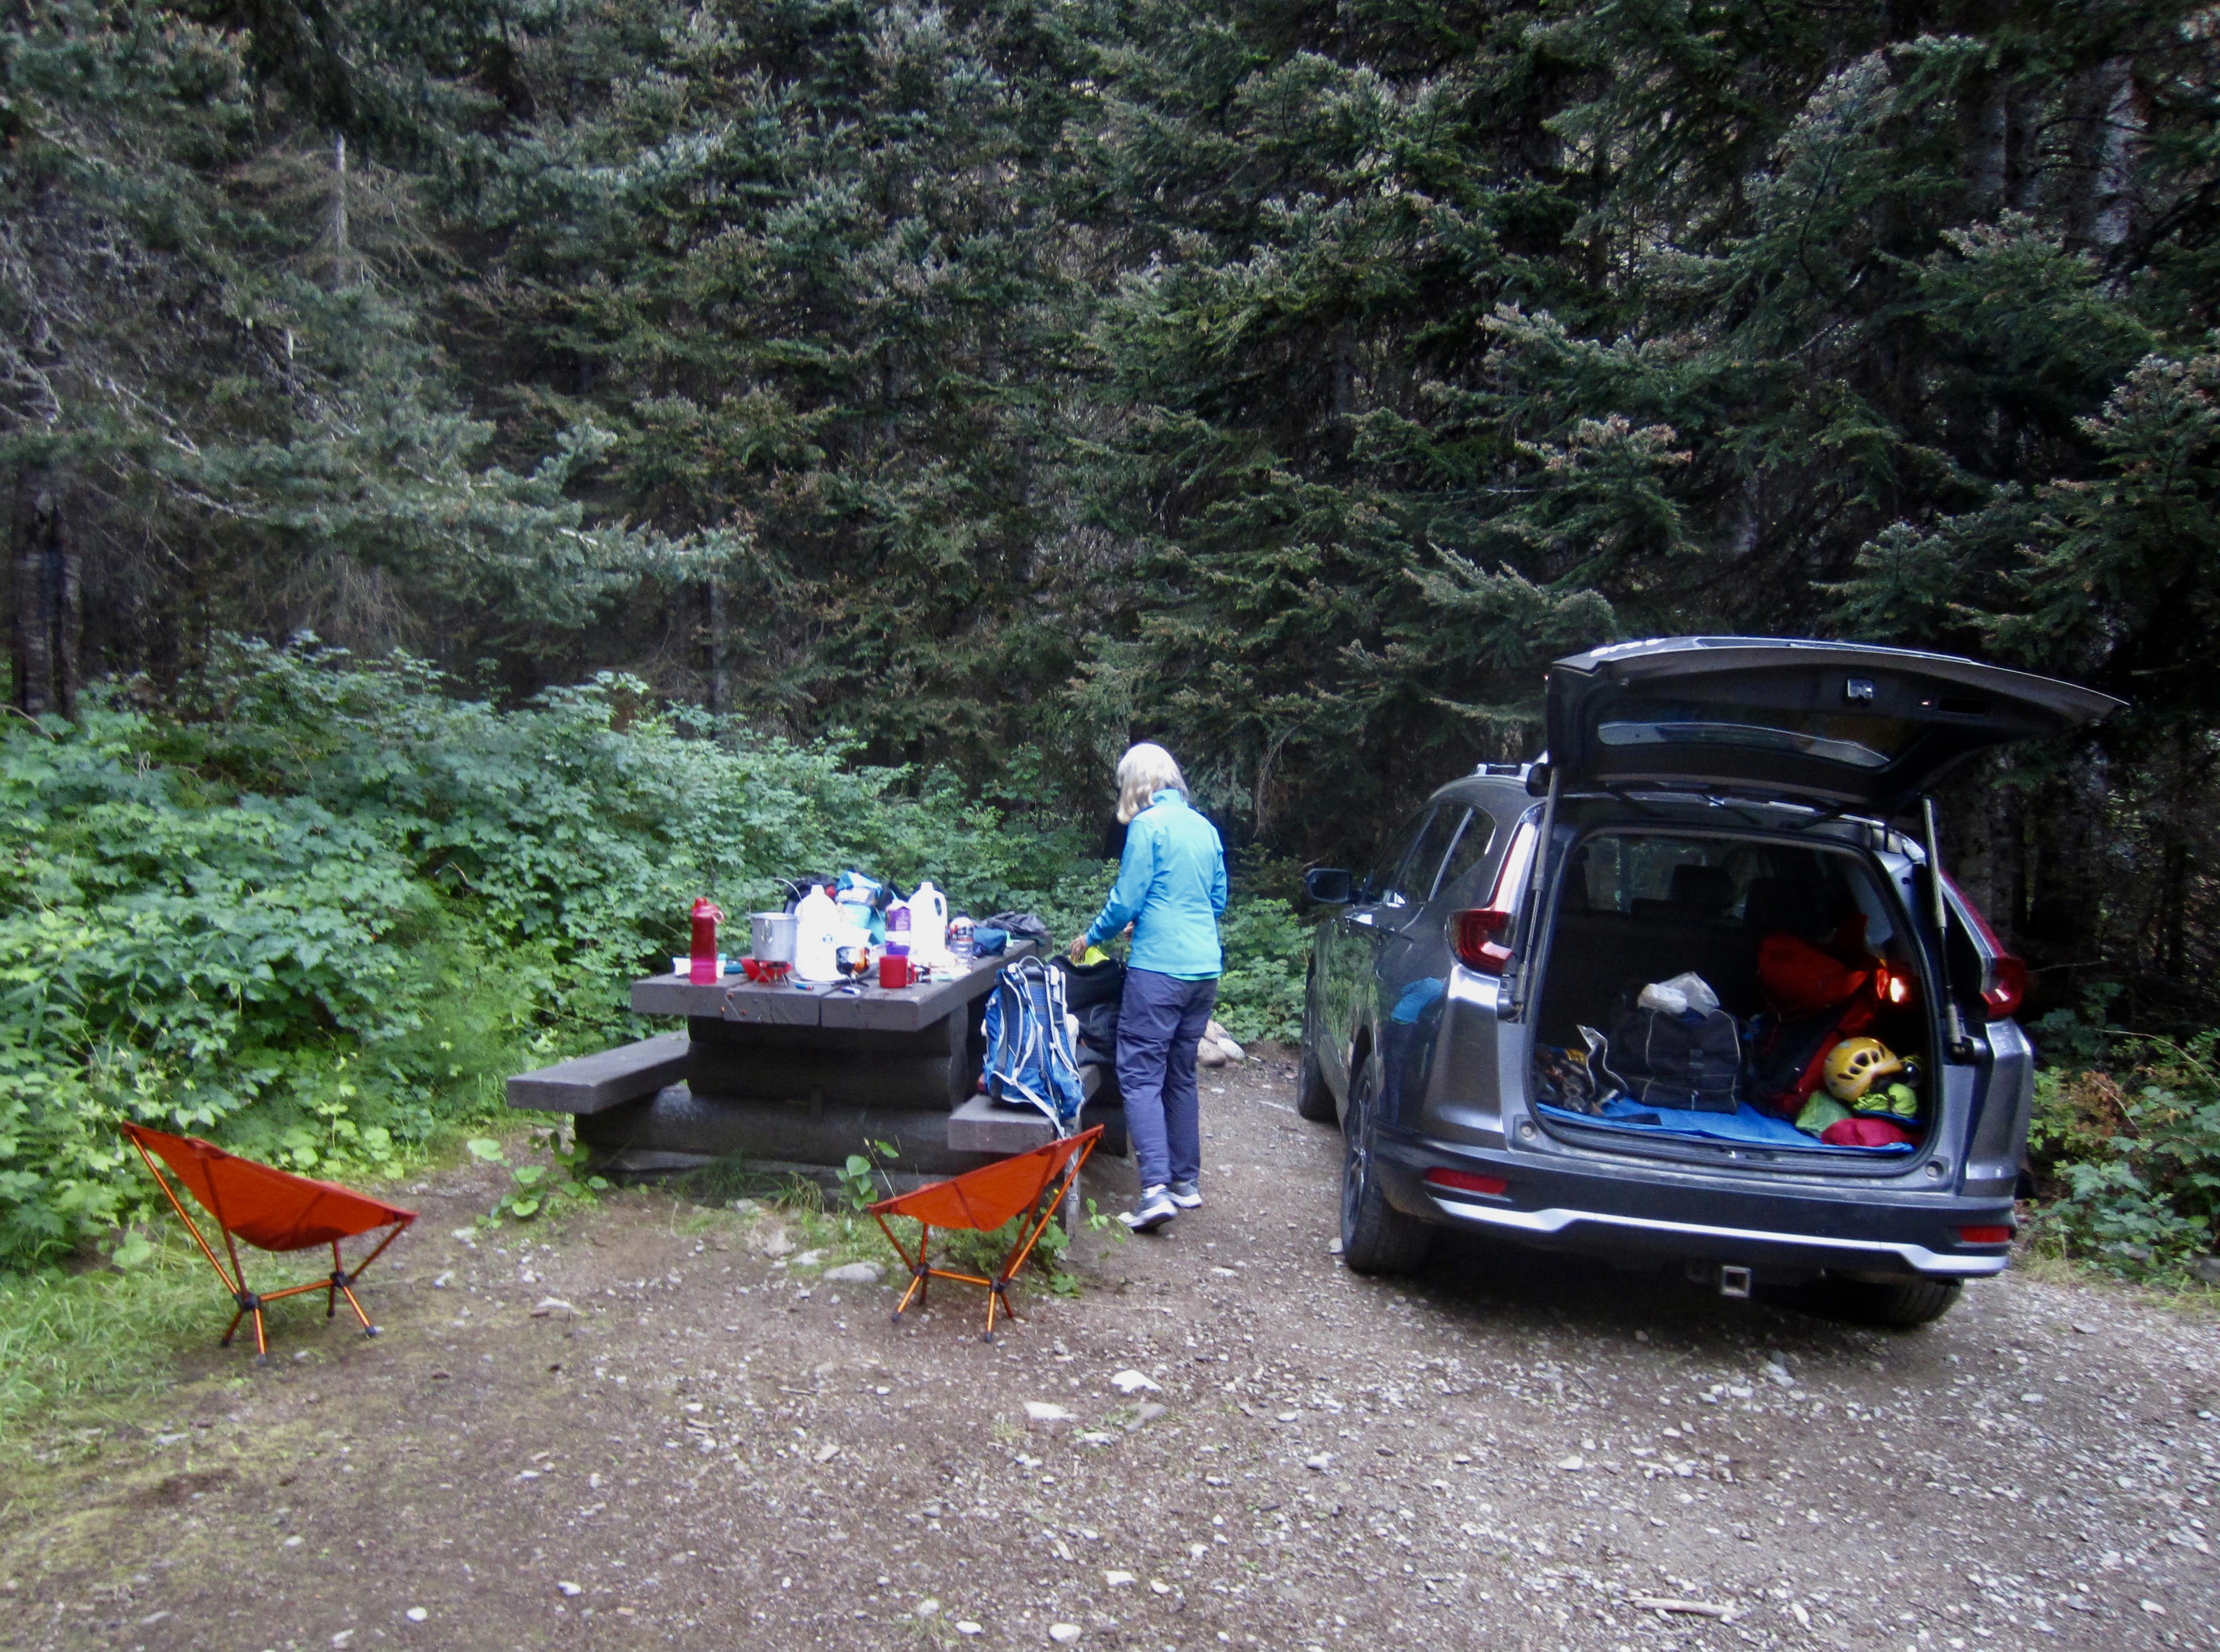
For our ascent of Vicuna Peak, Eileen and I spent the night before and the night after at the Zum Peak Recreation Site, a tiny campground situated 5 miles up the Upper Coldwater River Road at a point where the road crosses Little Douglas Creek. This recreation site has only one picnic table but room for several vehicles and tents. Good water is available from the creek, just a few yards away. Because we had made an early decision to walk the last 4 miles of roadway rather than using bikes, being camped fairly close to the trailhead gave us a significant time benefit.
During our drive to the Zum Peak Recreation Site, we found that the first half of the approach roadway was in pretty good condition and passable by pretty much any sort of vehicle. In contrast, the second half is moderately rutted and rocky; an SUV or other high-clearance vehicle is definitely advantageous, but a lower-clearance vehicle could navigate it with careful (or devil-may-care) driving. Regardless of vehicle type, expect to suffer some paint scratches due to the overhanging brush.
.
Full Trip Report
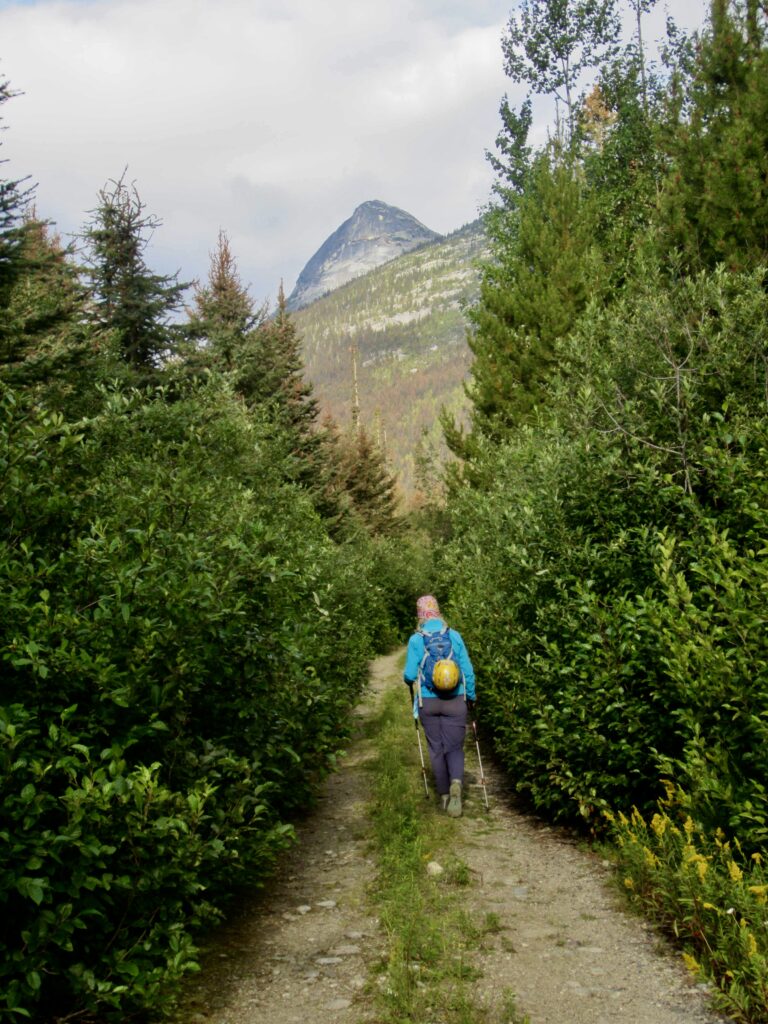
Starting from our base camp at Zum Peak Recreation Site on an overcast Tuesday morning, Eileen and I began our trek with a 4-mile march along the Upper Coldwater River Road. Initially, roadway conditions were pretty decent, but the brush gradually closed in to form a narrow passage, and there were several places where the roadbed was deeply eroded. How far you would be able to drive up this part of the roadway depends on your vehicle’s 4X4 capability and on your own tolerance for vehicular damage. Although mountain bikes would be useful here, Eileen and I were happy to be walking. Later in the day, we met another party who had managed to drive an additional mile up the roadway before they called it quits and walked the remaining 3 miles.
.
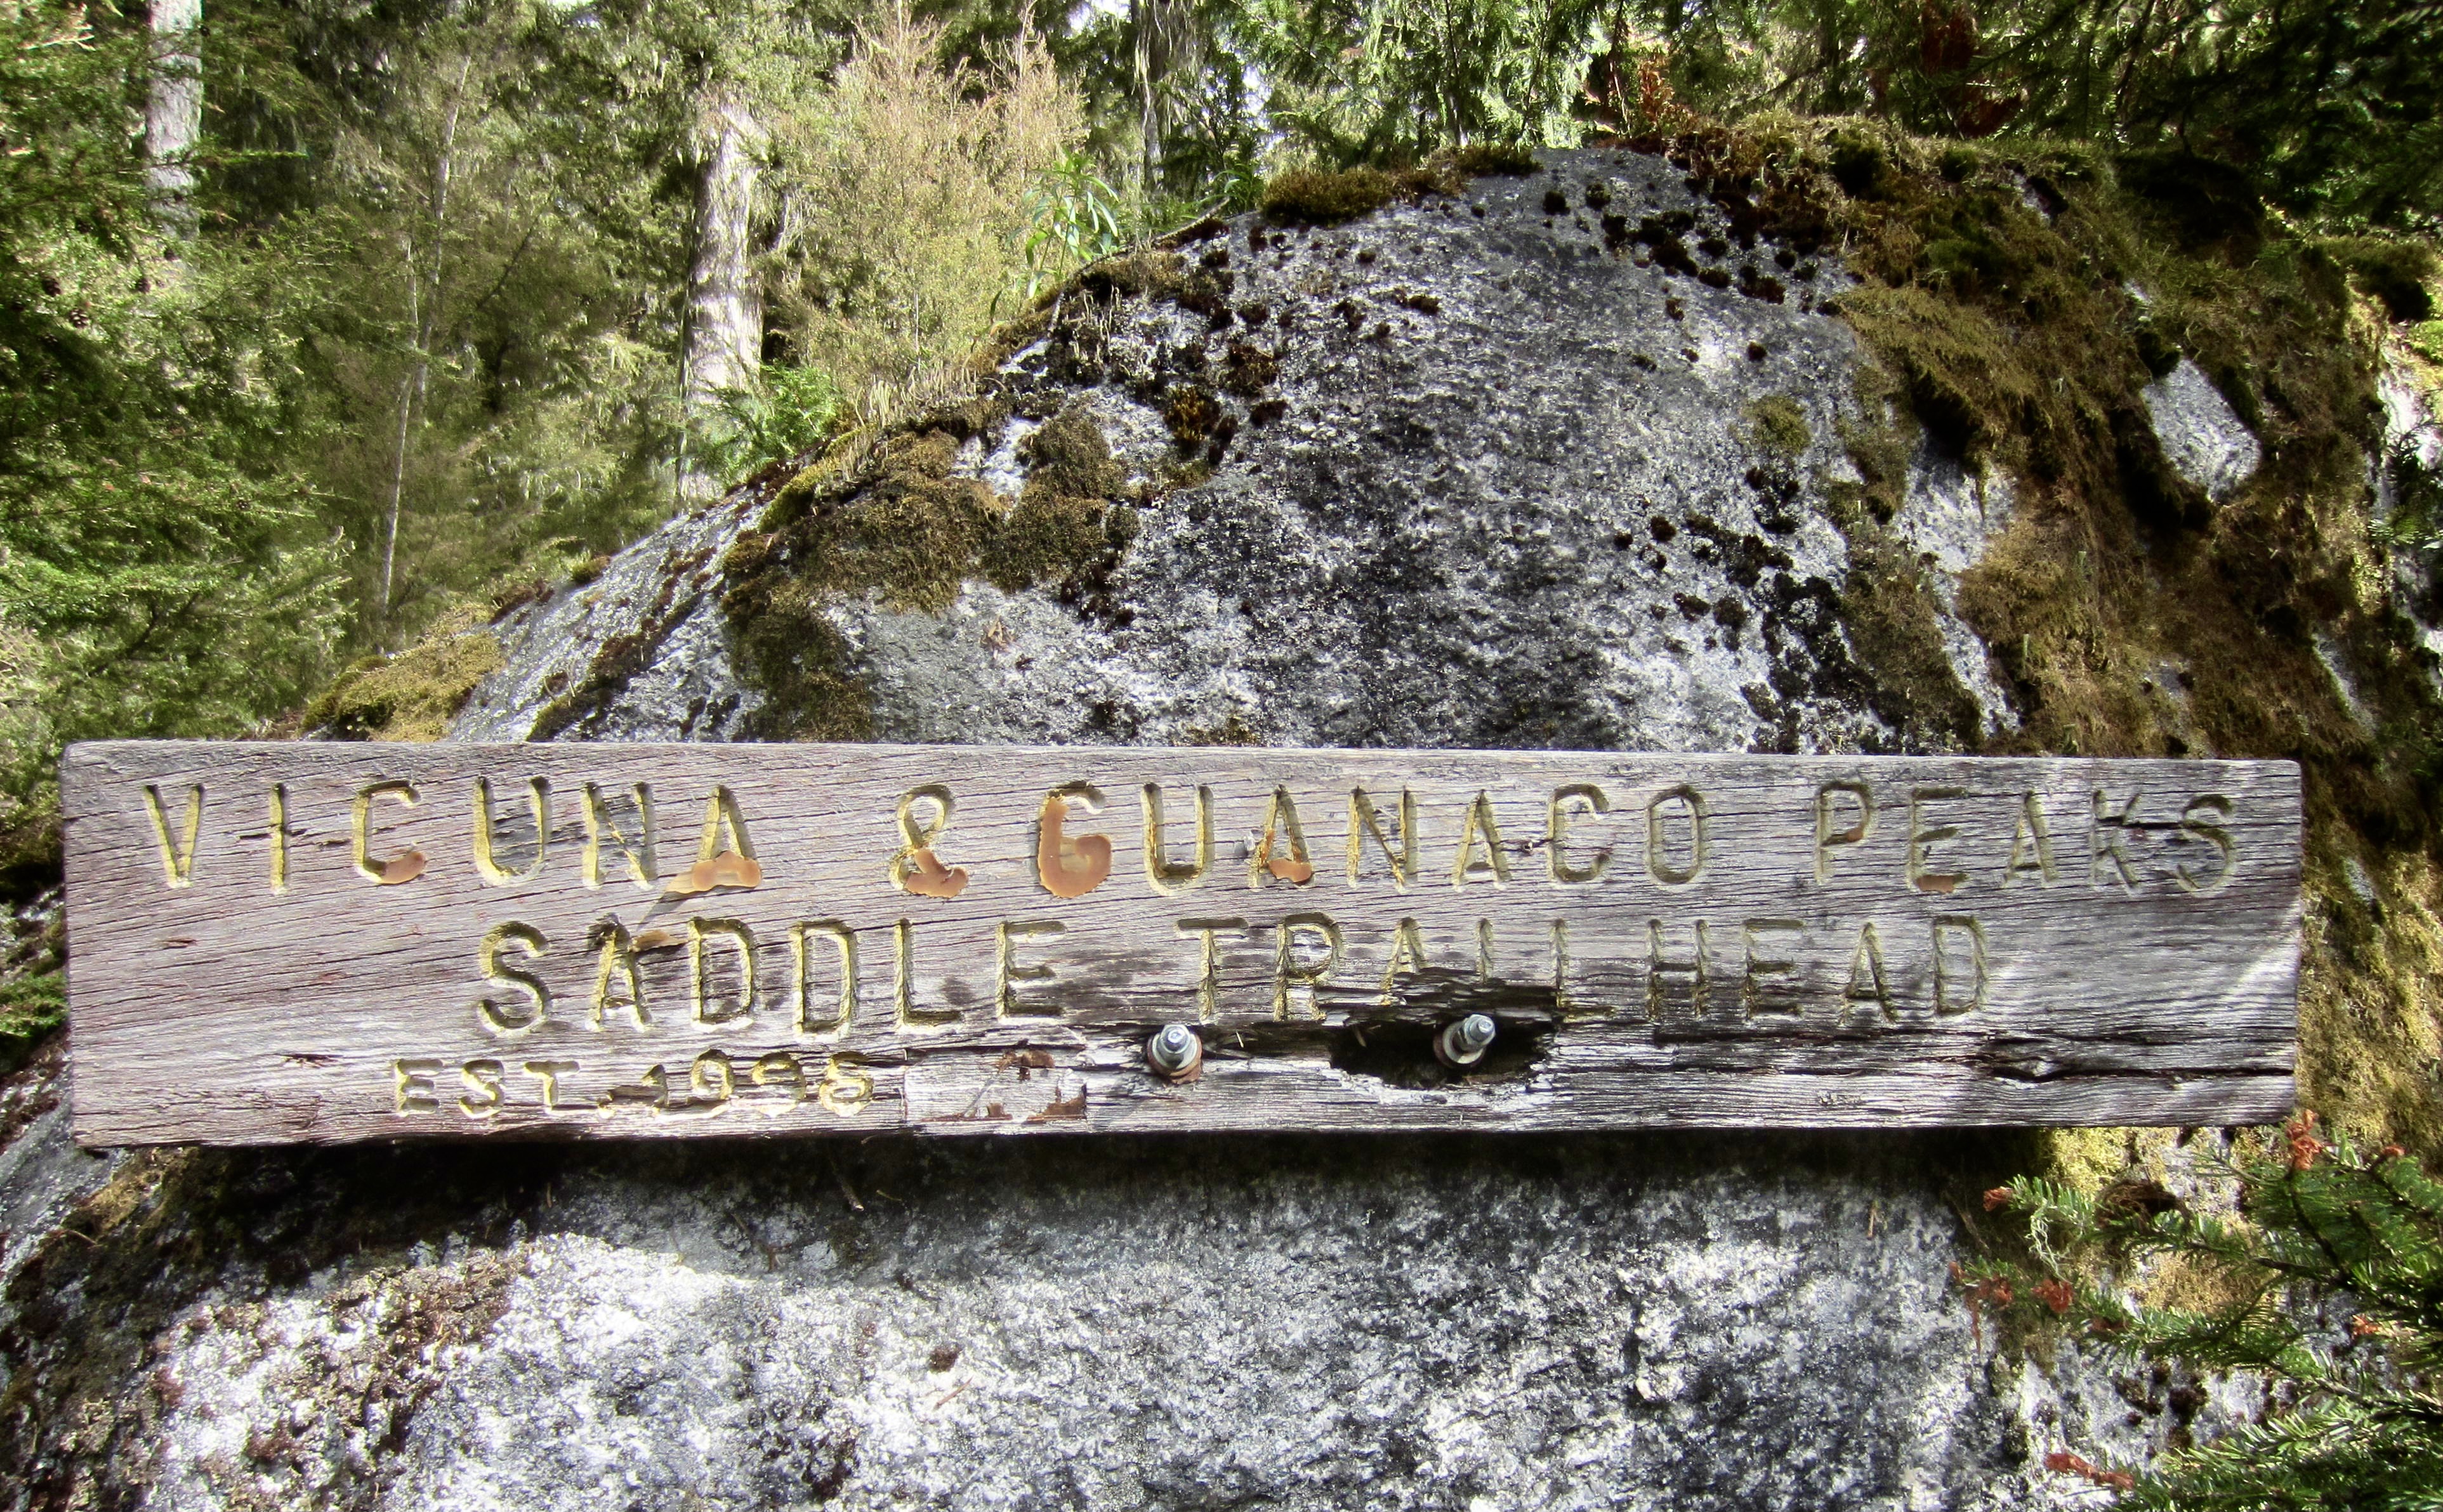
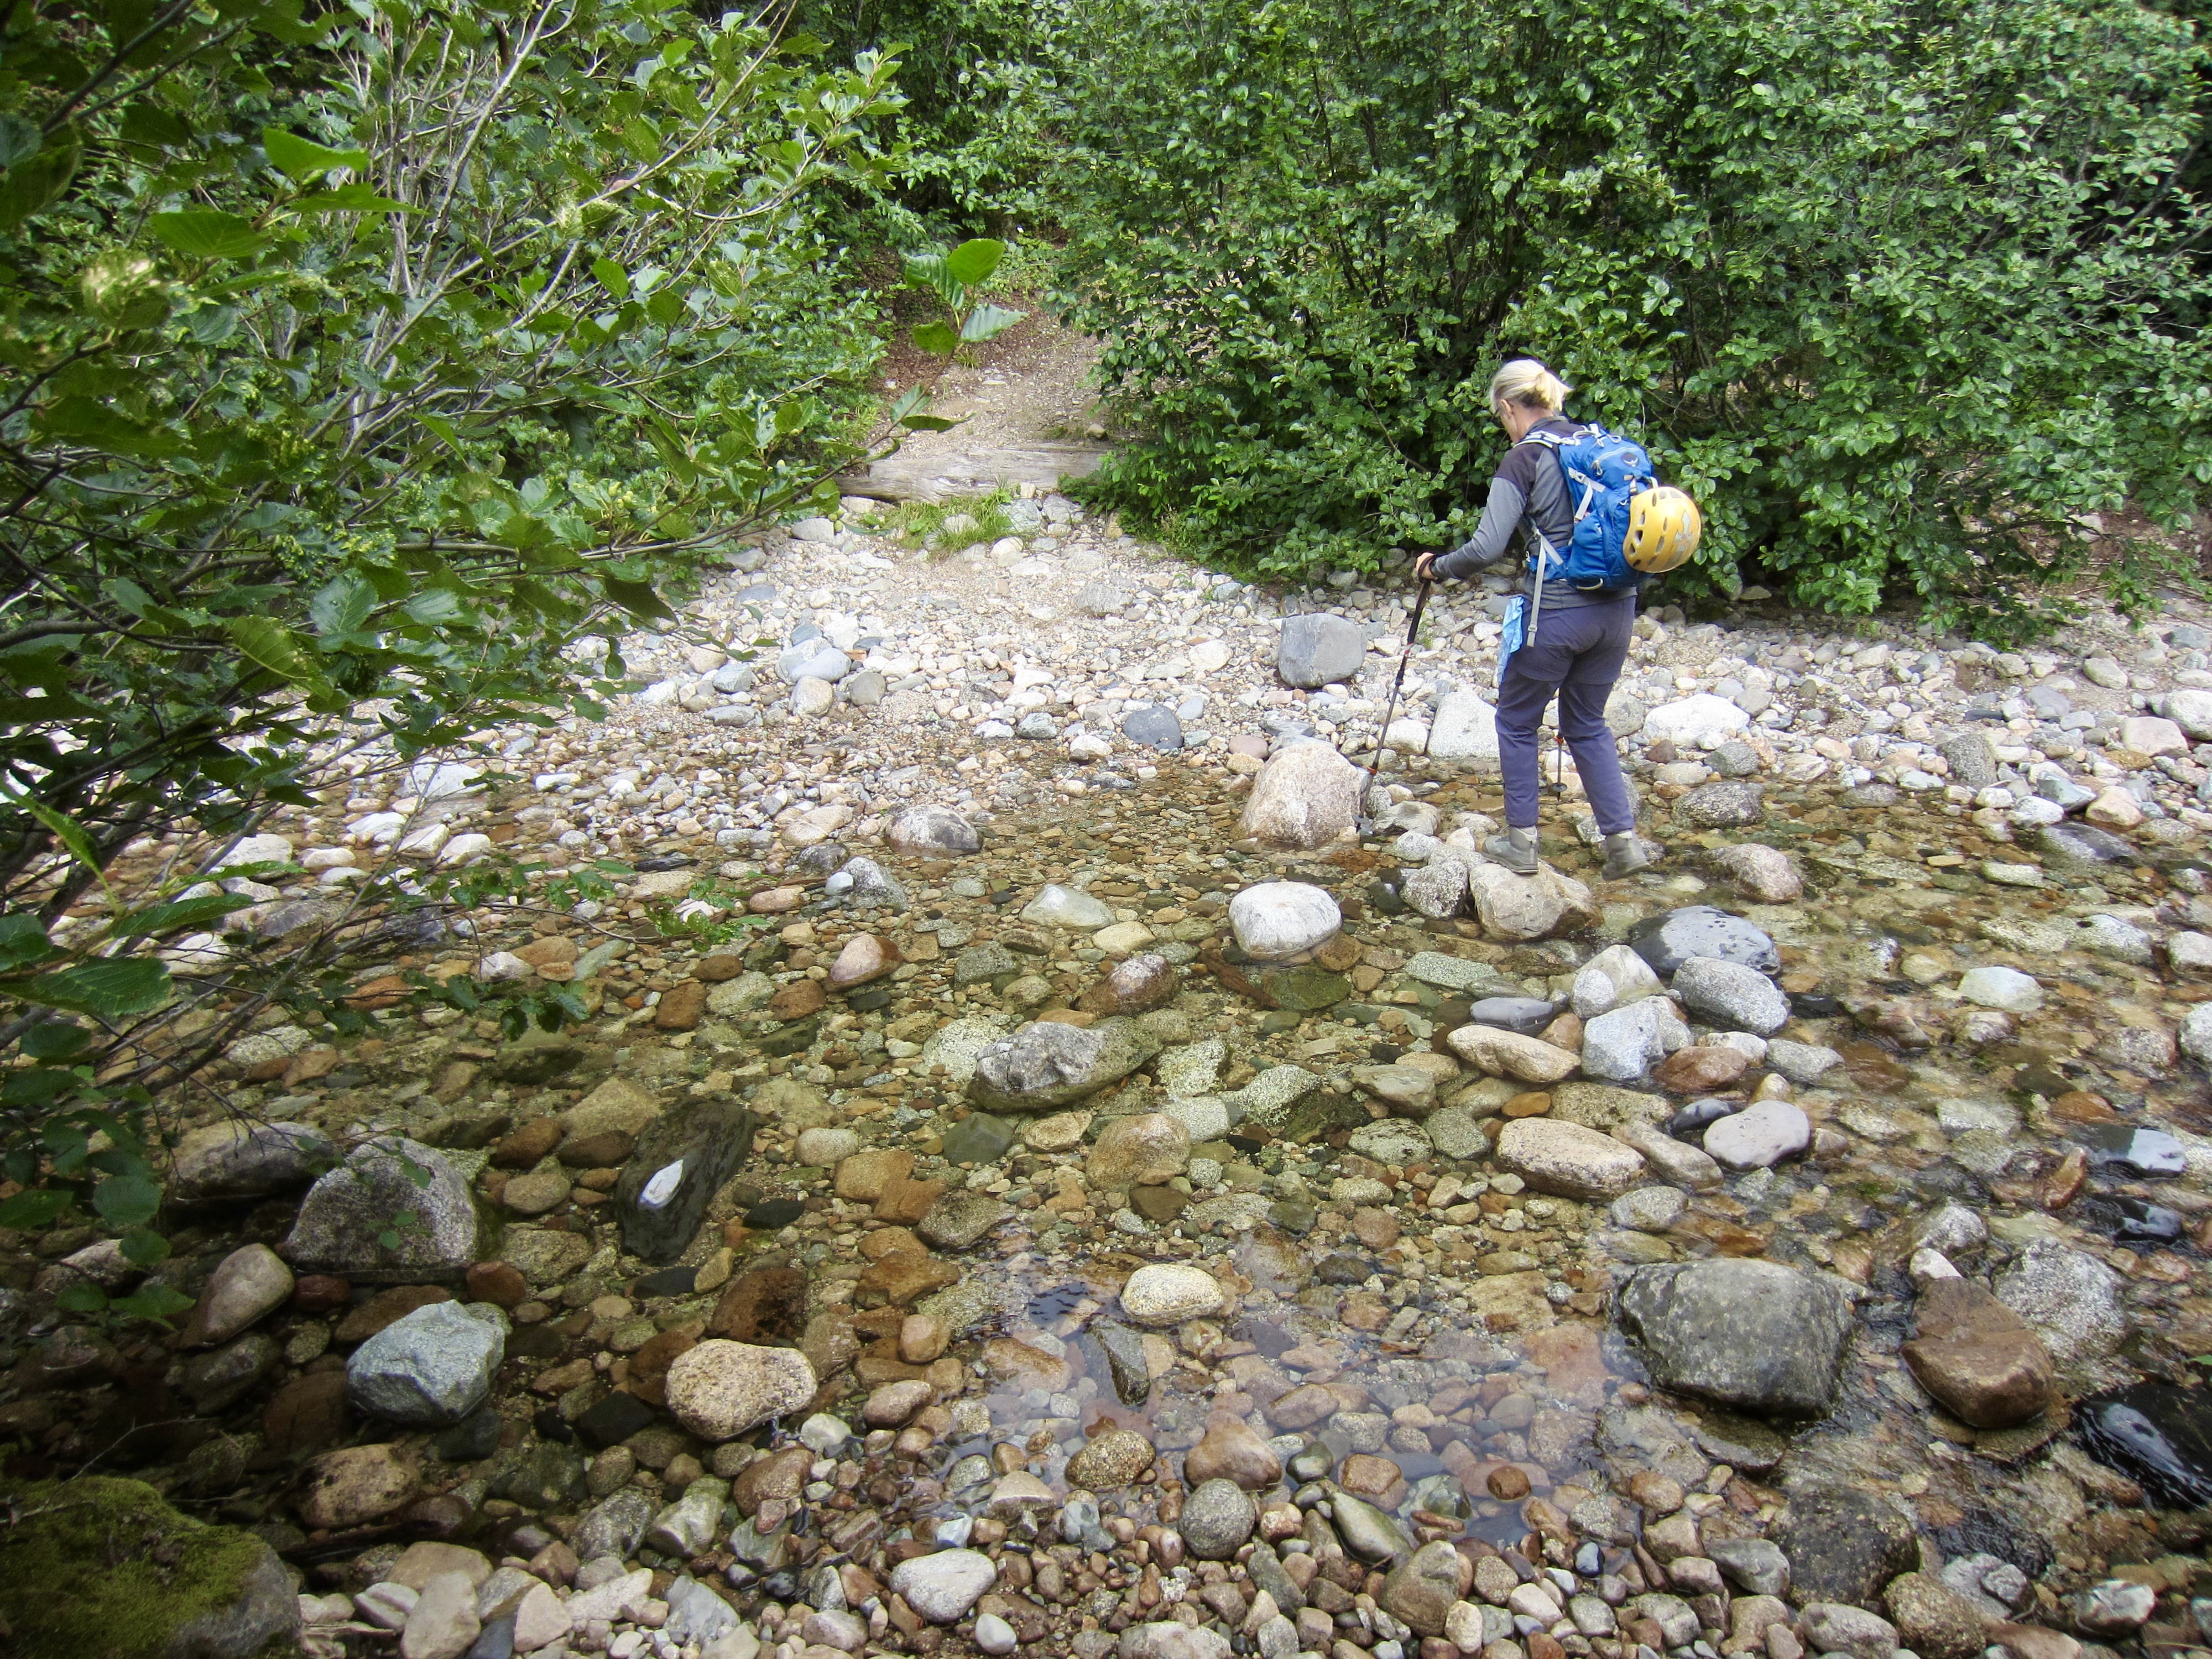
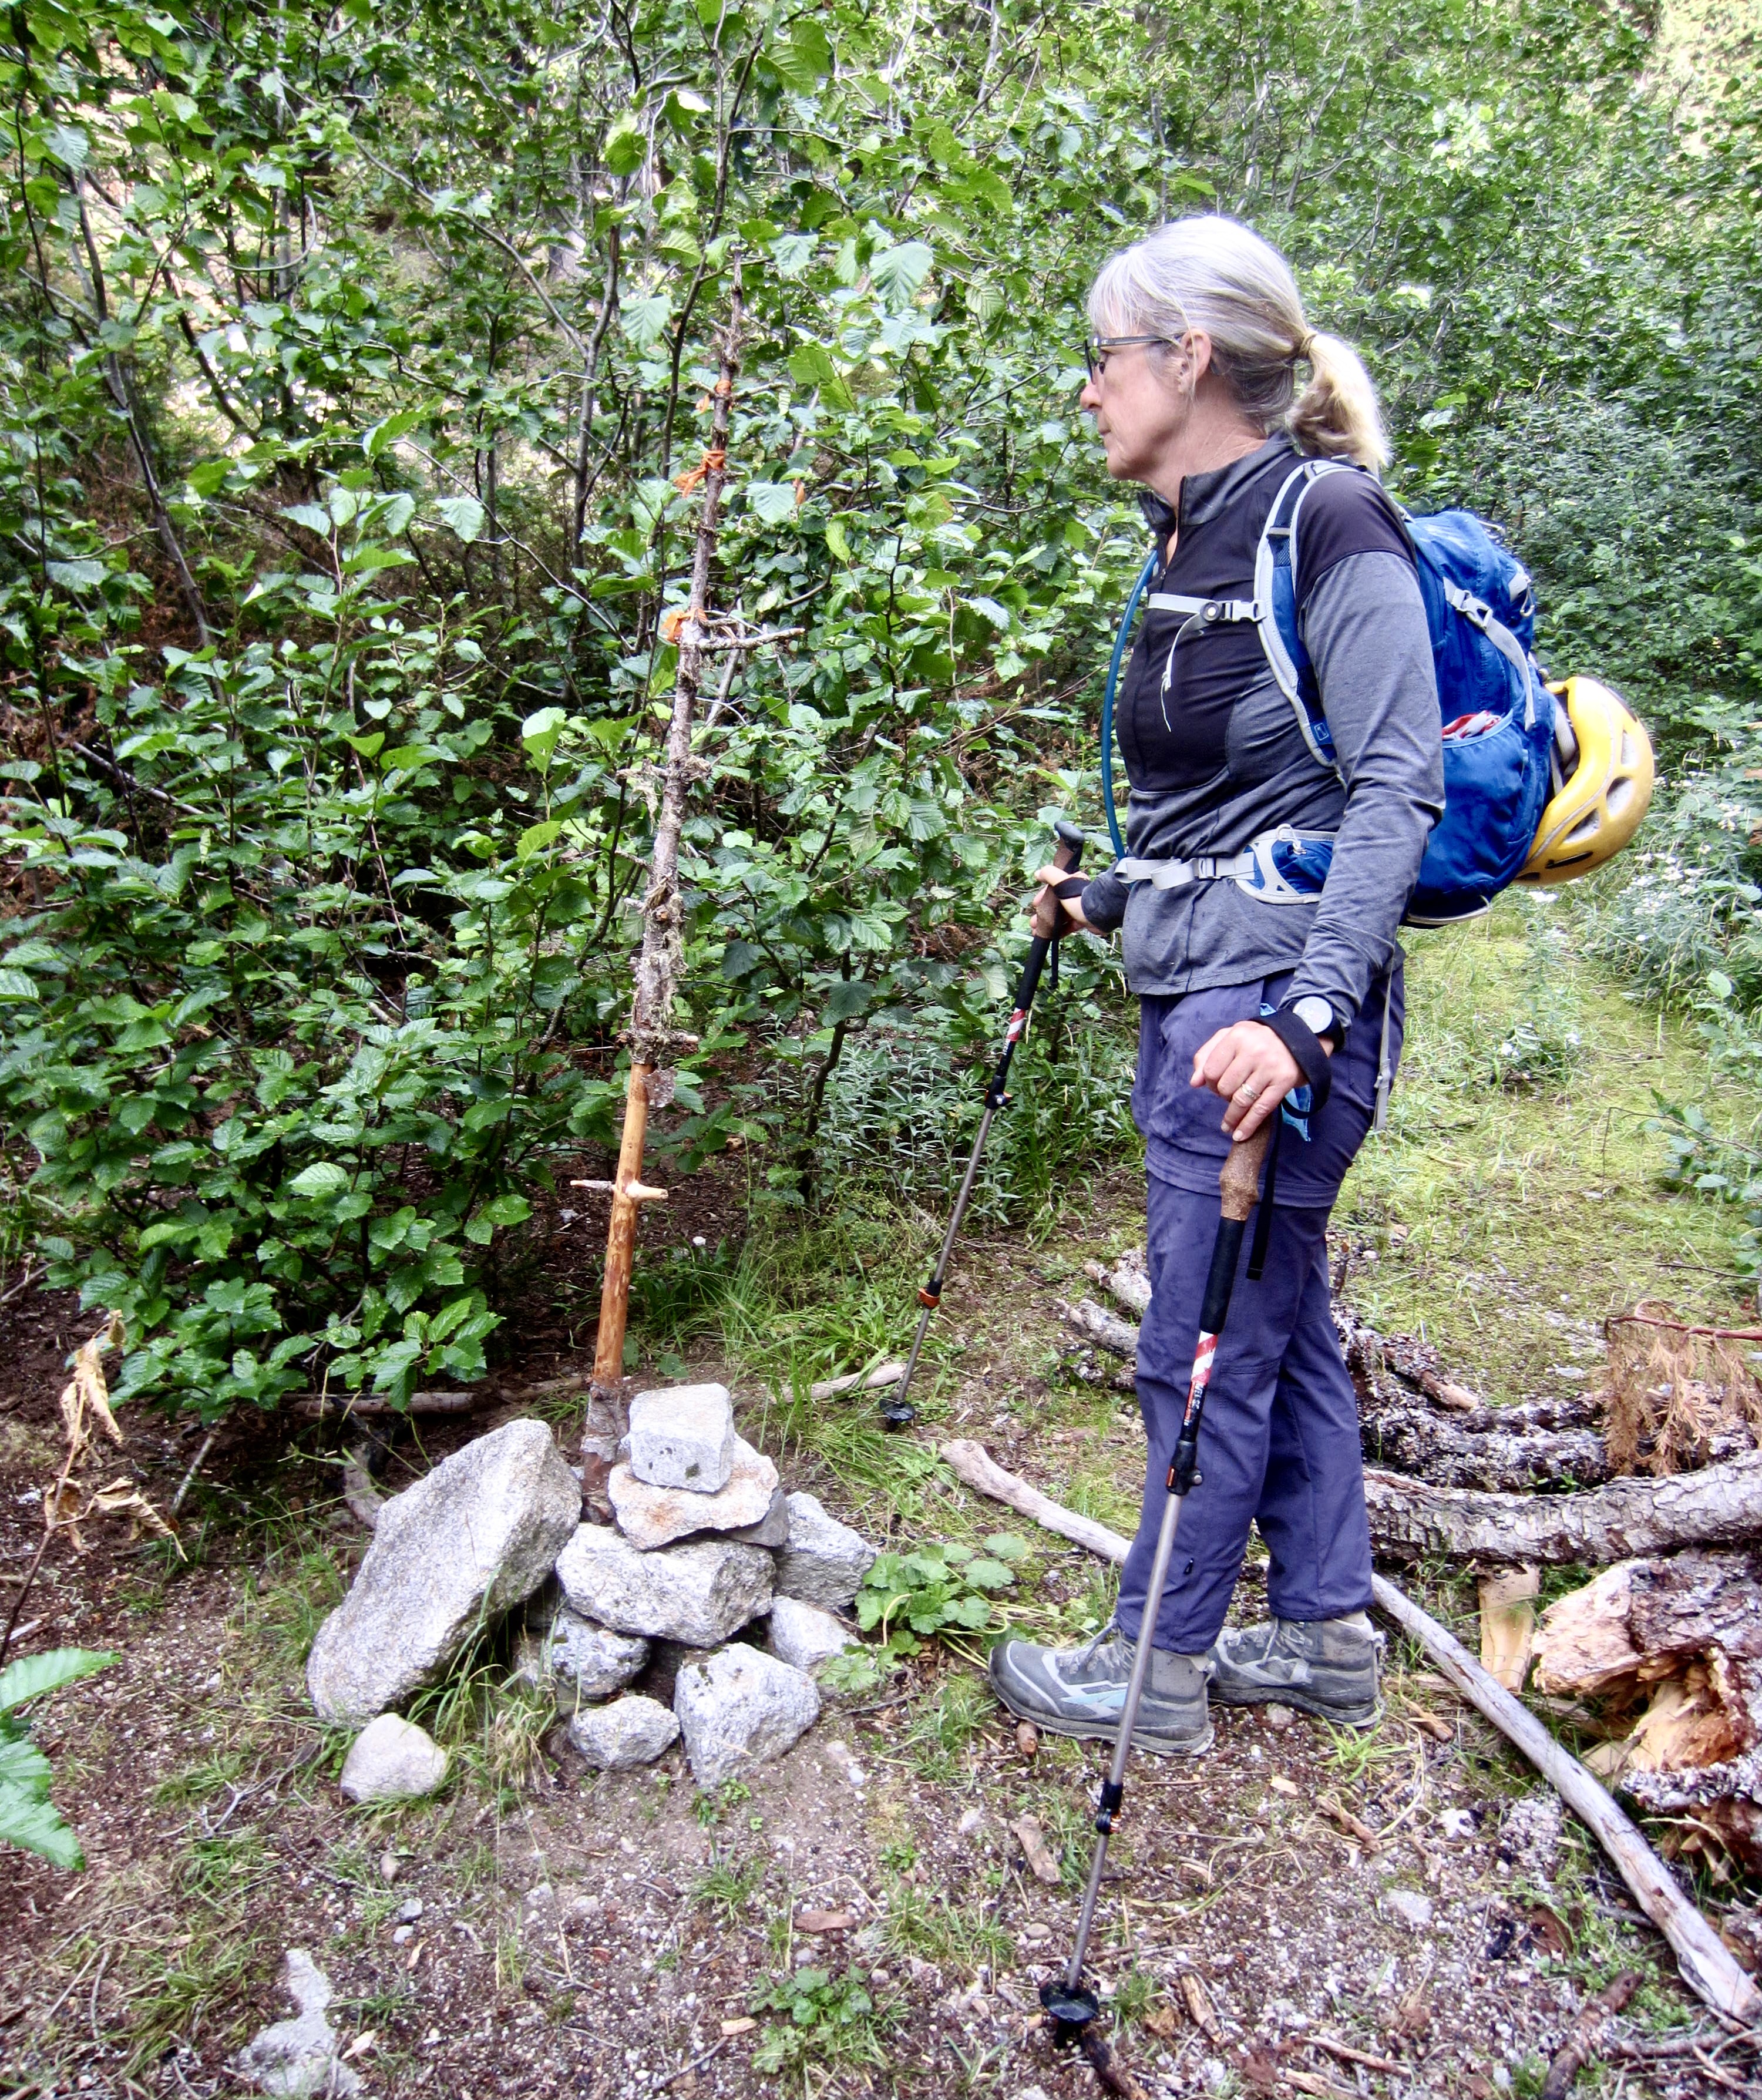
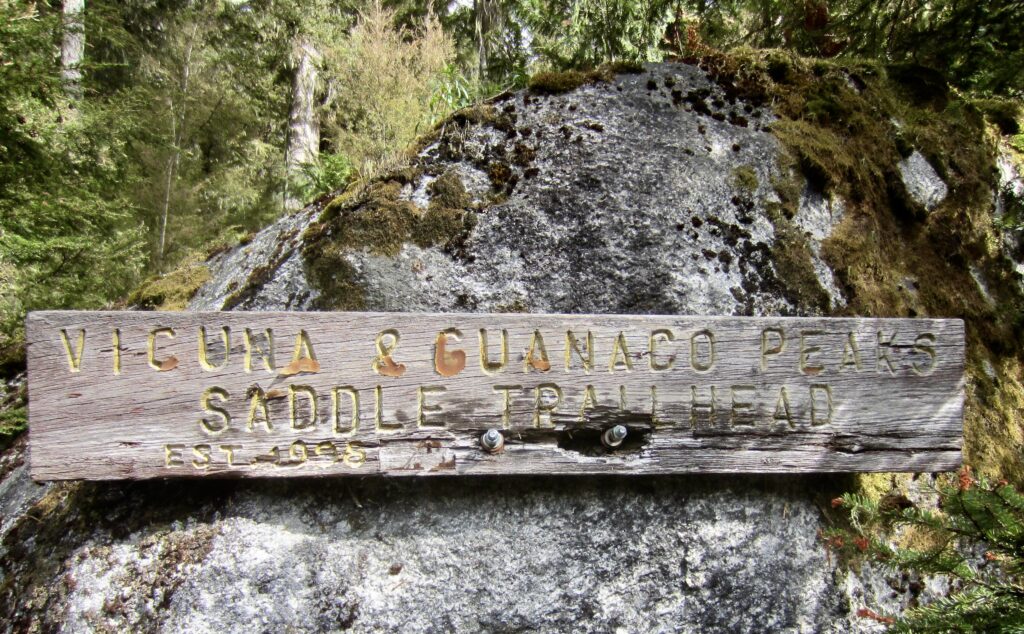
After 3½ miles of easy road walking, we rock-hopped across the Coldwater River, which is little more than a shallow creek in these upper reaches. On the other side, the roadway gets considerably rougher and more overgrown, such that bikes would become nearly useless. A short ½ mile of road bushwhacking brought us to the Vicuna–Guanaco Saddle Trailhead (1.8 hours + 3.9 miles + 300 feet from camp). This trailhead was clearly marked by a cairn, stick, and flagging on the roadway. A wooden sign mounted on a nearby boulder states that the trail was established in 1998.
.
.
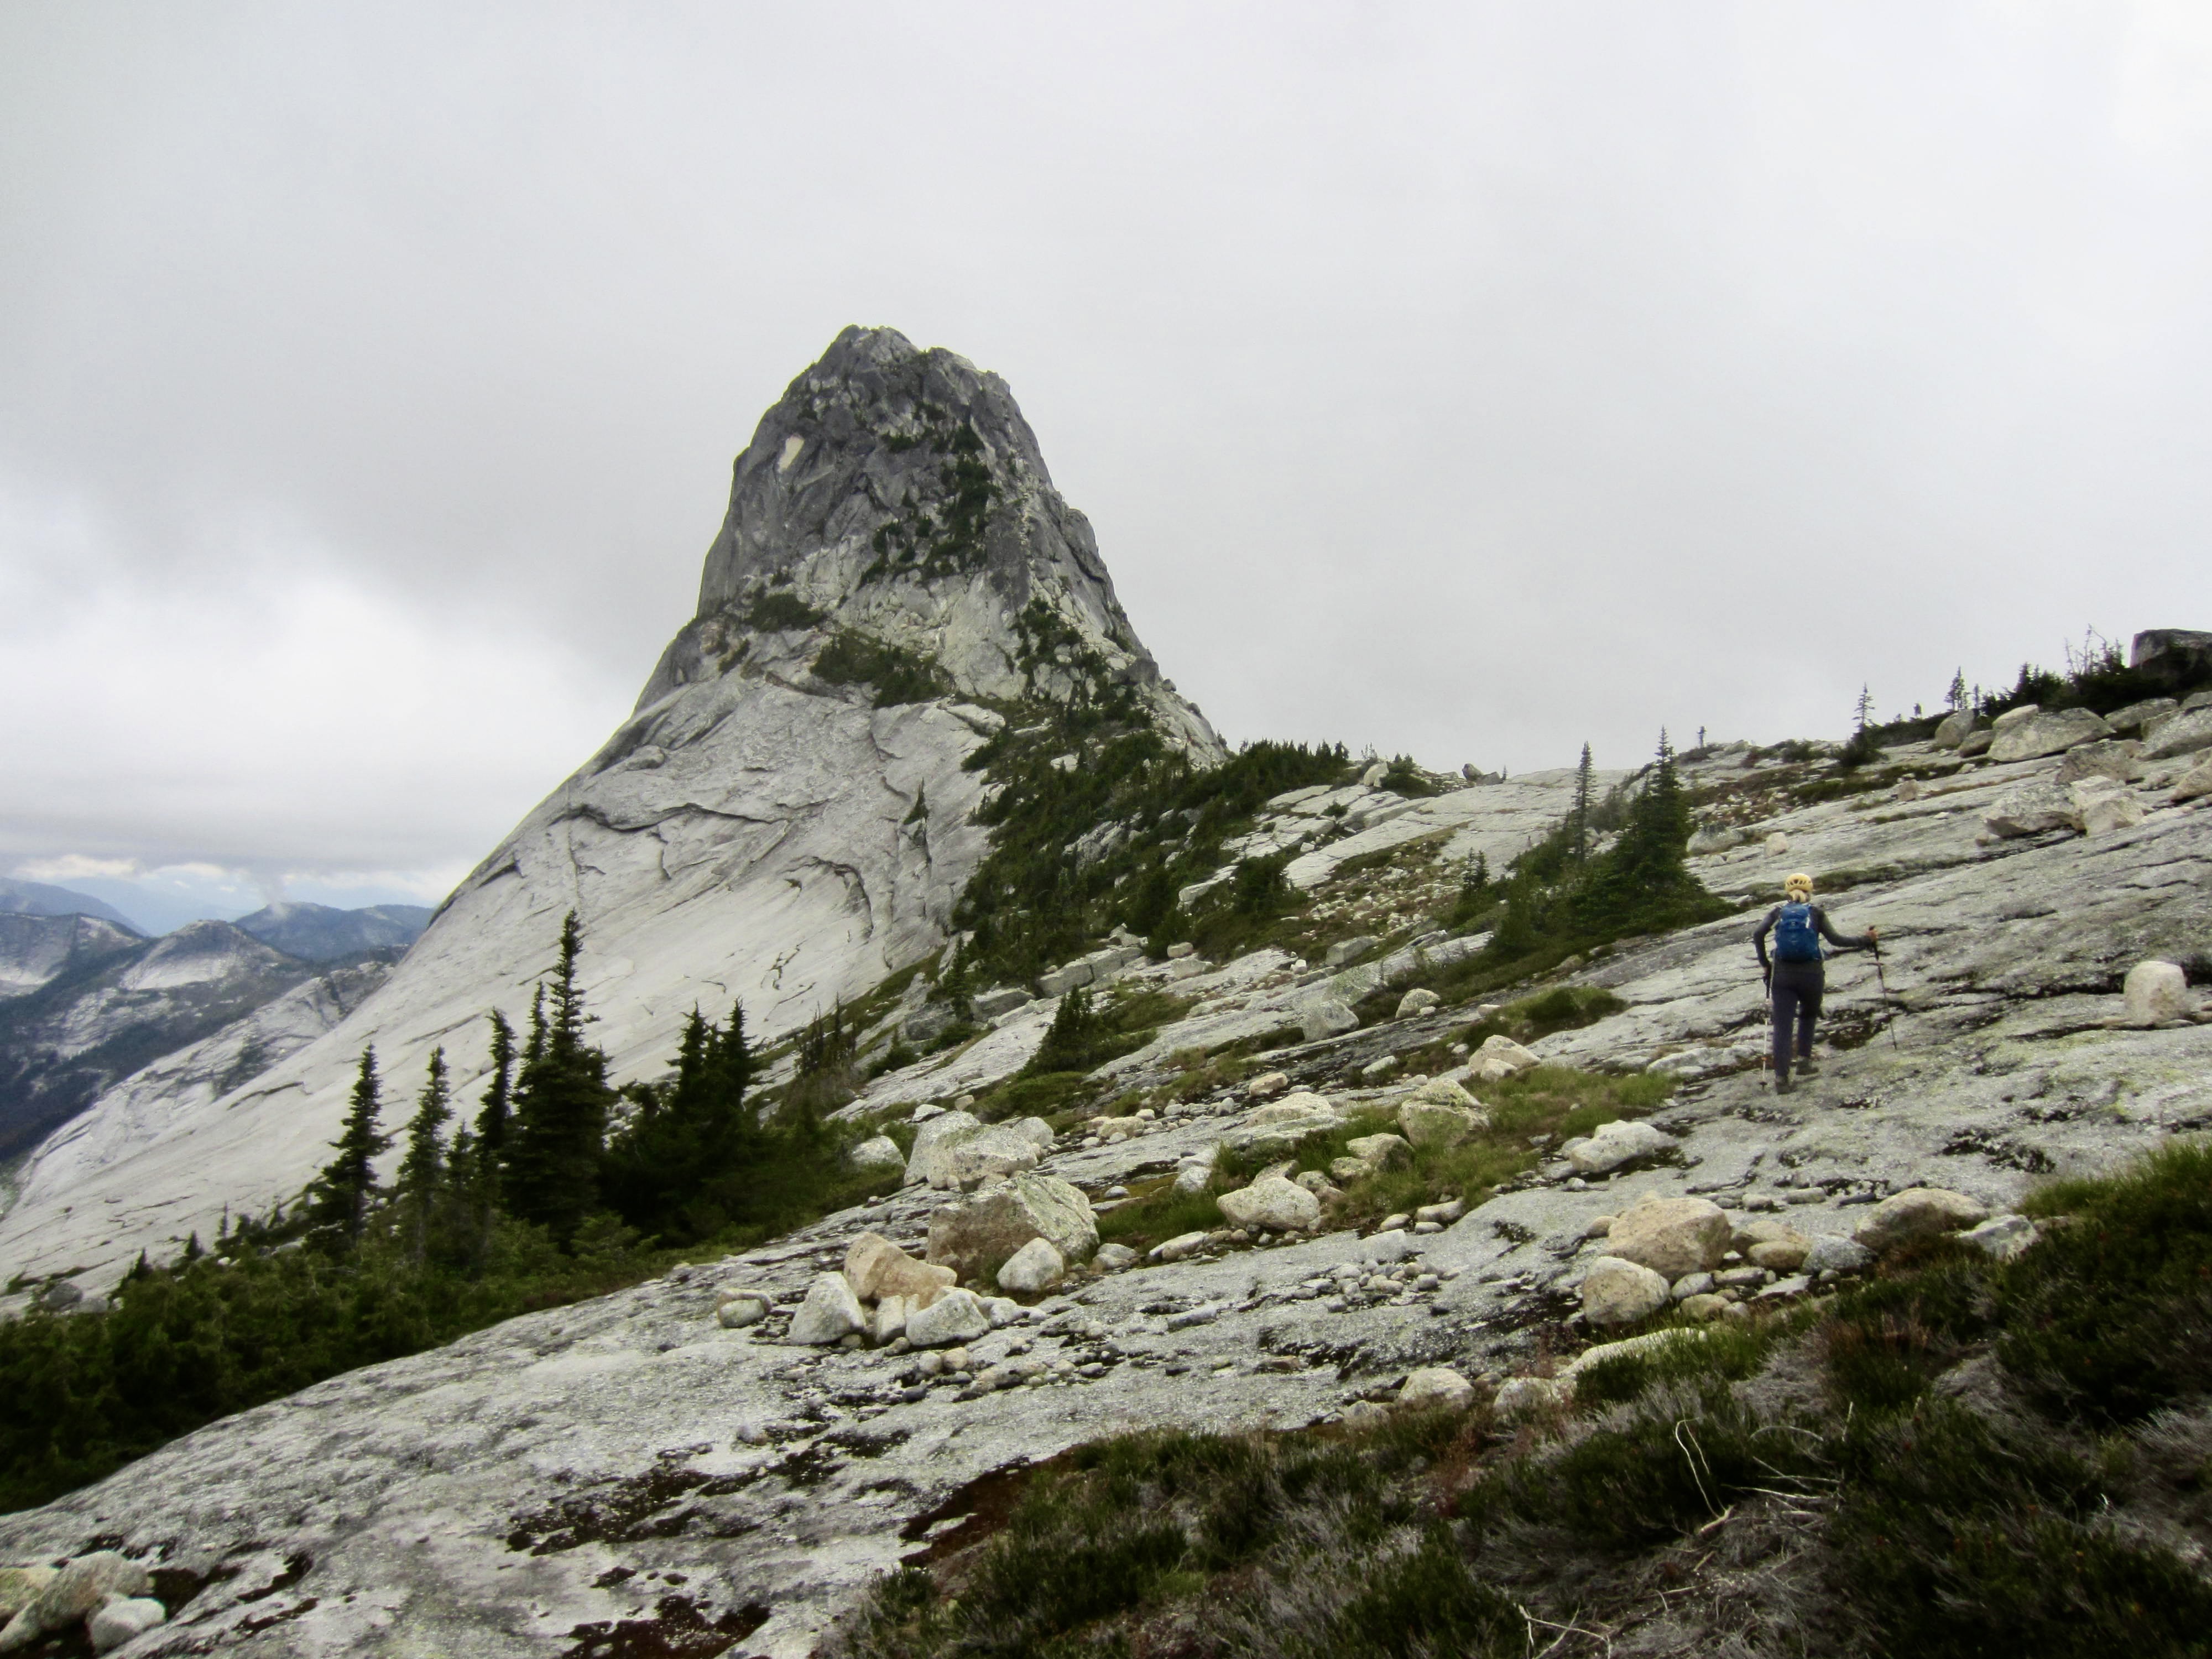
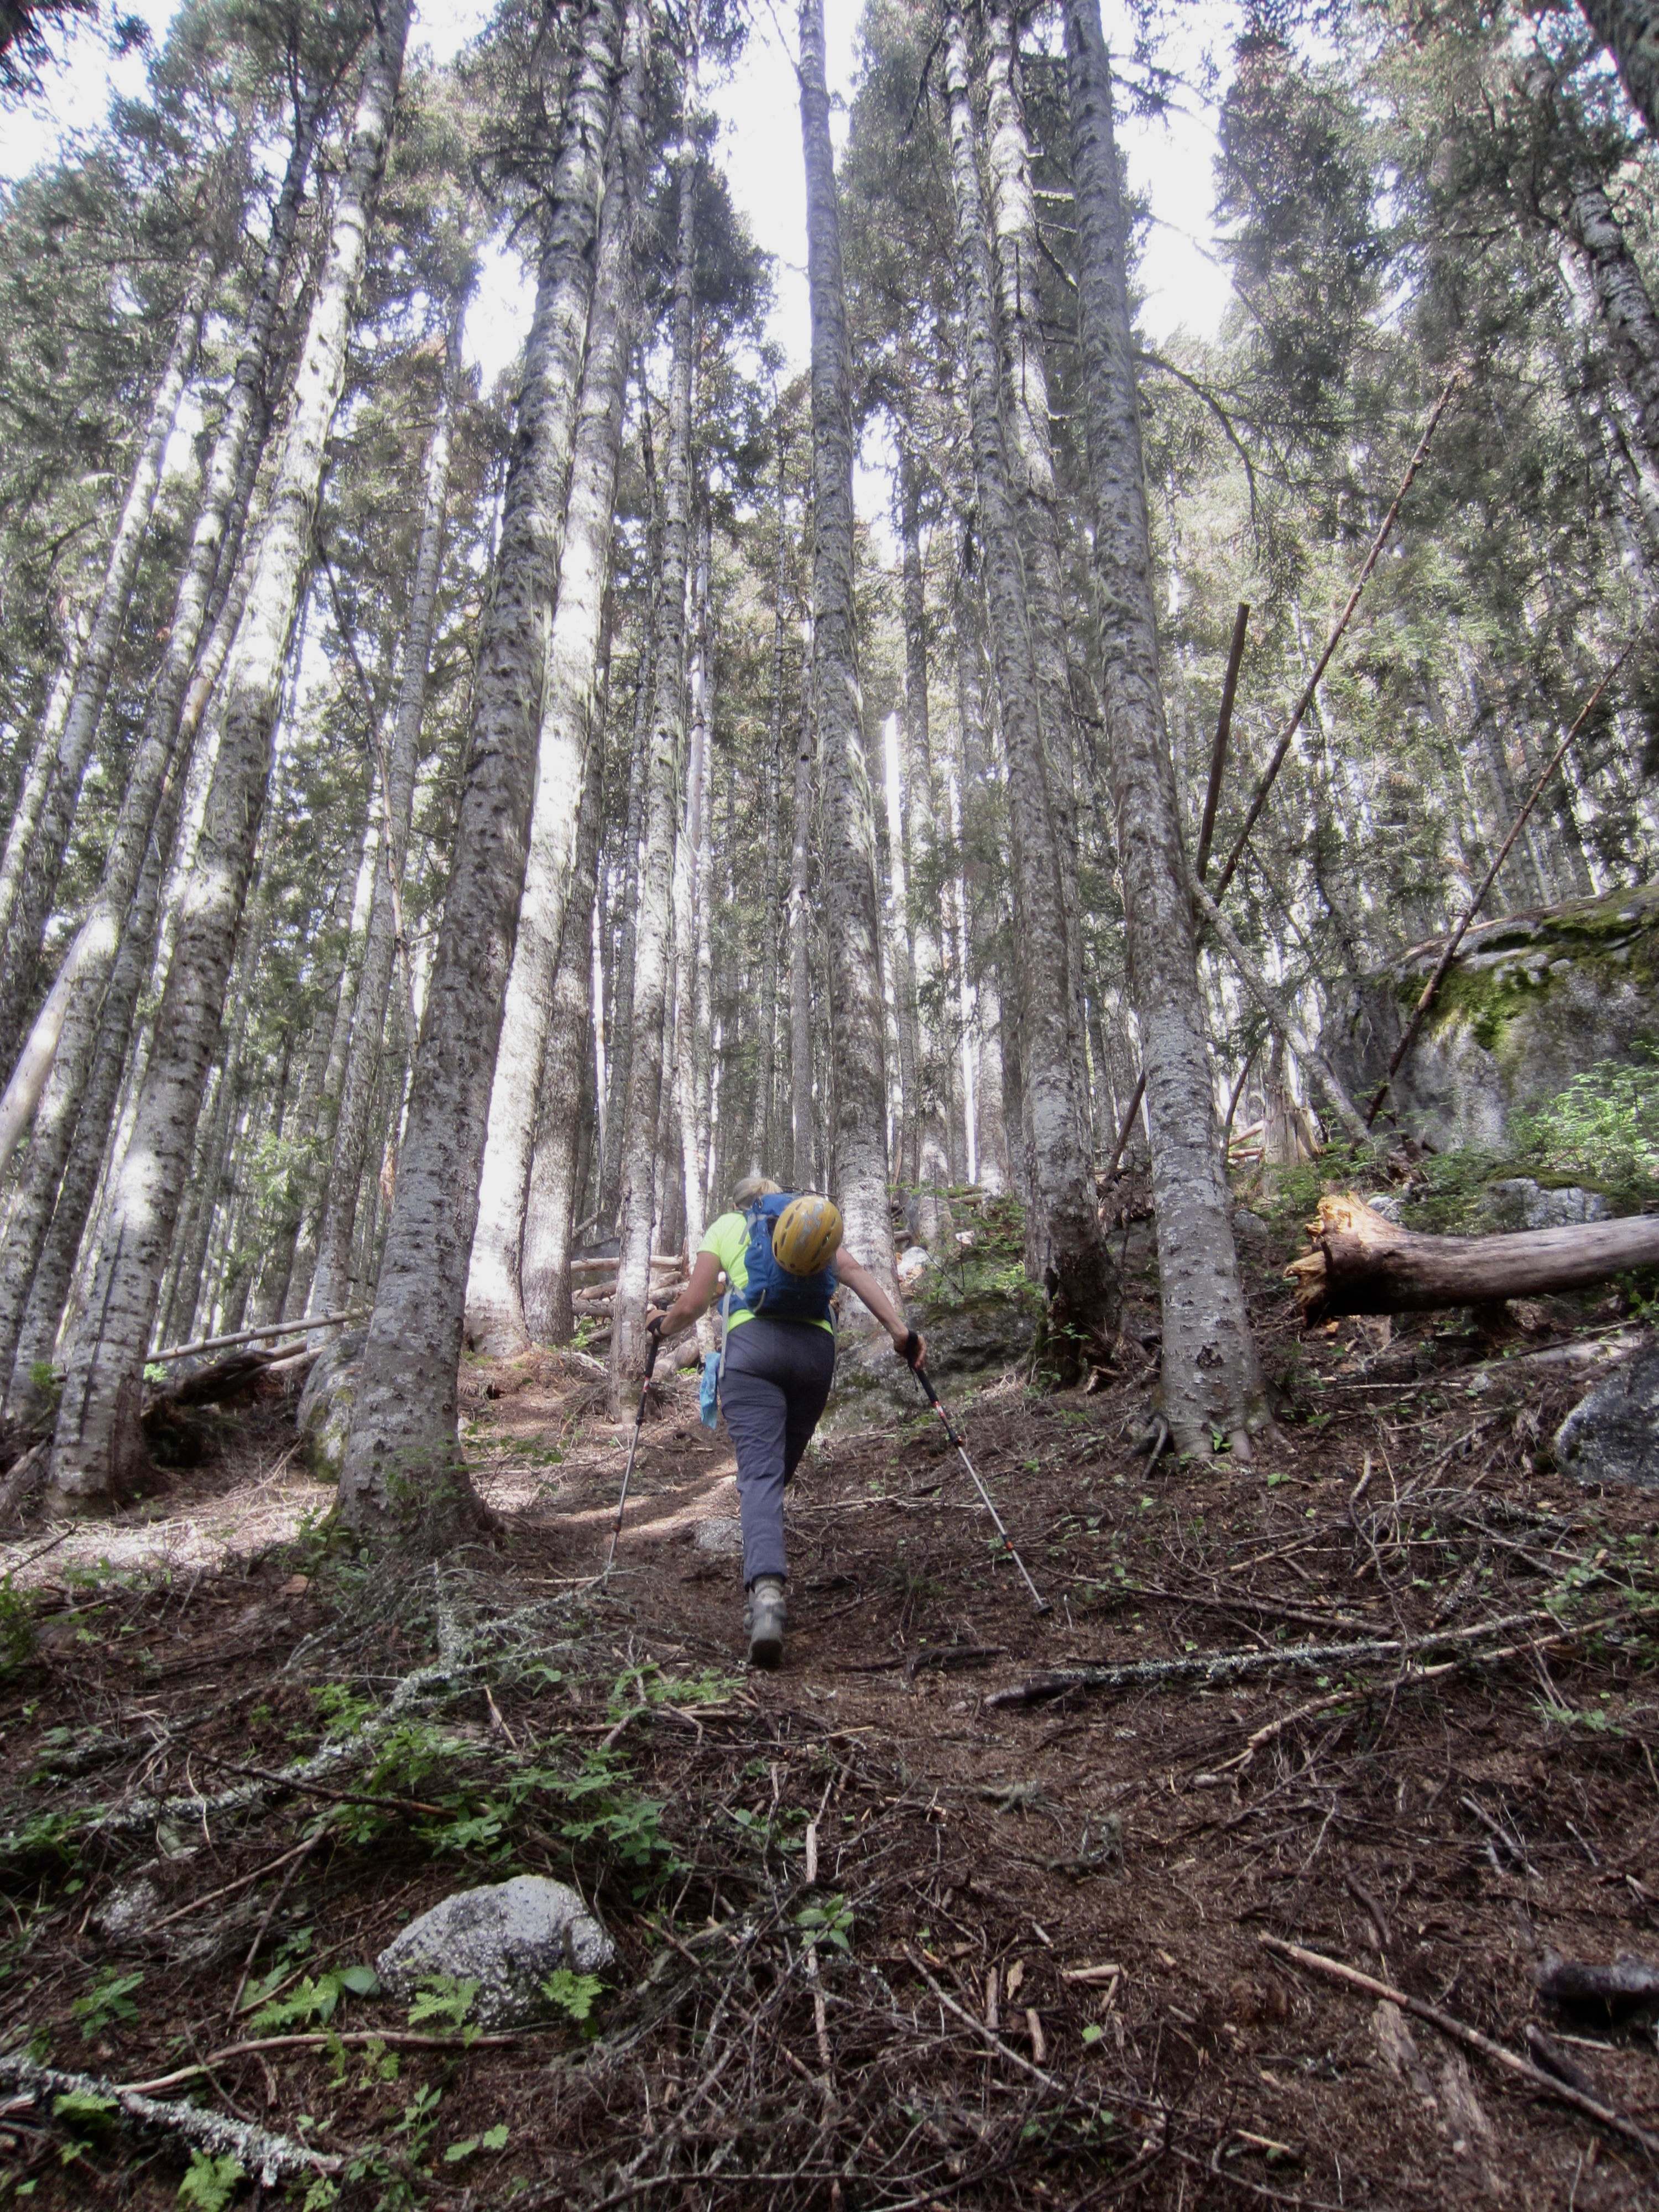
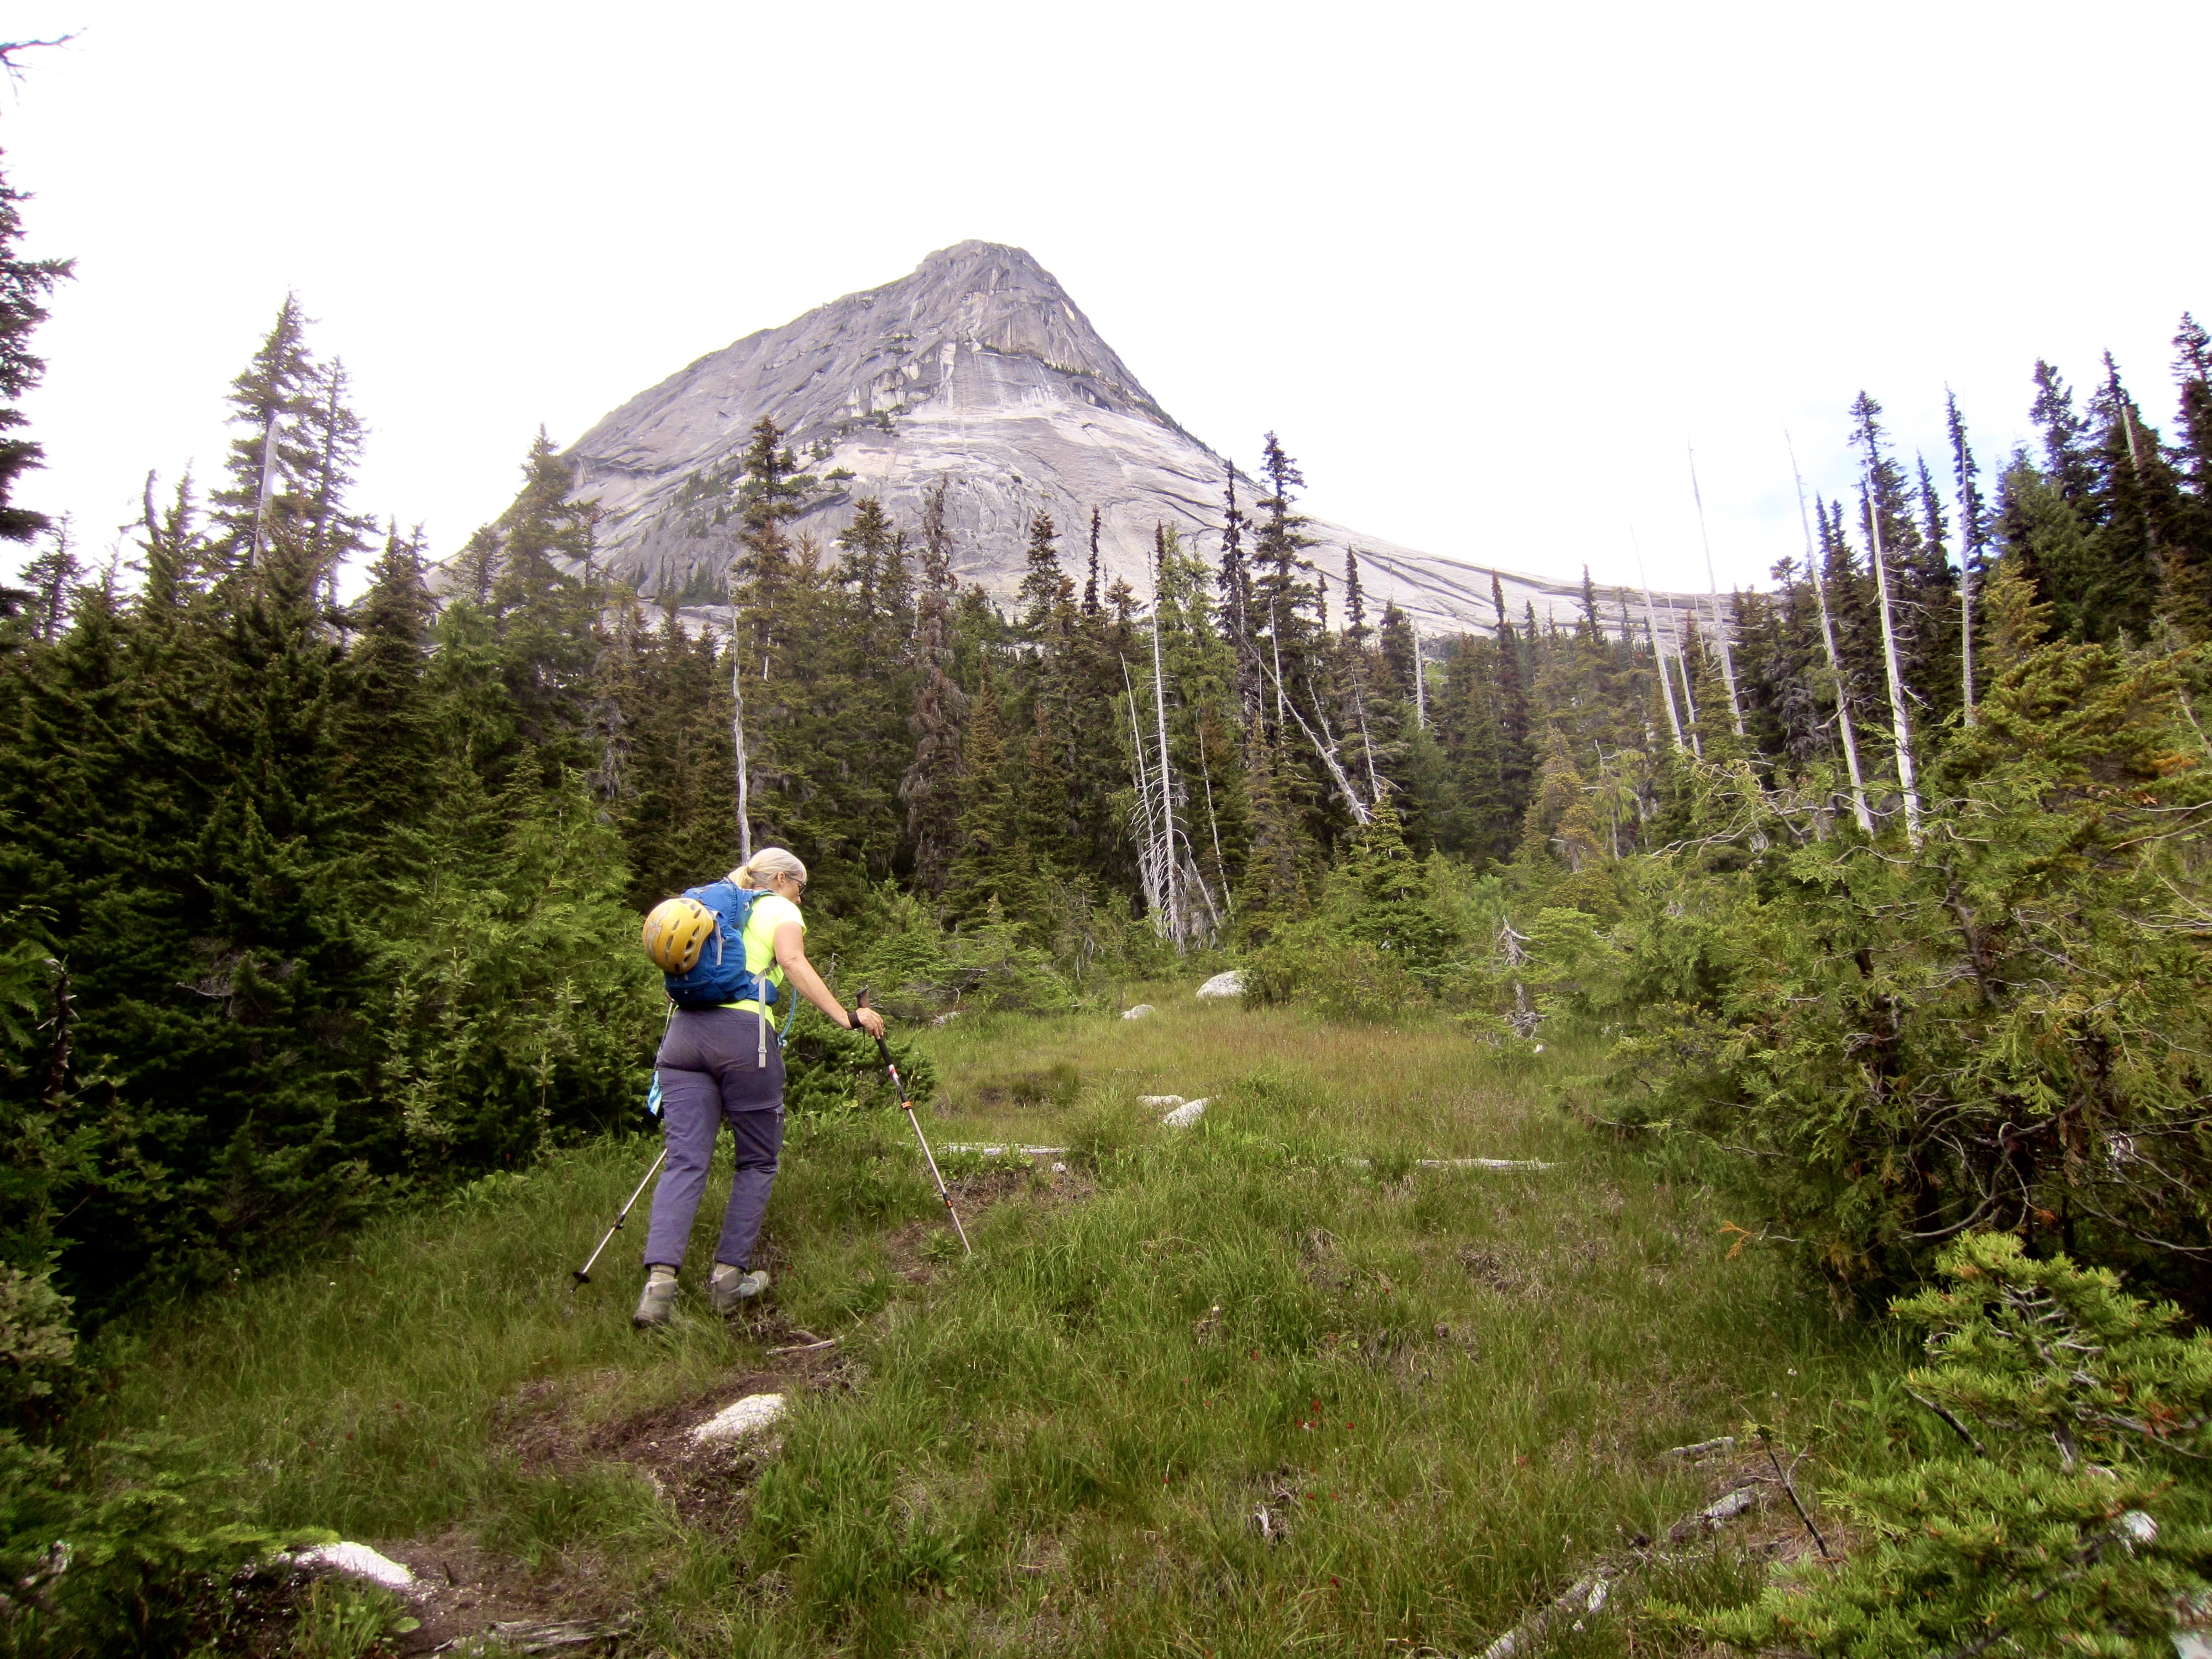
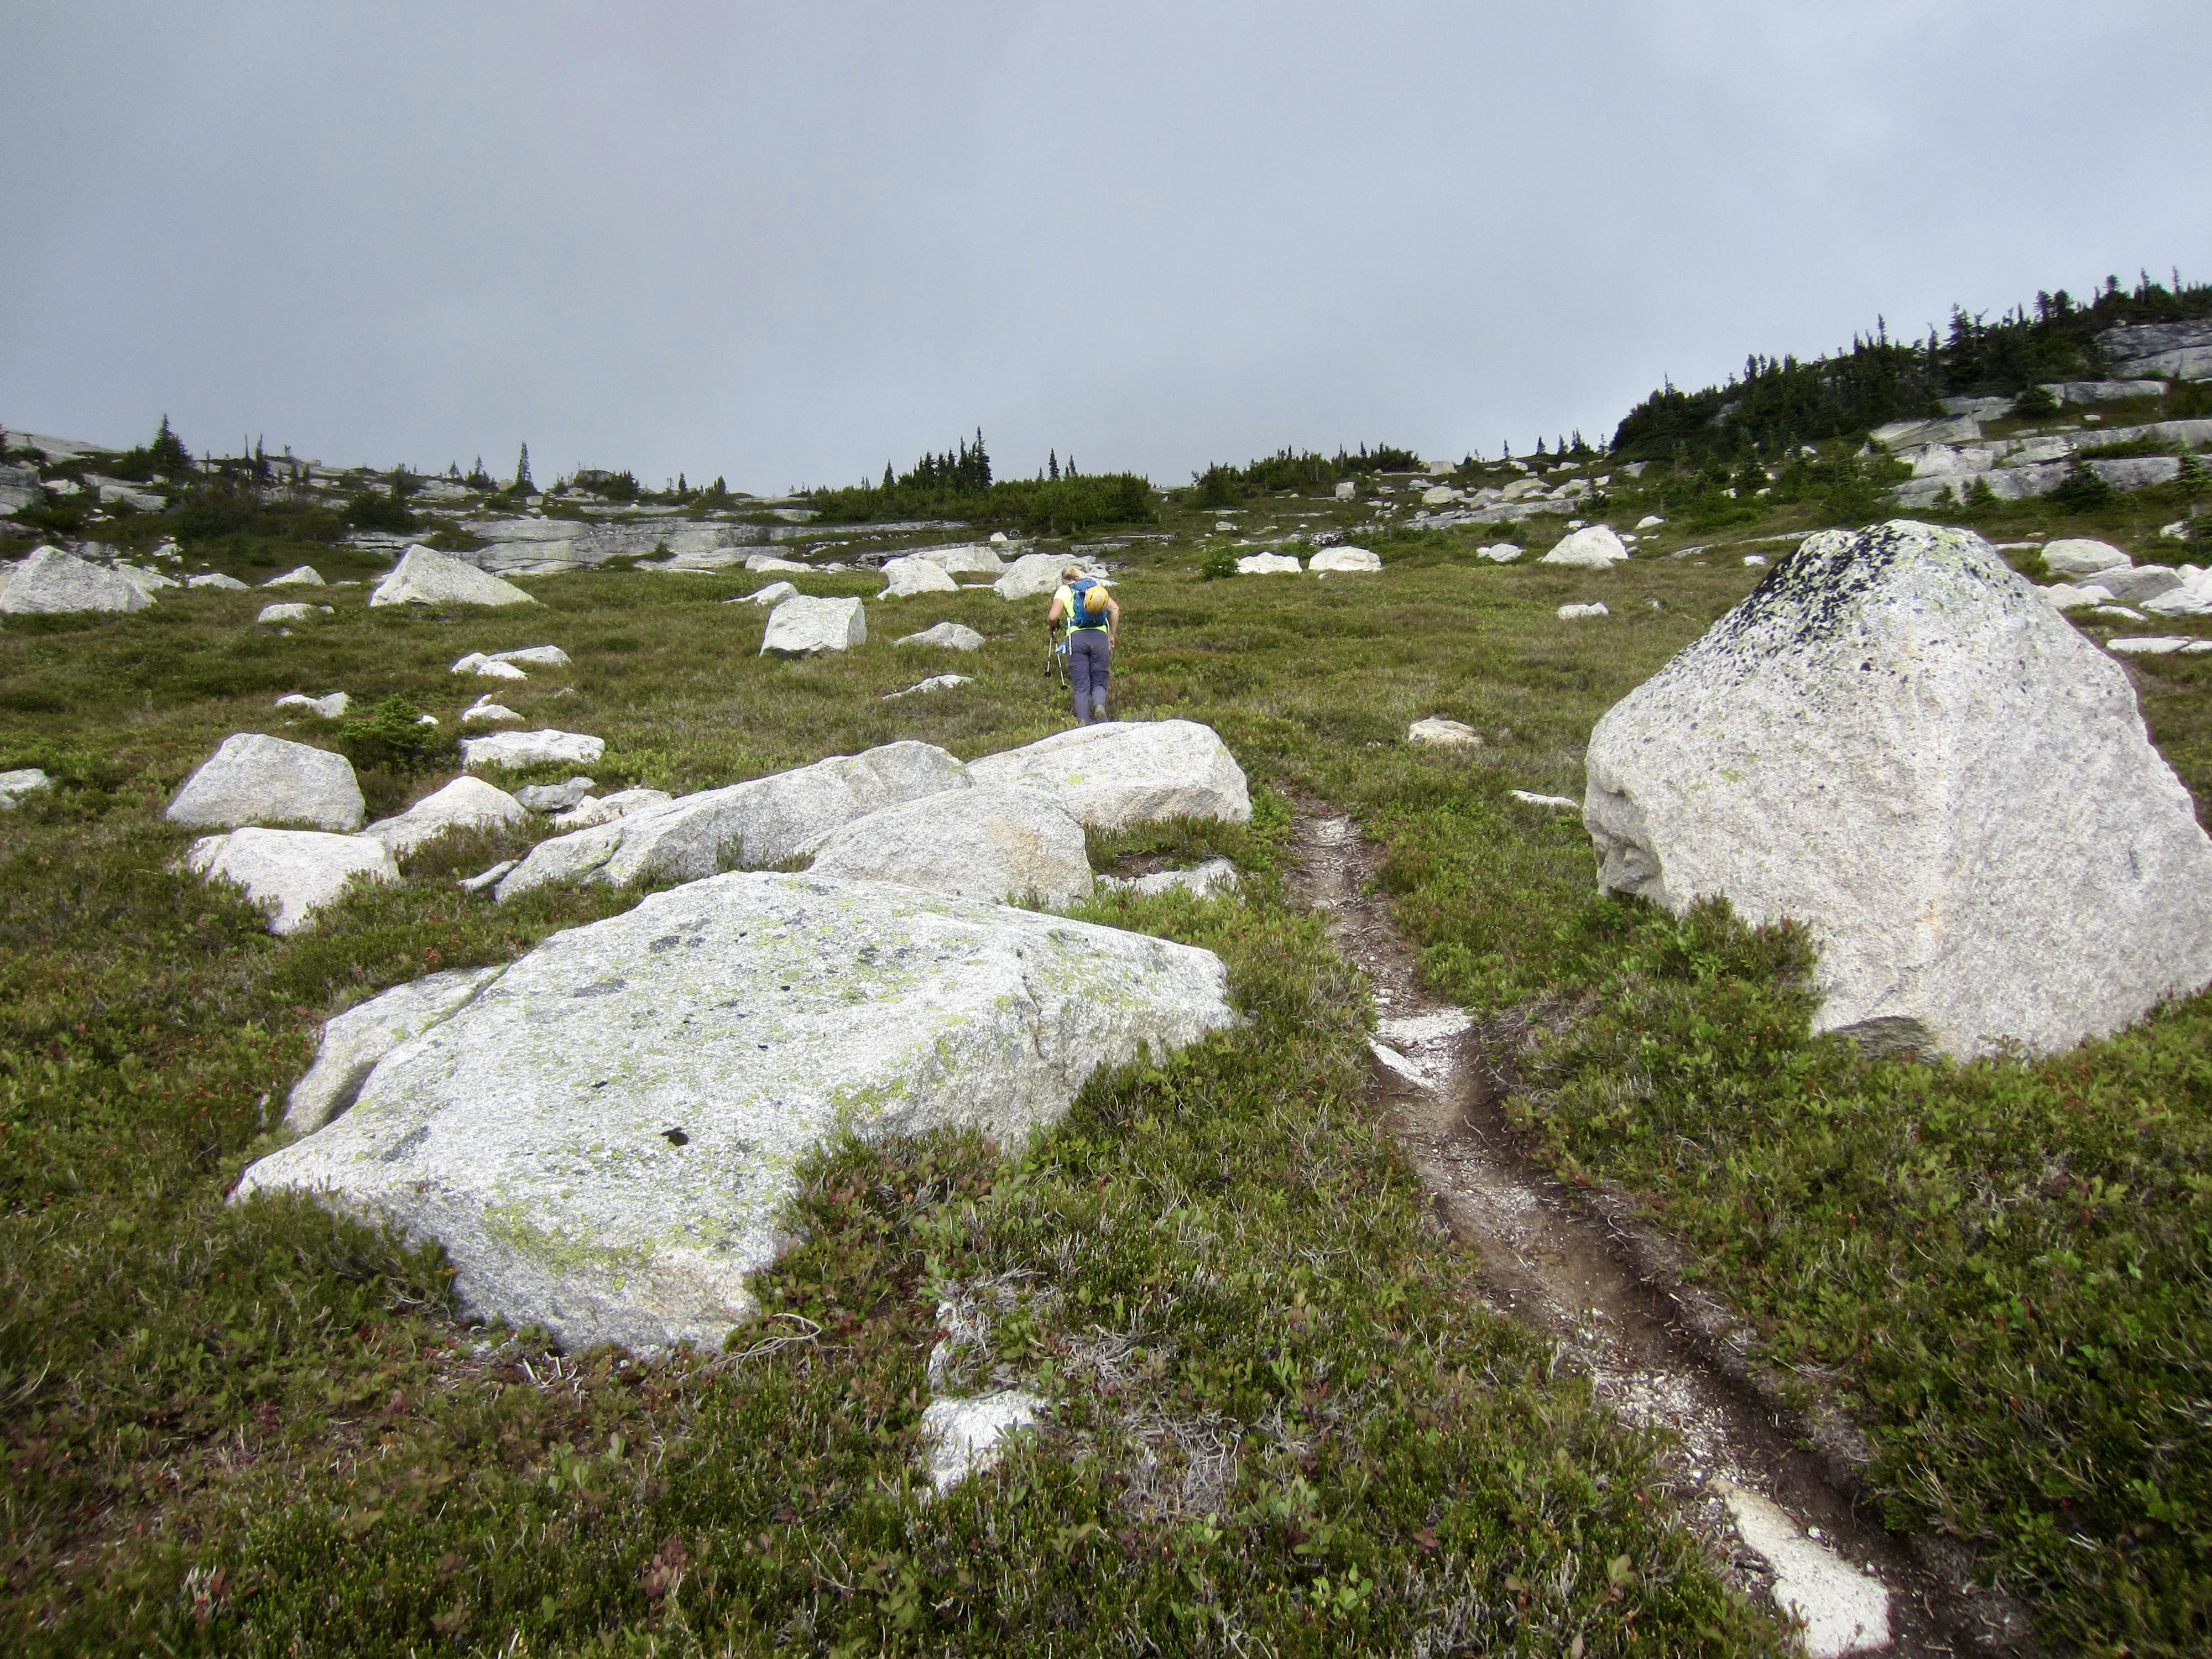
The well-defined trail led us steeply upward through mature forest for 1000 feet and then through a boggy meadow for another 200 feet. The sharkfin-shaped summit horn of Vicuna Peak came into view directly above us.
.
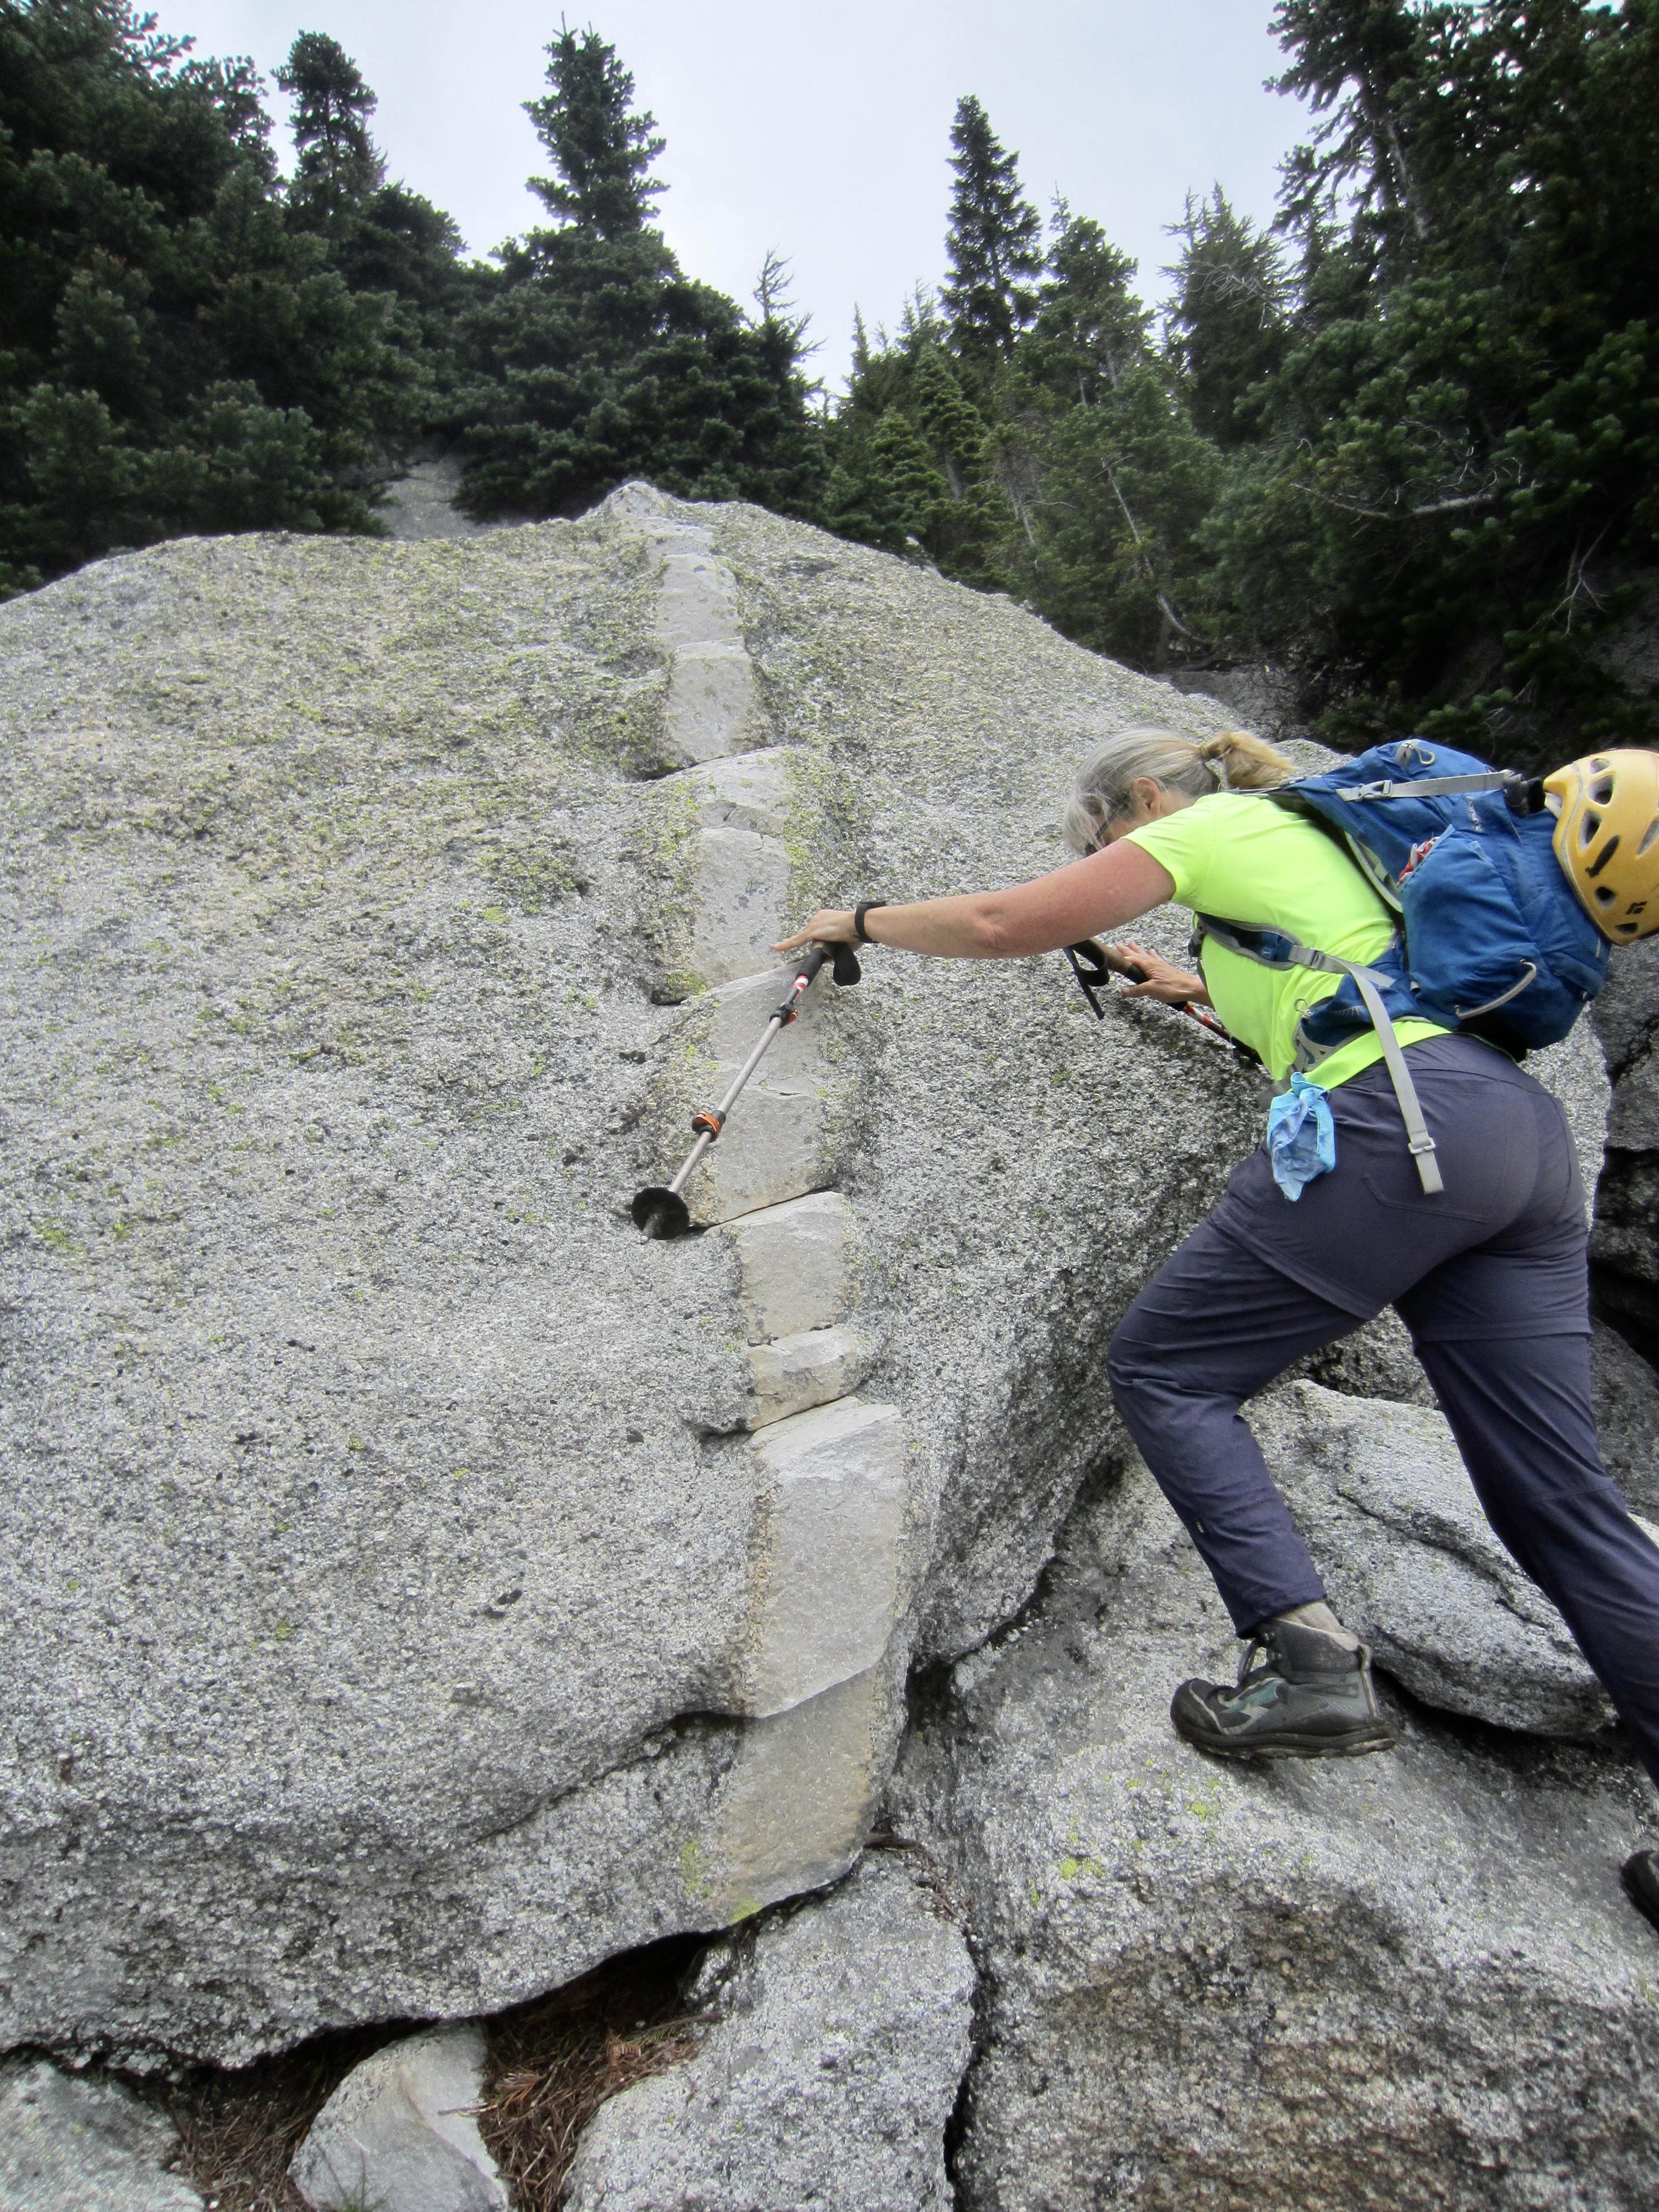
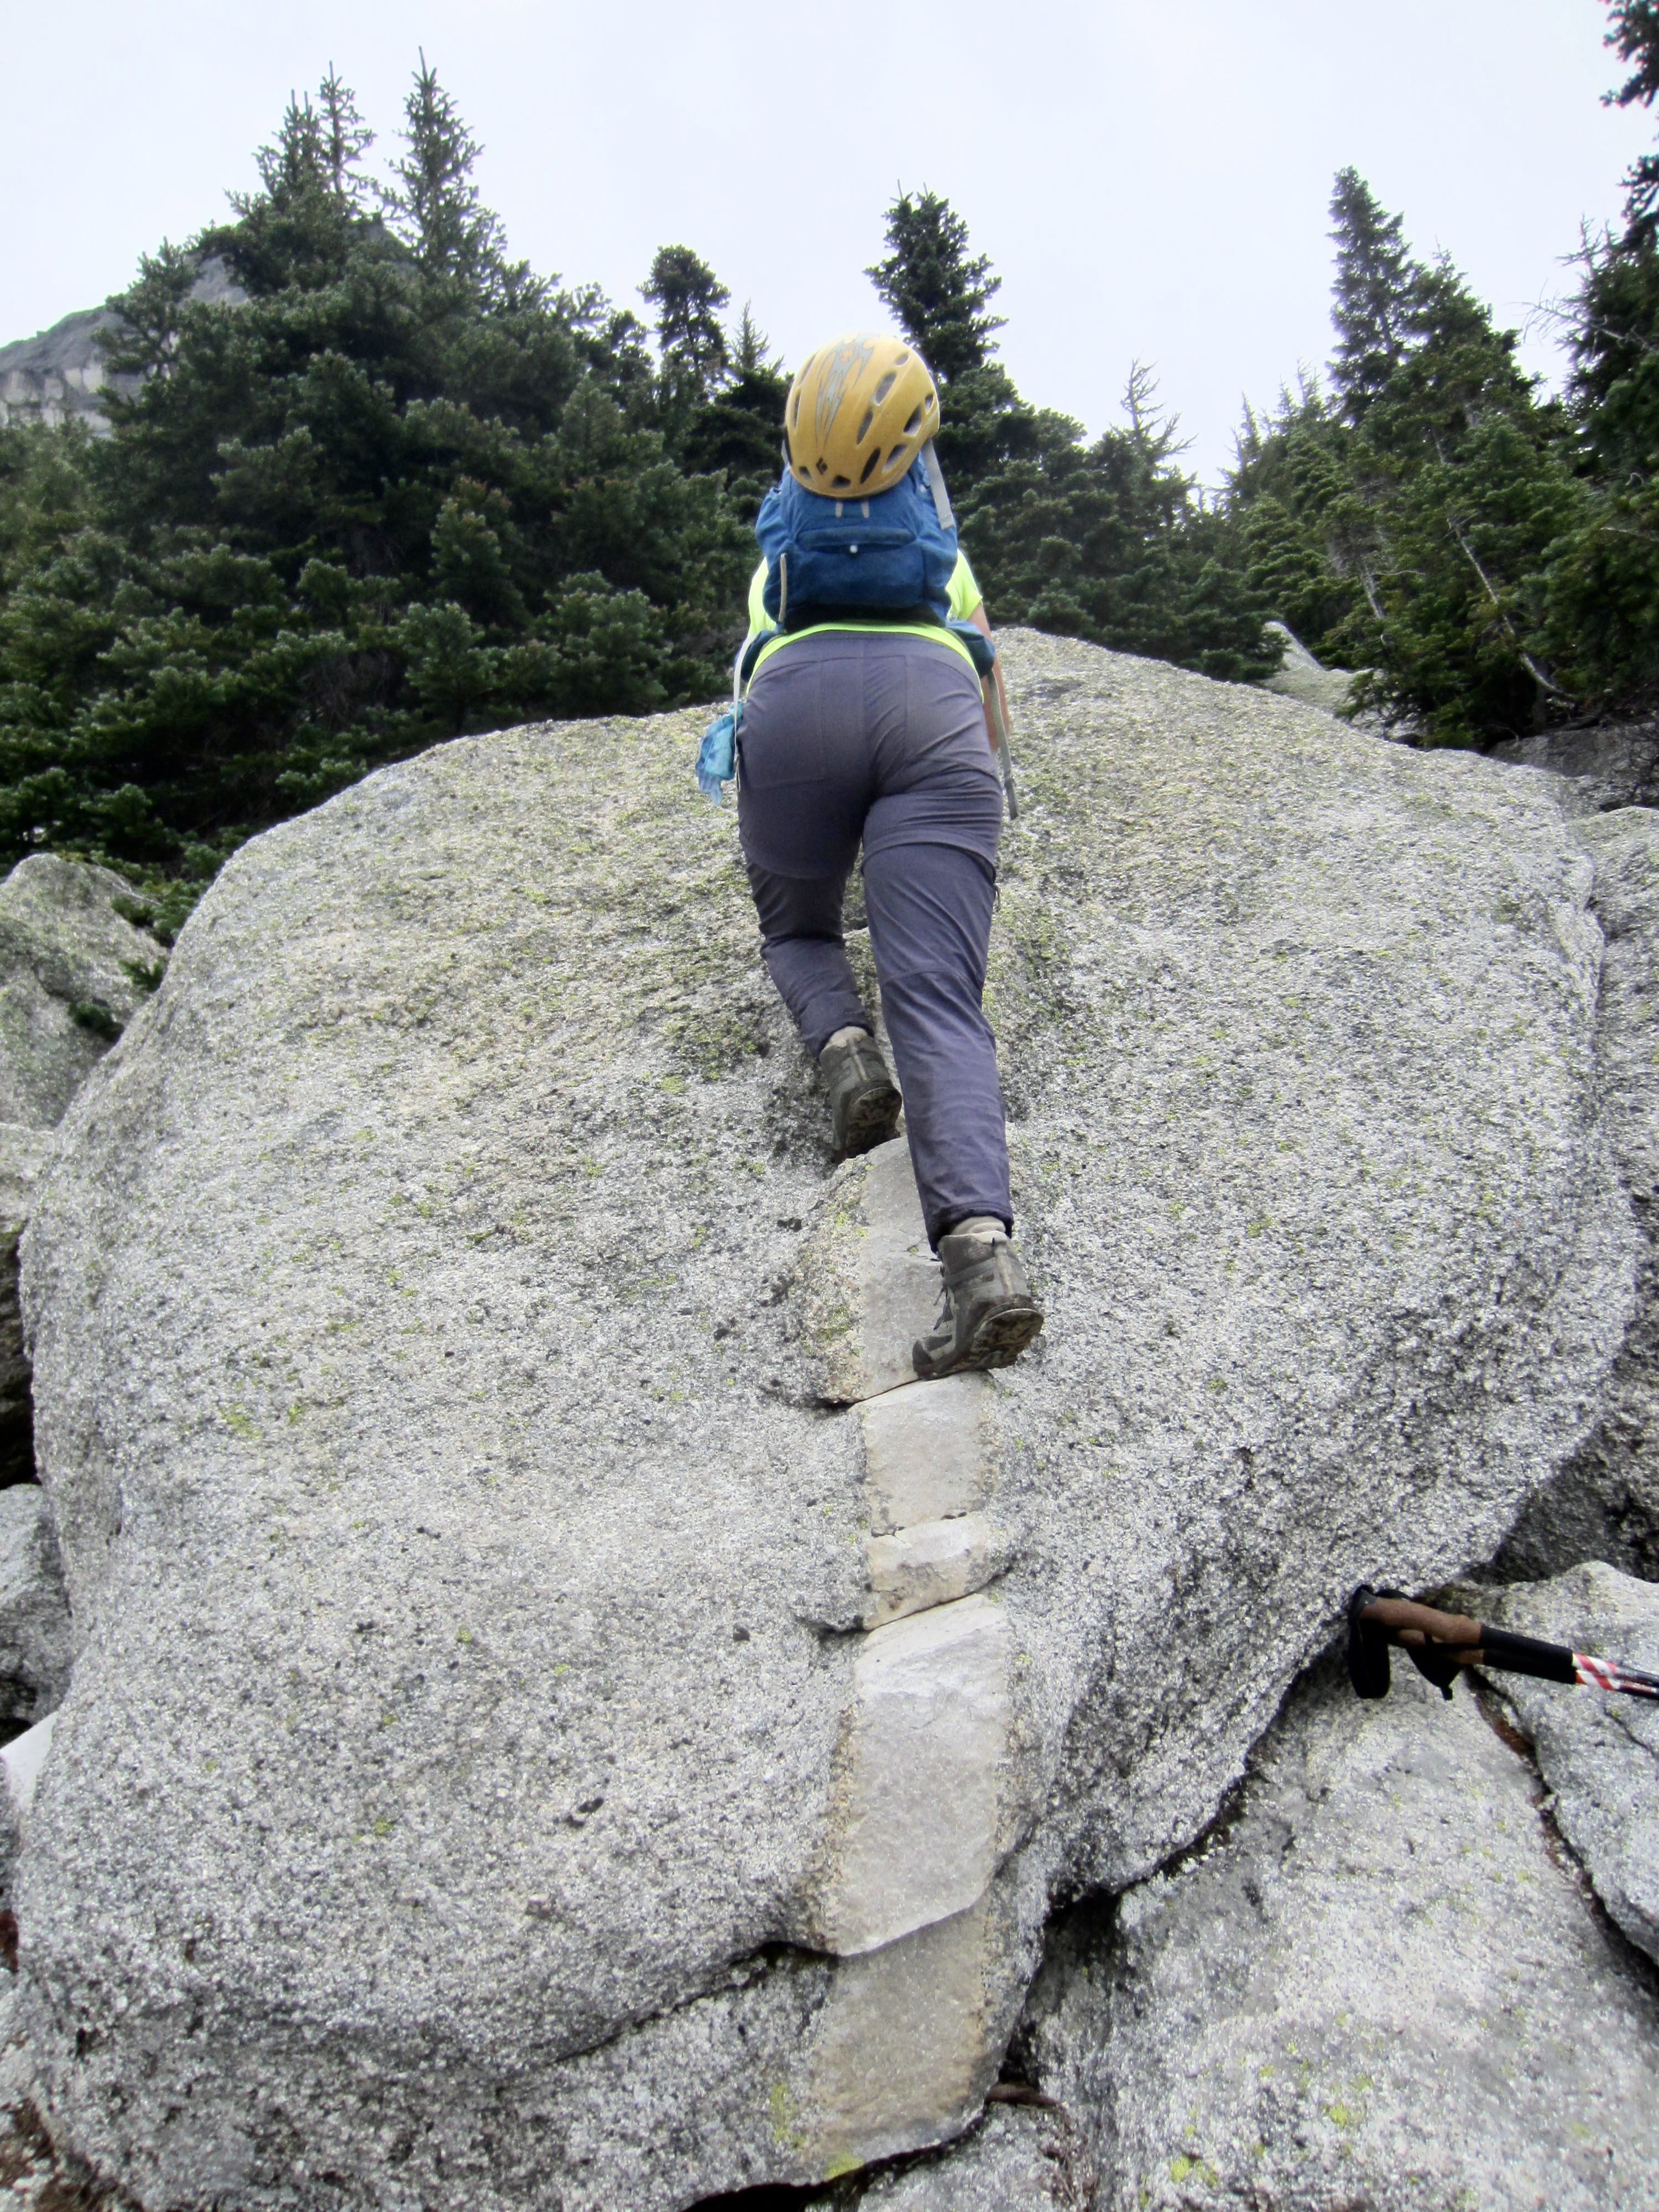
After slogging through the boggy meadow, we encountered a localized zone of large granite boulders. One of these boulders presents a geologic feature that is both remarkable and convenient: A narrow intrusive dike of white rhyolite runs vertically through the boulder and has eroded in such a way to form a natural stairway!
.
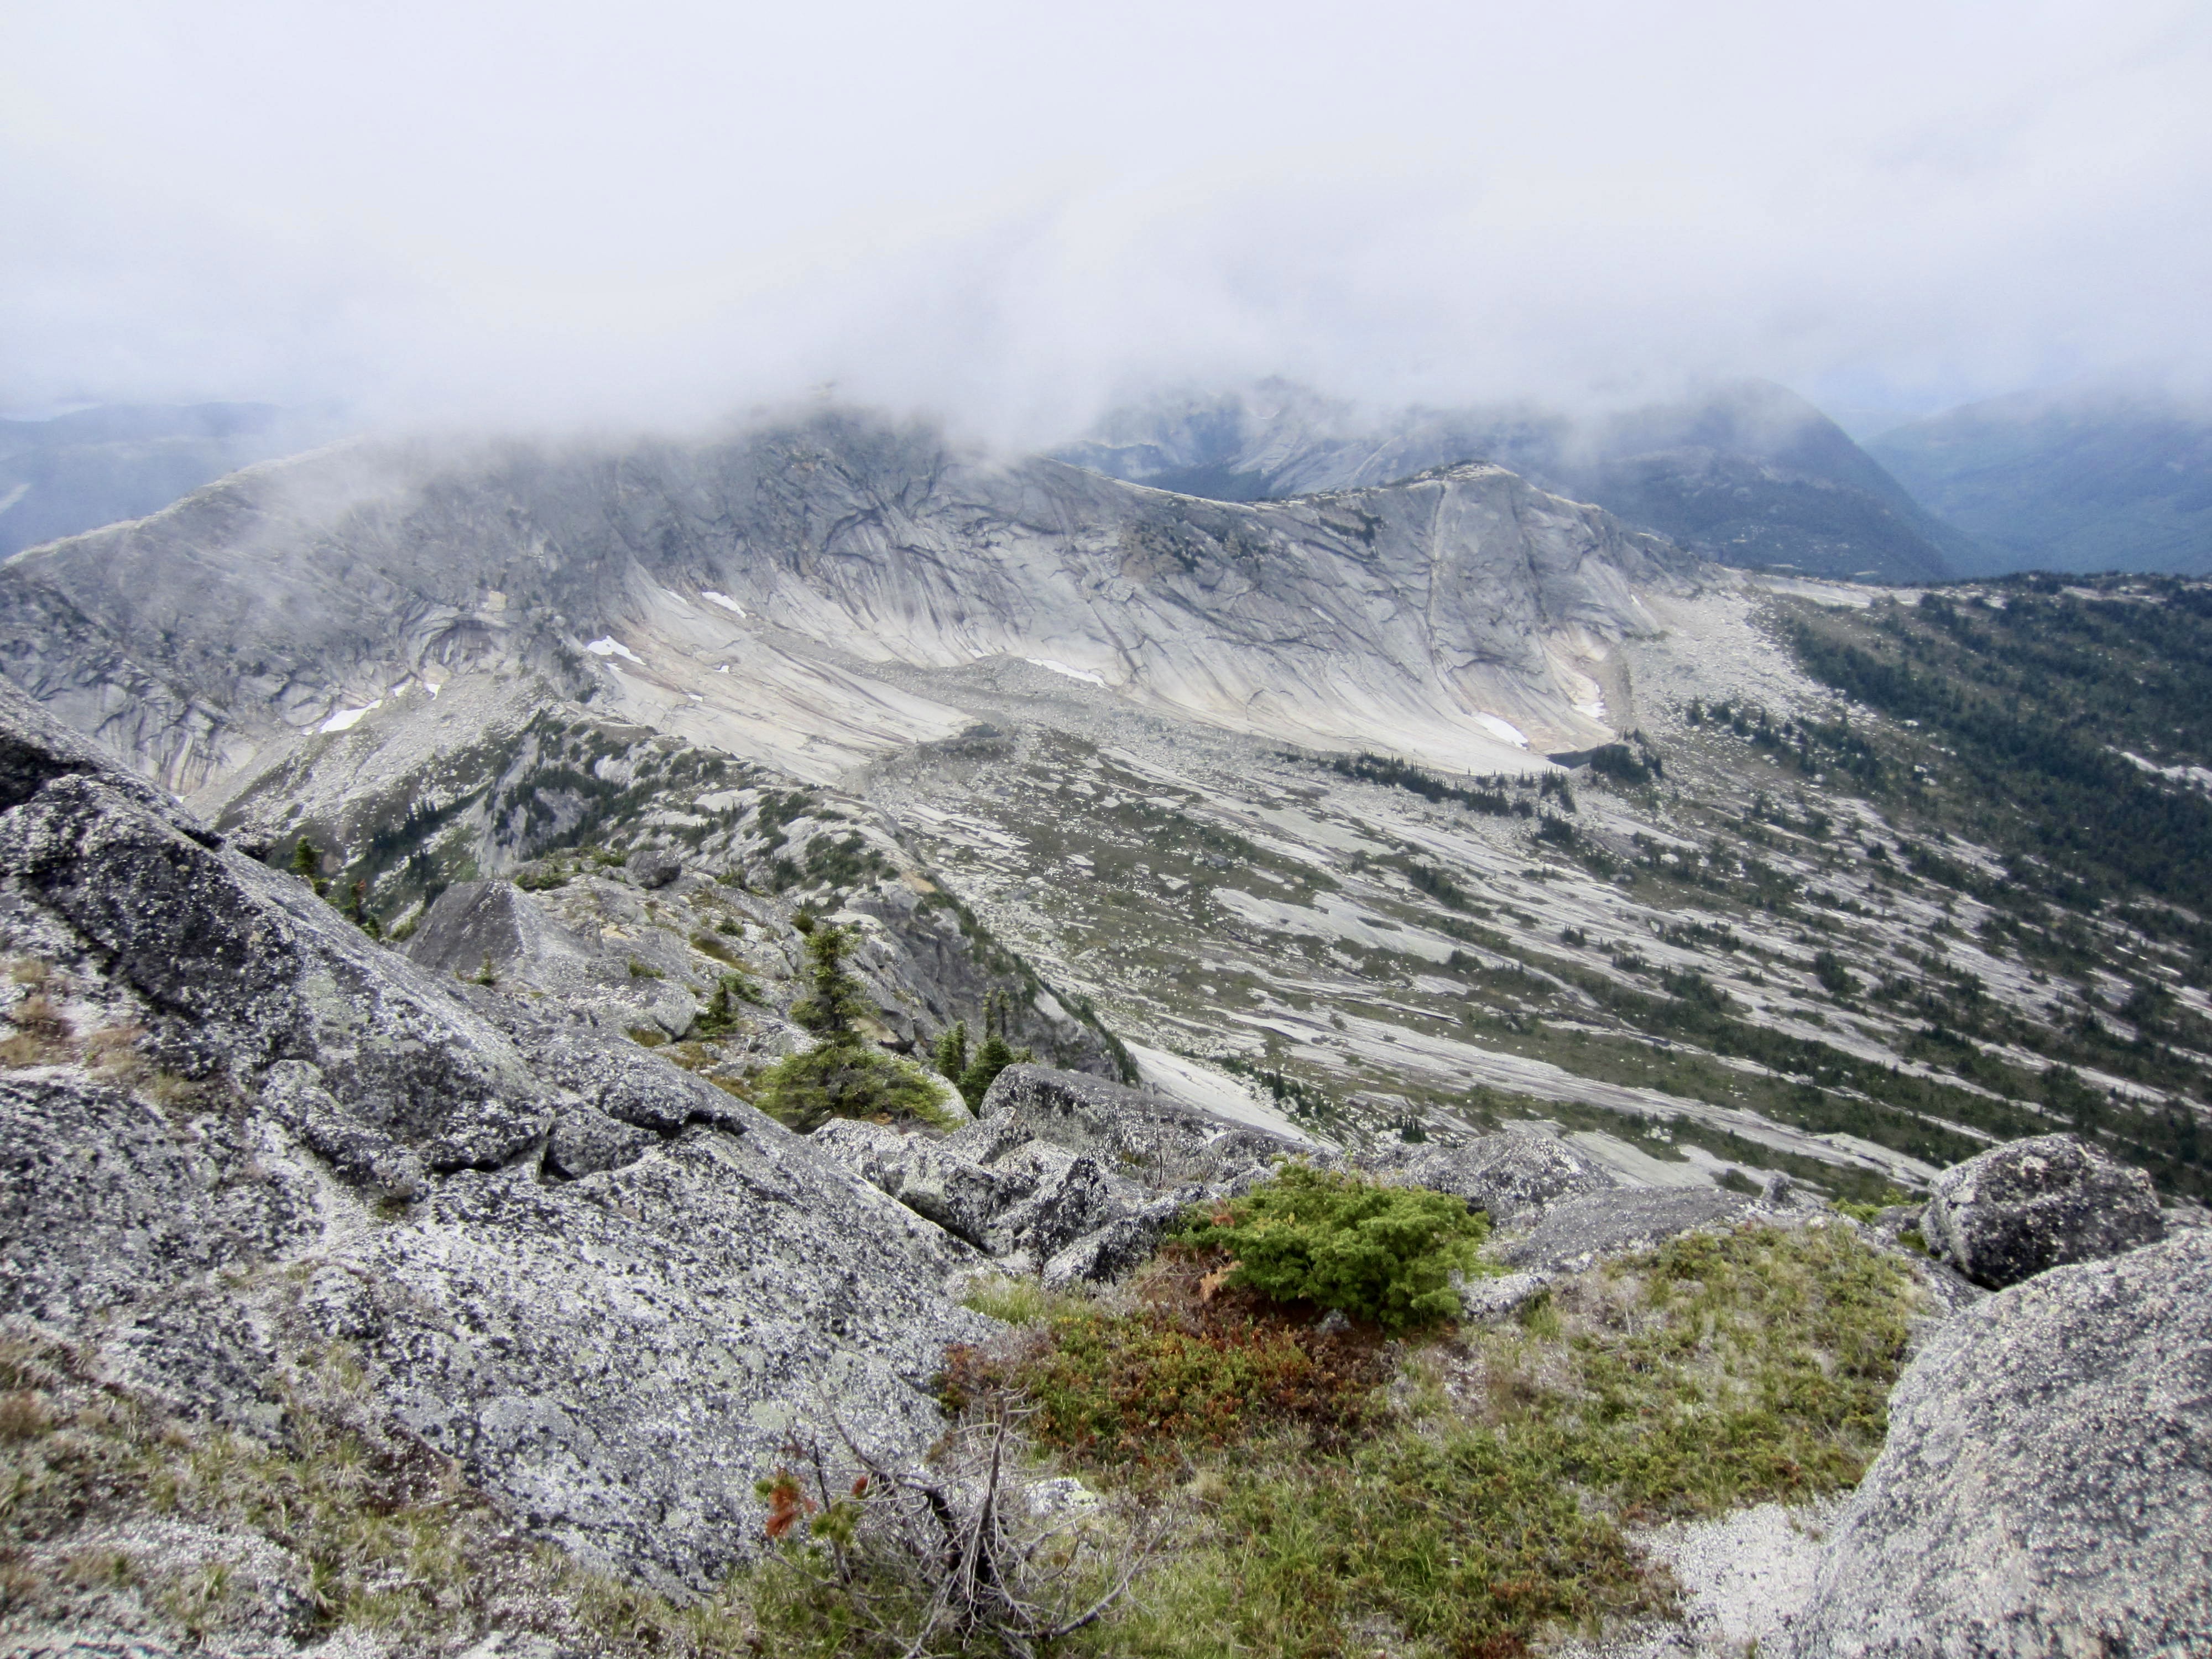
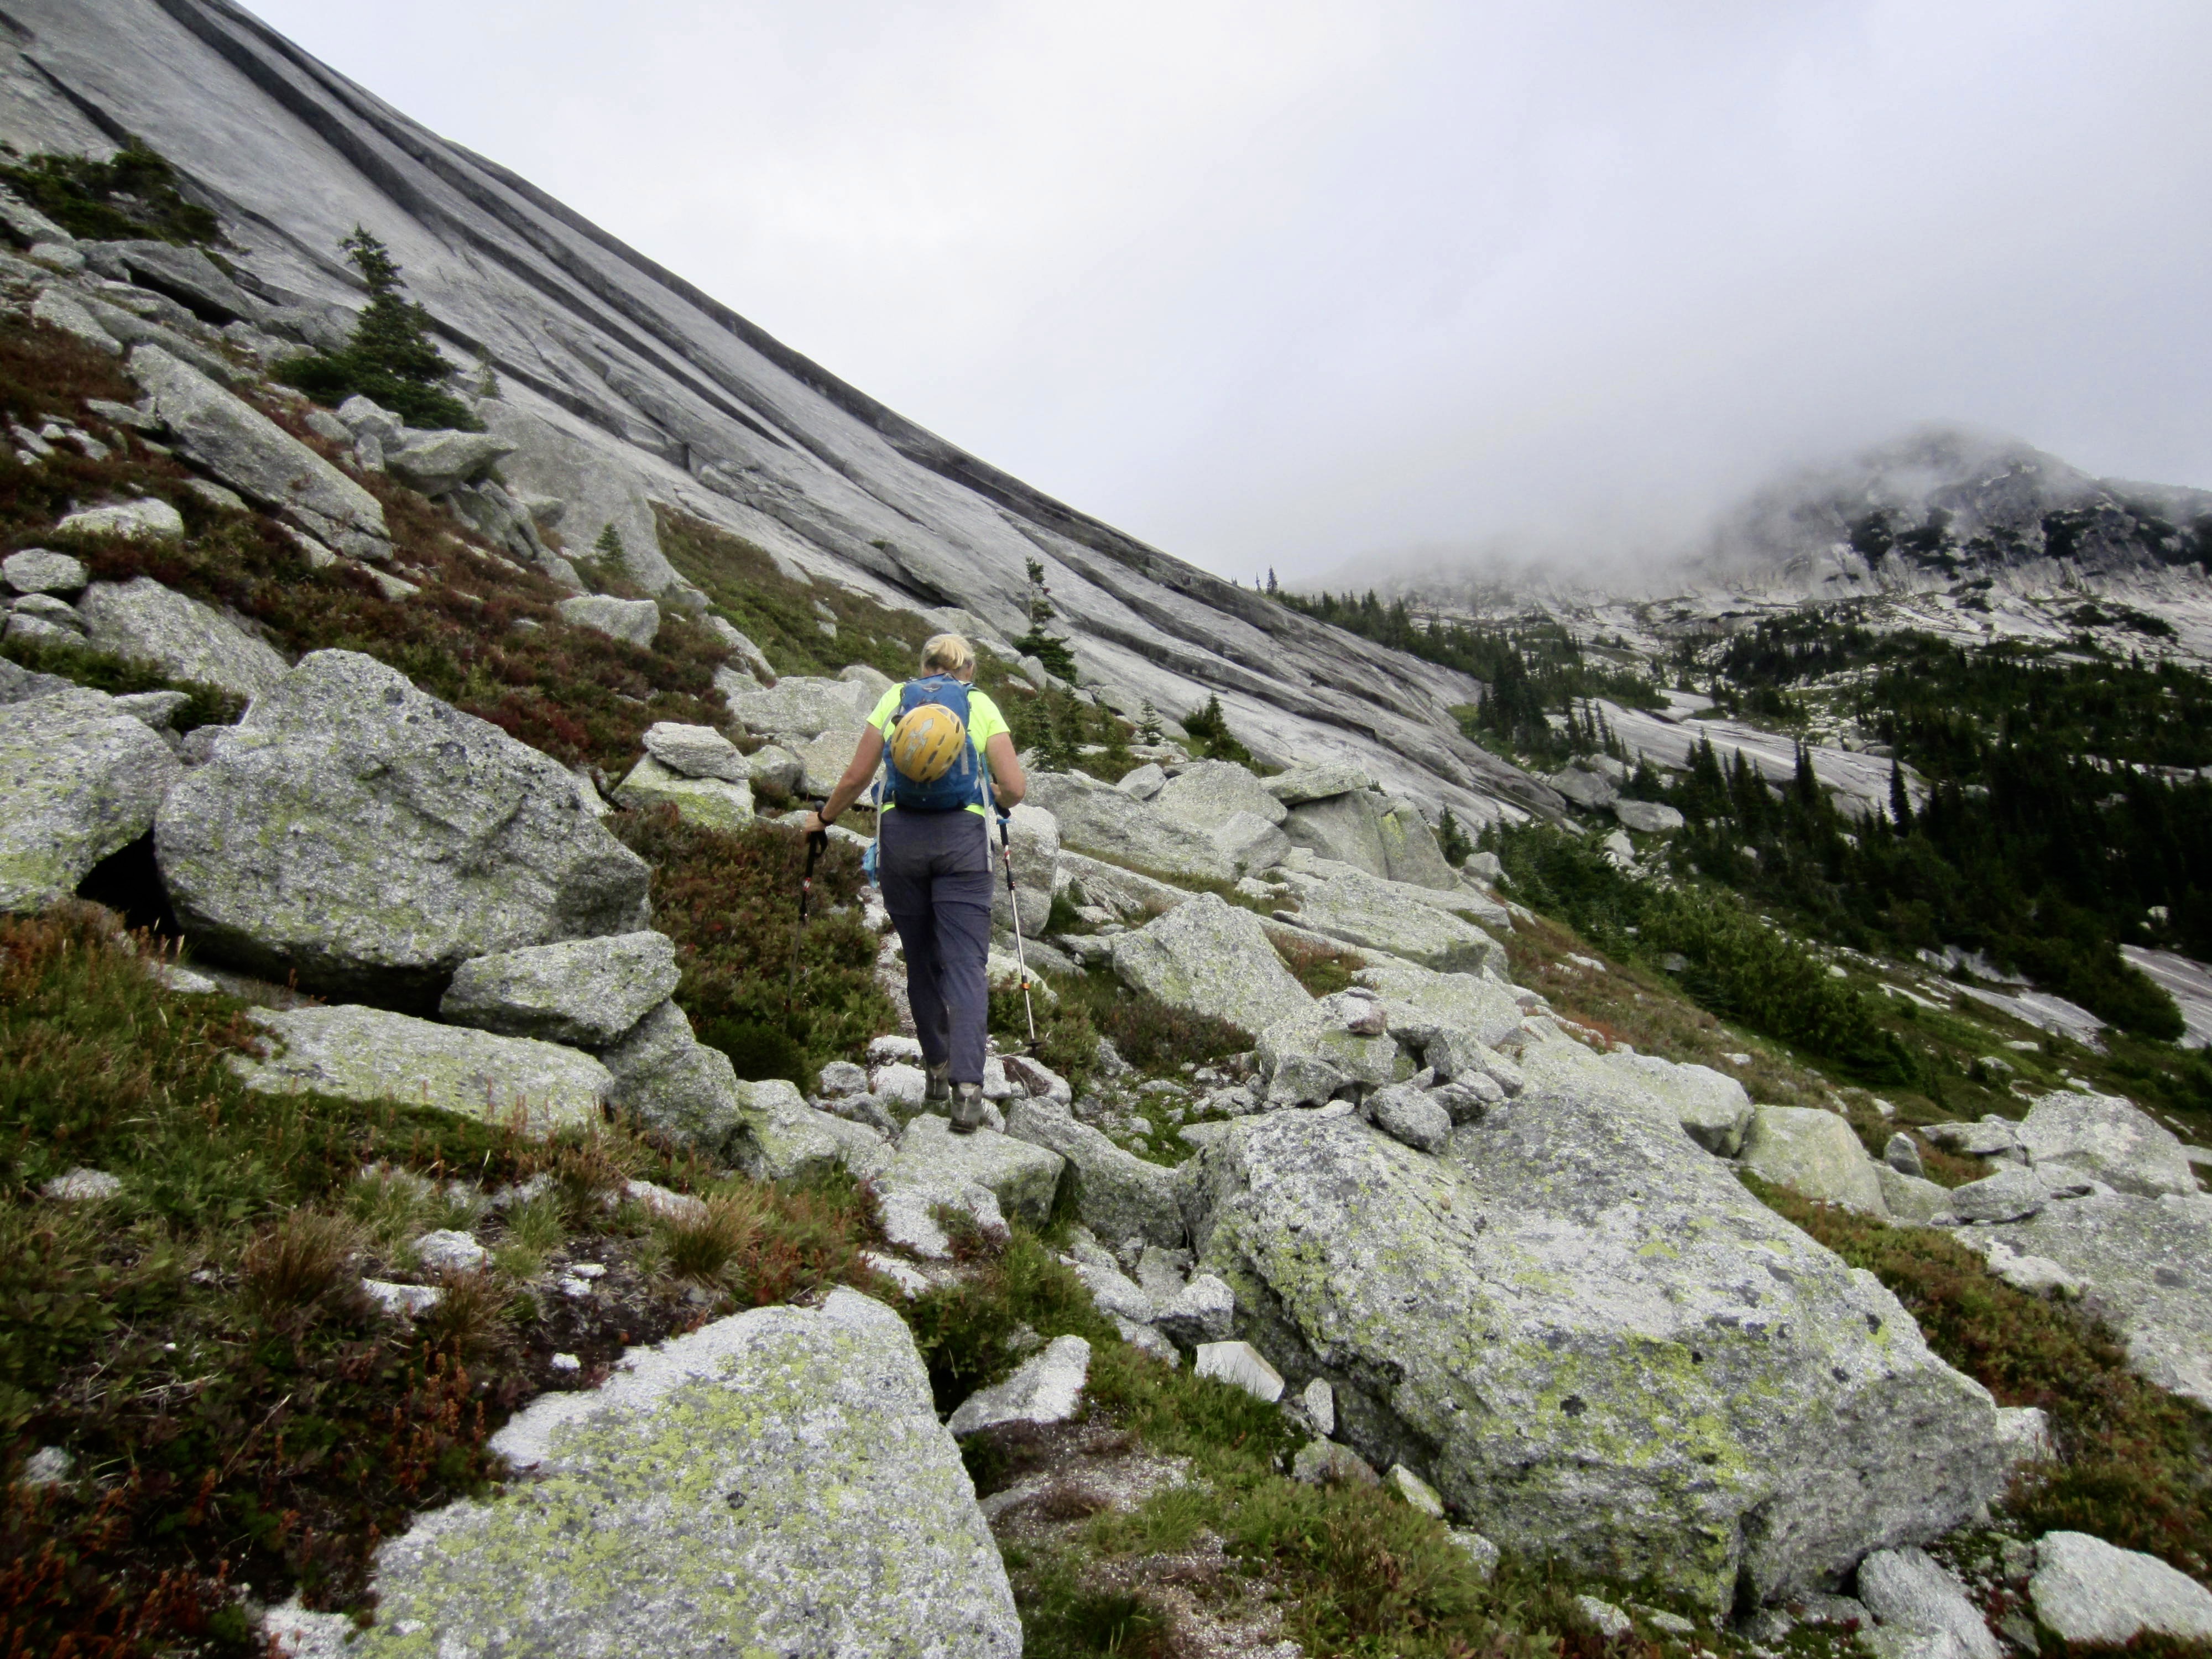
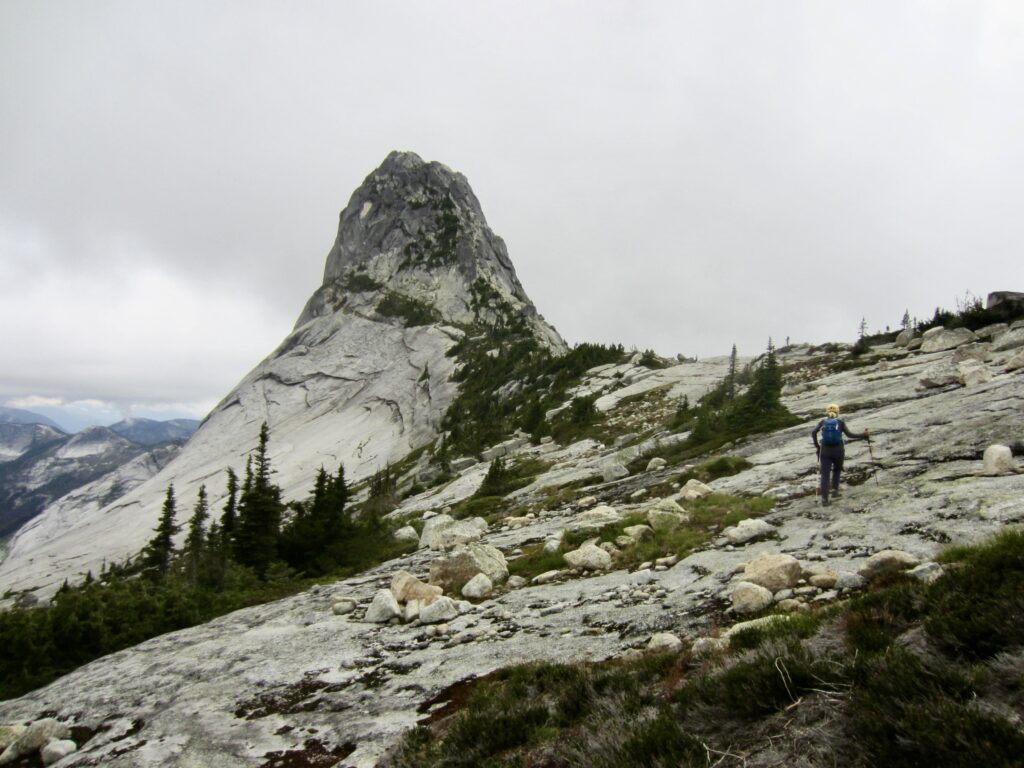
At 6000 feet, the trail makes a rightward traverse along the base of Vicuna’s slabby southeast face and then heads straight up through a pretty heather meadow decorated with white boulders. Just below the 6400-foot Vicuna–Guanaco Saddle, we came to a T-intersection. The right-hand branch leads to Guanaco Peak, while the left-hand branch leads to Vicuna Peak. A cold fog was blowing over the saddle and swirling around both peaks, thereby endorsing a forecast of afternoon rain. Eileen and I hoped to get up and down our peak before wet weather arrived.
.
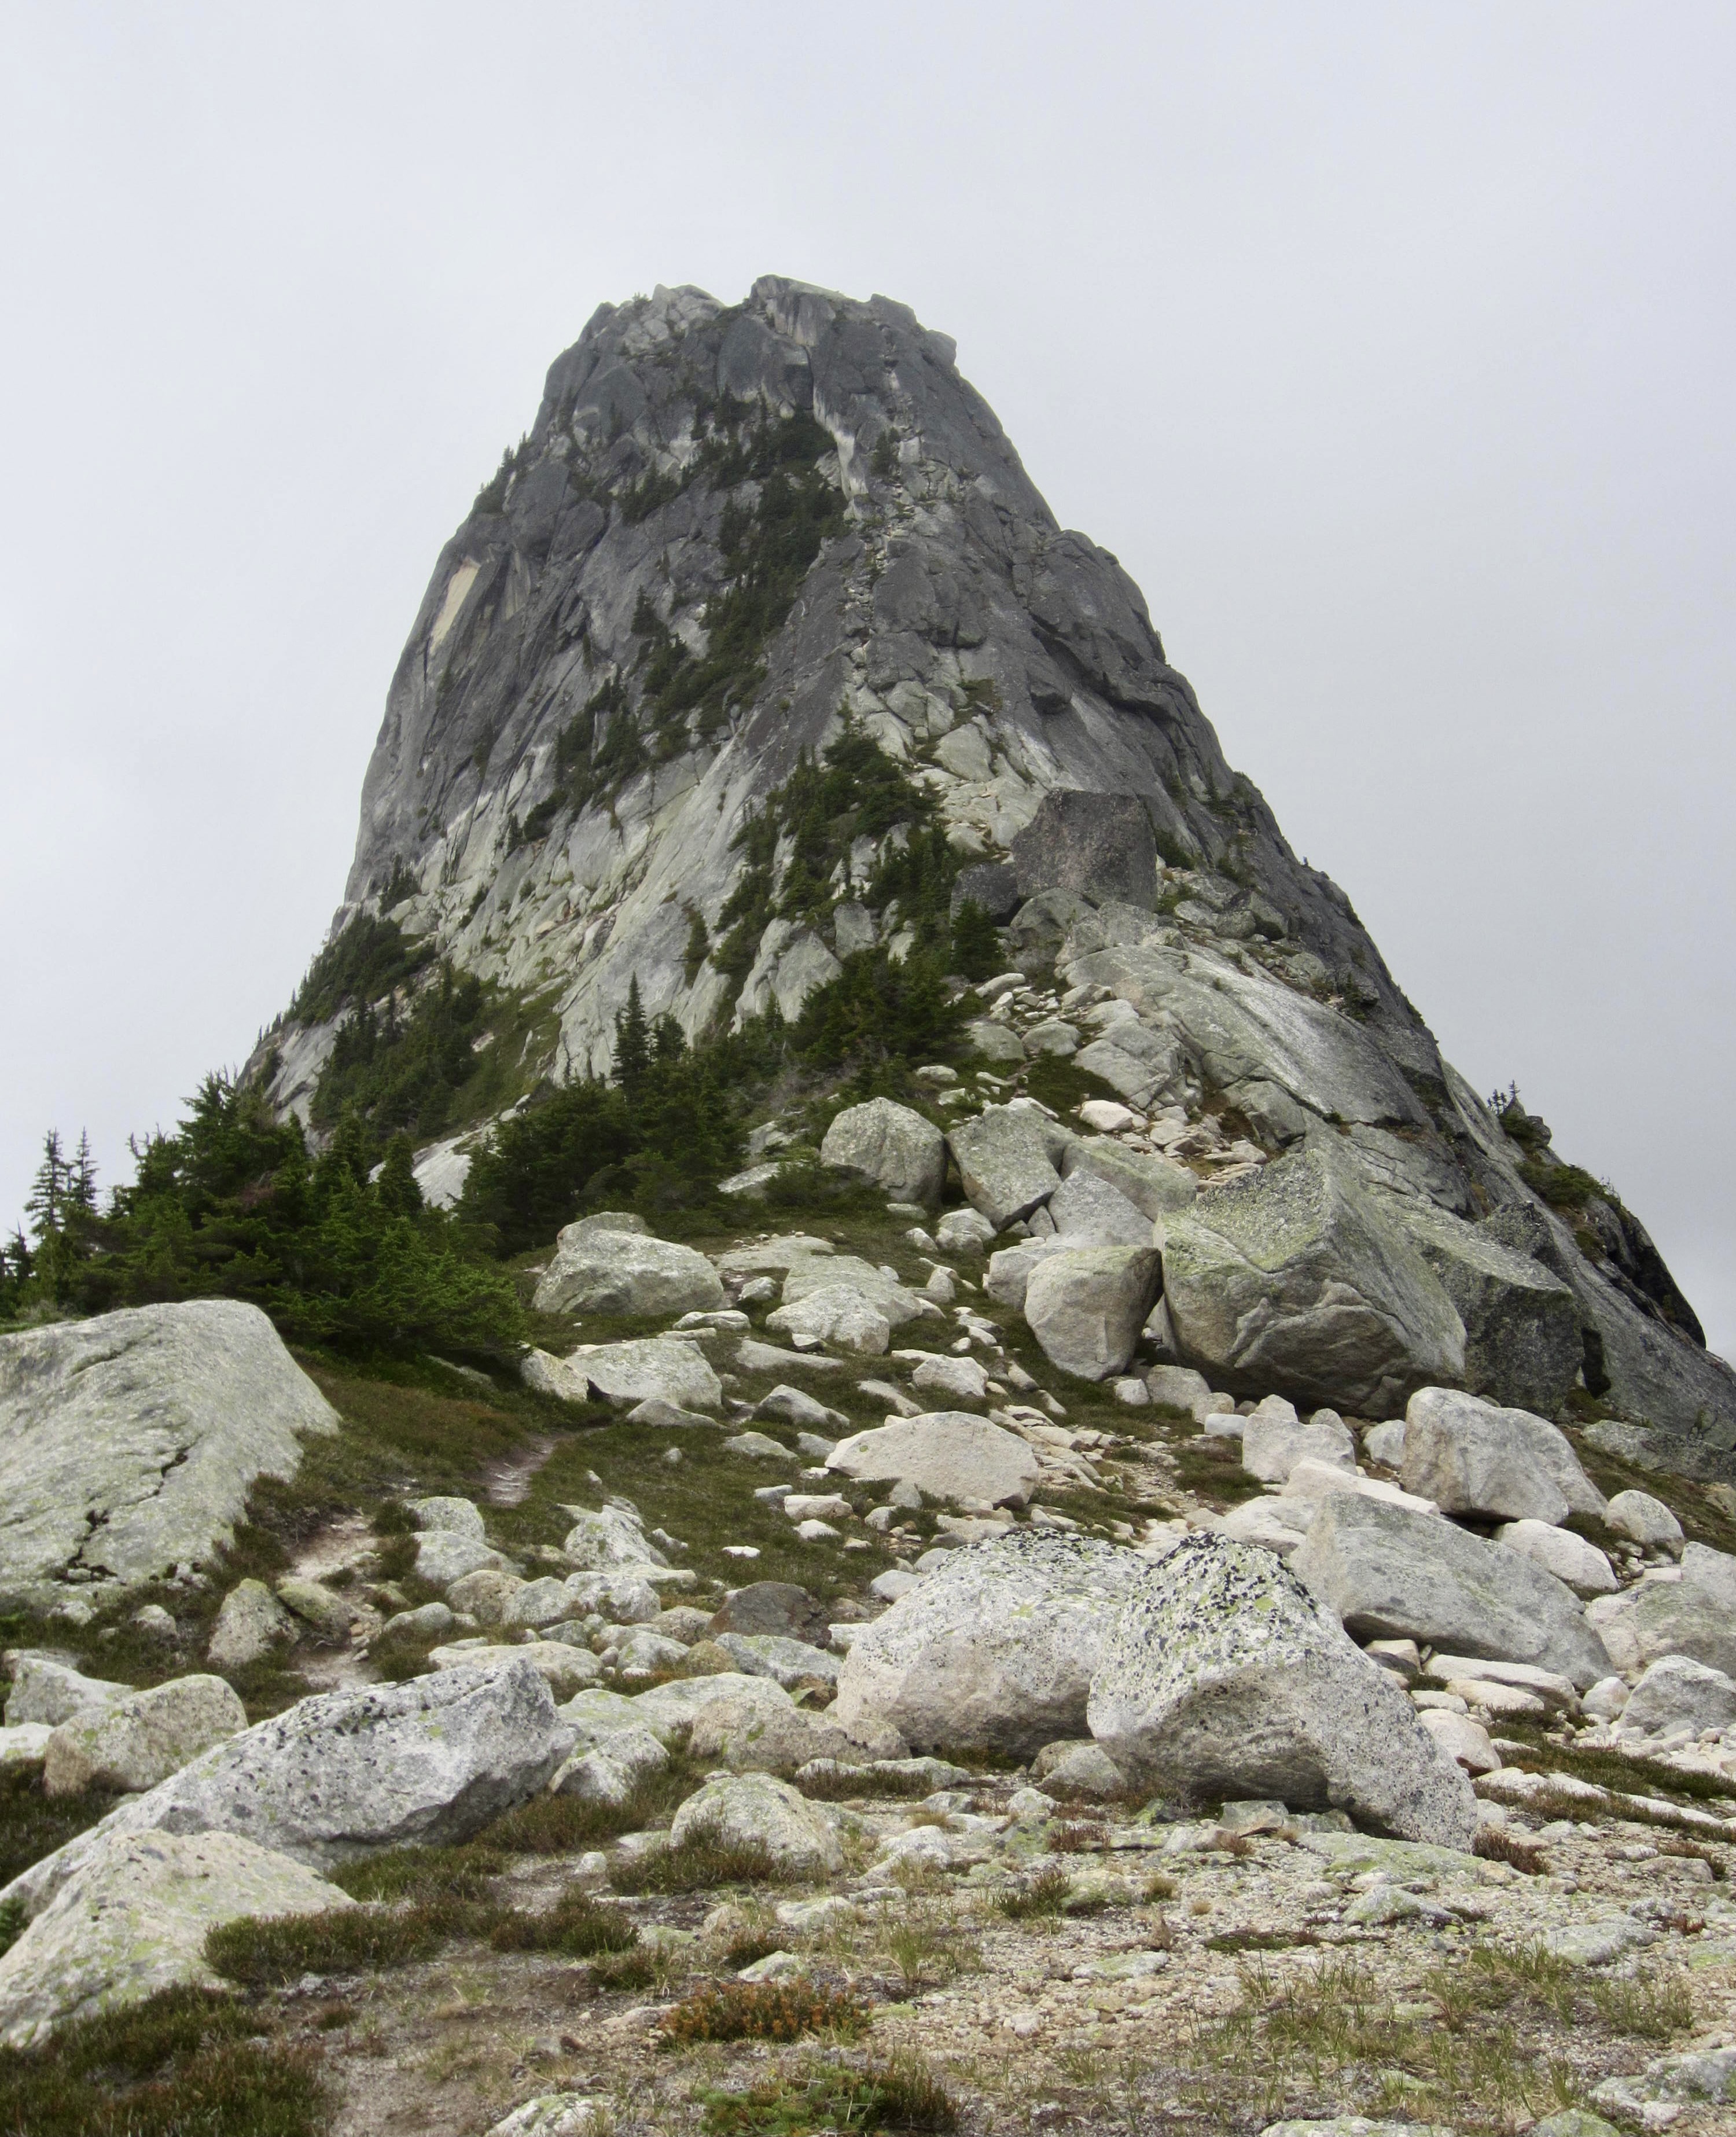
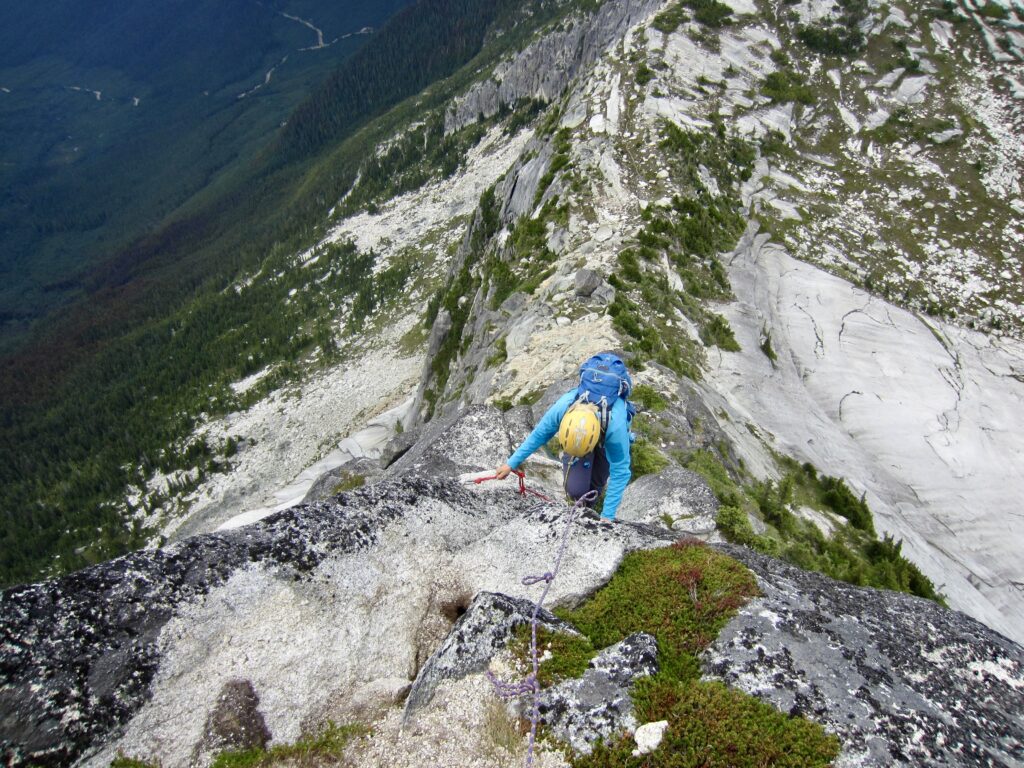
We made a leftward traverse across rock slabs and along the ridge saddle, aiming for Vicuna Peak’s prominent granitic horn. From a distance, there didn’t appear to be any reasonable route up the steep northeast ridge. From a closer vantage, however, we could clearly see a natural geologic weakness extending up the entire ridgeline. How fortuitous is THAT!
.

.
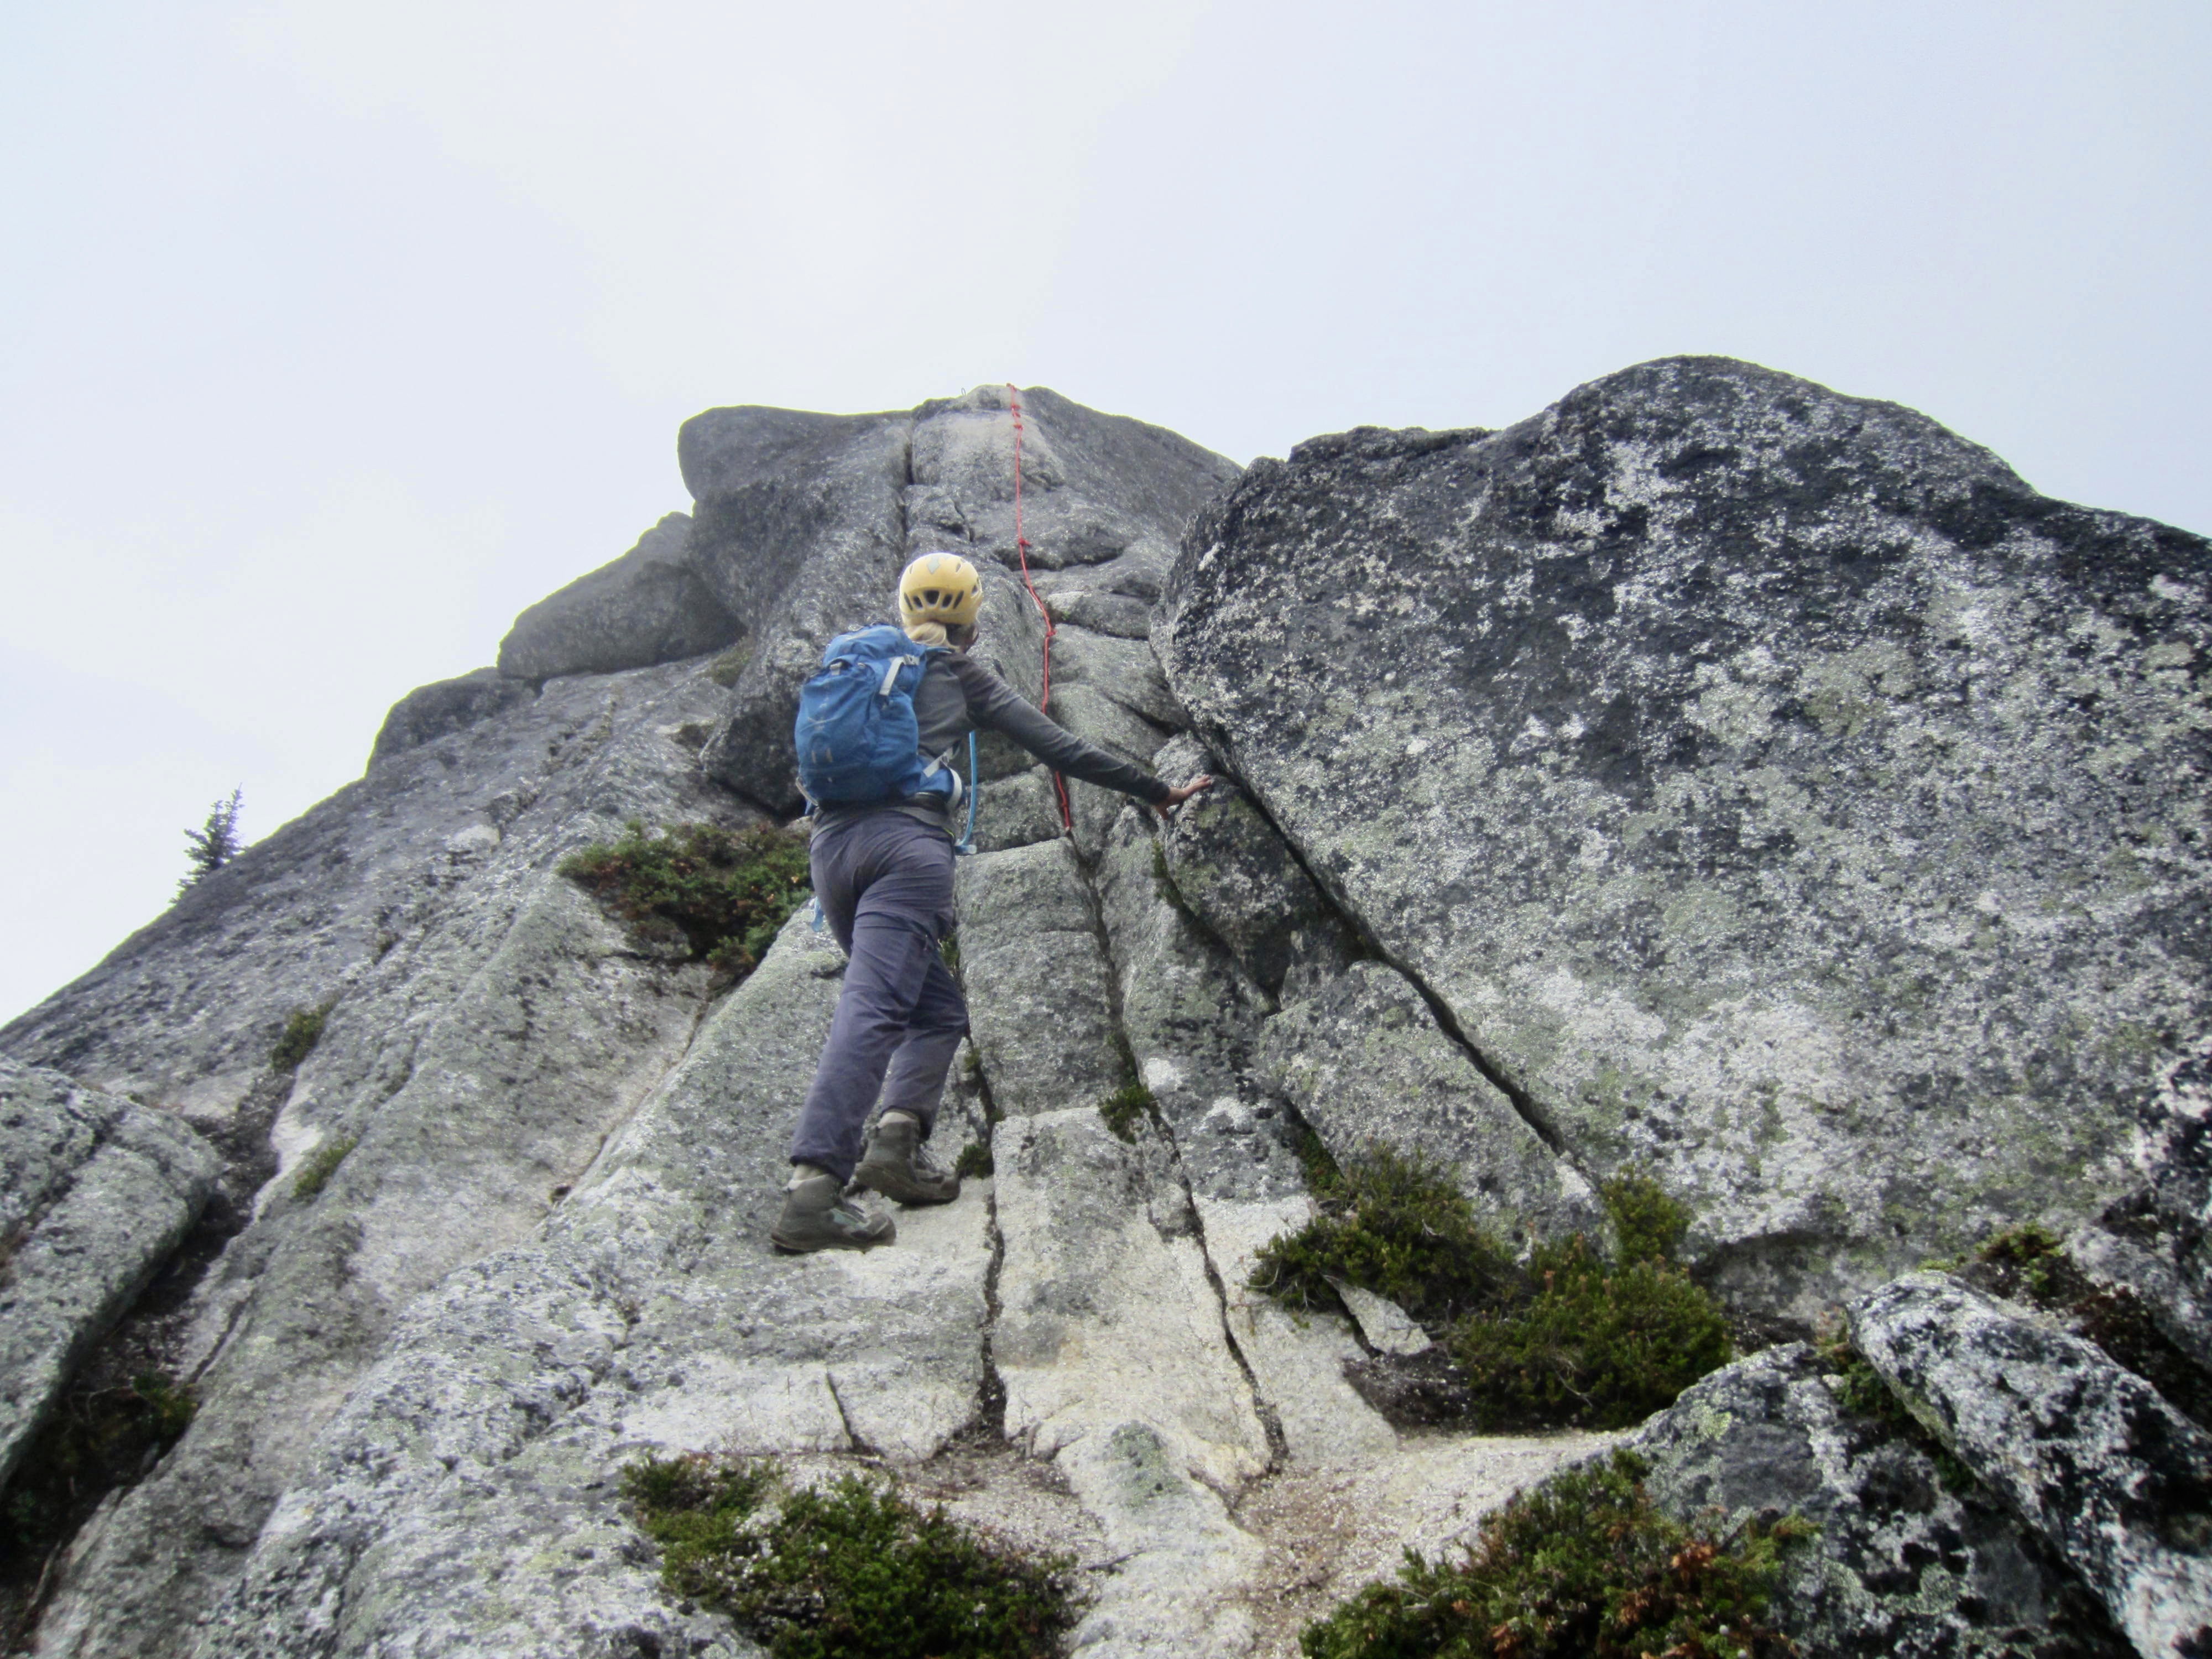
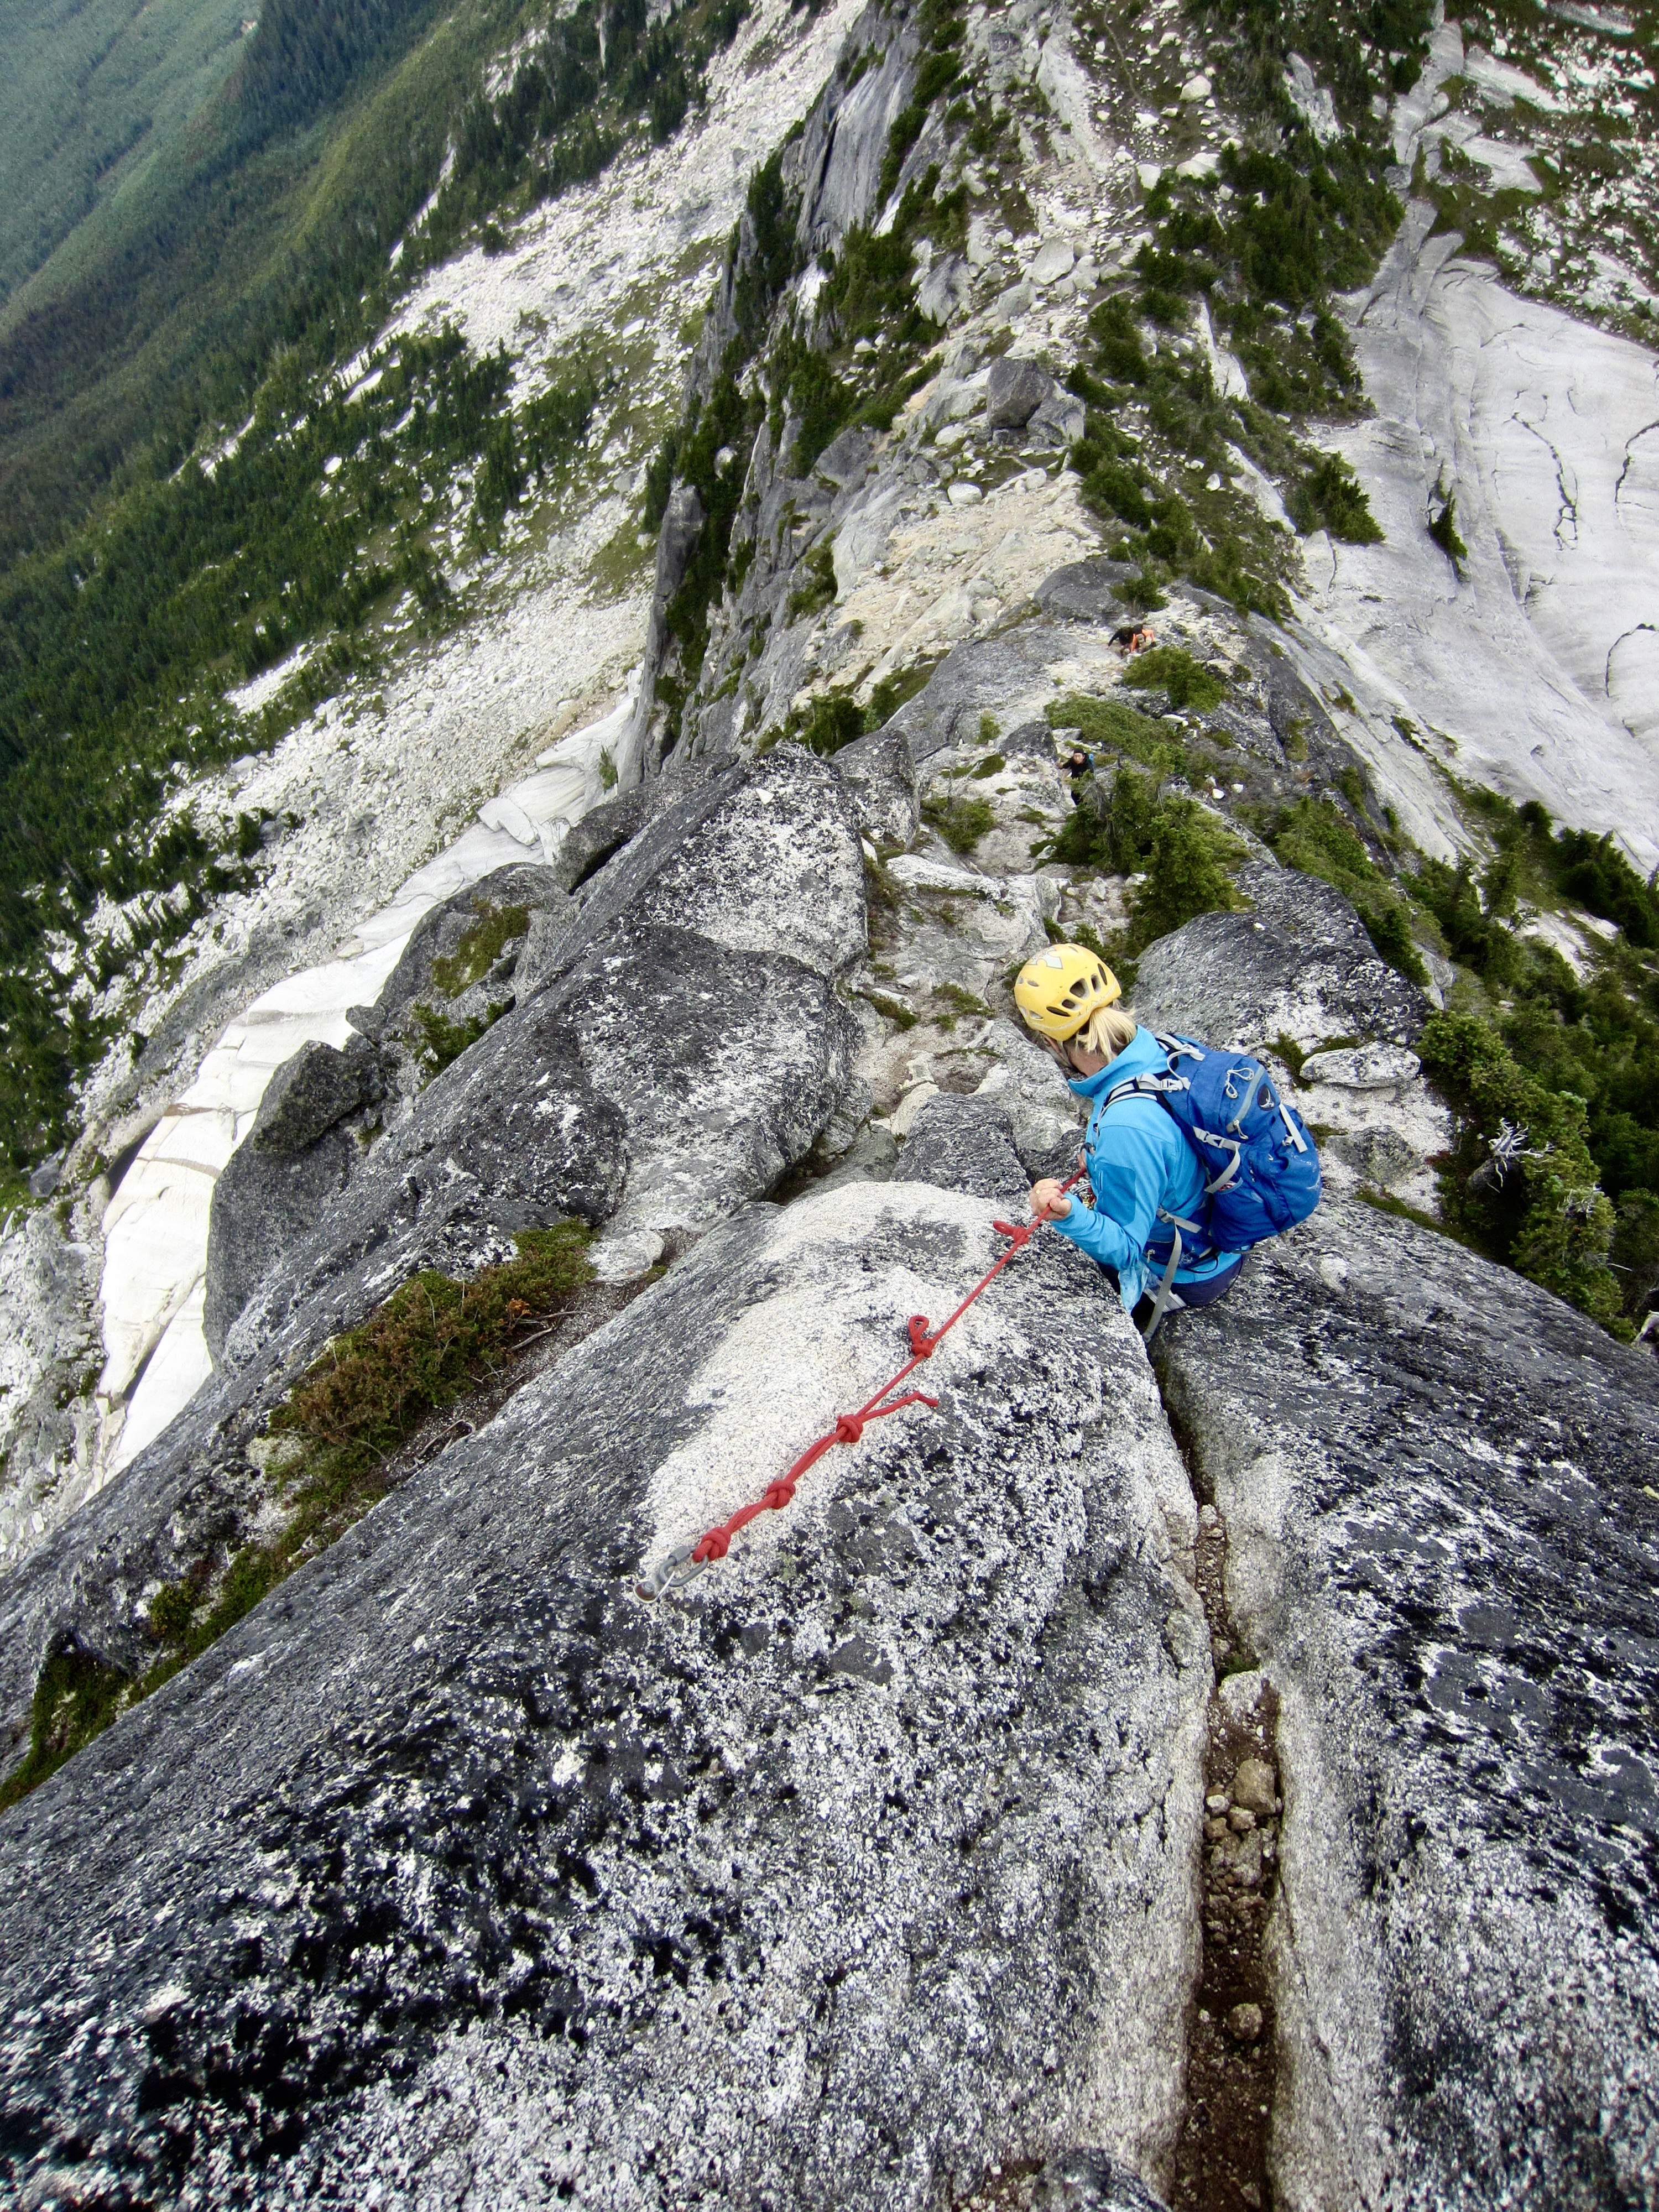
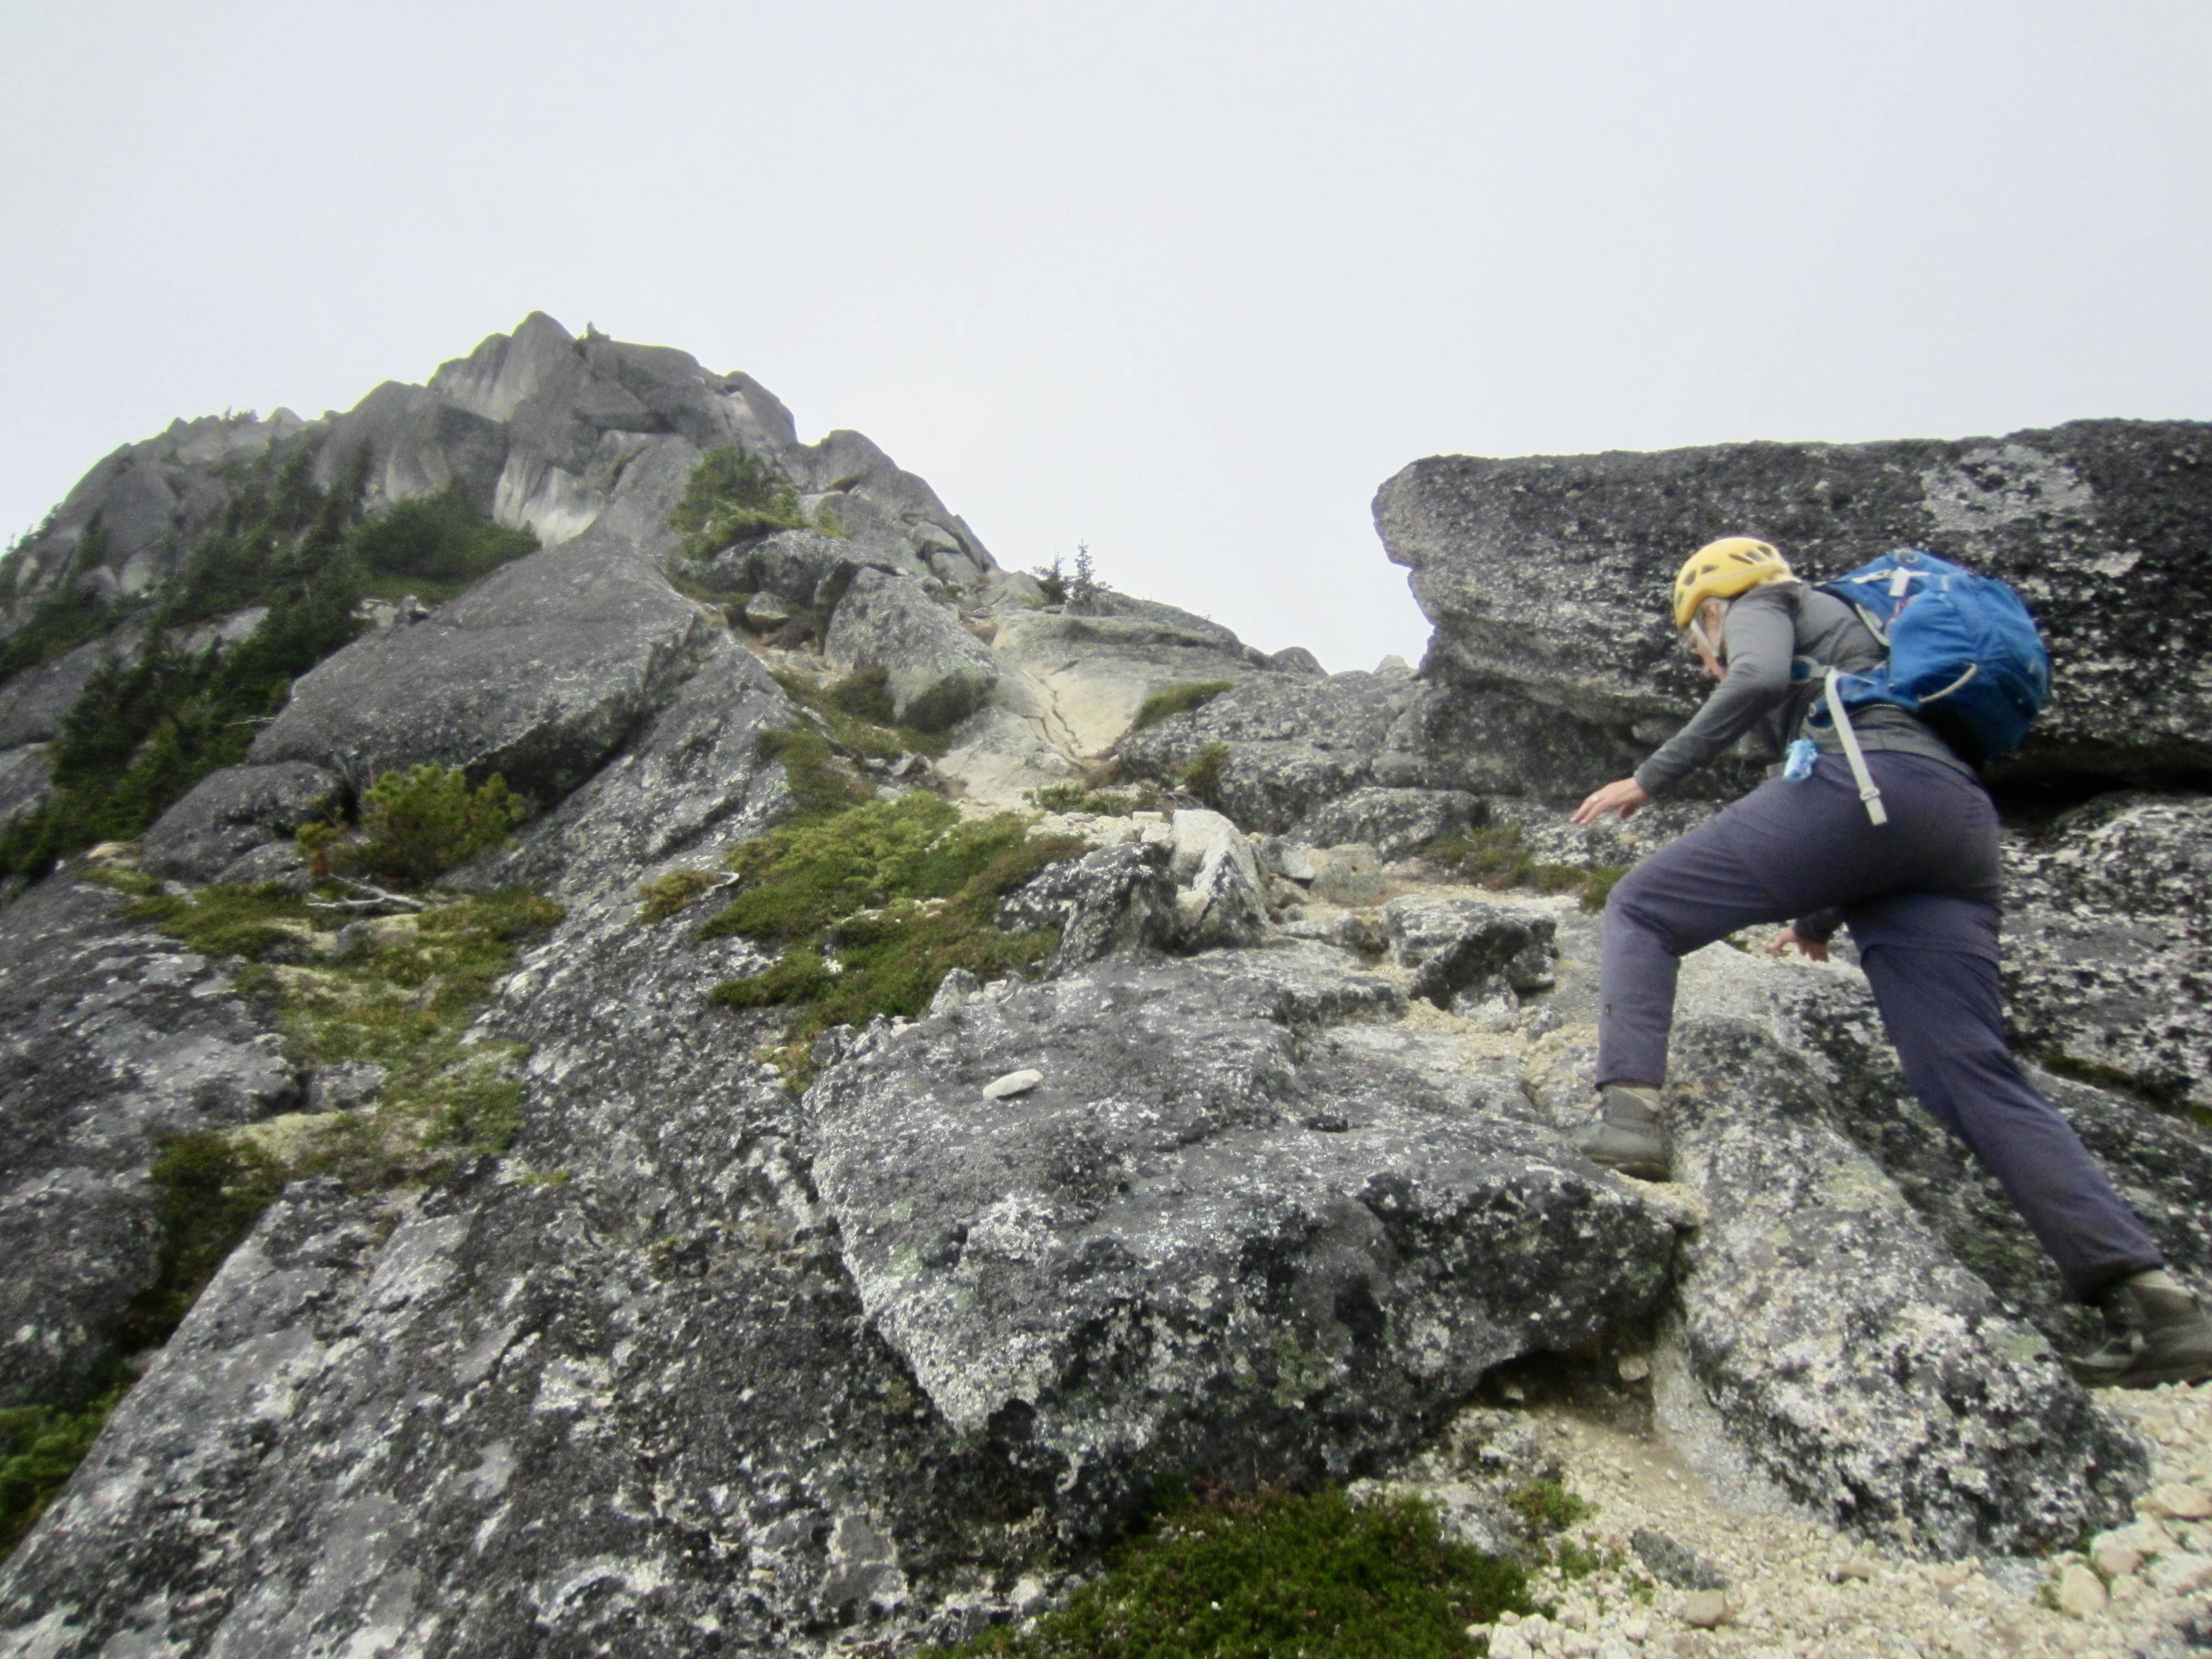
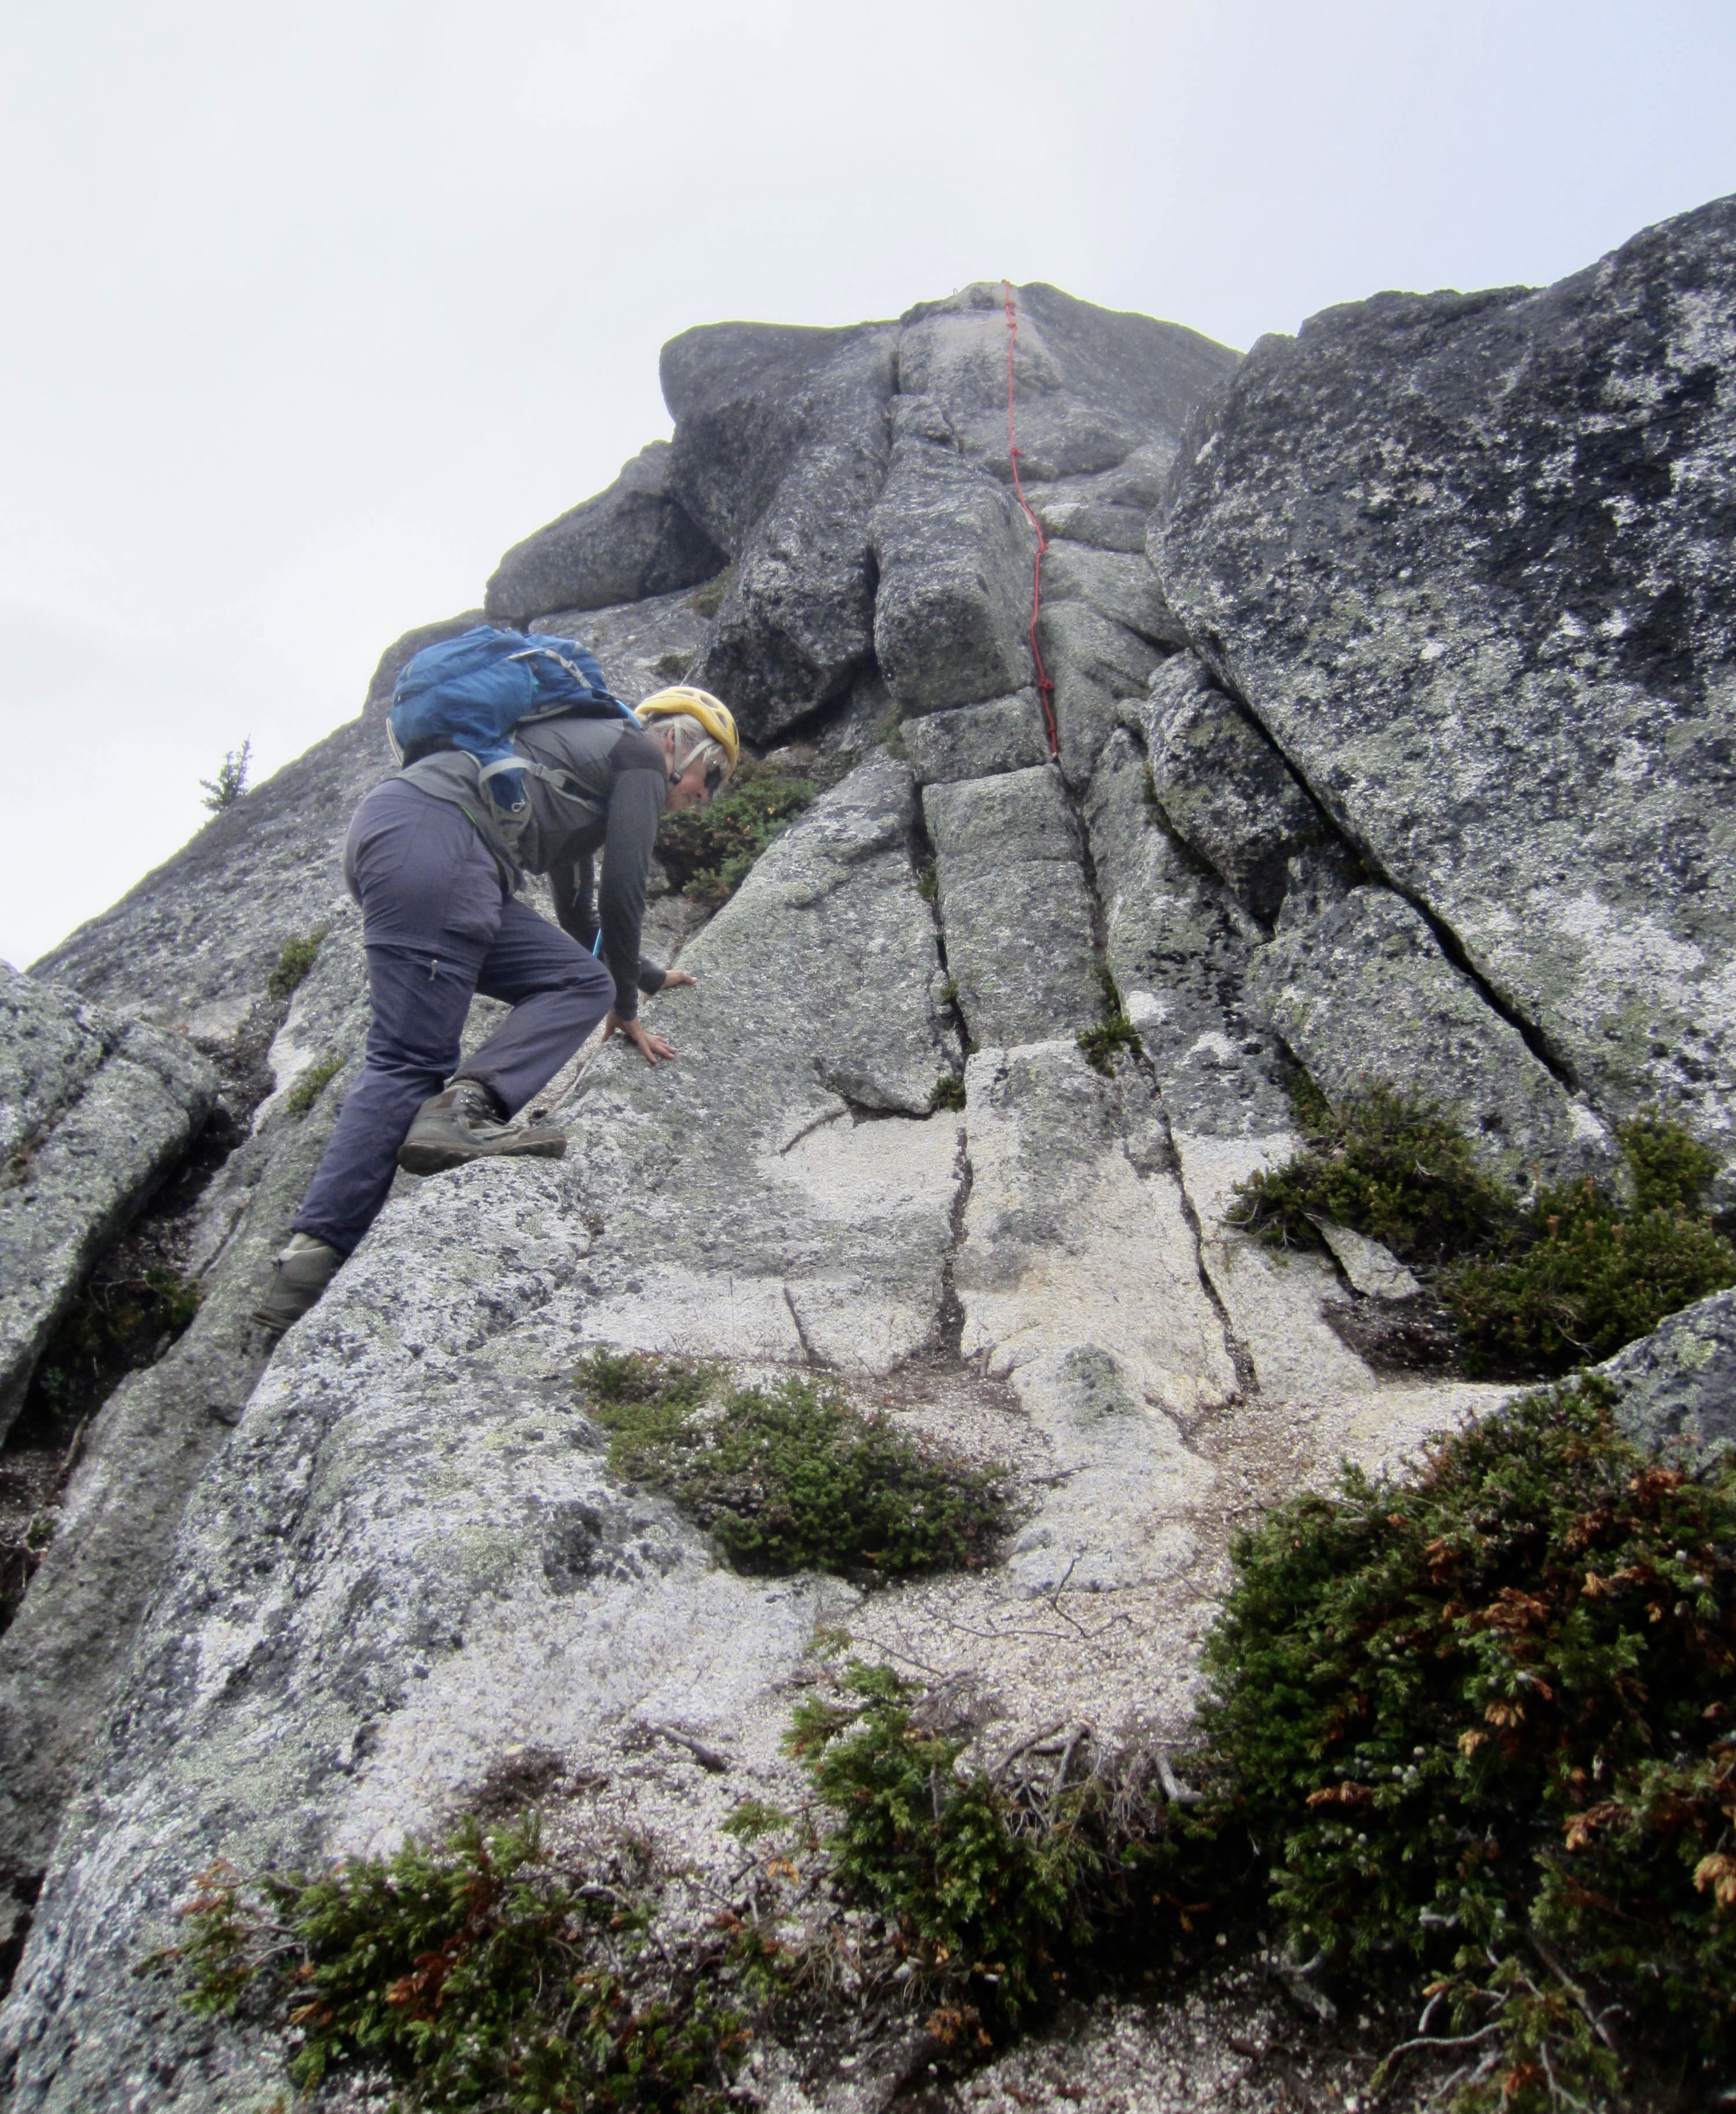
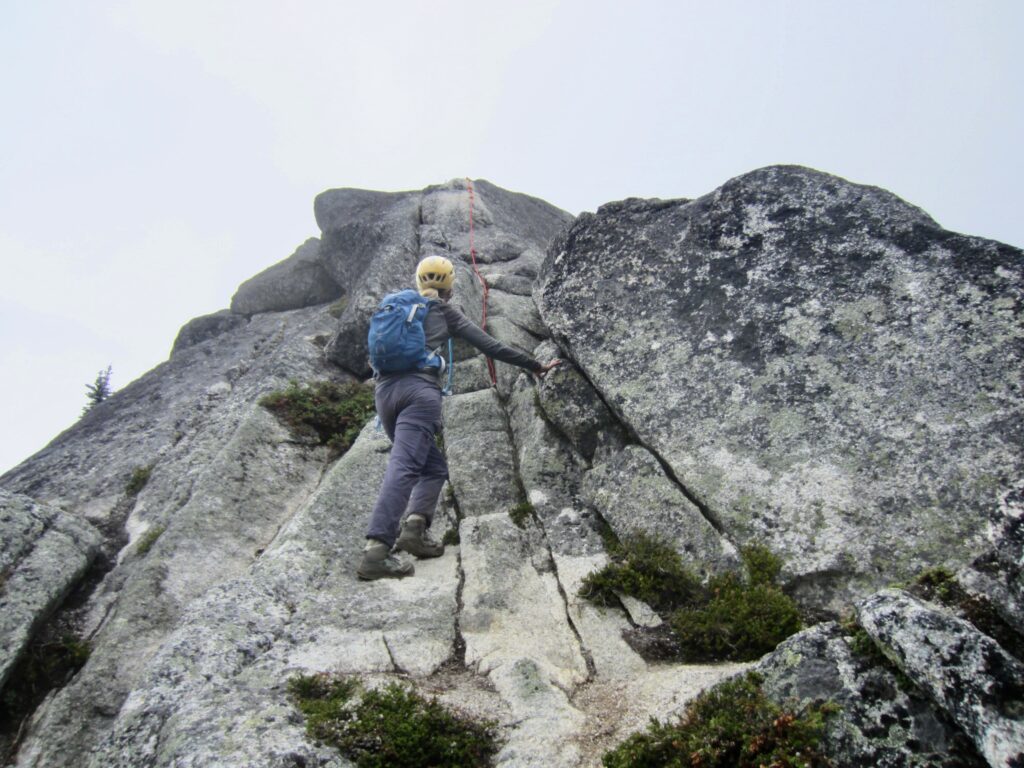
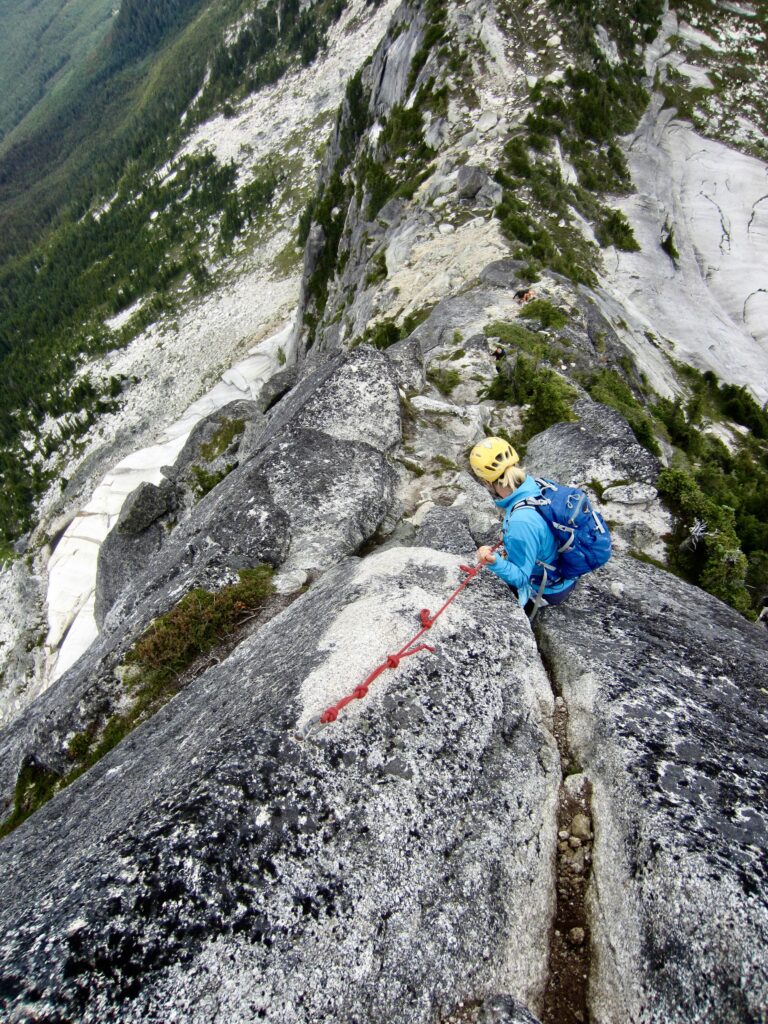
The obvious route up the northeast ridge begins with some easy Class 2 scrambling, then transitions to enjoyable Class 3 scrambling as the angle gradually steepens. Soon, we found ourselves at the crux of the climb: a steep, exposed rib split by several vertical cracks. Conveniently, a knotted rope dangled down the rib for use as a handline. Eileen and I had brought lightweight harnesses with tethers in case we felt the need to rope up, so we put them on here.
.
.
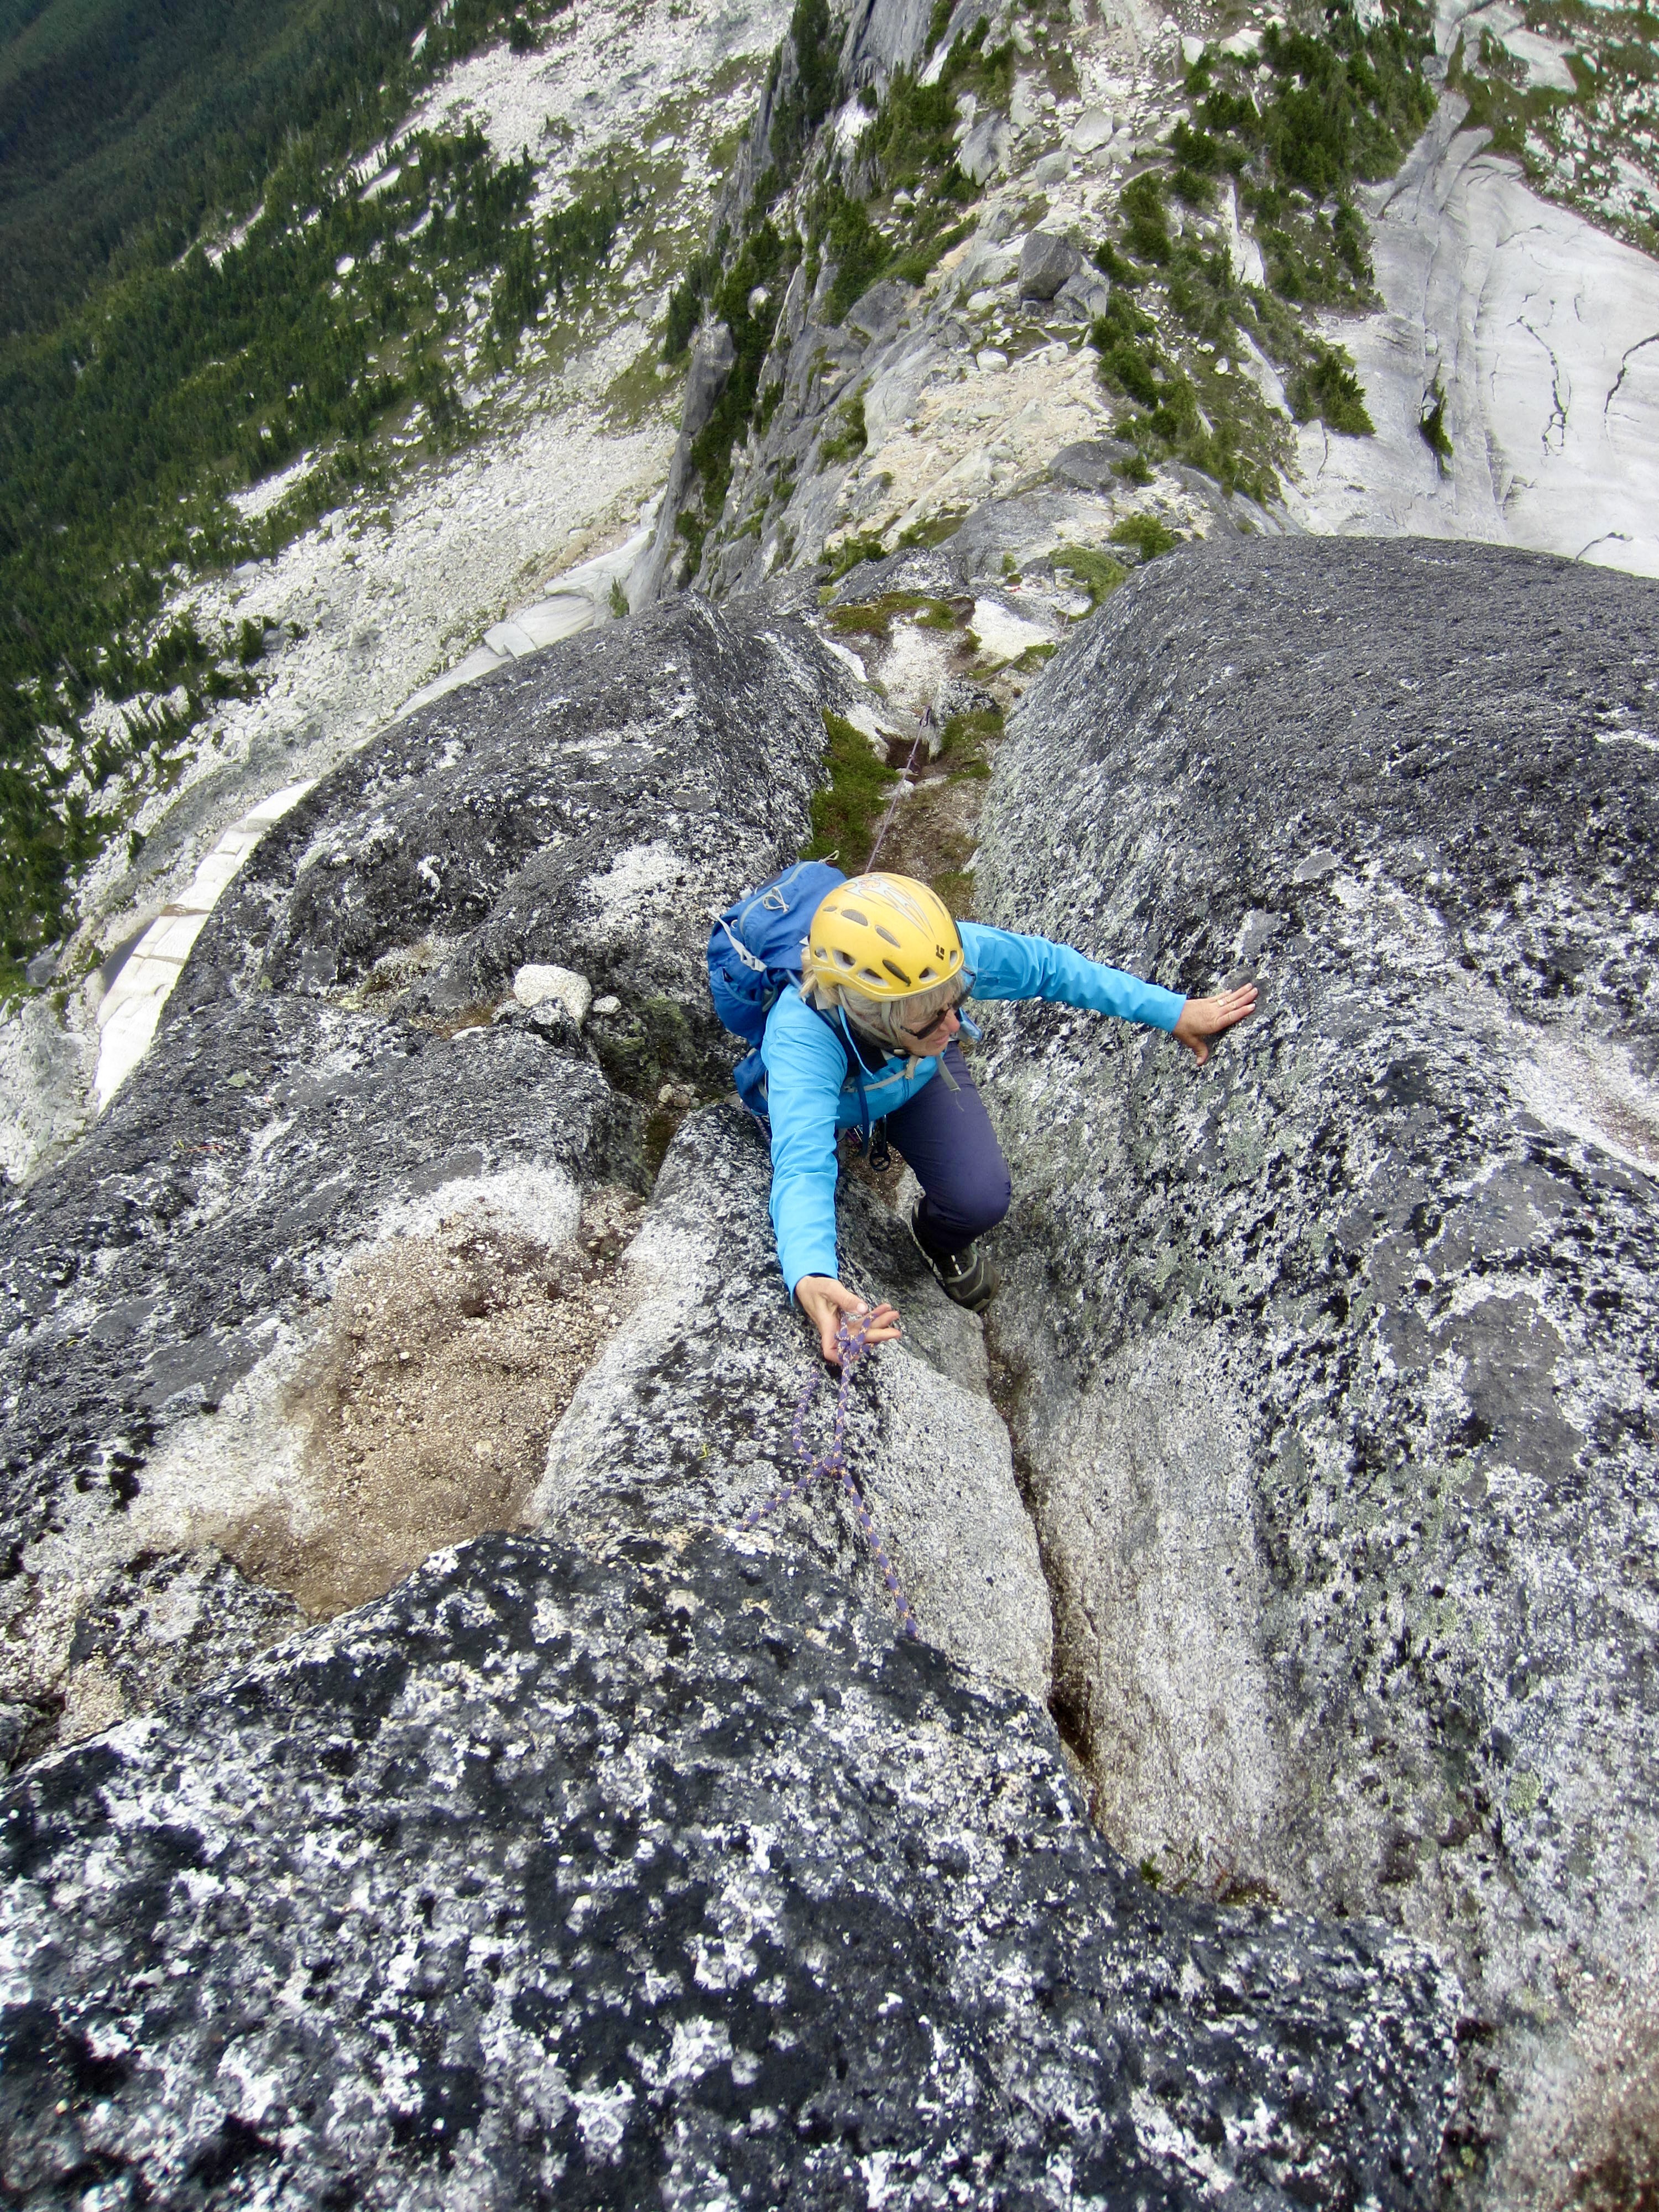
By using the fixed rope as a handline and occasionally clipping our tethers to the butterfly knots, we felt comfortable climbing up the rock rib. Without rope assistance, this would be a legitimate trad pitch rated at Class 5.4 or 5.5. A second fixed rope just above the first rope was helpful in getting over several bouldering moves, although these had less exposure than the rib. The quality of the granite is very good along the entire route.
.

.
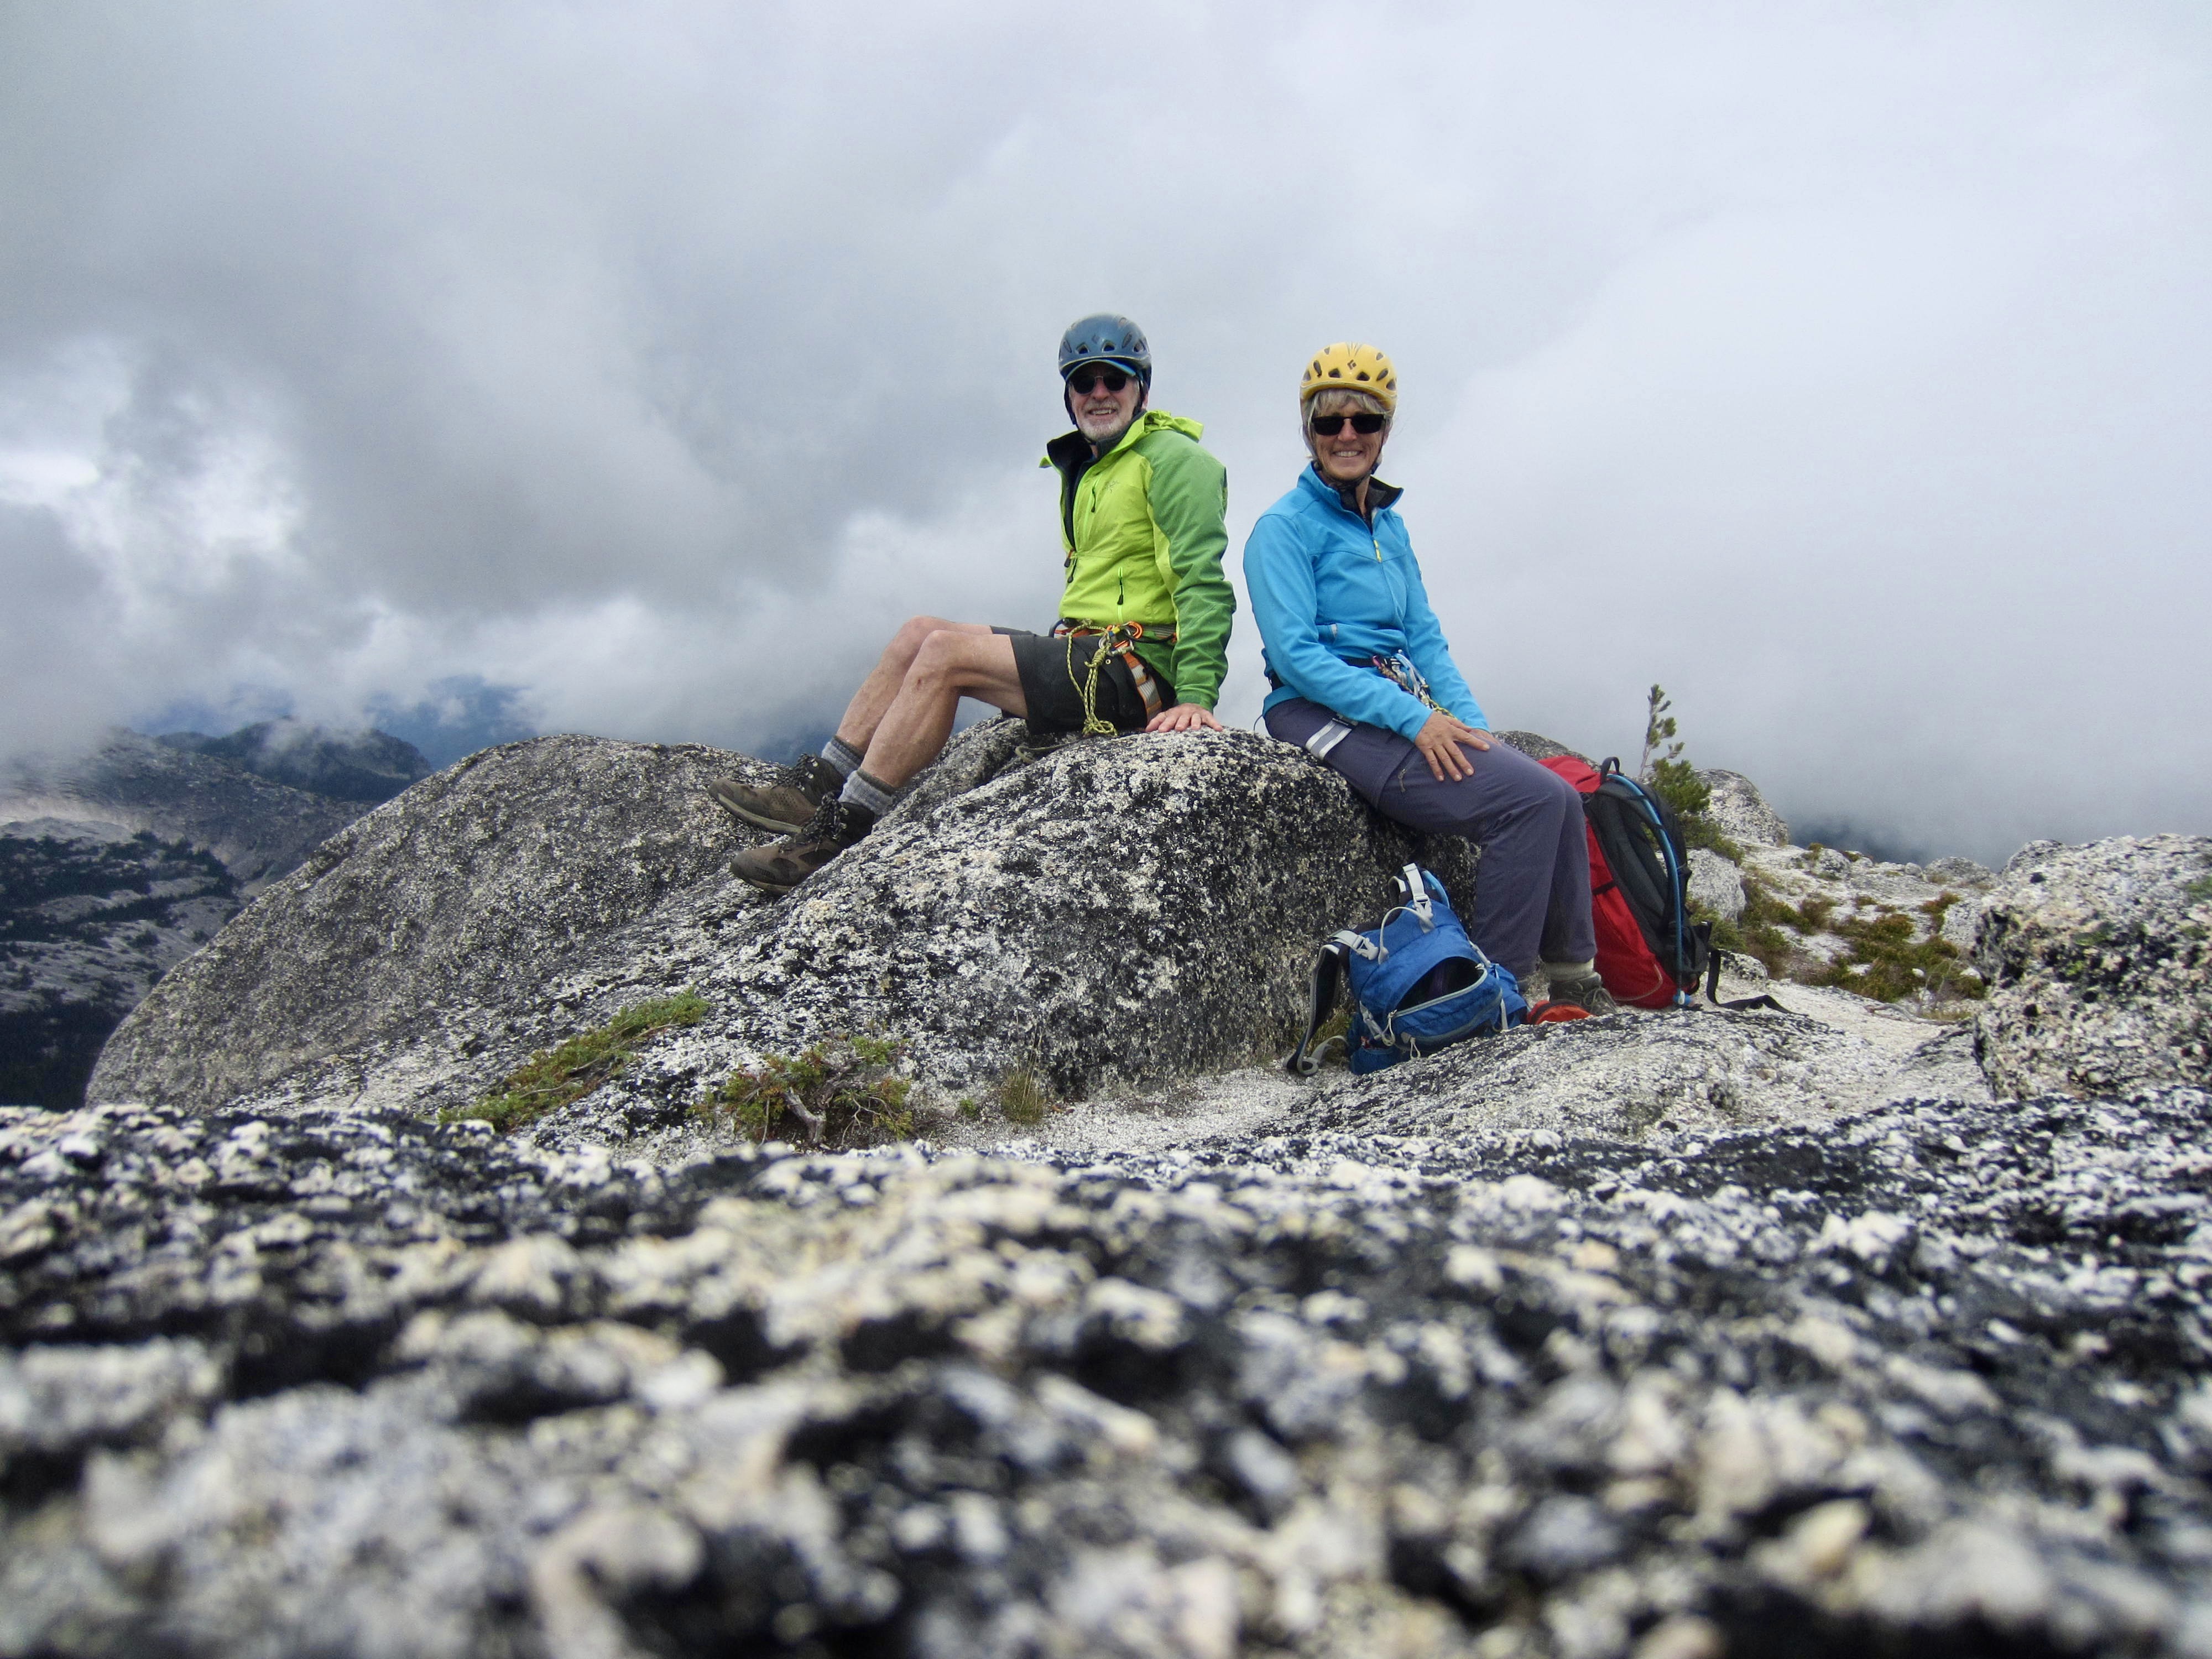
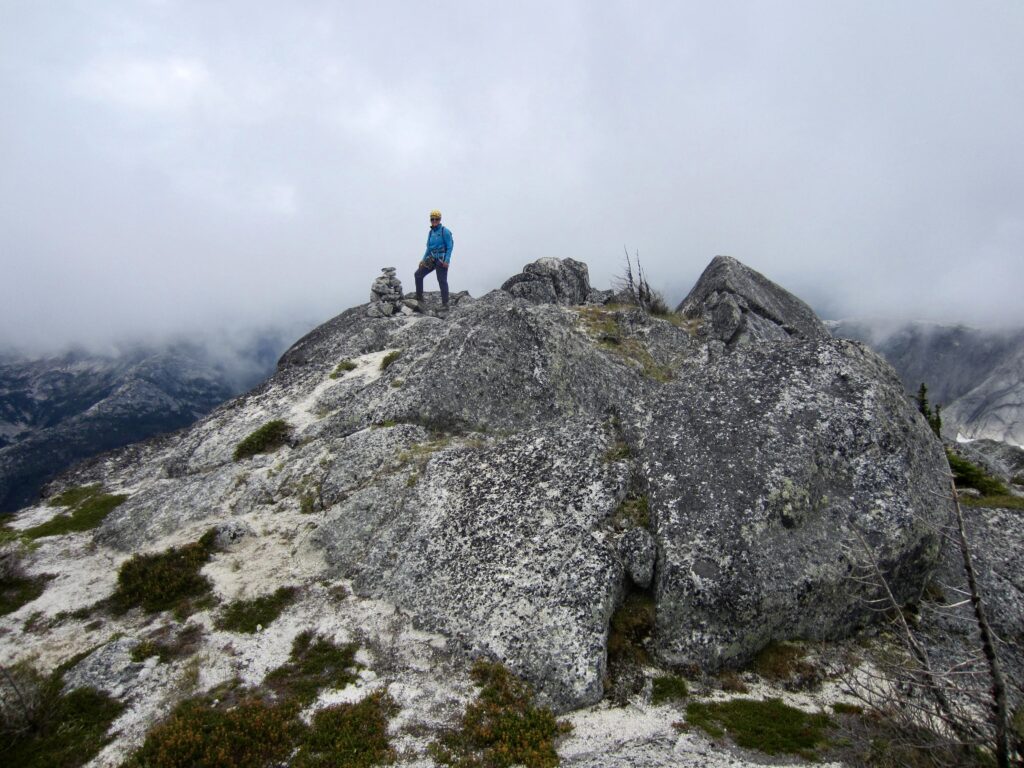
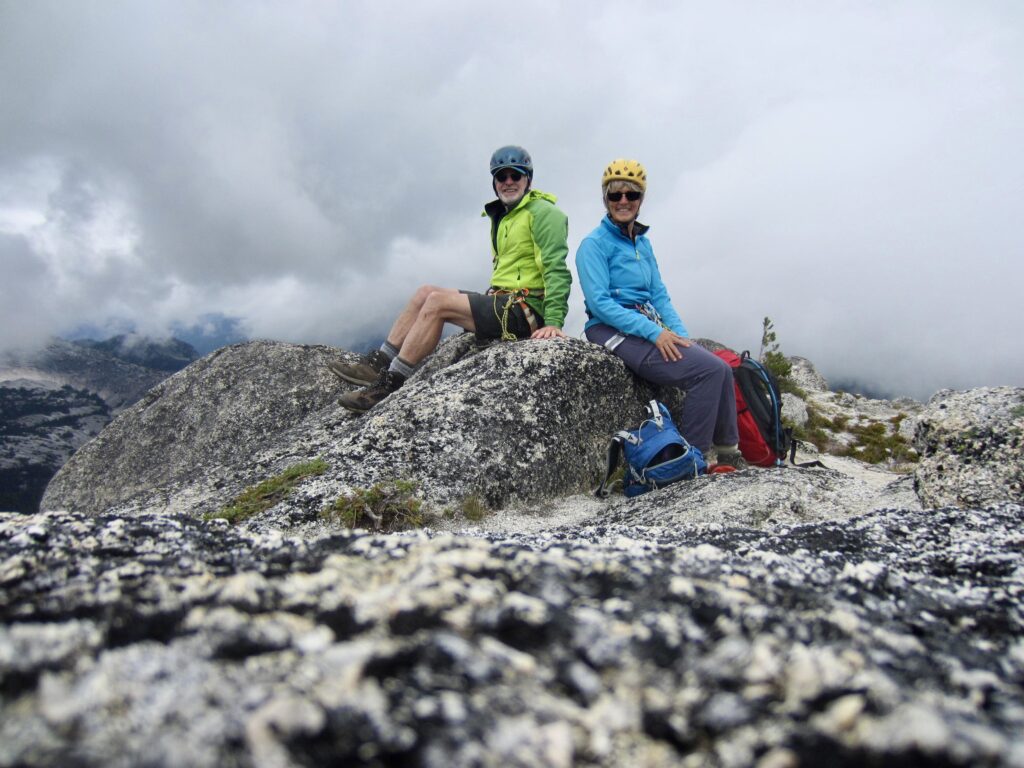
Once past the fixed ropes, we quickly scrambled up more Class 2 slabs and sandy benches to gain the flat summit of Vicuna Peak in early afternoon (4.9 hours + 3050 feet from camp). There was a summit cairn but no register. Sadly, all of the surrounding Coquihalla peaks were shrouded in fog.
.
.

.
After a brief stay on top, we headed down, hoping to get off the summit horn before any rains came. Down-climbing the steep, exposed part of the ridge was a little unnerving, especially due to the stretchiness of the fixed ropes. In contrast to the steel cables used on via ferrata routes, these dynamic climbing ropes felt like rubber bands! Just as Eileen and I reached the bottom of the lower rope, we met three climbers heading up. They looked at the steep rock ahead and at our gear, then the leader blurted out, “We probably should have brought helmets and harnesses!” Nonetheless, two of them were able to get up and down the crux without incident.
.
Eileen and I took about 30 minutes to carefully get off the summit horn, and then it was simply a matter of hiking down to the trailhead and walking back along the road. We arrived at our campsite in late afternoon (4.8 hours + 150 feet from summit), delighted to have beaten the rain and happy to be spending another night here. It had been an outstanding ascent—without question, one of our all-time favorite day climbs!
Route Map & Profile
…
…
Photo Gallery
Click to enlarge…